When your classic ride is running an EFI conversion, upgrading the distributor for more precise spark timing or to handle higher engine speeds can be a little intimidating for some. Understandably, some do-it-yourself types can get a little nervous with various aspect of the install, like recalibrating the EFI software to send the proper commands to the new unit, or even phasing the pickups.
Holley [1] recently posted a how-to video featuring the company’s technical training manager, Tom Kise. In the video, Kise covers the entire installation process from start to finish using one of Holley’s EFI Dual Sync distributors [2] on a small-block Chevy.  [3]
[3]
Setting Up The Software
Setting up the software to properly communicate with your EFI distributor might actually be the easiest part of the job. Under the ‘Ignition Parameters’ sub-menu, the ignition type will need to be set to custom, and after clicking configure you will be given a series of drop down menus that will be used to calibrate the ECU to correctly decipher the crank sensor, cam sensor, and output signals of your new dual sync distributor.
Once you’ve configured your new ignition settings, remember to select ‘Send To ECU’ and follow the directions on the screen to write your new settings to the car’s computer.
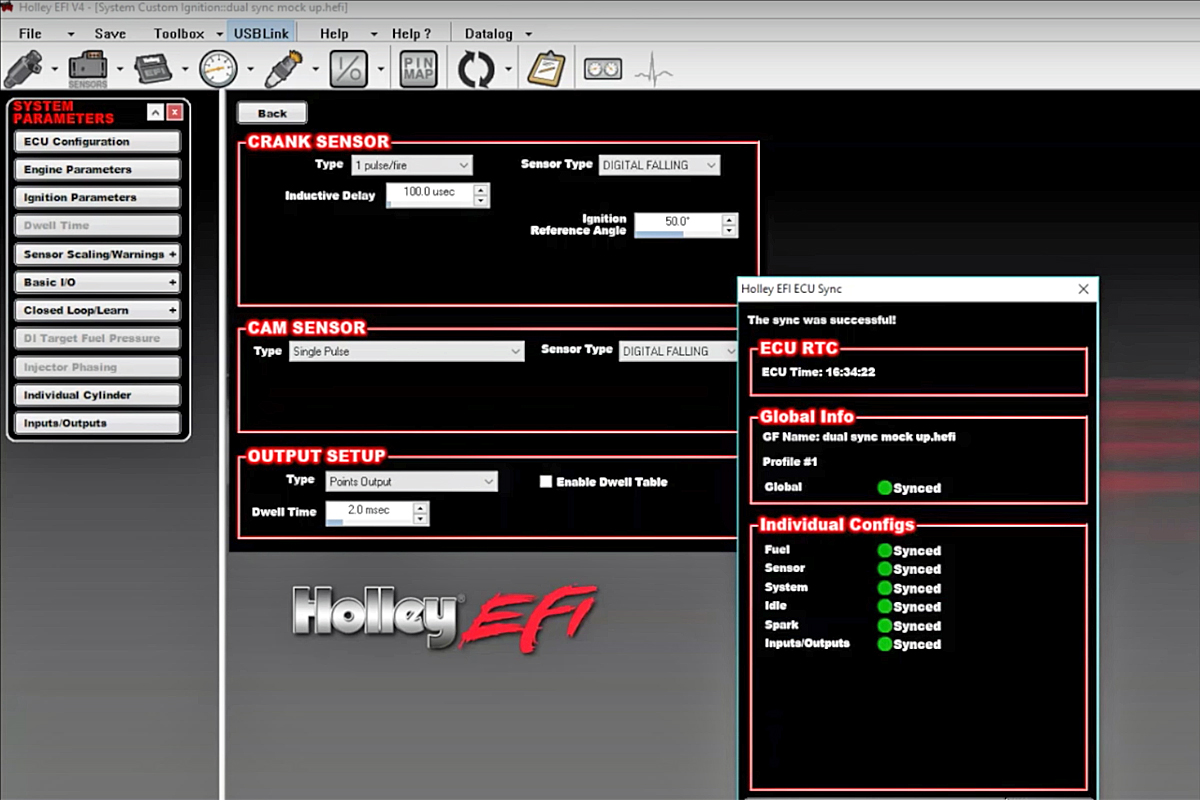 [4]
[4]Kise’s recommended settings for Holley’s Dual Sync distributor.
Setting Crank Position
Before beginning the physical install, it’s important to make sure that cylinder one is at top dead center (TDC) on the compression stroke. Once that has been verified, the next step is to match the physical crank position with the 50-degree ignition reference angle set in the EFI software. Remember to always rotate the crankshaft in the same direction as when the engine is running; for the small-block Chevy used in the video above, the crank is rotated clockwise.
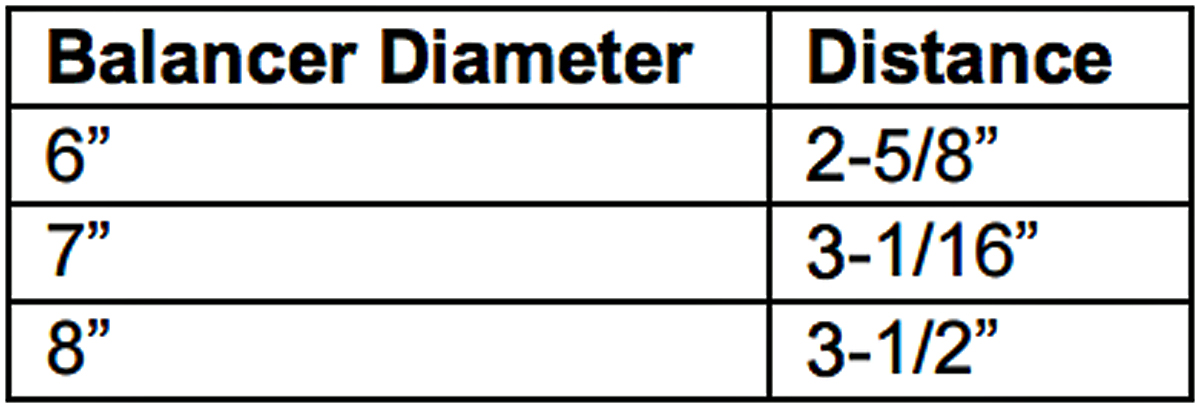
If you have one of the more common 6-inch, 7-inch, or 8-inch diameter harmonic balancers but yours isn’t marked at 50-degrees before top dead center (BTDC), Holley provides the distance needed from the TDC mark in the supplied instructions so that you can find it on your own.
 [5]
[5]The measurement from 0-degrees needed on your harmonic balancer to mark 50-degrees BTDC.
If your balancer diameter isn’t one of the ones listed above, there’s a simple formula for figuring it out yourself. Find the diameter of your harmonic balancer, then multiply your measured diameter by Pi (3.141), divide that value by 360, then finally take that total and multiply it by 50 to get your required distance.
To keep this example simple, we’ll use a diameter of 8-inches:
- 8 × 3.141 = 25.128
- 25.128 ÷ 360 = 0.0698
- 0.0698 × 50 = 3.49
To make measuring it as a fraction easier, the final value of 3.49 was rounded up by one hundredth of an inch to an even 3.50-inches.
We previously mentioned the importance of verifying that you’re on the compression stroke. The easiest way to verify this is to first remove the spark plug from cylinder one, as you rotate the crank and begin to approach your 50-degree mark, plug the hole with your finger and you should be able to feel the cylinder building pressure.
 [6]
[6]Plugging the cylinder one spark plug hole with your finger as you approach the 50-degree mark will tell you if the engine is on the compression stroke if it builds pressure.
Installing The Distributor
Once the crank is set at 50-degrees BTDC, it’s always a good idea to verify your phasing isn’t off by 180-degrees before continuing. The simplest way to do this is to disconnect the battery and fuel injectors, and then remove your currently installed distributor cap and verify that the rotor aligns with the cylinder one position. If the rotor is opposite of the number one post, simply rotate the crankshaft one full rotation.
Before removing your current distributor, it’s important to make sure that the area surround the distributor is free of loose dirt and debris that may fall into the engine when you pull the distributor out. Now you can disconnect any connections to your distributor, loosen the locking plate, and remove your distributor.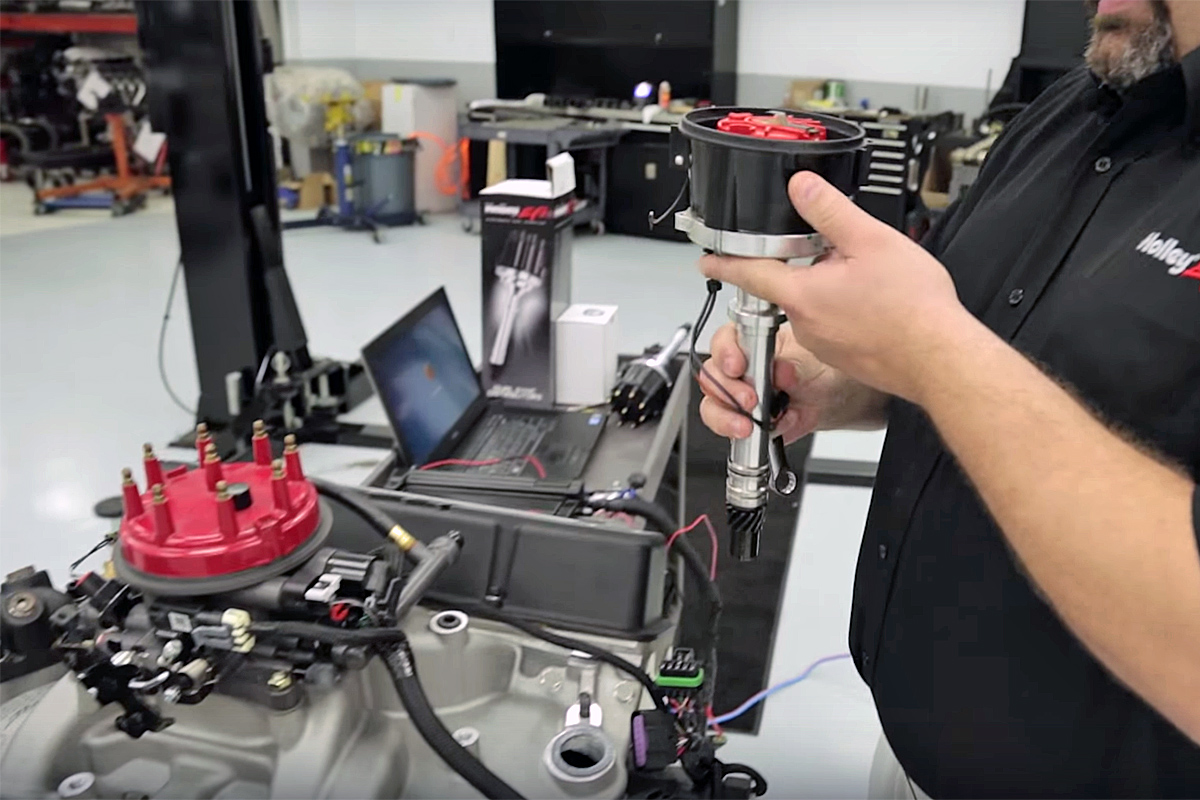 [7]
[7]
Depending on if your engine has been decked or not, you may need to verify that the distributor doesn’t bottom out before seating with its mating surface by first installing the unit dry. At this point, coat the drive gear in engine oil if you plan to start the engine soon, otherwise Holley recommends using a break-in camshaft lubricant if the engine will be sitting for awhile.
Position the distributor so that the rotor matches the number one position on the cap, as you carefully lower the distributor into position allow it to rotate as it mates with the camshaft gear. If the rotors position is off after the gears align, simply lift the distributor slightly and reposition it until the rotor orientation is correct. Then loosely reinstall the hold down plate to help with stabilization.
It is now safe to connect the distributor to the engine harness and reconnect the battery. Turn the ignition to the on position, if the previous steps were done correctly both the crankshaft and cam position LEDs should light up. When the lights are on, it indicates a digital falling state, if the lights are off it’s in a digital rising state.
 [8]
[8]The light on the left represents crankshaft position, the light on the right is for camshaft position.
To phase your pickups, first figure out which direction your engine is designed to turn the rotor. Slowly turn the housing in the forward direction until the crank position LED shuts off to signal a digital rising state, then slowly rotate the housing back in the opposite direction until the light comes back on.
You can now install your DIS cap or distributor cap (with your number one spark plug post marked and aligned with the rotor), fully tighten the hold down plate, and reinstall any spark plugs removed along with their boots and wires.
With the injectors still disconnected, you can begin going through the process of verifying your cranking ignition timing, if everything looks good at this point, connect your injectors and begin checking your timing at idle. For specific troubleshooting advice, check the instruction manual included with your dual sync distributor or contact Holley’s tech support team if you find yourself in real trouble.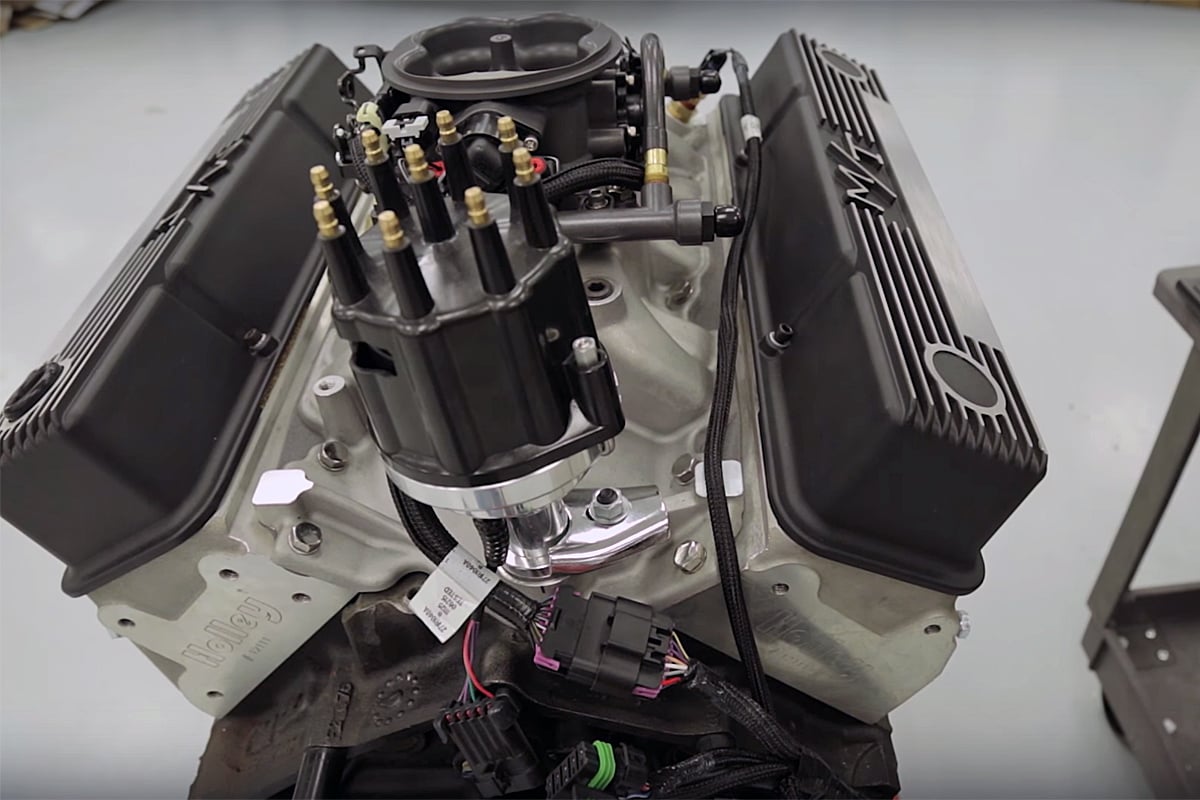 [9]
[9]