 [1]
[1]
Look at any vintage drag racing photos from the ‘50s through the early ‘70s. You’ll notice that legends like Dick Landy, Grump Jenkins, Ronnie Sox, et al ran their early Pro Stockers wearing jeans and a plain white T-shirt, Landy with a cigar hanging out of his mouth. And more often than not, their “restraint system” was a stock 2-point seat belt. NASCAR was the same way. But that’s one of the reasons that the early pioneers of drag racing didn’t make it home. It’s a different world today.
Impact’s Racer two-piece suit is rated at SFI 3.2A/5, meaning it offers 10 seconds of fire protection before second-degree burns start happening. The two-piece suit is handier in our opinion than a one-piece, especially at a hot track, since you can take just the jacket off between rounds. Impact’s price as listed on their website is $335 for the jacket and $310 for the pants.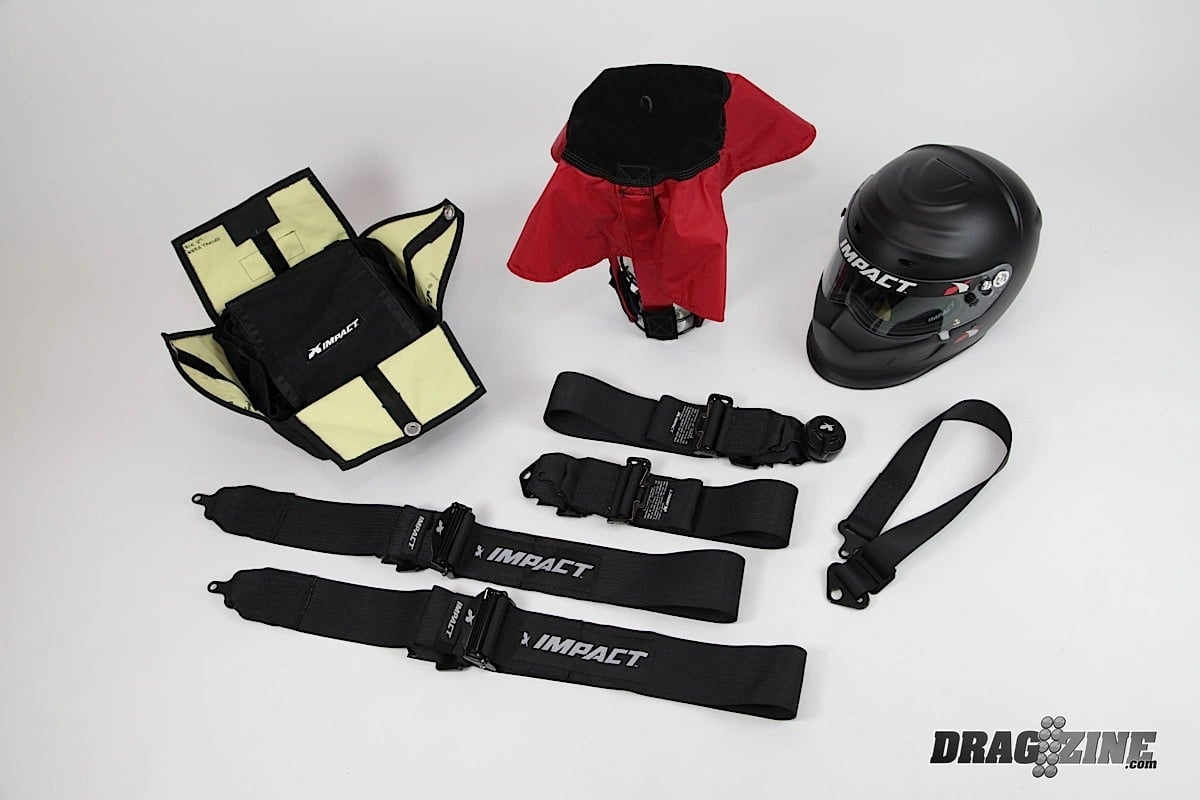 [2]
[2] [3]
[3]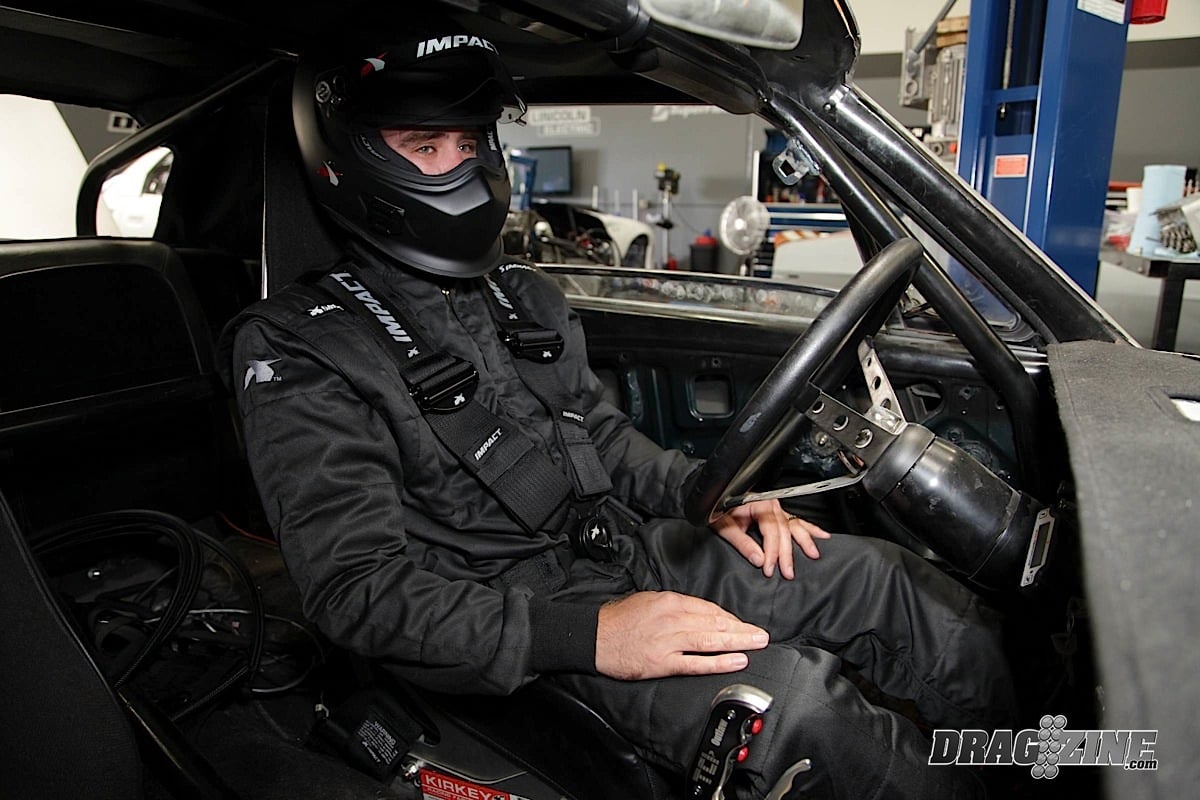 [4]
[4]
Today, most of us know the importance of protection from head to toe with equipment like SFI-spec driving suits, helmets, and five-point restraint systems. Your author has personally witnessed racers engulfed in flames, only to come out of the car with minimal burns (if any) thanks to the proper fire-retardant driving suit, gloves, shoes, helmet and head sock. Rules requirements are different for each class or type of car (convertible versus closed roof for example), so if you’re planning on drag racing your car, you need to bone up on the safety rules for how quick and fast the car is. To do that, get an NHRA rulebook, or do some judicious ‘net searching and you can find the rulebook online.
 [5]Project Biting the Bullitt [6] is our 1965 Mustang project car that has a 1,000 horsepower Windsor with a Paxton Novi 2500 supercharger, and it has already run in the 9-second zone but will drop those ETs in the very near future as we go True Street racing with a goal of 8-seconds in the quarter-mile. Because of this, we needed to upgrade the safety equipment, not only to meet the NHRA rules for the speed the car will run, but also because the owner has a family and doesn’t want to die in his car. And for the gear, we’ve turned to the folks at Impact Racing [7], one of the leading manufacturers of safety equipment in the racing industry. He’s being outfitted with an Impact 2-piece driving suit and helmet, and the car itself is getting new Impact 5-point restraints and an Impact parachute with a Chassisworks ‘chute mount and launcher system.
Protect Your Body
There are a lot of things that influence what kind of suit you get such as sanctioning body rules, track requirements, the type and speed of your car, etc. Considering these factors, how do you buy the suit that is right for you? Well, to be legal it must be SFI-approved. You’ve probably noticed the black and white SFI patch on many drivers’ left shoulders at various tracks—the patch demonstrates that the manufacturer certifies the suit to meet or exceed the SFI specification. The standard is the SFI Foundation Specification 3.2A for Driver Suits.
The purpose of the TPP is to measure the length of time the person wearing the garment can be exposed to a heat source before incurring a second degree, or skin blistering, burn.

Here are the SFI ratings with the corresponding TPP values and times to a second-degree burn:
SFI Rating TPP Value Time to 2nd Degree Burn
3.2A/1 6 3 Seconds
3.2A/3 14 7 Seconds
3.2A/5 19 10 Seconds
3.2A/10 38 19 Seconds
3.2A/15 60 30 Seconds
3.2A/20 80 40 Seconds
Impact provided us with their Racer suit, which is a two-piece suit with separate pants and jacket, rated at SFI3.2A/5. Manufactured from Impact’s matte-finish Nomex and ImpactMAX lightweight inner liner, the Racer has 360-degree floating sleeves, an expandable back gusset for ease of mobility, extra deep pockets, and a bootcut cuff. You can get in a one-piece or two-piece style, and be confident that you have a quality suit without breaking the bank. Impact also provided one of their Champ helmets in flat black.
 [8]
[8]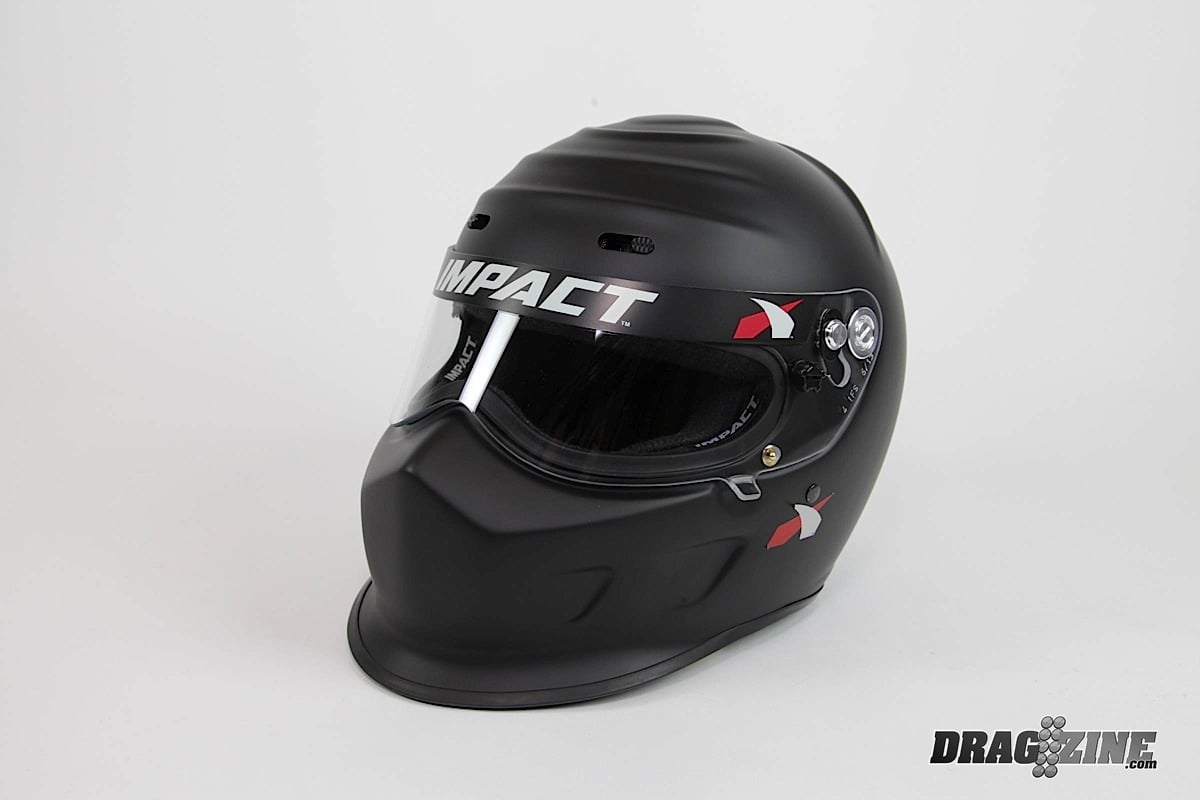 [9]
[9]
The Impact Champ helmet has an aggressive and unique chin bar designed to cover the mouth and nose; a feature that acts as a built-in breath deflector minimizing fumes inside the helmet and reducing fog on the shield. The integrated slotted vents on the forehead provide for additional ventilation while Impact’s exclusive “Ripple Effect” helmet crown and wicker bill create aerodynamic stabilization, which isn’t a concern in a closed car like Bullitt. But it looks cool.
NHRA rules for 2014 state that, “Any car running 14.00 and quicker in the ¼-mile requires a Snell 2005 or newer or SFI 41.1A helmet (see complete list below)”. Also a new NHRA rule in 2008 requires that, “Any car running 9.99 or quicker in the ¼-mile requires an NHRA approved full-face helmet with visor.
Explains Impact’s Kelli Willmore, “Each helmet in Impact’s line-up offers different features that target either specific forms of racing or budgets. Our most popular model, the 1320, is a budget-minded helmet, however it will work for most forms of racing. If you’re looking for an inexpensive Made in the USA helmet that will work for street, strip and everything in between, this is the helmet for you. Our SuperSport helmet has a few additional features such as directional top air for those wanting more ventilation that will also work for many different forms of racing.
“The Impact Charger and Champ helmets are typically used in drag racing, continued Willmore. “The Champ features aggressive chin bar designed to cover the nose and mouth and act as a built-in breath deflector minimizing fumes while reducing fog. The Champ also features our narrowed eyeport reducing the incidence of peripheral distractions while a “ripple effect” crown and wicker bill provide aerodynamic stabilization in open cockpit race cars.”
It is recommended that restraint systems be replaced at a minimum at least every two years. However, webbing that has been exposed to harmful solvents, chemicals, or acids, or prolonged exposure to outdoor elements, may need to be replaced sooner.
As outlined under Class Requirements, drivers in all classes, including motorcycles, must wear a helmet meeting Snell or SFI Specifications.
SFI Spec 31.1A = Snell SA, open-face helmet
SFI Spec 31.2A = Snell SA, full-face helmet
SFI Spec 41.1A = Snell M or K, open-face helmet
SFI Spec 41.2A = Snell M or K, full-face helmet
Restraining The Driver
Stock seat belts work fine in a fairly stock vehicle on the street, but when you start hammering the car on a drag strip they fall far short of the protection you need, especially the ancient belts in a ’65 Mustang. NHRA rules require, “A quick-release, three-inch minimum width driver restraint system with a two-inch crotch strap meeting SFI Spec 16.1 or a two-inch with two-inch crotch strap meeting SFI 16.5 mandatory in all cars required by the rules to have a roll bar or roll cage.” The also have rules about mounting the belts, and SFI-spec belts must be “updated” every two years. That means you have to send them back for an update, which usually means new webbing, or buy new ones.
 [10]
[10] [11]
[11]
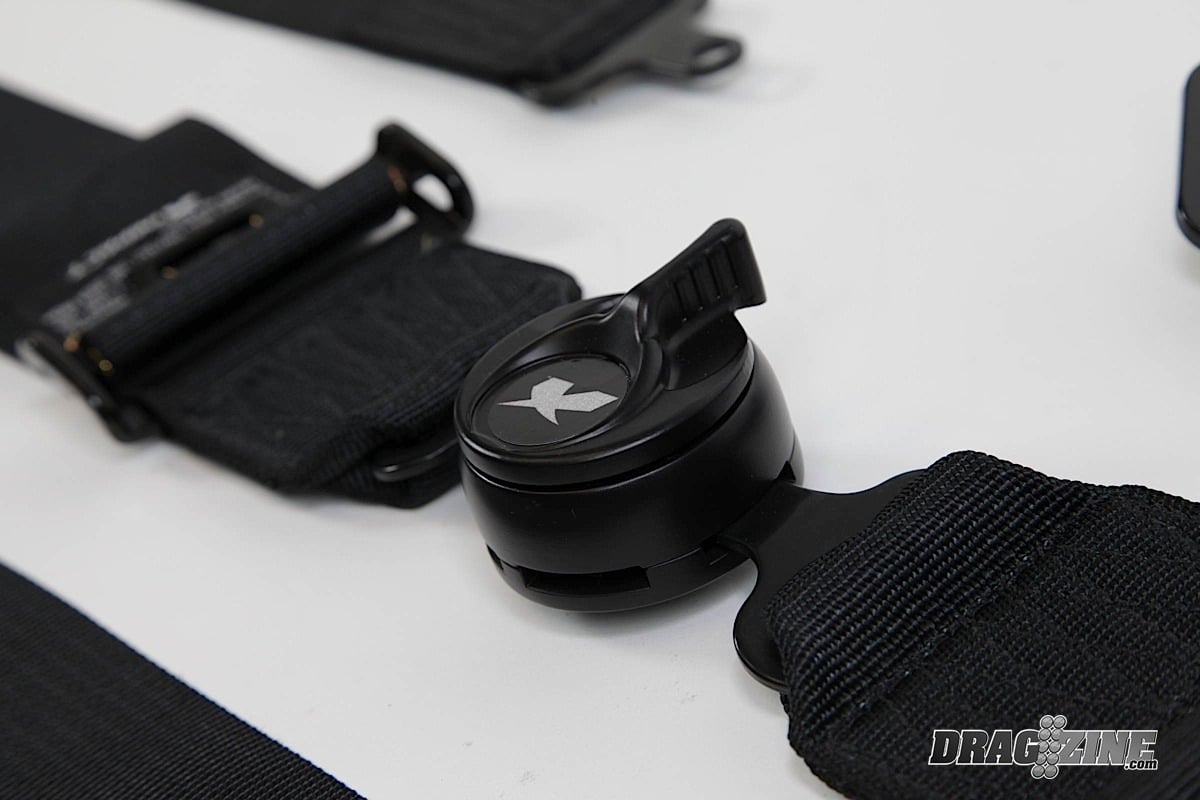
We are using Impact’s Racer Series belts, which are five-point belts with three-inch wide waist and shoulder straps, a two-inch crotch belt, and a very handy Camlock latch. The Camlock is easier to use than the standard lever latch system, especially when fastening the belts.
 [12]
[12]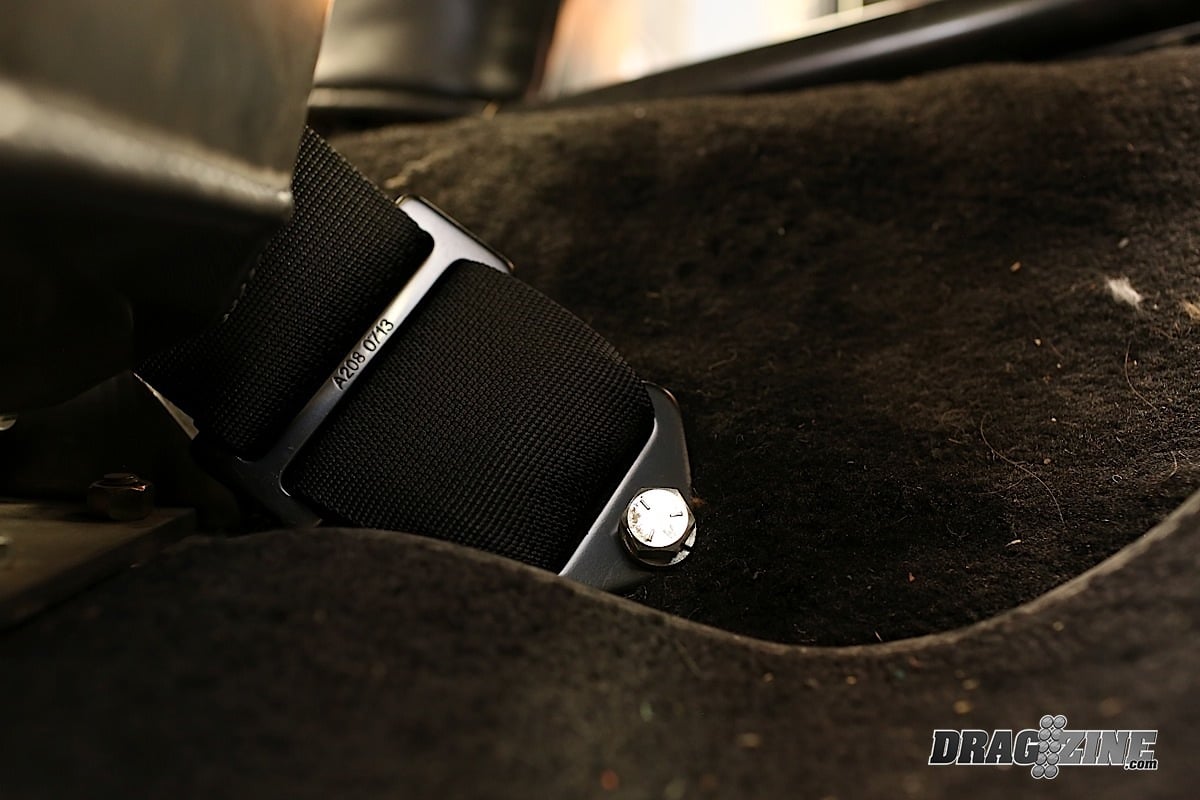 [13]
[13]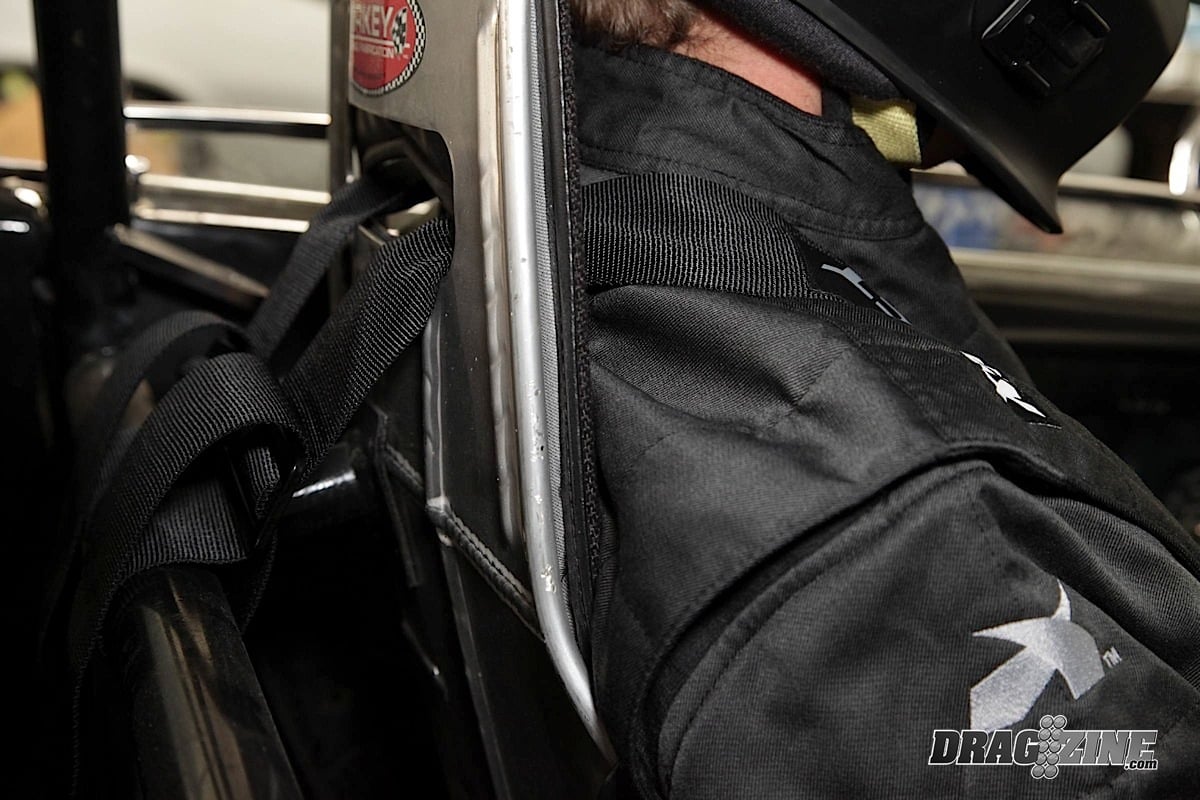 [14]
[14]
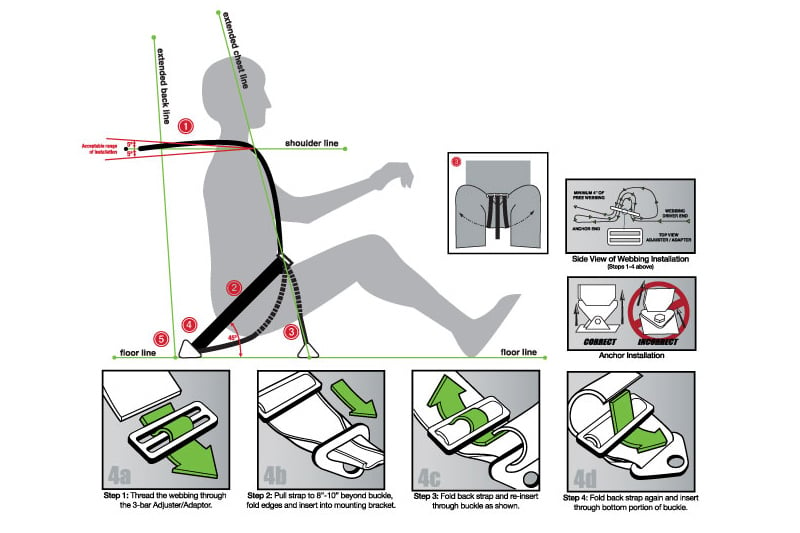
The Power Automedia techs installed our belts with grade 8 hardware according to NHRA’s safety rules. The illustration from Impact shows the proper and legal way to mount the belts.
Asked about the differences in choosing a cam lock versus latch and link-style belts, Willmore shared, “Cost is often the main determining factor, followed by ease-of-use. Camlocks are often slightly higher priced than a latch and link, however, the ease of use often offsets the price for most racers. If you’re running a sand drag car or other dirt related style of racing, many dirt racing series and sanctions will not allow a camlock style belt.”
As Willmore tells us regarding bolt-in belt installation versus wrapping the shoulder belts, “Bolt in, clip-in, and wrap shoulder belt installations are acceptable per the SFI Foundation’s 16.1 specification. Proper installation regardless of attachment style is critical followed by the angles at which the belts are installed. The shoulder belts should be installed at -10 degrees from horizontal for optimum performance. The shoulder belts should be as short as possible from the mounting point and the webbing should have an unobstructed path without any interference from the seat opening.”
Willmore continued, “The belts that will be doing all the work, when needed, and are the most integral part of a restraint system are the lap and anti-sub belts. The Iliac Crest is the curved ridge at the top of the pelvic bone and it forms the most prominent and largest bone in your pelvis. This area of the body is generally most capable of withstanding force, which is why it is important for the lap belt to fit as tightly and comfortably into the Iliac Crest as possible. The anti-sub belt will assist with keeping the lap belt low and tight across this region as long as both belts are installed and worn as recommended.”
Sky Diving at the Drag Strip
 [15]
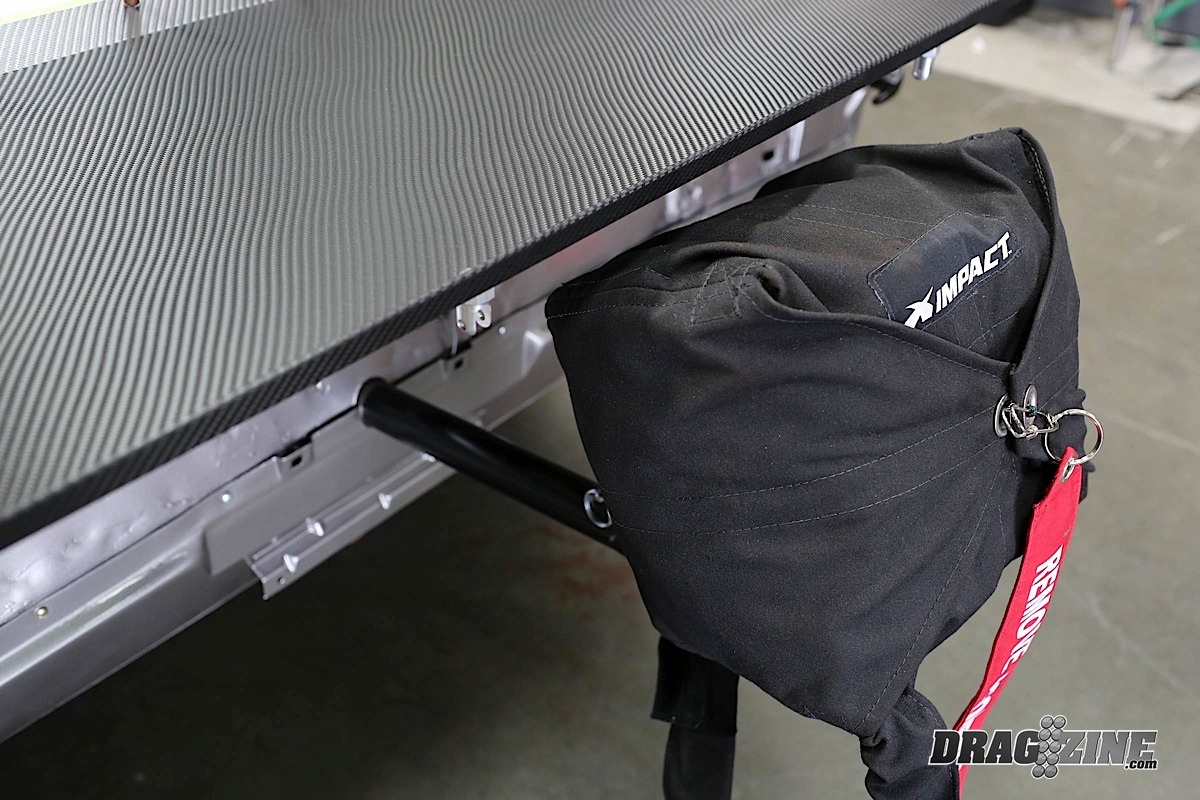
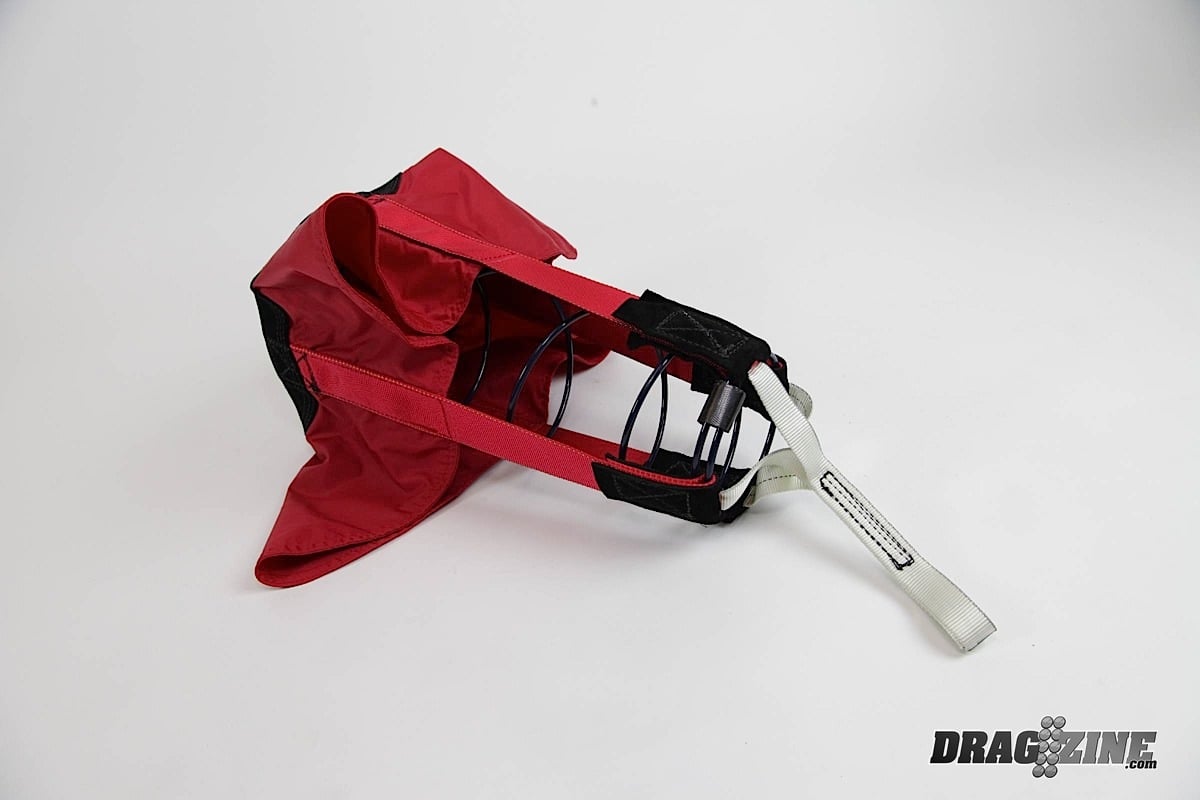
[15]We set up Bullitt with an Impact Pro Stock drag chute that has a lightweight crossform (4-point) design and features an outer bag, an inner bag (for use with a pilot ‘chute), lanyard, and pilot ‘chute.
Those parachutes you see on the back of race cars are not for looks. Drag race brakes are by nature light with thin rotors, and must be augmented by a ‘chute to slow a drag car down in the sometimes short distance of a drag strip’s shutdown area. Take our own Project BlownZ Camaro for instance. That car has dual parachutes, and at an NMCA West race in Fontana one of the chutes malfunctioned—the result was BlownZ ending up in the sand trap at the end of the track. Other than pride, no real damage was done but it could have been much worse.
We used a universal parachute mount from Chris Alston's Chassisworks but before we could mount the ‘chute, we had to make this brace in the trunk to handle the loads of a blossomed parachute dragging the car down from big speeds. Chassisworks also provided a 'chute strap mount. The bracket was welded to the mount tube, and the strap pivots on the aluminum spool that is bolted in place.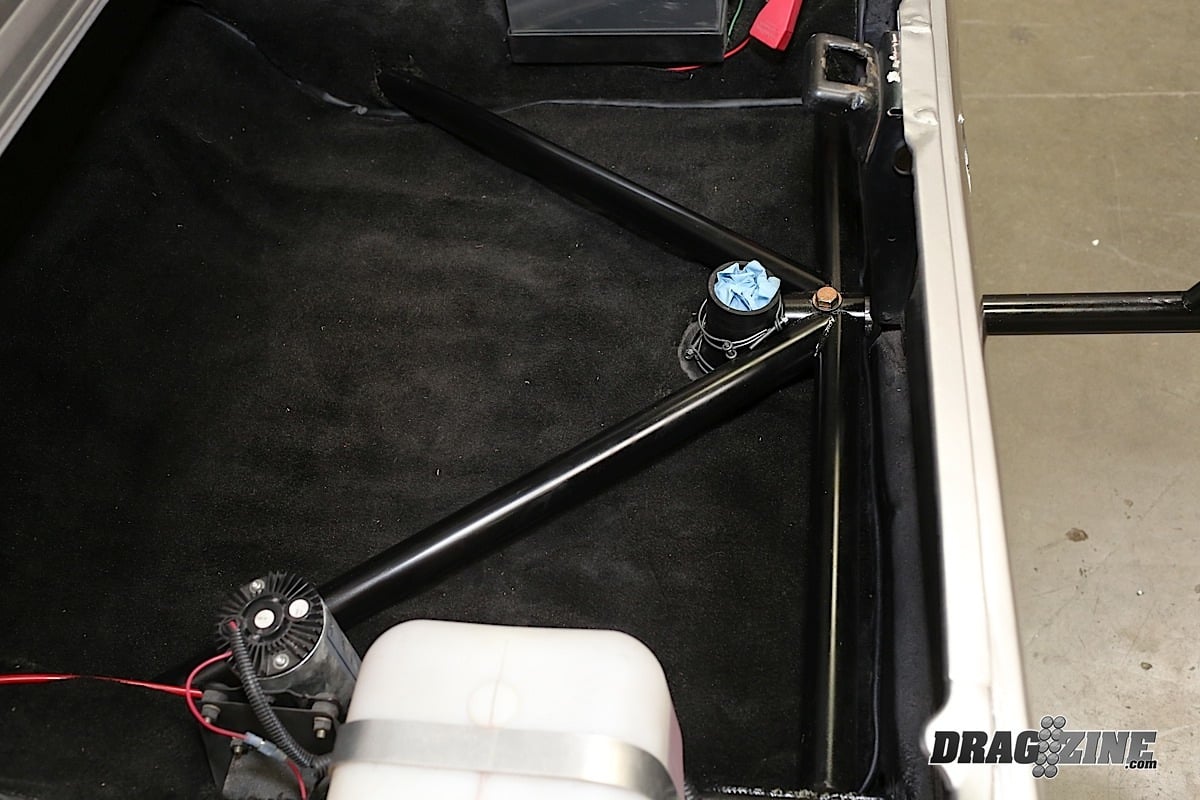 [16]
[16]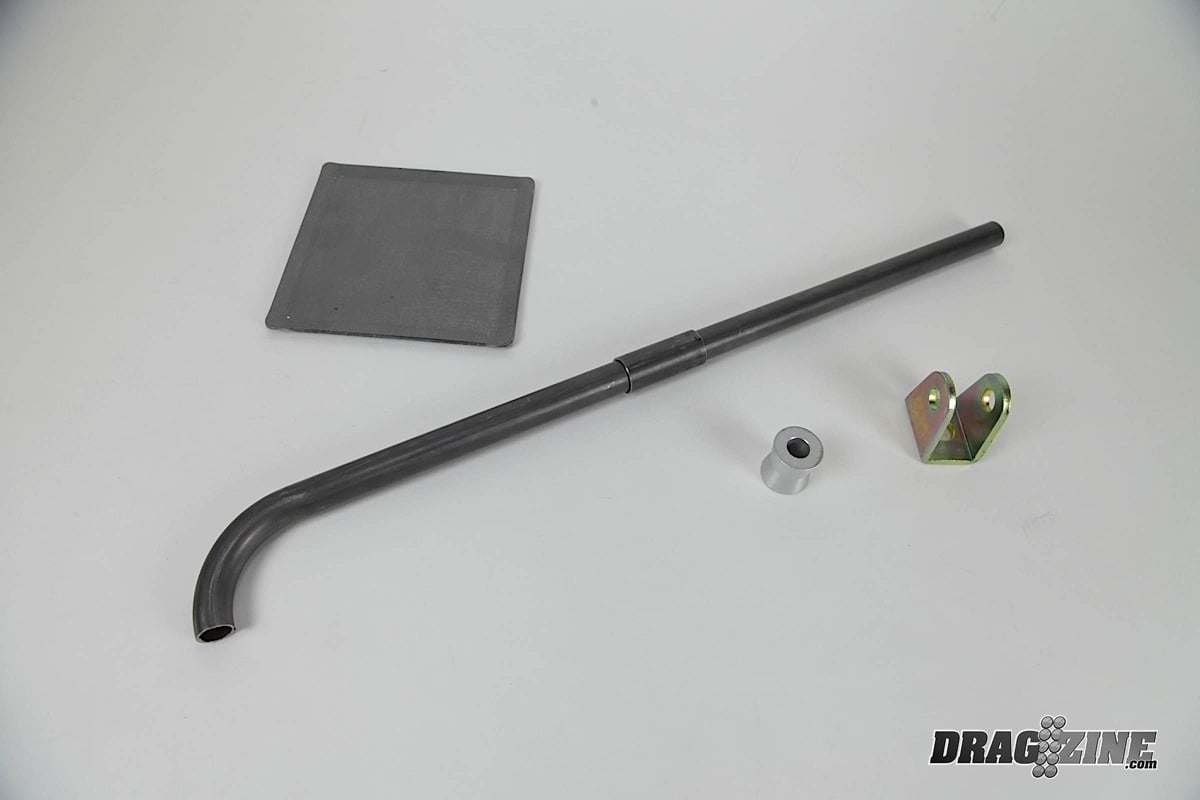 [17]
[17] [18]
[18]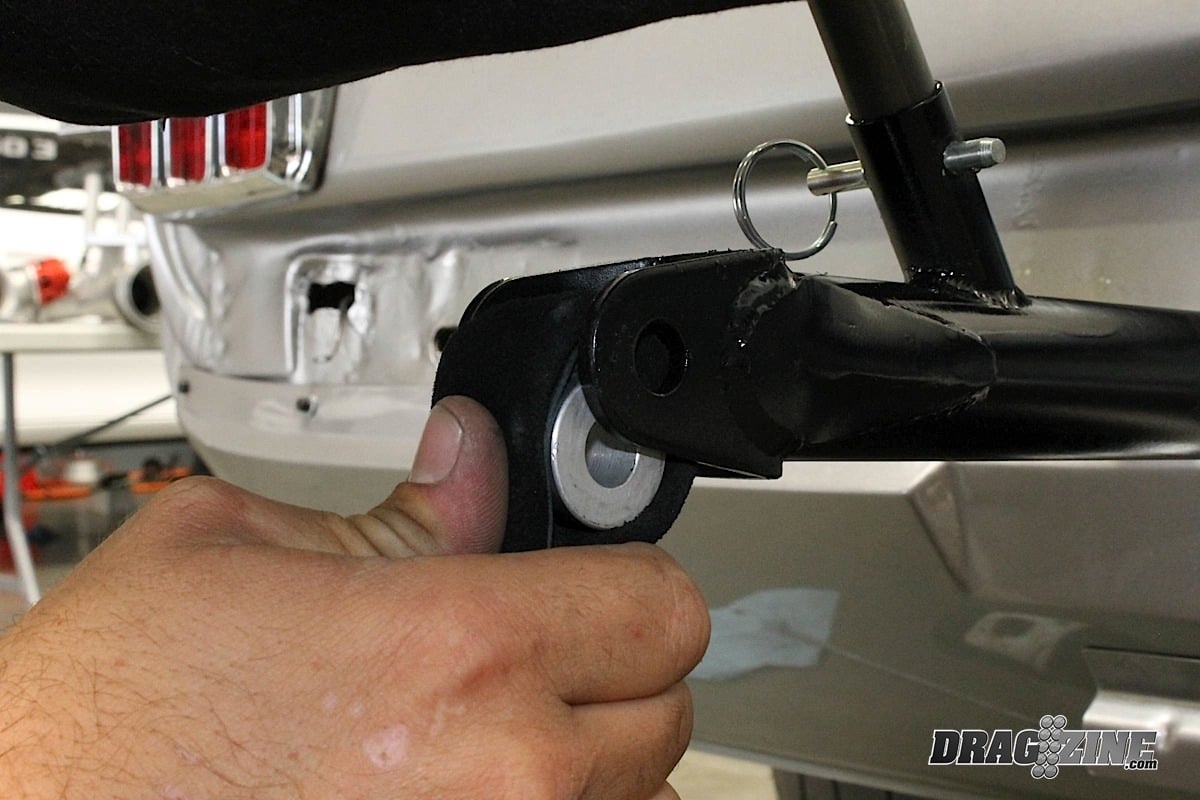 [19]
[19]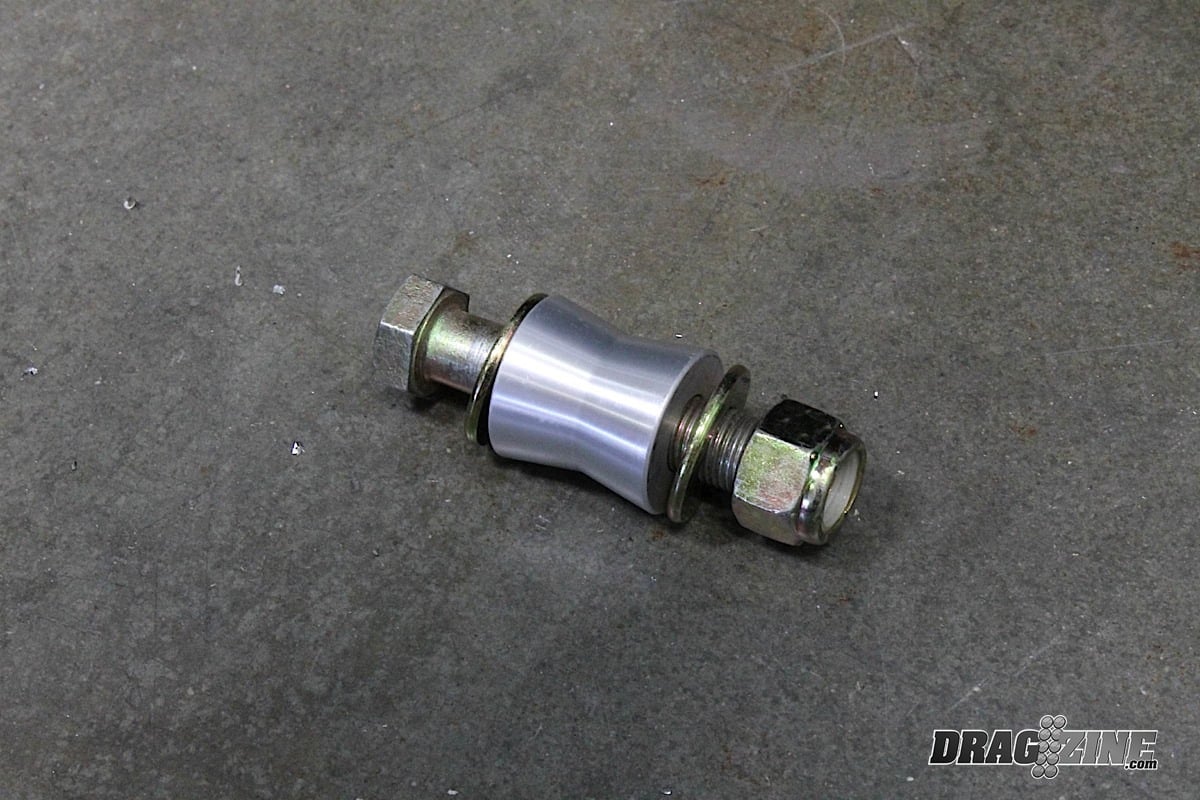 [20]
[20]
 [21]
[21]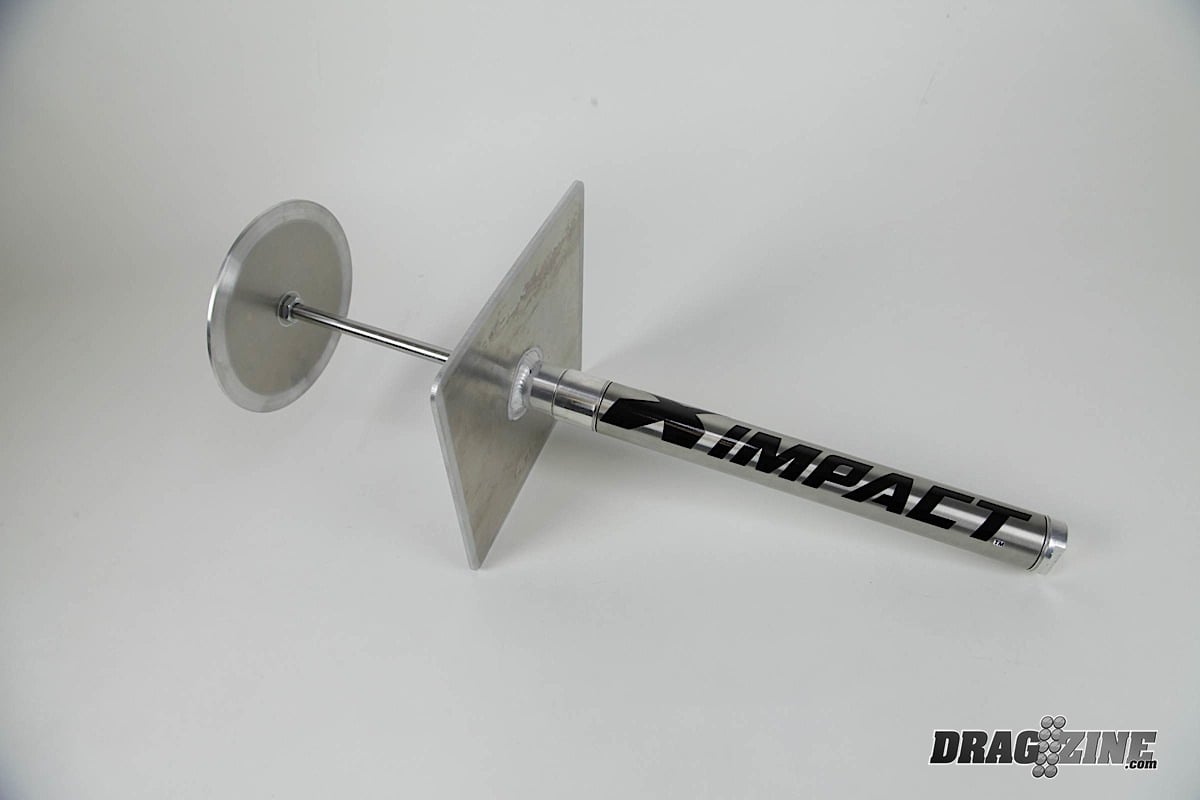 [22]
[22]
Impact also has an air-powered parachute launcher that helps force the 'chute to deploy. We elected to just use a pilot 'chute, which uses a high-quality Hypercoil spring that is designed to be as light as possible yet endure the stresses of extreme conditions for reliable deployment.
Besides, NHRA rules mandate a parachute on any car going 150 MPH or more in the quarter-mile, dual ‘chutes if you top 200 mph. We set up Bullitt with an Impact Pro Stock drag chute that has a lightweight crossform (four-point) design and features an outer bag, an inner bag (for use with a pilot ‘chute), lanyard, and pilot ‘chute. Impact also makes an air-powered launcher, which shoots the ‘chute out of the bag to ensure that it blossoms properly. We didn’t elect to use the launcher, and instead went with just the pilot ‘chute. We mounted it to the back of the car with a Chassisworks parachute pack mount, ‘chute trap pivot, and release lever and cable.
“The determining factor for the size — and whether a racer needs more than one drag chute — is based off the speed and weight of the race car,” explains Willmore. “Because there are many different factors that contribute to the proper set-up, we suggest you call the product manufacturer for their recommendations.”
 [23]
[23]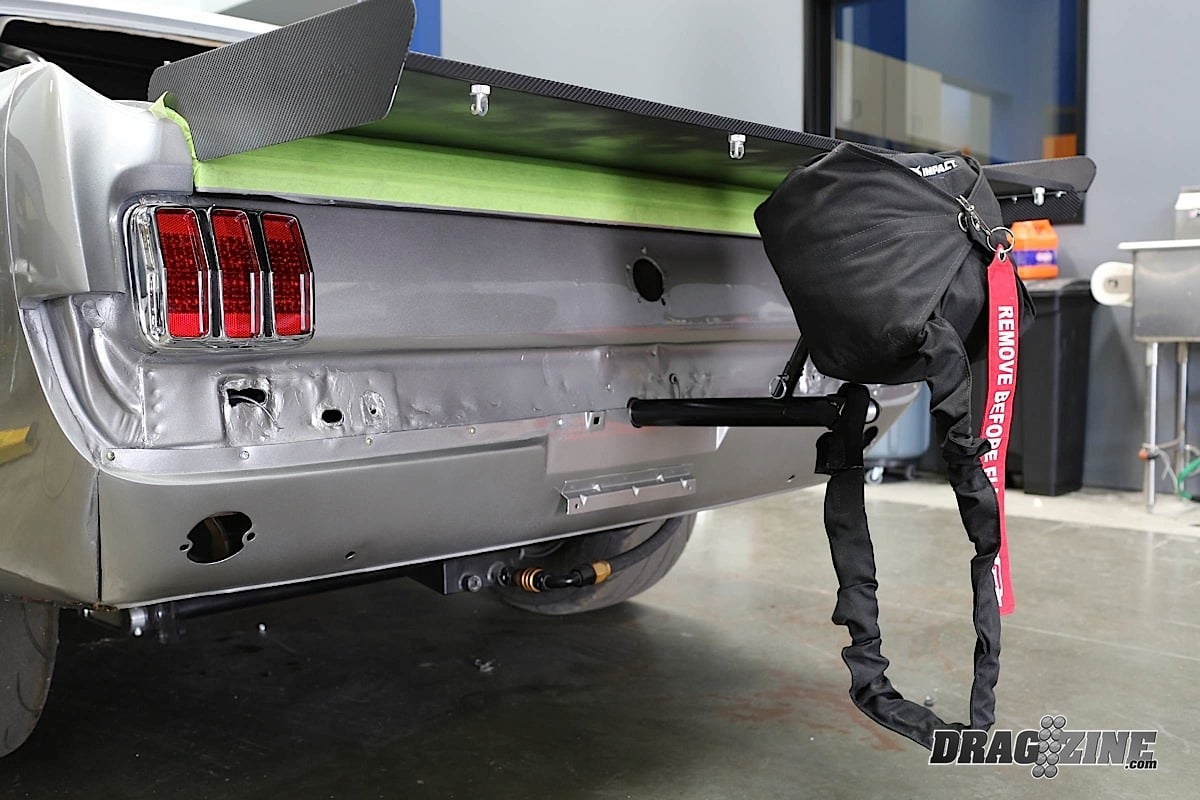 [24]
[24]
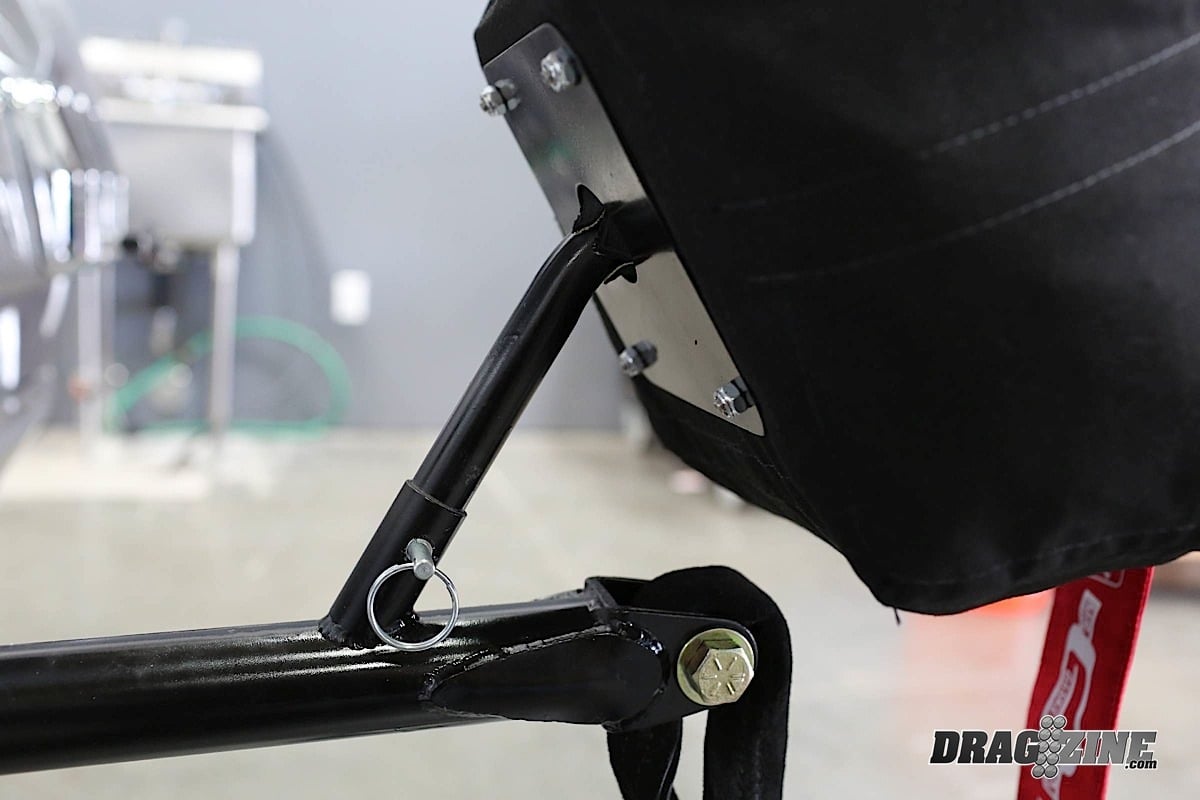
This is how the completed parachute installation looks. The quick-release pin allows the whole setup to be removed quick and easy.
What is SFI?
Taken directly from their website, “SFI is a non-profit organization established to issue and administer standards for specialty/performance automotive and racing equipment. This includes parts like clutch assemblies and fuel cells as well as personal driver safety items. The standards/specifications are created via a committee process.
 [25]
[25]To activate the parachute, we used a Chassisworks release lever and cable that has an aluminum lever, mounting hardware, and a 14-foot cable.
The technical committees are comprised of individuals from all facets of the industry. Through their expertise and research, a spec is drafted and then offered to all interested parties in the form of a public hearing. Once revised to the committee’s satisfaction, the spec is presented to the SFI Board of Directors for approval. If approved, the spec is published and made available to the public. Sanctioning bodies all over the world include SFI specs in their rulebooks and use them as minimum requirements.”
How to Pack a Parachute
Properly packing a parachute is vitally important for it to work. If you just stuff it all in the ‘chute bag, there’s a chance it can improperly deploy and/or get tangled up, and you can imagine the disaster that will follow if that happens. Packing the ‘chute is not that complicated but time must be taken to get it right. Here we show how to pack the Impact parachute used in this project.
Stretch the parachute out fully behind the car, making sure the straps aren’t tangled with each other, then carefully fold it according to the directions. Once the ‘chute is folded, carefully put it in the bag. Then fold the straps in a neat manner over it.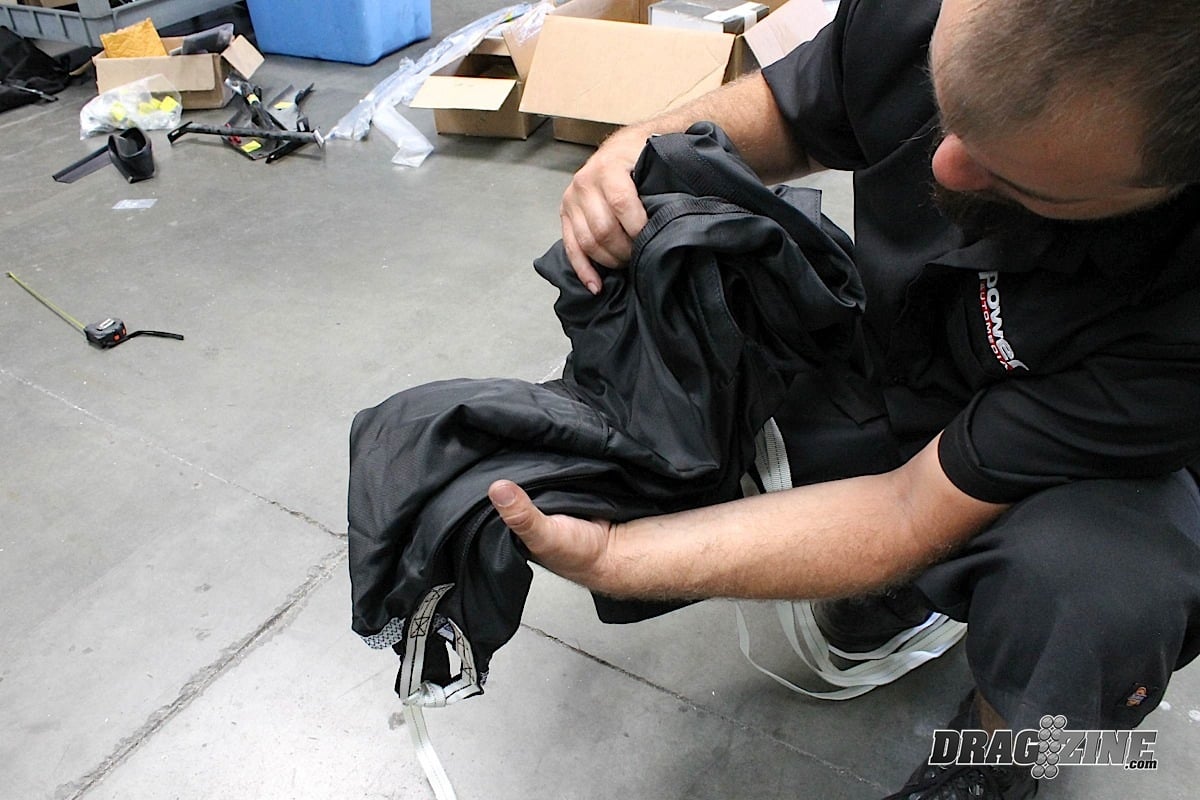 [26]
[26] [27]
[27] [28]
[28] [29]
[29]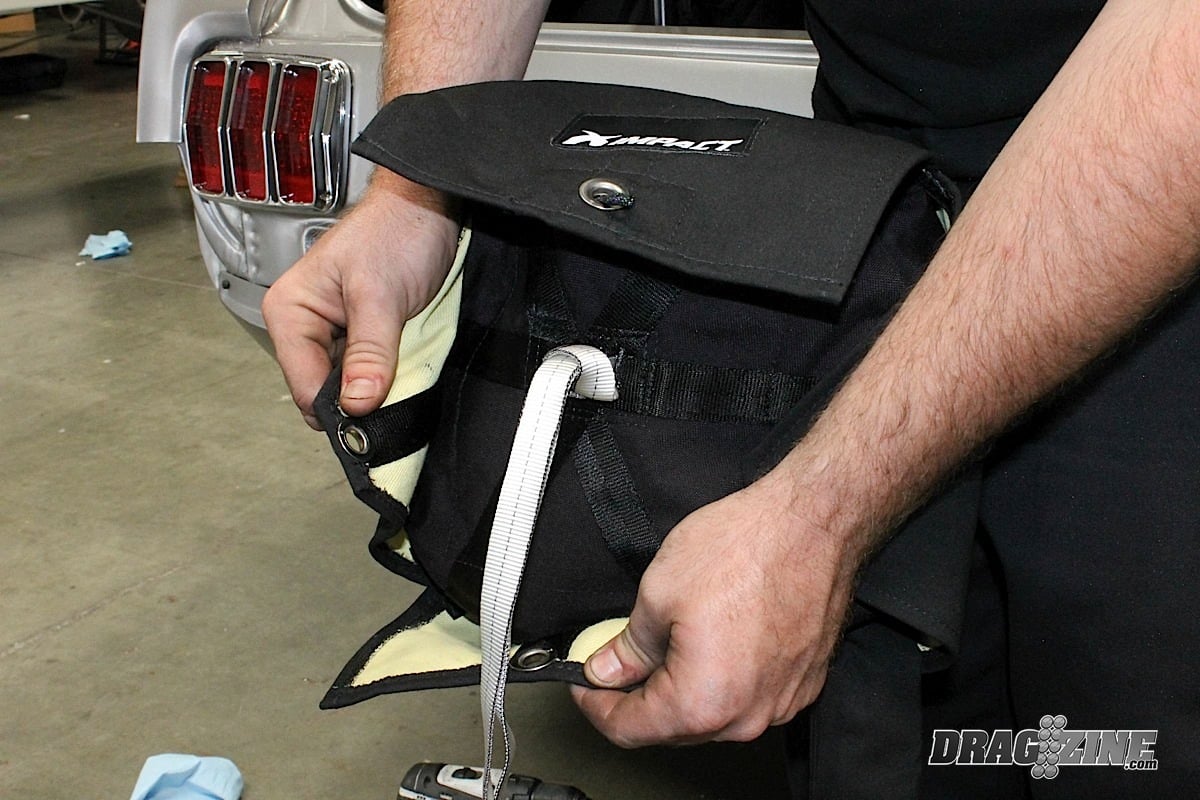 [30]
[30] [31] [31]
 [32]
[32]
With the safety gear from Impact and quality installation by the Dragzine shop techs, Project Biting the Bullitt is nearing readiness to hit the strip, True Street style. We can’t wait, and we can also lighten the life insurance premium we took out on the car owner now. See you at the track!