 [1]
[1]
 [2]
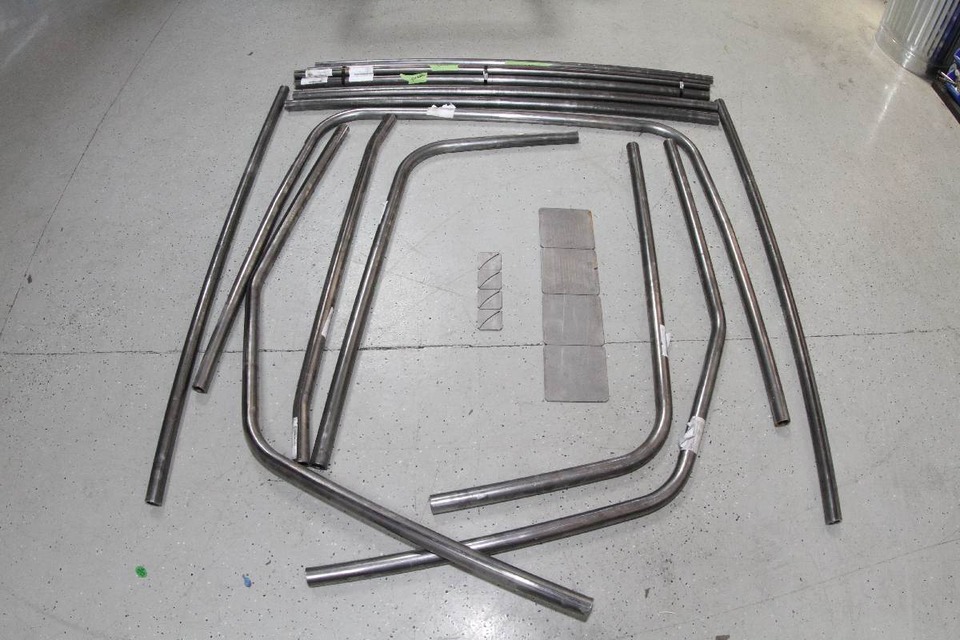
[2]We ordered some extra tubing as well as some gussets. More on that later.
Project MaxStreet [3], our blown, big-block ’66 Chevy II [4], is full of cool stuff—850 ProCharged rear-wheel horsepower [5], Detroit Speed rear suspension [6], Chassisworks front clip [7]—all good parts that ensure this rig will be a fun ride down the quarter-mile. That ride could, however, be our last if not for some necessary safety gear, namely a 10-point roll cage. Without the cage, MaxStreet won’t even make it to the staging lanes. You never plan to crash, but you should always build the car around the idea that you might. Never scrimp when it comes to protecting yourself.
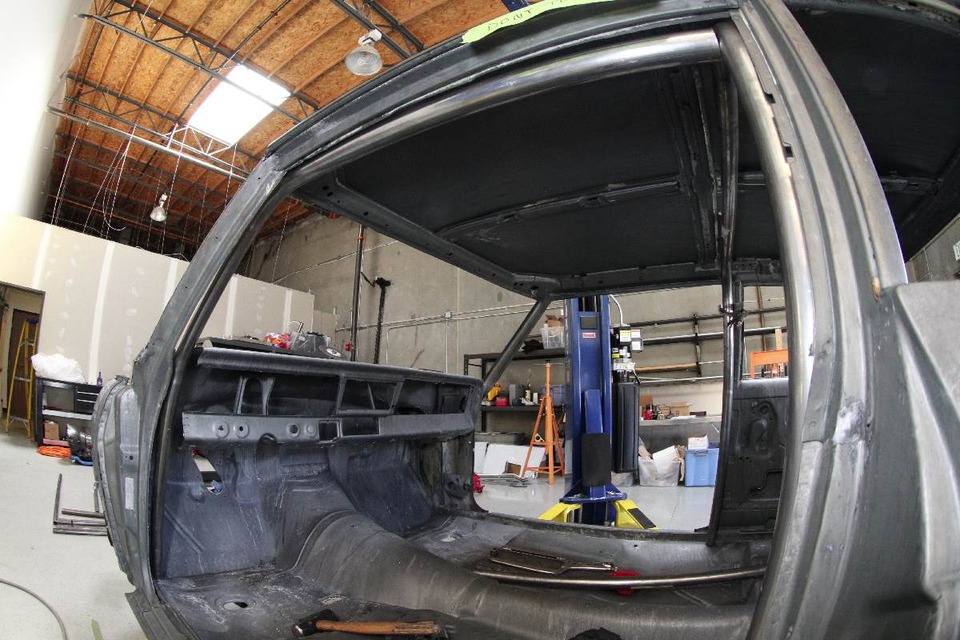
With the Nova sitting in the middle of the PowerTV shop, we ordered up a 10-point roll cage kit from Chris Alston’s Chassisworks [8] and got to work. Because this is a street car, we made some alterations to the door bars to make them clear the arm rests, yet remain permanent (not swing-out) and therefore stronger. Often, when installing a cage kit, some minor modifications may need to be done to suit personal tastes, and our taste dictates that our left arm is not flopping around between the door and the seat while we cruise the car on the street.
 [9]
[9]
Chassisworks PN 7011 Roll Cage [10]
- 1-5/8ths x .134″ mild steel tubing
- Kits designed specifically for popular chassis configurations for proper fitment
- Fits with stock interior installed
- Bent rear struts (further modified in house) to clear rear seat
- Front down bars converted into 4-link support bars
- Good up to 8.50 second ETs
It is always better to have a full roll cage in the case of a crash. A full roll cage is pretty hardcore for a street car, requiring some yoga moves to get in and out of the car, so why did we install it in our dual-purpose, street-strip Nova? The answer is simple: the NHRA rulebook says so. Specifically, the rules say that any vehicle running between 11.49 and 11.00 in the ¼-mile (and convertibles as slow as 13.49) must have a roll bar (minimum 5 points of attachment). Running 10.99 or faster, or any car exceeding 135 mph, must have a roll cage.
Full-bodied cars get a pass on the cage from 10.99-10.00, as long as the firewall is unaltered, meaning they can be accepted with just a bar. For convertibles running 10.99 or faster (or exceeding 135 mph), the full cage is mandatory. Getting into the sub-9.99 range requires a 3-year chassis certification with a serialized sticker on the cage. All cars running 9.99 or faster must also have SFI Spec 45.1 padding on the cage where it may come into contact with the helmet. “It is always better to have the full roll cage in the case of a crash,” said Jim Wright of Chassisworks. “If the car would roll over the top of the windshield will collapse on the driver so the cage protects the driver from this happening.”
 [11]
[11] [12]
[12]
First, the main hoop is trimmed and fit to the car. This is typically set flush or just behind the B pillar or door jamb. Next, powerTV fabricator Dean checks the fit of the front down bars. You don’t have to remove the windshield at this point, but it makes it easier. The tubes are always left long so that you have room to trim them, since every car is a little bit different.
Regardless of racing type, it is always better to have the full roll cage in the case of a crash.

There a lot of details inside the rulebooks that must be adhered to, such as tube diameter, floor plates, and even the angles of certain bars in certain situations. The point is that if you want to get serious, buy the rulebook before you build your cage—we can’t stress that part enough. This story only covers the process of installation of the Chassisworks kit, not all the technical details of cage design itself.
 [13]
[13]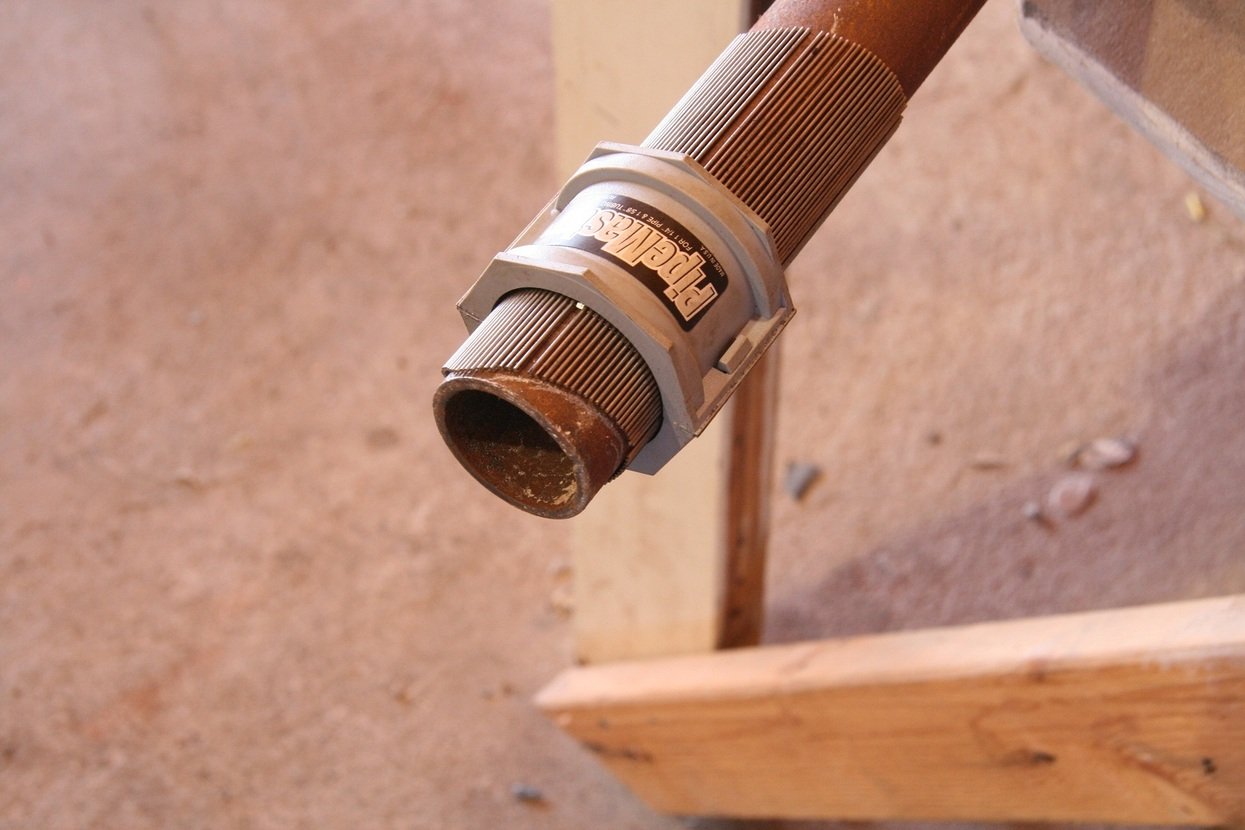 [14]
[14]
Here you can see how tight the bars fit to the structure of the car. The closer the fit, the better the final look of the car, comfort of the driver, and safety. There are several ways to notch the tubing to mate up to each other. This is a tubing sleeve from PipeMaster (right). If you don’t have a tubing notcher, this is what you want. It gives the perfect line to cut.
 [15]
[15] [16]
[16]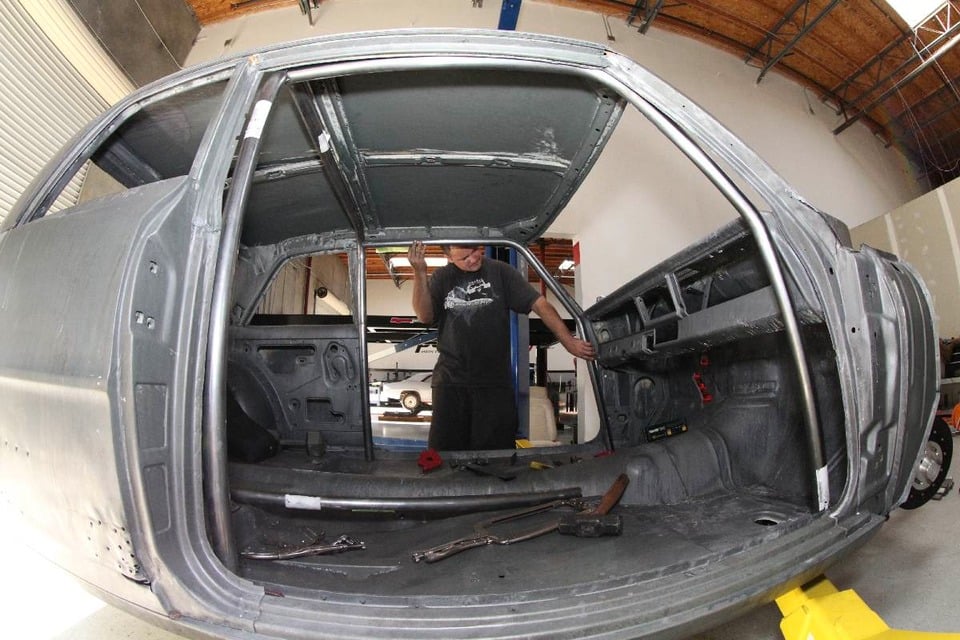 [17]
[17] [18]
[18]
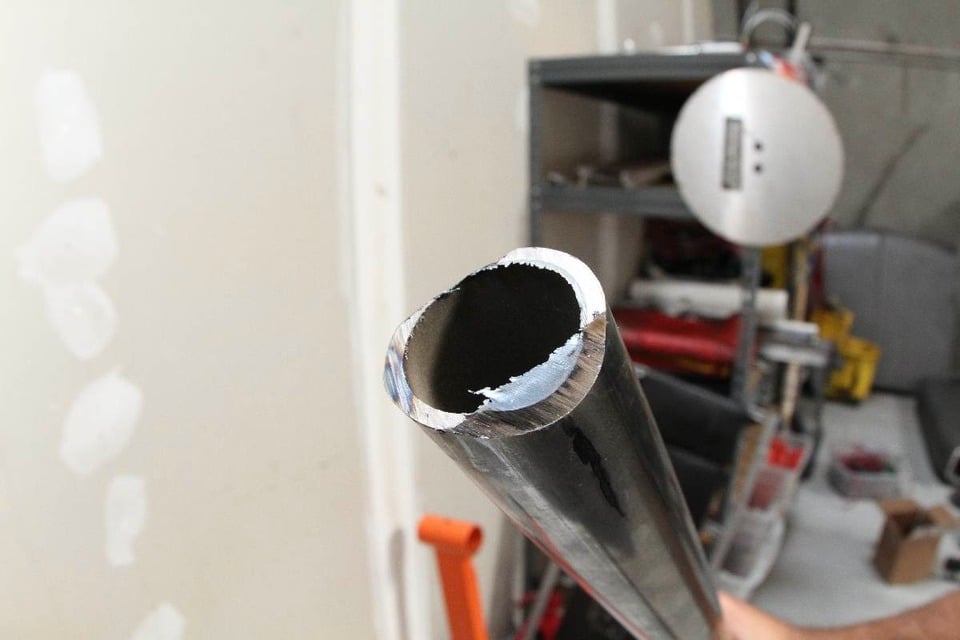
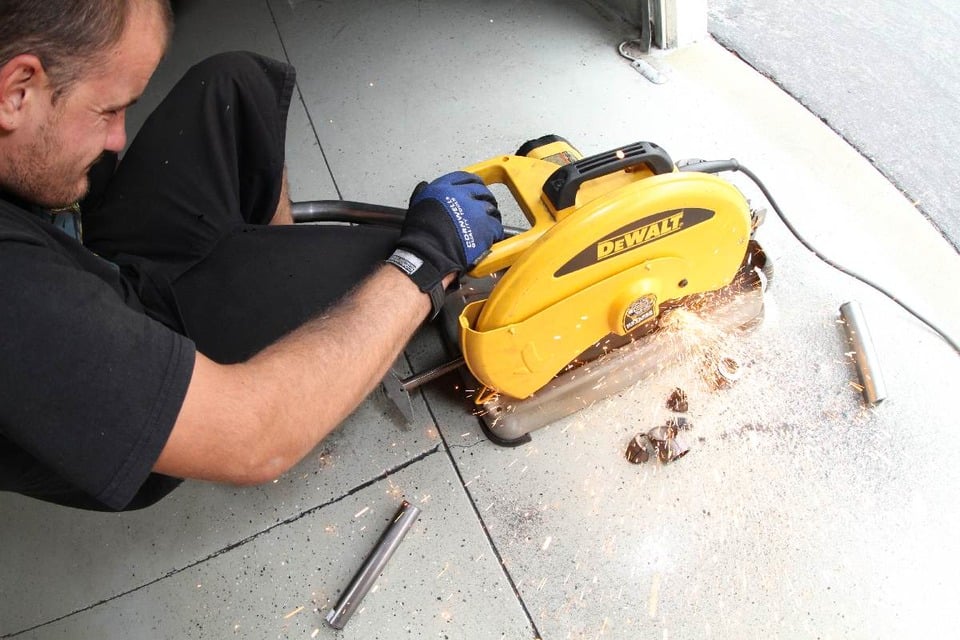
Clockwise from top left: Dean cut the tubing to length with a chop saw, then cut the tubing at an angle to facilitate mating up to the round tubing. The upper bar was then tacked into place. You don’t fully weld anything until the whole cage is tacked into place. Next, we measured between the main hoop and the front down bars. MaxStreet will get a set of rocker bars because the factory subframe does not run outside the driver’s legs. With both sets of front bars set, the cage is starting to take shape.
 [19]
[19]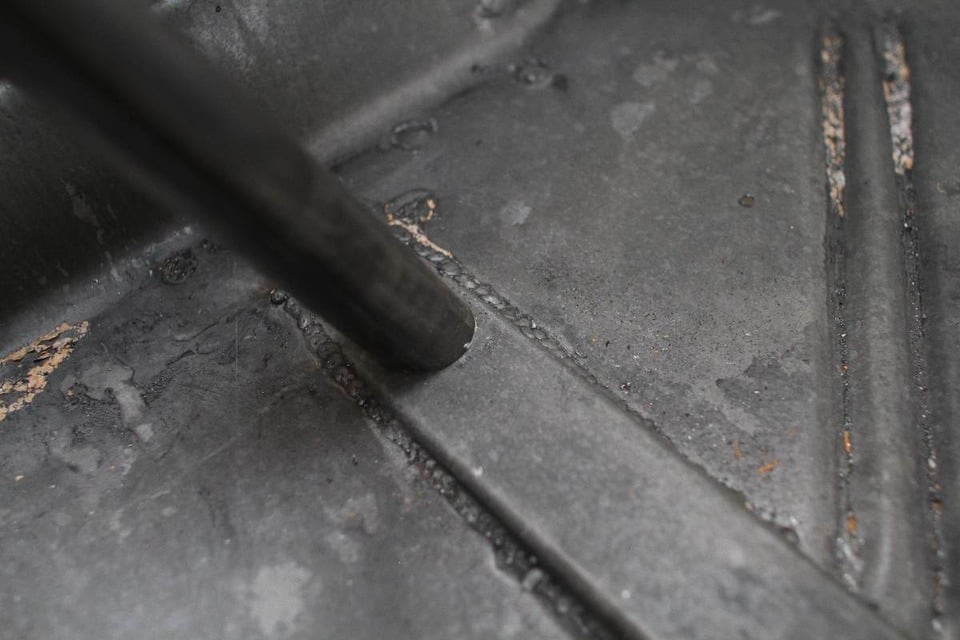 [20]
[20] [21]
[21] [22]
[22]
Left to right: There are four bars in the main hoop—the hoop, the center crossbar, and two rear bars. These four bars intersect in the middle for strength. The center bars must connect to the frame, subframe, sub connectors, or the driveshaft tunnel (with floor plates). These are called “D” bars by the NHRA, and connect to the subframe channel on MaxStreet. This is where the D bars will be welded to the floor, at the subframe channel in the OEM floor. Dean bent us a pair of rear down bars to connect to the rear subframe. The rear bars fit snug to the roofline and drop right over the rear wheel tubs. By running the rear bars this way, there is more room for rear passengers, provided they can get over the center bar.
Think To The Future
 [23]
[23]A mechanical tubing bender was used to bend the bars. It is complicated looking device that performs a difficult task. In order to keep the tuning form kinking, there is a die on the inside of the bend (not inside the tube, that is mandrel bending) and the tube stretched against it.
Fast cars have a tendency to get faster, due to the owner’s greed for speed, so when planning your hot rod’s roll cage, it’s always a good idea to build it to the next level of performance. In other words, let’s say your combination should go 10.50s in the quarter. You might as well build the ‘cage to be legal for 9.50s, since you may soon bore of going tens and step the combination up with more motor. If you do that in a car with a 10-second-legal cage, you can’t legally drive the car to its full potential. And that’s a drag. Even if you’re running slower than you want to, build the car for how quick you eventually want to run.
Once you have figured out the basic requirements, the placement of certain bars is critical for passing tech. All roll bars (main hoop behind the driver) must be within 6 inches of the rear of the driver’s head, extending 3-inches above the helmet in while in a seated position, or within one inch of the roof/headliner. It must be at least as wide as the driver’s shoulders or within 1 inch of the driver’s door. The driver’s side must have a forward sidebar that intersects the driver midway between the shoulder and elbow. There must be a crossbar in the main hoop that is no more than four inches below and not above the driver’s shoulders.
Cage Specifics
 [24]
[24]This bender is powered by a hydraulic ram, but you can get a tubing bender that is hand-operated on the cheap, and it is very effective. You can over-bend a tube pretty easy, so the work is done slowly, checking progress along the way. If you are bending manually, watch out for spring-back, which is when the tubing unbends as you release the pressure.
When it comes to mounting the bar or cage to the chassis, there are several ways of doing it. OEM full-frame cars must attach the bar/cage directly to the frame either with bolts or welds. Unibody cars may be welded to the floorpan via .125-inch-thick, 6×6 (inches) steel plates bolted top and bottom through the floor with at least four 3/8-inch bolts or be welded to the rocker sill area with .125-inch-thick reinforcement plates, and must be fully welded. Chromoly bars must be TIG welded, mild steel may be TIG or MIG welded. Roll bars must be made from 1¾” diameter, .118-inch (wall thickness) mild steel or .083 chromoly tubing, while roll cages can be 15/8-inch, .118-wall mild steel or .083 chromoly tubing.
There are some other attachment rules for the cage; Unless you are mounting the cage to the OEM floor or frame, there are minimum requirements for the attachment points. Each roll cage member must be connected to at least a 1 5/8, .118-wall mild steel or .083 chromoly round tube or 2×2, .058” mild or chromoly rectangular tubing. This is particularly important for unibody cars where the cage runs through the floor and is welded to the subframe or subframe connectors.
 [25]
[25]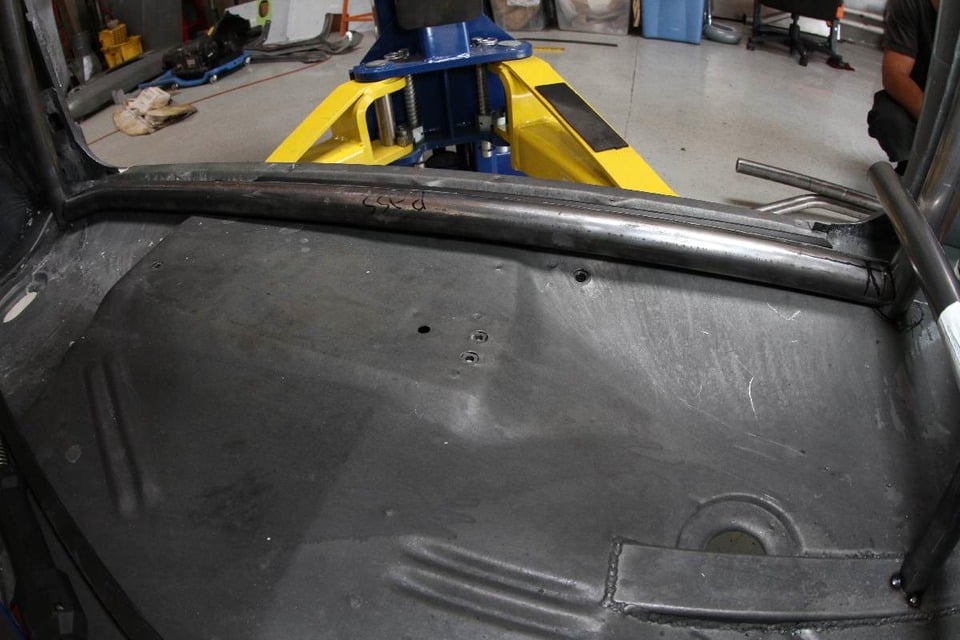 [26]
[26] [27]
[27]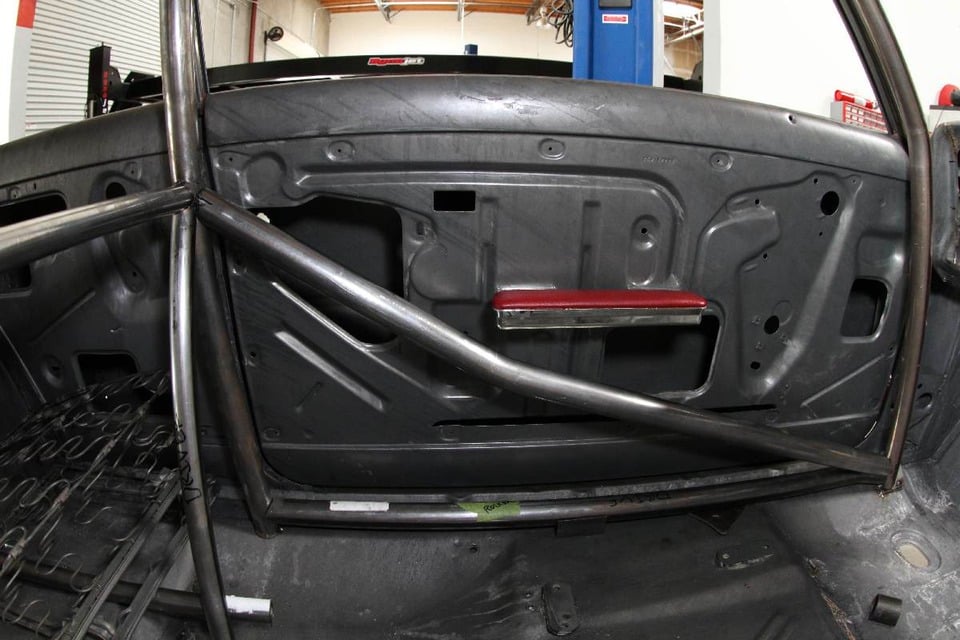 [28]
[28]
Clockwise from top left: Gussets are not required for most roll cages, but they are a good idea. A gusset can be added to provide additional support when at least 75 percent of the seam is welded. This is applicable in situations where the top of the bar can’t be reached, but the lower ¾ can be. A gusset will make it legal. What you can’t do is weld half the tube and then add a gusset. The rocker bar was bent to follow the rocker and then curve in to reach the front down bar. Here you can see the door bars. These must intersect the driver’s arm, between the elbow and shoulder, other than that, you have some room for adjustment, as long as it attaches to the base of the front down bar. We made our own door bar so that the stock armrest will clear, MaxStreet will have a nice interior, it is a street car after all.
Designing a roll cage can get very complicated, working with a professional is highly recommended. Chassisworks’ technicians are available on the phone to get the parts you need to make it happen with less work. With the right specs, they can design the correct cage to fit your car and make it an easy installation, and even provide custom tweaks to fit your particular plan. ” We offer customer cages bent to the customer’s measurement using our custom worksheet. We also offer the swing-out side bar kit that can be used in cars that do not have to meet a SFI spec,” Wright told us.
 [29]
[29]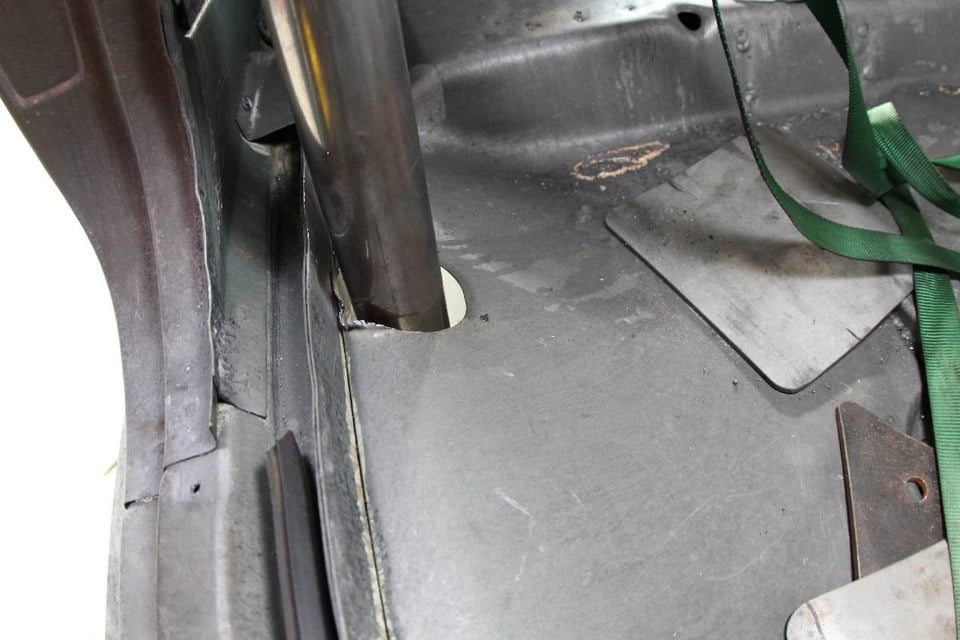 [30]
[30]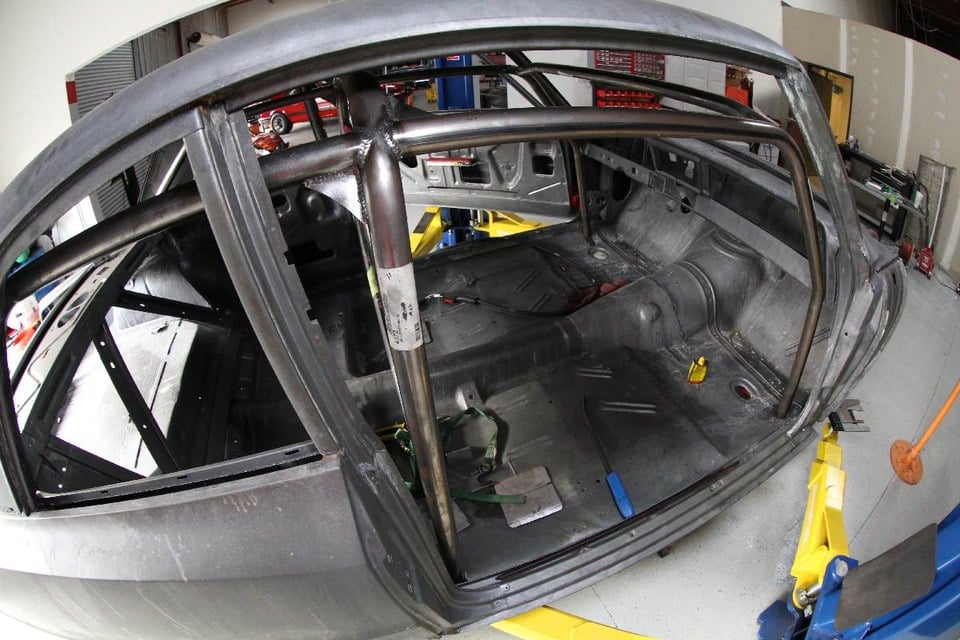 [31]
[31]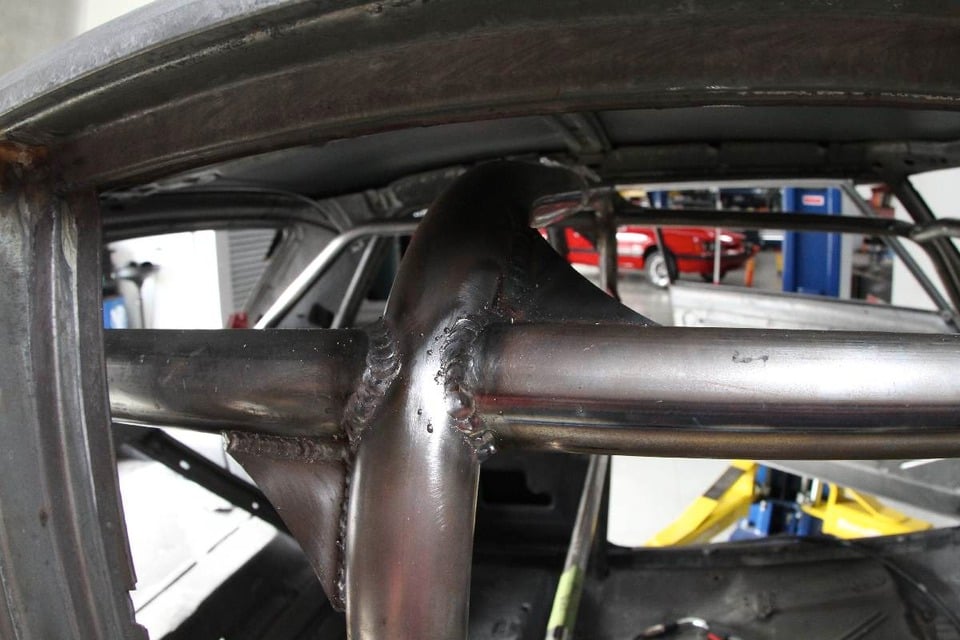 [32]
[32]
Left to right: You need a few tools to install a pre-bent roll cage kit: a chop saw, a grinder, a welder, and lots of clamps. The main hoop and front bars were dropped through the floor so that it can be welded up top. If you don’t drop it, you can’t reach the top of the bars. You could choose to connect it through the floor to the subframe connectors as well. With the bars dropped, you can see how much easier it is to get to the top of the bars. Your welds must be clean, free of slag and porosity. If you are MiG welding and it starts popping, laying down porous welds, adjust your settings. You can’t grind roll cage welds.
Installing a cage is not that tough, as long as you follow the rules. TiG welding is required on chromoly bars, and is actually easier than MiG welding (assuming, of course, that you have a TiG machine), since you have more control, plus the TiG torch is much smaller so you can get better access to the top of the cage.
 [33]
[33]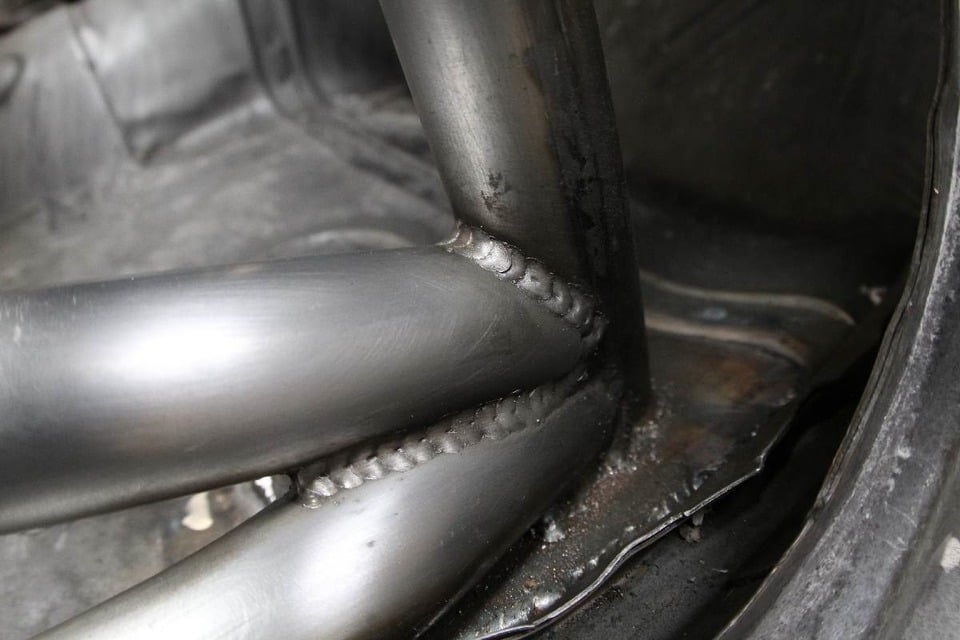 [34]
[34]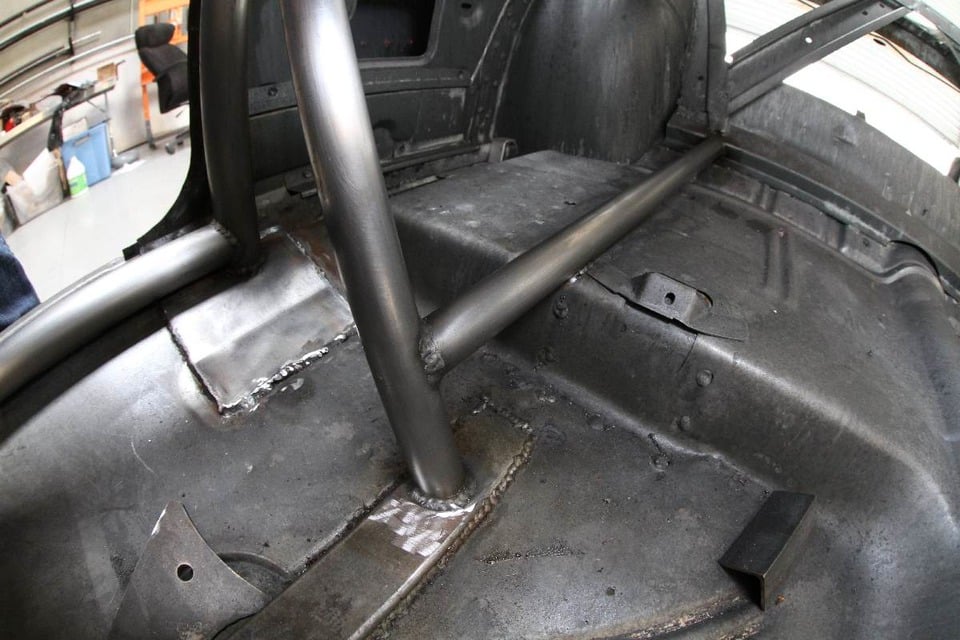 [35]
[35] [36]
[36]
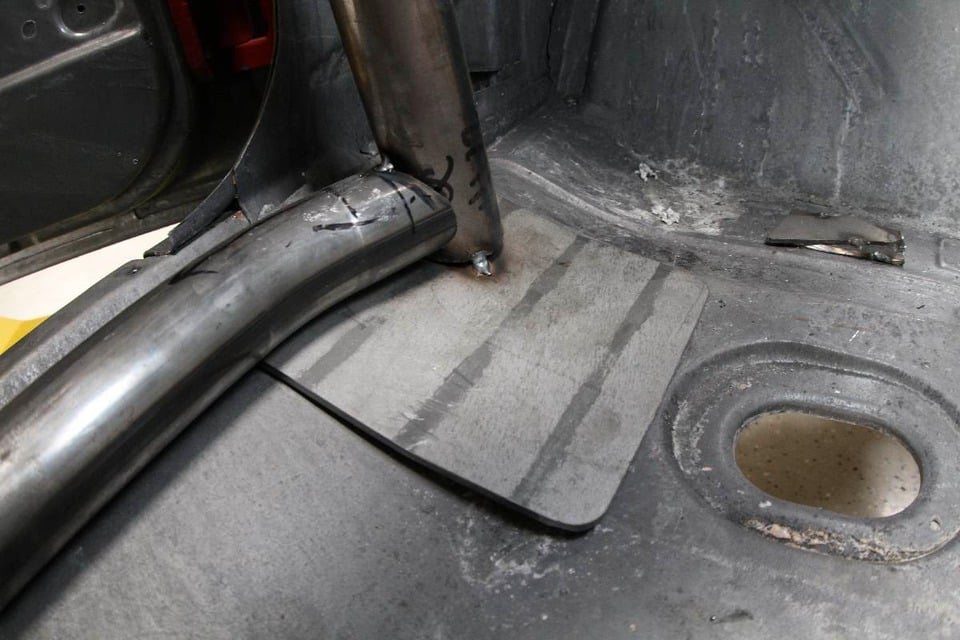
Clockwise from top left: At the front of the car, the floor plates were bent to follow the shape of the floor. This is required by NHRA rules. The rocker, door, and front down bars were all welded together at the floor plates. Dean also added some floor bars to the D bars for extra strength along the floor. The rear floor bars were welded to the floor pan at the differential hump.
 [37]
[37]Finally, the floorpan plates for the main hoop were welded to the floor, along with the main hoop and rocker bar connections.
TiG welds are also naturally cleaner, and NHRA rules strictly prohibit grinding roll cage welds. That doesn’t mean you have to TiG—mild steel can be MiG welded with excellent results, but the welds must be free of slag and porosity. The rules even dictate how you painting the cage. Wright told us, “Any paint is allowed as long as the welds are fully visible during tech inspection.”
After chatting with Wright and getting all the details hashed out, we ordered up a 10-point cage for MaxStreet. Since we needed to add some custom touches to the cage, we opted for some extra straight tubing and bent our own side bars and rear down bars to keep them as close to the rear frame as possible.
Patience and planning are the keys to a quality cage. Measure everything ten times, then once more to be sure. Once you cut, you can’t put it back…
 [38]
[38]And there she is, an NHRA legal roll cage for our Chevy II. Before the car goes down the track, however, we'll have to have an NHRA inspector certify the cage.