 [1]One of the biggest talking points about the drawbacks of muscle cars – particularly vintage examples – is that they can’t (or won’t) handle well. Often it’s discussed as though American car manufacturers couldn’t summon the dark magic engineering secret that the Europeans had long since figured out.
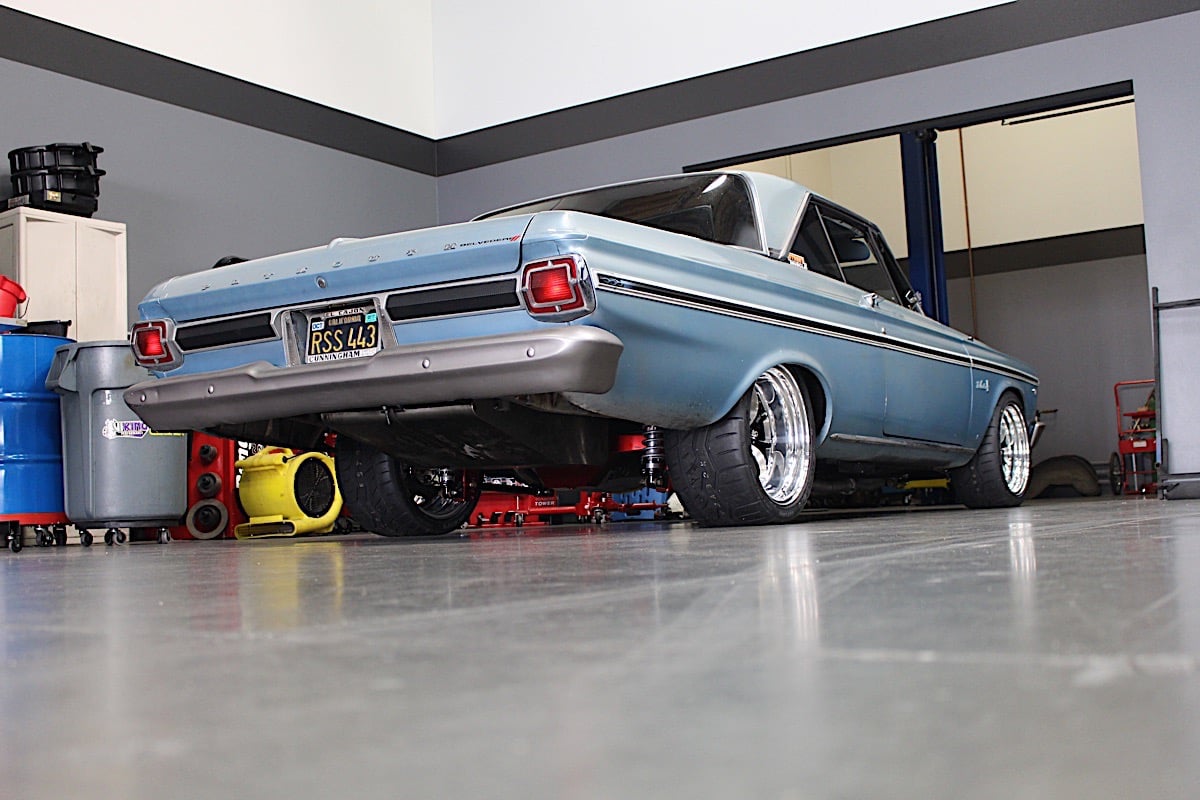
In reality there’s much more pragmatic reasoning behind the suspension tuning of those old school street machines. Comparing an overhead map of city like Detroit and the surrounding region to that of the English countryside tells most of the story – the roads in most parts of U.S. were arrow-straight, which stands in stark contrast to the layout of many European roadways, and there’s no reason to give a suspension a harsh, buttoned down tuning if there’s nowhere to really utilize that sort of handling. This is where Flaming River [2] is helping us with an old Plymouth.
 [3]
[3] [4]
[4]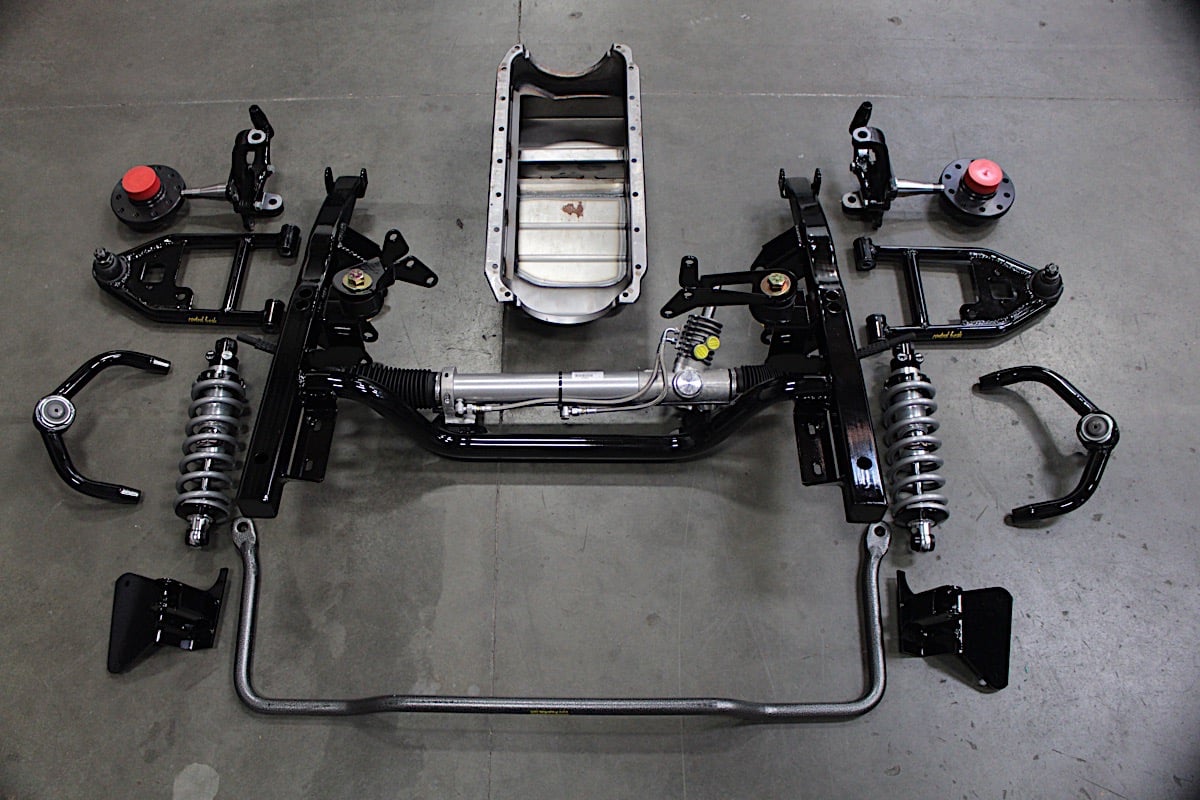 [5]
[5]
Project Track Attack already sports a disc brake conversion from Master Power Brakes, 18-inch wheels from Weld Racing, Mickey Thompson Street Comp tires and QA1’s tubular front control arms, so its braking, cornering, and grip is already well beyond a stock Mopar B-body from the era. Stepping up to a coilover front suspension will take this Pro-touring progression even further. The Control Freak suspension system comes with its own K-member to make the subframe work with the rest of the car, and adding that requires swapping out the heavy steering box for Flaming River's lighter, Power Rack unit. This upgrade to a Mustang II-style rack and pinion should provide much better steering feel and precision.
Times, tastes, and technology have changed substantially in the subsequent years. With the growing popularity of Pro-touring builds in recent years, the aftermarket has brought some trick hardware to market that can dramatically improve the handling of vintage muscle cars with little sacrifice to ride quality and harshness.
 [6]
[6]The Borgeson upgrade we performed was a much lighter, better steering box. However, the upgrade to coilovers means a complete front suspension overhaul, replacing every component in the suspension and the steering. The Borgeson unit served us well these past couple of years as a direct OE-style replacement.
That bodes well for Project Track Attack [7], which is in the midst of receiving a major handling upgrade by way of Control Freak Suspension’s [8] front coilover suspension system. However, as is often the case when merging hardware that’s more than half a century old with the latest aftermarket components, there’s a bit of supplemental retrofitting required to make everything work in harmony. So we’re swapping out the steering box with a rack and pinion unit from Flaming River, along with the associated steering shaft and column. Here we’ll take a closer look at some of the cool features of Flaming River’s steering components and provide some insight into the installation process.
Going Rack And Pinion
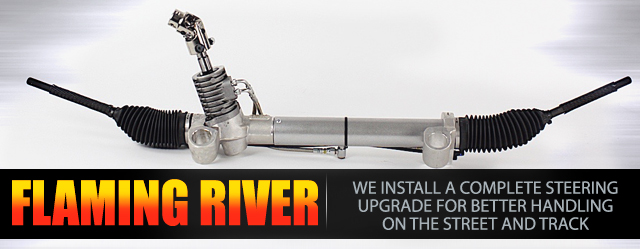
For our ’65 Plymouth Belvedere we opted for Flaming River’s Mustang II-style Power Rack with 16-inch mounting location and a plain powder coat finish (PN. FR40001PLN [9]). Made from all new components rather than a rebuilt core, Flaming River’s rack offers over six inches of travel, which provides the full factory turning radius for classic street machine applications.
 [10]
[10]
 [11]
[11] [12]
[12]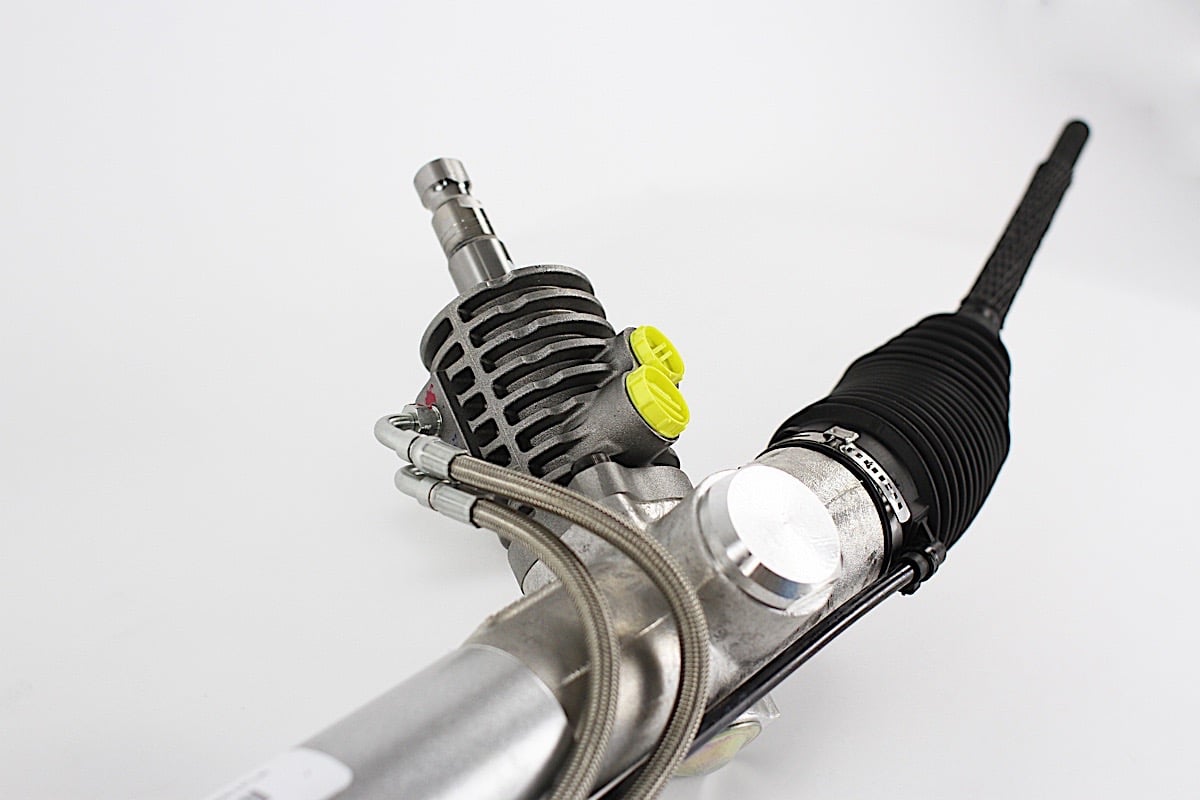 [13]
[13]
Like any intermediate sized Mopar, the Belvedere isn't really a featherweight, so we opted to use a power-assisted rack to reduce steering effort. An FR Power DD universal billet-joint is required for installation - sizing and configuration are application-dependent.
Along with providing the clearance we need in order to install the new front suspension, the new rack and pinion system should offer far more steering feel, precision and response than the limitations of the steering box it replaces. It’s also significantly lighter than the original steering box, and taking mass off the front end of the car – even in small increments – can only benefit performance.
The system is designed to work with most factory power steering pumps. To hook the new rack and pinion to the existing pump, we used Flaming River’s hose fittings kit (PN. FR1632 [14]) for the pressure and return ports of the rack. As far as dialing in an ideal pump pressure, we got the low-down from John Jennings of Flaming River. “For the power rack we recommend a flow rate of about 1.7 gallons per minute and pressure of about 1,100 to 1,200 psi,” Jennings explained.
 [15]
[15]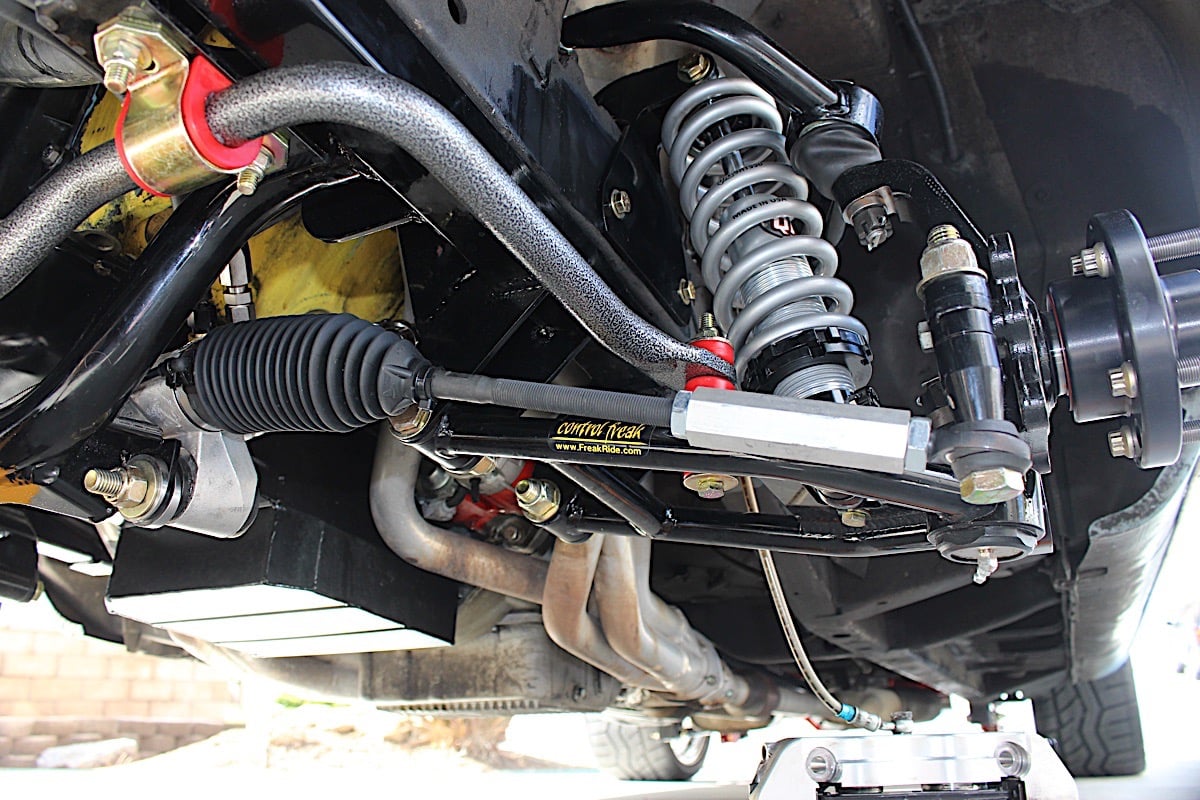 [16]
[16]
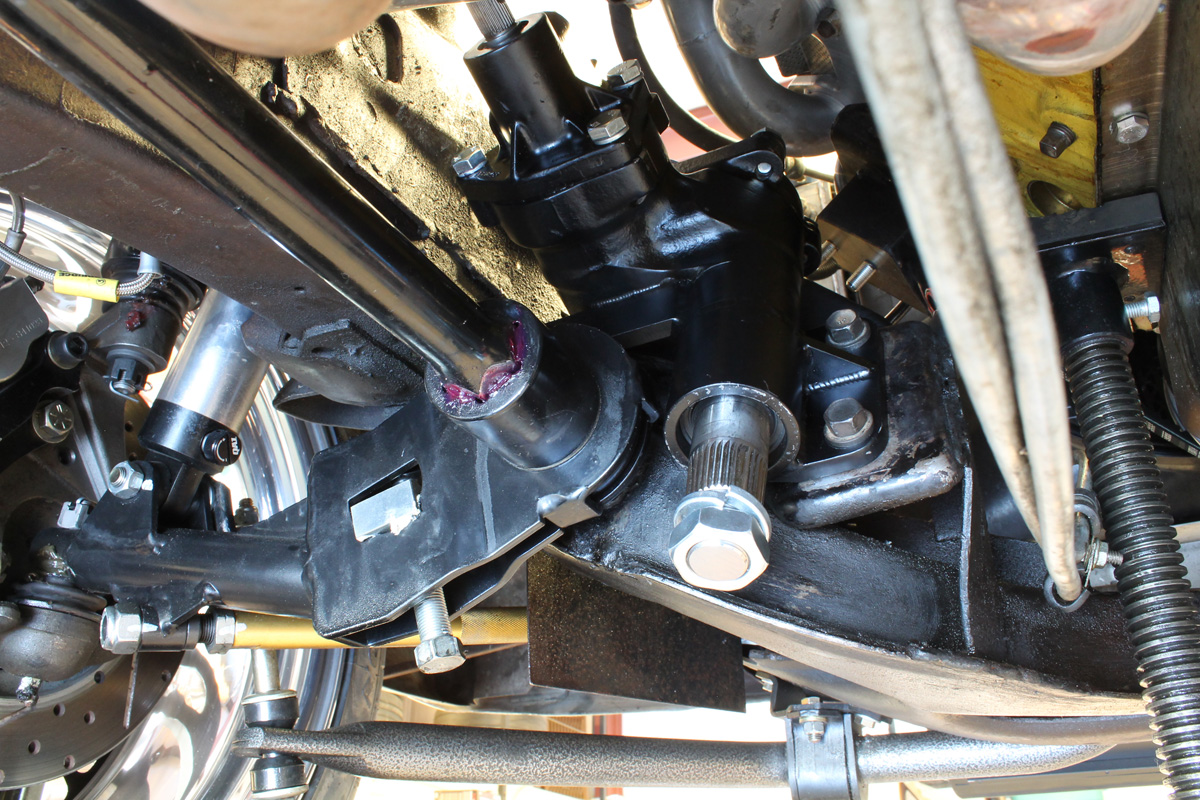
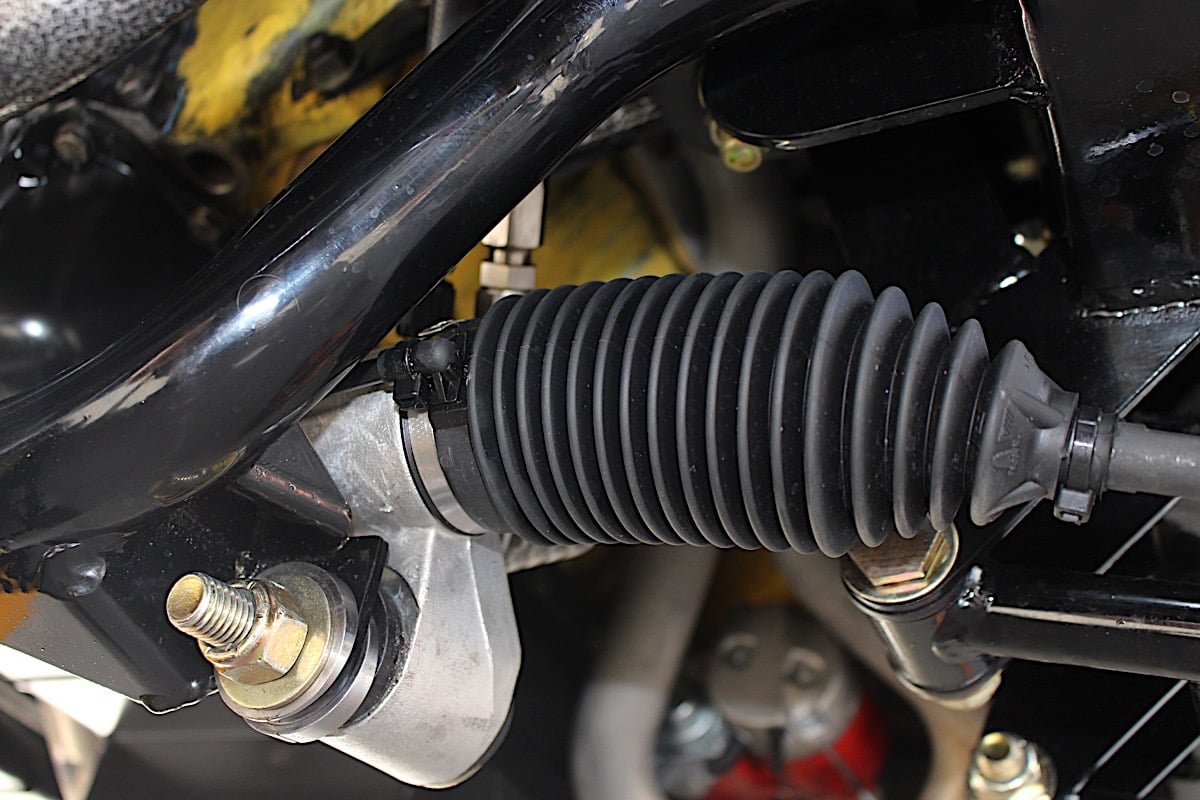
Mounted to the Control Freak K-member required us to convert from a rear steer setup on the steering box to a front steer setup with the rack and pinion unit.
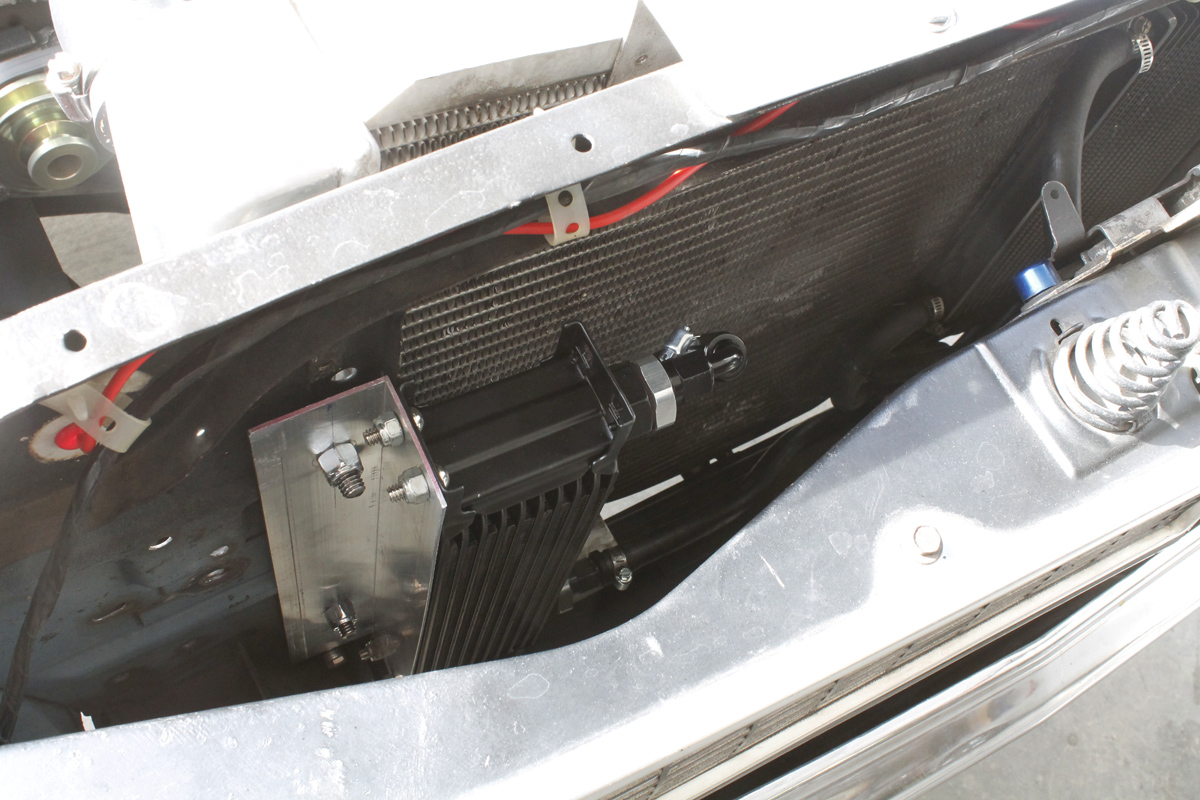
And if your ride is going to see some time on the road course like Project Track Attack is, power steering fluid temperatures need to be considered as well. “We recommend using a high quality synthetic power steering fluid,” says Jennings. “In some instances, builders may also want to consider adding a power steering cooler to the system as well.”
 [17]
[17]Like any heat exchanger, the key to its efficiency is ensuring it has proper access to air flow. Accordingly, we mounted the Derale stack plate cooler front and (almost) center, directly in the path incoming air through the grille.
That’s exactly what we did here. For this application, we chose a 10-row Derale [18] stack plate cooler (PN 51006 [19]) for the job, which helps lower reservoir temperatures up to 8 degrees. These aluminum heat exchangers can also be used for engine or transmission cooling and feature a 20,000 BTU rating.
 [20]
[20]
 [21]
[21]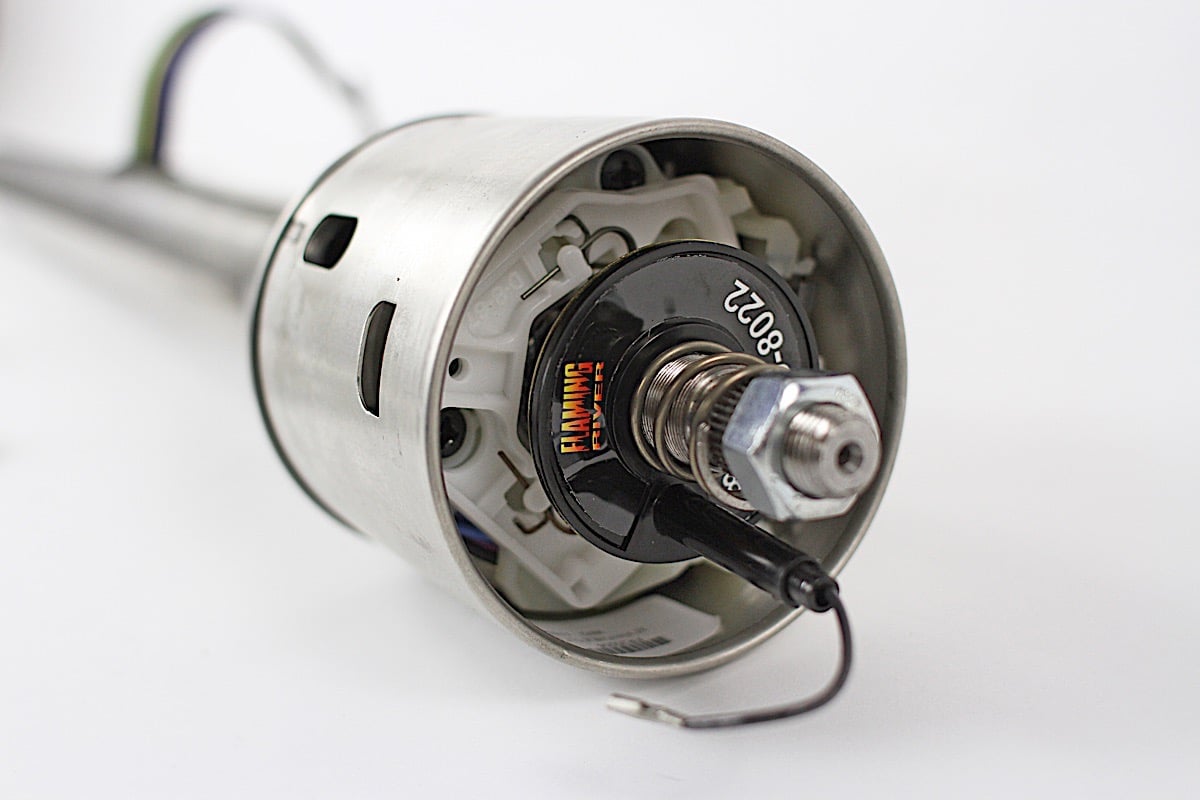 [22]
[22]
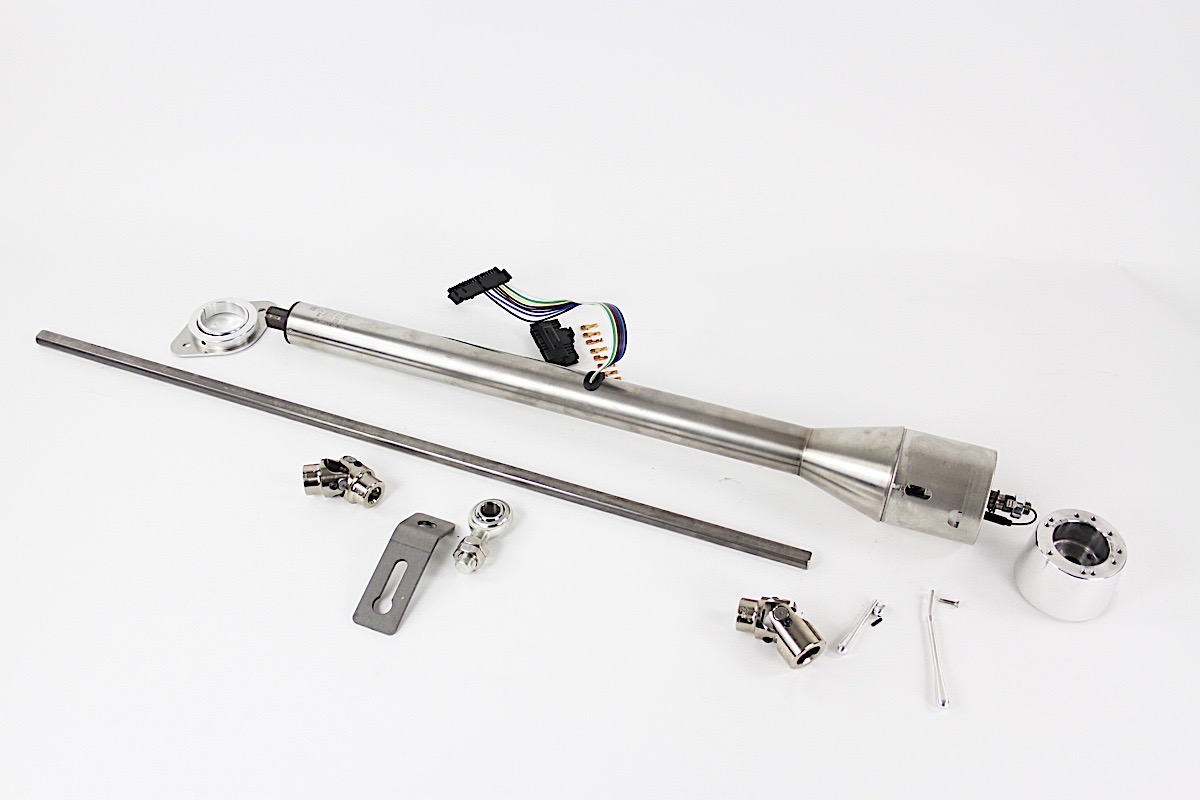
Flaming River’s Mopar Steering Column
Moving up the chain of command, we tackled the steering shaft swap next. Here we used Flaming River’s 3/4-inch DD non-stainless steel shaft with a mill finish (PN FR1851 [23]), along with a 3/4-inch billet universal joint at the rack (PN FR1789P [24]), a similar joint for the center of the shaft (PN FR1716DD [25]), and a 3/4-inch support bearing kit with an angled bracket (PN FR1810KA [26]) to allow for easy mounting of the support bearing. Any time you have more than two universal joints, you’ll need to have a support in the center to keep the steering shaft in place.
 [27]
[27]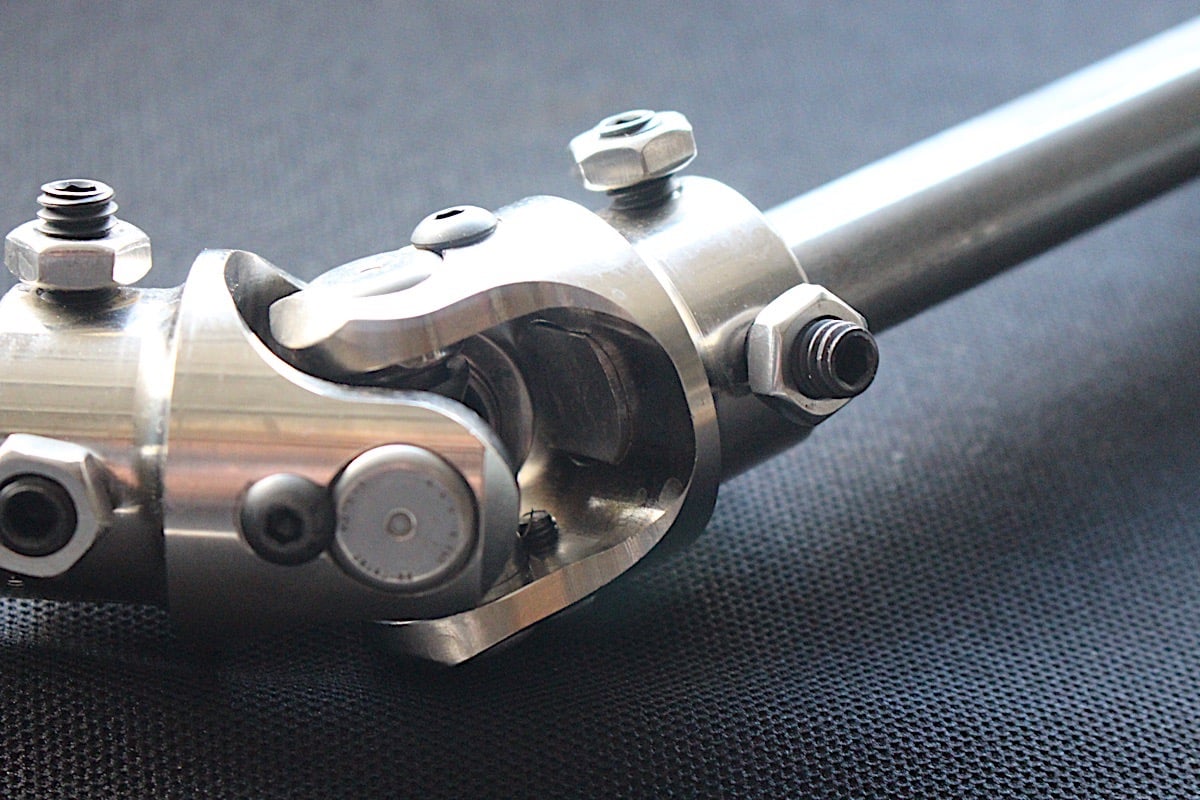 [28]
[28]
 [29]
[29]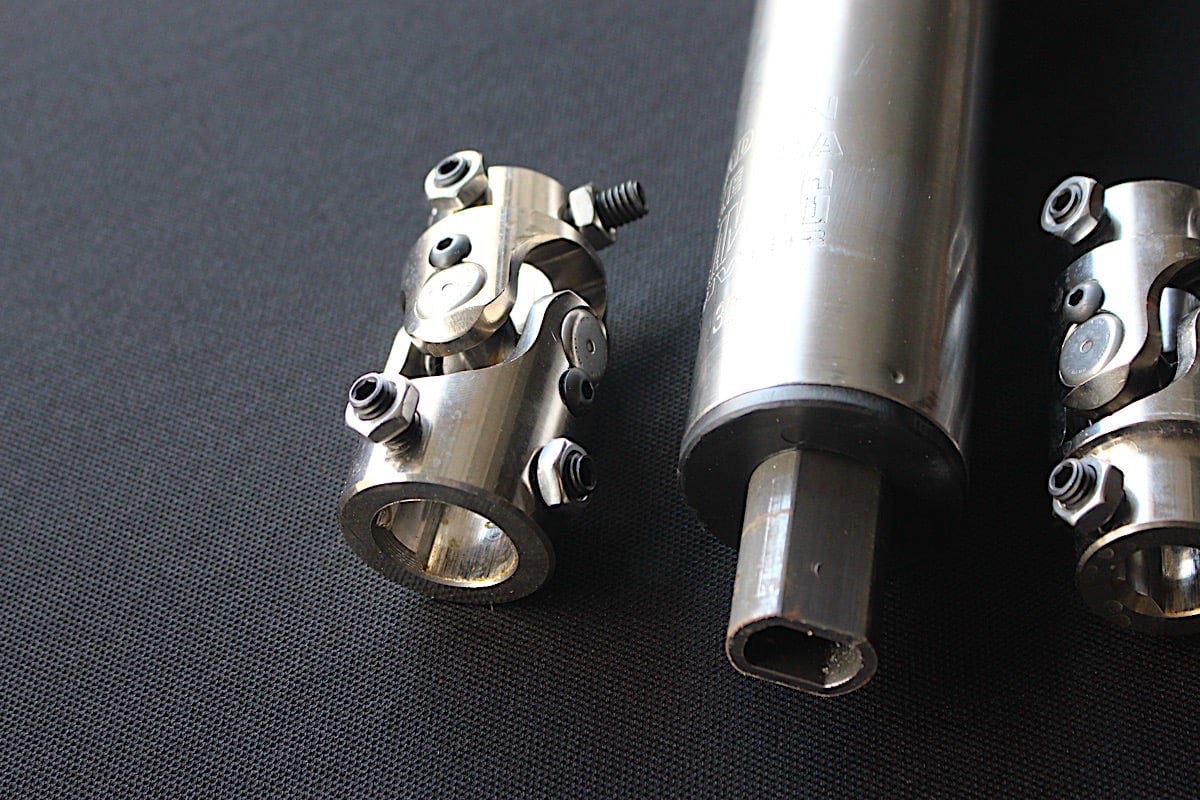 [30]
[30]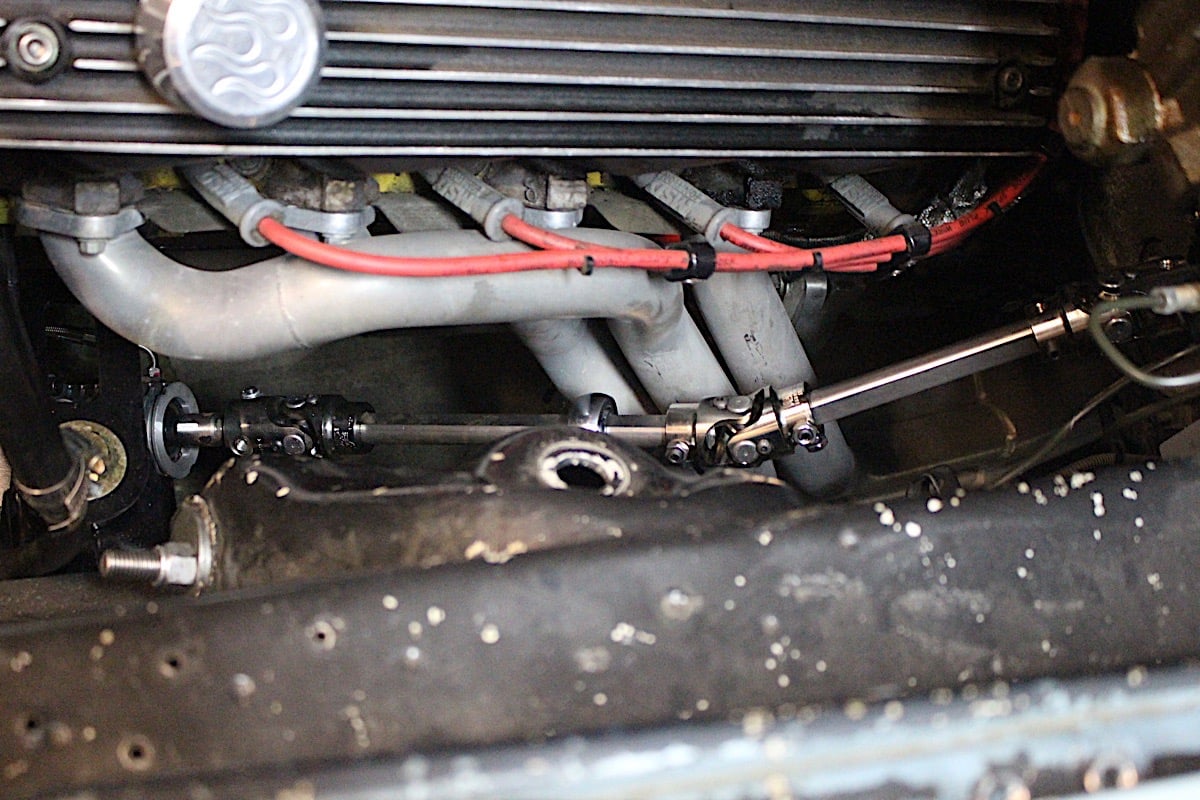 [31]
[31]
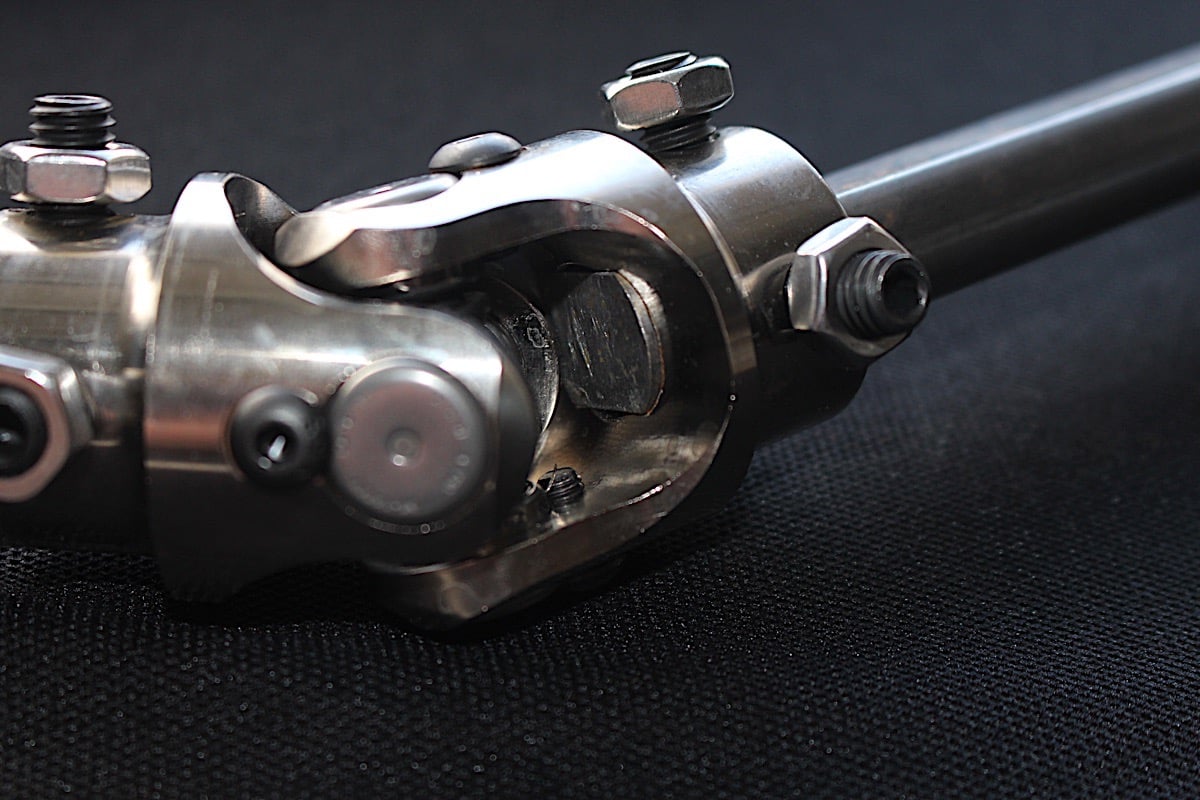
Top: To ensure that the universal joints have full articulation, it's imperative that the DD shaft doesn't extend into the area of the joint itself. It only needs to be secured by the two set screws.
Bottom: These universal joints allow the steering shaft to snake through the engine bay without running into any other components. The header did provide some room, but it was best to add a center joint to pull the shaft away from the primaries. To ensure proper clearance with the exhaust we used a pillow ball mount and cut the shaft to length, then coated the shaft in engine enamel for protection.
For this application we planned to use a straight shaft but discovered that it was making contact with the header, so we used a pillow ball mount and cut the shaft to length for proper clearance. We also painted the shaft with an engine enamel to protect it from the elements as well as the heat generated by the headers.
 [32]
[32]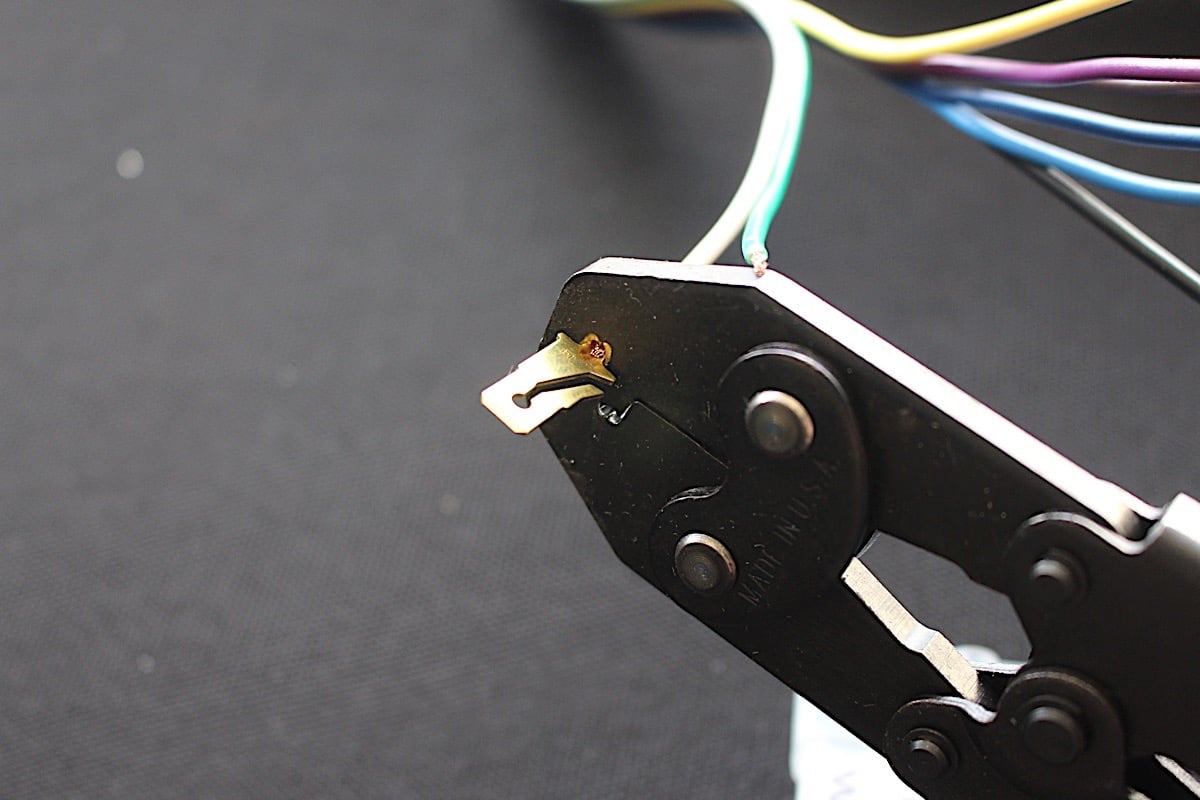 [33]
[33]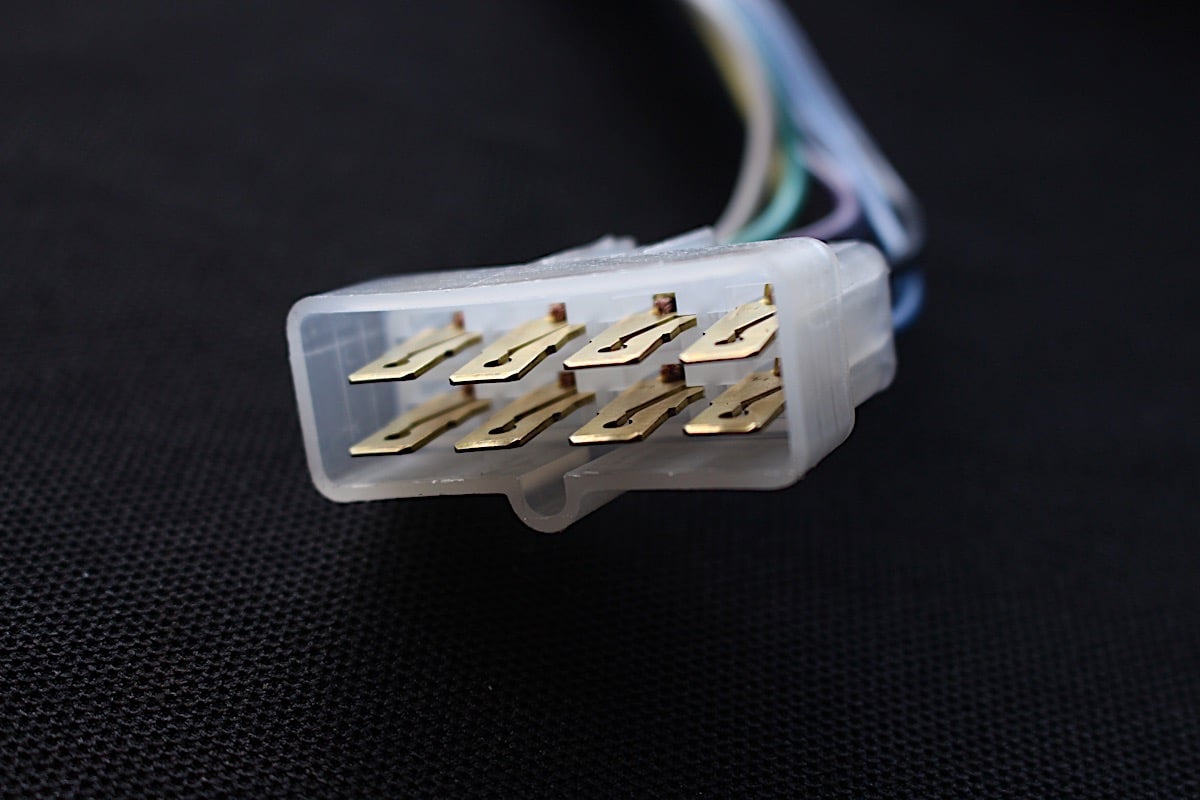 [34]
[34]
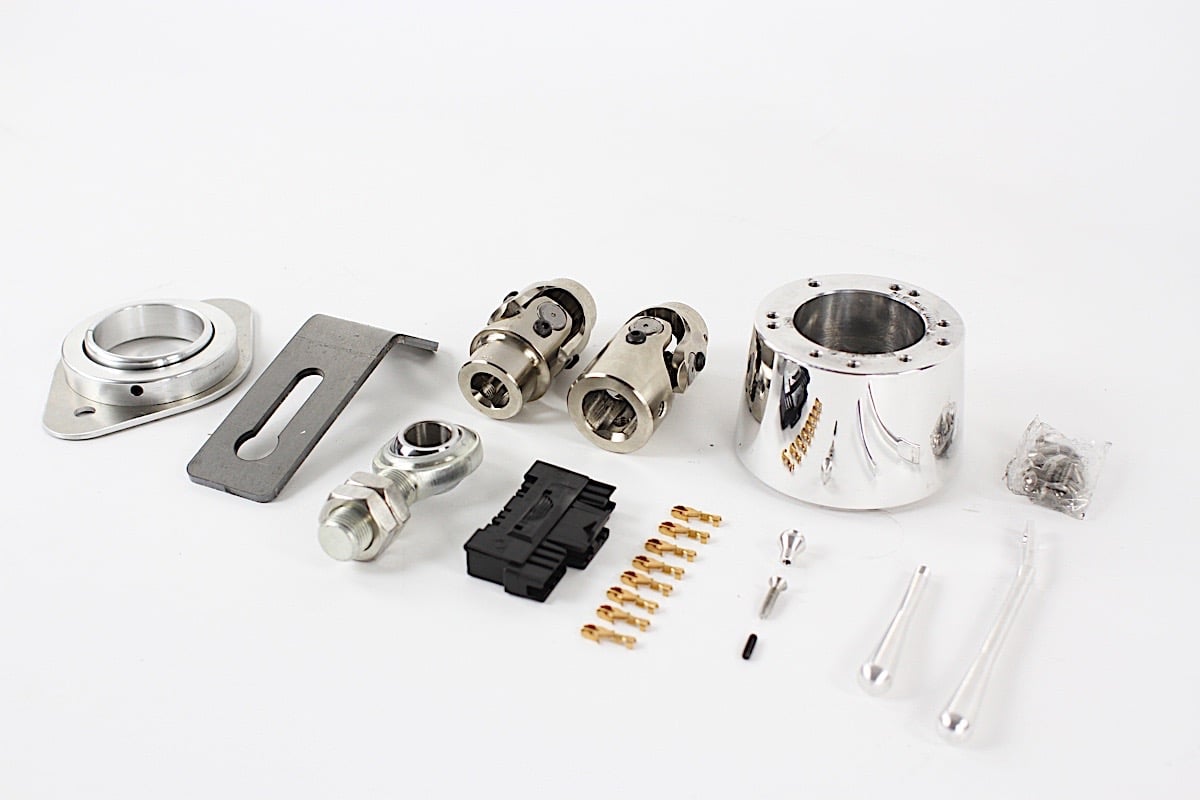
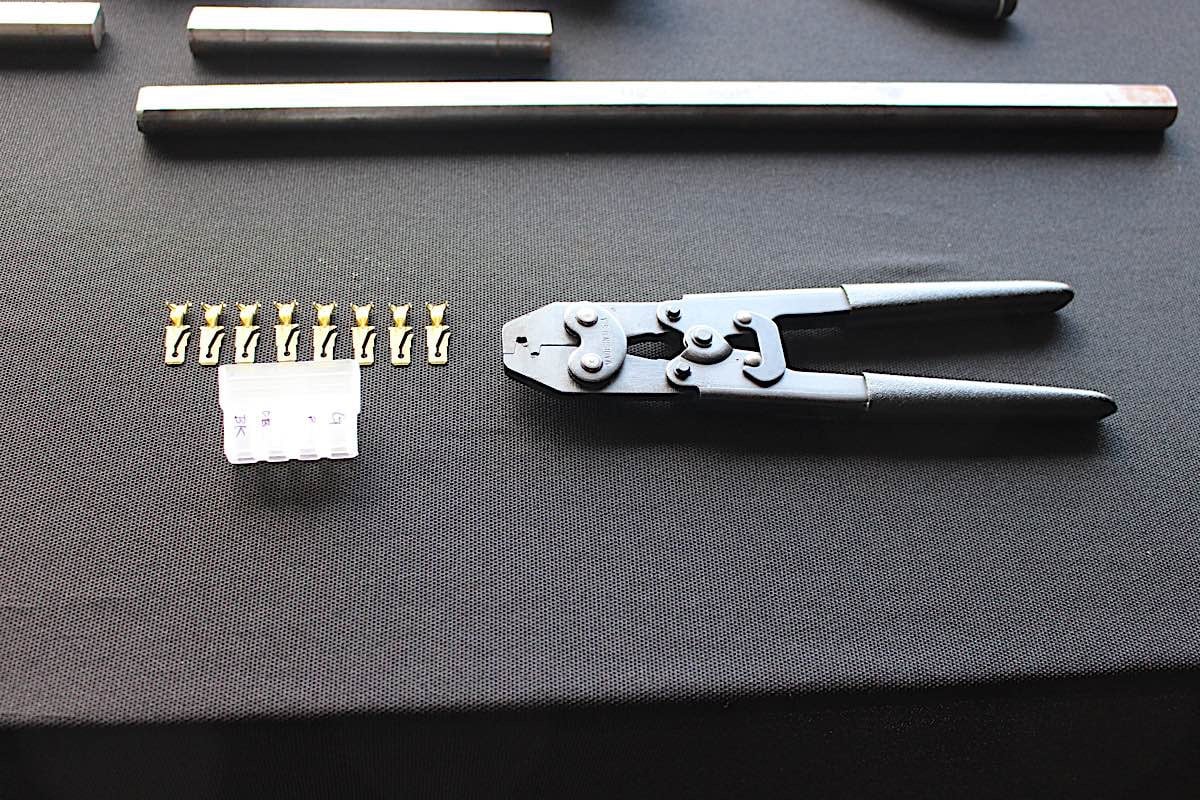
We opted to rewire the column wiring connections for an existing Packard 56 connector, a job made far easier by using a high quality crimping tool. We used a Ron Francis crimp tool for open barrel terminals (PN CT-56) for the job.
Cutting the shaft to the proper length can be a tricky proposition – if it’s too long it won’t allow the joint to articulate, but if it’s too short then it will not allow the set screws to engage the shaft. “Measure from tip to tip of the shafts,” Jennings suggests. “You want to go from the tip of the column shaft to the tip of the steering gear shaft without overlapping and subtract 3.25 inches.”
Measure from tip to tip of the shafts. You want to go from the tip of the column shaft to the tip of the steering gear shaft without overlapping and subtract 3.25 inches. -John Jennings, Flaming River

The column includes a wiring plug and connectors, but we chose to rewire it using an existing Packard 56 connector that we had on hand using wire crimps from Ron Francis [36], which saved us a lot of time and effort.
 [37]
[37] [38]
[38]
 [39]
[39]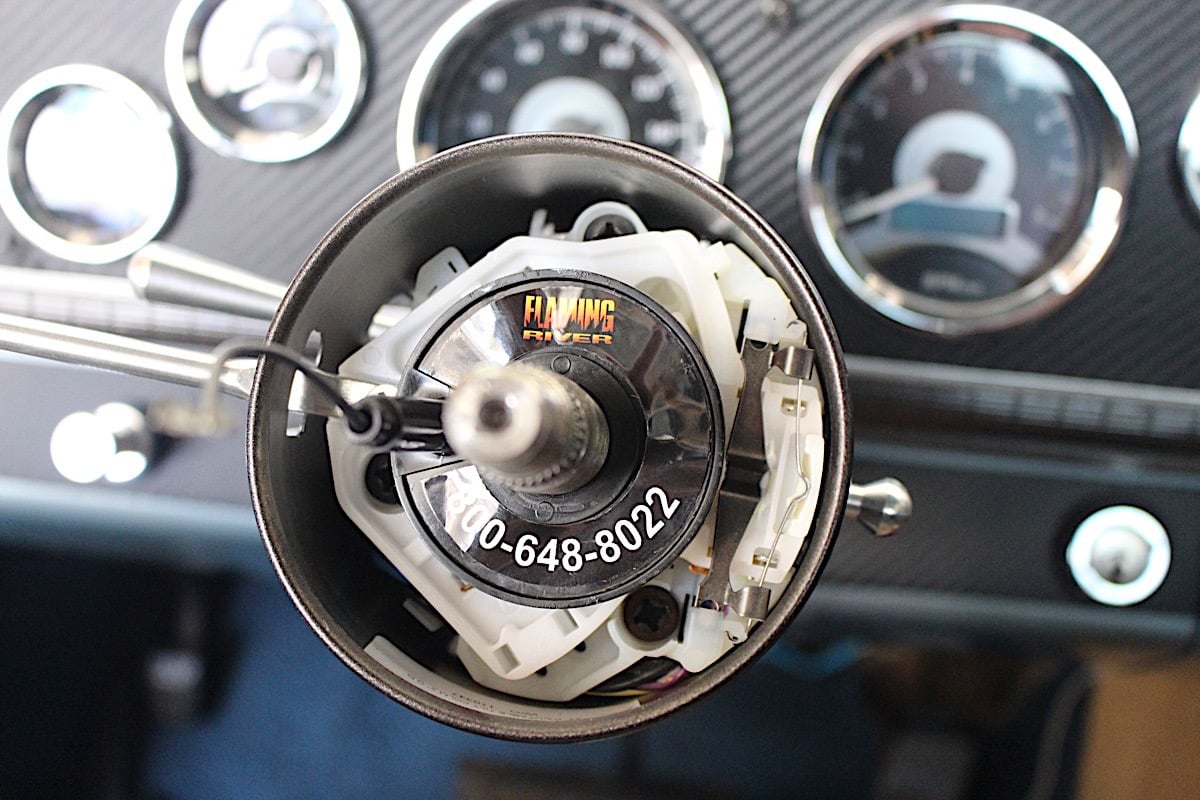 [40]
[40]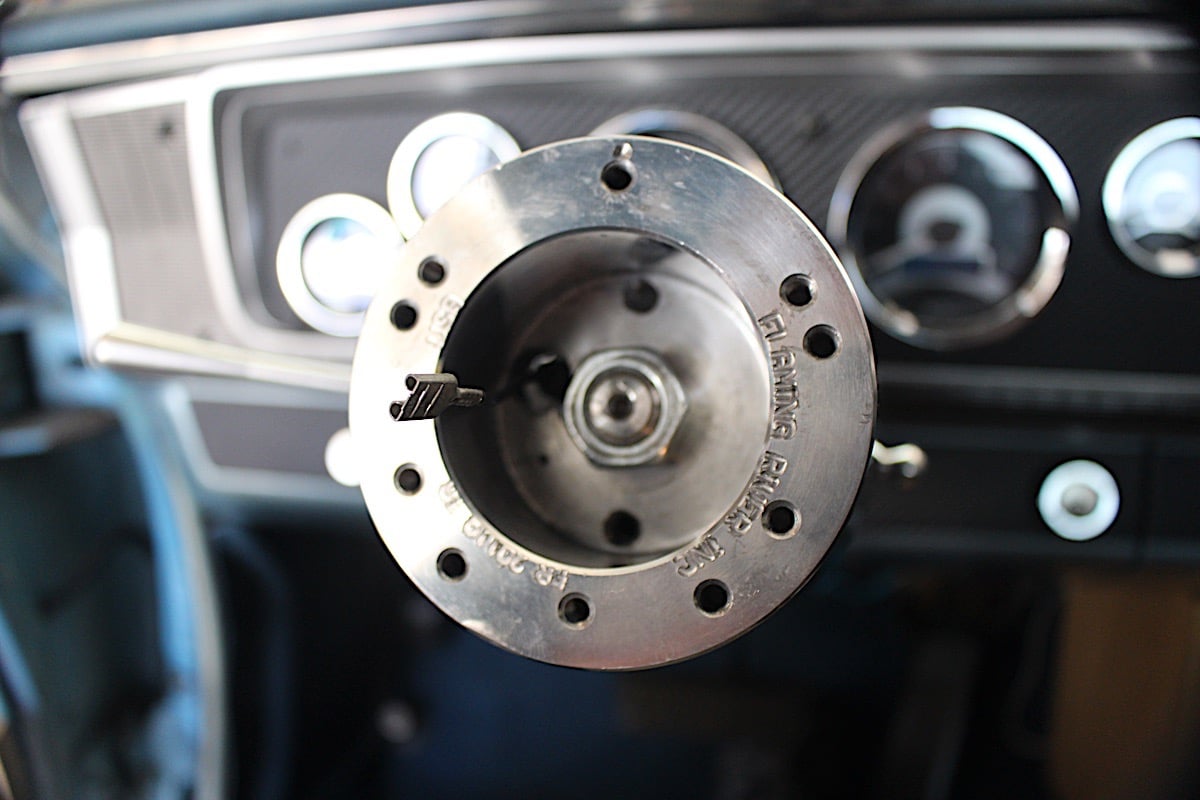 [41]
[41]
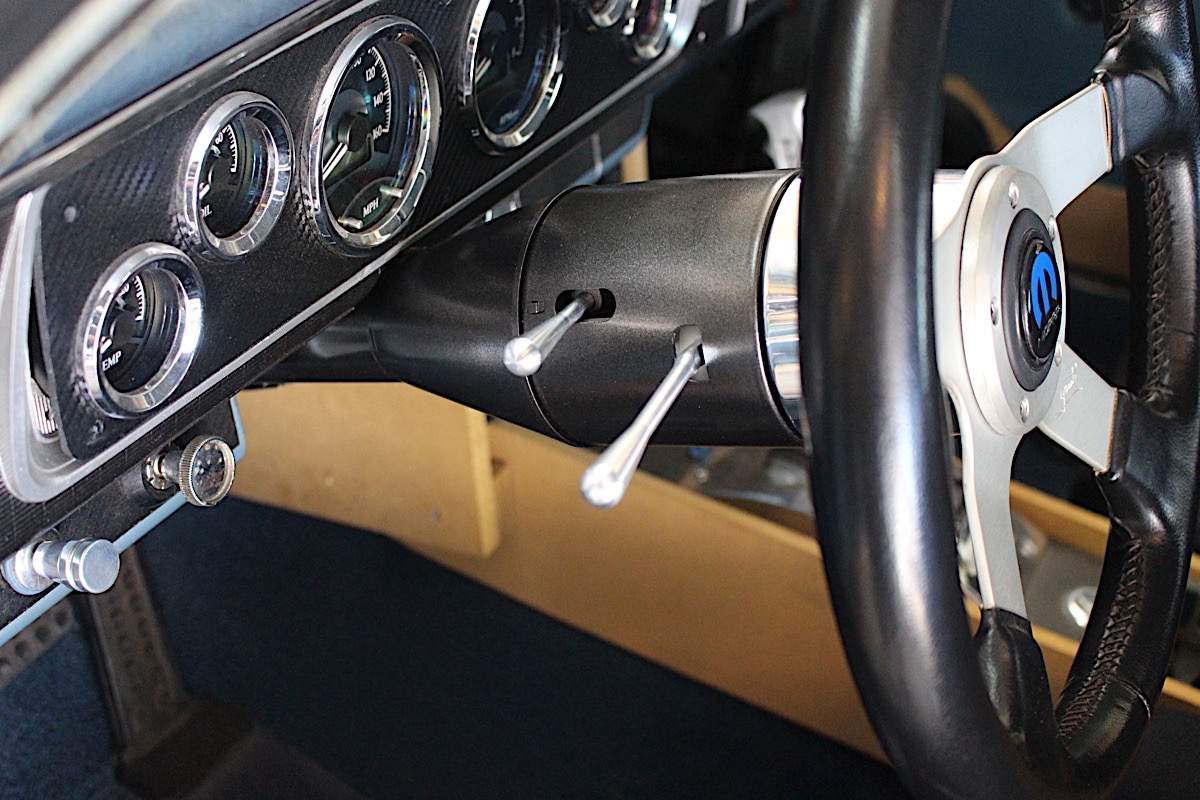
To ensure we could properly match the column's color to that of the existing dash, we chose to get a paintable unit and apply the coats ourselves. Flaming River's hub adapter (PN. FR20119TA) will allow you to mount a Flaming River steering wheel to the column, or any other aftermarket 5 or 6-bolt steering wheel of your choosing.
“One of the most common errors during column wiring happens when someone is replacing their stock OEM steering column,” Jennings tells us. “They will remove the factory original column without verifying the wire colors for the turn signals, as it’s easy to assume that the car has the original wiring and that someone has not gone in and tinkered with it at some point in its lifetime. Before you do anything else, check that the wiring is still in good condition and make note of the colors of the wires that operate each turn signal.”
 [42]Looking to bolster the handling capability of your vintage Mopar, Ford or Chevy project? Give a shout out to the folks at Flaming River [2] to see what they have for your ride. Not only do they offer a number of different columns to fit various popular applications, they can do custom work as well, so no matter what you’re working on they’ve got you covered.