 [1]
[1]
As much as we romanticize our Mustang past, there has never been a better time to be a Mustang enthusiast than here and now. Aftermarket companies are cranking out new products for the S197 and nearly every Mustang from past generations on what seems to be a weekly basis. As power output has increased on our Project Wild E Coyote [2], the factory suspension struggles to keep up, in spite of the upgrades we’ve already installed. To help us get better traction at the drag strip and more rear cornering grip, we turned to Lakewood Industries [3] for some chassis upgrades and a complete rear suspension package.
 [4]
[4]We've already improved on the stout S197 chassis with lowering springs, as well as shock, strut and sway bar upgrades. With over 590+ hp already available to the rear tires, the only way we'll effectively put more to the track is with a rear suspension upgrade.
Heavy-Duty Control Arms – Partners In Stability
Our heavy-duty upper and lower control arms are constructed from high-strength tubular steel and include polyurethane bushings that can be lubricated periodically. – Jeremy Walinu

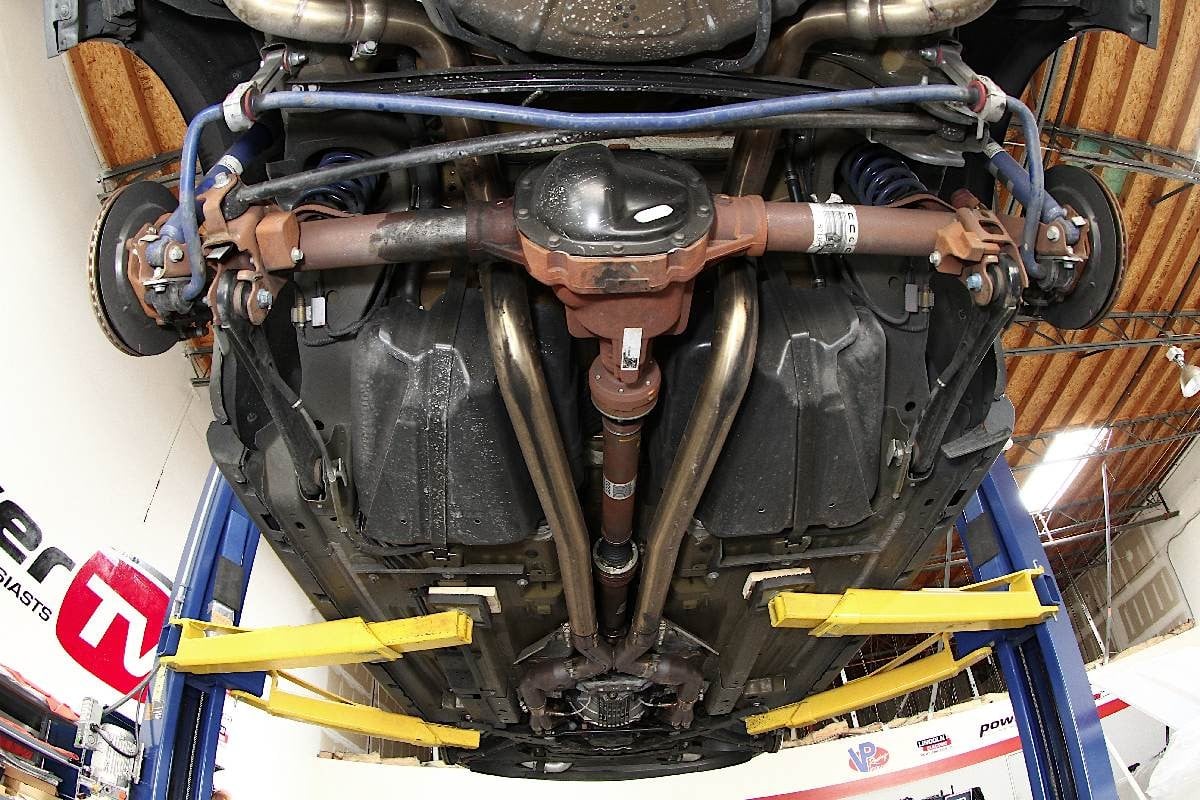
Factory control arms are stamped steel and feature rubber bushings for ride compliance and better noise, vibration and harshness characteristics. The stamped steel design also saves weight and simplifies manufacturing. However, they flex under demanding driving conditions, which alters suspension geometry and adversely affects handling. Even on a fairly low mileage car like Wild E Coyote, the factory lower control arms are plagued with an incredible amount of movement.
The factory control arms are not adjustable, which makes them impossible to tune. Knowing this, we opted for Lakewood’s Heavy-Duty upper (part number 20705) [5], and lower (part number 20105) [6] control arms for 2005-13 Mustangs. These control arms are a simple replacement that can be performed in an afternoon without the need to remove the rear axle. We also need to mention that Ford made some chassis changes to the Mustang with the 2010 design freshening. In our case this required a special mounting bracket adapter for our upper control arm, which we sourced from Metco, part number MUB2011.
 [7]
[7]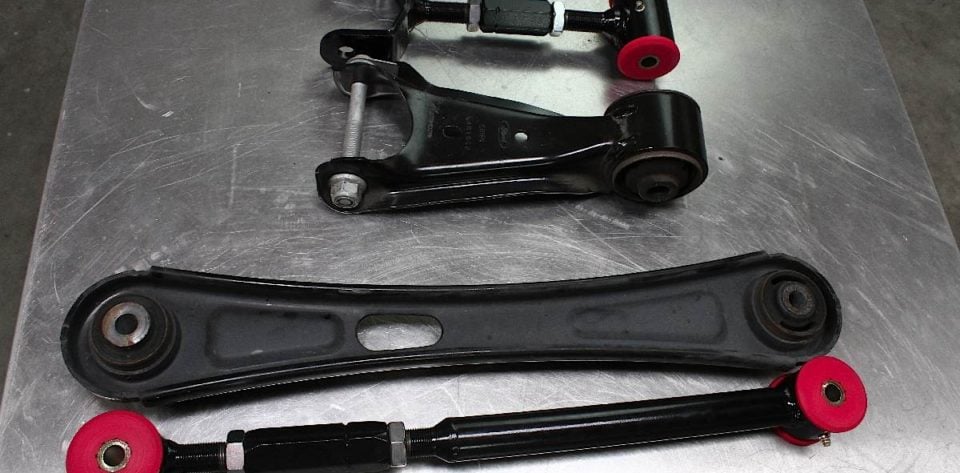 [8]
[8] [9]
[9]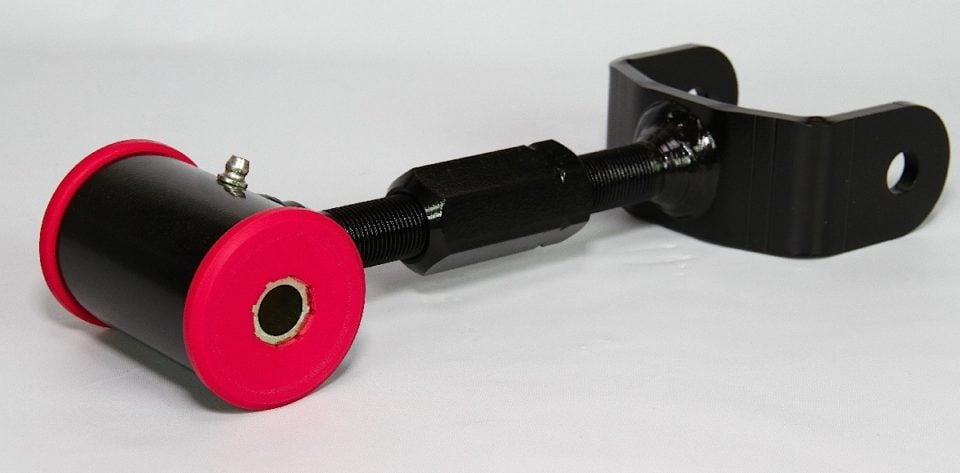 [10]
[10]
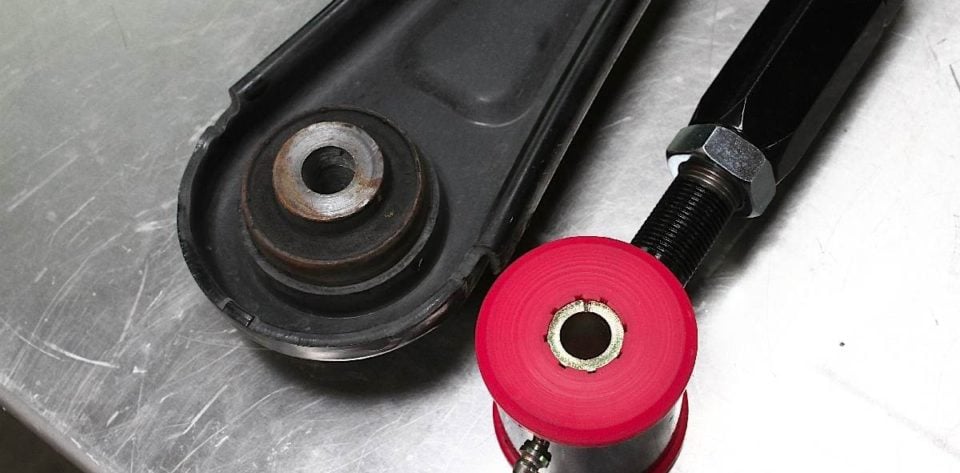
Top: Check out the difference between the stock control arms and these adjustable bad boys from Lakewood. Brute polyurethane bushings with easy to access grease fittings. Bottom: Both the upper and lower control arms are adjustable allowing for optimal handling and traction.
“Our heavy-duty upper and lower control arms are constructed from high strength tubular steel and include polyurethane bushings that can be lubricated periodically,” according to Jeremy Walinu of Lakewood Industries. He went on to explain that the bushings also provide a more rigid attachment to limit unwanted suspension deflection while remaining torsionally free to prevent binding and allow proper suspension articulation. These high-performance control arms also feature double adjustable links to allow length adjustments when installed on the vehicle. “This allows adjustment of the pinion angle and rear axle position relative to the wheel well to make the suspension more accommodating to things such as vehicle lowering spring kits,” says Walinu.
 [11]
[11]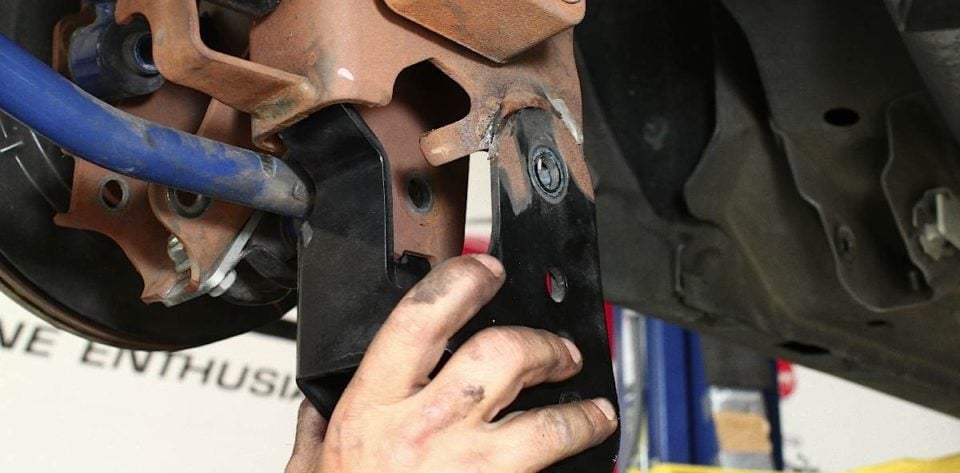 [12]
[12] [13]
[13]
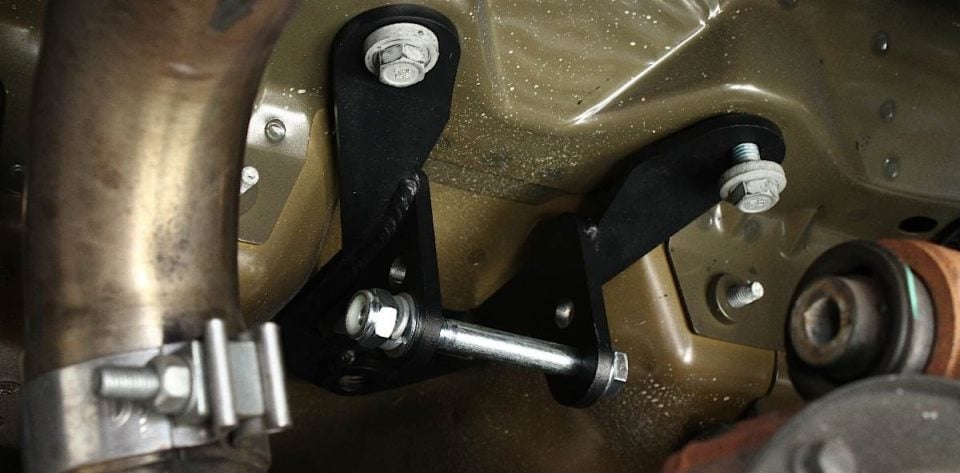
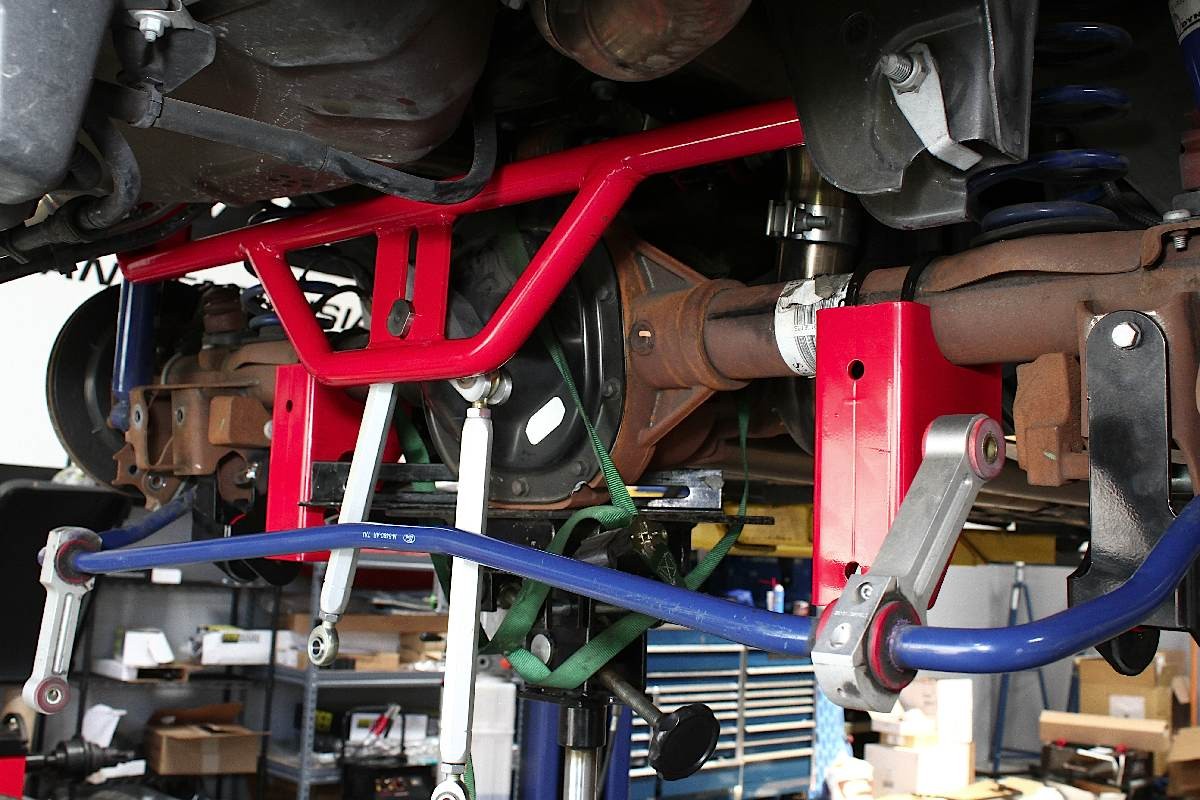
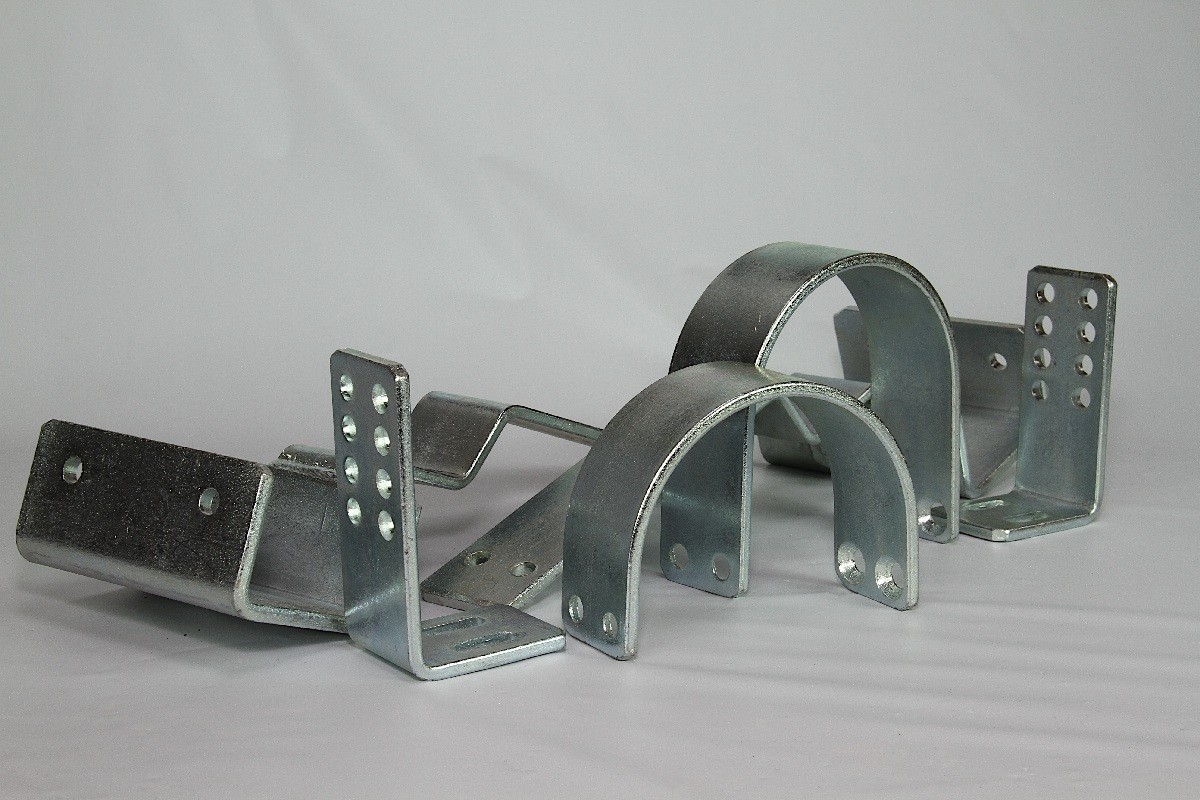
Left: The difference in the upper control arm between 2005-2009 cars and 2010 and newer Mustangs requires this mount adapter from Metco. Center: The lower control arm mounting bracket goes on first at the rear end housing. Right: Welding is not necessary for the lower control arm mounting brackets, but since we're already putting down over 560 hp to the rear tires, we thought it might be a good.
We also installed Lakewood’s adjustable lower control arm relocation brackets, part number 20101 [14]. These are ideal for a lowered car, as well as cars that go to the drag strip. They allow the mounting position of the lower control control arm to be changed at the rear axle housing. So we can not only compensate for changes in suspension geometry due to our lowering springs, but also adjust the rear suspension for maximum traction, should the need arise.
A key to faster installation and proper adjustment is to get the new control arms exactly the same length as the factory arms by placing them side by side and doing a bolt/bushing match-up. This gets you in the ballpark so you can set the pinion angle and check the axle centering once all the parts have been installed.
 [15]
[15]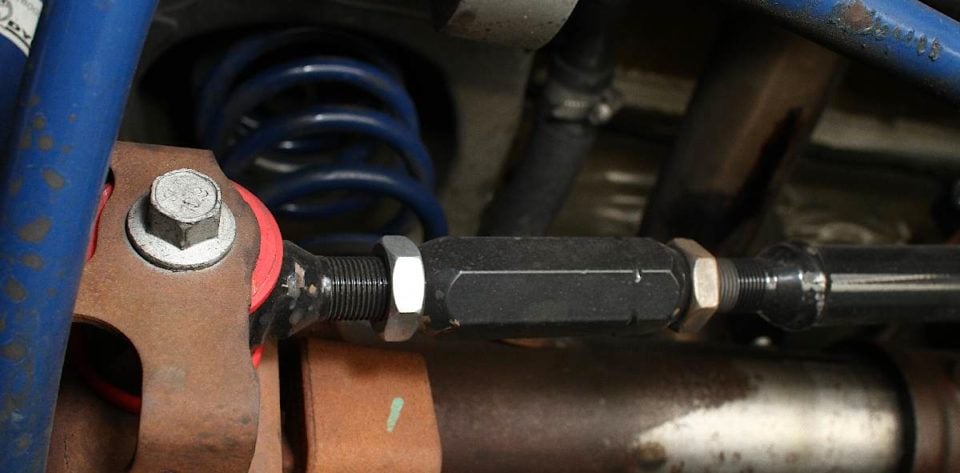 [16]
[16]
The Lakewood Panhard bar is a direct replacement for the factory stamped steel piece. Just like the control arms it features polyurethane bushings with serviceable grease fittings. Right: Unlike the factory piece, the Lakewood Panhard bar is also adjustable, meaning we can properly center the rear axle laterally to compensate for Wild E Coyote's lowering springs.
Setting Pinion Angle
A benefit of adjustable control arms is setting the car’s pinion angle. This keeps drivetrain components in proper alignment, minimizing wear. It can also benefit traction and prevent breakage to driveshafts and pinion yokes, since those parts can bind as the suspension reacts under launch or hard acceleration.
 [17]
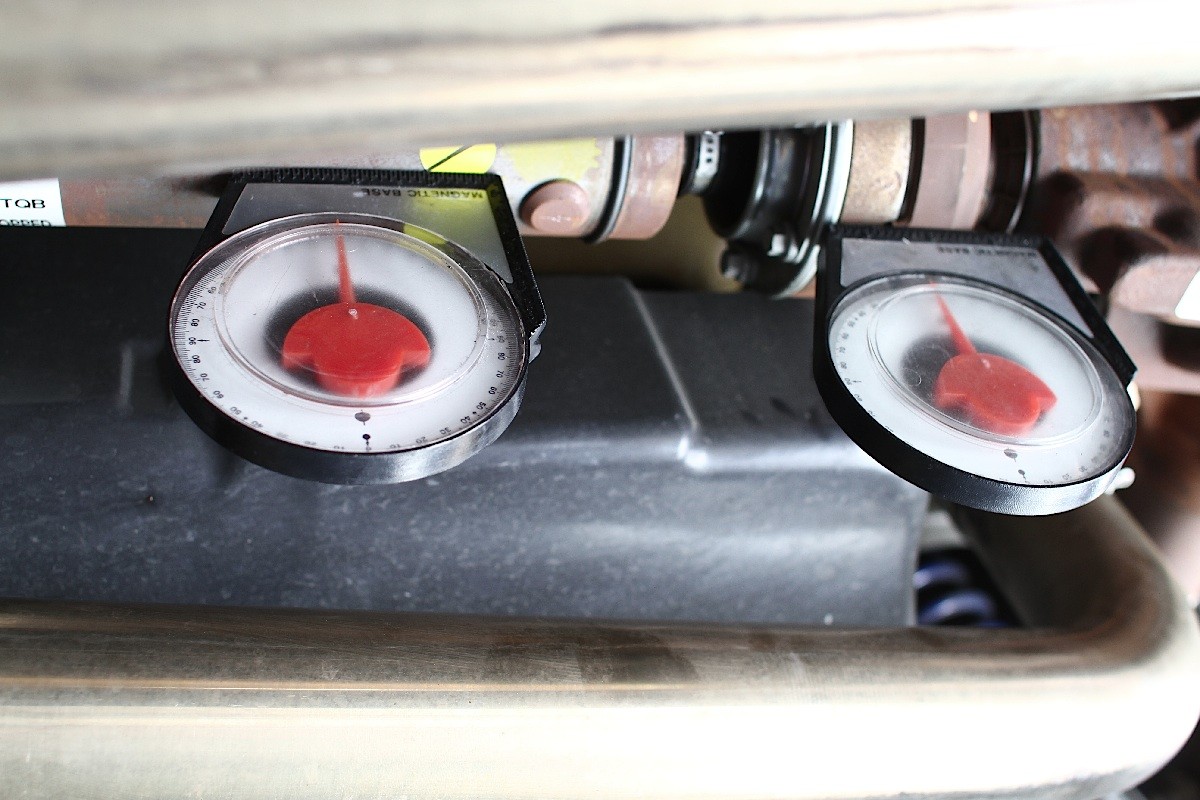
[17]We checked and set the pinion angle on Wild E Coyote to -2 degrees ideally at launch, when the suspension reacts, you want your drivetrain to be aligned from the transmission output shaft to the rear end giving you a pinion angle of 0 under load. This minimizes wear and parts breakage. While every setup is different, a good rule of thumb is that many Mustangs will react with an increase in pinion angle of +2 at launch, so setting our pinion angle at -2 degrees when the car is static should yield the best possible result under acceleration.
Setting pinion angle is done after the control arms are installed. The weight of the vehicle must be on all four tires with the car sitting at ride height. We used two angle finders with magnetic bases to find and set the pinion angle of the car appropriately. You simply take the angle of the rear pinion and the angle of the driveshaft, subtract the rearend number from the driveshaft number. For Wild E Coyote this was a -3 and a +1, resulting in a -2 pinion angle. Should we need to adjust this angle, we can do so with by changing the length of the upper control arm.
Panhard Bar
Lakewood’s Watt’s Link
 [18]
[18]
Lakewood also offers a Watt’s Link kit, part number [19]20505 [19], which would be an upgrade from the panhard bar. The Watt’s Link offers a more linear approach to rear axle stability. It is engineered to keep the rear axle centered under all conditions. What this means for owners is more consistency, because it’s more stable than a panhard bar. What’s more, the Watt’s Link is fully adjustable, meaning it can be tuned to maximize rear suspension performance. We ran into an interference problem during mock up between the Watt’s Link and the rear sway bar we’re already using on Wild E Coyote. This forced us to utilize the Lakewood panhard bar instead.
Ford blessed the Mustang world in 2005 by equipping all new Mustangs with a much needed panhard bar. The panhard bar is a transverse link that helps keep the rear axle centered under all kinds of driving conditions. Unfortunately the factory piece is not adjustable. In a car like Wild E Coyote that has been lowered from the factory ride height, the OEM non-adjustable panhard bar actually causes some lateral shift in the rear axle because the length is constant. To correct this issue and keep the rear of the car in line with the front, we installed the Lakewood adjustable panhard bar, part number 20405 [20].
Just like the control arms, the Lakewood adjustable panhard bar features heavy duty polyurethane bushings, with serviceable grease fittings. The axle end is also adjustable, allowing us to set the bar to the correct length, keeping Wild E Coyote tracking straight no matter what driving conditions we face behind the wheel.
A Solid Foundation
Wild E Coyote needs a solid platform that won’t flex and twist. In spite of a much improved chassis over every previous generation Mustang, the body is still going to flex when cutting apexes and blasting down the quarter mile, especially with as much horsepower as we have on tap. To further reinforce our chassis we installed subframe connectors. Lakewood’s subframe connectors, part number [21]30201 [21], will provide us with the additional chassis strength that Wild E Coyote needs. These can be installed in an afternoon, and although they are bolt in it’s recommended that you weld them as well.
 [22]
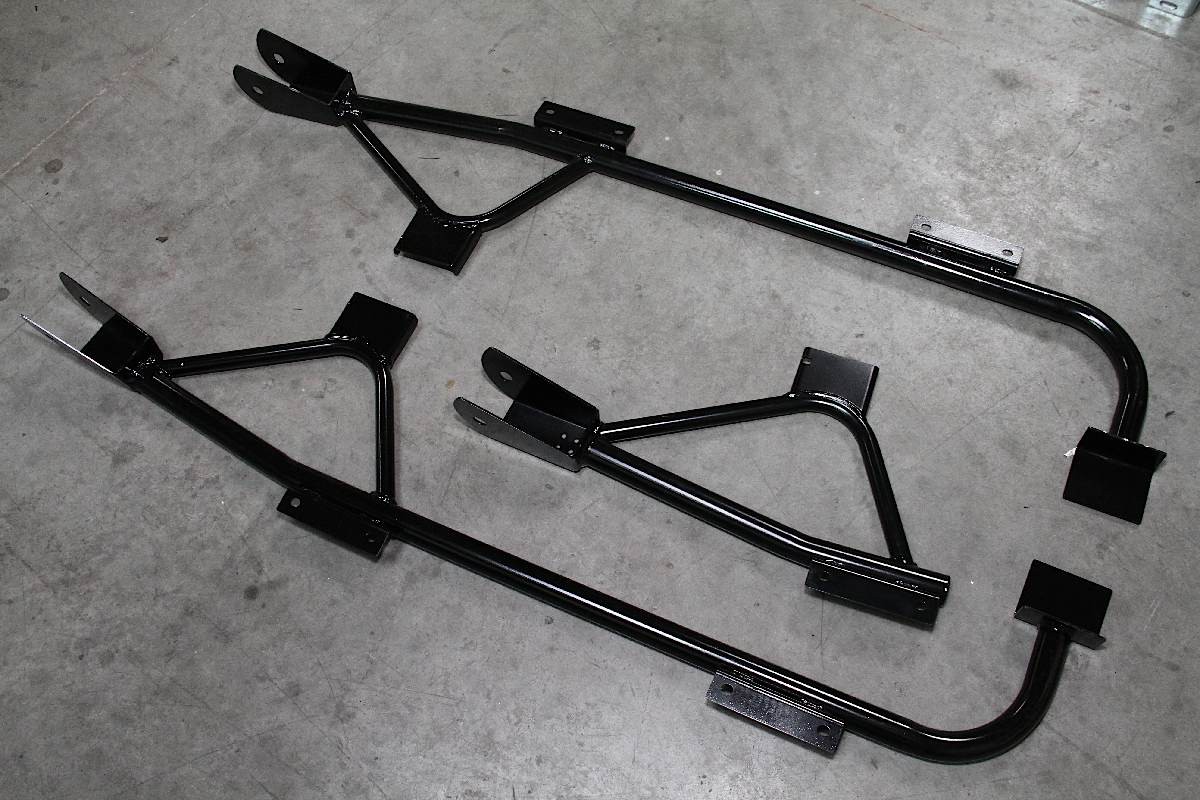
[22]Lakewood offers two solutions for chassis stiffening. The smaller torque box brace is one option, however we went with the full length traditional style subframe connector which incorporates the torque box brace into its design.
We chose the full-length tubular steel subframe connectors for their additional strength and chassis stiffening. These incorporate the same benefits as the torque box braces by attaching at the rear control arm mount. They have additional mounting points further forward, giving the chassis additional benefits. The connectors are made from DOM tubing and feature a hard powder coat finish, which should give them years of service. Once they’re completely installed they become an integral part of the chassis.
 [23]
[23]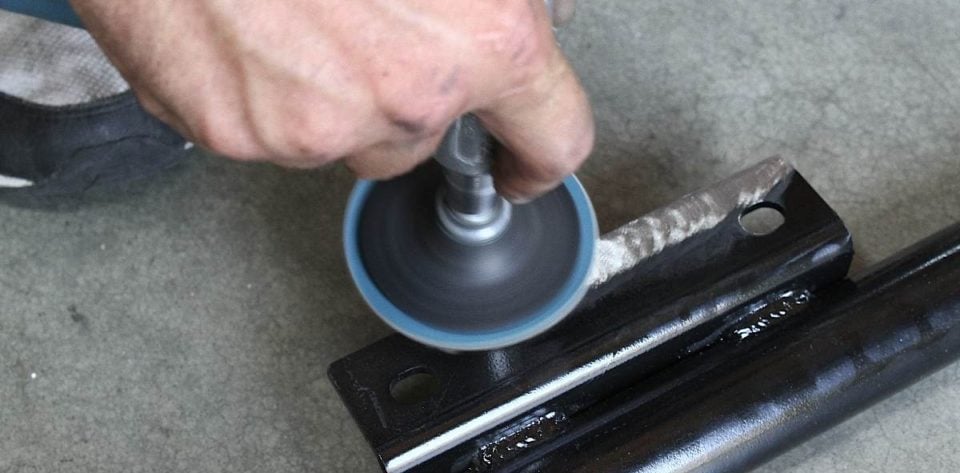 [24]
[24]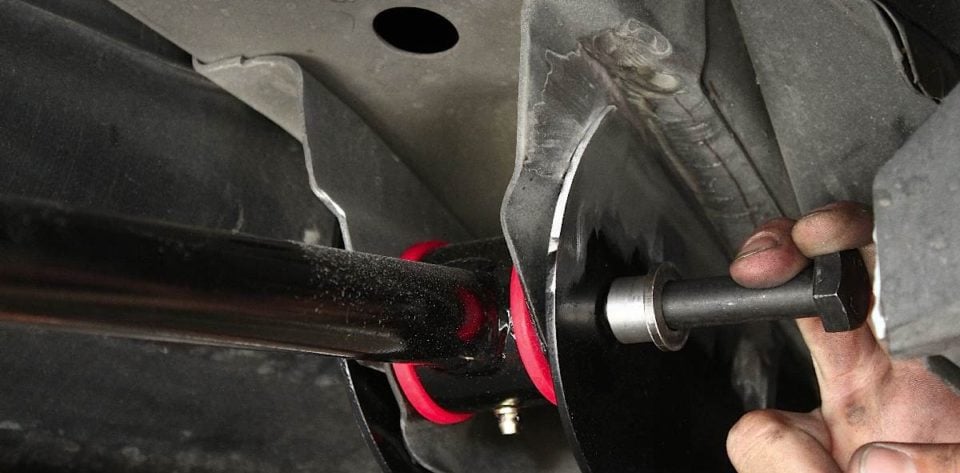 [25]
[25]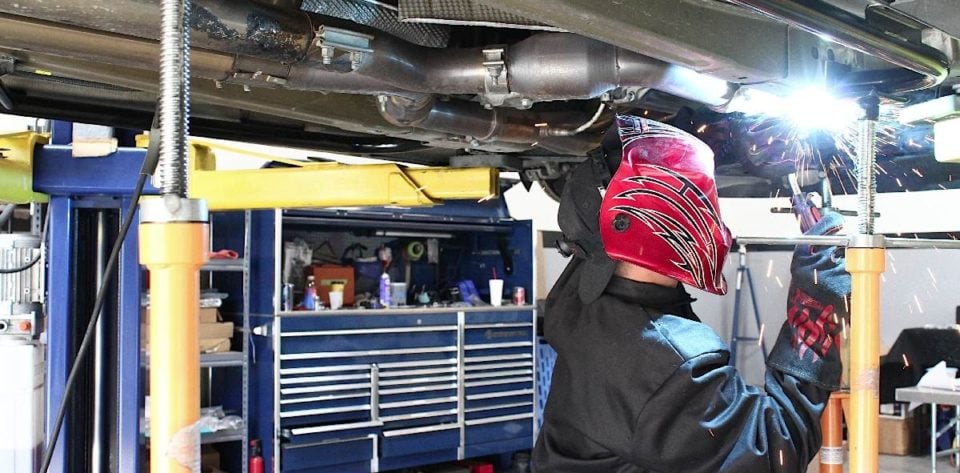 [26]
[26]
Left: With the car supported and squared on the chassis mounting points, we mocked up our subframe connectors and marked the frame and connectors where we need to grind the paint off before welding. Center Left: We ground the powder coat off the subframe connector and the paint off the frame to ensure good weld penetration. Center Right: The rear portion of the connector bolts in at the rear lower control arm mount. Right: The final step is to weld in the connectors on both sides.
The Inside Loop
 [27]
[27]The multi-piece design of the Lakewood driveshaft loop means that the exhaust and driveshaft don't need to be removed in order to install it.
While we were doing our rear suspension upgrade, we gave a lot of thought to safety issues that come with high-performance driving. It is surely surprising how many of us never consider driveshaft security when we’re building hot Mustang muscle cars. However, a stray driveshaft can cause severe damage to a car and the track, not to mention potentially causing a serious crash. Many sanctioning bodies, including NHRA, require a driveshaft safety loop as vehicle performance increases or to be allowed to run slicks at the track. Lakewood offers a variety of driveshaft safety loops for the S197 Mustang.
We chose to install Lakewood’s smaller diameter driveshaft loop. Their normal kit is a part number 18005 [28], but we needed two of the smaller half circles to clear our X-pipe, and can be special ordered through Lakewood. It’s multi-piece design means that the exhaust and driveshaft don’t have to be removed to install it. The driveshaft loop secures to the car’s frame rails, meaning we don’t have to drill our floor pans. This also means should we ever need to remove it, we won’t be left with large gaping holes in the floor. Securing to the frame rails also means the loop is more likely to stay in place should a driveshaft failure occur.
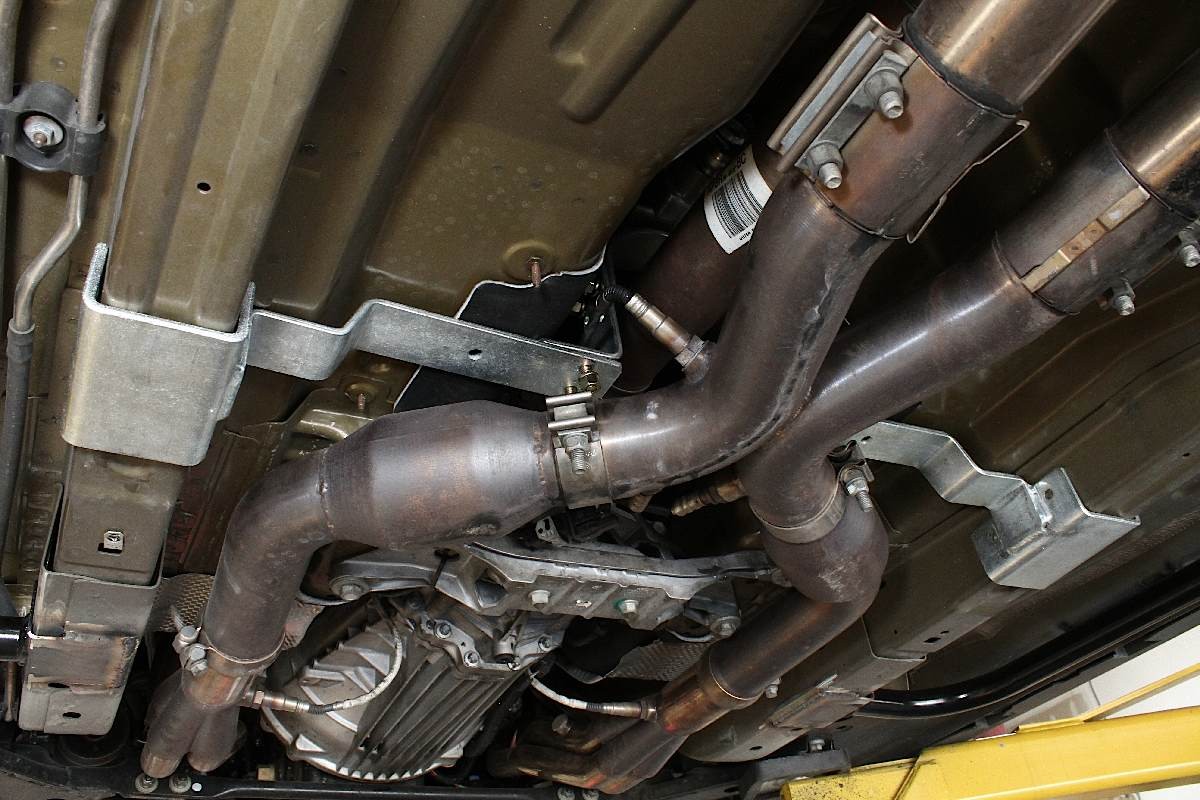 [29]
[29]The Lakewood driveshaft loop fits without the need to remove the exhaust and does not interfere with any of the components under the car. It attaches to the frame rails, meaning we don't have to drill holes in the car's floorpan.
Faster Times with the Same Horsepower
While suspension modifications don’t add horsepower they do increase vehicle performance by allowing us to better apply the power we’re already making. By going with Lakewood for all of our components we eliminate any guess work as to compatibility, ensuring everything works together as a system.
 [30]Part Numbers Used
• Lower Control Arms – 20105
• Upper Control Arm – 20705
• Panhard Bar – 20405
• Watts Link System (for demonstration only) – 20505
• Driveshaft Safety Loop – 18005
• Subframe Connectors- 30201
• Control Arm Mount Brace – 20102
• Control Arm Relocation Brackets – 20101
We took Wild E Coyote to the drag strip for some passes to see what kind of improvements we had made. At the NMCA Pomona race the weather was hot, and the track temps were well over 100 degrees. The one thing that stayed very consistent all day long though was how the car launched. This means we can adjust tire pressures and then allow the suspension to do its job getting the car off the starting line consistently.
On 18-inch drag radials we had previously only managed 60-foot times in the low 1.70’s. Even with track conditions less than optimal we were still able to see a difference in our timeslips recording a best 60-foot time at the event of 1.65. Under more ideal conditions we expect to see the car hook up even better and wouldn’t be surprised at all if our 60-foot times drop well into the 1.50’s.
More horsepower is always fantastic, but without the ability to put it through the chassis and into the track, we’re literally left just spinning our tires all day long. With these new parts from Lakewood, Wild E Coyote will be a more consistent performer both on the drag strip, the street, and through the corners on a road course. The quality of the parts mean they’ll last for years, and Lakewood’s extensive engineering and chassis experience gives us piece of mind to know that they’ll work the way they’re supposed to every time we drop the clutch and leave the starting line.