 [1]Most of us already know that racing around a track is safer and more controlled when you’re strapped into a bucket seat with a racing harness. All sanctioned events in the US require some form of suitable restraints, and for many events, such as open track days and some drag racing events, the factory seat belts are perfectly acceptable. But acceptable is a far cry from recommended when it comes to racing.
 [2]
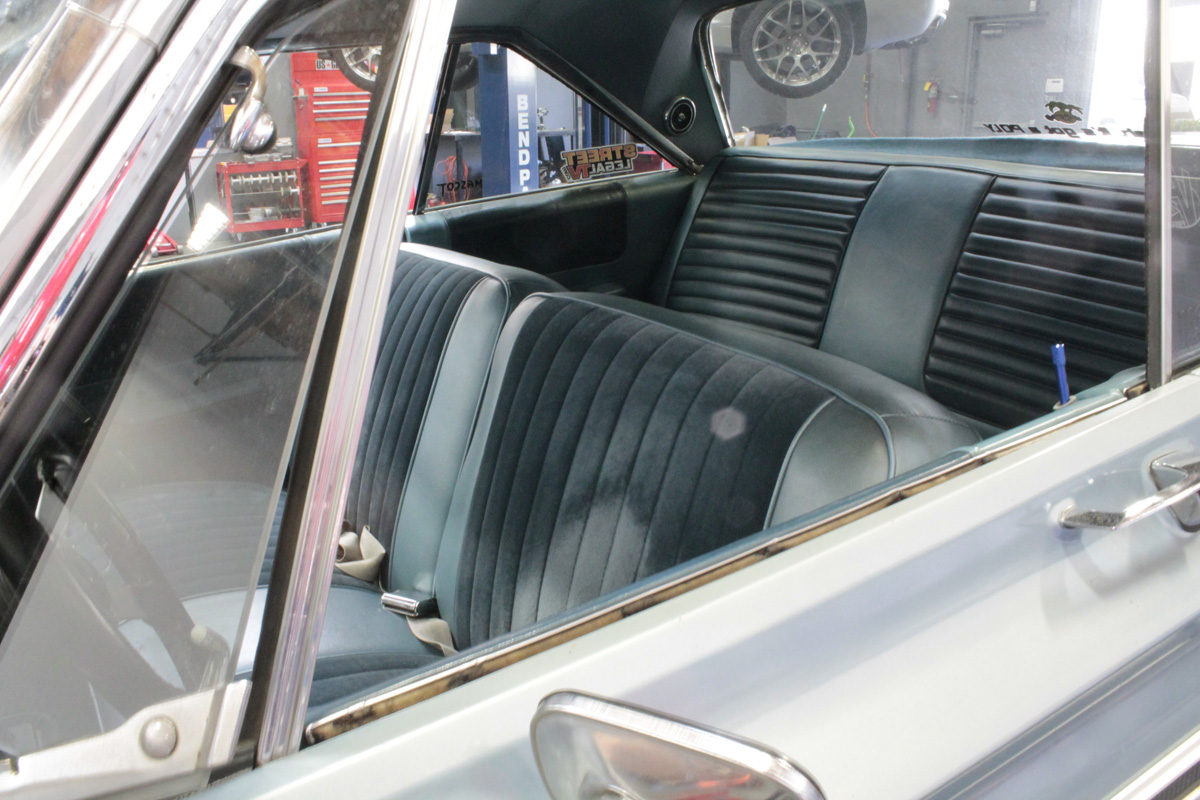
[2]A bench seat and factory lap belts are legal for open track racing, but are probably equivalent to duct-taping yourself in the car.
When we first started racing Project Track Attack [3] in open track day events at Willow Springs International Raceway [4], we essentially brought a stock 1965 Plymouth out to the track with very few suspension modifications. Inside the car, the factory bench seat and a single lap belt were the only means of support as we raced around the track.
Though the car didn’t hit any ballistic speeds on the 2.5-mile road course, reaching about 105-110 mph on the straights, the bench seat and lap belts didn’t exactly keep us planted. With each turn there was a lot more going on in the driver’s seat than pushing some pedals and turning the wheel.
 [5]
[5]Cornering with a bench seat/lap belt required a lot of body language.
Every left turn was aided by a left hand grasping the vent window frame, or holding onto the top edge of the door, to keep from sliding around while wearing the ill-fitting lap belt. Right turns were a little easier, but bracing a leg against the door trim panel is not the best driving position. The bottom line was that we needed a little bit more than what we had, so we put together a plan.
We outlined this plan with a pair of bucket seats from Procar [6] and racing harnesses from Impact Racing [7]. Attaching harnesses in a car is best done by attaching the shoulder harness to either a cross brace in a roll cage, or by using a harness bar – much like the universal harness bar kit we installed from Chris Alston’s Chassisworks [8].
 [9]
[9]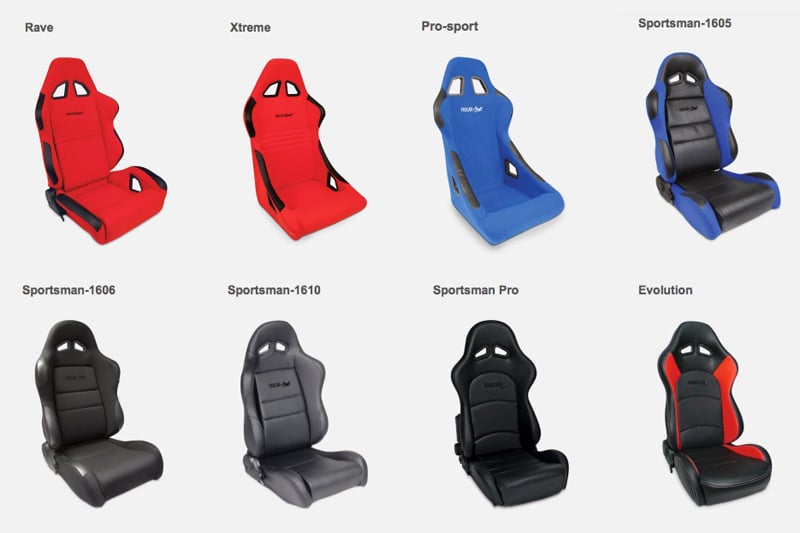 [10]
[10]
Many of the seat styles available from Procar will provide either classic looks, luxurious comfort, racing support, or a combination of all three.
Procar Bucket Seat Installation
There are literally hundreds of bucket seat styles, from factory style seats to full-on racing seats. Because we drive the car quite regularly and only hit an open track day or autocross a few times each year, we wanted a seat that would be comfortable on longer trips, but still provide some lateral support for cornering. Of course, we also had to make sure that we could use over-the-shoulder harness straps, so we took that into consideration when choosing a seat.
 [11]
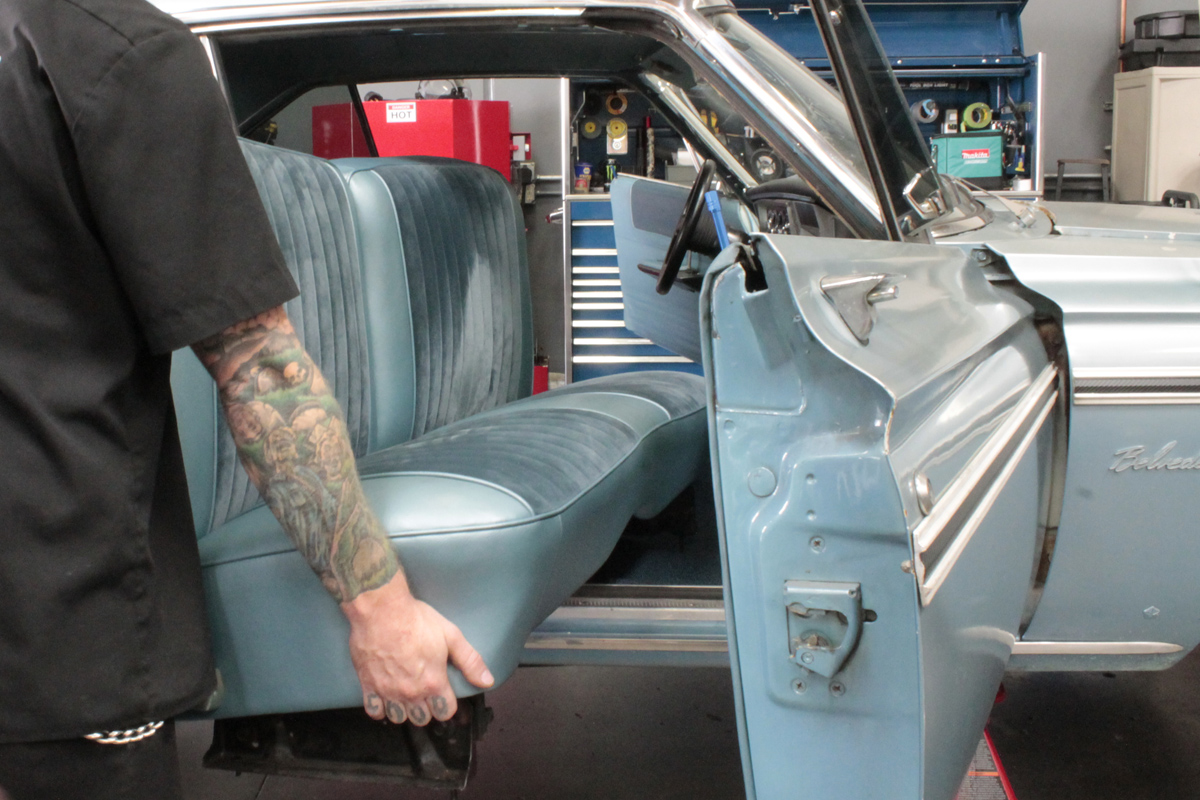
[11]Out with the old. The new buckets provide more comfort and support, whether cruising or racing.
We talked to Craig Schenasi at Procar to see what recommendations he had for us. Looking through the website, there are several styles available, and each seat has roughly four to five color choices, with canvas, leather, vinyl, or velour for fabric choices. We asked about the velour in particular, and Schenasi told us, “The velour is a very durable fabric for our seats, and will hold up well to the constant brushing past the seat while getting in and out of the car.”
There are fixed seats designed for racing applications, like the Xtreme [12] and Pro-Sport [13] seats, and seats such as the Evolution [14], Rave [15], and Sportsman [16] series providing similar support but in a reclining model. With comfort as our first concern, we looked closely at the Rally and Elite series seats, finally deciding on the Elite Lumbar [17] as our choice for a good, all-around seat.
We selected the Elite Lumbar seat for the comfort, as well as the lateral support we need for occasional road racing. [18]
[18] [19]
[19]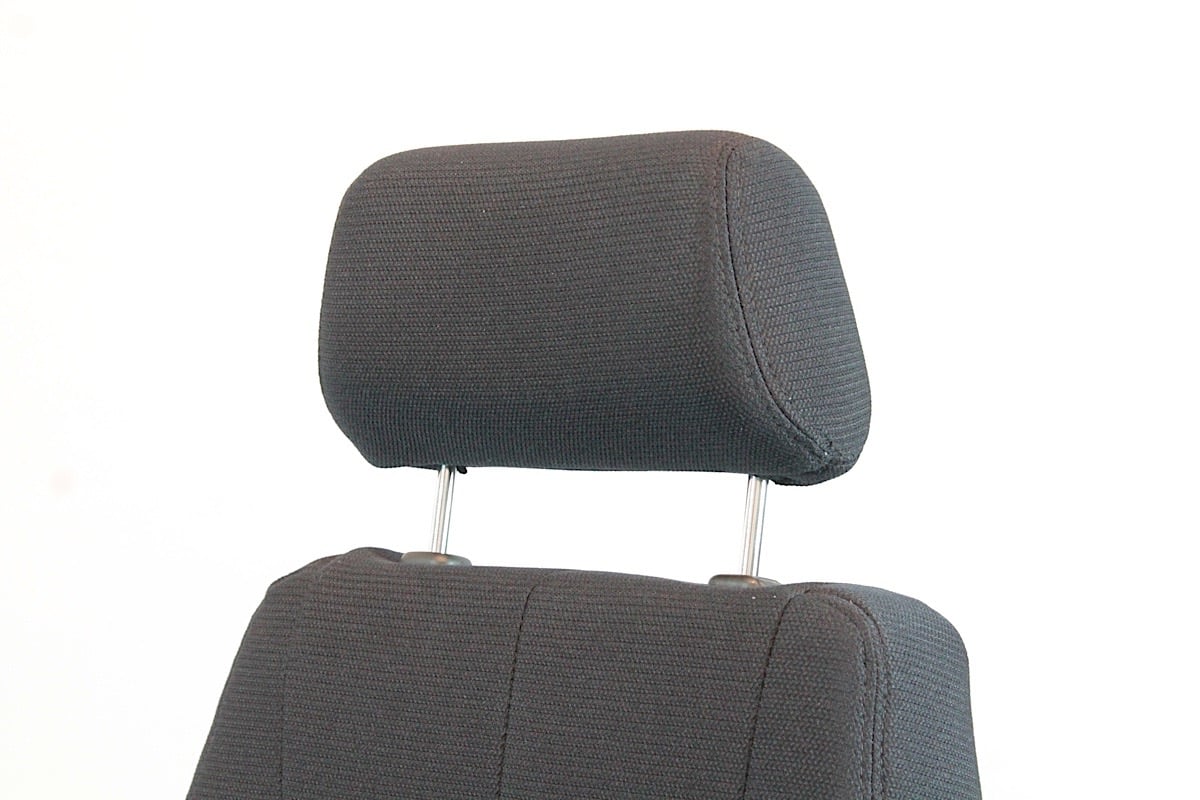 [20]
[20]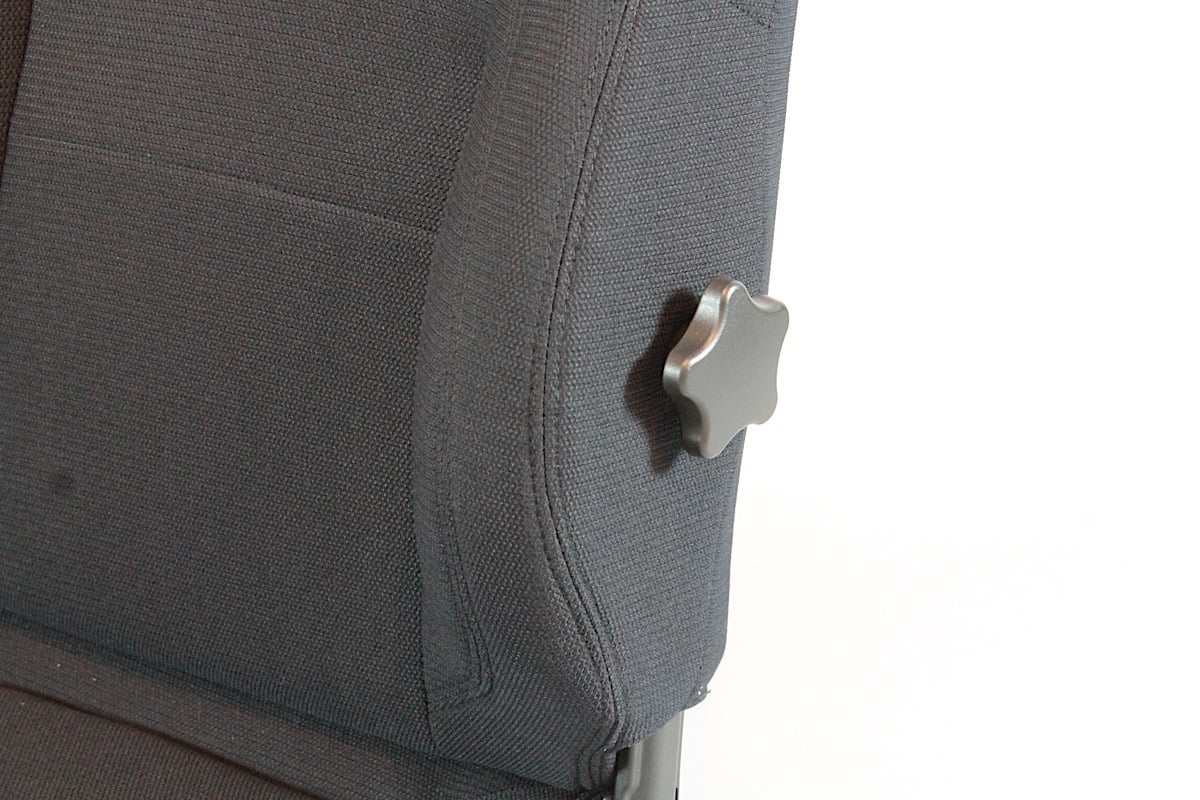 [21]
[21]
Much of our decision was based on wanting full flexibility with the seat, allowing it to fold forward for rear seat access, and to have multiple adjustments for the backrest for how we drive the car. The Elite Lumbar seat has an adjustable headrest, and is available in leather, velour, or vinyl. Although there are a few choices for colors on the website, Schenasi told us that they can have the seats upholstered in just about any color or fabric for custom applications.
For custom colors/fabrics, Schenasi suggested that the customer should contact Procar and get measurements for the amount of material required. The customer could then visit a local upholstery shop or outlet and purchase the fabric and send it to Procar, or a few samples can be sent to the customer if the seat color doesn’t need to be an exact match to the existing interior.
A universal adapter kit is available for cars without a direct application. Assembly of the seat and adjusters is simple, with all included hardware necessary.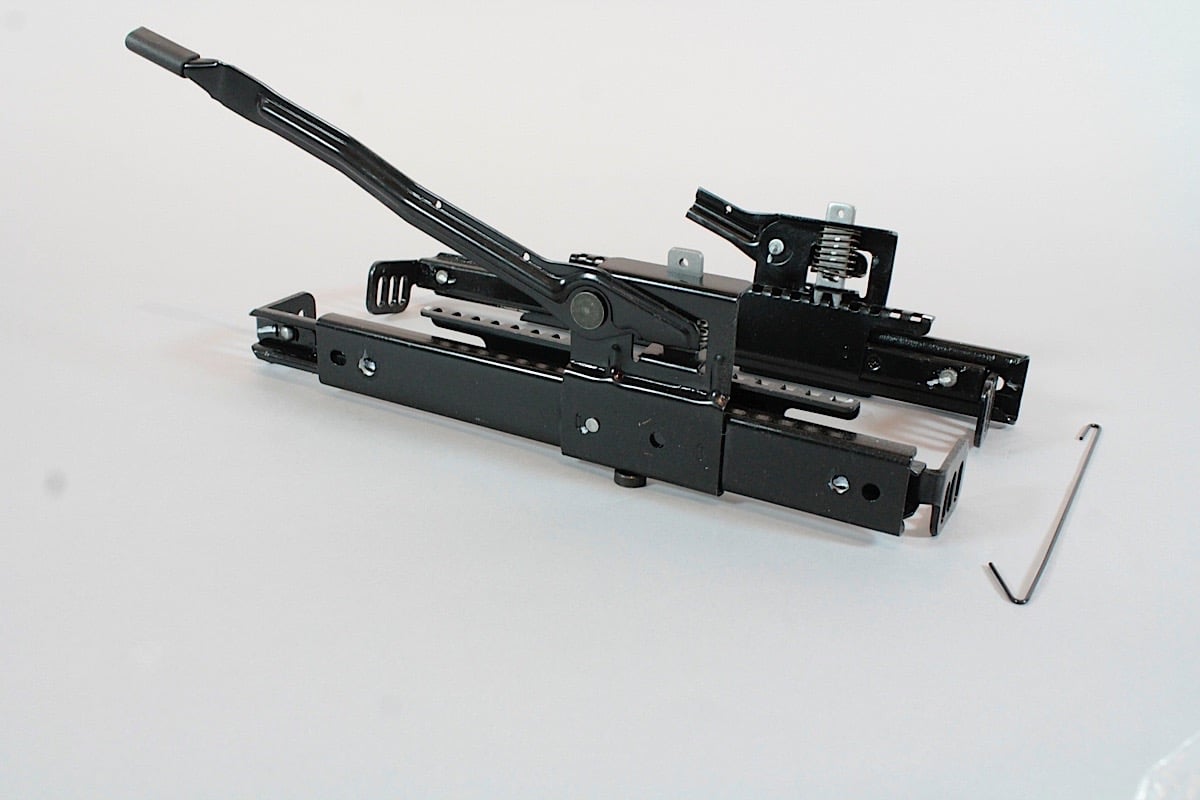 [22]
[22]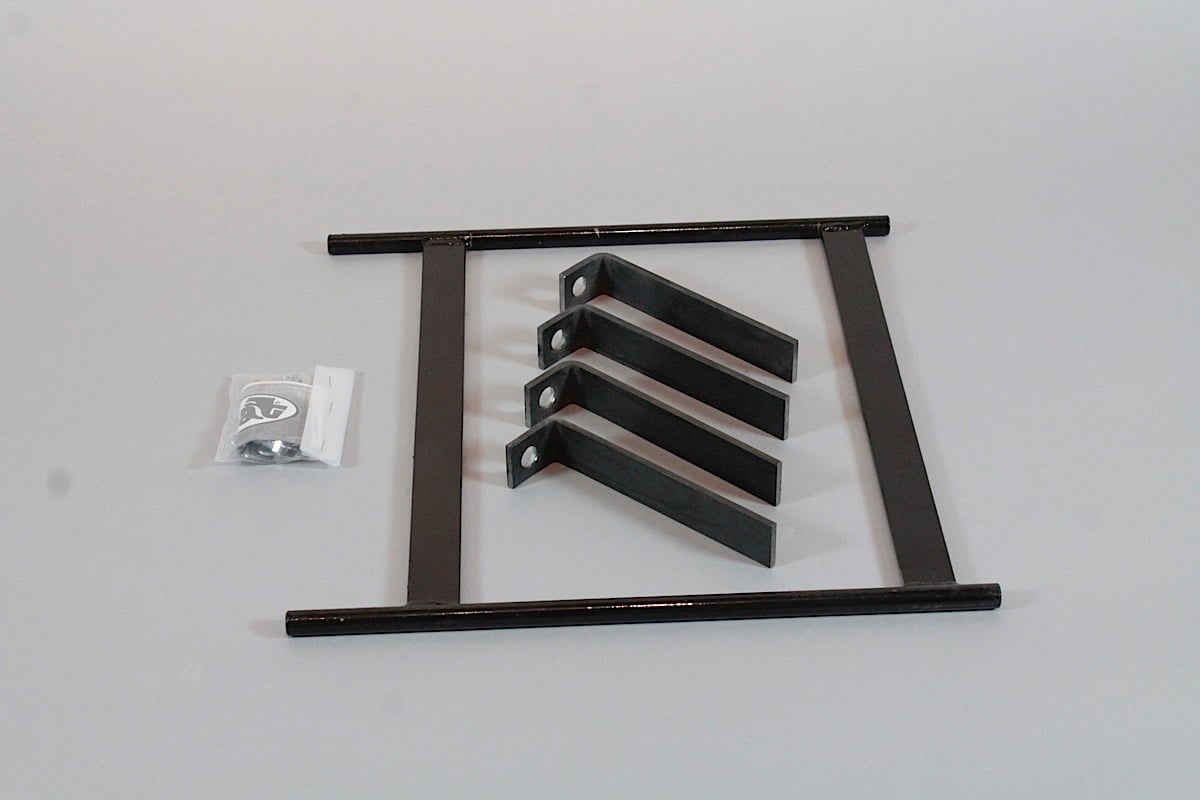 [23]
[23]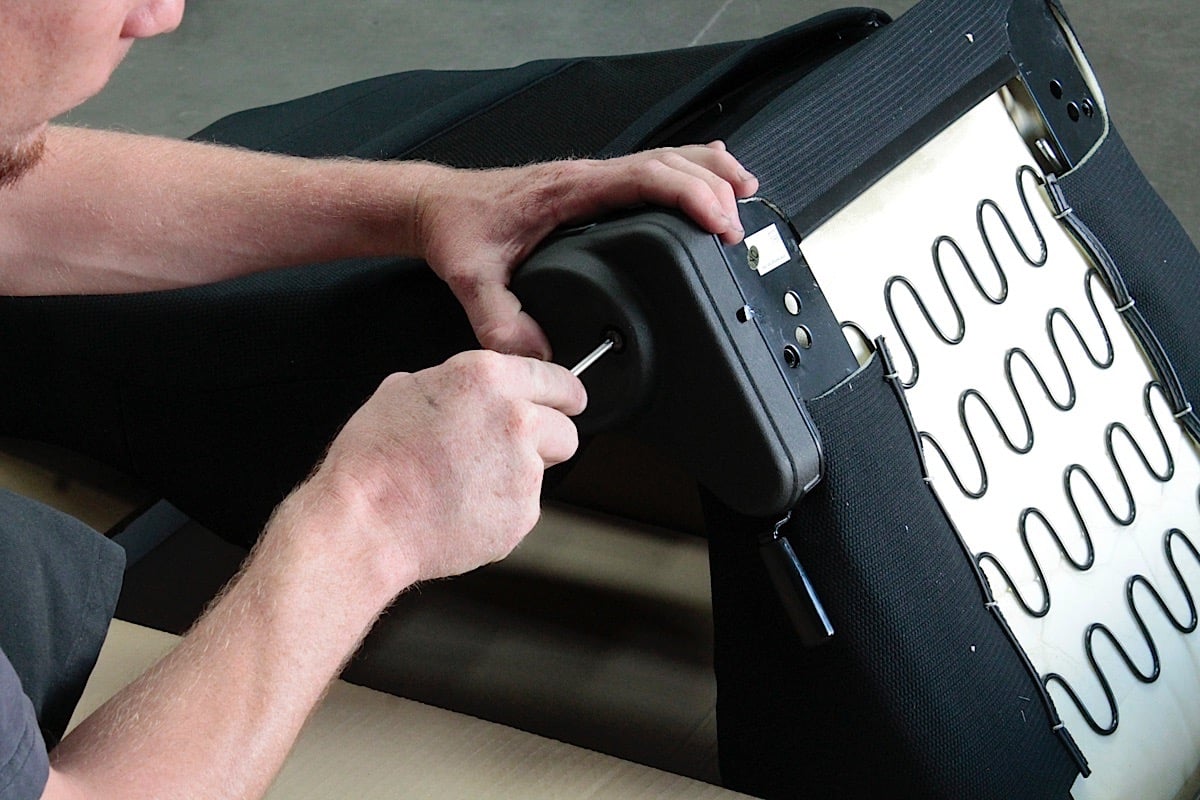 [24]
[24]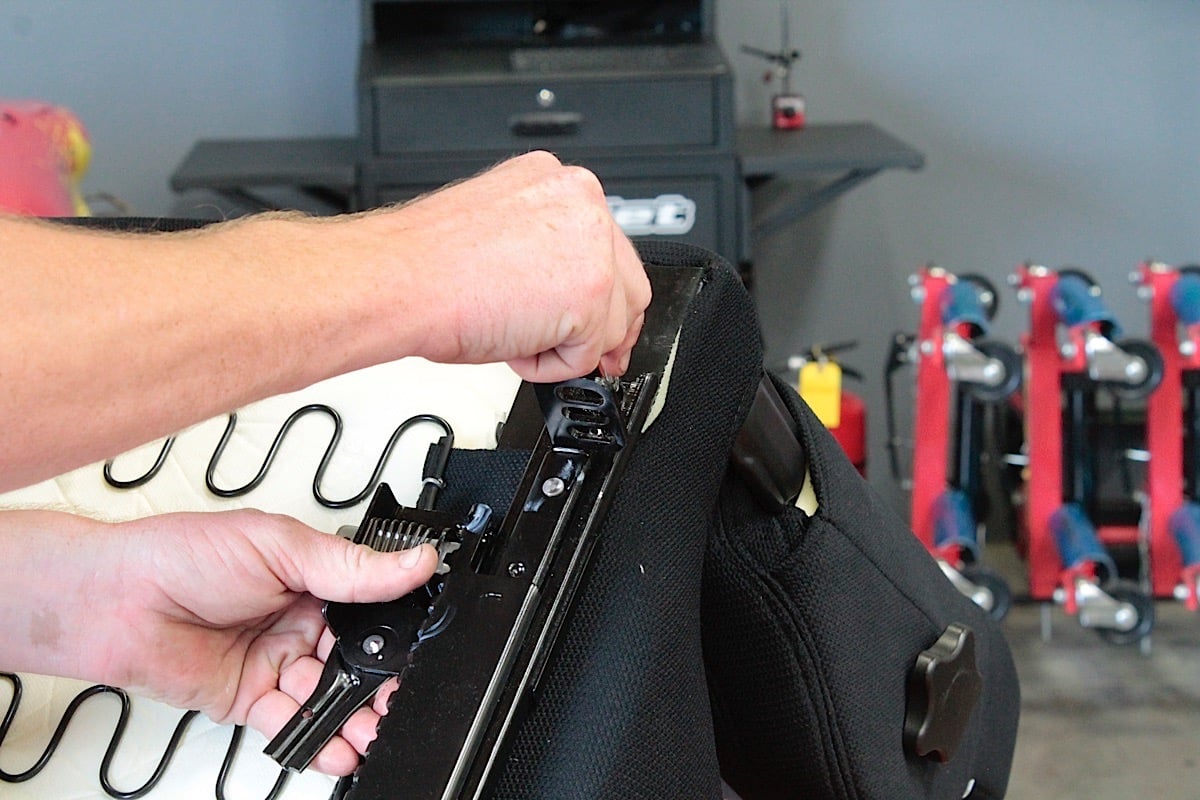 [25]
[25]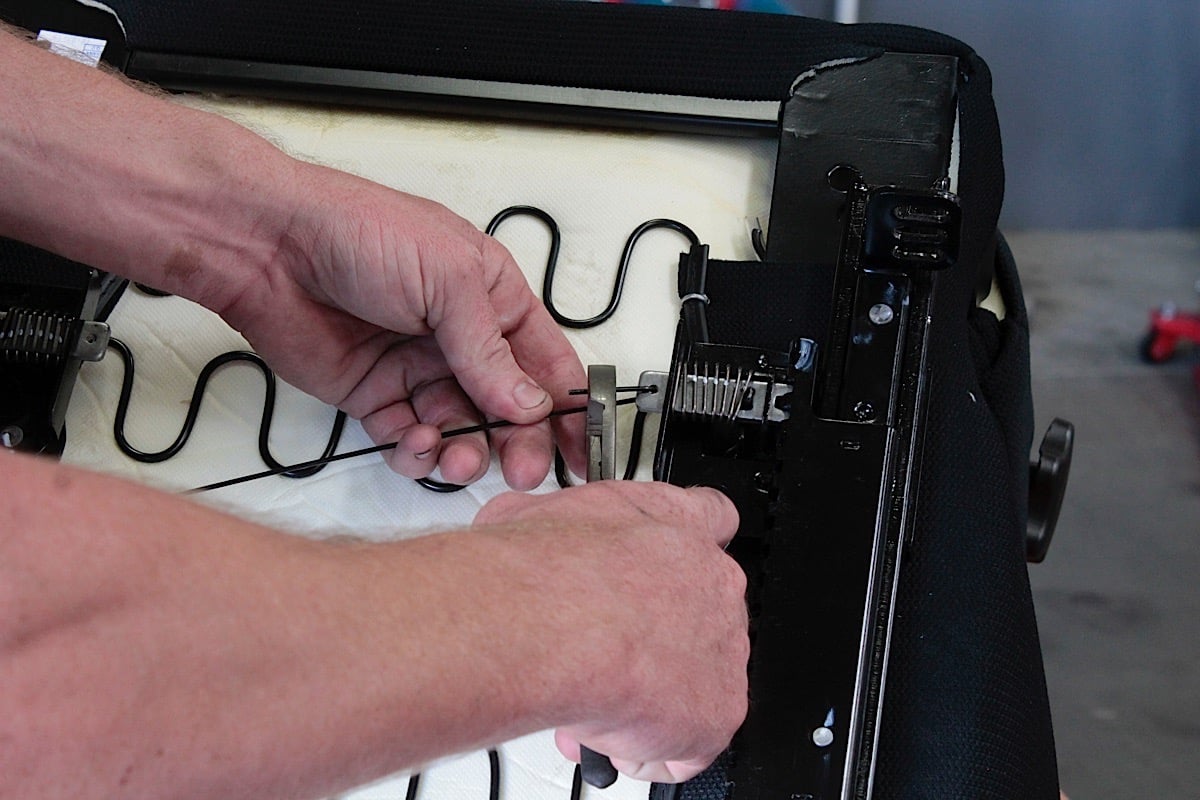 [26]
[26]
For most popular vehicles, Procar has seat adapter kits [27] that will bolt its seats to the existing floor pan. For applications like ours, a universal seat adapter kit allowed us to bolt the Elite Lumbar to the oddly-shaped floor in our Plymouth. The universal kit has a seat frame that bolts to the seat adjusters, and four brackets that can be cut to fit.
Switching from a four-bolt bench seat to a pair of bucket seats with four mounting bolts each meant that we needed to drill the inner mounting holes. The outer holes were utilized because they were reinforced with additional sheetmetal for strength. But before we started drilling the inner holes, first we needed to determine the seat location and height.
 [28]
[28]Lumber lying around the shop was used to set the seat height. This should be done prior to welding the adapter braces to the adjusters.
To determine the height, we stacked up various lumber scraps to build a base for the seat on the uneven floor pan. With the seat positioned to where we were comfortable, the universal seat bracket frames were bolted to the bottom of the seat, and the four risers were measured against the seat height and cut as necessary. The risers are long enough to accommodate the varying planes on the floor pan, where one bracket may end up longer than the other three so that the seat can be mounted level in the car.
The four risers were then bolted to the floor and tack-welded to the seat bracket, and the driver position is tested once more prior to removing the seat for final welding of the brackets. A good coat of black paint once the welds had cooled and the seats were ready for the final installation, with a thick plate fabricated for each of the inner bolt holes for strength.
Top: We measured the height from the floor to the seat adapter, then cut the brackets to size.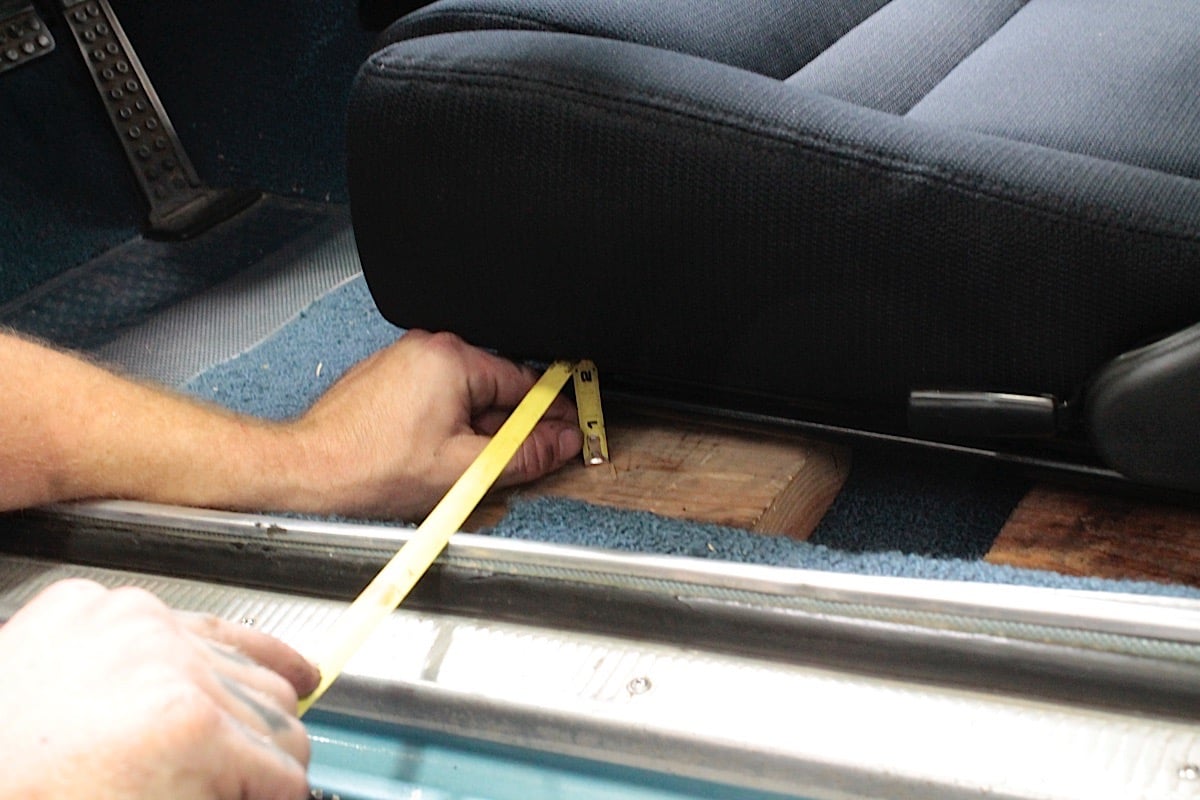 [29]
[29] [30]
[30]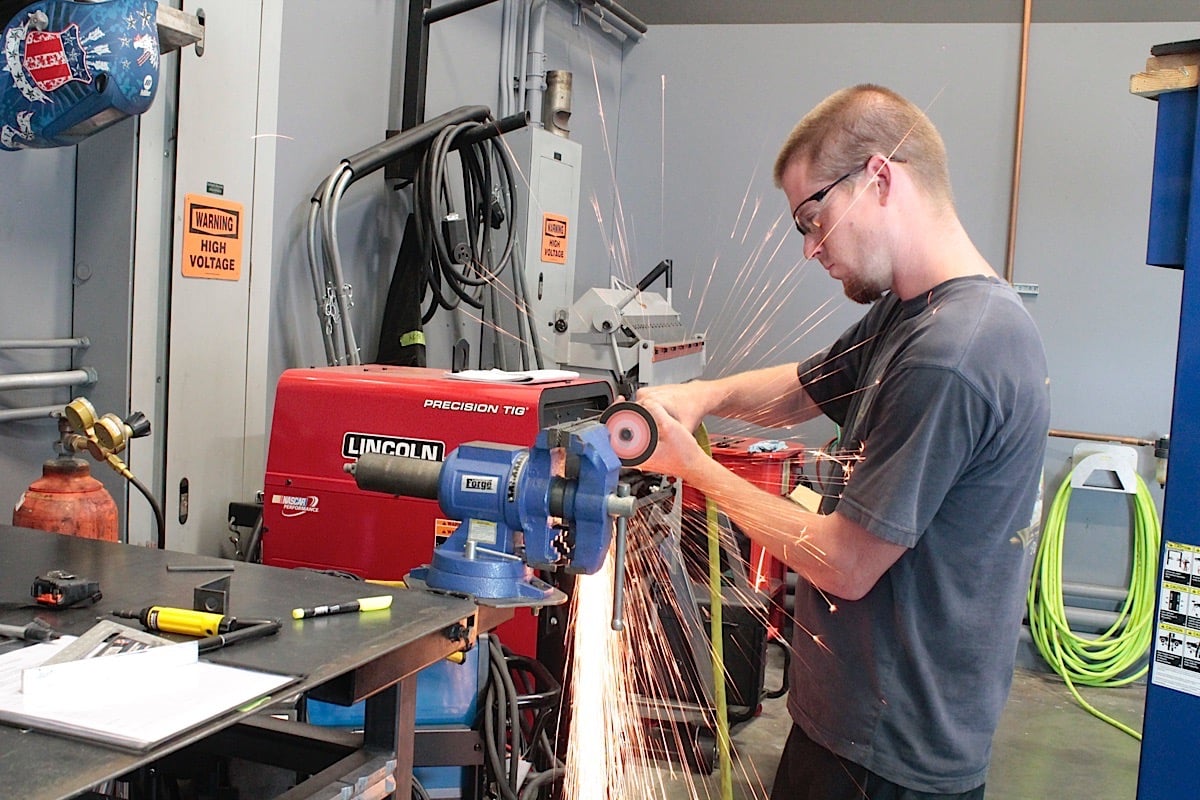 [31]
[31]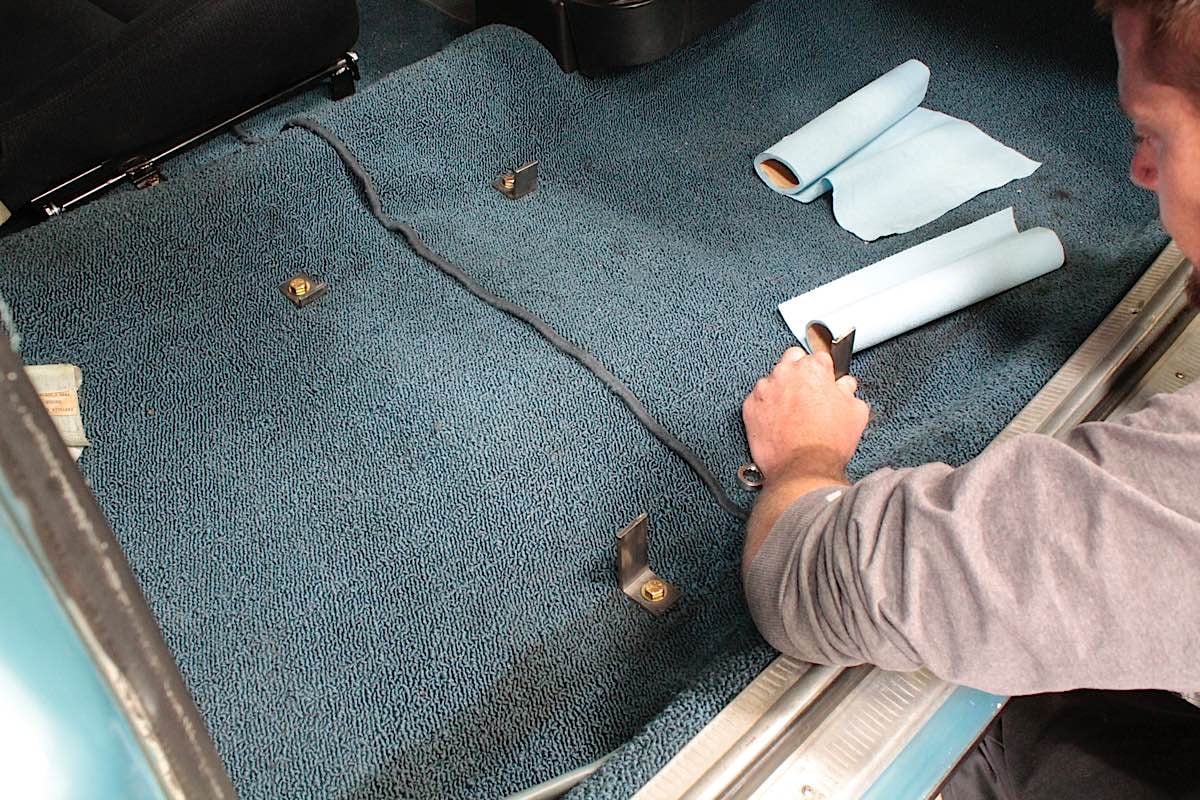 [32]
[32] [33]
[33]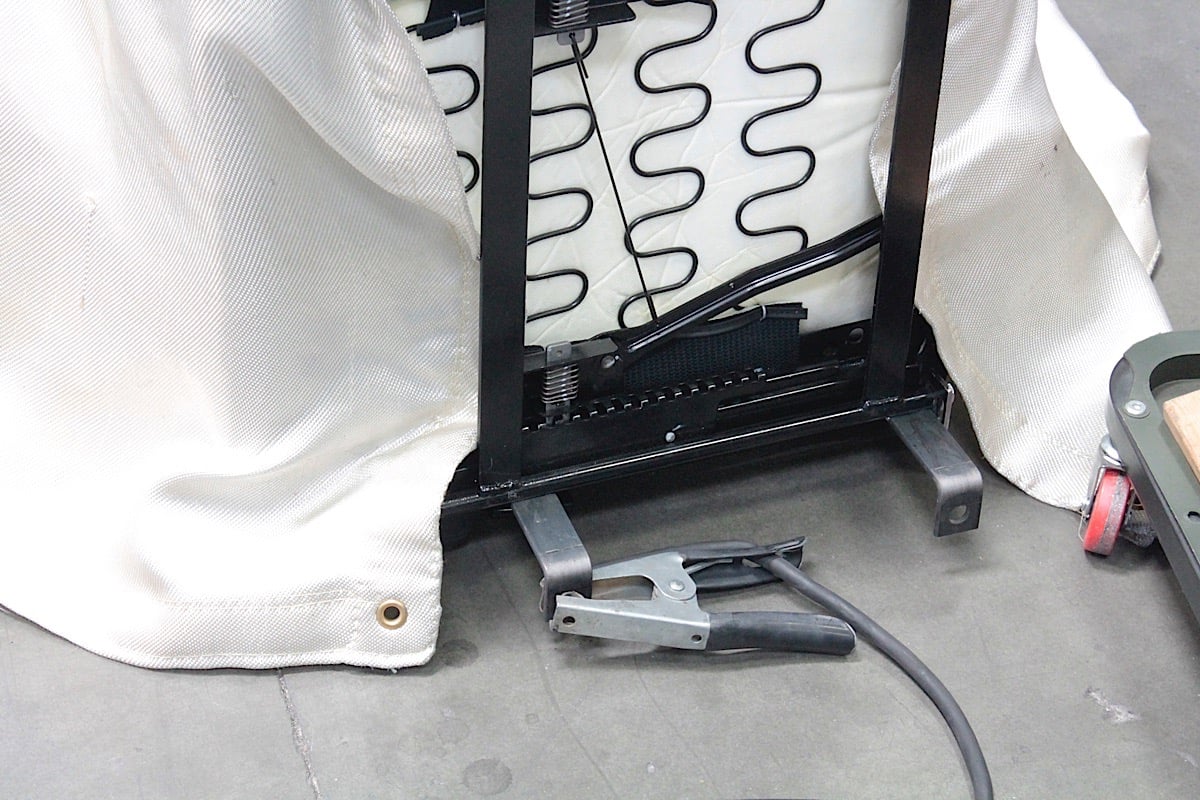 [34]
[34]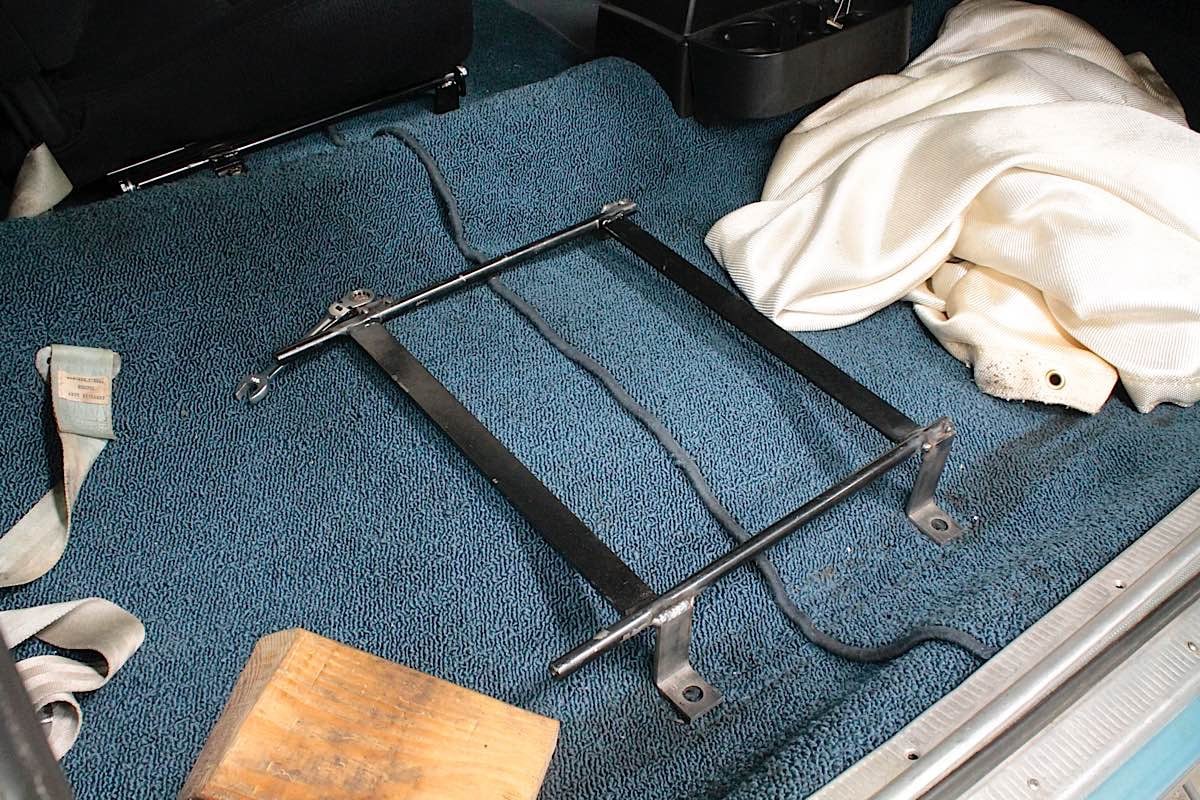 [35]
[35]
Bottom: We bolted the brackets to the floor then placed the adapter in place and tack-welded them so we could finish welding on the bench.
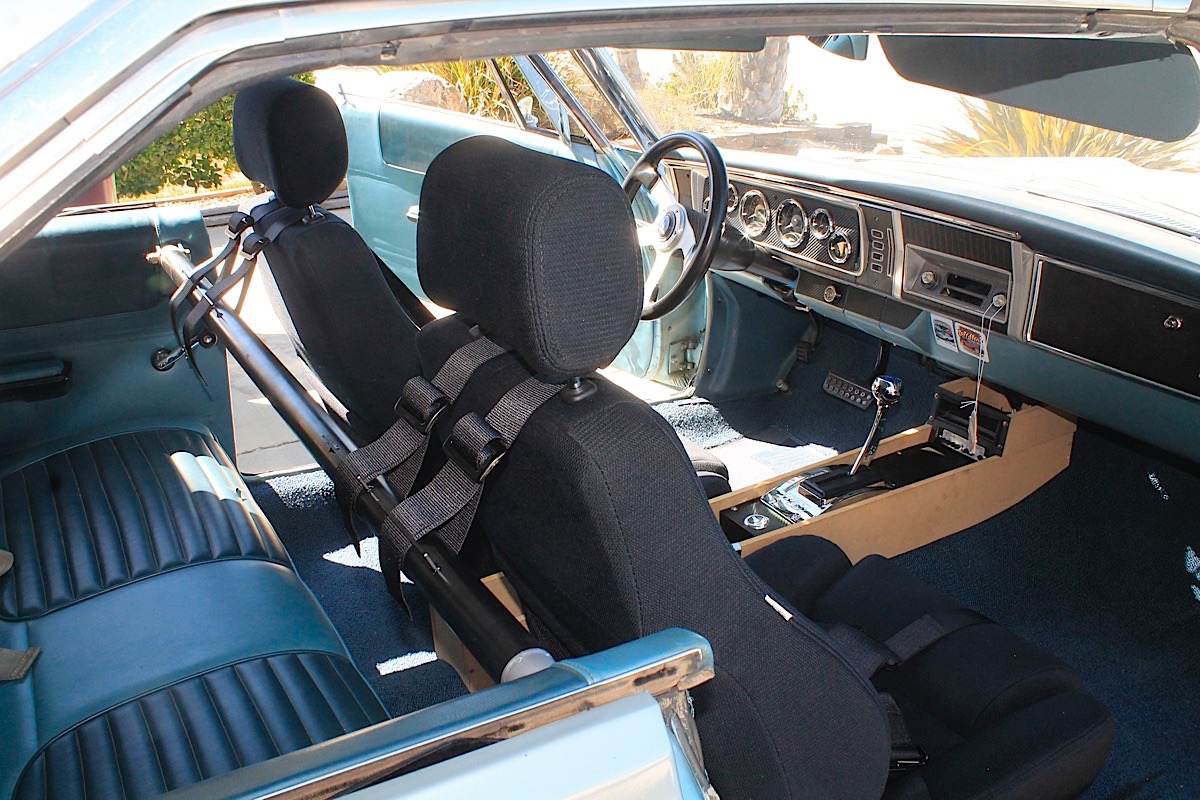
The seats are fully adjustable, and will slide forward for racing and back for cruising. An adjustment knob on the side of the seat allows for lower back support adjustments. The Elite Lumbar turned out to be a great all-around seat to serve two purposes in our car, but the real test was when we hit the track – we’ll get to that in a bit here.
The completed install of the Procar Elite Lumbar bucket seats. Next stop: the Chassisworks harness bar so we can install the Impact five-point harnesses. [36]
[36]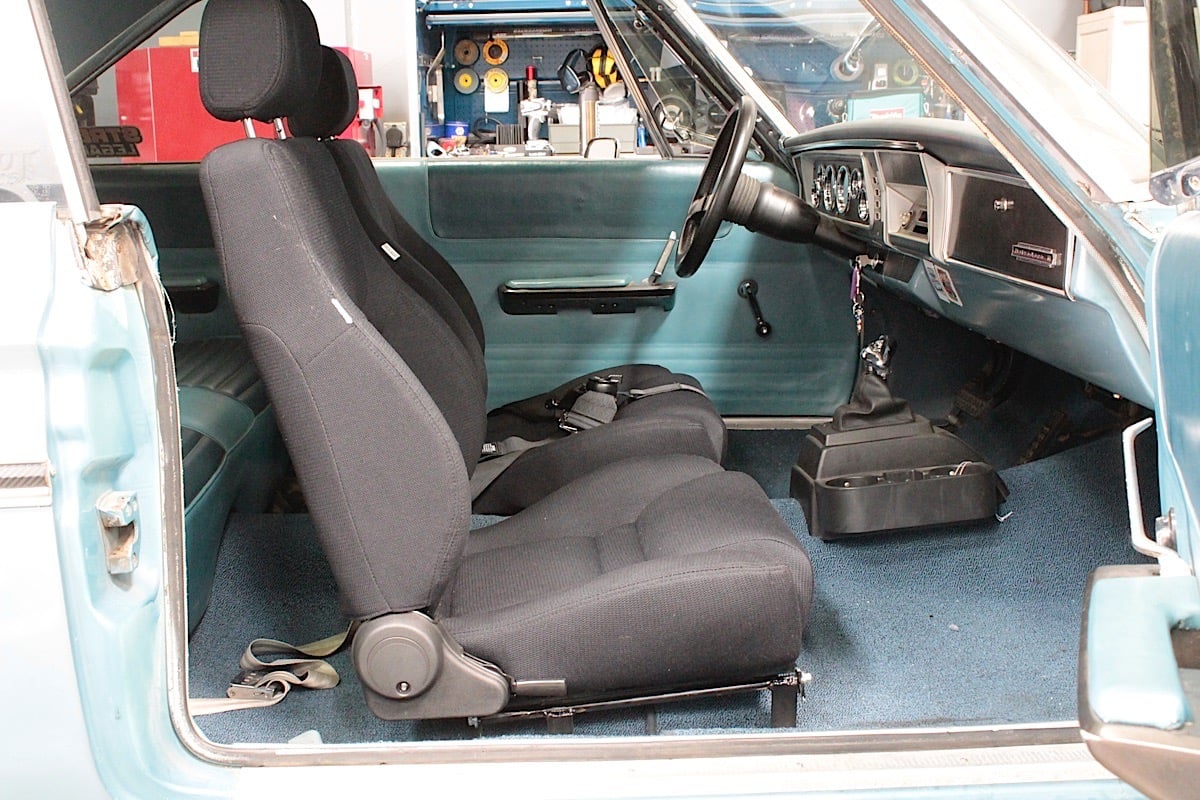 [37]
[37]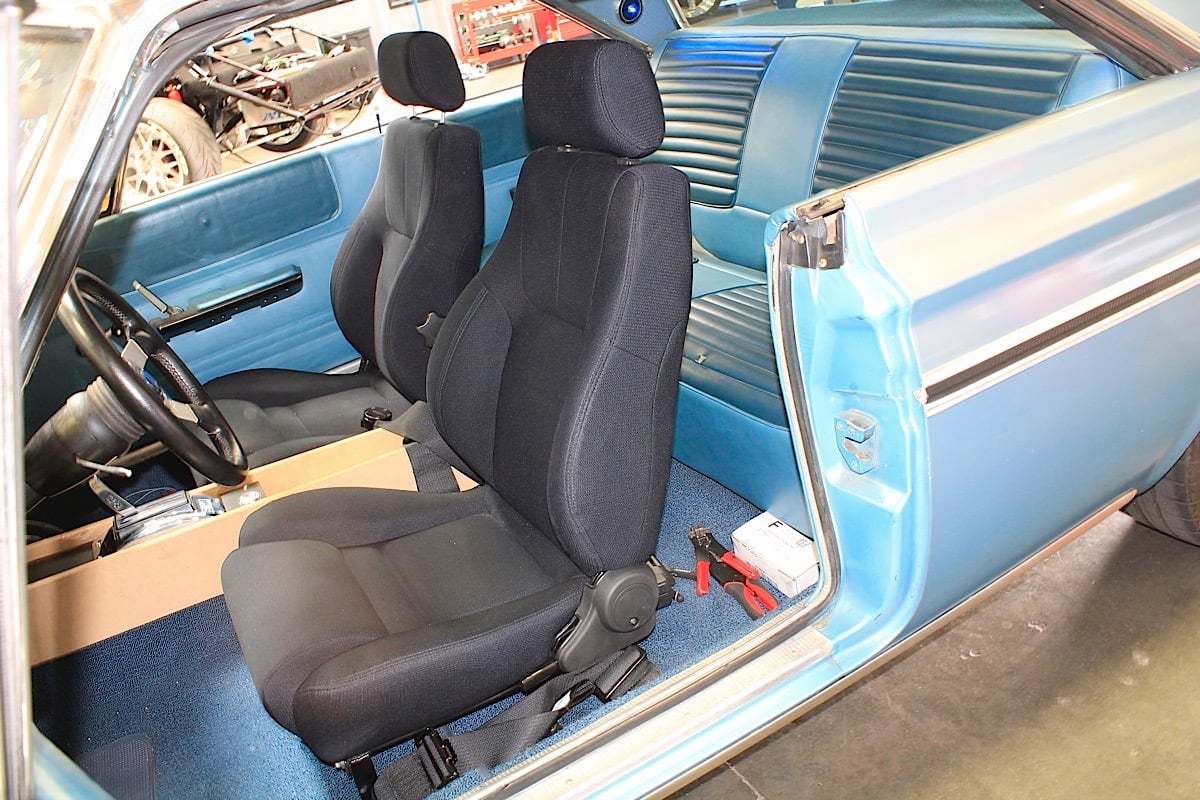 [38]
[38]
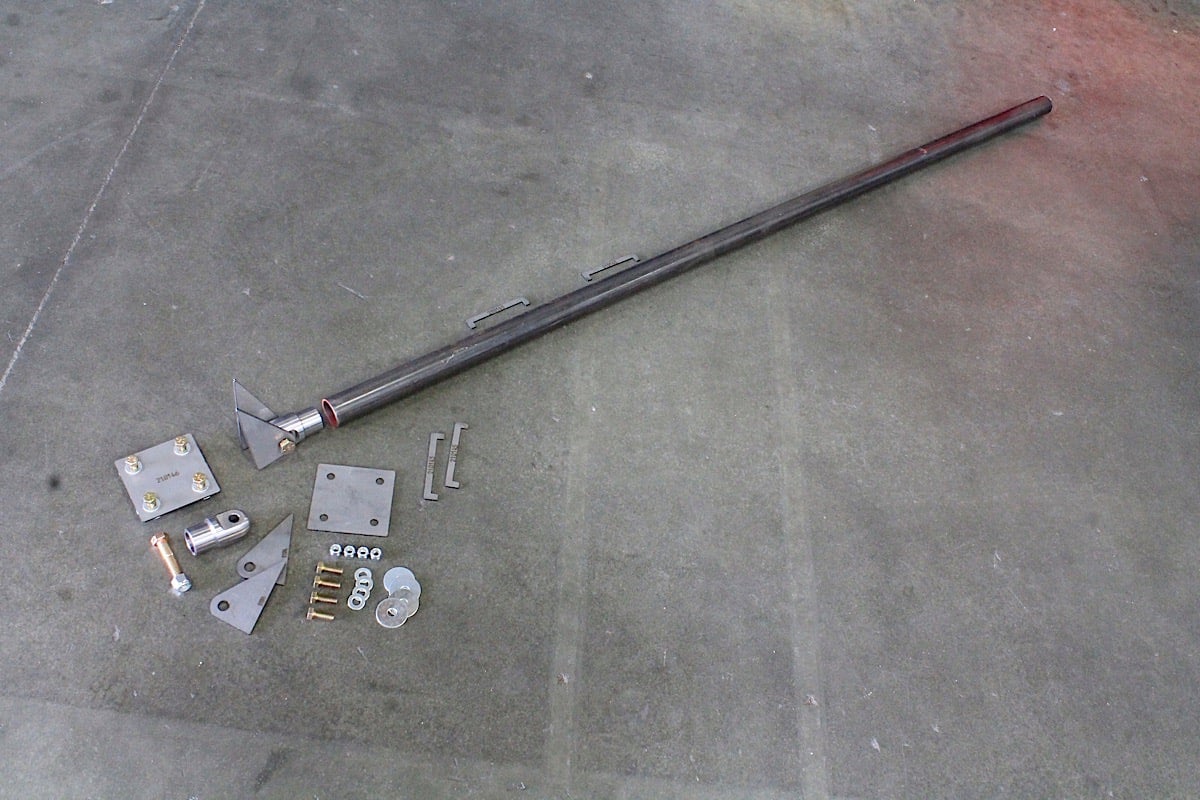
The Chassisworks harness bar kit includes all brackets and hardware to fabricate your own harness bar using 1-5/8-inch tube stock.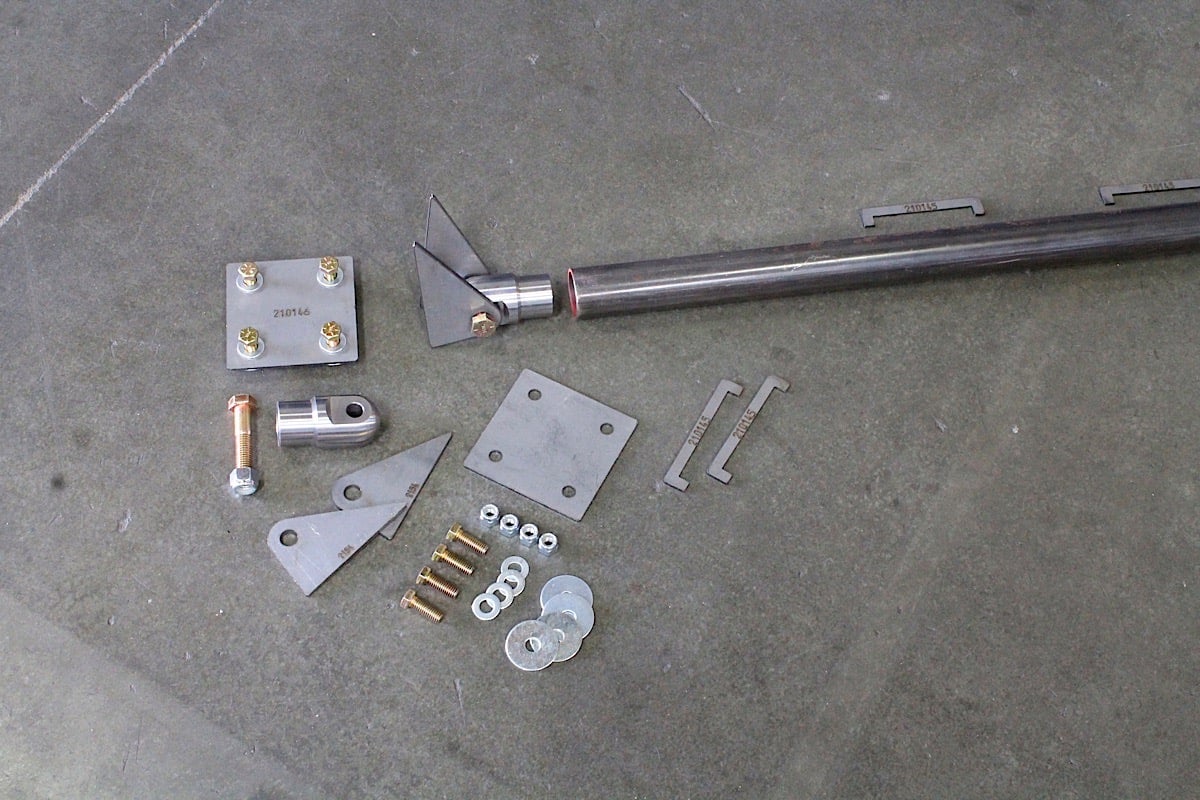 [39]
[39]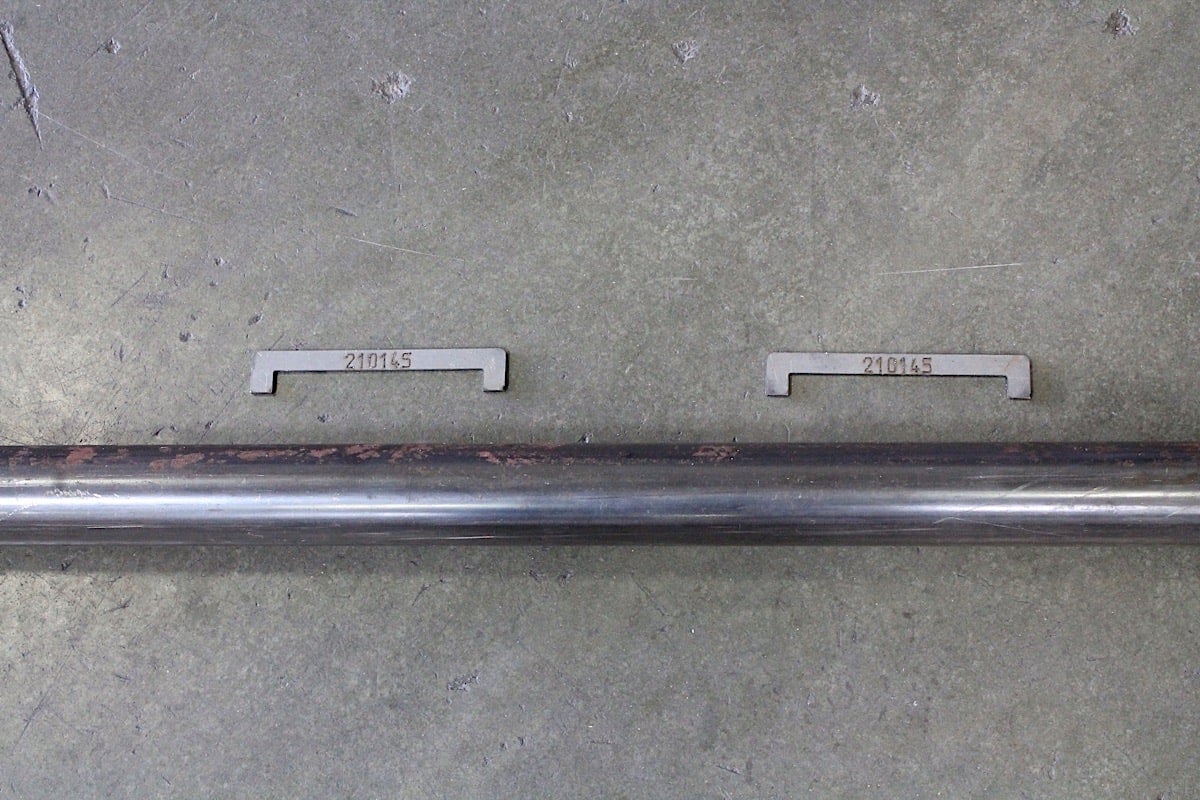 [40]
[40]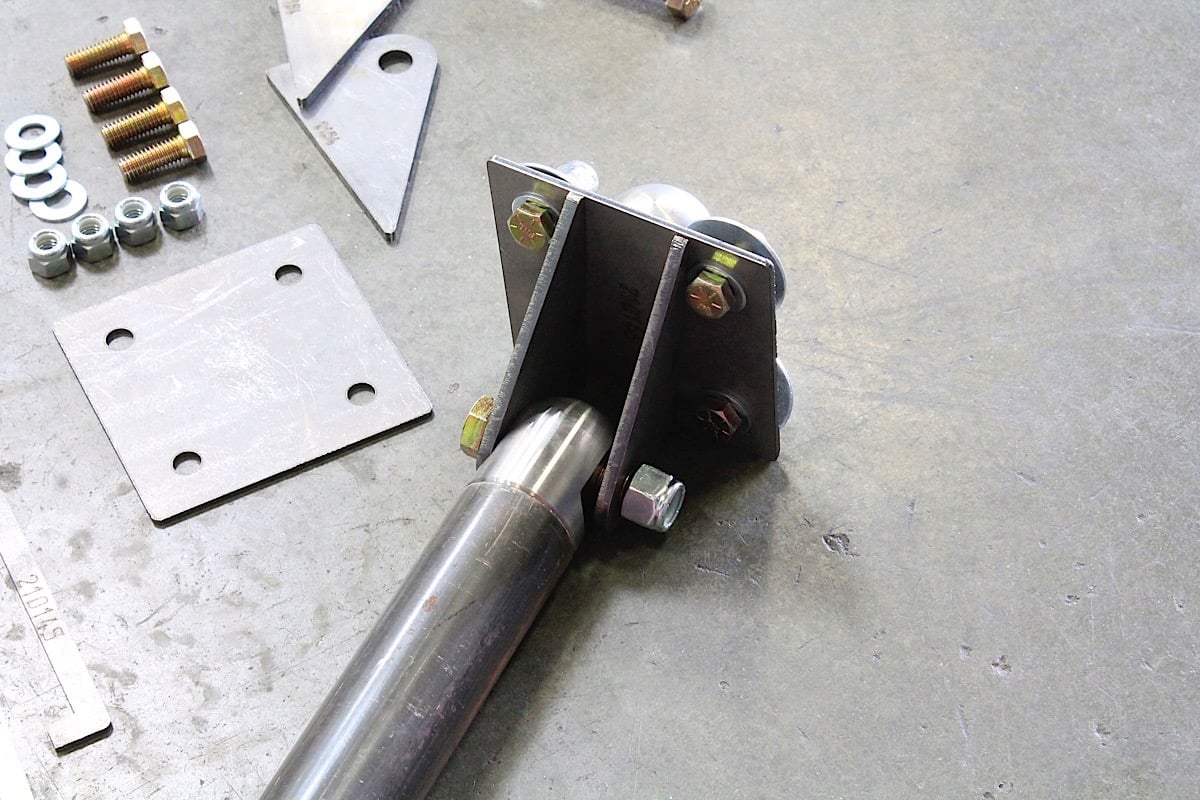 [41]
[41]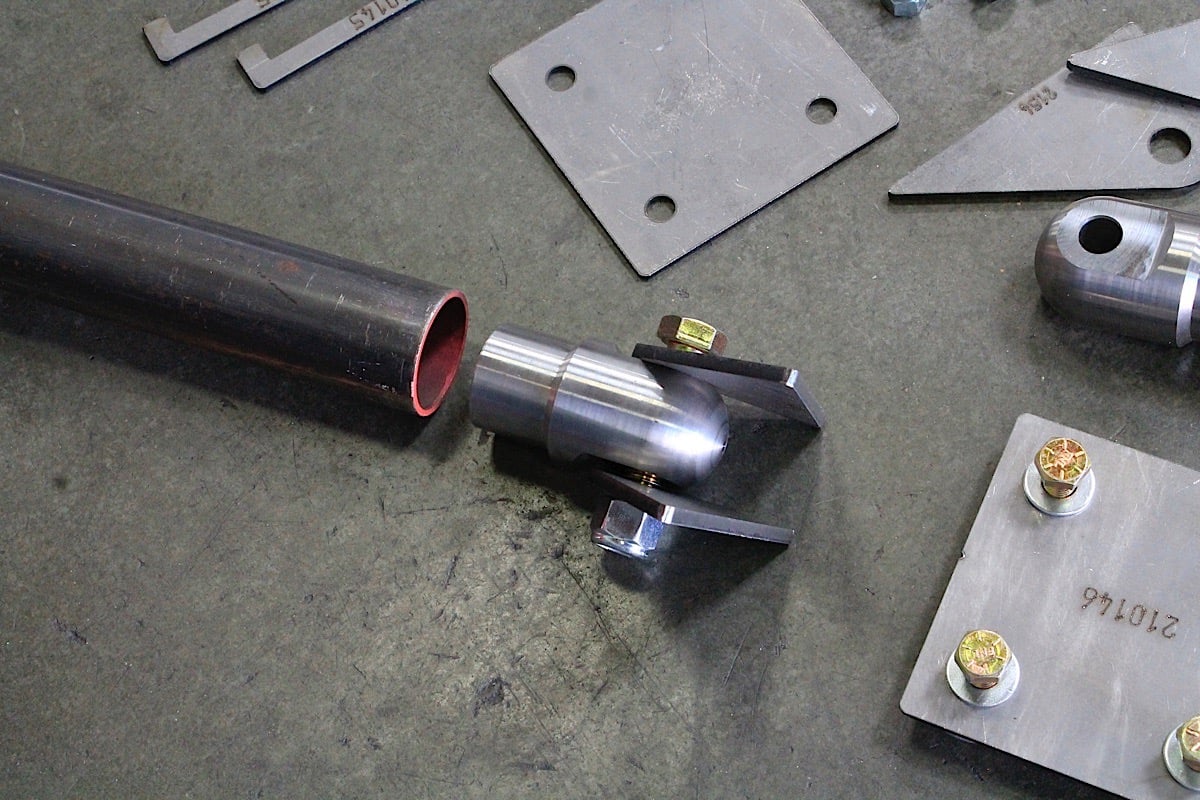 [42]
[42] [43]
[43]
Chassisworks Harness Bar Installation
Quite often when the goal is to get strapped into a seat for racing, a four-, six-, or eight-point cage is welded into the car at specific points on the floor and frame. A roll cage provides not only a location for a pair of shoulder harnesses, but also helps to strengthen the chassis for racing, and protects the driver in the case of a rollover. For our intentions, we were simply looking for a means to attach the harnesses, but didn’t want to give up the existing rear seat room – as we mentioned, we do drive the car quite often and occasionally have rear seat passengers.
 [44]
[44]We used our own bar stock, but for those who don’t have access to it, Chassisworks can provide an optional 1-5/8 by 60-inch bar to your order.
We talked to Lino Chestang at Chris Alston’s Chassisworks regarding a removable harness bar utilizing some of its existing products. “Why not install a cage?” Chestang asked. When we explained what our goals and intentions were, he said he would get back to us with a solution that would work for our application.
The reason for the harness bar is to provide a suitable mounting location for the shoulder harnesses. The harness should be mounted just below the top of the seat and as close to the driver as possible. But Chestang was quick to point out, “The harness bar is a great option for a safe attachment point in cars not equipped with a roll bar or cage, but does not have the chassis stiffening benefits of a bar or cage.”
The Harness bar kit [45]comes in as an affordable solution to installing a full cage in a car, and includes the brackets and clevis ends. Due to shipping expenses, a 60-inch tube is optional to keep the prices down, but is otherwise a complete, affordable kit. The brackets are mild steel which allows them to be formed to the car’s B-pillar for a better fit, and can be MIG welded. The clevis end is made from steel billets and machined using a fully-automated CNC machine.
 [46]
[46]The best location for the bar meant we had to do a little fabrication due to the uneven surface on the inner quarter panel.
Chestang said that MIG welding is perfectly suitable because the clevis shoulder has a good sized chamfer, making it possible to get a clean bead. We called upon one of our resident experts, Dean Jigamian, who fired up the Miller [47] Dynasty 280 to TIG weld the bar stock to the clevis ends. The clevis is designed to fit a 1-5/8-inch tube with a .134-inch wall thickness, which is sufficient for this purpose.
The harness bar is purposefully designed for non-sanctioned racing events, such as open track days, and is designed to be removable for rear seat access. It should not be considered an SFI-approved (SFI Foundation, Inc. [48]) component, as it is specifically for attaching a shoulder harness. To locate the shoulder belts, two pairs of tabs are included in the kit to keep the shoulder belts from sliding.
We fabricated a base for the bracket, then broke out the Miller TIG welder and laid down some impressive beads.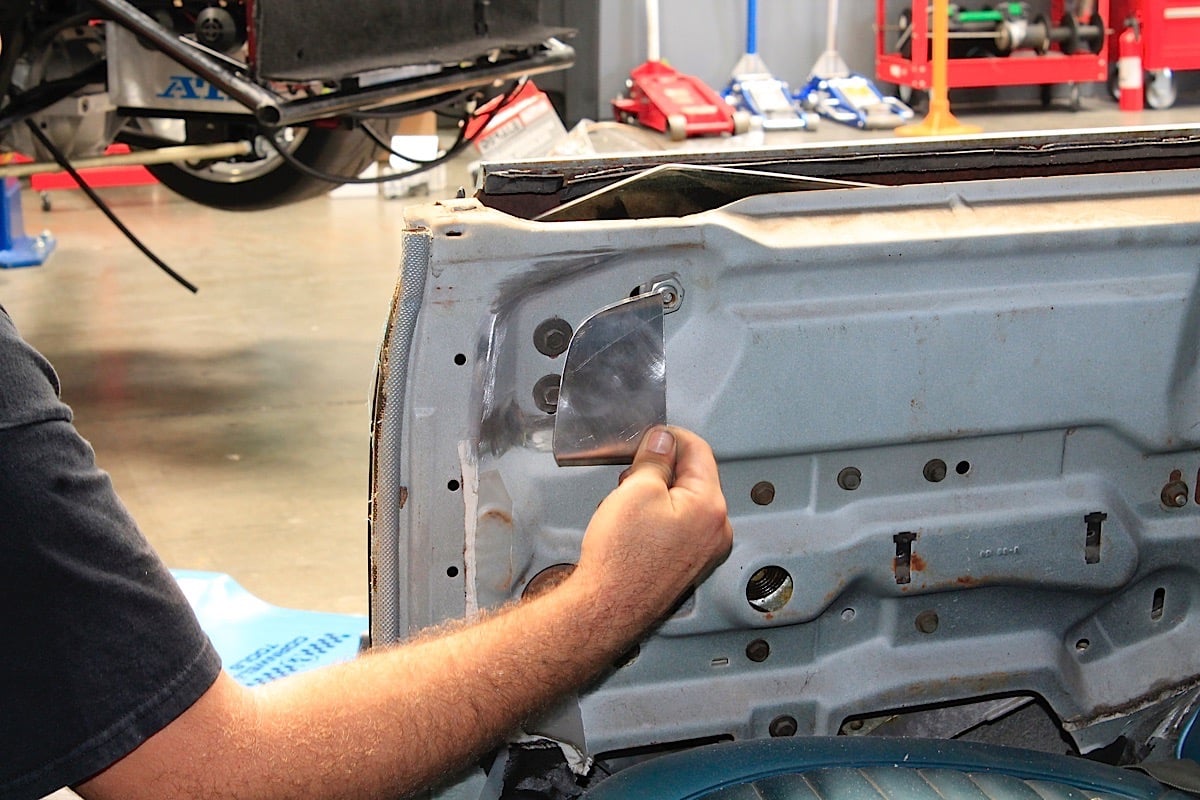 [49]
[49] [50]
[50]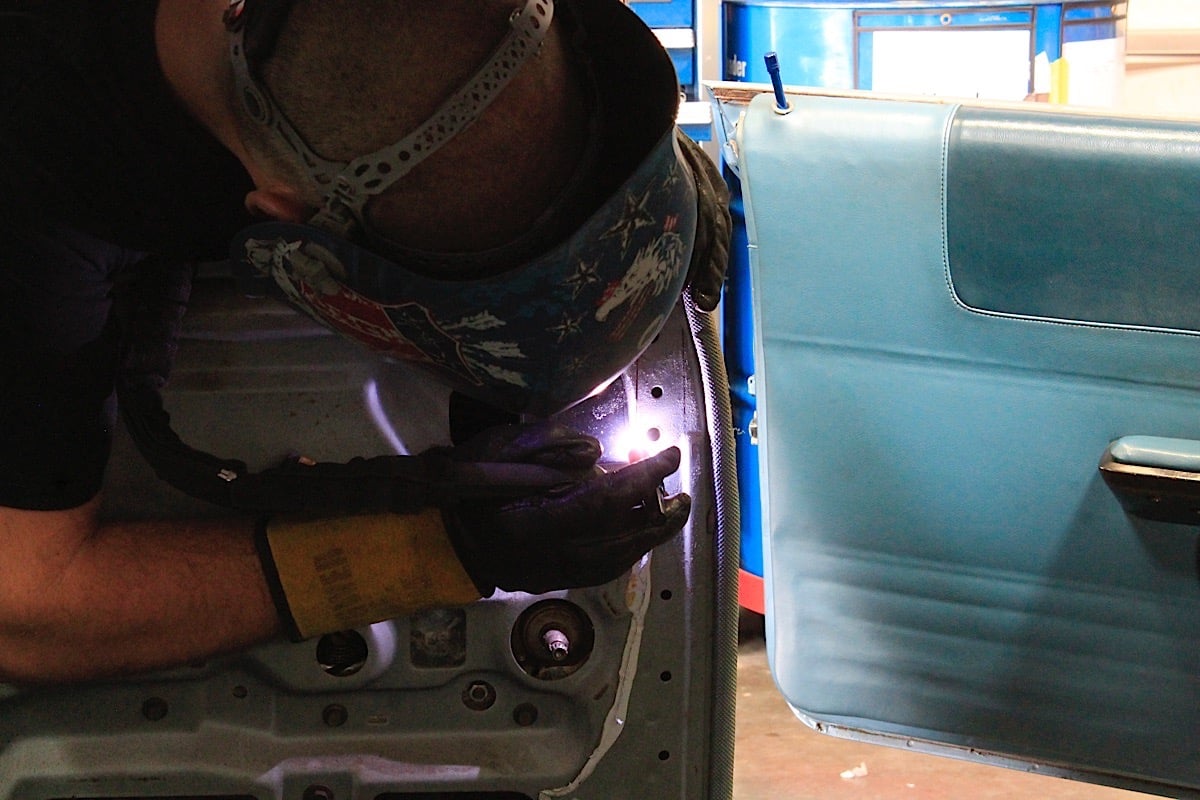 [51]
[51]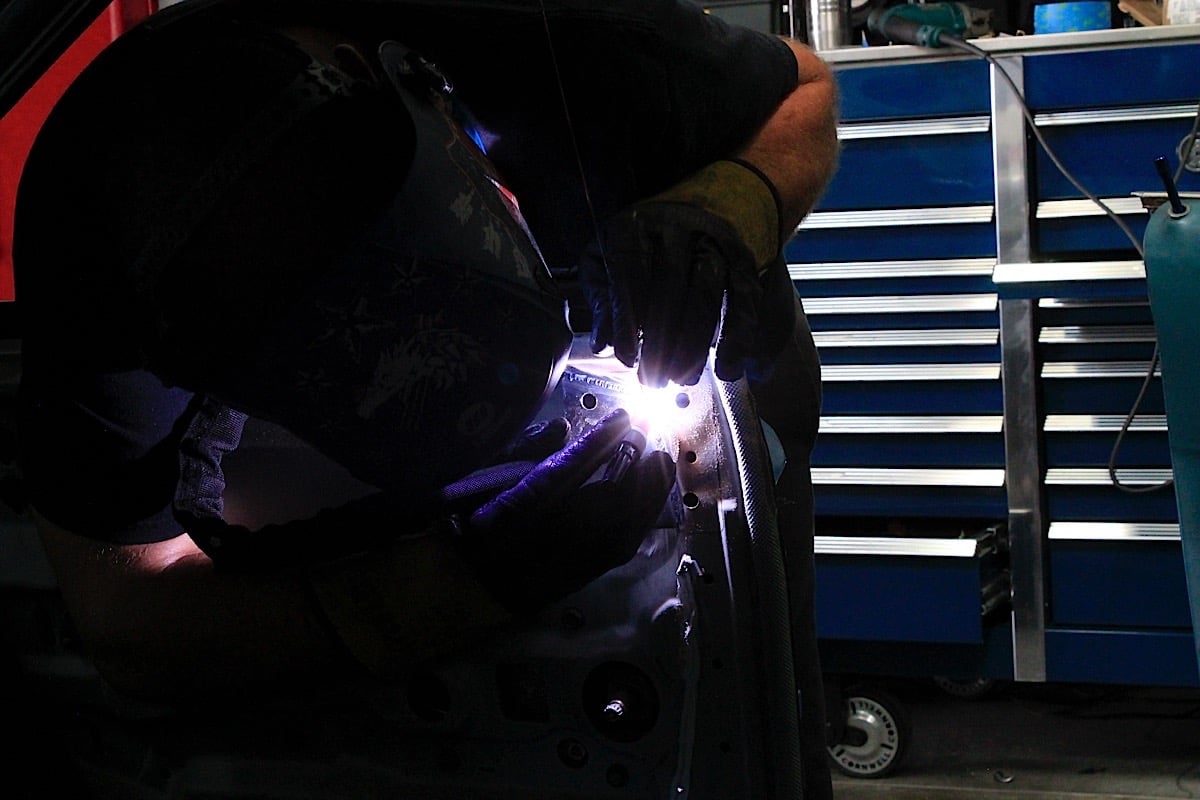 [52]
[52] [53]
[53]
To install the harness bar, a suitable mounting location should be established by removing the interior trim panels to determine where to mount the plate. The harness should be at or below level with the shoulder, and no more than about a 10 degree angle, however, a horizontal placement is preferred. Due to the limitations of the vehicle’s structure, we needed to fabricate a couple of plates that would accommodate the mounting location, and once again Jigamian broke out the TIG welder to make the pretty welds on our kit.
Other than the uneven inner quarter sheetmetal, we ran into zero issues with the harness bar kit. It helps having a competent welder to put the kit together, and though we used a TIG welder, a MIG welder will do just fine.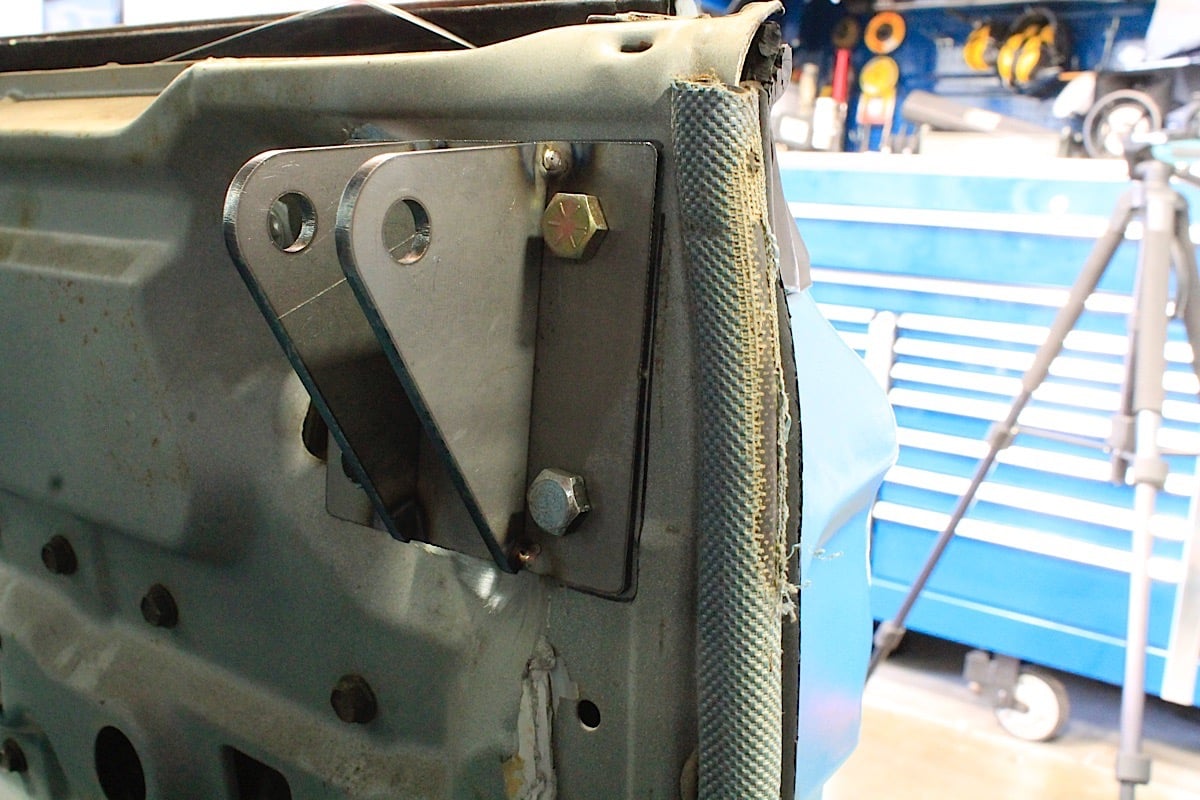 [54]
[54] [55]
[55]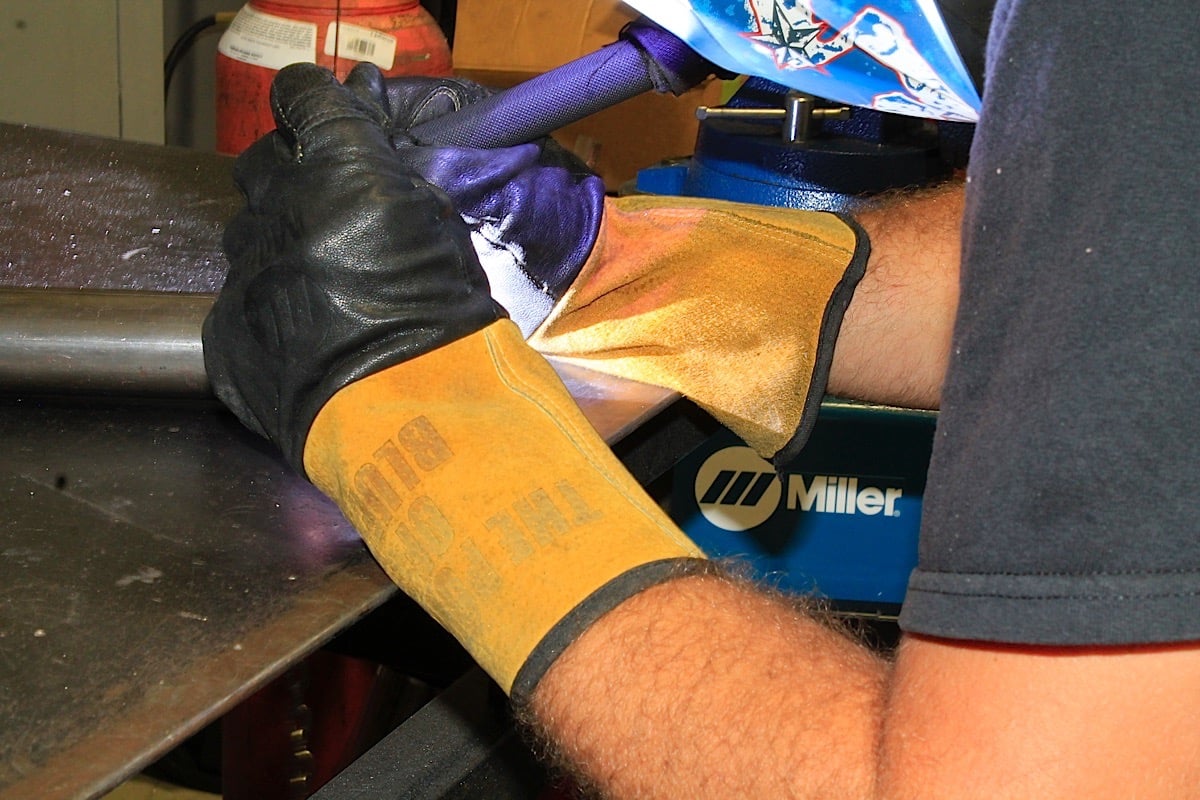 [56]
[56] [57]
[57] [58]
[58] [59]
[59] [60]
[60]
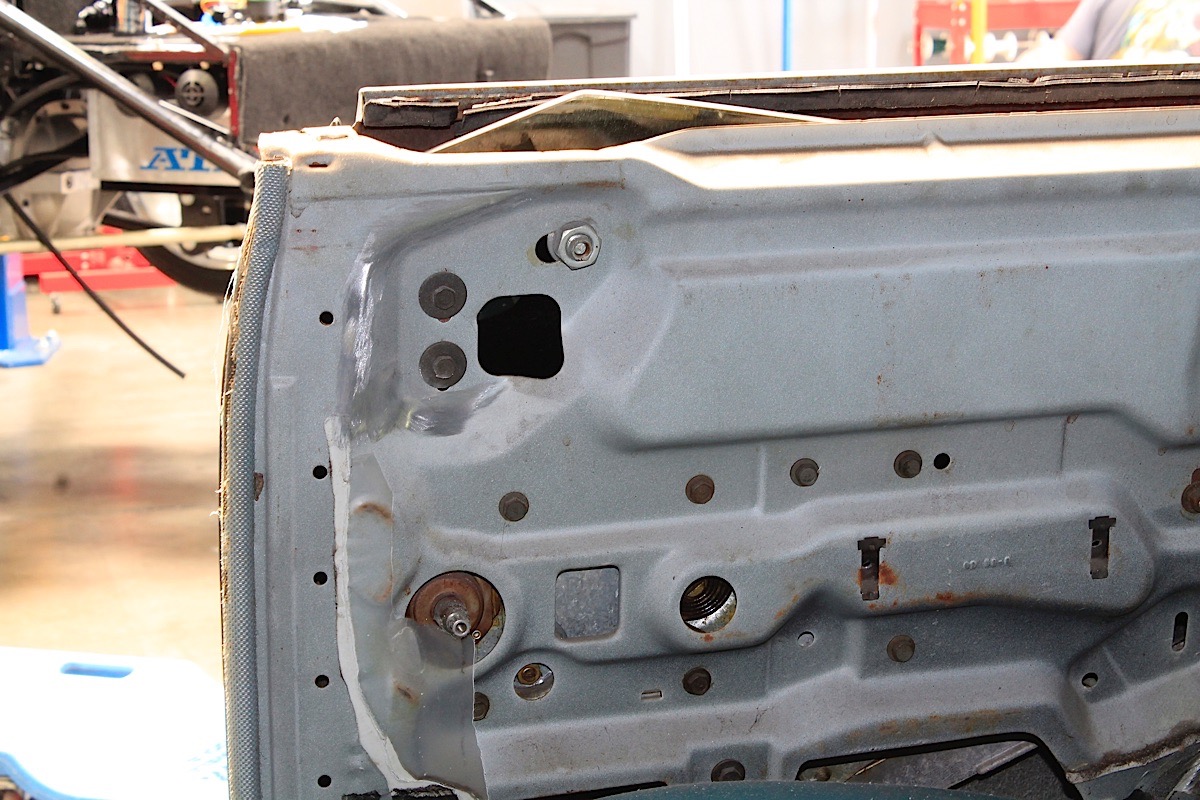
With the mounting plates located, the pair of tabs can be welded to the plates, and the bracket assembly is bolted to the inner quarter panel. The next step is to install both clevis ends and secure them to measure the bar length.
 [61]
[61]The bracket mounts behind the trim panel, but isn’t intrusive with the bar removed.
It’s also very important to make sure the car is on the ground so that the body isn’t twisting, and to make sure both bracket assemblies are level to each other so the bar will be mounted at the same height at both ends.
With a bar length determined, the bar stock is cut to the proper length and the clevises are welded to the bar. The next step was to install the bar into the brackets to locate the harness tabs, which keep the belt from sliding during cornering.
Once the entire bar was completed, we grabbed a couple rattle cans and painted up the brackets and the bar. Since the bar can be removed, we opted to match the brackets to the interior trim, and got a little creative with the bar – it turned out great. Check out the welds that were laid down with our Miller Dynasty 280 TIG welder [47].
Impact Racing Harnesses
The final step of this upgrade was the five-point harnesses that we installed. We reached out to Impact Racing to get a harness that would be suitable for our track events and help keep us firmly planted in the seat.
 [62]
[62]
We spoke with Kelli Willmore at Impact Racing to get the lowdown on a set of harnesses for our bucket seats, and we found that there were quite a few choices we had to make. There were five-point and six-point harnesses available, in both latch/lever or camlock buckles. We also had the option for a full three-inch harness, or a three-inch harness that narrows down to two inches at the shoulders, making them a little more comfortable.
When it comes to safety, Willmore said, “We always want people to have all the safety all the time on the track.” So choosing a harness typically starts with the safest harness Impact Racing sells. While Willmore states that the six-point harness would be more comfortable (two-each lap, shoulder, and front belts), we opted for a five-point harness for convenience with our mounting situation.
 [63]
[63]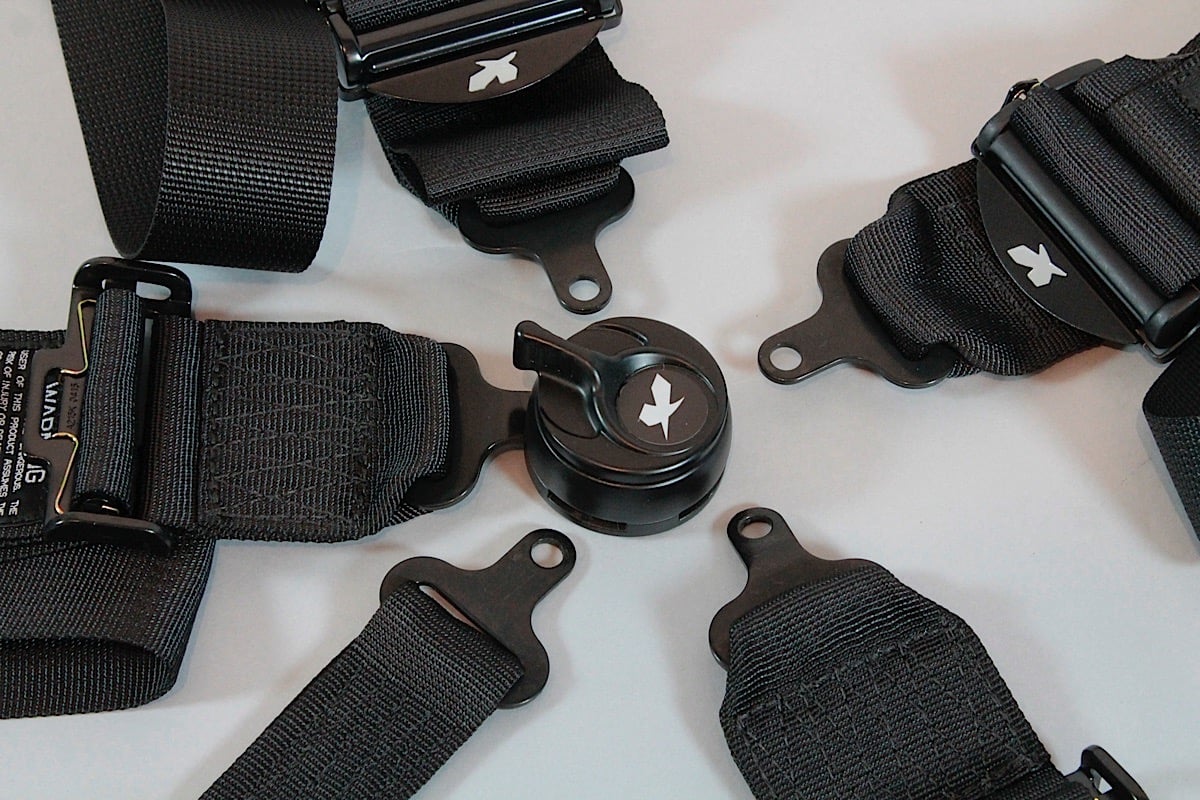 [64]
[64]
The camlock system uses a knob that, when twisted, will release all other belts from the main lap belt. To connect, simply insert the tab and it will snap into the locked position.
All SFI approved harnesses will have a tag with the date of manufacture and the SFI specification. Willmore suggests that the shoulder harness should be at zero- to no more than 10 degrees from the top of the shoulders to limit potential spinal compression. This is why shoulder harnesses should never be mounted to the floor behind the seat. [65]
[65] [66]
[66]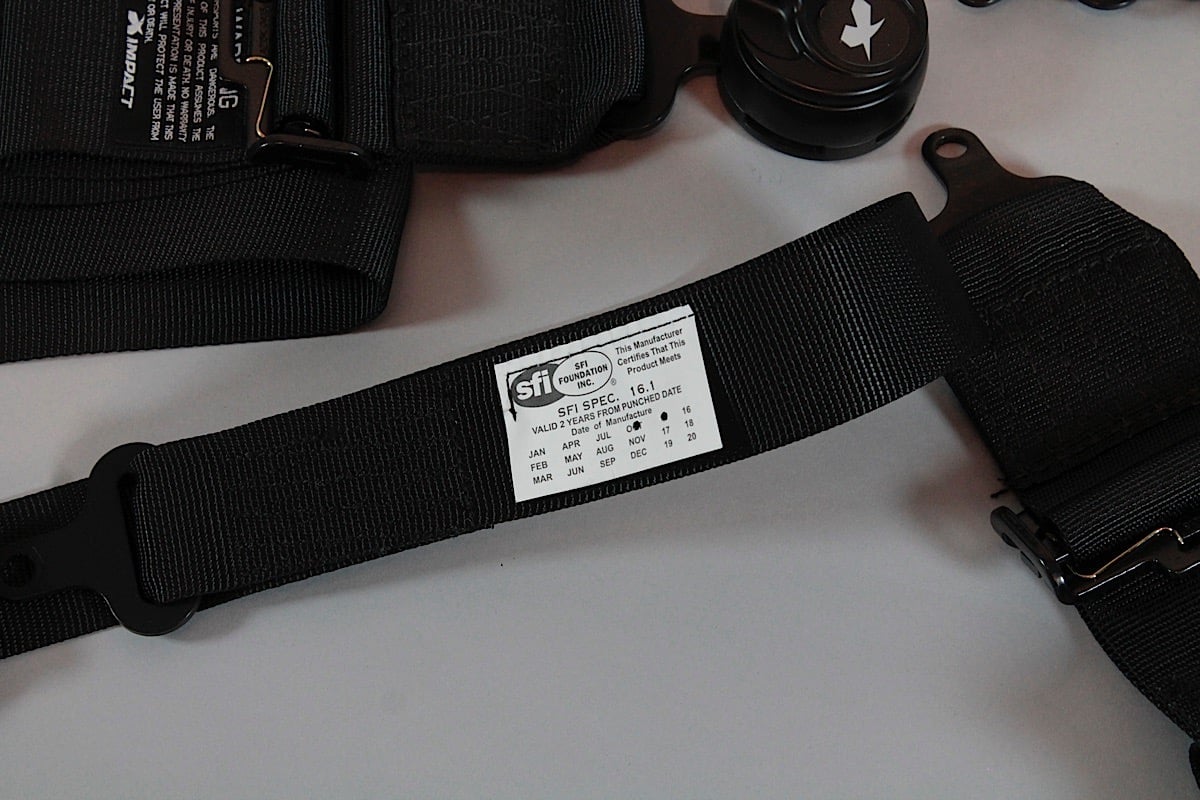 [67]
[67] [68]
[68]
A six-point or seven-point harness will provide much more protection than a five-point harness during compression. Additionally, a two-inch lap belt, like that used in the 16.5 PRO series restraints, will be more comfortable across the pelvis, and allows the driver to tighten the lap belt a little further. Because the lap belts are tighter, the impact loads to the pelvis are faster and that helps to reduce loads to the chest.
 [69]From a training document that Willmore shared with us:
“Chest (and neck) loads from an impact do not begin until the pelvis has stopped moving and the more movement in the pelvis, the greater the force is that travels up to the chest and neck. By containing the pelvis better, and also allowing the pelvis to take the load faster and more evenly, the load to the chest is reduced. The more the pelvis and lower body is allowed to move, the greater the load to the chest will be.”
As you can see, choosing a harness for your application will depend a lot on the type and amount of protection you will need. It doesn’t mean that a five-point harness won’t be sufficient, just that a six- or seven-point will protect you a bit more.
Harness specifications are reviewed every two years by SFI Foundation committee members and participating manufacturers. Willmore stated that restraints should be replaced every two years from the date of manufacture in keeping with SFI standards, as well as many racing sanctions.
Rather than investing in new belts every two years, Impact allows customers to send in their belts and will reweb the belts using the customer’s original hardware, and will retag the belts with new SFI tags. -Kelli Willmore, Impact Racing

Find out more about harness safety [70] on the Impact Racing website [71]. If you’re looking to upgrade to a set of bucket seats – for cruising or racing – be sure to check out the Procar website [6] and let its staff know what you’re requirements are so they can help get you seated properly. And don’t forget: that shoulder harness should never be attached to the floor behind the seat, so reach out to Chris Alston’s Chassisworks [8] for roll cages, or its new harness bar, to attach your multi-point harnesses properly.
So, now that we’ve completely changed our seating arrangements, we know we’re strapped in far better than before, but did it make any difference on our lap times? We went out to Willow Springs again, and the very first lap we were able to reduce our lap times by nearly a second, showing that when you are buckled in properly you can focus more on driving, and less on where or how to prop yourself up for the upcoming turns. Check out the video above to see the difference between buckets and harnesses (left), and bench seat and lap belt (right).