 [1]Back in the 1960s and early 1970s, when a gallon of gasoline was about a buck, car owners didn’t think about things like overdrive or freeway gears. We didn’t think twice about dropping $20 for gas to go cruising on the weekend.
 [2]
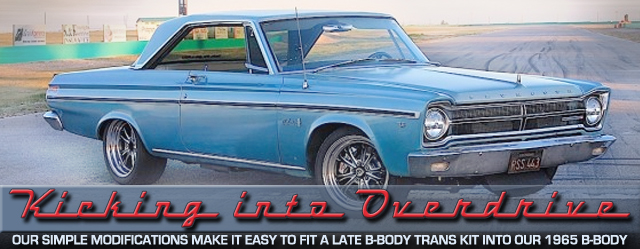
[2]Flying down the track at Willow Springs is only a smaller part of how we use this car.
But today’s gas prices still being about three bucks a gallon in many places can really impact our budgets, and cruising all weekend in a classic musclecar stings a little due to the cost involved. We enjoy driving our classic musclecars more when we modernize the engine, suspension, and brakes. But filling the tank can run upwards of $65 or more, and that leaves many cars sitting in a garage, or parked at a local car show for a few hours at a time.
There’s hope to get these classic musclecars back on the road and cruising again, like we did a few decades ago. Silver Sport Transmissions [3] (SST) can take the sting out of your budget and put your car into overdrive, without sacrificing a penchant for making power. Whether you decide on a manual or automatic upgrade, overdrive can become your next project upgrade.
We’ll show you everything you need to do to install the 4L60E into the early B-body, right down to where we had to use a little five-pound persuasion to the floor pan. A simple modification to the transmission mount and crossmember was all we needed to do to mount the A41.
 [4]
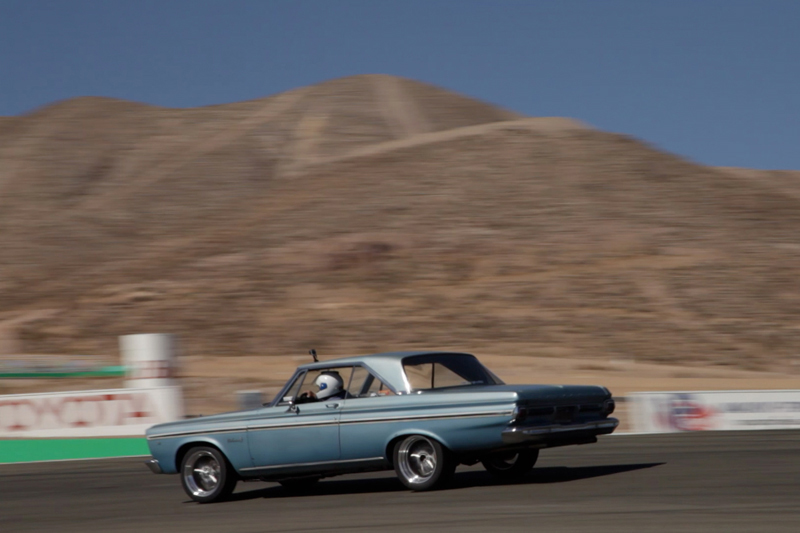
[4]Racing is only a part of this car’s repertoire, it also sees about 5,000 miles on the road going to events and shows. Fuel mileage is a little bit of a concern here.
The PerfectFit Powertrain Solution
The PerfectFit Kit [5] from SST is a complete transmission upgrade package that provides everything you need to add an overdrive transmission to a classic ride. Whether you’re into Ford, GM, or Mopar it is designed to install in popular classic musclecars using a modern manual or automatic transmission.
 [6]
[6]
SST PerfectFit Kit
- Transmission
- Correct bellhousing
- Manual:
- Clutch and flywheel
- Pilot and throwout bearings
- Automatic:
- Torque converter
- Flexplate
- Dipstick and tube
- Trans crossmember and mount
- Driveshaft and slip yoke
- Controller and harness
- Trans cooler and lines
- Hardware, fluid, full instructions
For manual applications: The popular Tremec TKO and T-56 Magnum transmissions are available for many classic cars. Whether you’re upgrading to overdrive or converting from a factory automatic, the PerfectFit Kit is delivered with everything needed, including the clutch. Even the shifter position is modified [7] by SST to fit your console.
For automatic applications: The versatile GM 4L60E four-speed overdrive kit provides everything necessary, including the torque converter and flexplate. The proper bellhousing is also included to mate to your Ford, GM, or Mopar engine. If you’re using a factory shifter, instructions are included about how to adapt your shifter to the transmission.
SST has done all the hard work for you so that your time is spent on the installation, and not on the Internet or at the salvage yards trying to find parts.
 [8]
[8] [9]
[9]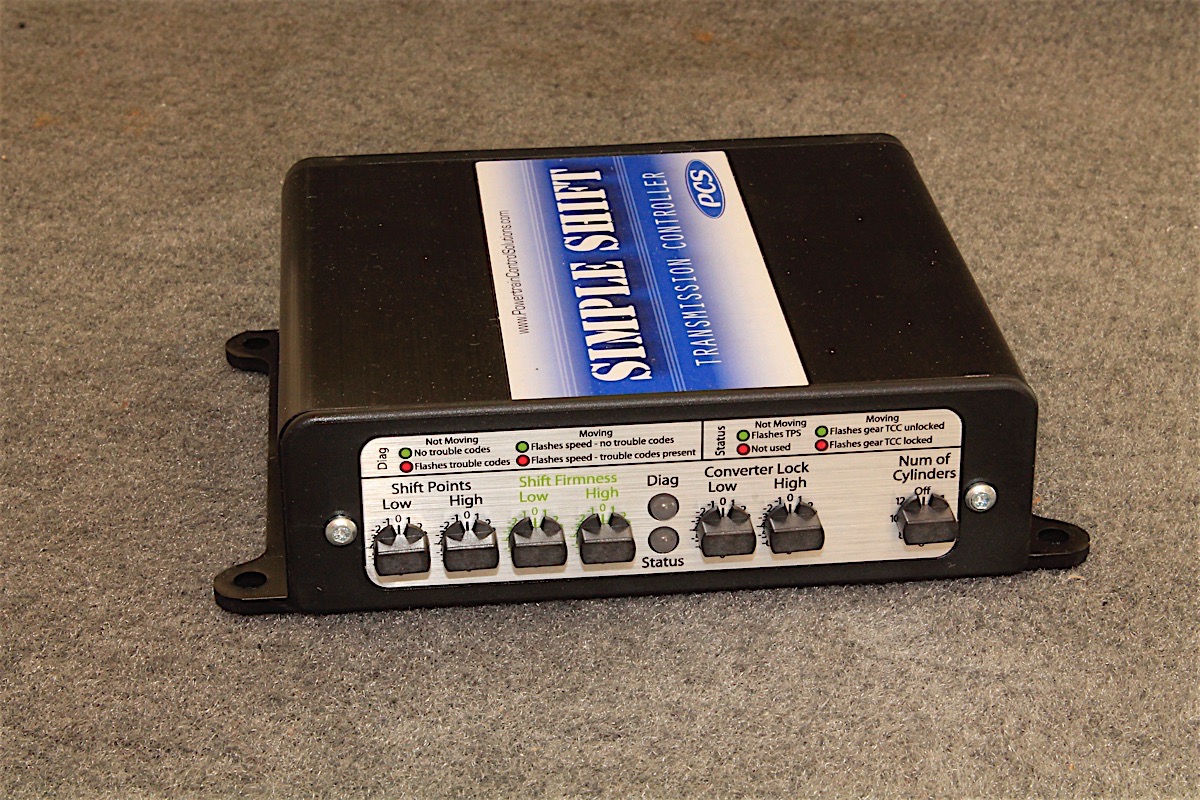 [10]
[10]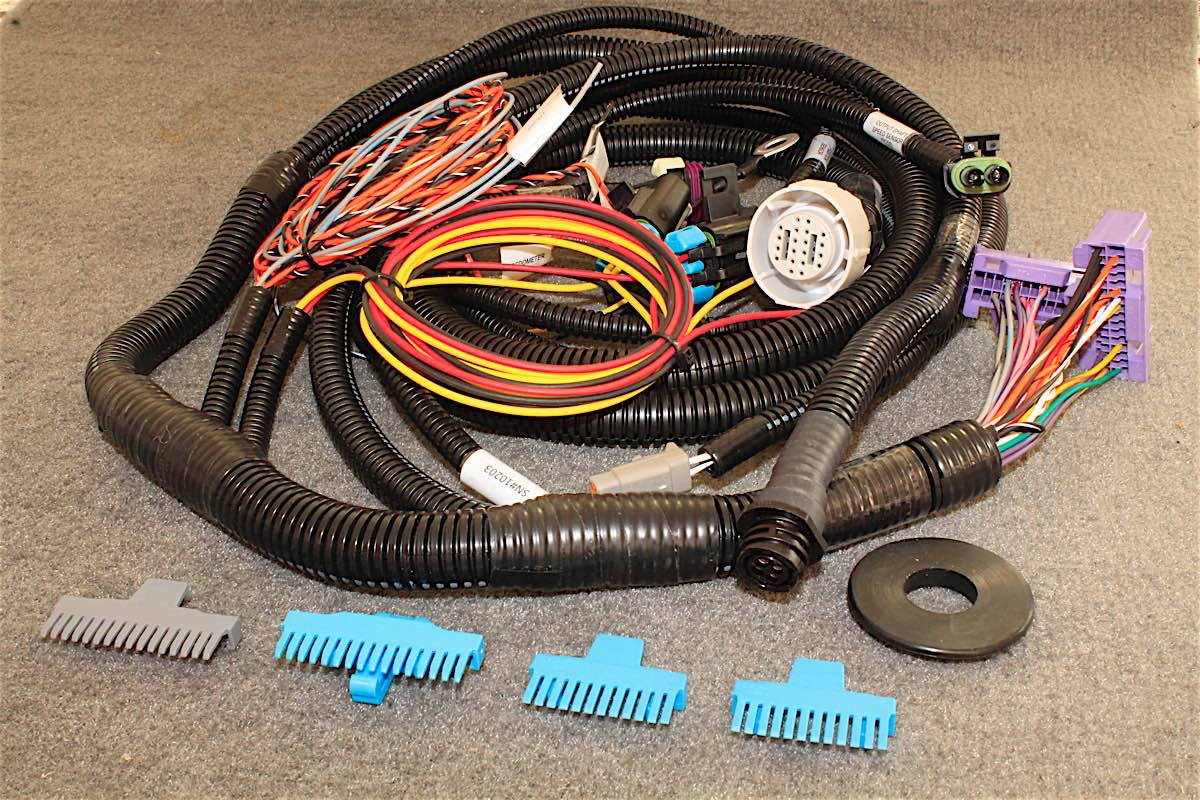 [11]
[11]
Two different transmission controllers are available from Powertrain Control Solutions. The complete harness, and all other necessary components to complete this installation are in the PerfectFit Kit. Silver Sport Transmissions fabricates a new crossmember to fit each application.
All PerfectFit Kits also include a custom driveshaft, which requires some measurements to be taken after the transmission is installed in order to provide the correct driveshaft length. Since it’s included in the kit, providing the measurements to SST will ensure the proper driveshaft is sent out.
Hope For Old Mopars
Classic Mopar owners are saddled with one solution for a factory overdrive transmission: the A518, which is a small-block-only bolt pattern. It can be built to handle some power, but it doesn’t solve the dilemma for big-block owners. The PerfectFit Kit from SST is the ultimate solution for just about any Mopar V8 engine.
 [12]
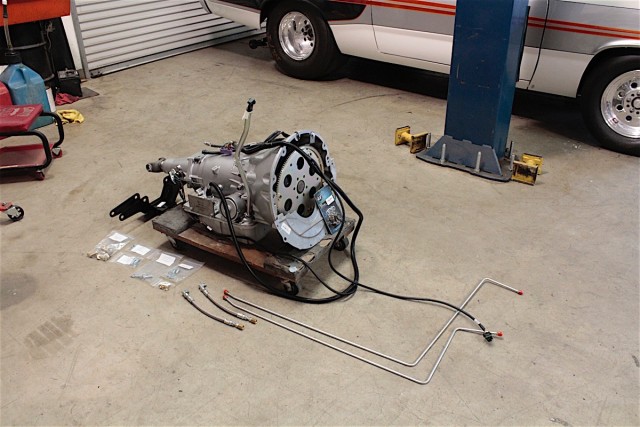
[12]The 4L60E is a popular transmission for a swap to overdrive, and can be externally controlled by the PCS transmission controller. One plug for the main harness, and another for the speed sensor are all that is needed on the transmission end.
SST has PerfectFit Kits for 1964-’76 A-body, 1966-’74 B-body, and 1970-’74 E-body Mopars, as well as some street rod and truck applications. We decided it was time to replace the TorqueFlite 727 automatic transmission in our 1965 Plymouth Belvedere [13] so we can get out on the open road a little more often.
We liked the option of installing the A41 four-speed automatic from SST, and knowing what we know about the ’62-’65 B-body Mopars and the similarities to the ’66-’70 B-body cars, the 1966-’70 PerfectFit Kit was our best option.
 [14]
[14]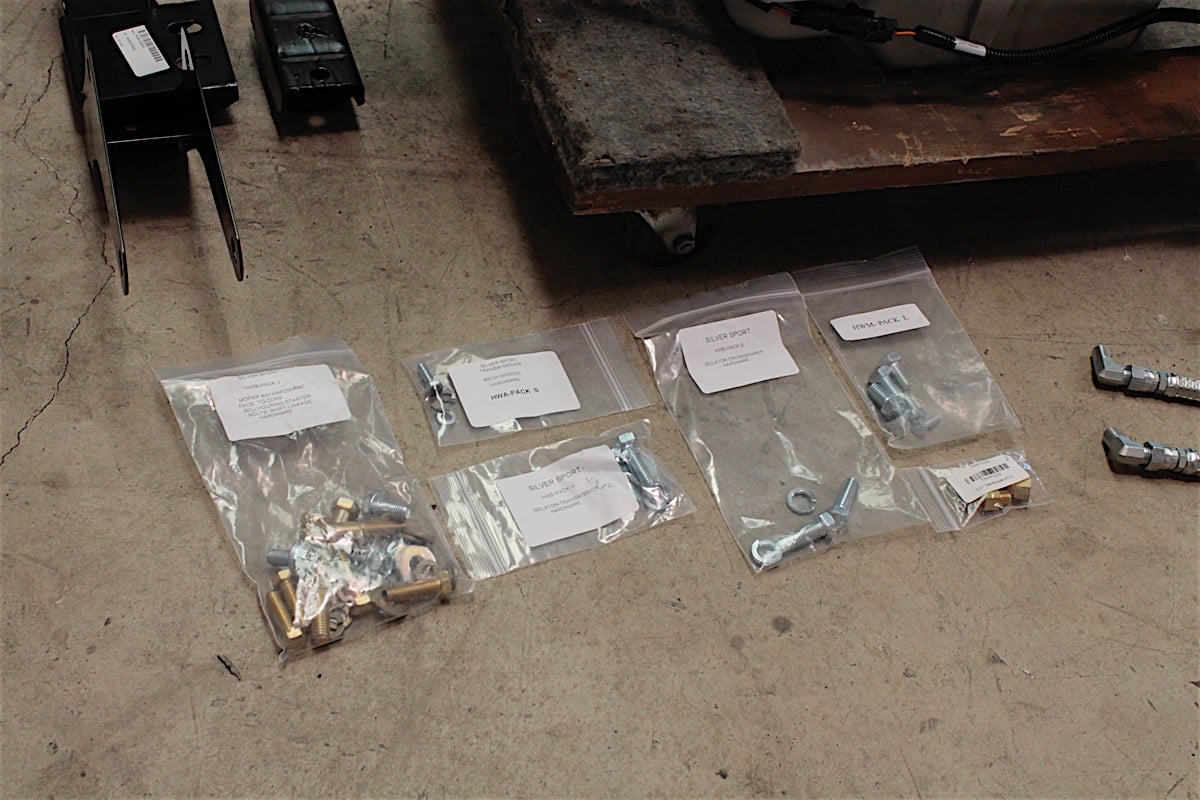 [15]
[15]
 [16]
[16]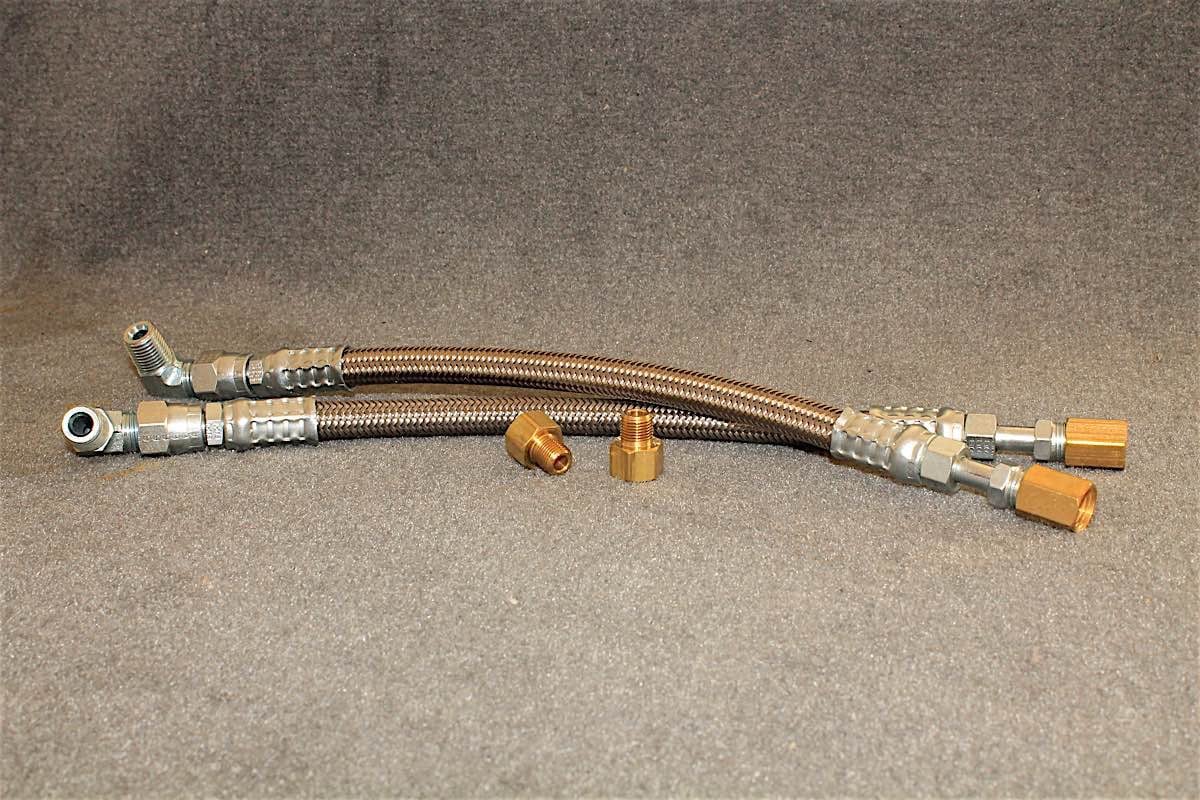 [17]
[17] [18]
[18]
All of the hardware you'll need for this conversion is included, meaning you won't have to scrounge around in old coffee cans or bolt bins for anything in this kit. Both hard and flexible transmission cooler lines are included, as well as the transmission dipstick and tube.
 [19]
[19]Aaron Bourdage of Viau Motorsports knows early Mopars, and has seen the underside of them on a regular basis. Having completed transmission swaps before, the Silver Sport PerfectFit Kits saves him time and money.
Kicking Things Into Overdrive
We paid a visit to our friends at Viau Motorsports [20], a preferred installer for SST, and they went to town on Project Track Attack. With Viau Motorsports’ knowledge of classic Mopar cars and parts, we knew we were in good hands. Shop technician Aaron Bourdage was on hand to tackle this installation.
The PerfectFit kit arrived in a crate with everything we were going to need – except the driveshaft, as mentioned. The transmission is rebuilt to performance specs, and is available in three stages: stage 1 — 450 torque; stage 2 — 550 torque; stage 3 — 650 torque.
 [21]
[21]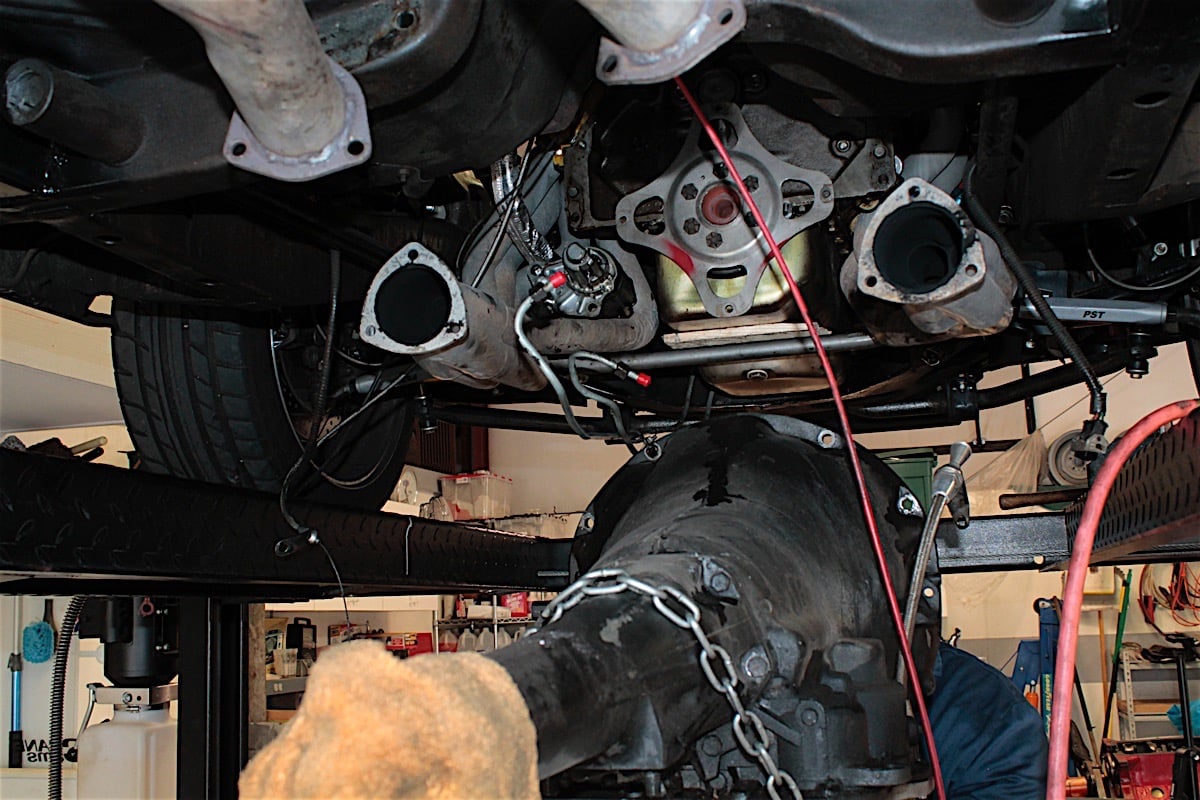 [22]
[22] [23]
[23]
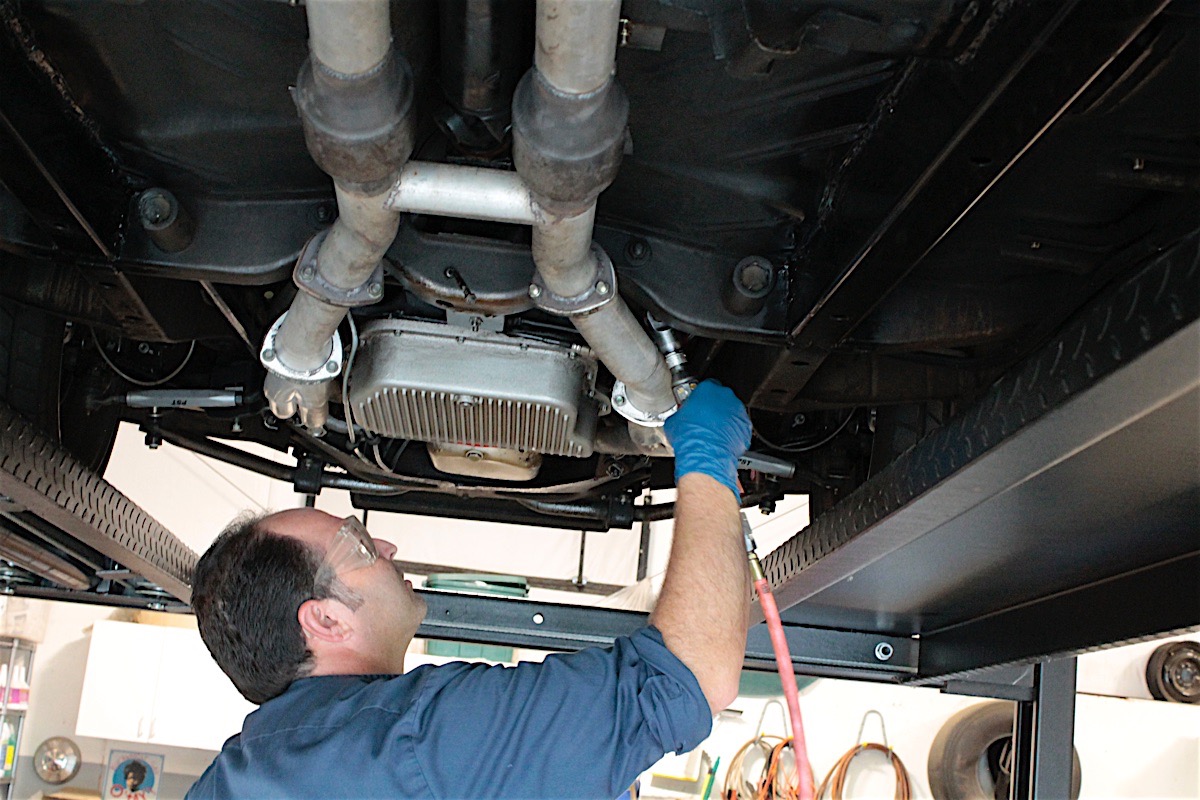
First things first: Disconnect the battery, and drain the transmission fluid. Although our TF727 served us well, it did nothing for us in the MPG department, so out it comes.
When we opened the box, we laid out all of the parts and took inventory. Our kit included the correct flex plate and torque converter, and even included the eight quarts of Mobil 1 synthetic transmission fluid, recommended by SST. All mounting hardware and a new crossmember was included, fabricated by SST to fit the 1966 and up Mopars. This is a big kit with a lot of packages of hardware, harnesses, and various components, so it’s best to check everything off the package list before you start just to be safe.
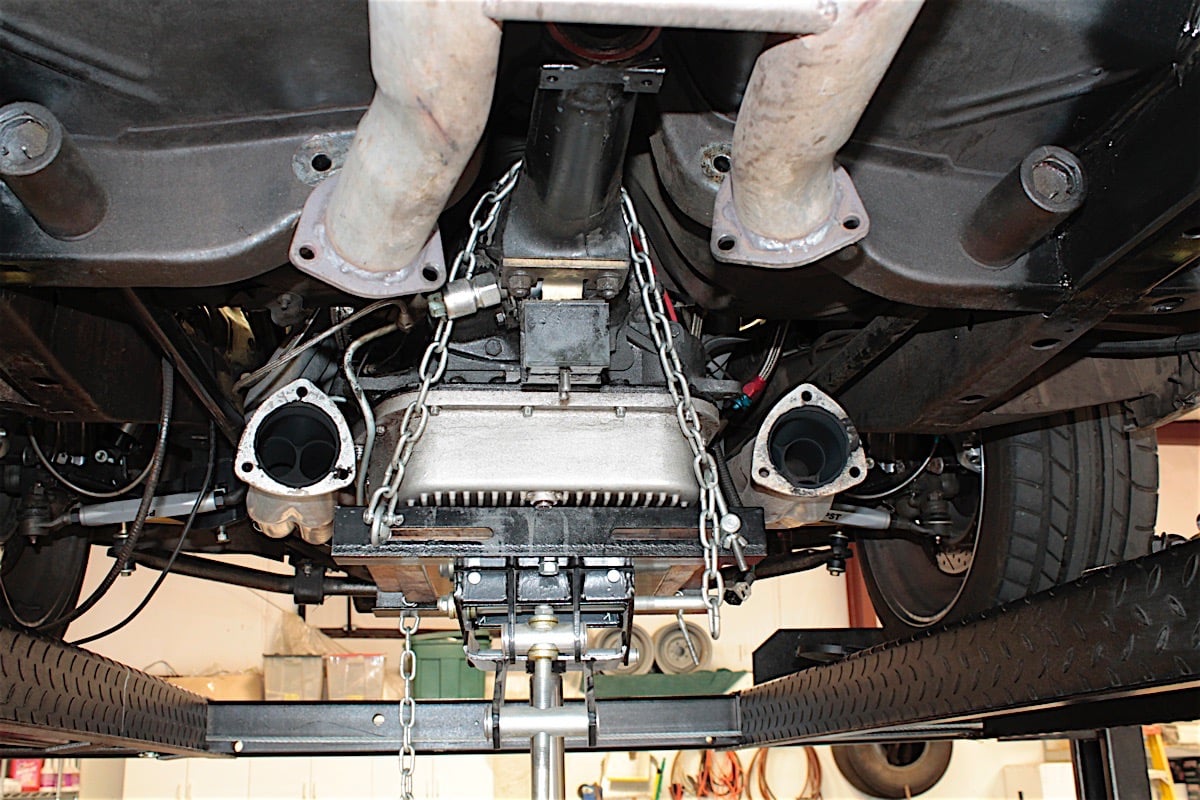
We removed the driveshaft and part of the exhaust for access to the transmission. Our transmission kit included the new slip yoke for the 4L60E, but since the new transmission is a few inches shorter than the TF727, the old driveshaft had to be replaced entirely. The new slip yoke utilizes the beefier 1350 Spicer U-joints for strength.
 [24]
[24]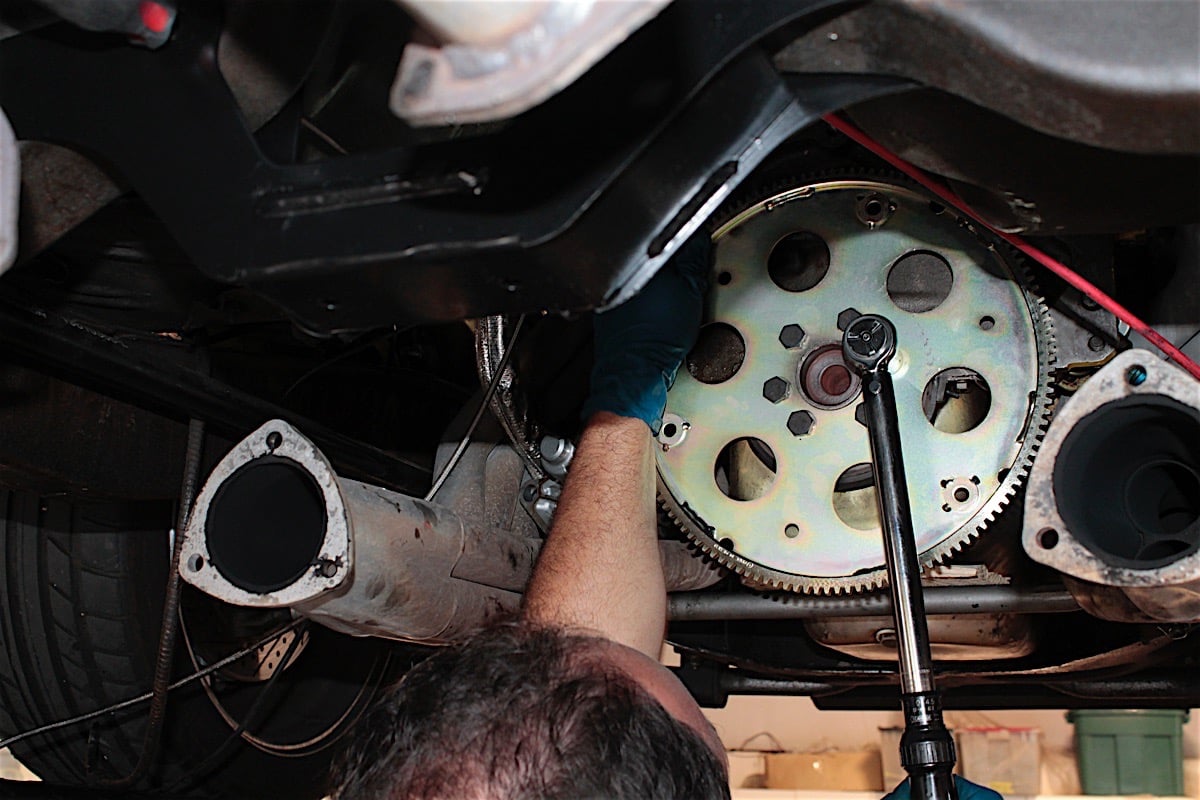 [25]
[25]
 [26]
[26]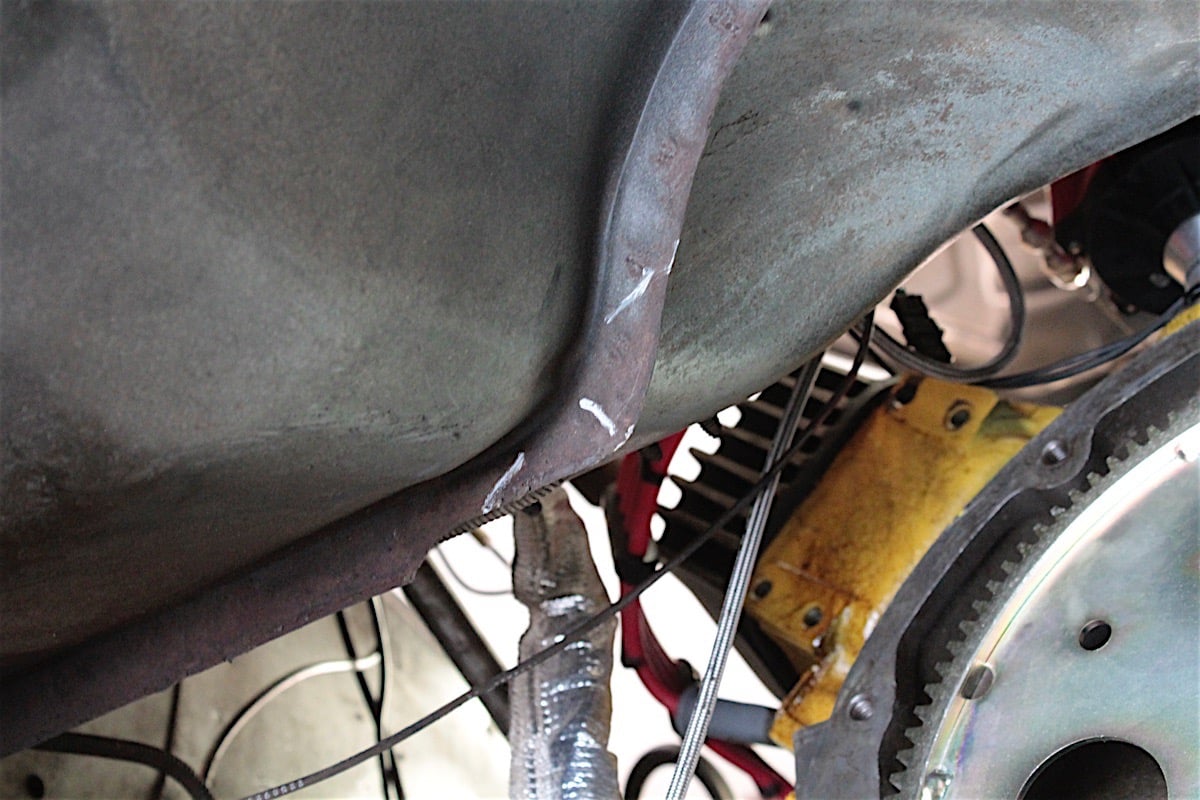 [27]
[27]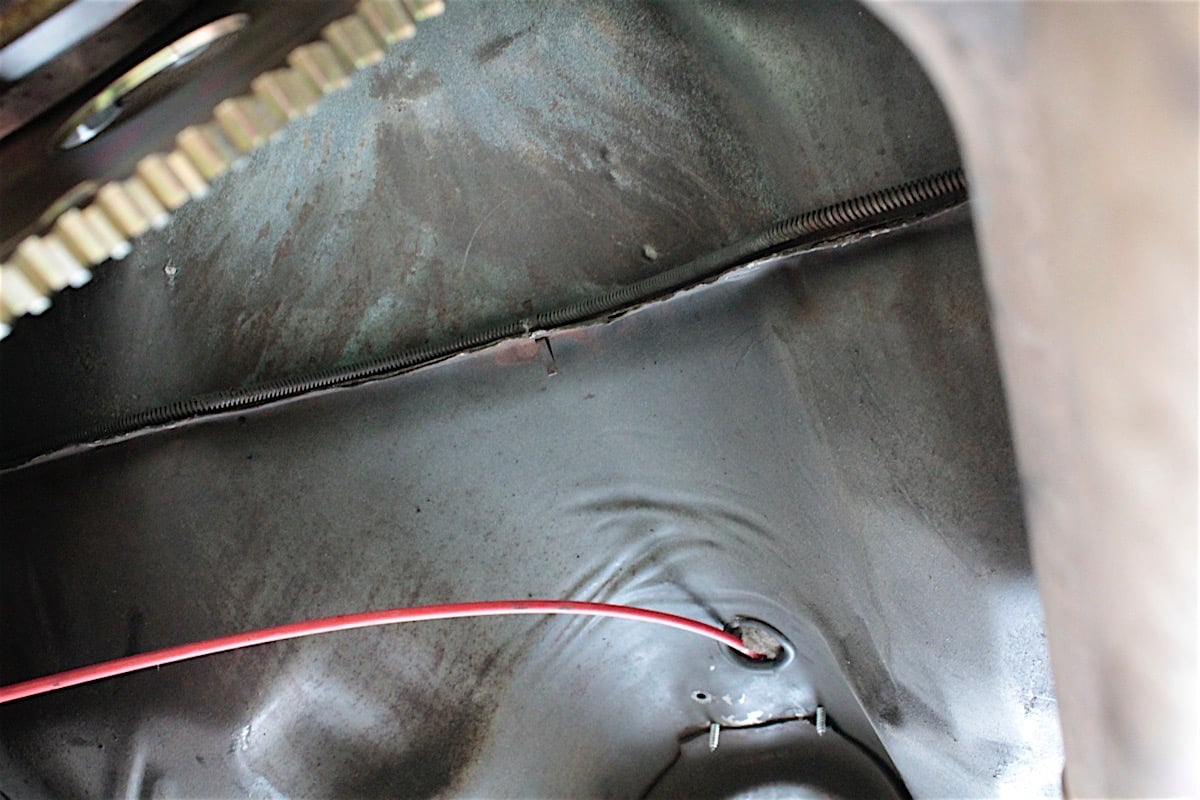 [28]
[28]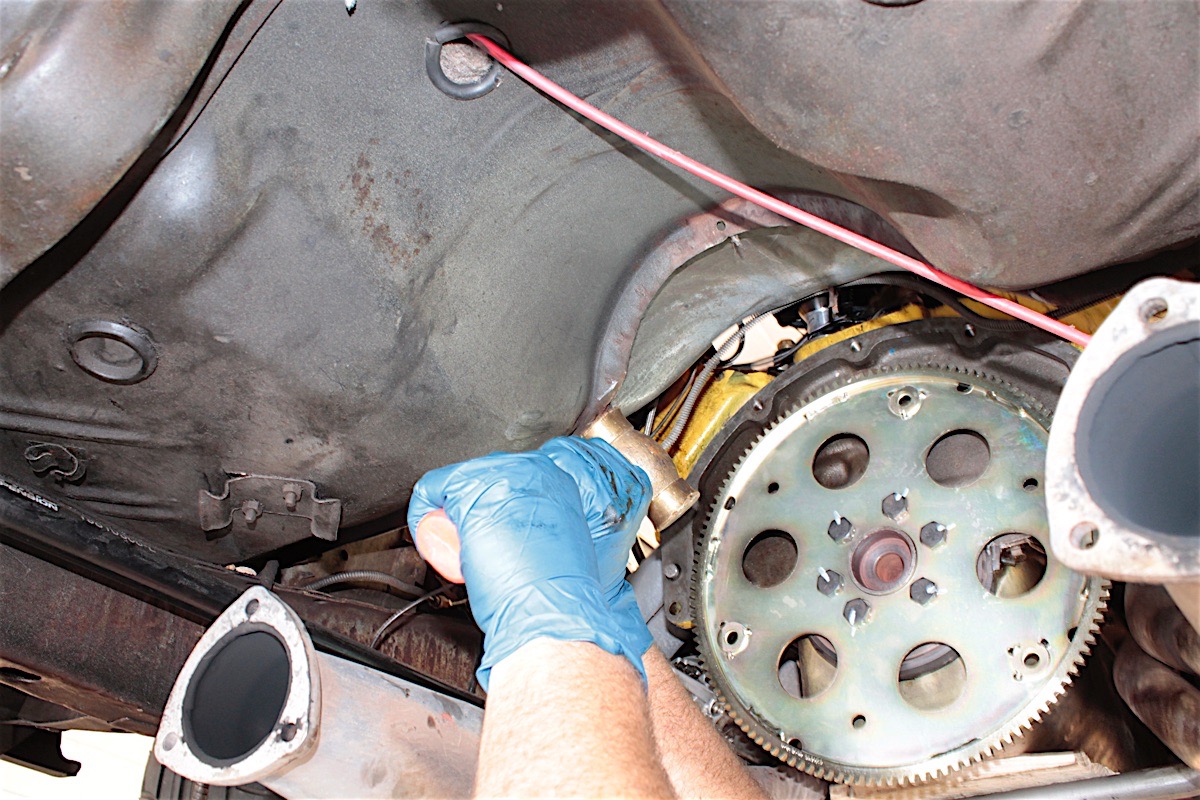 [29]
[29]
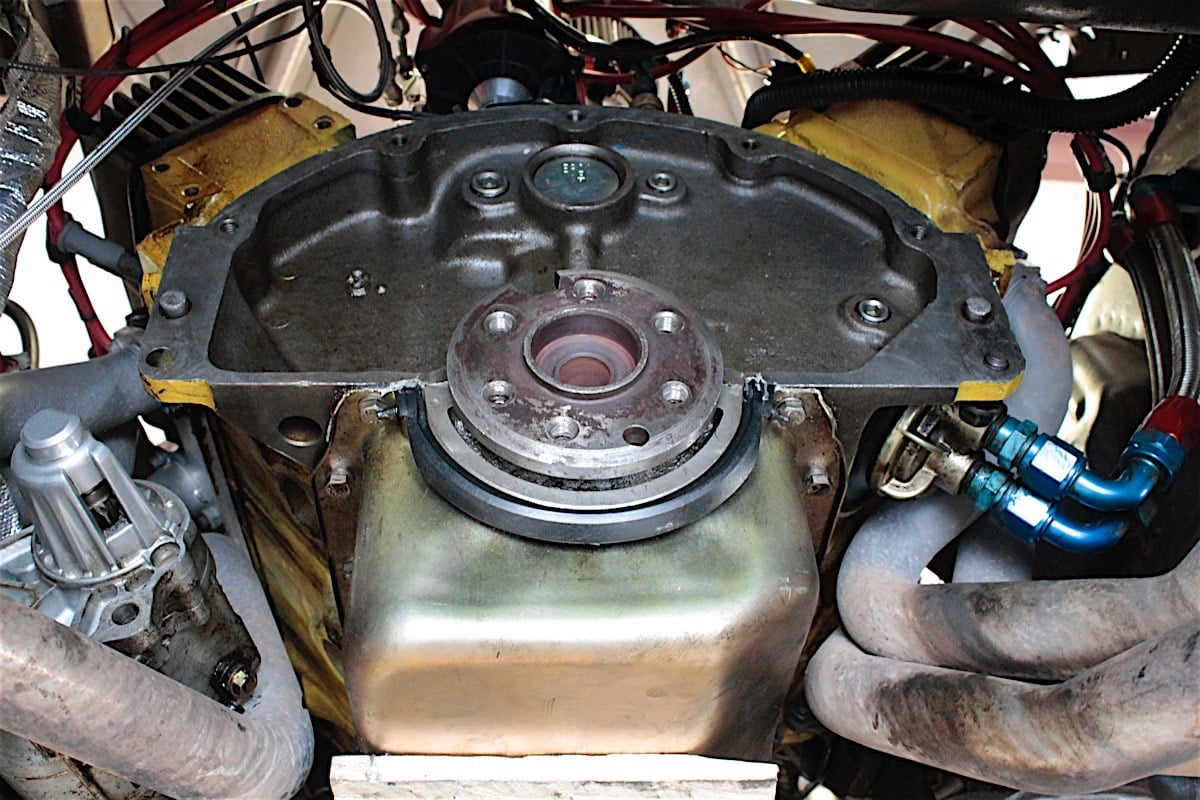
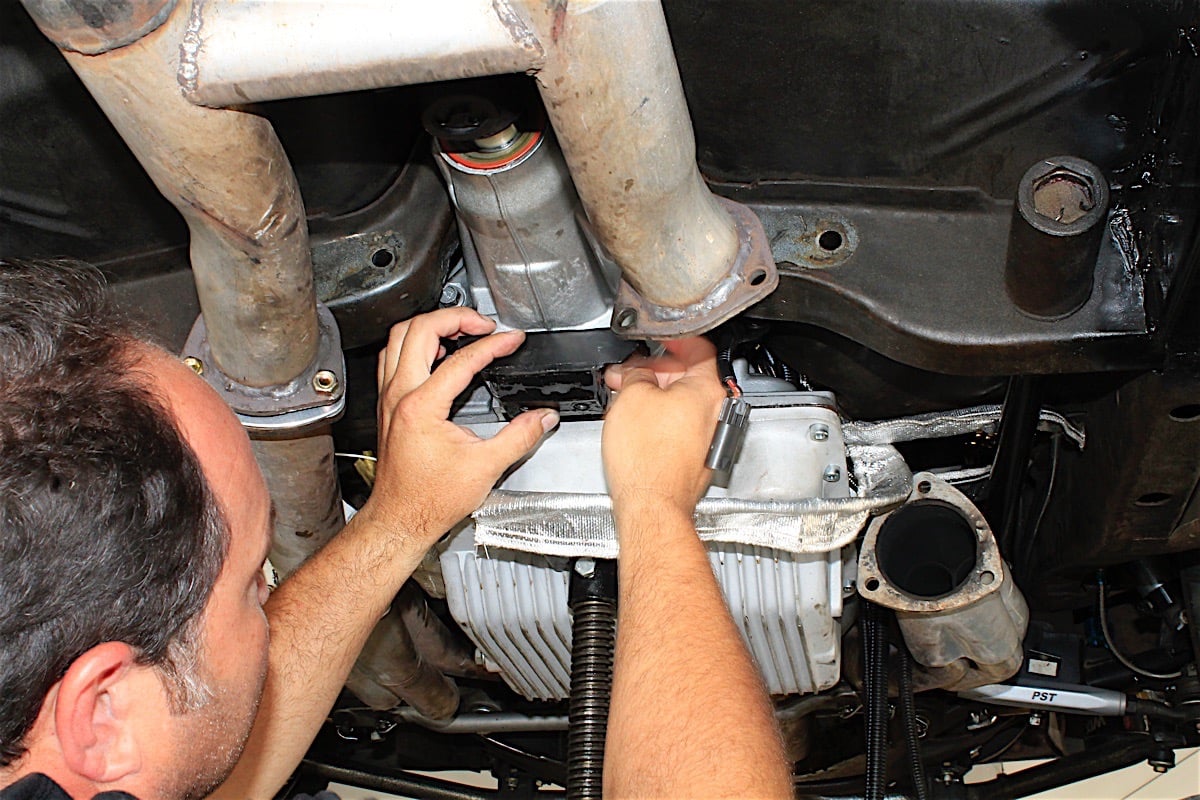
Top: We cleaned the crankshaft surface and bolted the ring gear in place using thread locker. Bottom: Having a lift and a transmission jack are crucial here, because you'll spend a bit of time raising the transmission into place and pulling it back down. Silver Sport shows you where you'll need to make some adjustments, but you will need to make them in small increments and test fit the transmission again and again.
The 4L60E transmission is a bit bulkier than the TF727, so that meant the transmission tunnel needed some persuasion with a small five-pound sledge. This is not something that could be guessed at due to the differences in the early and late floorpans, so we took our time raising the transmission into place and marking areas of concern.
 [30]
[30]The speedometer sending unit was another area that needed some tunnel modification, and a few whacks with a ball peen hammer did the trick.
We didn’t bother with the transmission crossmember until we were able to bolt the transmission to the engine without any interference with the floor. We folded back the body pinch welds towards the front of the tunnel, and took note of everywhere the transmission would come in contact with the floor pan and made smaller adjustments to the shape of the floor as needed. You can expect to raise and lower the transmission a few times before everything clears the old sheetmetal.
There was one location that required a little more adjustment, and that was where the speedometer sending unit mounted to the right side of the transmission. We simply pounded back the tunnel’s upper crossmember in that area until it completely cleared the sender. We also used a button-head Allen bolt to aid with clearance.
 [31]
[31]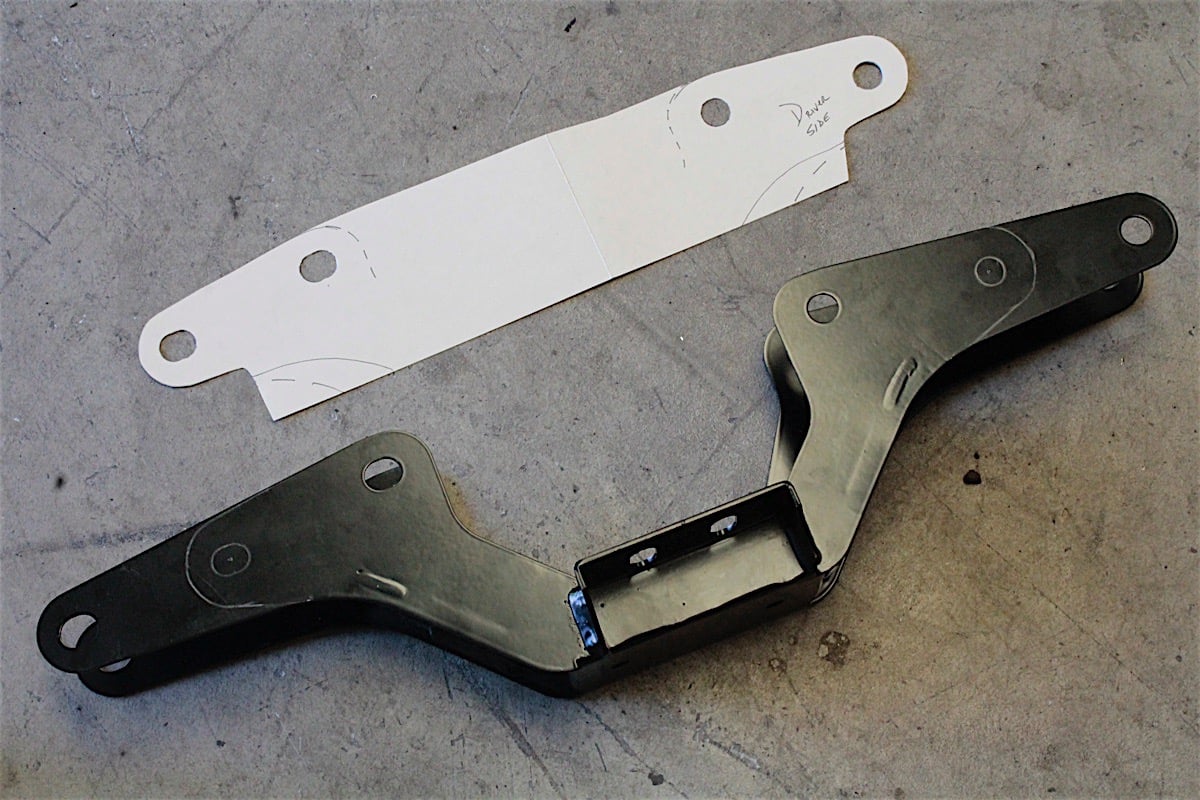 [32]
[32] [33]
[33]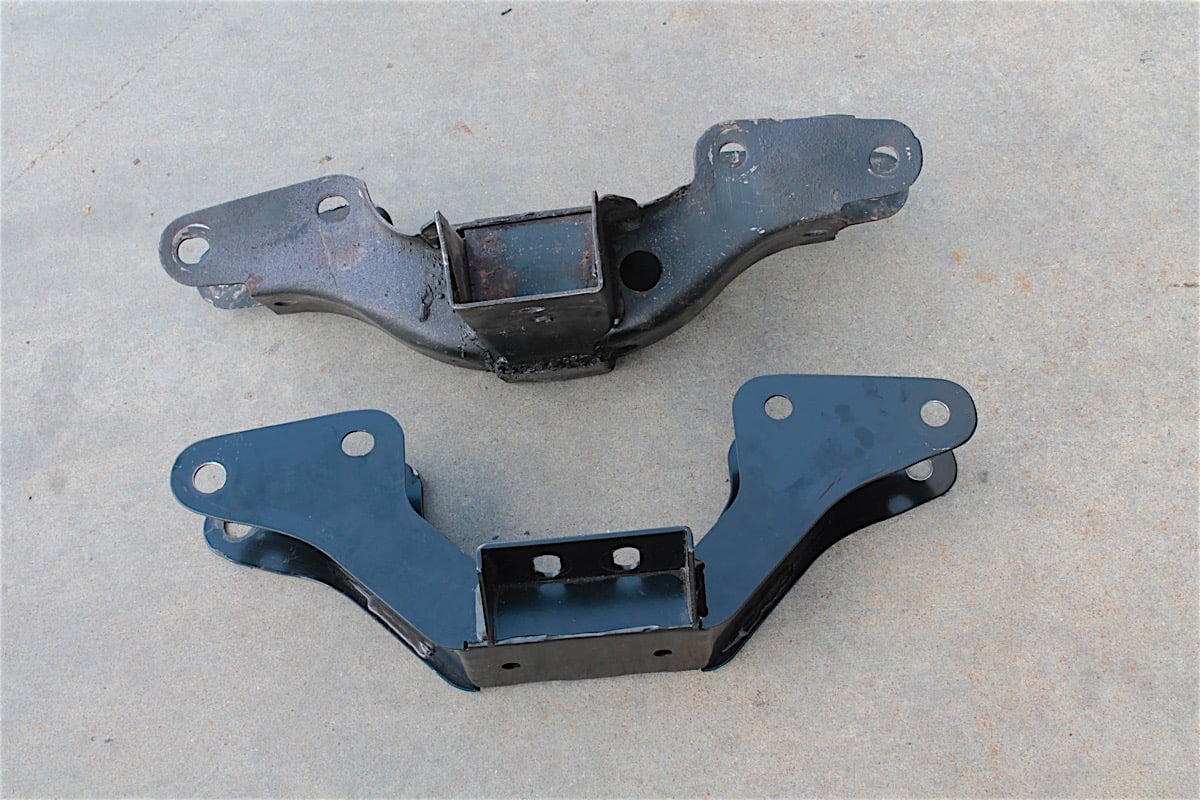 [34]
[34]
 [35]
[35]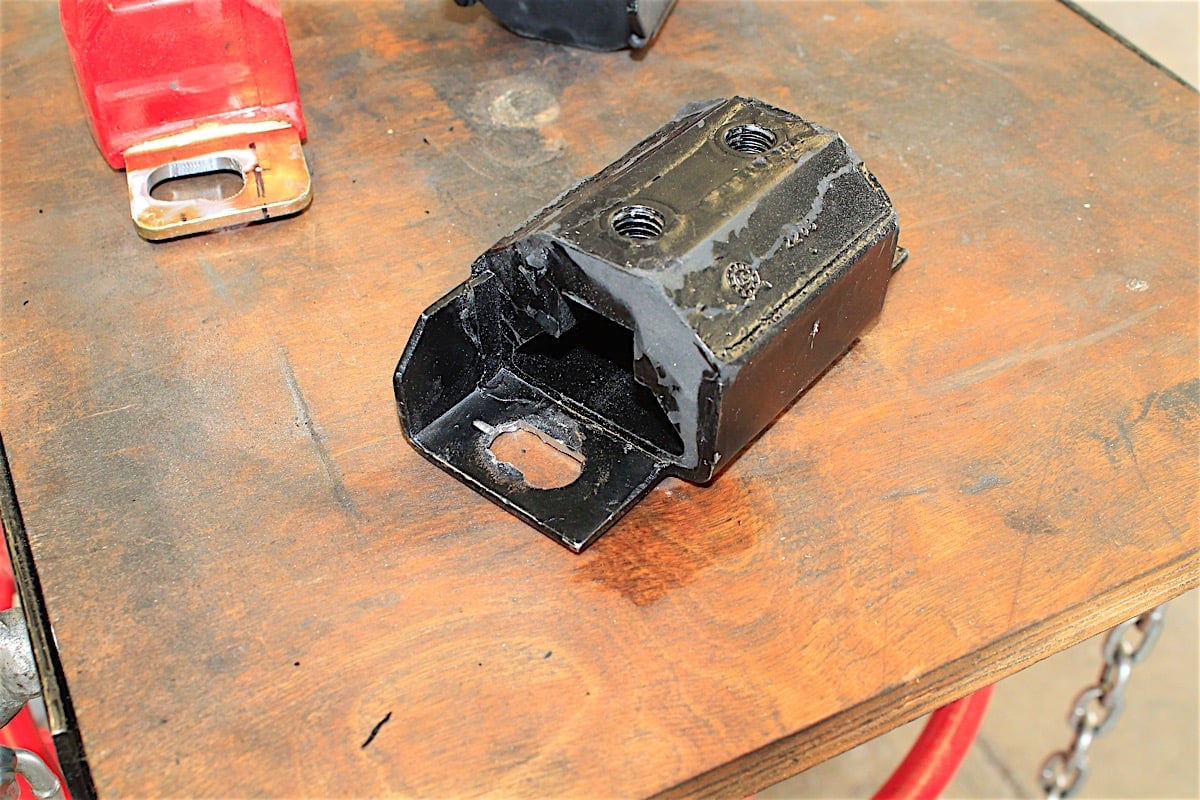 [36]
[36]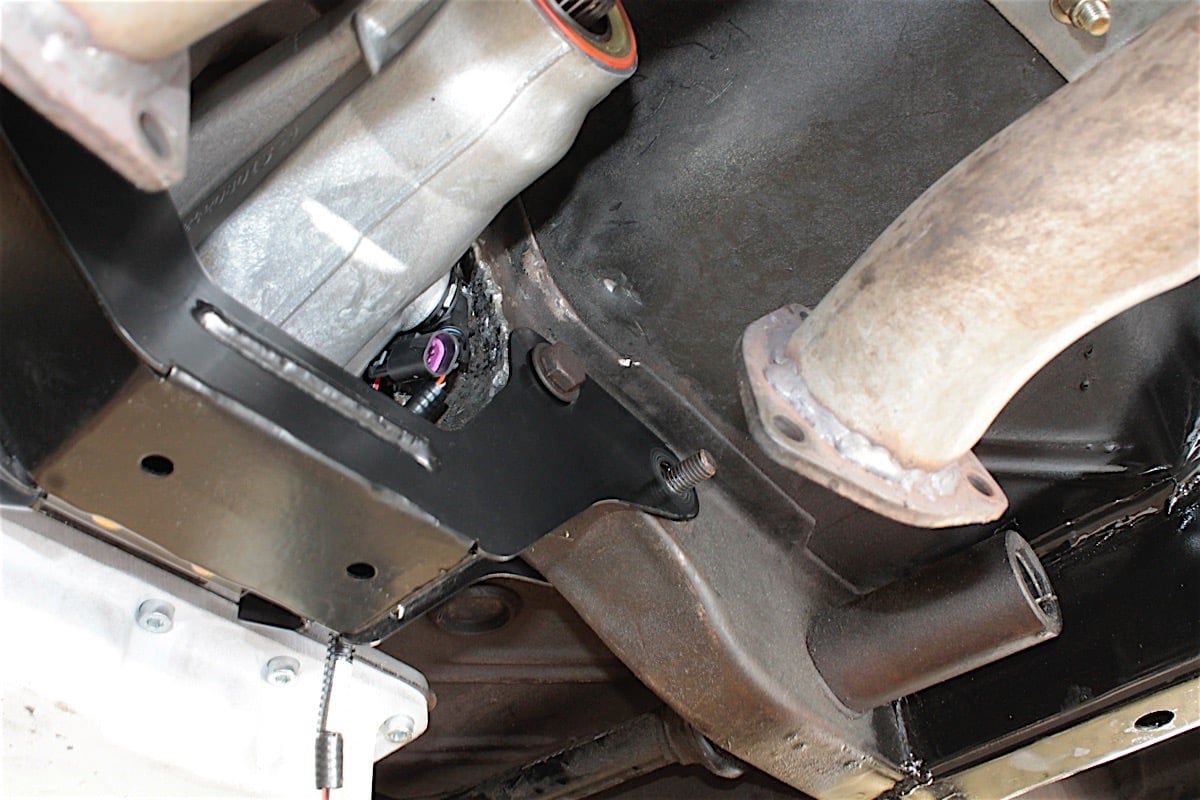 [37]
[37]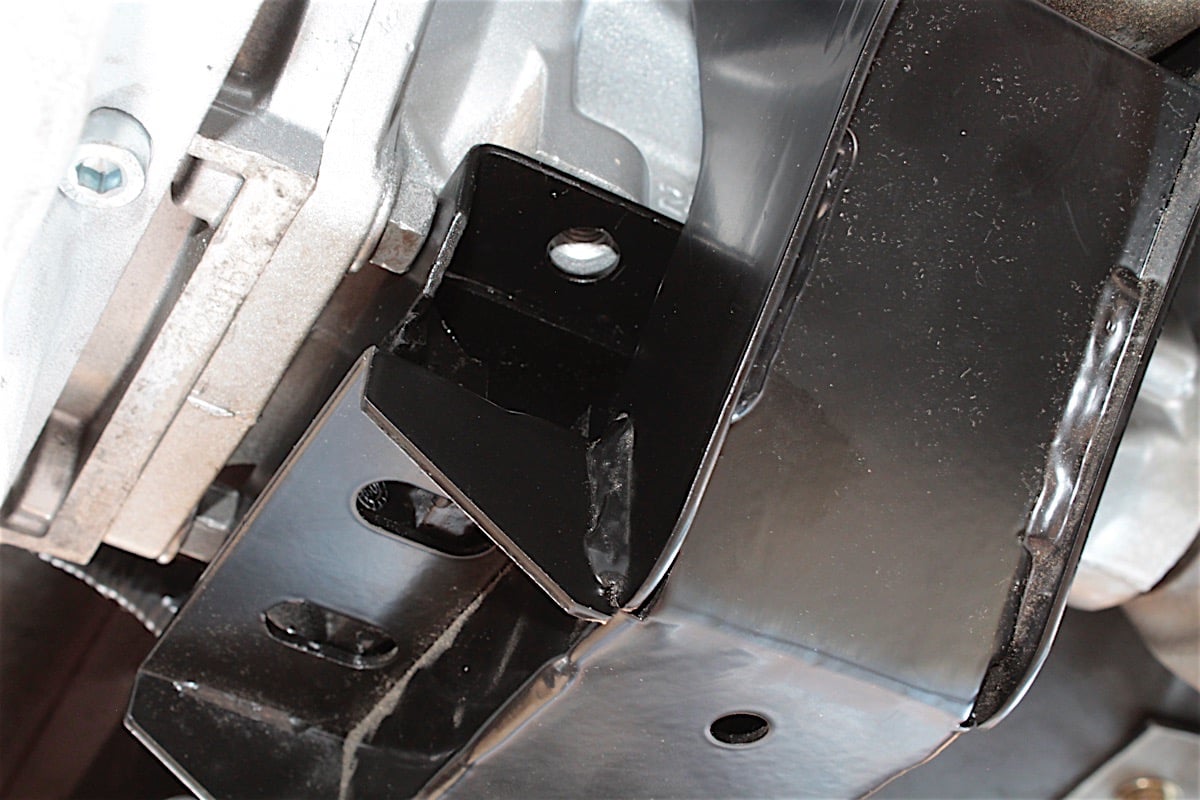 [38]
[38]
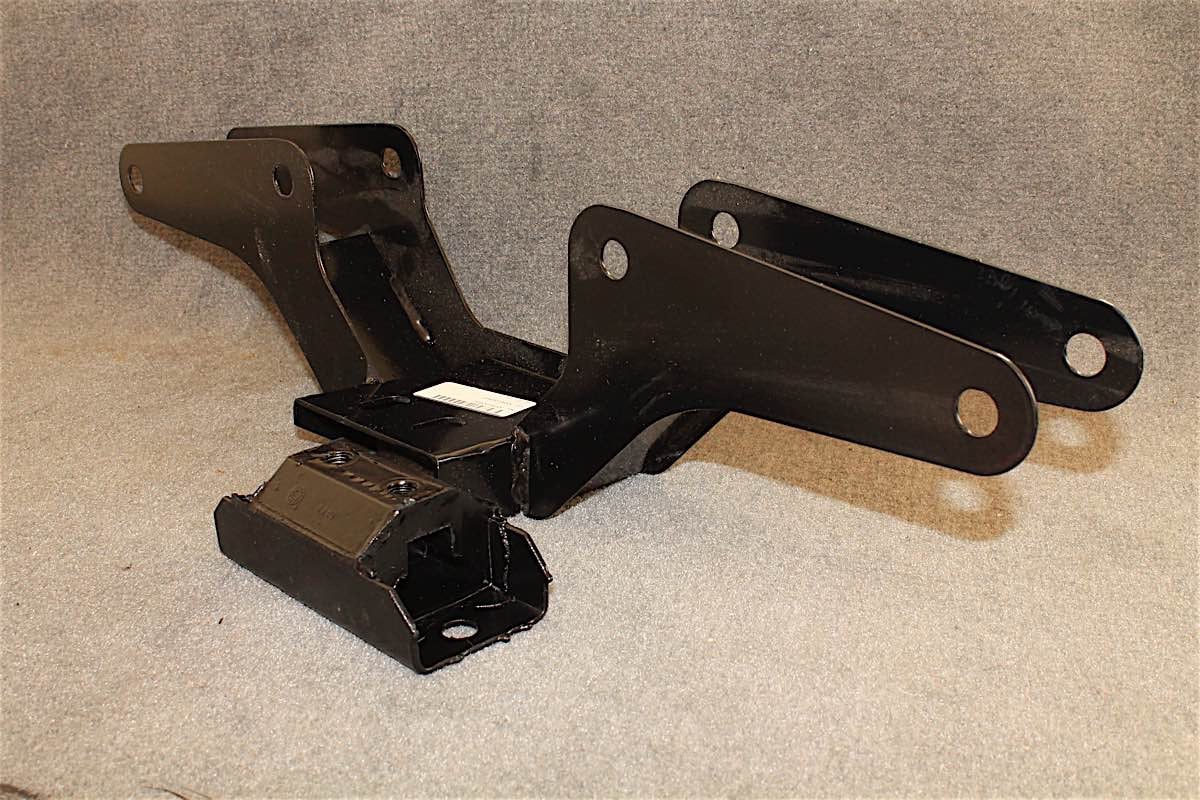
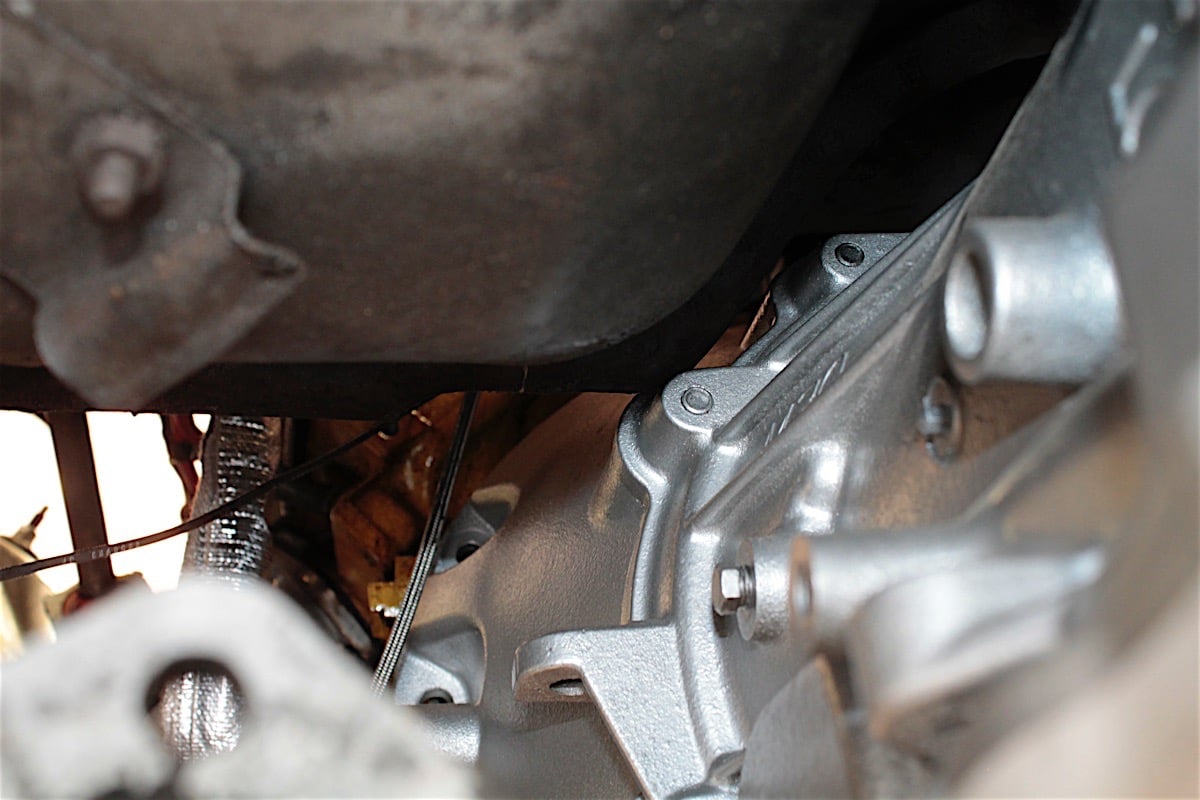
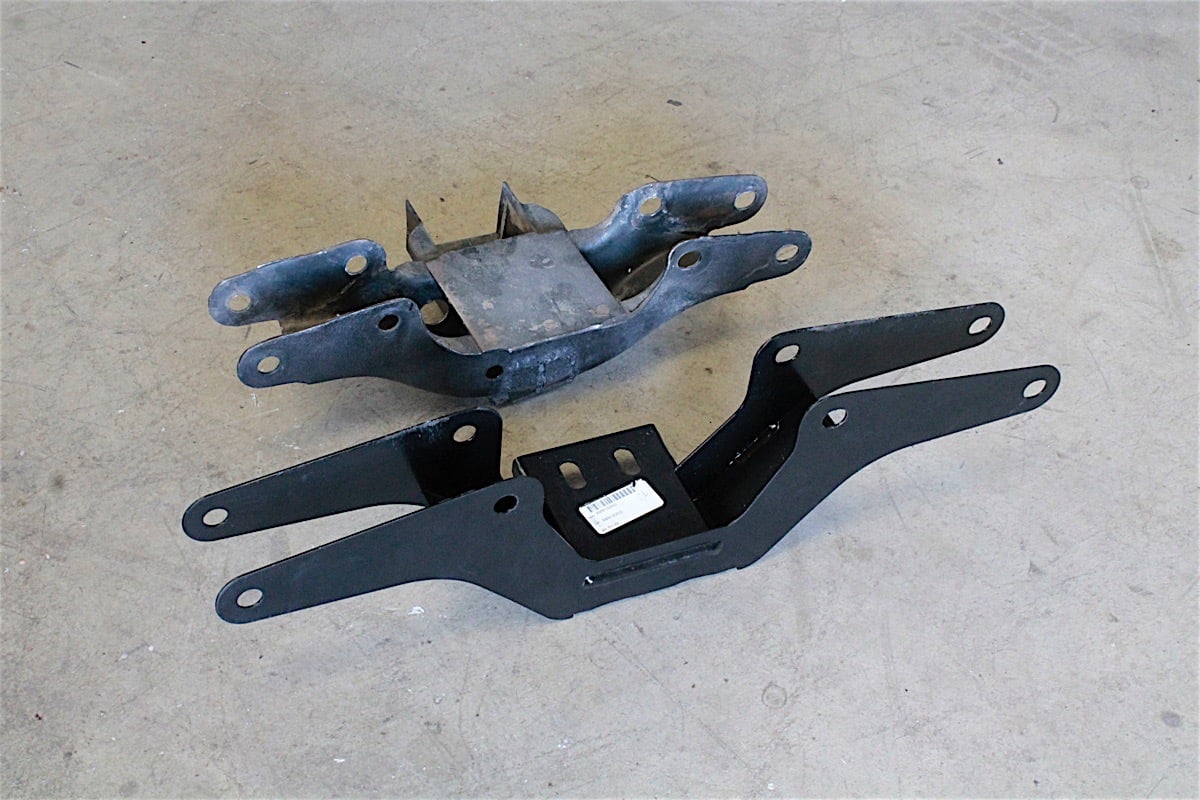
Top: The transmission crossmember required a little trimming, but it was an easy modification.
Bottom: Since the mount is in a slightly different spot with the earlier cars, we also did some trimming for clearance. The result is a great fit that didn't take up much time.
The only real area of concern was the transmission crossmember, but we knew going into this that we would have to make some modifications. Those modifications, however, were a piece of cake for Bourdage. The 1965 and 1966 crossmembers shared a pair of bolt holes, and all we needed to do was shorten the ears on the crossmember and drill two new holes.
 [39]
[39]There isn’t much room for weeding the harness into the tunnel, so it was plugged into the transmission and fed up through the tunnel when we were ready to bolt the transmission into place.
If we were installing this transmission into the proper application, no modifications would be necessary, but this does open the door for the early B body installs. The second part of this modification was to the engine mount itself, we simply clearanced it to mate to the bottom of the transmission. Overall, Bourdage said it was a simple modification that took little of his time. Being an engineer helps, and you can tell by the quality of his work, but these two modifications were minimal.
Before the final installation of the transmission, we were sure to attach the entire harness and both flexible transmission cooler lines. It’s a very tight fit but with an extra pair of hands and some guidance, the transmission can be lifted into place, and the harness can be fed up to the engine compartment.
We recently rewired the entire vehicle [40], so we had good connections for the power and ignition source for the Simple Shift Controller. We used the shift module that was included with the kit for reverse and neutral safety switches, and following the instructions we set the module by shifting through the gears to make sure it was aligned prior to tightening the bolts.
 [41]
[41]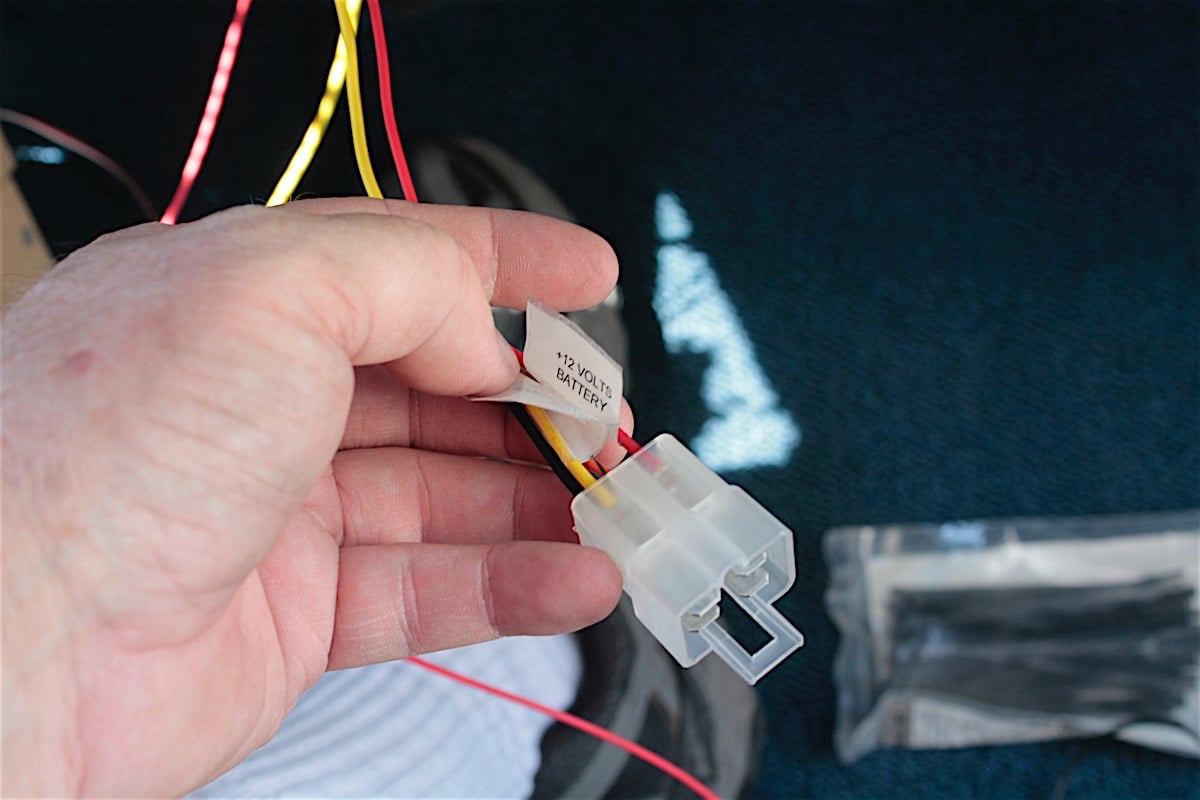 [42]
[42]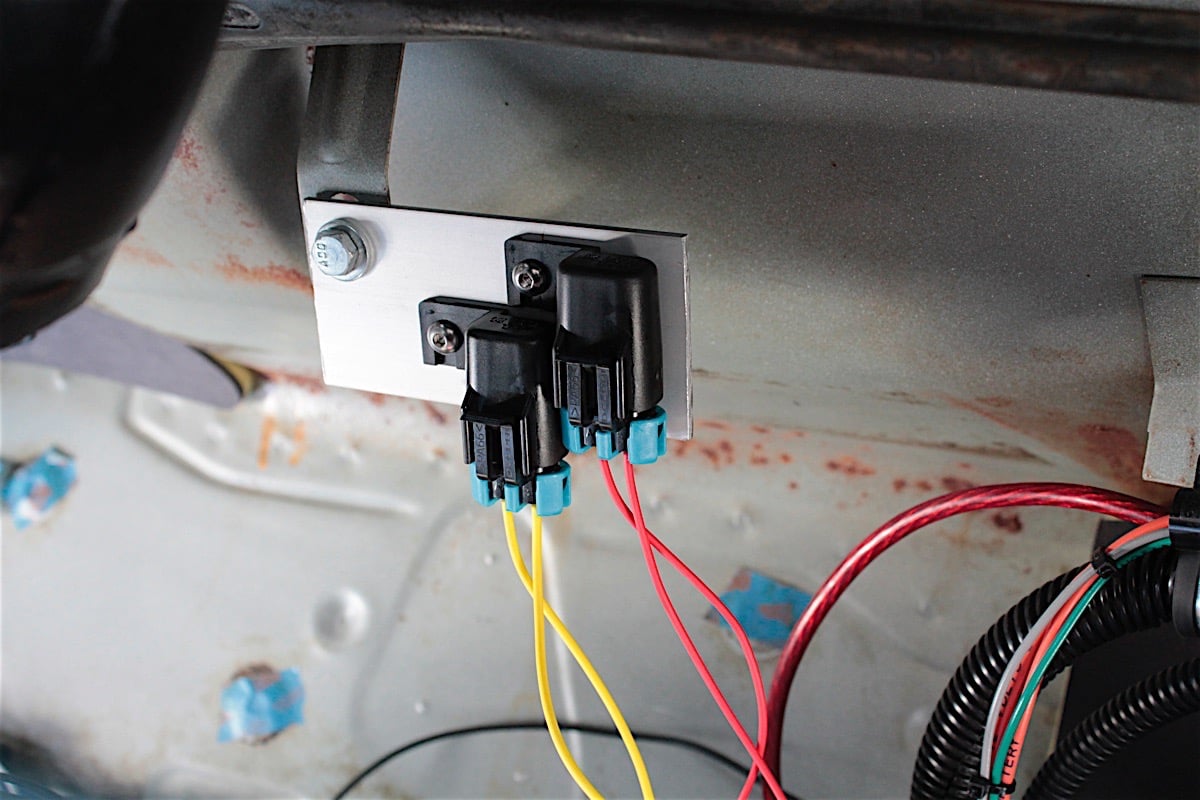 [43]
[43]
Plan ahead: We terminated the harness with connectors left over from our wiring project, and mounted the two relays for the transmission and controller. Having this done ahead of time saved about one hour during the install process.
We prewired the harness so that when we installed the transmission we could just plug in the transmission harness. There are a few unterminated wires that need to be connected: 12 volt battery, 12 volt switched, chassis ground, brake lamp input, speedometer, tachometer, and tachometer ground. We later found that some aftermarket ignitions systems are not compatible with the transmission controller, so it’s recommended that the tachometer lead is not connected as it’s not required for the controller to function.
 [44]
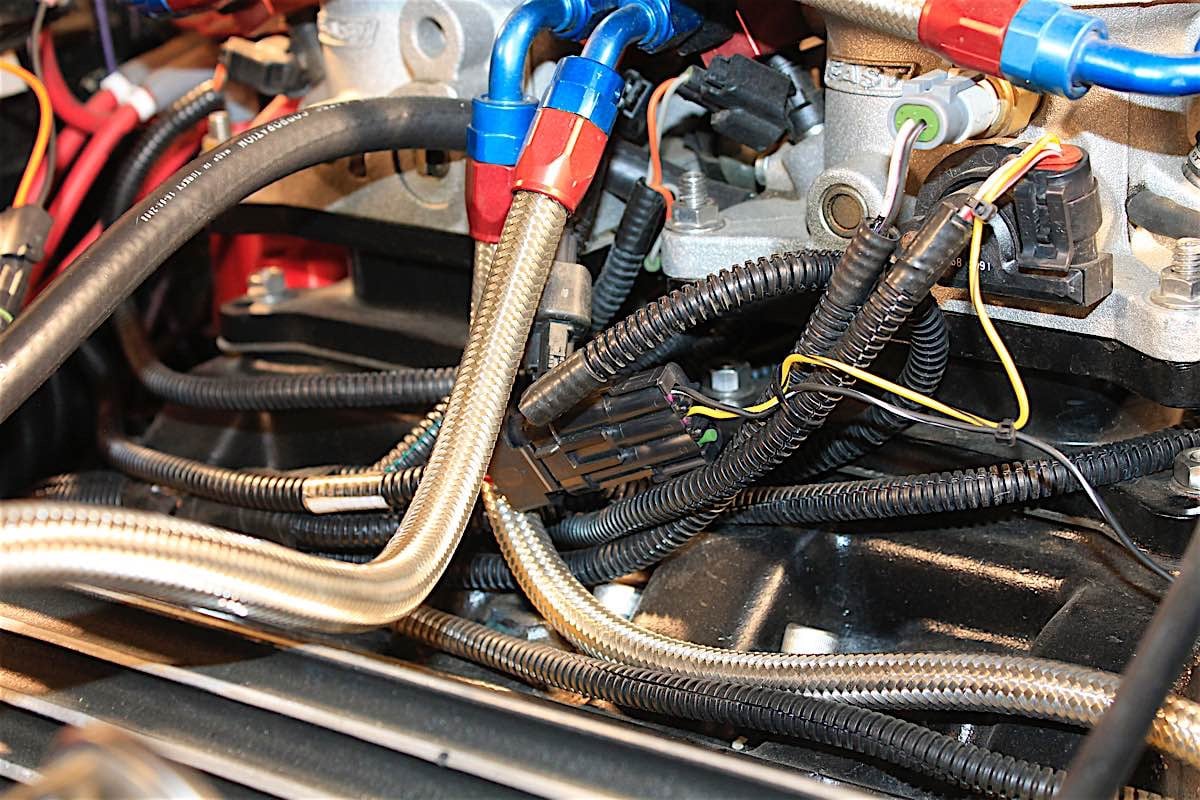
[44]The Simple Shift controller needs to see 0-5 volts from the TPS. The PerfectFit Kit includes a cable and TPS for carburetors, but since we had an EFI conversion, we simply tapped into the FAST TPS.
One other lead that needs to be plugged in is the throttle position sensor (TPS), and since we already had an EFI system installed, we simply checked with the manufacturer regarding connection. We found that the FAST [45] TPS range is .5-4.5 volts, which is sufficient for the PCS transmission controller, so we opted to connect the TPS lead directly to the TPS on the throttle body as directed. For those who have a carburetor, Silver Sport includes a TPS and cable kit to install on your vehicle. A TPS signal is required, so either the included kit or an acceptable signal is necessary.
We also took the time to determine a mounting location for the two relays in the harness, as well as a location to mount the transmission controller. The harness is quite long, so you shouldn’t have any issues with it fitting your vehicle. A hole was drilled into the firewall about 2 o’clock above the transmission tunnel for the harness to fit through. Be sure to file down the edges and carefully feed the wire through.
Peripherals: Coolers, Shifters, And Driveshaft
With the transmission bolted securely to the car, we were able to get started on all the peripherals. While SST includes these components in each PerfectFit kit, we already had some of them on the car and simply chose to use what we had rather than duplicate some parts. Since we also road-race the car, we made sure to use components that would support the high speeds and hard driving that we occasionally do.
 [46]
[46]This was the perfect time to upgrade to an MSD DynaForce starter. These high-performance starters will take the heat that the headers put out.
We took this opportunity to upgrade from an OE-style starter to a much better, high-performance DynaForce starter from MSD [47]. These starters will handle higher horsepower, high compression applications with a 4.4:1 gear reduction, and tolerate heat from the TTi [48] headers.
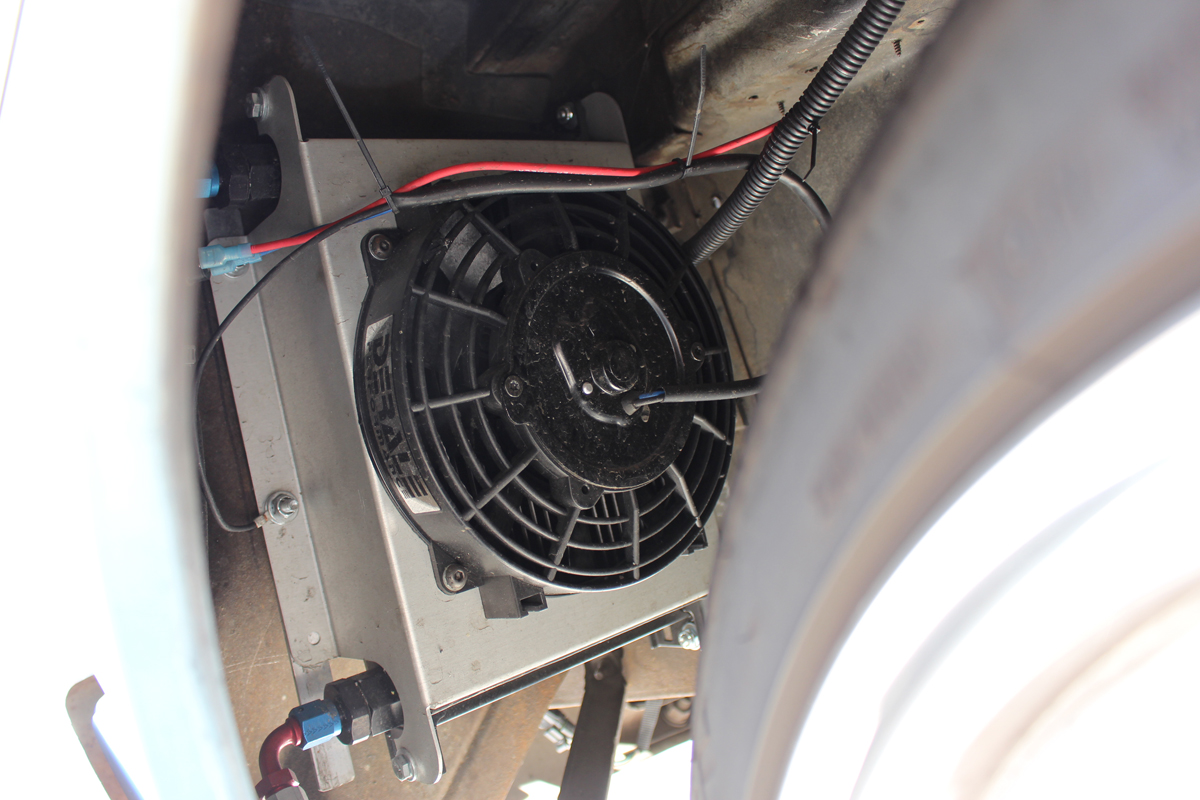
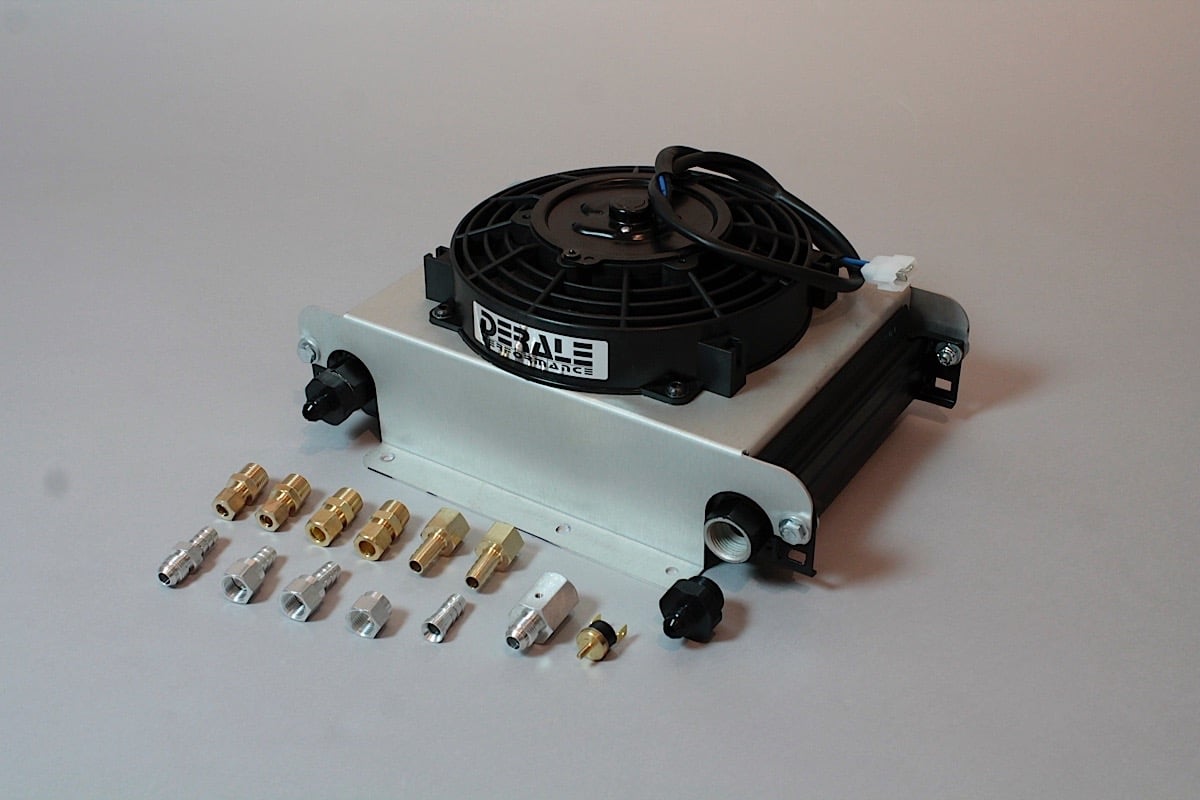
Our Derale [49] Hyper-Cool remote mount transmission cooler (PN 13960 [50]) was a perfect solution to the limited space in the car. We wanted something that was going to support racing, and also needed to be able to mount the cooler some place other than in front of the radiator. We decided to mount it behind the headlamp panel, inside the driver’s side front wheelwell.
The attached fan and temperature sender meant that we didn’t need to have this cooler mounted in direct air flow. Derale’s Mike Murphy told us these coolers are designed to supply their own airflow by pulling air through the cooler. That means that even though we have it in an odd location, the cooling fan will do the task of cooling fluid being sent back to the transmission.
 [51]
[51]
 [52]
[52]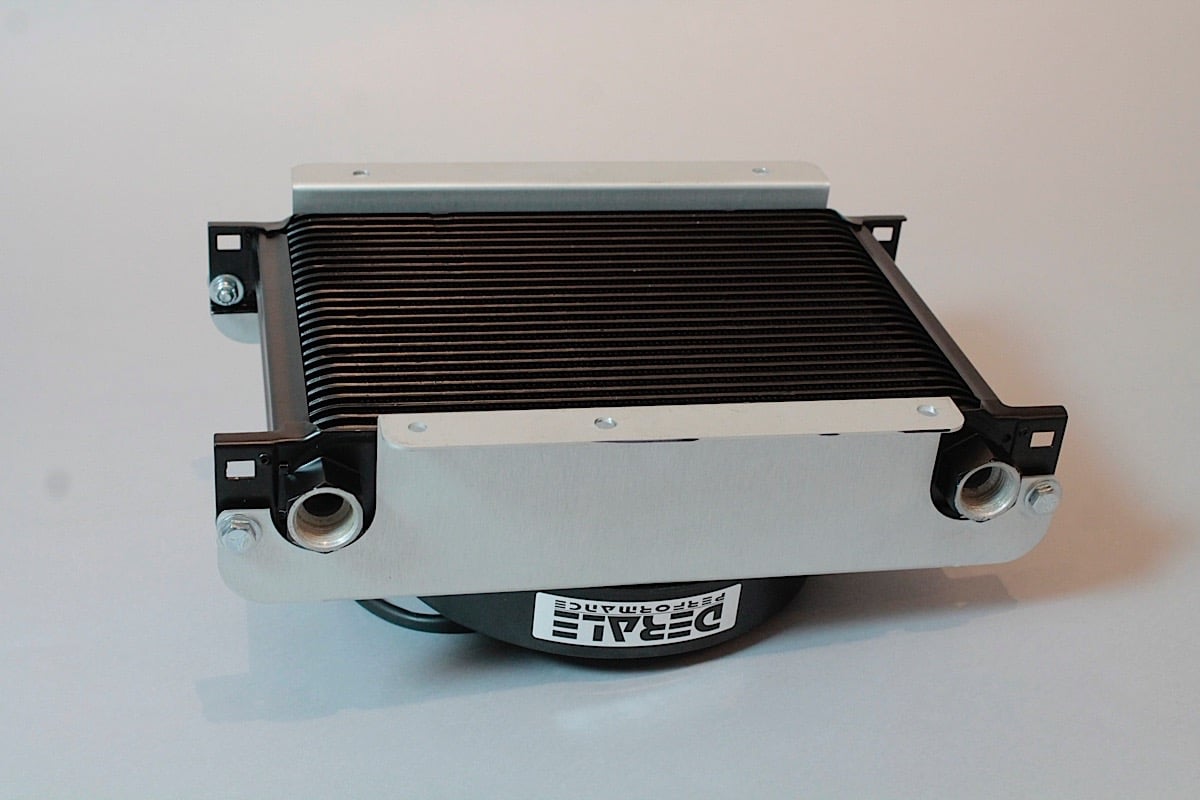 [53]
[53] [54]
[54]
Because we already had a transmission fluid cooler, our Derale Hyper-Cool was more than sufficient to do the job.
We were happy with the B&M [55] ratchet-type shifters that we’ve used before, so we opted to install a new Quicksilver shifter [56] for our new transmission. We built our own console, and adapted it to work with the Quicksilver housing. If you have a factory console and want to use your factory shifter, SST shows how that can be accomplished in the included instructions.
An electronic shifter is also available from SST if you prefer. We like the ratchet shifter for racing, and with a slight modification to the shifter bracket we were in business. Because of the close proximity to the header, we covered our fluid lines and shifter cable with DEI Heat Shroud [57] to insulate them from the excessive heat.
 [58]
[58]
 [59]
[59]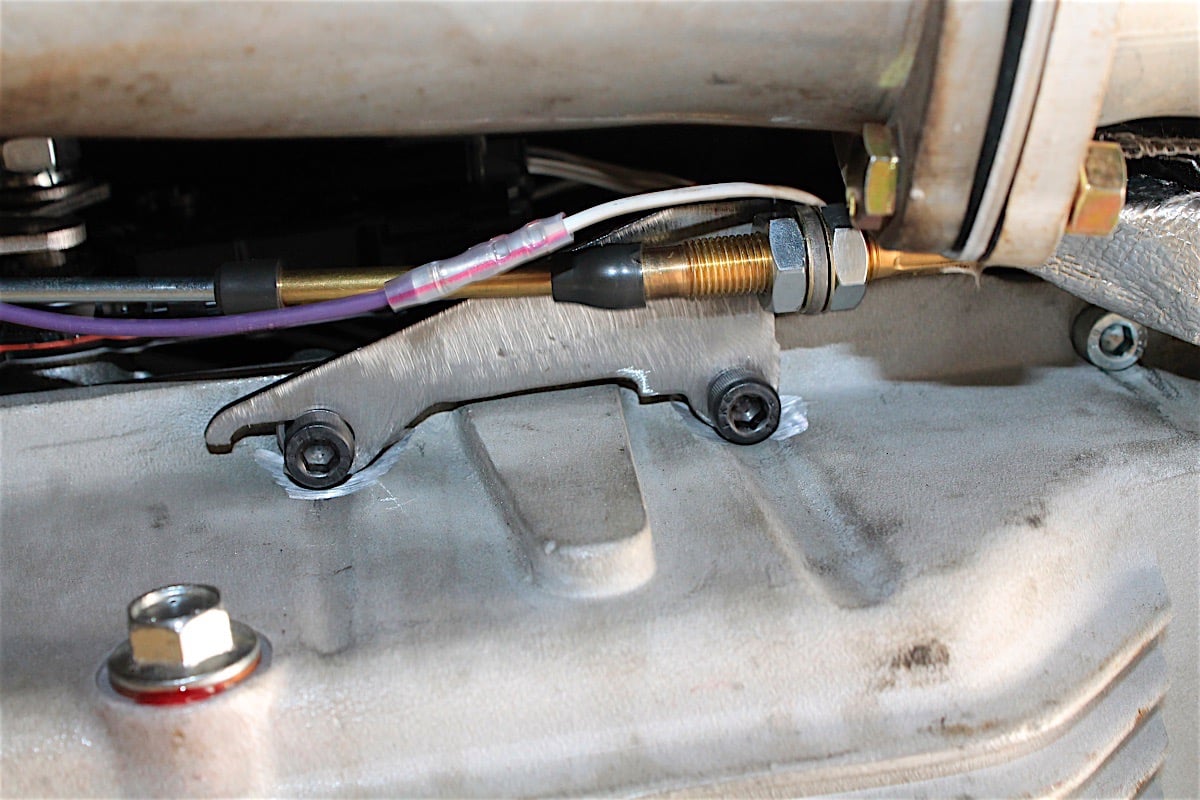 [60]
[60]
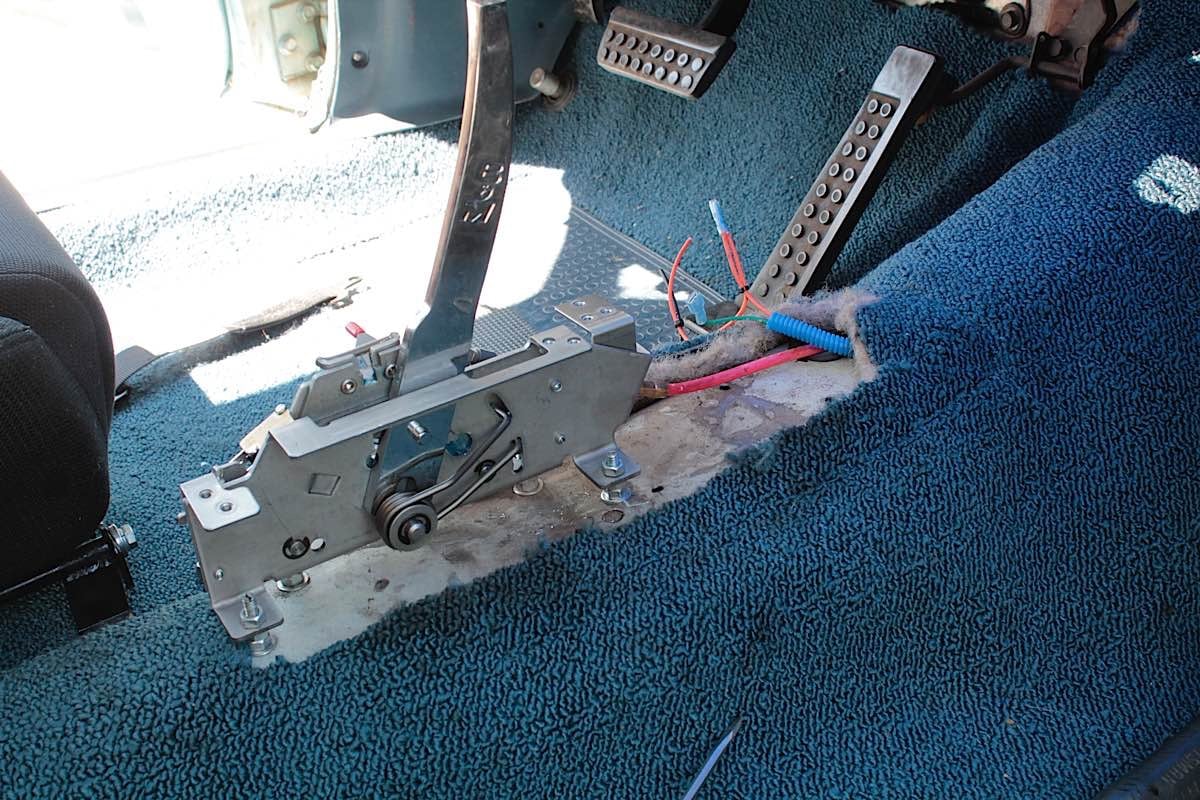
Our original shifter was on the column, but we preferred a floor shifter like the Quicksilver from B&M. A slight modification to the bracket was required due to the cast aluminum pan.
Although SST includes the driveshaft as an after-install component of the PerfectFit Kit, we decided to call on our friend Nacho at Inland Empire Driveline [61]. He’s done a few driveshafts for us before and promised us a same-day turnaround, so we couldn’t pass that up.
Our prior driveshaft was a bit smaller in diameter, and it was recommended to step it up a little because of the added length. We dropped off our slip yoke and original driveshaft in the morning, and by that afternoon Inland Empire Driveline delivered, as promised. That also meant we were going to be able to get the car on the road a little sooner, and we were anxious!
 [62]
[62]
 [63]
[63] [64]
[64]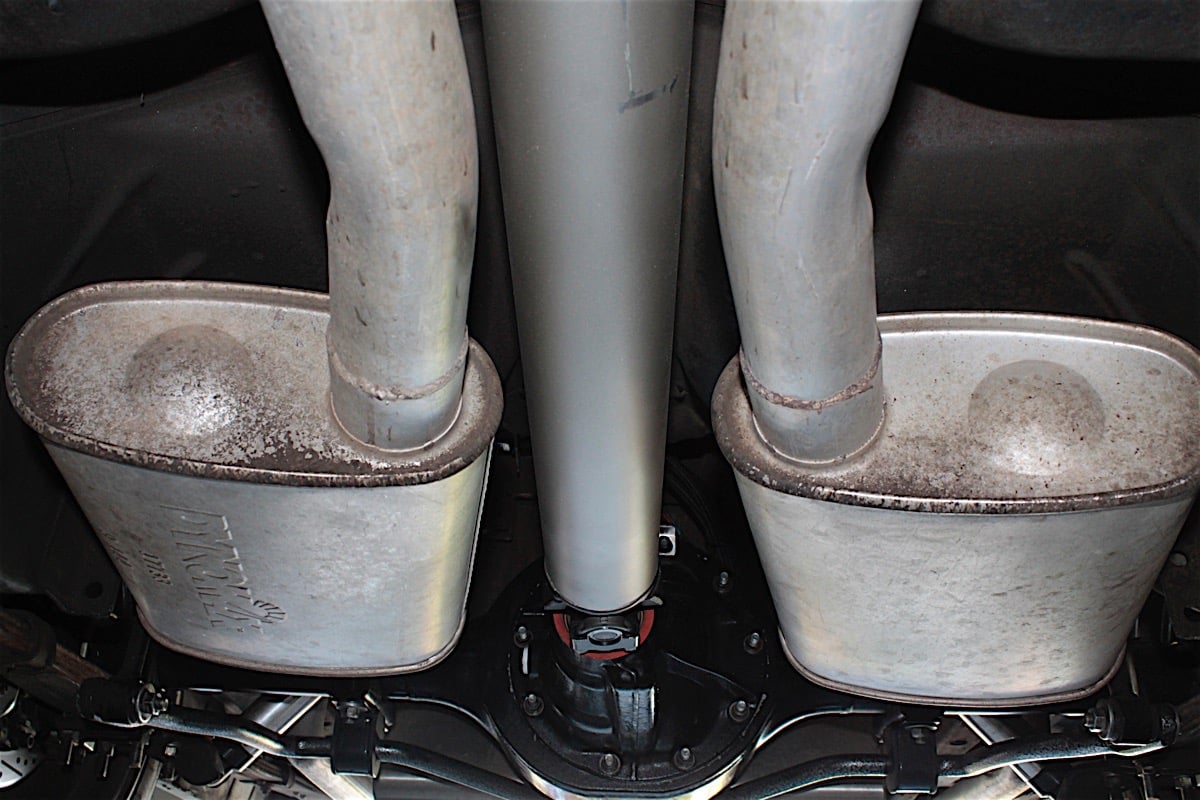 [65]
[65]
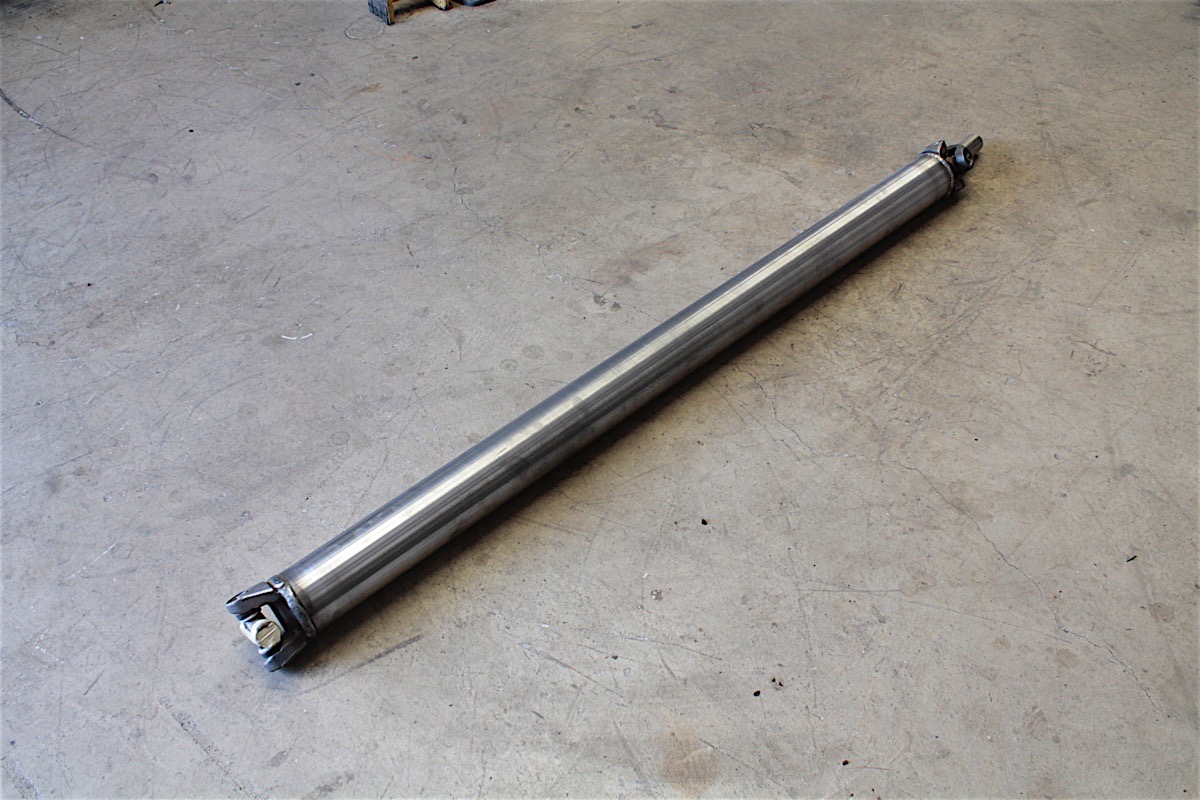
Our driveshaft needed to be a couple of inches longer, so we were not able to reuse the previous part. No worries, SST includes the driveshaft and all that is needed is the measurements to have one sent within a couple of days.
 [66]
[66]The nitial settings are given by PCS for the first start up, from there, adjustments can be made to suit your driving style. It could take a few runs, but eventually you’ll find a sweet spot.
Simple Shift Transmission Controller
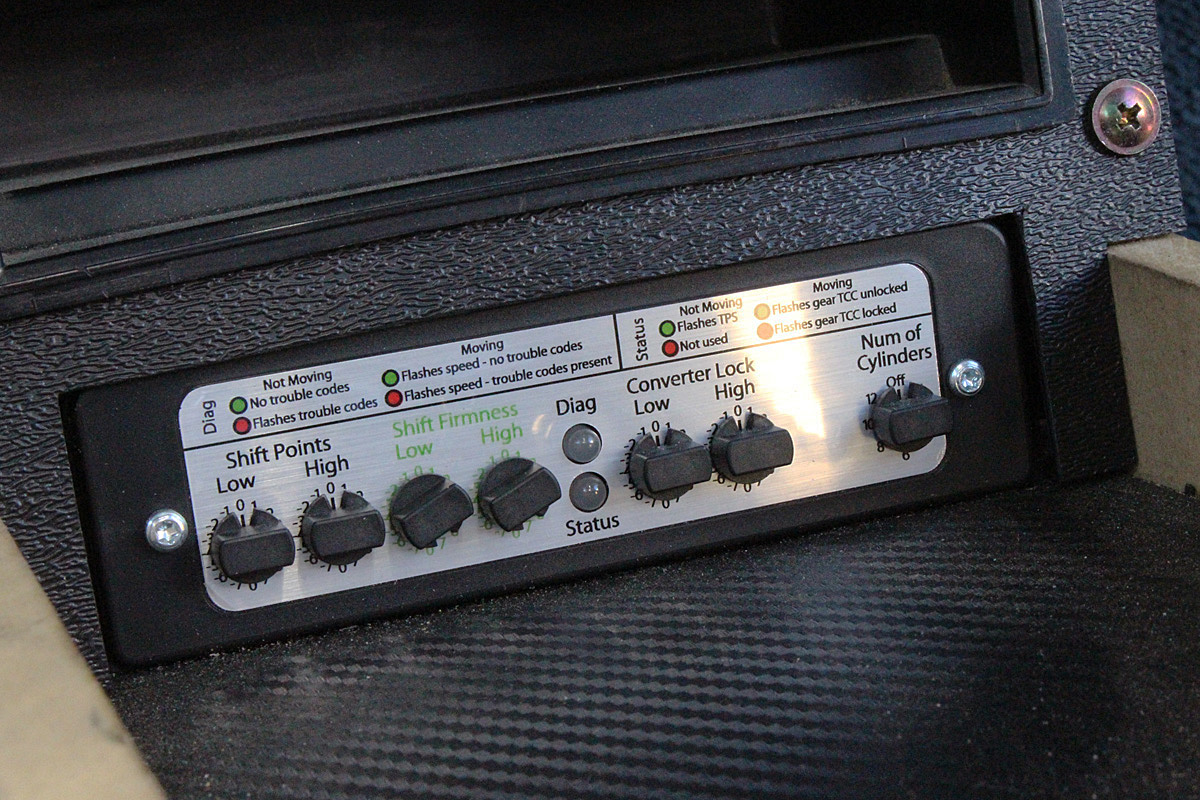
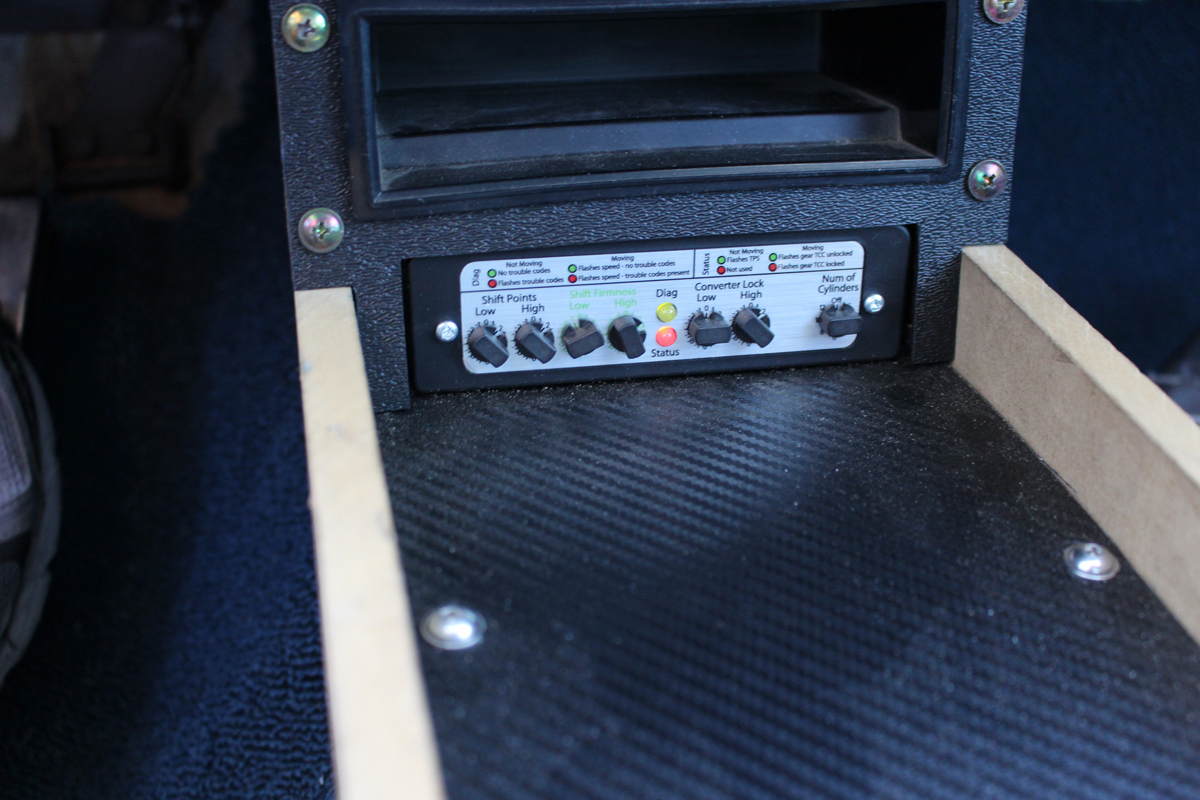
We built a center console after installing bucket seats recently, and that made a perfect location for the Simple Shift Controller, which allows you to adjust the high and low throttle settings for shift points, shift firmness, and torque converter lockup.
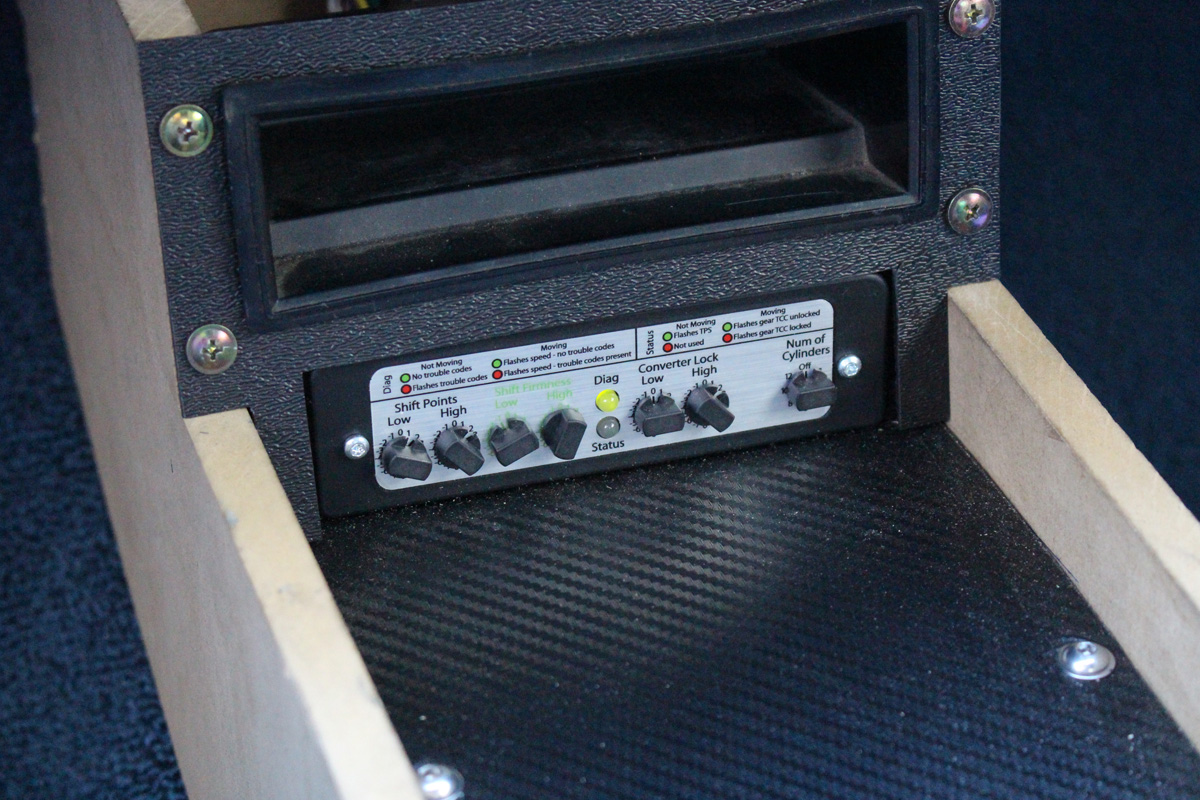 [67]
[67]This green LED indicates that we have the unit connected, and it’s ready for the TPS check. This must be done whenever power is reconnected to the unit.
The very first step, after connecting the harness and hard wiring the controller to the car, is to check for TPS signal. It’s important here to follow the instructions and to make sure the controller is reading the TPS signal, or you can run into problems.
The PCS Simple Shift has indicator lights that provide constant, real-time feedback based on speed and throttle position. Should there be a problem, the computer will supply trouble codes to help diagnose the condition.
We spoke to Jim Miller at PCS tech support to get some information on settings for the Simple Shift controller. He advised that the instructions are read thoroughly and adhered to when setting up the controller. For advanced users, the upgraded controller is available with the PerfectFit Kit, and it allows the user to create multiple shift patterns, such as sport mode, or cruising mode.
Setting the pressures to the highest level for full throttle, and then lowering it to get the desired feel is very important. -Jim Miller, PCS Tech Support

He also stated that it is better on the clutches/bands to have a quicker shift. From that point adjust all the other setting to a level of performance that is acceptable. It’s important to remember that shift points are based on throttle position, not engine RPM. It’s best to keep in mind that it takes a few hundred RPM to complete a shift, so if the shift point is too high, turn it down one and see if that meets your expectations.
Miller warned us that long, softer shifts are harder on the transmission and may reduce durability. The torque converter lockup is based on vehicle speed and throttle position, and he said, “At light throttle you may want the lockup to come on sooner for better fuel economy and cooling.”
But Miller also warns us that it’s not good to have lockup at lower engine speeds to avoid lugging the engine. Minimum engine speed at lockup should occur at greater than 1,000 rpm.
 [68]
[68]The red LED at the bottom indicates that the converter is in lockup, and it will flash once for each gear, so fourth (overdrive) will flash four times. A touch of the brake pedal will take it out of lockup.
Miller said, “When the TCC is locked you are reducing transmission heat generation, especially at higher loads. Also, you gain efficiency with the TCC locked, which improves fuel economy.”
As you drive, adjustments can be made for low and high throttle settings, and adjusted based on whether you’re cruising or racing at the track. The great part is that you control these with the turn of a knob, and the changes can be made on the fly and felt immediately.
Many early transmissions required you to drive in a lower gear (1:1 ratio) and only shift to the overdrive gear when at freeway speeds, but Miller stated that it’s perfectly acceptable to keep it in “D” and make adjustments as you drive for better overall feel and driveability.
 [69]
[69]Protecting all of our cables and fluid lines from the heat is a job done by DEI heat shrouds. It’s a great investment to protect your expensive parts.
Results, Impressions, MPG
After making some adjustments and taking our much improved Belvedere out on the road, we were pleasantly surprised. Our previous TF727 was built, with a low gear set and a firm shift kit that would chirp the tires even at low speeds. But were we going to get better performance from the A41? That was our goal, after all, to get better MPG and to still have the same kind of tire-chirping performance that we had before.
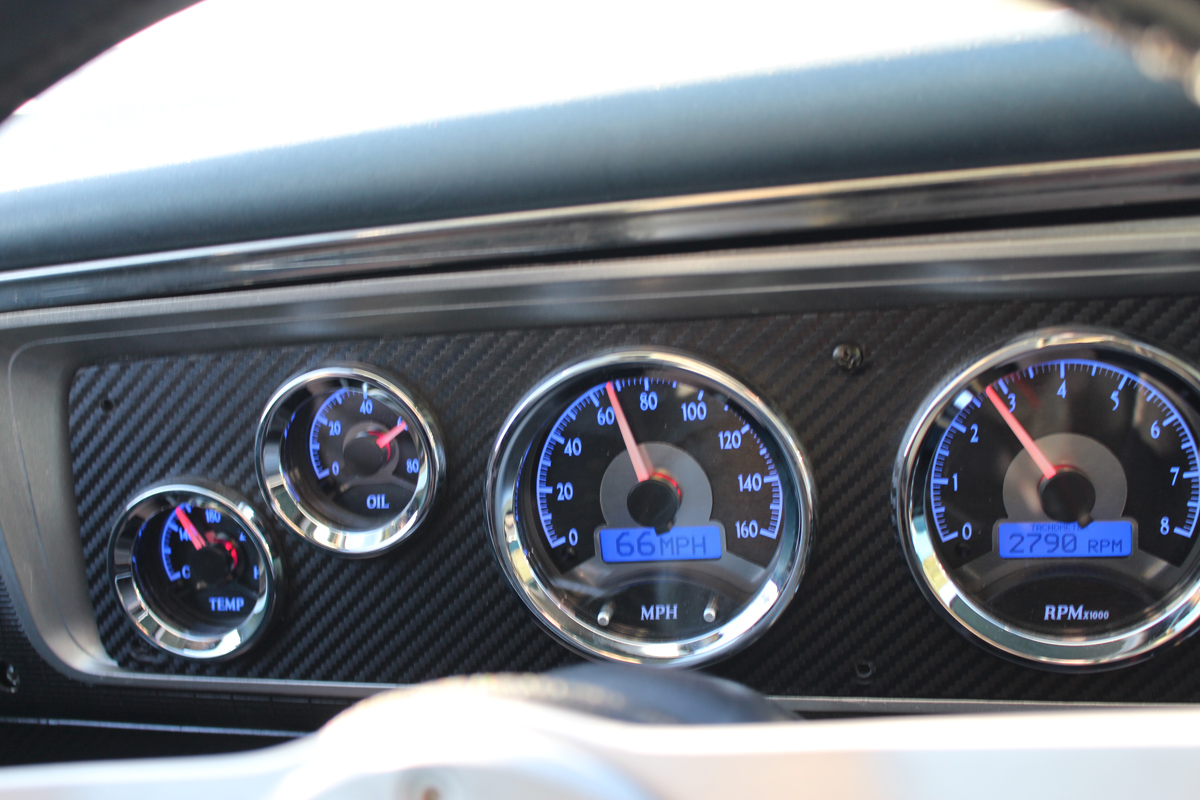 [70]
[70]Turning nearly 2,800 rpm at 65 MPH? That’s too much for a cruiser.
The overdrive on the A41 is at .70, with a 3.06 first gear, and a 1.63 second gear. These were actually lower than the low gear set in the TF727, meaning the car was even quicker off the line. And that chirp in second gear actually turned into a sideways-pitch where we were actually spinning the tires. We compared our tachometer at 50, 60, 70, and 80 mph in third (1:1, same as the TF727) and in fourth (overdrive), and it meant that driving at freeway speeds was going to be a lot nicer on the engine.
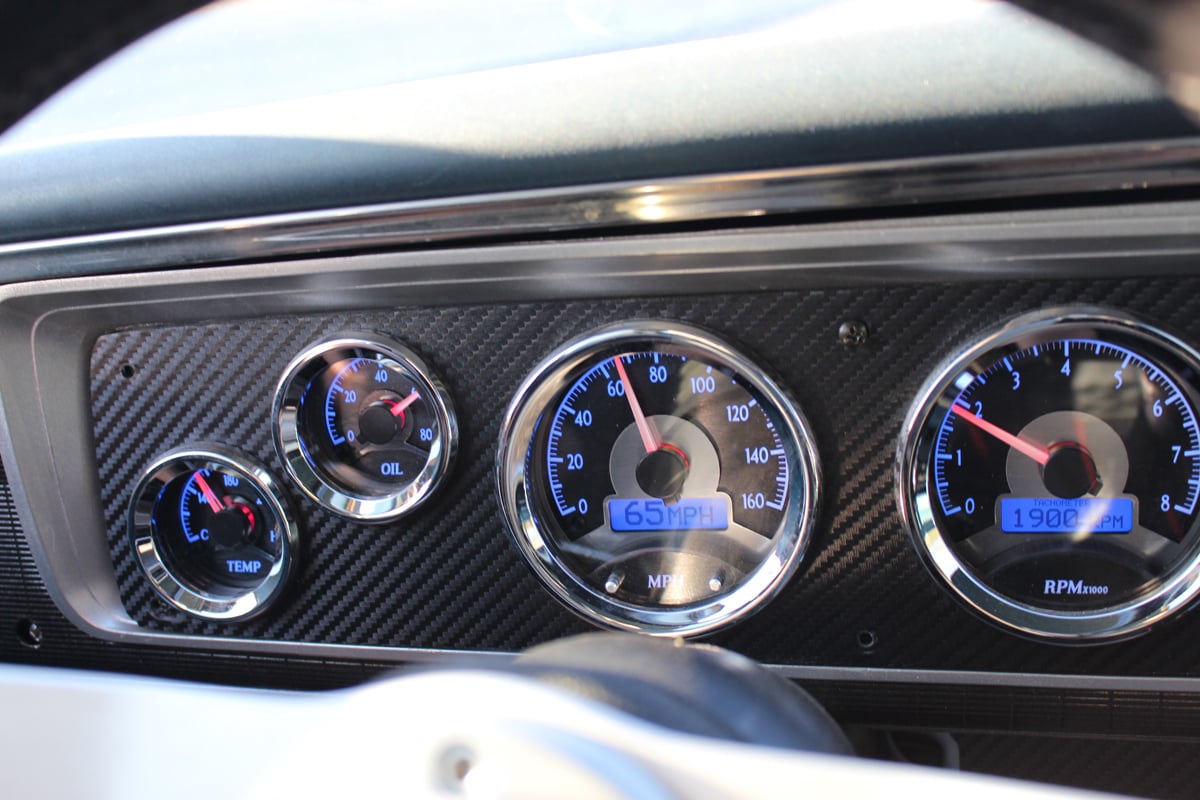
At 60 mph, our engine speed dropped from 2,550 rpm to 1,800 rpm; at 70 mph, our engine speed dropped from 2,900 rpm to 2,050 rpm; at 75 mph, our engine speed dropped from 3,150 rpm to 2,200 rpm. And our fuel mileage? That went from a respectable 13 mpg up to 16.7 mpg while cruising at 70+ mph. With better driving habits and some adjustments to the controller and the speed, we could see even better MPG.
 [71]
[71]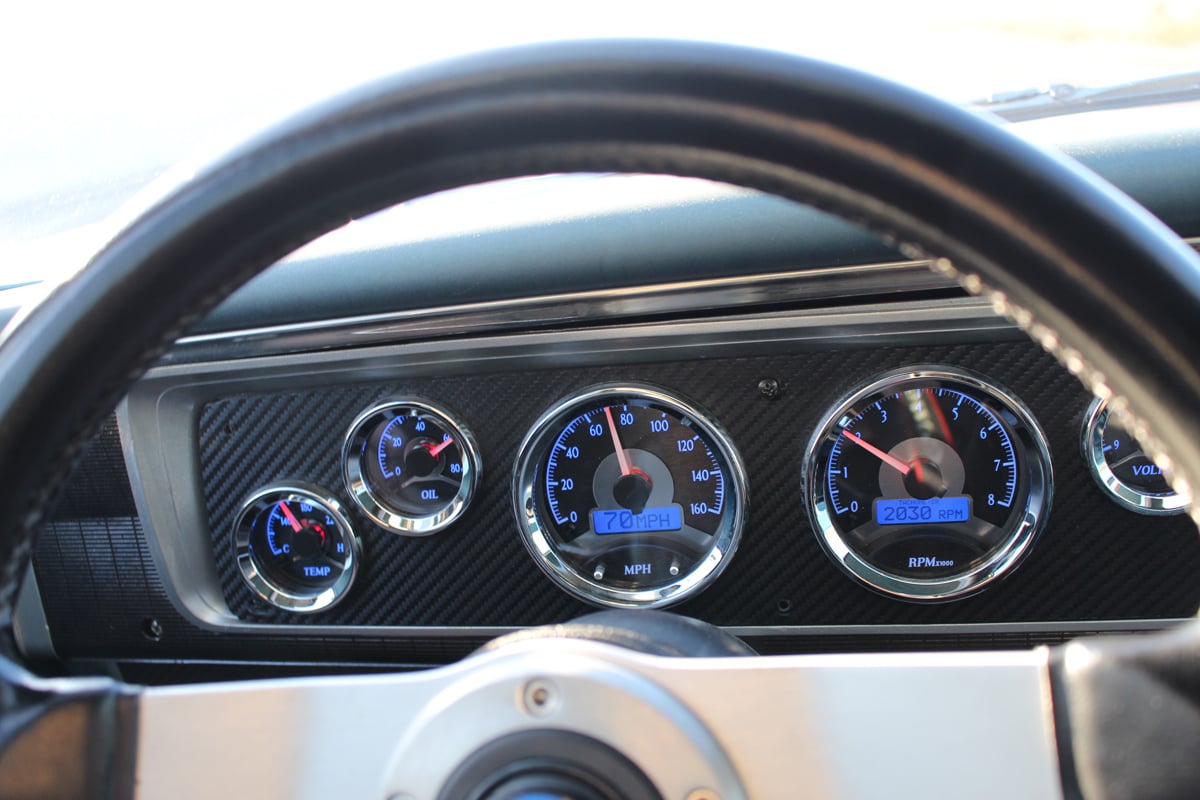 [72]
[72]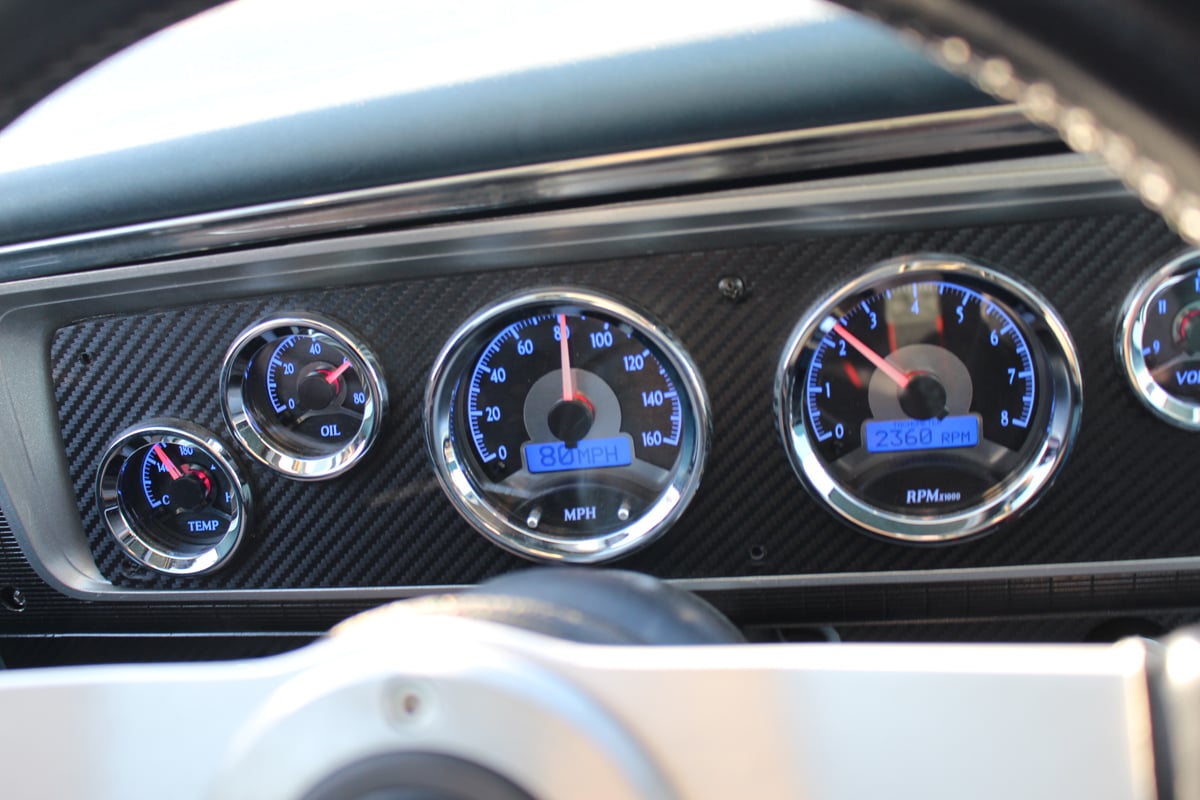 [73]
[73]
Not only is the overdrive increasing our fuel economy, it's increasing the longevity of our engine because it's now revving about 800-900 rpm less at freeway speeds.
We’re happy with the results, and now we’re ready to hit the track again. We will be in Las Vegas with the car for the upcoming MATS show [74] on March 18-20, 2016 – our first long trip with the new transmission. If you’re thinking about taking some longer trips with your musclecar, you need to check out the PerfectFit kits [5] from Silver Sport Transmissions [3].
SST has your entire drivetrain covered; in addition to its transmission packages, Silver Sport also supplies an extensive line of crate engines and rearends to help complete the drivetrain in your classic musclecar.