 [1]
[1]
We think transmissions don’t get the proper credit they deserve. While everybody wants to talk about how many cubic inches, carburetors or how much horsepower your ride’s engine cranks out, very few people bother to ask, “What stall converter you running?” or “How many discs does that clutch have?” Nope; like the Jan Brady of powertrain parts, the transmission will always – and unfairly – live in the shadow of its sexier sibling.
Since Oldsmobile introduced the Hydra-Matic in 1938, the first American-made clutchless hydraulically-operated transmission (a factory option available for a whopping $57!), Americans have been warming up to the automatic transmission faster than anywhere else in the world. Designed to meet the growing demand from both the daily commuting set and those horsepower-hungry types, the first TorqueFlite came into existence in 1962.
 [2]
[2]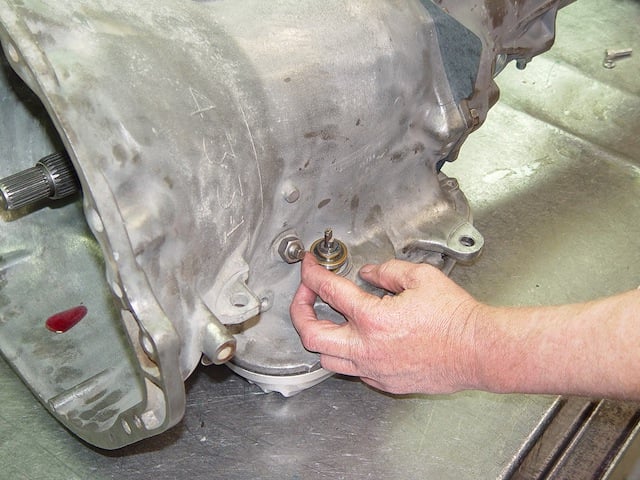 [3]
[3]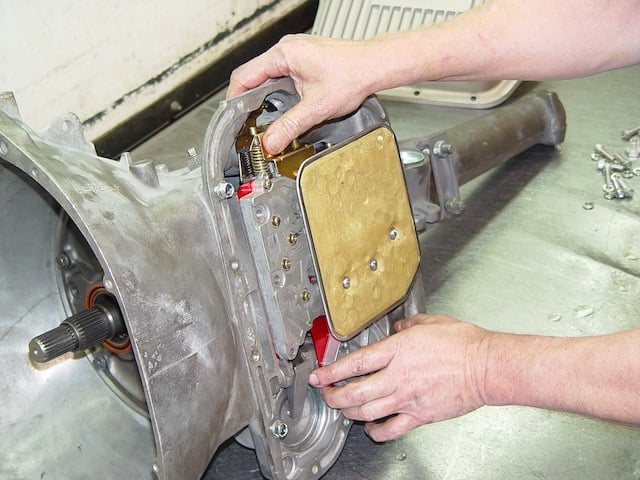 [4]
[4]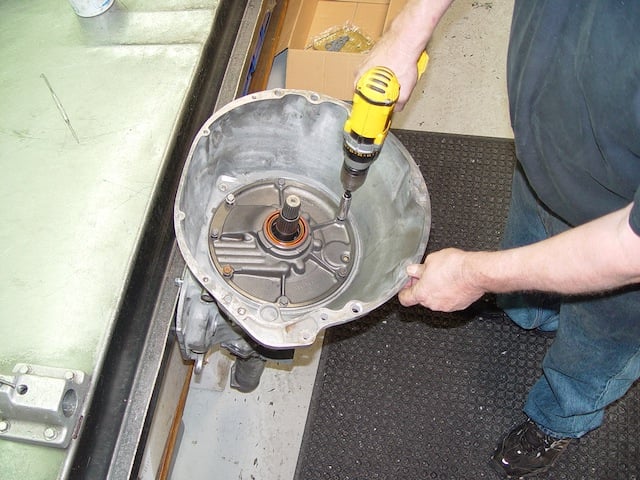 [5]
[5]
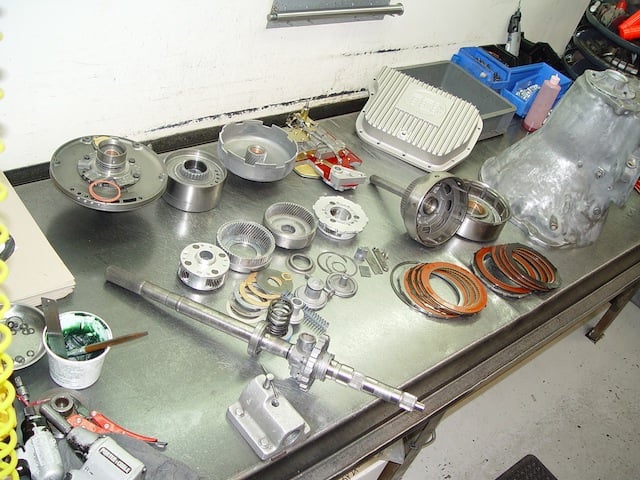
Our TorqueFlite had seen better days. First to go were the old converter, transmission mount (not shown), the kick down lever and gear selector. Next to go was the old oil pan, which when removed, exposed the valve body and filter. The filter screws directly to the valve body, so removing the 10 bolts of the valve body saves you the hassle of unscrewing the four screws keeping the filter on. Since the factory valve body will be replaced with a reverse manual unit from TCI, the old piece was merely thrown away. Finally, all seven bolts holding down the oil pump assembly were unthreaded. The pump - comprised of a pump body, two rotors, and a reaction shaft support - needed to be rebuilt as well.
Built to Last
Surprisingly enough, the sturdy 727 TorqueFlite design survived through the early years of unmerciful “neutral-drop” launches from those racing push-button shifted Chryslers. While such treatment casually murdered one TorqueFlite after another, word quickly spread that the new Mopar slushbox was a force to be reckoned with. Designed to be nowhere near as complicated as GM’s TH350 and 400, and more streamlined than Ford’s C4, the 727 proved formidable behind the HEMI or Mopar’s high-revving LA-block.
But, as it is with most automatics, not all TorqueFlites are the same. Since our project ’69 Dodge Charger [6] Killer Kong was once a mild-mannered two-barrel 383 B-Block-powered daily driver and not a snarling factory-equipped 426 HEMI-powered street bruiser, the included 727 3-speed came woefully ill-equipped to handle the power of a Magnum 440 or a 7-liter elephant – not to mention the 750-horse naturally-aspirated hemispherical-headed monster we’ve got cooking.
Differences between the degrees of performance are various, but usually add up to a discrepancy in the total number of front clutch plates, clutch springs and their respective spring tension, governor weights, the pre-programmed up-shift speed, band friction material and construction, as well as the torque converter stall speed. All of these variants can have a significant impact on the given TorqueFlite’s behavior.
 [7]
[7]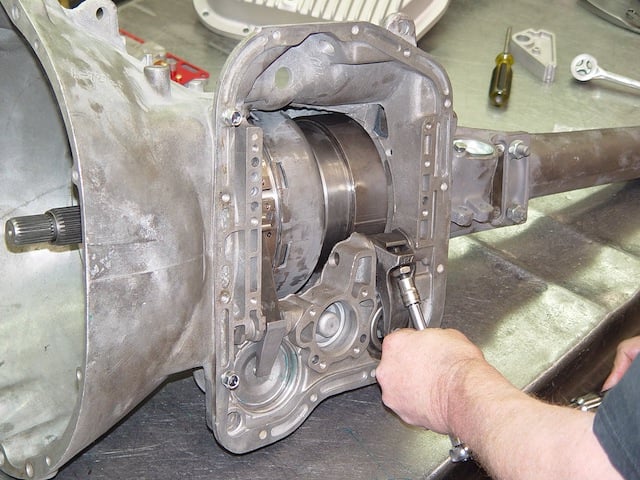 [8]
[8] [9]
[9]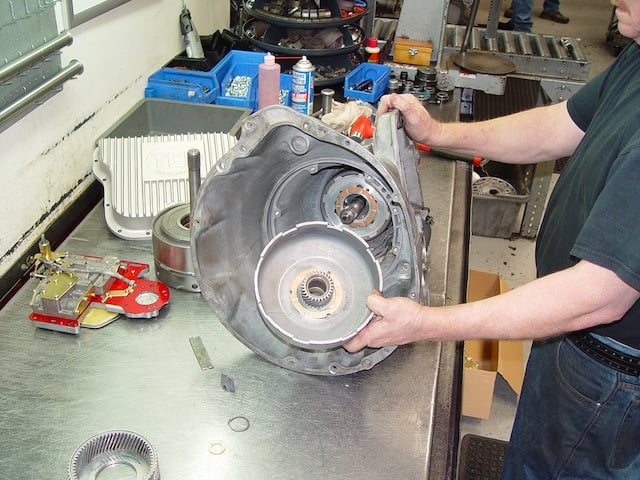 [10]
[10]
With the valve body out, the front and rear clutch assemblies are exposed, permitting direct access to the front kickdown band. This should be loosened before attempting to remove the clutch. With the bands loosened and removed, the clutches are removed, allowing us access to the planetaries and annulus gears as well as the drum and sun gears. The planetaries, annulus gears, and sun gears all ride on the output shaft, which was next to go.
Spic-And-Sprag
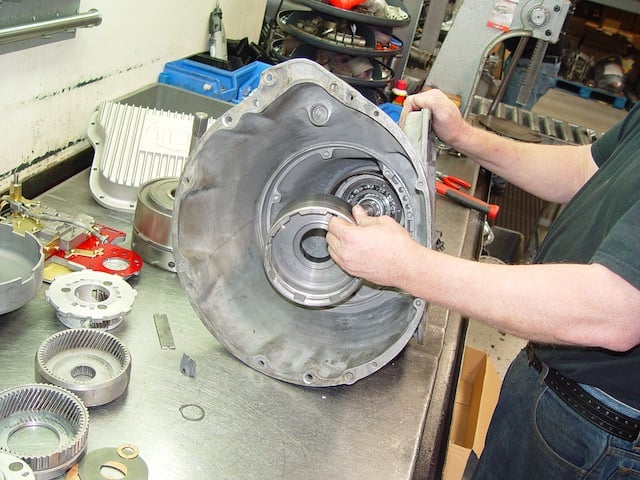
Our particular 727 was in poor shape [11]. Needing as much help as we could muster, we first called Tod Struck at Inline Performance Specialist for some advice. Struck’s been piecing together race and street/strip TorqueFlites for nearly a quarter-century now and knows his way around a Mopar gearbox.
 [12]
[12]If this doesn’t scare you, nothing will. Take a good, hard look at our input shaft (left hand side), as well as our front and rear drums. The front drum in particular is showing significant hazing and oxidation, while the rear drum is only half as bad. In many cases, it’s worth chucking up on a lathe and milling down to fresh metal. Our planetaries and annulus gears looked good, with little to no slop in the planetary gears. The pump and input shaft will need quite a bit more attention.
He suggested, “Knowing the kind of power you’re wanting to make, and being that [the ’69 Charger] is such a big car, you’re going to want to take extra precautions.”
The plan was simple: less moving parts meant less potential for breakage. We wanted a reverse-manual valve body and a high enough stall converter to spin those tall 4.56 gears to get our big B-Body on its way. Where we came short was the guts. Where should we start?
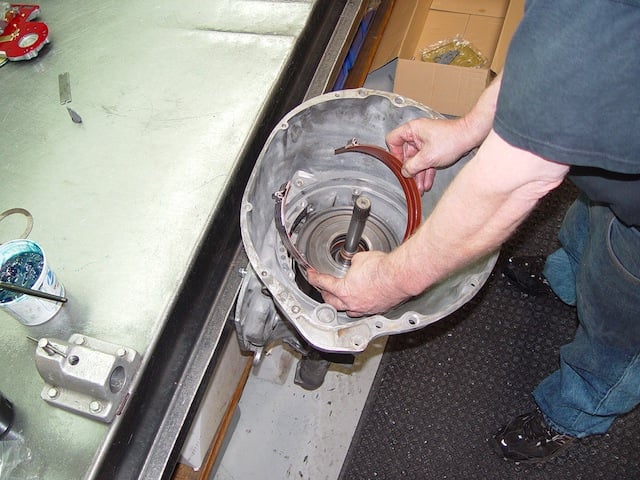
“A bolt-in sprag, for one,” Struck continued. While impressively strong, the 727 does have an Achilles’s Heel, an overrunning clutch assembly, or “sprag.”
Designed to prevent excessive or potentially catastrophic damage if the transmission is allowed to free-wheel, the transmission’s sprag is a pressed-in housing containing spring-loaded rollers to help slow (and stabilize) the transmission’s rotating assembly.
And since all of the combined kinetic energy of the transmission and engine are absorbed by the sprag, it can – when coming loose – actually start to spin out of the transmission case with destructive effect. To counter this, many racers resort to drilling and tapping the factory sprag, bolting it down in place. Luckily, there’s an easier – and cheaper – way to fix this, thanks to TCI Automotive [13].
 [14]
[14]
Next the accumulator spring and front and rear servos can be removed. These activate the front and rear bands. When reassembled, a new billet single-piece servo will replace the factory rear servo, as well as new aftermarket springs and heavy-duty retainers to minimize the spongy shift cushioning characteristic to the stock servos. The front servo simply received new inner and outer springs. TCI also included a 4.2 ratio band apply lever, which increases the 'snap' between shifts.
TCI is no stranger to top-of-the-line transmission performance. Since 1968, TCI has earned itself a solid reputation for quality products, whether you’re looking to simply rebuild your transmission or eke out as much bulletproof performance as you can. As for our needs, TCI designed an overrunning clutch kit (i.e. bolt-in sprag [15]) that’s already drilled and tapped, as well as fitted with new springs and rollers.
Since our TorqueFlite needed much more than just TCI’s new sprag kit, we consulted with TCI’s Scott Miller. “A full manual reverse shift-pattern valve body should be no problem on the street,” Miller explained. “But to keep [the 727] together, you’ll need more than just the valve body. You’re looking at our Super Street Fighter kit.”
 [16]
[16] [17]
[17]
Next, standing the housing up vertically, remove the access plate to the snap ring, which once removed allows the output shaft to simply fall out. The output shaft features four sets of splines; the first set fits in the front planetary gear, the second set mates the output shaft to the rear annulus gear, the third set holds the governor-park pawl assembly to the output shaft, and the fourth connects to the drive shaft yoke. There's also the gear teeth to drive the speedometer gears. With the shaft removed, the nose cone can be detached easily.
Ready For a (Street) Fight
Since our factory 727 came pretty weak – compared to those TorqueFlites equipped with HEMI-grade components – we counted on a full rebuild of the TorqueFlite. TCI has several levels [18] of performance kits, namely the Sizzler, Street Fighter, Super Street Fighter [19], and Race [19] transmissions. Officially, the Super StreetFighter is designed to bridge the gap between their StreetFighter and Race series transmissions, for cars producing up to 600 horsepower. Knowing we’d be well north of the 600HP mark, we consulted Miller again.
“Don’t worry. Most of the [components] used in the Super Street Fighter are used in the full Competition Series transmissions as well,” explained Miller. “We’ll use Red Eagle clutches, heat-treated Kolene steels, a Red Eagle flex-style high performance intermediate band, Kevlar high performance bands, a two-extra-quart capacity deep aluminum pan, and a 4.2 ratio band apply lever [20].”
For those do-it-yourself trans builders wanting to reduce their TorqueFlite’s slippage, Inline’s Tod Struck also suggested, “A lot of guys use all reverse clutches. They’re thinner than the forward clutches, which allows you to pack more in. It’s an old trick.” While we weren’t going to be employing this tip, it was a helpful bit of advice.
 [21]
[21]The governor gear slides on the output shaft like a collar, and works to control shift points. According to Allpar: “Two cast iron sealing rings, the governor body-park pawl assembly and the governor valve-governor weight assembly all work together to send the governor signal to the valve body to tell it to operate various shift valves, controlling up and down shifts. There is one snap ring used to hold the governor body park pawl assembly secure on the splines on the output shaft.”
Coming Through In a Clutch
Disassembling our transmission only took a short amount of time. Starting from the outside and working our way in, we removed the old torque converter, which we believe spun around 1200-1600RPM from the factory. Next came the cracked and broken rubber cross-member mount, speedometer gear drive, and shallow stamped steel pan. Our new TCI aluminum pan [22] adds over 2 additional quarts of ATF and is finned for better cooling, a stark improvement over the dented steel one.
 [23]
[23]After polishing the output shaft to clean up its surfaces, it was time to put it back in. But before we could slide it back in place, TCI pulled out the old overrunning clutch assembly, or “sprag.” TCI’s bolt-in sprag bolts in through the rear of the housing, where the previous sprag was merely pressed in. Now installed, the output shaft was fitted with the governor pawl and bolted down with a new gasket.
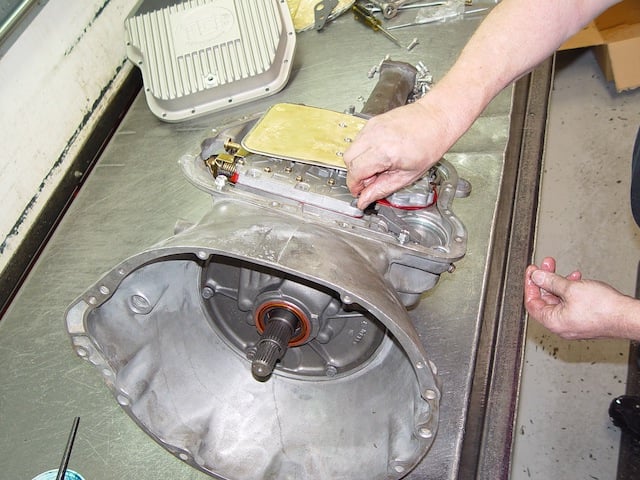
With the pan gone, we had direct access to the valve body. Normally referred to as the “brain” of the transmission, the valve body acts very much like your engine’s camshaft, with pre-programmed points and circuits mandating shift points and fluid pressures.
Since we’re going with a reverse-shift-pattern manual valve body [24], we no longer need to worry about slippage as we’ll be shifting our automatic manually from here on out.
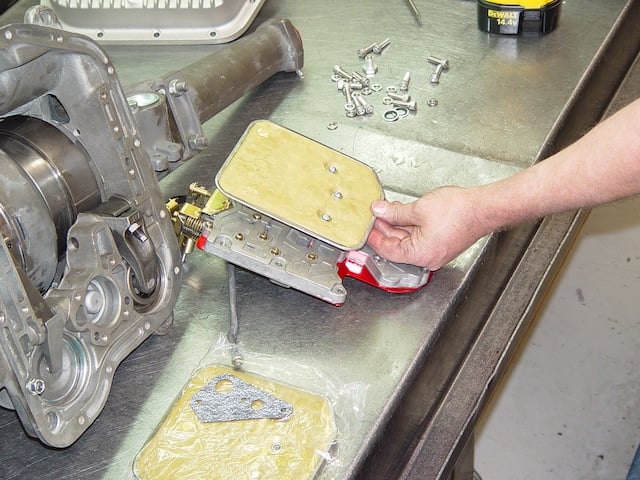
Removing the valve body required the twist of ten bolts with the attached filter (held on by four screws), and, when gone, revealed the clutch drums and servos that truly make our transmission come to life. The oil pump assembly is held in by seven bolts.
Many find it difficult to pull out without the use of a thread-in slide hammer or having to press it forward from the inside. Either way, with the pump out, the planetary gears can be removed easily; held in by a snap-ring (or “circlip”) the planetaries, clutches and drums all slide out in sequence.
It’s a smart idea to double check your planetaries for any “slop” in your gears. Thankfully, our TorqueFlite’s planetary gears were in good shape and showed a safe amount of side-to-side “play.” Unfortunately, our clutch drums exhibited some surface rust. A couple passes of emery cloth or steel wool knocked off the oxidation without much ado. Otherwise, we’d have to turn the drums down on the lathe. Many shops, in fact, will mill a step into the drum to give the band a guide. Yet another little trick that some like to use.
 [25]
[25]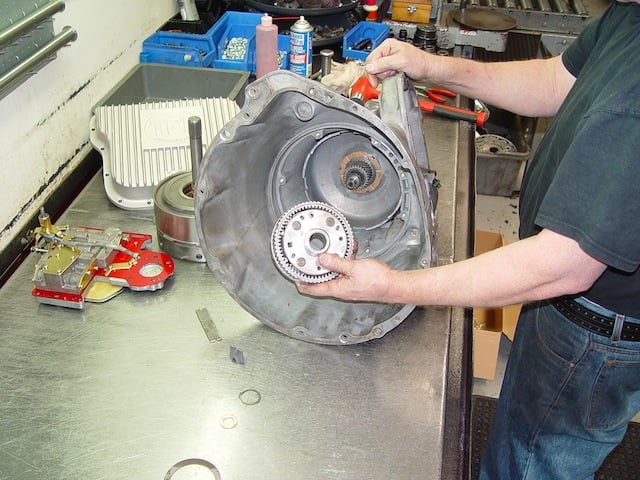 [26]
[26]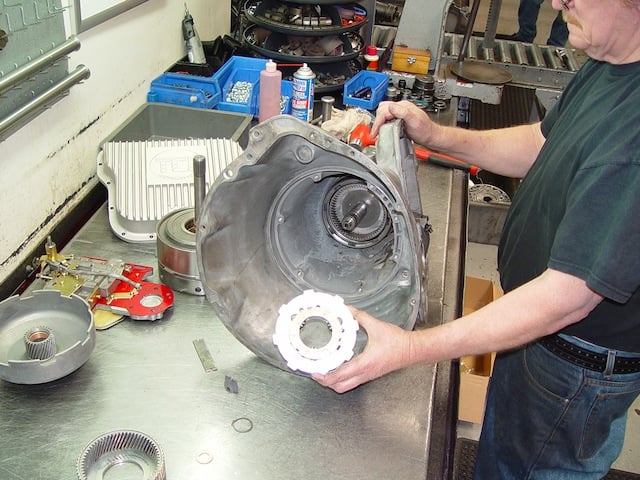 [27]
[27]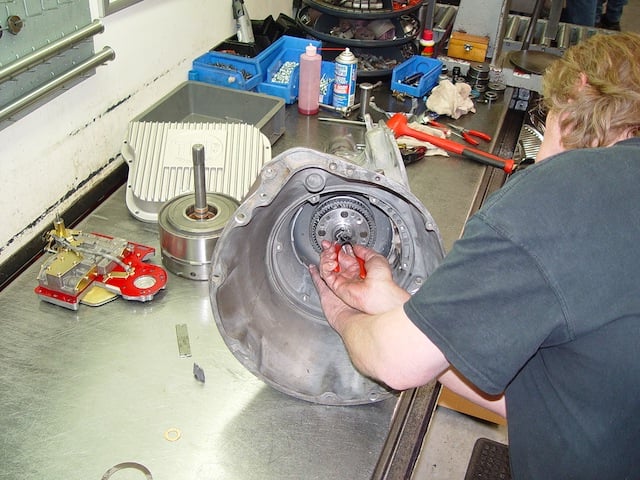 [28]
[28]
Reassembling the rear gear train is surprisingly straight forward. First, install the rear band, attaching it to the rear band arm (or strut). Next, slide in the rear drum, indexing it into the bolt-in sprag. The sprag should allow the drum to spin easily clockwise, but lock when trying to turn it counter-clockwise. Next, insert the output shaft. This step should be followed by inserting the rear annulus and planetary. Next, slide on the drum with the two sun gears. The front annulus and four-pinion planetary (big block-equipped 727s came with a four-pinion versus small blocks, which got a three-pinion). A single snap ring holds the whole assembly in place (shown).
Rebuilding Our TorqueFlite By The Numbers
- 727 Bolt-In Sprag Kit (PT# 127000) $77.02
- 727 Red-lined Flex Band (PT# 125500) $31.36
- 727 Forward/Direct Steel Plates 0.068″ (5 ea.) (PT# 124066) $38.65
- 727 5.0 ratio Hemi Band Apply Lever (PT# 146900) $31.56
- 727 Cast Aluminum Deep Pan (PT# 128000) $160.10
- 727 Reverse Kevlar®-lined Band (PT# 125505) $17.14
- 727 Forward Clutch .061″ (PT# 124500) $28.52
- 727 Racing Overhaul Kit (PT# 128600) $62.38
- 727 StreetFighter Torque Converter (PT# 142203) $539.91
- 727 Direct Aluminum Drum (PT# 123900) $711.23
Total: $986.64
Getting Our Act Together
Putting the TorqueFlite back together was merely a reversal of the disassembly process, only doing so a bit more carefully and using fresh, new components. With with the tail off, TCI thoroughly cleaned the bare housing, blowing out the circuits before reassembly. TCI was mindful to apply a dab of grease to each hard contact point. While the TorqueFlite will be running TCI’s Max Shift ATF [29], the added precaution ensures a safe installation and additional insurance from unneeded wear.
The rear gear train went on quickly after installing the bolt-in sprag. The rear drum friction band goes in first, mating up to the rear band articulating arm. The arm is actuated via a sprung servo (which we replaced with a billet piece), and constricts the band when shifted either in low (first gear) or reverse. The clutch drum slides in next, which indexes into the bolt-in sprag. The sprag allows the drum to spin clockwise, but locks it from turning counter-clockwise.
With the drum in, the output shaft can go in next. The rear annulus and three-pinion planetary go into the drum afterwards. Many top performance builders prefer that the three-pinion planetaries be swapped out with four-pinion billet pieces. While our front planetary was a four-pinion, we kept our costs low by retaining our rear planetary. We’ll make sure to keep the down shifting (or engine braking) to a minimum.
 [30]
[30] [31]
[31] [32]
[32] [33]
[33]
Since our TorqueFlite's drums were oxidized - but not excessively worn - it wasn't necessary to turn them down on a lathe. Rather, they were simply scrubbed down with some steel wool until they looked brand new. With everything out, the bare 727 aluminum case was given a quick cleaning before the reassembly. Rebuilding the front and rear clutches require a bit more than just repacking the discs. First, TCI pressed out the snap ring, the retainer and the seals before swapping out the clutch springs and new seal rings. Using Red Eagle clutches and heat-treated Kolene steel plates, TCI alternated between the steels and clutches until five of each are pressed beneath the pressure plate. The process is the similar for the rear drum, except including the installation of the input shaft, as well as the addition of a new diaphragm, spacers, wave and flat snap rings, and of course a new bushing.
The forward drum (fitted with the two sun gears) was next followed by the the front annulus and aforementioned four-pinion planetary. Capped off with a single snap ring over the end of the output shaft, the whole assembly is held in place.
Joining the output to the input shaft is the forward gear assembly. The front and rear clutch drums were repacked with new springs, retainers and seals before the Red Eagle clutches and new high performance steels could be shuffled in. One after the other, the rear and front clutches index together on the input shaft before the pump goes on. But before the pump can be installed, the forward band is inserted.
Once sealed up, TCI rolled the 727 over and adjusted the bands properly, torquing the adjustment screws to 72 ft. lbs. Its usually a good rule of thumb to adjust the screws once, over-tighten them a turn or two and back them off before readjusting the screws back to the proper torque rate. This is a good tip particularly as this will set the bands.
With much less hardware to worry about, the manual valve body requires much less effort to bolt down than a regular automatically-shifted valve body. Attached with a new filter, the bottom end of the 727 was all but ready. Before buttoning up the new deep pan, the transmission was pressure tested. This test ensures that the new servos actuate the band arms, while the transmission is systematically rolled through all the gears. It’s the last bit of double and triple-checking that goes into a TCI-built performance transmission.
 [34]
[34]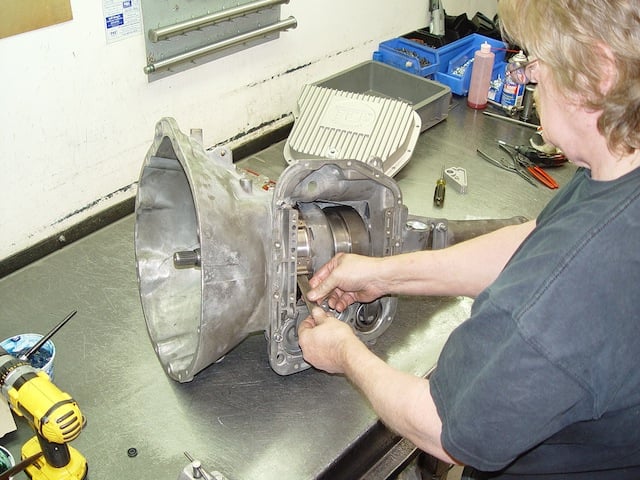 [35]
[35]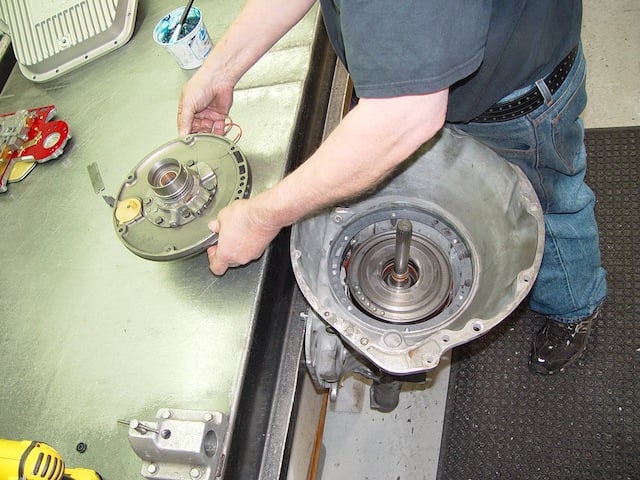 [36]
[36]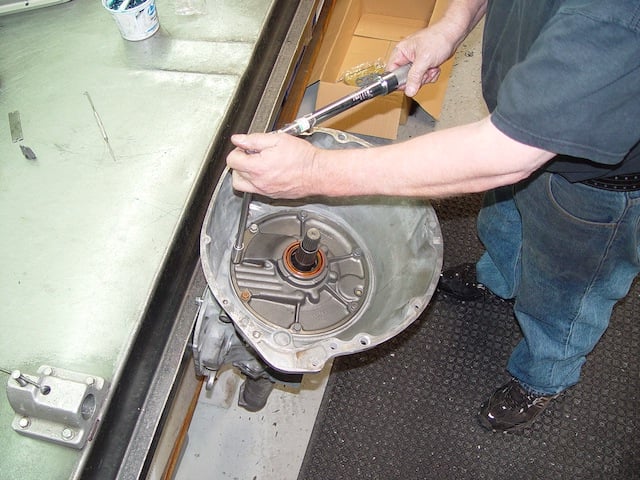 [37]
[37]
With the front clutch assembly in and properly indexed, TCI slid in the new Red Eagle flex-style high performance band. The forward band can go on in either direction, as long as the split is pointed outward toward the kickdown lever. Made with a Kevlar lining, these high performance bands are capable of handling up to 1,000 horsepower. Next, the heavy duty band struts are slid into place and tightened down by the adjustment screw. Following this step, the bands are left to be adjusted later as the rebuilt oil pump is bolted back into place. There's a specific way the pump should bolt down to keep all the oil passages open. Make sure the oil pump and the gasket are aligned properly or you risk blocking off your transmission's circuitry.
Buttoned Up And Ready To Burn Some Tire
With the pan on with a fresh gasket, Kong’s newly-TCI-rebuilt 727 TorqueFlite was given a fresh coat of paint (as is the TCI custom) and shipped back home, accompanied with a new TCI Outlaw Shifter [38], a Super Street Fighter torque converter [39], and one of TCI’s Performance Transmission Cooler kits [40]. We love the Mopar-appropriate pistol grip-design of the billet aluminum Outlaw shifter, and even toyed with the idea of maybe swapping out the black grip with a woodgrain replacement. Although the Outlaw can come with an electric shifter kit and one- and two-button triggers, we opted for the simplest setup with a Park/Neutral safety switch.
Transferring the power from the crank flange to the transmission is our new high-stall torque converter. Made with furnace-brazed fins, needle bearings, and a hardened, pre-ground hub, the Super Street Fighter converter is the right pick for our big block set up, particularly as we’re running 4.56′s with 30-inch tall tire. Pitched with a 3,800-to-4,000RPM stall, our 9-inch converter will flash pretty dang hard.
Totaling out our care package from TCI was their Performance Transmission Cooler kit. Constructed from aluminum and powder coated black with #6 AN fittings to work with high pressure lines, we’ll definitely put this to good use.
Building a hard-hitting engine is always the flashy, fun thing to talk about, but without the proper gearbox to back up all that power, your big and brash big block won’t have anywhere to go. We’re working on Killer Kong’s powertrain a little backwards on purpose because we want to emphasize how crucial the rest of the package is. While a stroked lightweight HEMI is a cool catch for this project car, it’s the collaborative effort of all the parts that make it a success, and with TCI’s help, we’ve got one less part to worry about.
 [41]
[41] [42]
[42]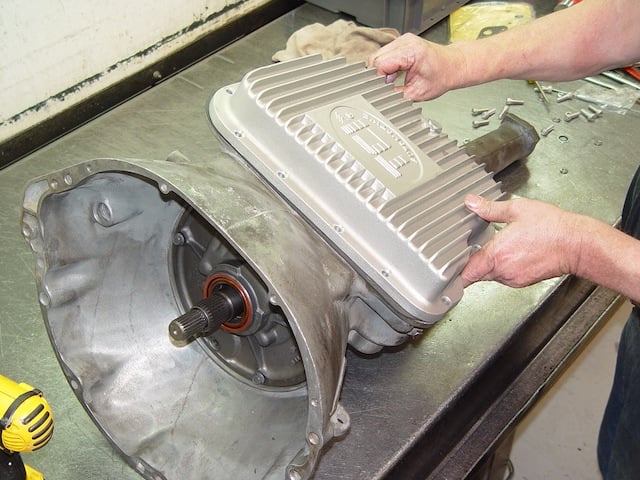 [43]
[43][44]
The rear band adjustment lever is torqued down to 72-pounds and backed off two turns. This allows enough slack in the lever to keep the band loose, but not sloppy. The front band is tightened down identically to the rear lever, making sure to back it off two turns. With the bands adjusted, the reverse-pattern, manually-shifted valve body can be installed. Designed for competition use, TCI's manual valve bodies run higher line pressures than automatically shifted transmissions, which prevents clutch slippage under high loads. Before buttoning up the TorqueFlite, the transmission is pressure tested to make sure that all of the servos respond as the transmission is artificially shifted through all the gears. With the 727 complete, TCI painted the Mopar gearbox in a coat of gray paint and install their deep cast aluminum pan.
 [45]
[45]With our mighty TorqueFlite buttoned-up and ready to go in, we wasted no time in getting Killer Kong up in the air and ready for the install. We’ve got some plumbing to do to hook up the new transmission cooler kit as well as the new Outlaw shifter, but we’ll have another update on that install coming up soon!