 [1]
[1]
When it comes to classic cars, the big three from Detroit offered everything from grocery getters with inline six-cylinder engines to big-block V-8s that had more ground-pounding power than the skinny tires could handle. The small-block offerings were varied – topped with a two-barrel carburetor, a four-barrel, or three deuces for a few vehicles.
 [2]
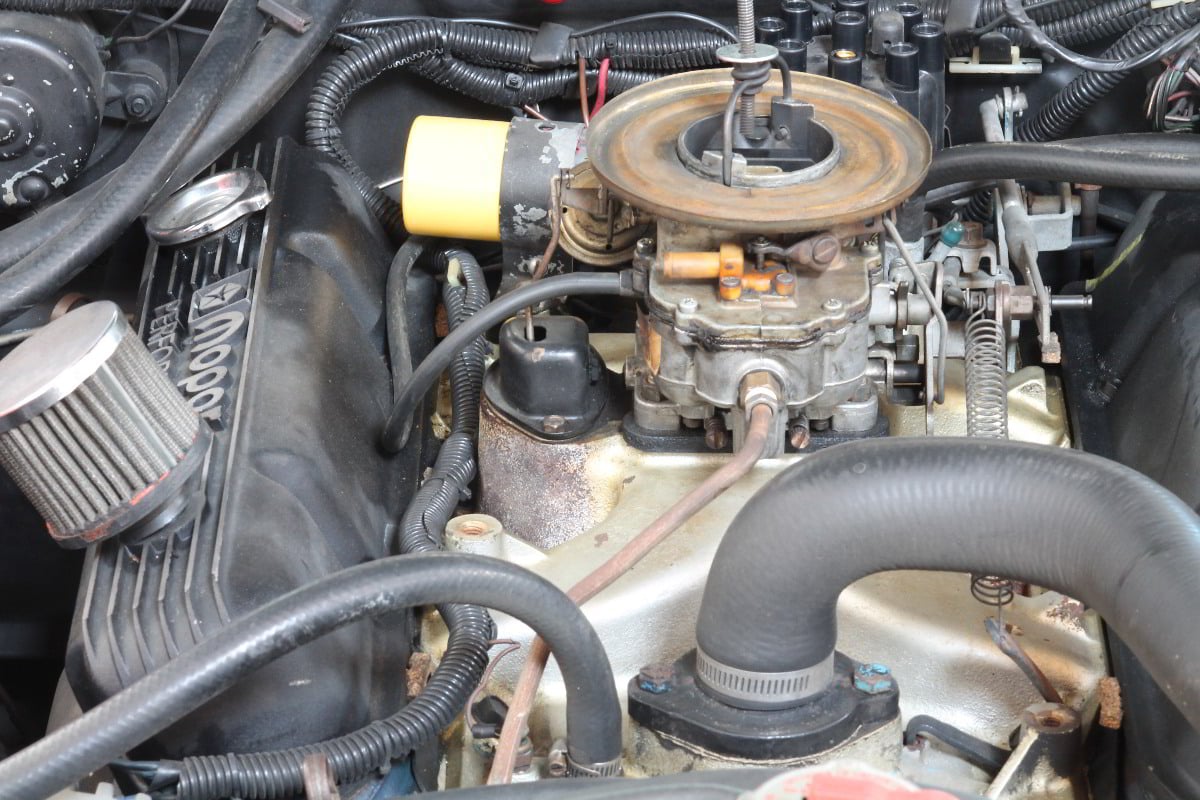
[2]This Dart came with a two-barrel carburetor: it's good for economy, not so much for performance. We aim to change all of that.
But the small-block engines were often limited when it comes to power, and for years people have been upgrading them with performance parts trying to get the respectable horsepower figures that these engines are capable of. One of those engines resides in our 1971 Dodge Dart Swinger – the LA 318.
The small-block Mopar (LA engine) spanned from 1964 to 2003, starting life as a 273 in 1964. The wedge motor, as it’s called because of its wedge-shaped combustion chambers, developed into the 318 in 1967, and it was a popular engine that showed up in nearly all of Chrysler’s RWD vehicles during its run.
The anemic two-barrel carburetors were fine if you wanted to take a stroll to church, or the grocery store, but it made many of these cars rather wimpy when it came to performance. The two-barrel was good for economy, but one of the more popular upgrades to the 318 was to add a four-barrel carburetor and headers, which became the basis for our 318 upgrade.
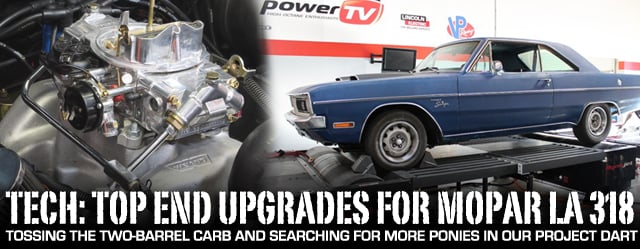
LA 318 Top-End Upgrades
 [3]
[3]
- Crane Pro Curve Billet Distributor – Part #1000-1801
- Crane HI-6 Digital Ignition – Part #6000-6445
- Crane LX-92 Coil – Part #730-0892
- Weiand Stealth Intake Manifold – Part #8022
- Holley Aluminum Street Avenger Carburetor – Part #0-83670
- Holley Chrome Fuel Pump – Part #12-360-11
We brought our Dart into the shop to make some upgrades, and we made a run on the dyno after each upgrade to see what kind of gains we could get from adding: a distributor and ignition box from Crane Cams [4]; a Holley [5] four-barrel carburetor and Weiand [6] intake manifold; and finally, a complete exhaust system including Hooker Headers [7] and Pypes Performance Exhaust [8] system.
While the performance numbers can vary depending on the condition of the engine, we knew that with a high-mileage engine we were already at a slight disadvantage, but this is where most people start out until they can afford a complete rebuild.
With most every performance component, it’s expected to see a gain in horsepower and/or torque. Typically, those gains are based on installing only that component on a stock engine. Calculating what gains you might see when installing that same component on a modified engine is a little more difficult to nail down because there are many other factors that need to be considered.
Performance components work hand in hand, and putting the right combination together will give you the best bang for the buck. You can’t just throw a Holley Dominator carb on this engine and expect to see better performance if your engine isn’t built to take it. We started with the basics, and we were pleased with what we were able to get out of the 318.
 [9]
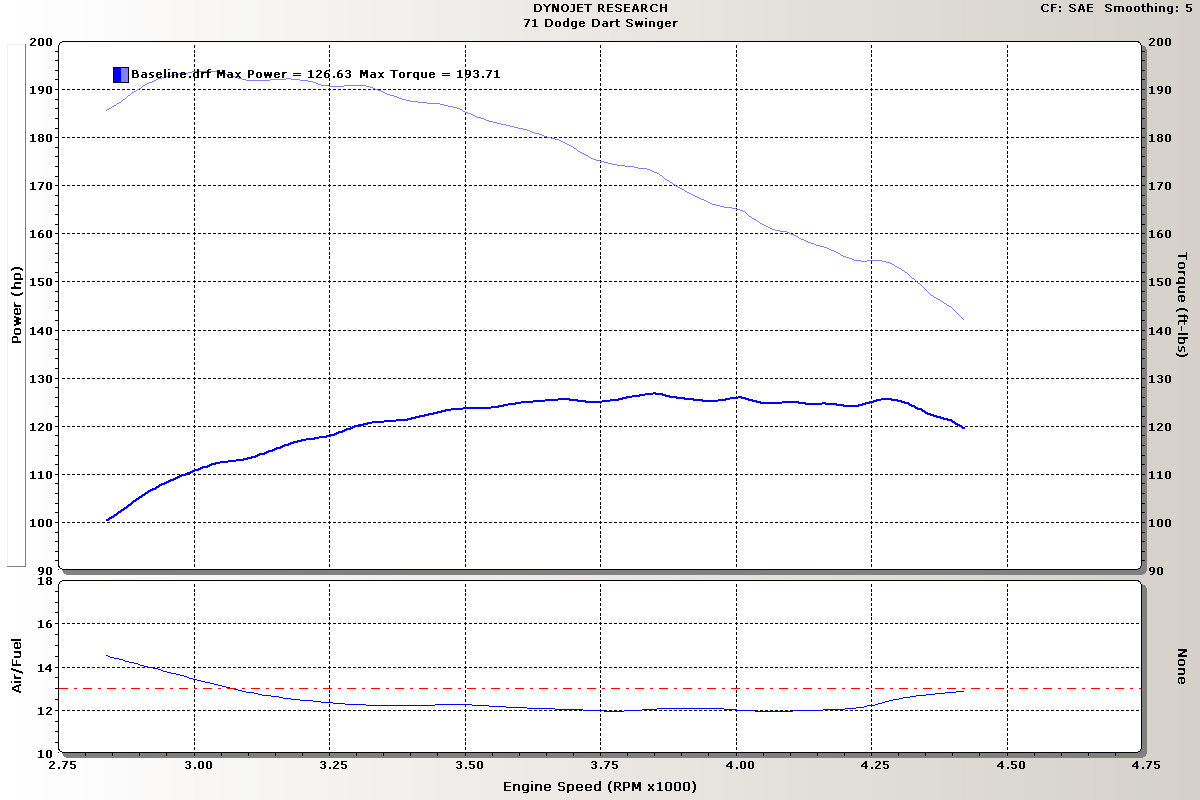
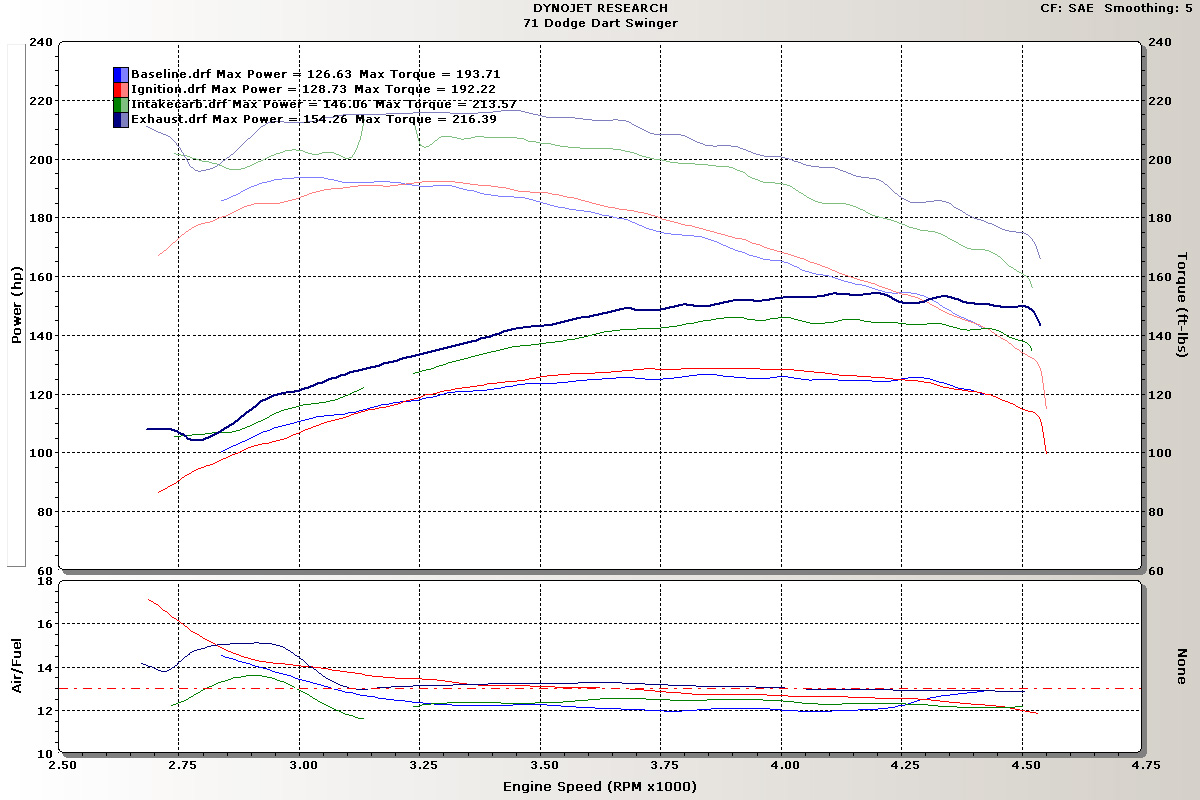
[9]Our Dart put down 126.63 horsepower and 193.71 lb-ft of torque, and it was running a little rich. We were looking for more power, one component at a time.
Baseline Readings
We ran our Dart on the dyno and set a baseline prior to the upgrades. We knew that we had some issues with oil fouled spark plugs, and we could tell by the dynograph above that we were running a little rich. We saw 126.63 horsepower to the rear wheels and 193.71 lb-ft torque on our initial run. Not too bad, but we knew we could do better. The air/fuel ratio was a little thick, but with the components we’re adding we’ll see if we can thin it out a little.
We began our upgrade with a Crane HI-6 ignition box, LX-92 Coil, and a Crane Pro Curve billet distributor. The second upgrade consisted of a Weiand Stealth intake manifold and Holley Street Avenger carburetor with a Holley fuel pump. We finished off the upgrades with a set of Hooker Super Comp headers and a complete header-back exhaust system from Pypes Performance Exhaust. After each upgrade was completed, we ran the Dart on the dyno again to record horsepower gains.
Crane HI-6 Ignition and Distributor
Distritbutors and ignition boxes don’t typically promise high horsepower gains because they aren’t necessarily considered power adders, like carburetors and exhaust systems are. What you can expect from an electronic distributor like our Crane Pro Curve billet distributor [10], Crane HI-6 Ignition box [11] and Fireball LX-92 coil [12] is a more efficient spark, which in turn provides a more complete burn of the fuel entering the combustion chamber, as well as improved fuel economy.
 [13]
[13] [14]
[14]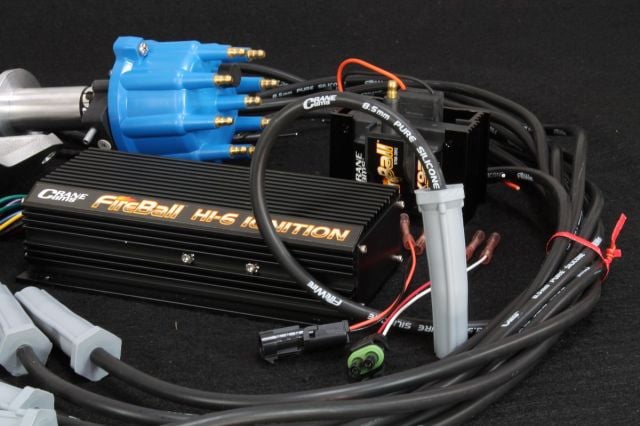 [15]
[15]
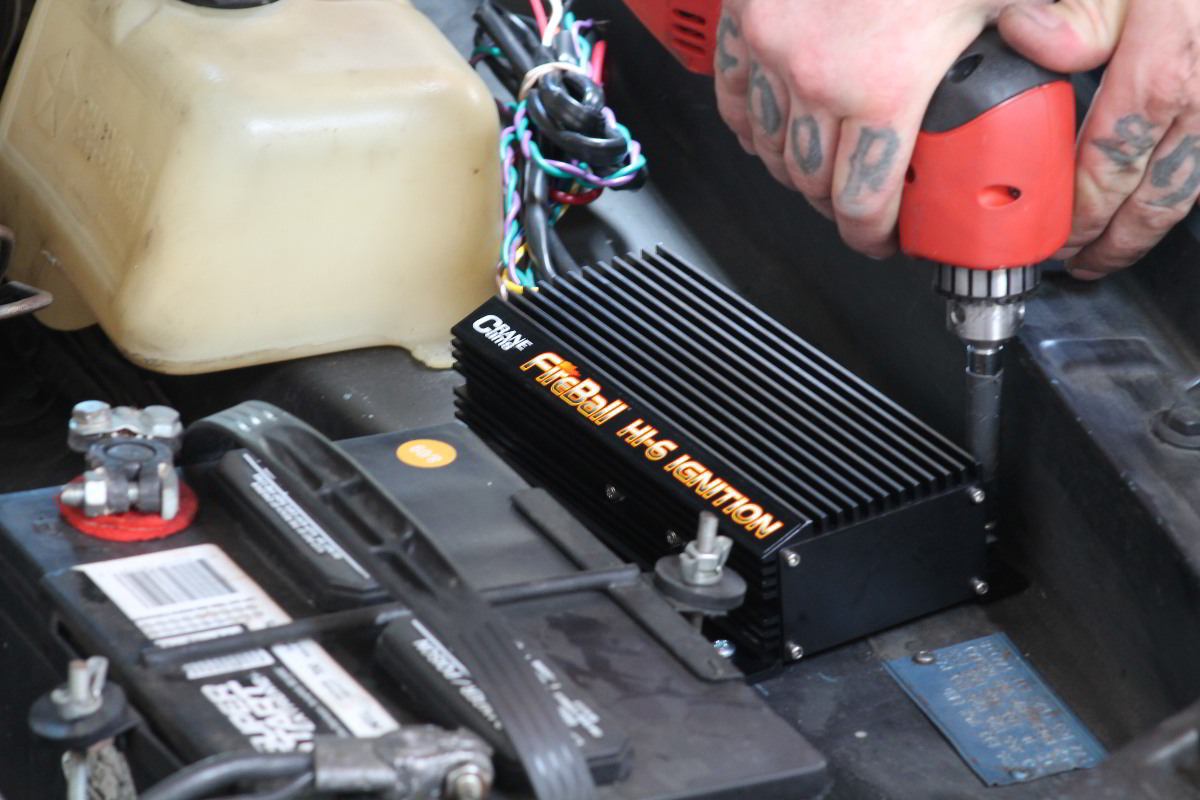 [16]
[16]The HI-6 is a sealed unit, but it's still a good idea to keep it away from heat and the elements. The apron was the perfect spot for ours to be mounted.
Crane has several different ignition boxes based on the specific application, from a street driven car like our Dart to a high performance car that is run only at the track. Crane’s web site provides you with the information you need to make the right choice for your ignition control box, and the HI-6 is the best fit for the Dart.
 [17]
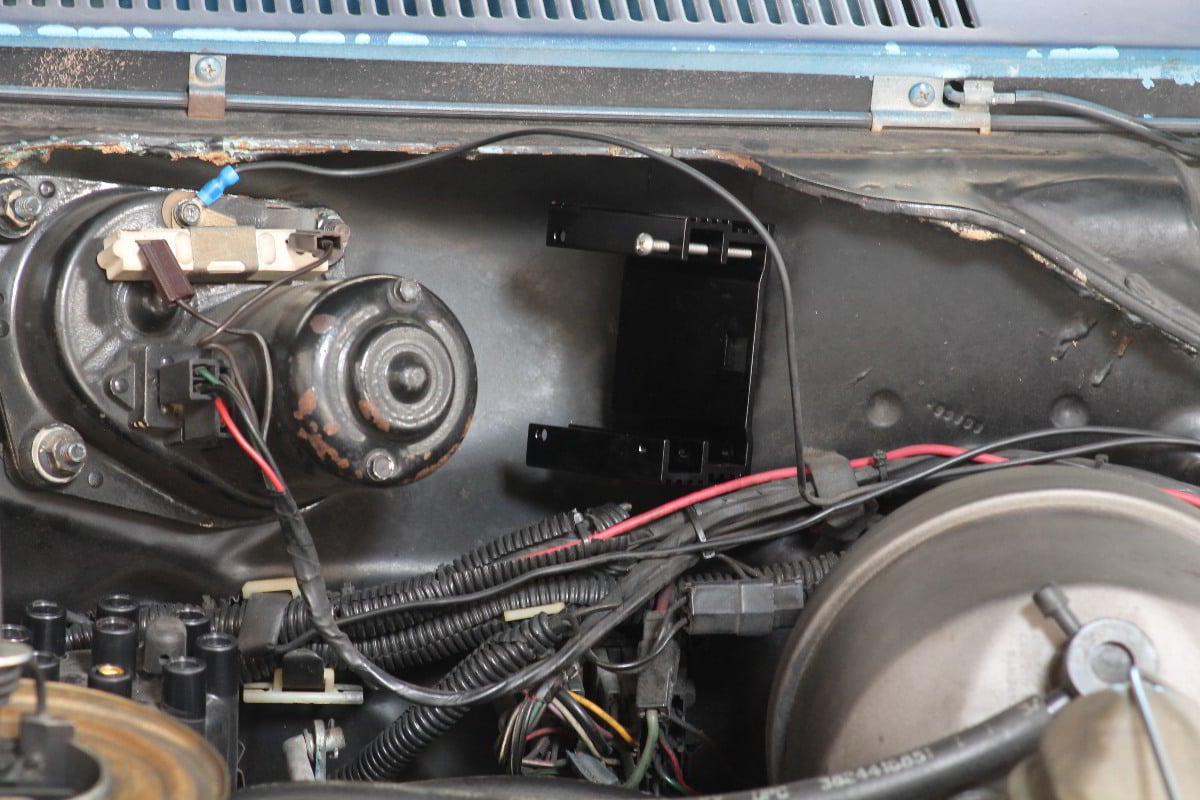
[17]We mounted the bracket for the FireBall coil to the firewall, it almost looks like it was made for this location.
The capacitive discharge ignition system allows for a bigger gap on the spark plugs, which means a bigger spark. Other features on the Hi-6 include fully digital components sealed inside the box for protection against heat and vibration. Crane’s multispark ignition provides a more complete burn of the fuel by firing multiple times instead of just once per cycle, and the built-in dials allow you to set a rev limit on your ignition. This keeps you from over-revving because of a missed shift and helps to protect your engine by cutting the spark to varying cylinders when the rev limit is reached.
The FireBall LX-92 coil that we used was designed to work with the HI-6. It’s a high output coil that provides up to 120% more output than a stock coil. It uses heavier gauge wire for lower resistance, and the insulated primary connector was added for additional safety.
The ignition unit has several connections that need to be made, and the easy-to-follow instructions provide enough information to connect the unit to a number of applications. These connections include positive and ground, as well as an ignition source and connection straight to the distributor. Since we used a Crane distributor, the pre-terminated connections were quick and simple.
The Crane Pro Curve billet distributor is a direct replacement for the LA distributor. Early Mopars that haven’t been upgraded to the newer electronic ignition will require a bit more modification to the wiring. 1972 was the first year that electronic ignition was available for the 318, but our Dart had been converted already which made the distributor install a little easier.
The Pro Curve Distributor requires a little bit of skill, and following the instructions is paramount with this set up.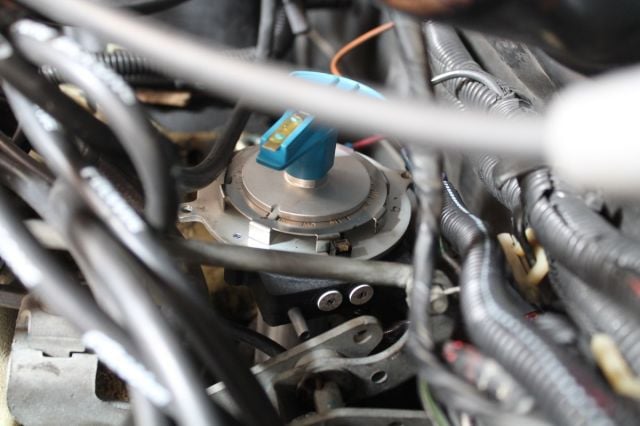 [18]
[18] [19]
[19] [20]
[20]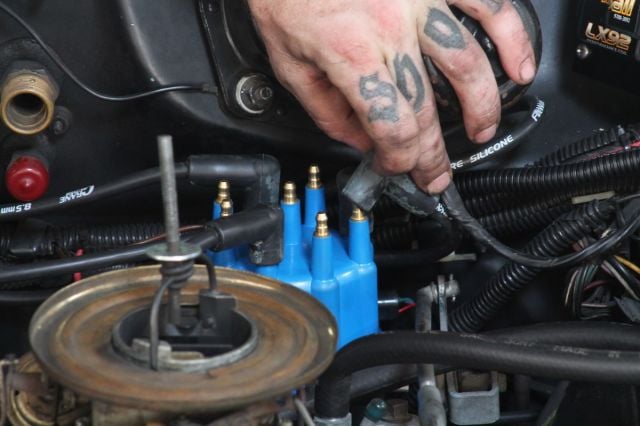 [21]
[21]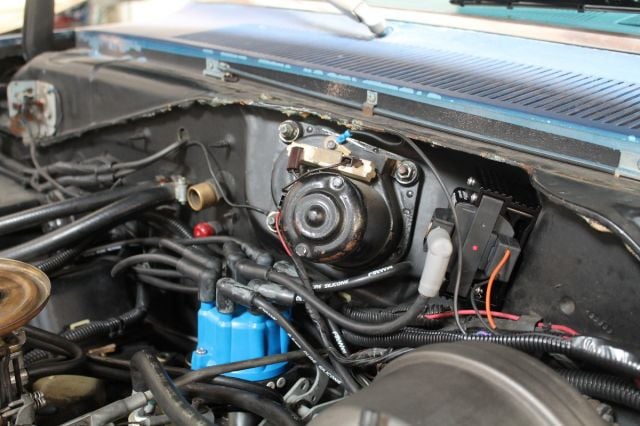 [22]
[22]
The setup for this distributor is more involved than a standard distributor because it’s completely programmable. With Mopar’s LA distributors, there are two ways the distributor can be installed: correctly, and 180 degrees out. But since the Pro Curve distributor is programmable, you have to first set it up properly and then set your initial and advance timing. It helps to make sure that your engine is at TDC, and that your distributor is installed correctly.
The first step is to align the marking on the distributor base, without the cap installed. With the marks lined up per the instructions, the dials can be set based on the timing profile described in the instruction booklet. We set an initial timing of 10 degrees with a total mechanical advance of 34 degrees, these are standard settings for a street driven vehicle that sees little-to-no track time, like our Dart. There are other profiles in the instructions based on various engine builds with other performance modifications.
 [23]
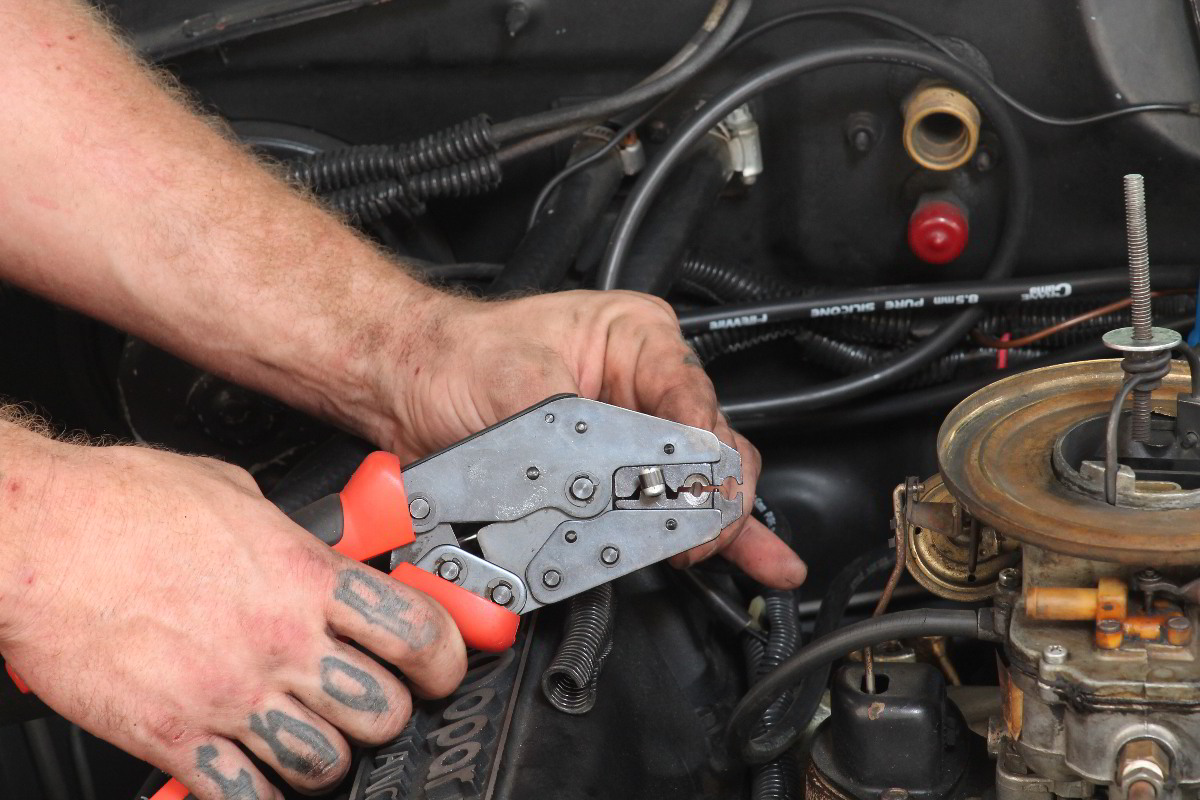
[23]A crimper tool helps make a better connection, regular pliers don't work so well.
We also got a new spark plug wire set from Crane, their 8.5mm FireWires [24] with straight boot design. These are a cut-to fit-wire set for most V-8 engines, with varying lengths of ignition wires. It’s best to start with the longest wire first and lay them out accordingly, the last thing you want is to have your last spark plug wire a few inches too short. So be sure to use the old adage of “measure twice, cut once” when you’re ready to crimp the distributor boots onto the wires.
With the LA engine, distributor rotation is clockwise and the firing order is 1-8-4-3-6-5-7-2. We loosely connected the wires to the spark plugs and ran the wires where we wanted them before securing them. It helps to have a crimper tool, this assures a better crimp onto the wire than a standard pair of pliers will ever do. A little WD-40 on the end of the wire will help slide the boot over the end of the wire, and also make it easier to slide the boot back over the terminal that is crimped onto the wire.
With the ignition, distributor, wires and new plugs installed, it was time to get the Dart back on the rails and run some numbers. We didn’t expect a big gain in performance, but we did hope to see a little bit better in the AFR area. We saw better numbers in both areas, with 128.73 horsepower and 192.22 lb-ft torque. The torque dropped a little, but the air/fuel ratio was closer to where it should be in the 12.7:1 range. No doubt, the combination of a better ignition system and new plugs and wires helped the Dart run a little better, and a little smoother, as can be seen by the blue line below in the chart.
 [25]
[25]Big horsepower gains aren't typical with ignition upgrades, but we not only saw 128.73 horsepower but the AFR was closer to optimum too. We lost torque, but we were still on the two-barrel carb so we knew it would improve later.
Holley Carburetor and Weiand Stealth Intake
We were able to pick up 2.10 horsepower by simply adding a new distributor, spark plugs and wires, and an ignition system from Crane. While this isn’t anything you can feel in the seat of your pants, it is an indication that things have improved, especially the air/fuel ratio. Having a better spark means that the fuel is getting burned more efficiently instead of being dumped out of the tail pipe. What will a four-barrel carburetor do for us? We’ll find out next.
 [26]
[26]With the powerband good from idle up to 6800 rpm, this Weiand Stealth intake manifold won't disappoint.
The intake that we chose for this upgrade was Weiand’s Stealth aluminum intake manifold (part # 8022 [27]). It’s a dual-plane manifold for street performance and economy, and a good match to the Holley Street Avenger carburetor. It’s a high rise dual plane design with a square bore mounting flange and no EGR provisions – this manifold is for performance upgrades, not emissions compliant replacements. The powerband on this manifold is good for idle through about 6800 rpm.
As with any intake manifold for classic engines, there are a few parts that you will need to obtain to complete this installation. We have found that it’s best to simply take the manifold with you to the parts store to get the proper fittings that are needed for the water outlets, which can include heater hoses and also the by-pass hose. You will also need to be sure that your water temperature sender will fit the new manifold, and if not a brass adapter may be needed.
We also recommend checking the condition of the thermostat housing and all associated hoses, and replacing the thermostat while everything is apart. With the low cost of a thermostat and heater hoses, it’s not a bad idea to replace them during an intake upgrade like this, and to also make sure that any openings not being used are properly plugged.
Top left: the original two-barrel intake. Bottom right: Although it seems the intake manifold misses a water jacket, this opening on the cylinder head doesn't go anywhere and won't cause a leak.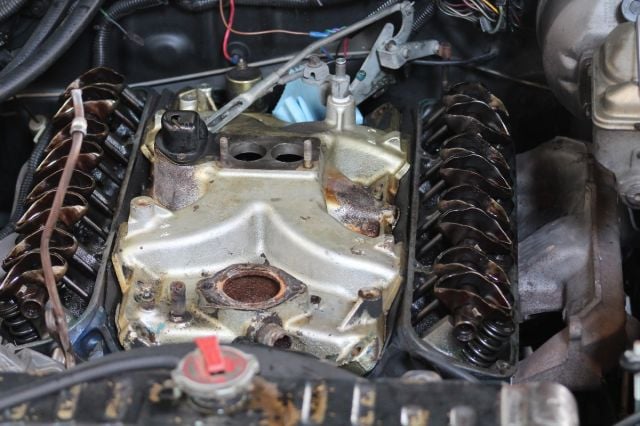 [28]
[28] [29]
[29] [30]
[30]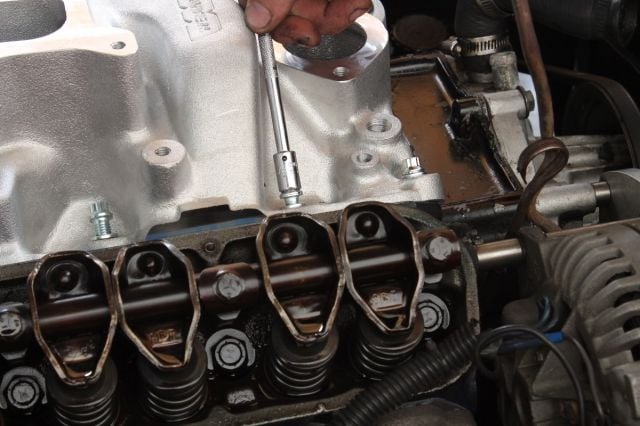 [31]
[31]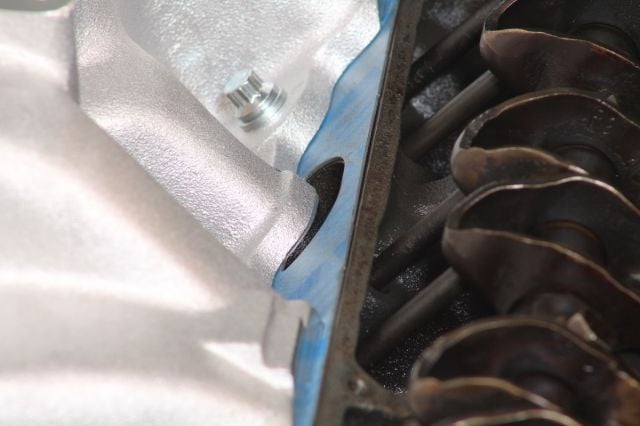 [32]
[32]
It’s always a good idea to test fit the manifold before you start using any sealants, this is to make sure that it will line up properly and that it will fit. Most intake manifolds for the LA motor will fit from 1964 – 1992, whether it’s a 273, 318, 340 or a 360. But there’s no better testament than placing the manifold on the block/heads and checking it yourself.
We checked ours prior to installation and there were some differences, but it was the right manifold and with minor adjustments it was ready to bolt up. We prepped the surface areas and made sure they were clean and smooth. All old gasket material needs to be cleaned up to assure there are no leaks and that the new gaskets have a good mating surface. Weiand states that the OEM style metal gaskets should not be used, instead use only a soft composition type gasket for an aluminum manifold.
When we installed our intake manifold, we noticed the openings above the coolant crossover in the center of the manifold. Even the gasket makes it look as though something is awry, but don’t be alarmed. This is an open area for heat to escape, and the passages lead to nowhere in the heads themselves. With the LA engine you’ll often get cork gaskets for the ends of the intake, we put silicone gasket sealer at the two ends of these cork gaskets to help seal off the corners. If you don’t seal them at the corners you will get oil seeping out under the intake.
 [33]
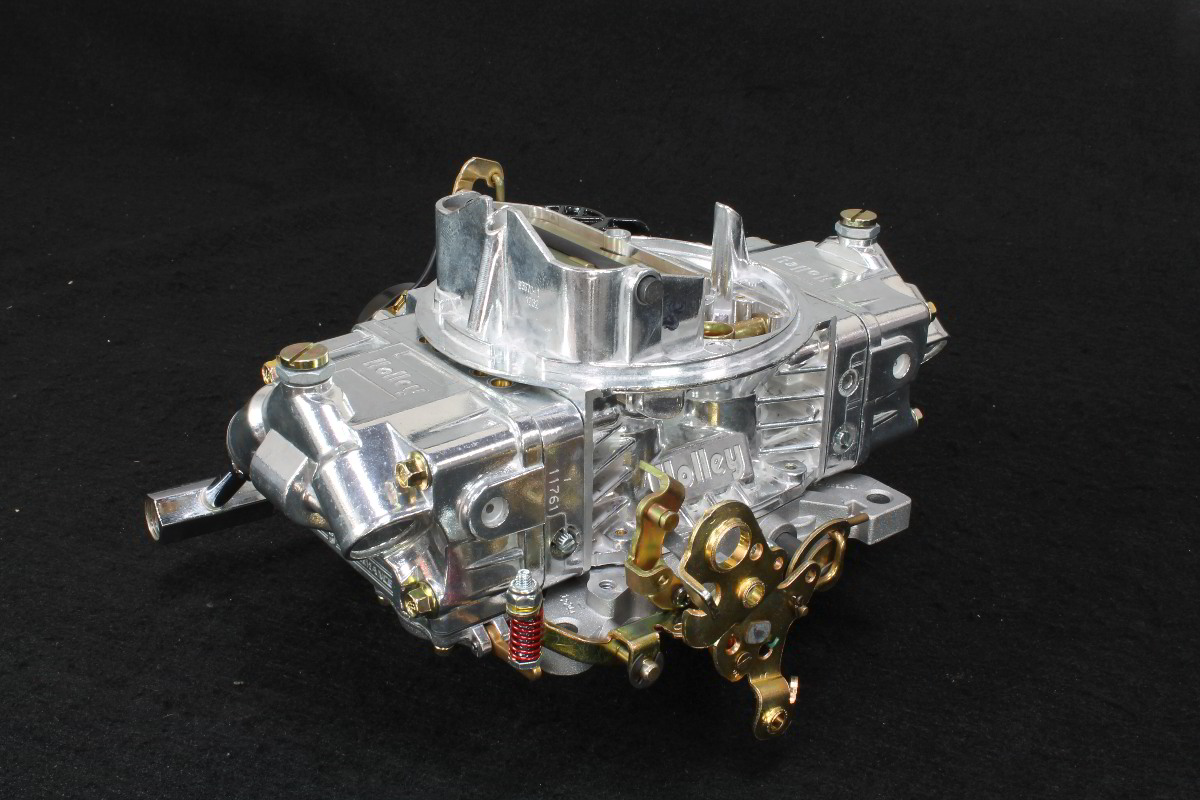
[33]Holley's Aluminum Street Avenger 670 cfm carburetor is enough carb to allow for further upgrades without being too much carb for the current setup.
When it comes to carburetors, we’ve all heard the braggart who said he “threw a seven-fifty double pumper” on his small-block. As impressive as it may sound to have a big carburetor, bigger isn’t always better. This sometimes results in a car that sounds like it’s going much faster than it really is when the owner gets on the throttle.
Too much carburetor only hurts the engine’s performance, there is a formula to determining the proper carburetor for your particular engine, and Holley has put all of that information right on their web site [34] to help you out.
The formula for matching a carburetor to your engine is based on the performance level of your engine, its displacement, and also the maximum rpm that your engine will see. For a street driven car like the Dart which isn’t going to see much more than about 5,000 rpm unless it’s being pushed, the formula gives us a few choices around the 600 cfm range.
You can go larger or smaller, depending on your needs and whether economy or performance is the driving factor. We decided on the 670 cfm Aluminum Street Avenger [35] for an out-of-the-box installation that won’t need a lot of adjustments.
Just like our other carburetors, it comes from the factory with very close, if not spot on calibration for most engine applications. -Blane Burnett

We talked with Blane Burnett, Marketing and P.R. Coordinator with Holley Performance Products, and asked about the Street Avenger carbs. He said, “The aluminum Street Avenger is intended for a more serious street enthusiast. Just like our other carburetors, it comes from the factory with very close, if not spot on calibration for most engine applications.”
The Street Avenger will give us a little more performance in case we plan to do some more upgrades in the future, without being too much carburetor for the current level of performance. A smaller carb might give a little better fuel economy, but this is a classic musclecar and we’re leaning towards performance.
Burnett said, “The Street Avenger also has more features that appeal to the hardcore street enthusiast, like the four corner idle adjustment and glass sight windows for easy float adjustment.” Other features that differ from their standard street carburetors include the quick-change secondaries that allow you to choose the opening rate of the secondary barrels. This can be adjusted to allow them to open faster or slower, allowing you to tune the way your carburetor reacts to wide open throttle.
 [36]
[36]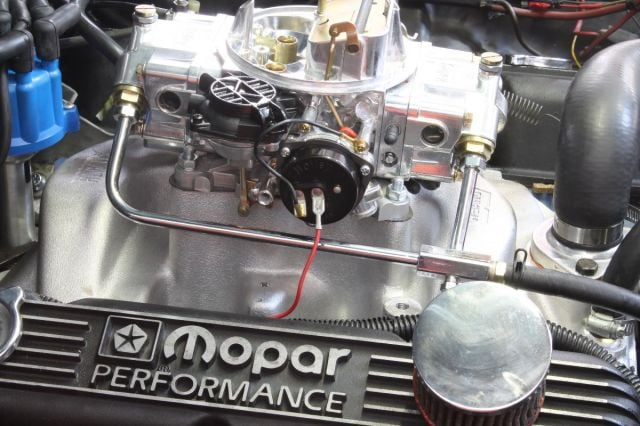 [37]
[37] [38]
[38]
Not only is the aluminum Street Avenger up to 44% lighter than it's zinc chromate counterpart, it also looks a lot better on the Weiand Stealth intake manifold. Unfortunately, it disappears under the air cleaner.
Other than the type of secondaries (vacuum or mechanical), another choice includes the type of choke system (manual or electric). For street driven cars like the Dart, vacuum secondaries and an electric choke are best. Mechanical chokes cost a little less, but unless you’re at the track often, the best bet is the electric choke.
Mechanical secondaries are better suited for a built motor that sees a bit of time on the track where the demand for fuel exceeds your dislike of gas stations. Vacuum secondaries work off of the amount of vacuum that the engine produces, and not necessarily on where the throttle is.
The one question that has come up from time to time is engine warm up. Obviously, a choke will allow the engine to operate better when the air is too cold, but can you drive with the choke on? The answer is yes, but keep it tame until the engine reaches operating temperature. The engine will warm up whether you’re driving or not, and letting a car sit on high idle for a few minutes only does one thing: waste gas. So when the engine is cold, normal driving is fine until it warms up and the carburetor comes down off of fast idle.
 [39]
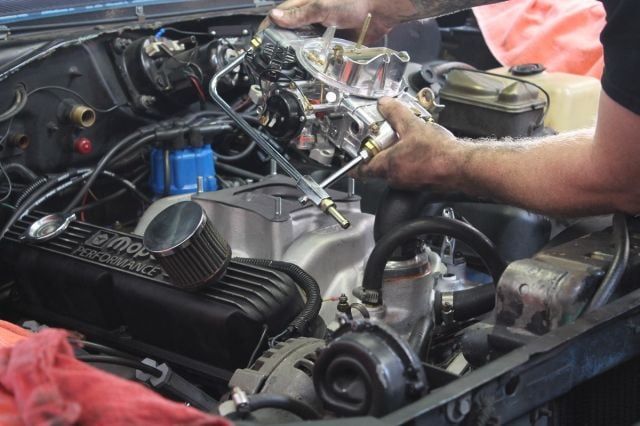
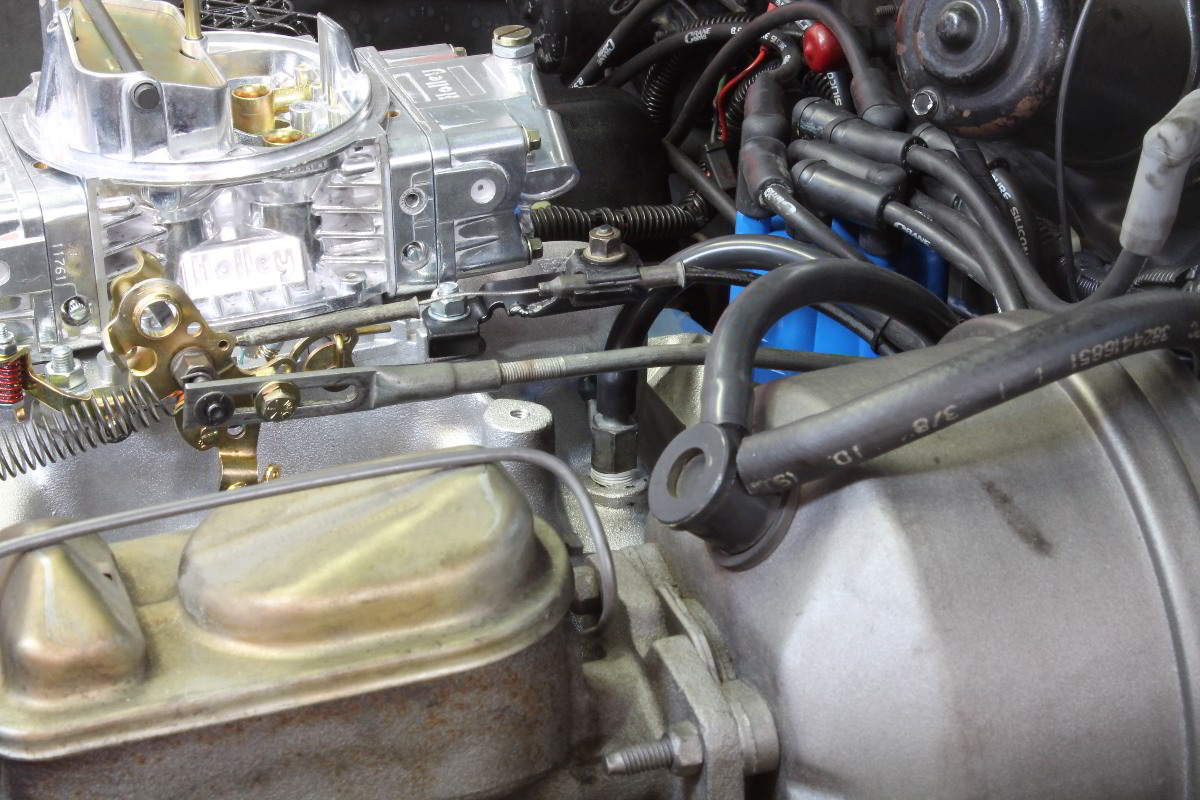
[39]Whenever aftermarket performance parts are installed, the possibility of modification comes into play. We had to modify the transmission kickdown lever and bracket slightly, but it was an easy fix.
One area that needed modification is the throttle cable and the transmission kickdown lever. With nearly thirty years of coverage for this intake manifold it’s difficult to cover every possible throttle and kickdown lever combination, and we did have to do some modifications to ours to mount the lever.
With the new carburetor and intake, we also installed a new chrome Holley mechanical fuel pump (part #12-360-11 [40]) to be sure that the proper fuel pressure is delivered to our new four-barrel carburetor. This fuel pump delivers 6.5-8 psi at 110 GPH fuel flow, and does not require a separate fuel pressure regulator.
The body of this fuel pump can be rotated to clear other engine components, allowing the pump to accommodate various fuel plumbing requirements. The only thing left at this stage of the upgrade was to get the Dart back on the dyno and see what kind of numbers we could get.
 [41]
[41]With the addition of a bigger carburetor, we saw 146.06 horsepower and 213.57 lb-ft torque on the dyno. That's good for 17.33 horsepower, but we were still running the restrictive factory exhaust system at this point.
Hooker Headers and Pypes Performance Exhaust
As you can tell by the graph above, we picked up 17.33 horsepower and 21.35 lb-ft torque with the addition of a carb and intake, giving us 146.06 horsepower and 213.57 lb-ft torque. But we still had one more ace up our sleeve, and that meant installing a set of Hooker Headers and a Pypes exhaust system.
LA 318 Exhaust System Upgrade
 [42]
[42]
- Hooker Super Comp headers – Part #5116-1HKR
- Pypes Exhaust System – Part # SMA10S
A good set of headers will help increase performance by allowing the exhaust to flow more freely and with less restriction. Like choosing a carburetor, you can also go too big with the exhaust, as well. For most systems on street-driven musclecars, a 2.5-inch exhaust is plenty big enough.
The headers for the Dart are Hooker’s Super Comp full length headers (part # 5116-1HKR [43]). These ceramic coated headers are designed to make the maximum horsepower and to make that power at the optimum point in the power curve. One thing that Hooker recommends is that ceramic coated headers are not used during engine break-in because it can cause damage to the coating and will void the warranty. The headers do require several heat cycles to fully cure before they can withstand extreme heat.
Time and patience has been put into the installation process for headers, and the manufacturer will give you the proper sequence and procedures. With our header installation, it required removing the starter and center engine mount bolt on the left side, as well as removing the left side tie rod from the drag-link and removing the drag-link from the pitman arm. The engine must be raised a couple of inches for clearance while installing the header.
The left side is a two piece header that allows for installing the headers above the steering gear. The front cylinder has a separate tube that will install after the header has been fastened to the cylinder head, and both pieces are installed from under the car. Once the header is located, the bolts and nuts can be started once the gasket is in place, and after tightening, the tie rod end and drag-link can be reinstalled.
To install the right side header, the left side must be completely installed and secured. The oil filter/adapter and bellhousing brace must be removed to make room for the header to be installed from underneath. The steering can be turned all the way to the left to give proper room for installation. When reinstalling the oil filter, it’s likely that a short oil filter will be needed to clear the headers. As with the left side, once the header is located, insert the gasket and tighten all bolts/nuts evenly until tightened. We also purchased a header flange kit to connect the headers to the exhaust system we installed.
As with most Mopars, it's a tight fit in the engine compartment, and the tubes snake their way around the steering components.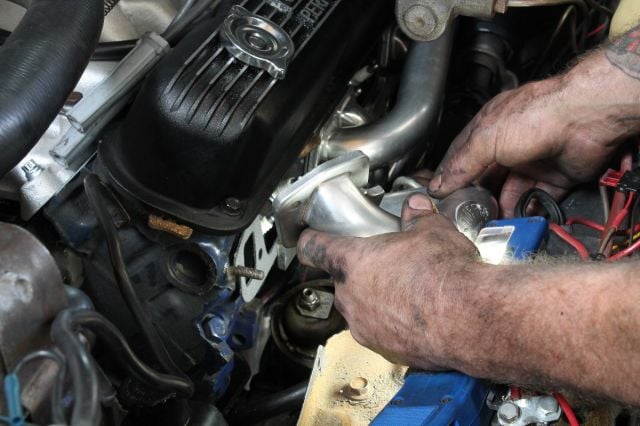 [44]
[44]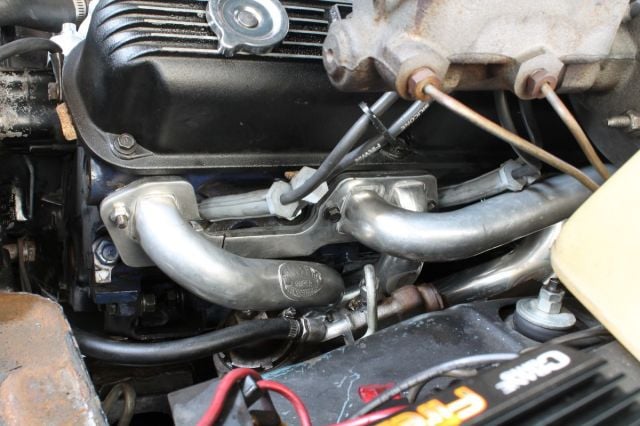 [45]
[45] [46]
[46]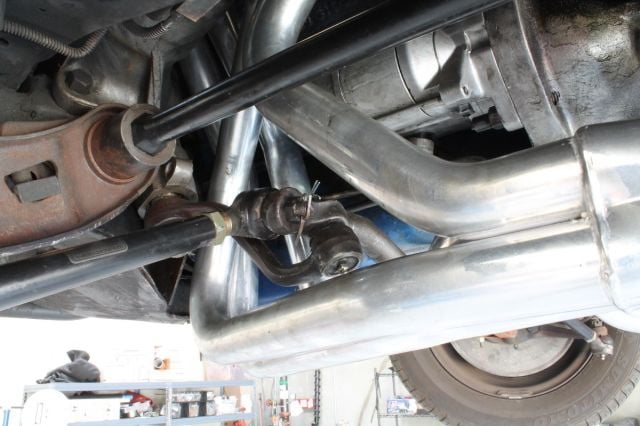 [47]
[47] [48]
[48]
Since we removed the entire exhaust system to make room for the new headers and Pypes exhaust system, we were able to use the parts from the kit to make our entire exhaust system without a tubing bender. The kit that we ordered is the 2.5-inch pipe with X-pipe (part # SMA10S [49]), and it includes enough pipe with varying bends and curves to fit the 1967-73 Mopar A body. It’s a 16-gauge mandrel-bent aluminized steel tubing system with 409 stainless steel X-pipe, mufflers and exhaust tips. You will need to do some cutting and welding with this kit, but it also includes plenty of clamps for the various connections.
With the Dart on the lift, we first set up the muffler locations and placed them on stands, and worked the rear tailpipe up over the axle and held that in place with bungee cords. Having the mufflers in location helped to lay out the rest of the exhaust from the headers back. Always give yourself a target to run the pipes to instead of trying to affix the mufflers to the front pipes.
The Pypes kit includes more than you'll need, so be sure to plan and execute the installation by measuring twice and cutting once.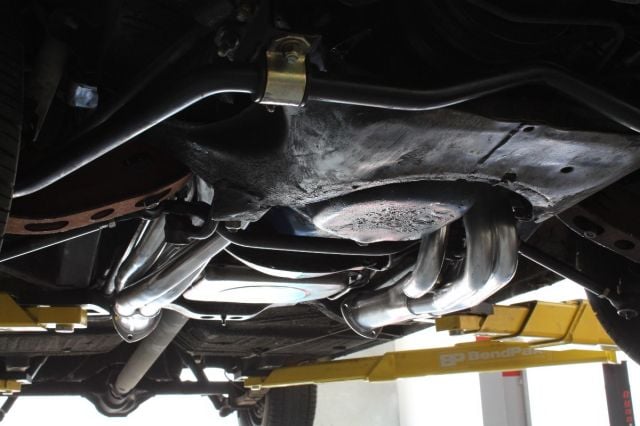 [50]
[50] [51]
[51]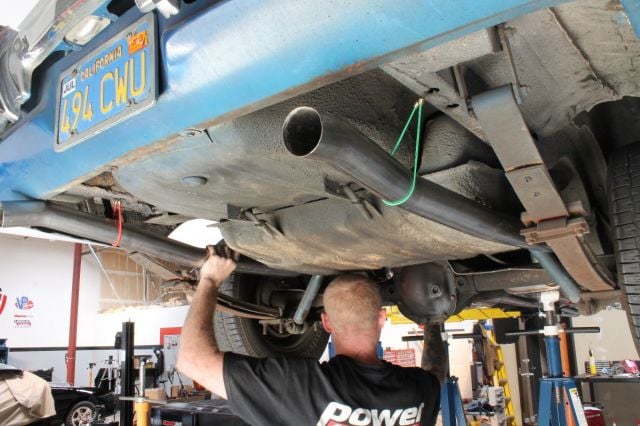 [52]
[52]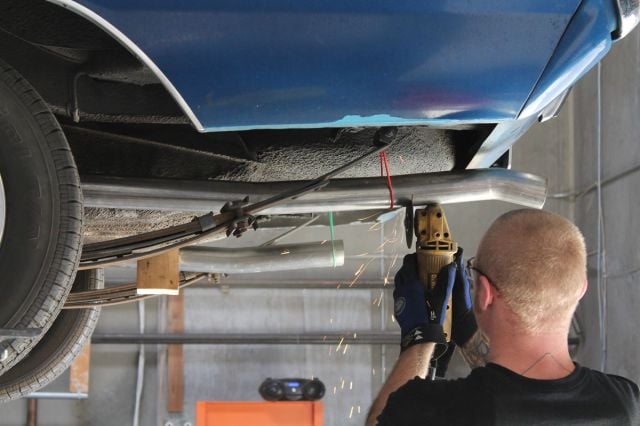 [53]
[53]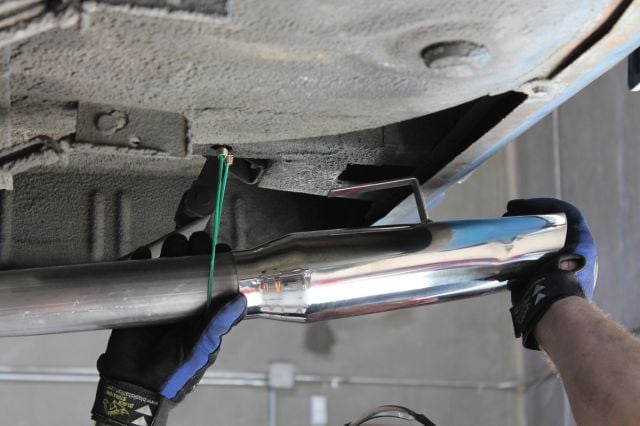 [54]
[54]
After connecting the collectors and front pipes, we installed the X-pipe and ran the straight pipes to the mufflers and began to make cuts where needed. As a rule, measure twice and cut once – cut it too short and you’ve got problems. We made sure the lengths were correct, fitted the pipes into the mufflers, and installed clamps where needed. Included with the kit are several hangers that can be attached to the body using the supplied clamps. Always be sure that the mufflers are supported properly with hangers before you remove the stands, and to also attach hangers to the tailpipes as well.
With all the cuts made and the clamps and hangers installed, we made marks to cut the tailpipes and make room for the tips and welded them up. With the end of the exhaust completed, so was the end of the install and it was time for a final run on the dyno to see if the Hooker Headers and Pypes exhaust system could add a few more ponies to the old 318.
 [55]
[55]After all upgrades were completed, the final numbers were a little better at 154.26 horsepower at the rear wheels and 216.39 lb-ft torque, with a very steady AFR around 13:1.
The Results Are In
After the final run, we saw 154.26 horsepower at the rear wheels and 216.39 lb-ft torque. While we know that the LA is capable of more with a fresh build using a performance cam and other internal components, we were pleased with the overall gain. Beginning with just 126.63 horsepower and a rich fuel ratio, we were able to bring that number up 27.63 RWHP by adding a new Crane distributor and ignition, a Holley four-barrel carb and Weiand intake manifold, and Hooker headers and Pypes 2.5-inch exhaust system.
We also picked up 22.58 lb-ft torque by adding these components. This gain was on an original 318 LA engine that hasn’t seen a rebuild. We knew we had some issues from the start, but nearly 30 rear-wheel horsepower with these upgrades gave the Dart some respectable numbers. This makes the Dart a little more fun to drive, and a little more respectable on the streets. These installs can give varying results depending on what you start with, and 27 RWHP is not bad for a weekend’s worth of work and a few choice upgrades.
Of course, the results on your own car can vary, but suffice to say, these common upgrades that can be done in a weekend – the look, the sound, and the performance gains are well worth the time and money invested. Short of a complete engine rebuild, the 20% RWHP increase makes it quite respectable.
Ground clearance is going to be tight, so the Dart is going to remain at stock height for a while.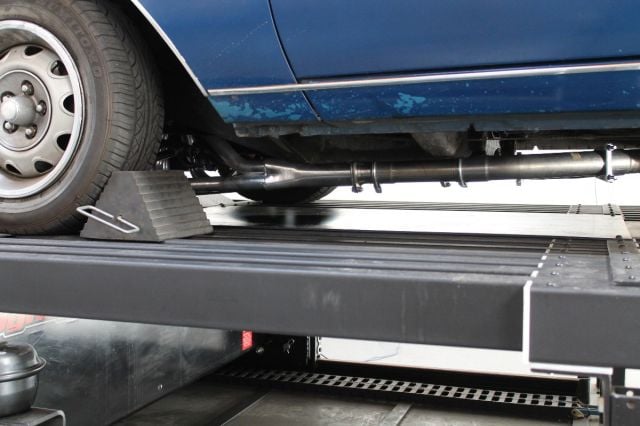 [56]
[56] [57]
[57]