
One key to a successful engine build is paying attention to the details. Performance engine builders know that if you sweat the little things, the engine will make good power, be responsive to tuning, and generally deliver on its end of the bargain. One place where these small things can pay off is with the piston-ring gap.
It stands to reason that a large gap at the end of the ring makes for an easier leak path. This can directly bleed off the precious cylinder pressure that is so difficult to achieve. The ideal situation sees this gap held to an absolute minimum. This is where we apply the art of filing ring gaps. But there are plenty of important details that need to be considered before hacking away at the top and second rings.
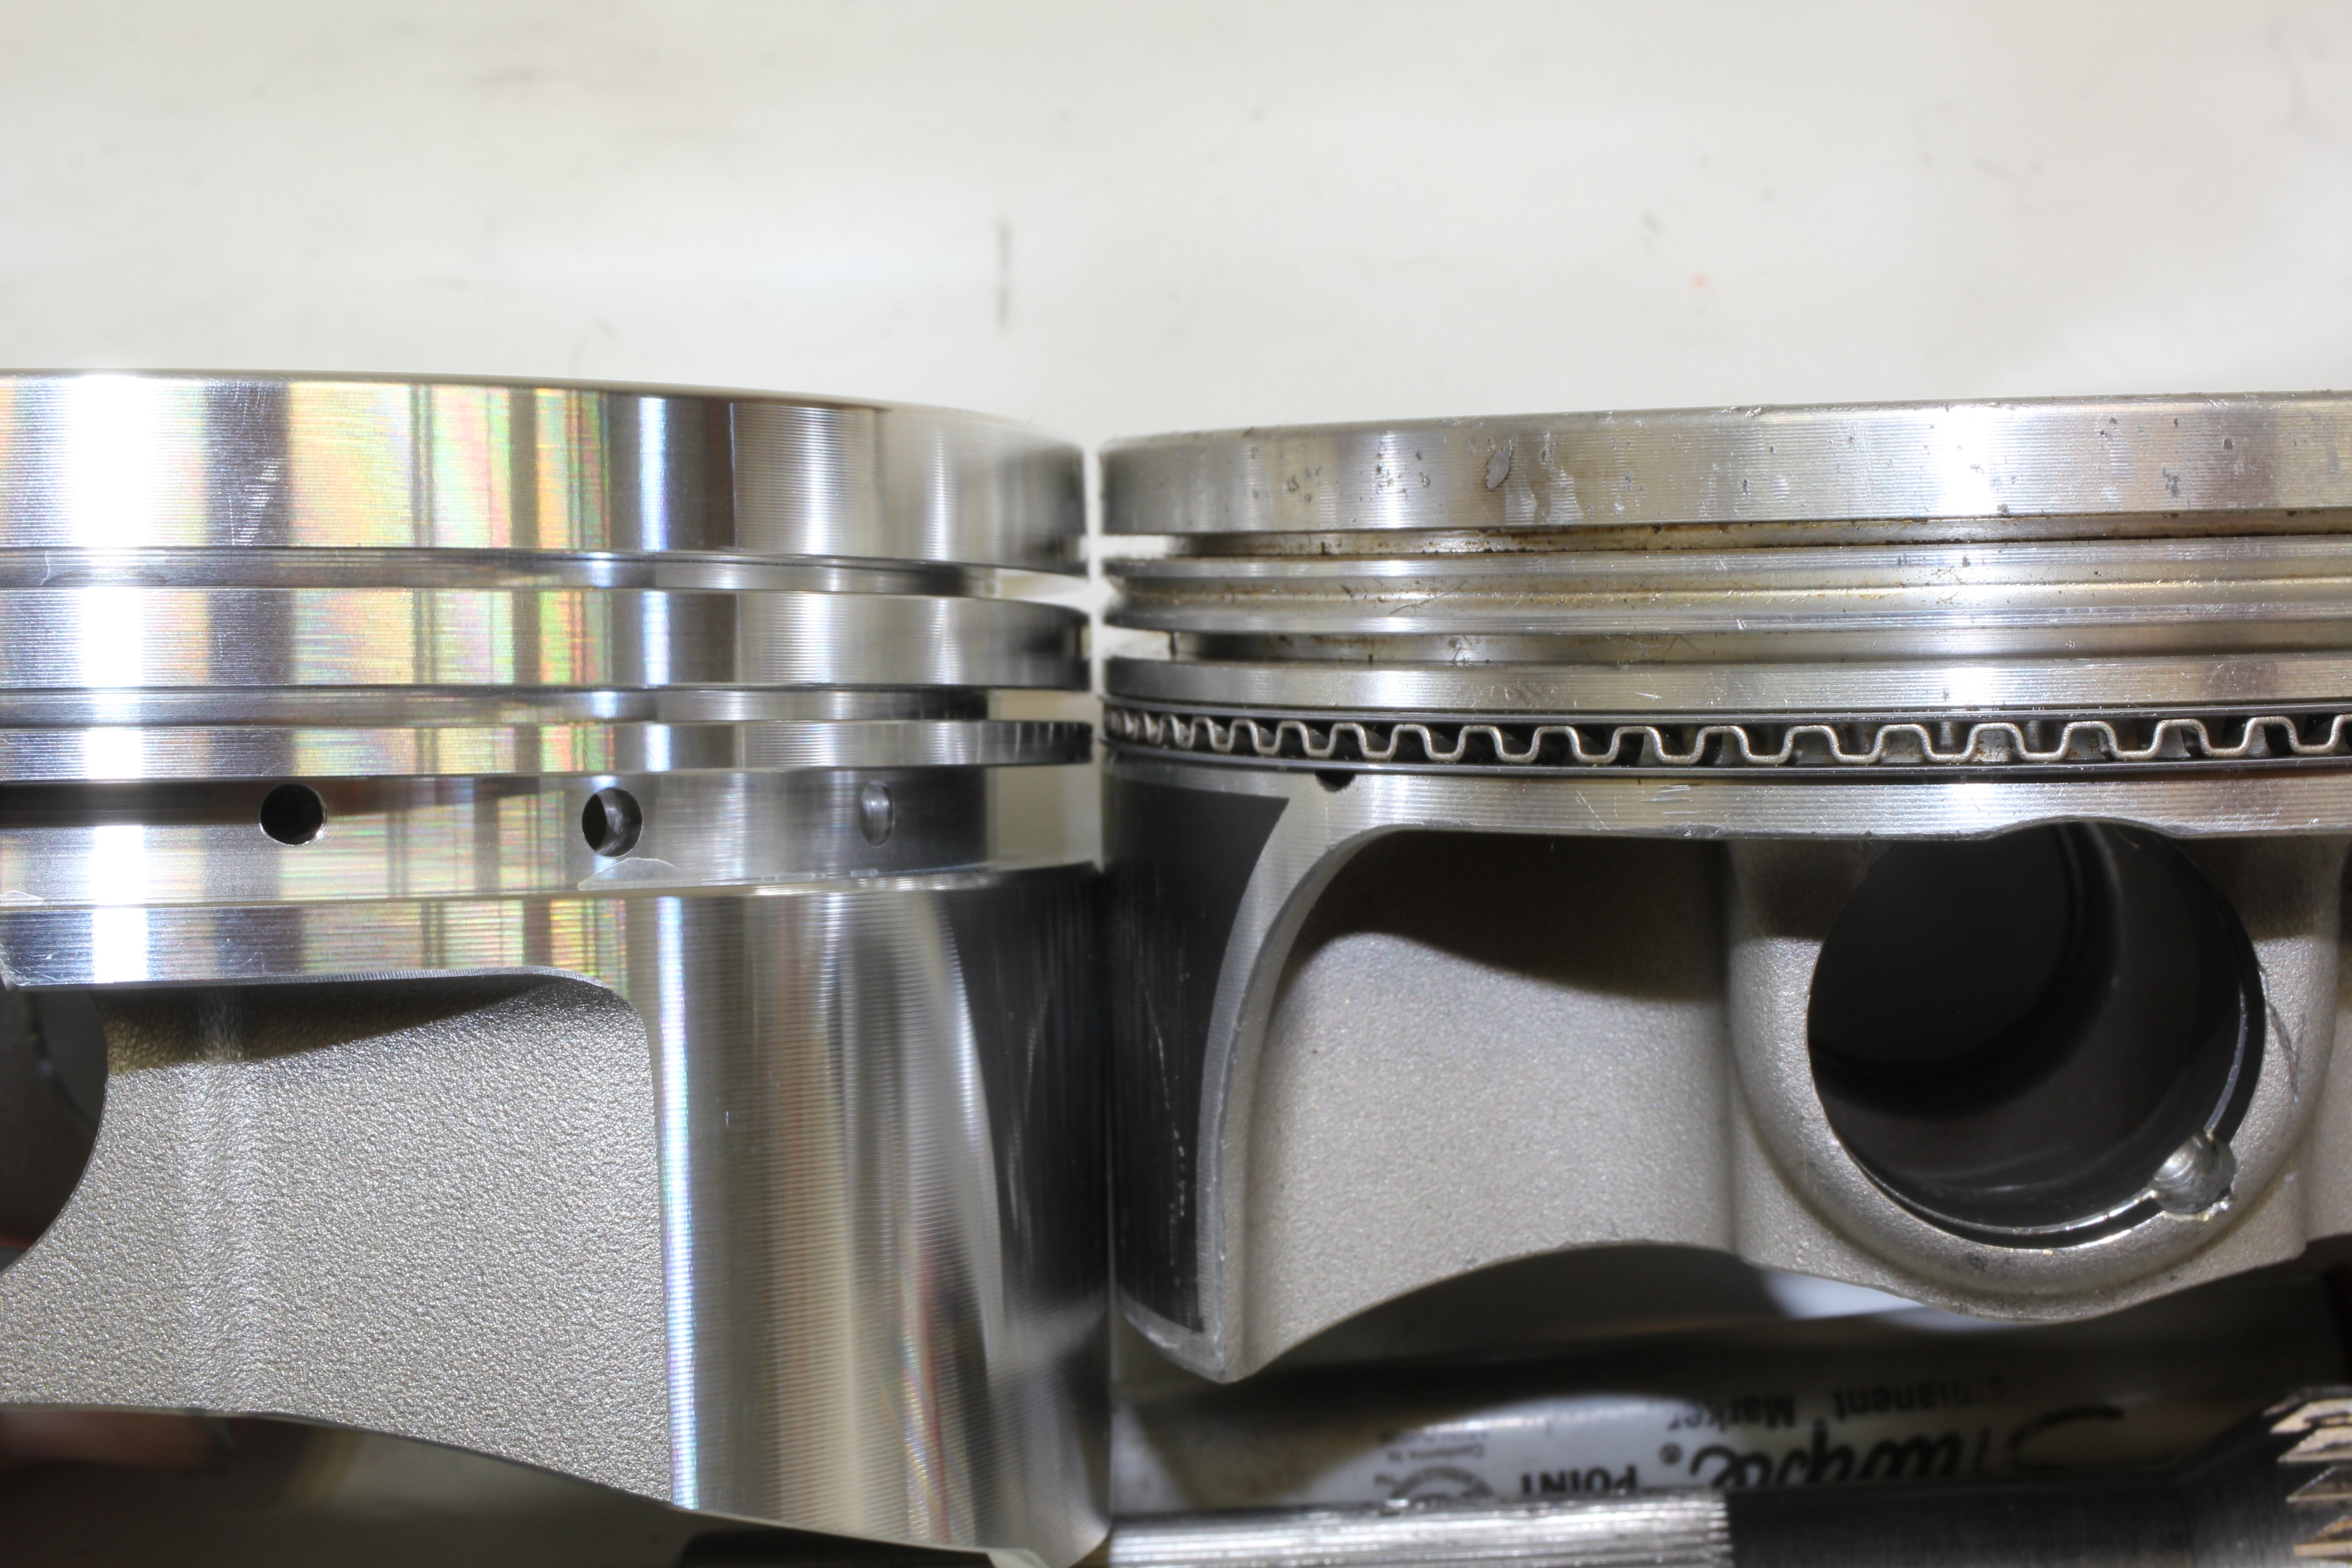
The piston on the left positions the top ring farther down from the deck than the version on the right. Supercharged and turbocharged engines tend to do this to protect the rings from excessive heat. Normally aspirated drag engines will move the ring closer to the top. This position affects end-gap specs. Also, note the depression between the top and second ring on the piston to the right. This is created to increase the volume in this area to minimize pressure buildup.
First, let’s look at why there are differing gap specs. The issue that adds complexity is the engine builder must account for a given amount of heat in the cylinder. As heat is applied to a metal – like a piston ring – it will expand. Because the ring is contained in the cylinder, the initial cold gap will close as heat is applied. If enough heat is present, the ends of the ring could even touch. As soon as that happens, the ring can no longer accommodate further expansion and begins to tighten in the bore.
With enough expansion, the ring can actually seize the piston. We’ve personally witnessed the upper section of a brand-new hypereutectic piston that snapped off at the oil return slots from a seized top ring, due to insufficient end gap. Even in a mild case where the ring ends barely touch, the result can be a heavily scored cylinder wall and serious piston-ring-land damage due to this excessive load.
One key to a successful engine build is to prevent this from happening. The average builder can certainly opt to use standard production-gapped rings to avoid this issue. While this works, be aware that most manufacturers err on the conservative side and deliver an increased gap in the top ring.
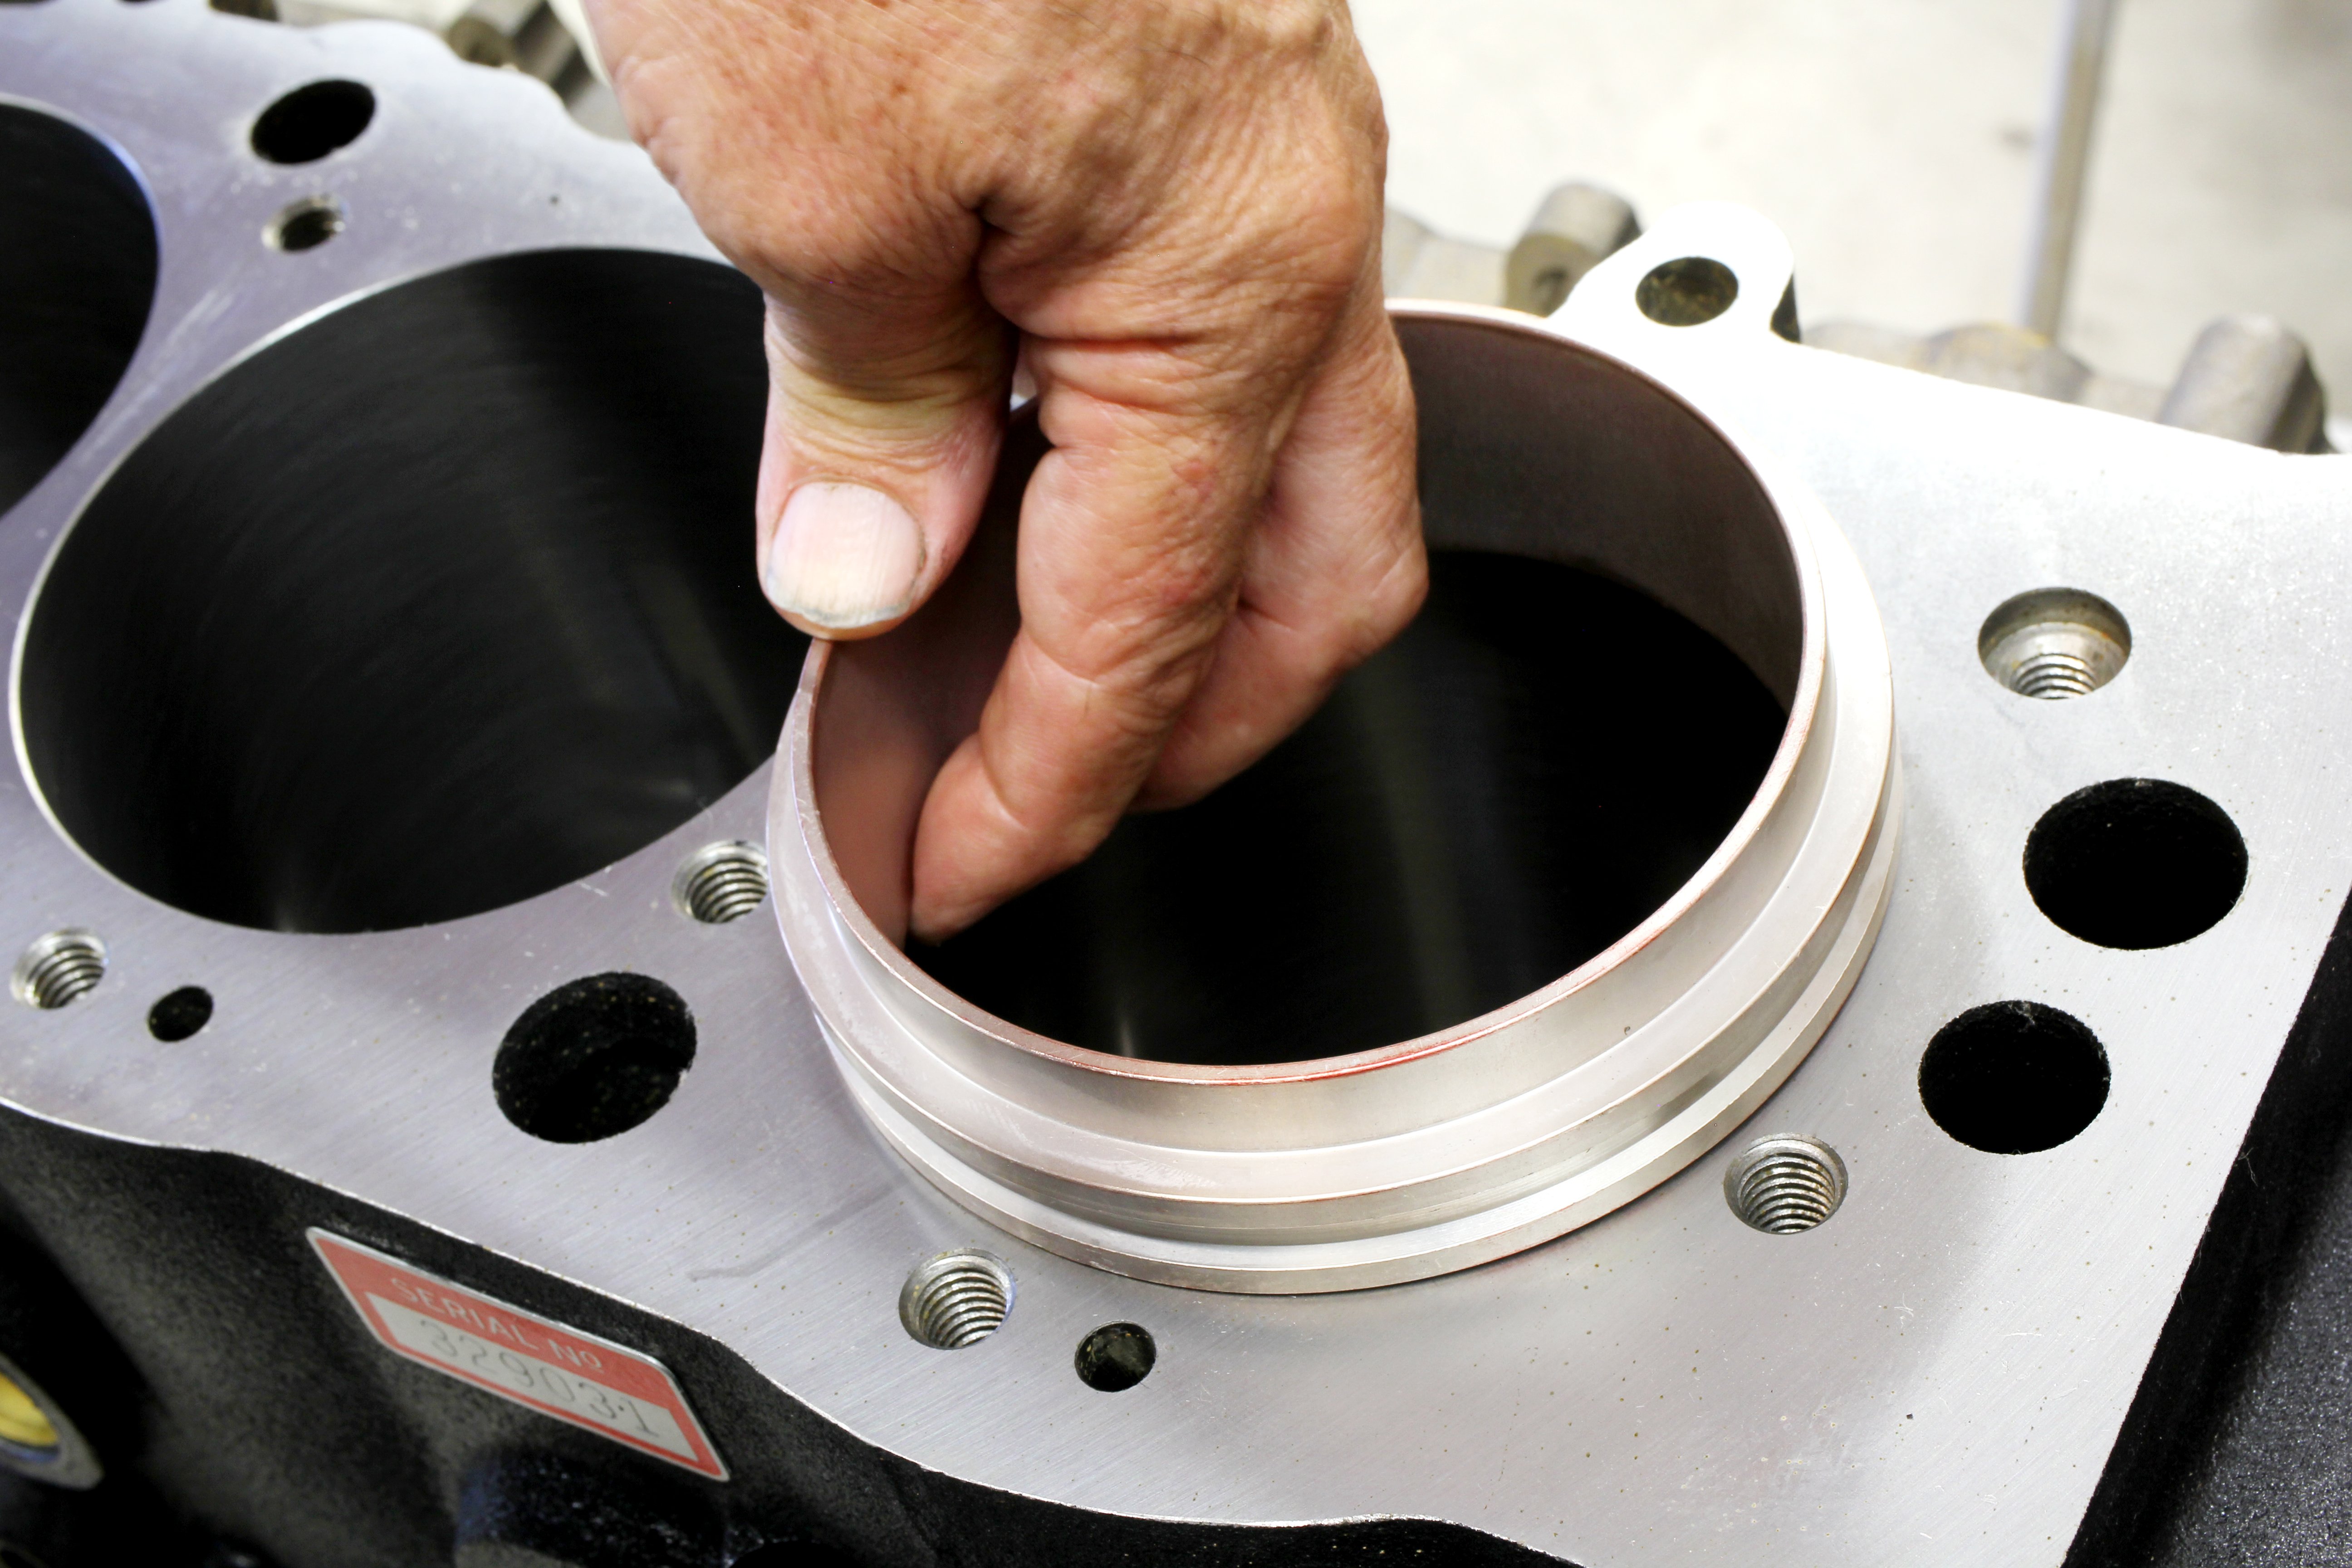
You can purchase a ring-squaring tool like this one or you make your own by placing a second ring on an old, slightly smaller flat-top piston. The flat top of the piston will square the ring in the bore and the best part is this tool costs nothing.
As an example, on a recent 5.7-liter LS build using stock replacement rings on a fresh, standard 3.898-inch bore, we measured a top ring gap of 0.025-inch. According to Wiseco, for a normally aspirated street engine, it recommends 0.004-inch per inch of bore size.
Multiplying 3.898 x 0.004-inch results in a minimum top-ring endgap of 0.01559 or 0.016-inch. That is a huge difference in the gap as compared to the production ring package. Is there a measurable power difference between these two gaps? If there is, it would be very small — in the range of 1 or 2 lb-ft of torque. But clearly, there are some advantages to taking the extra steps to create custom ring endgaps.
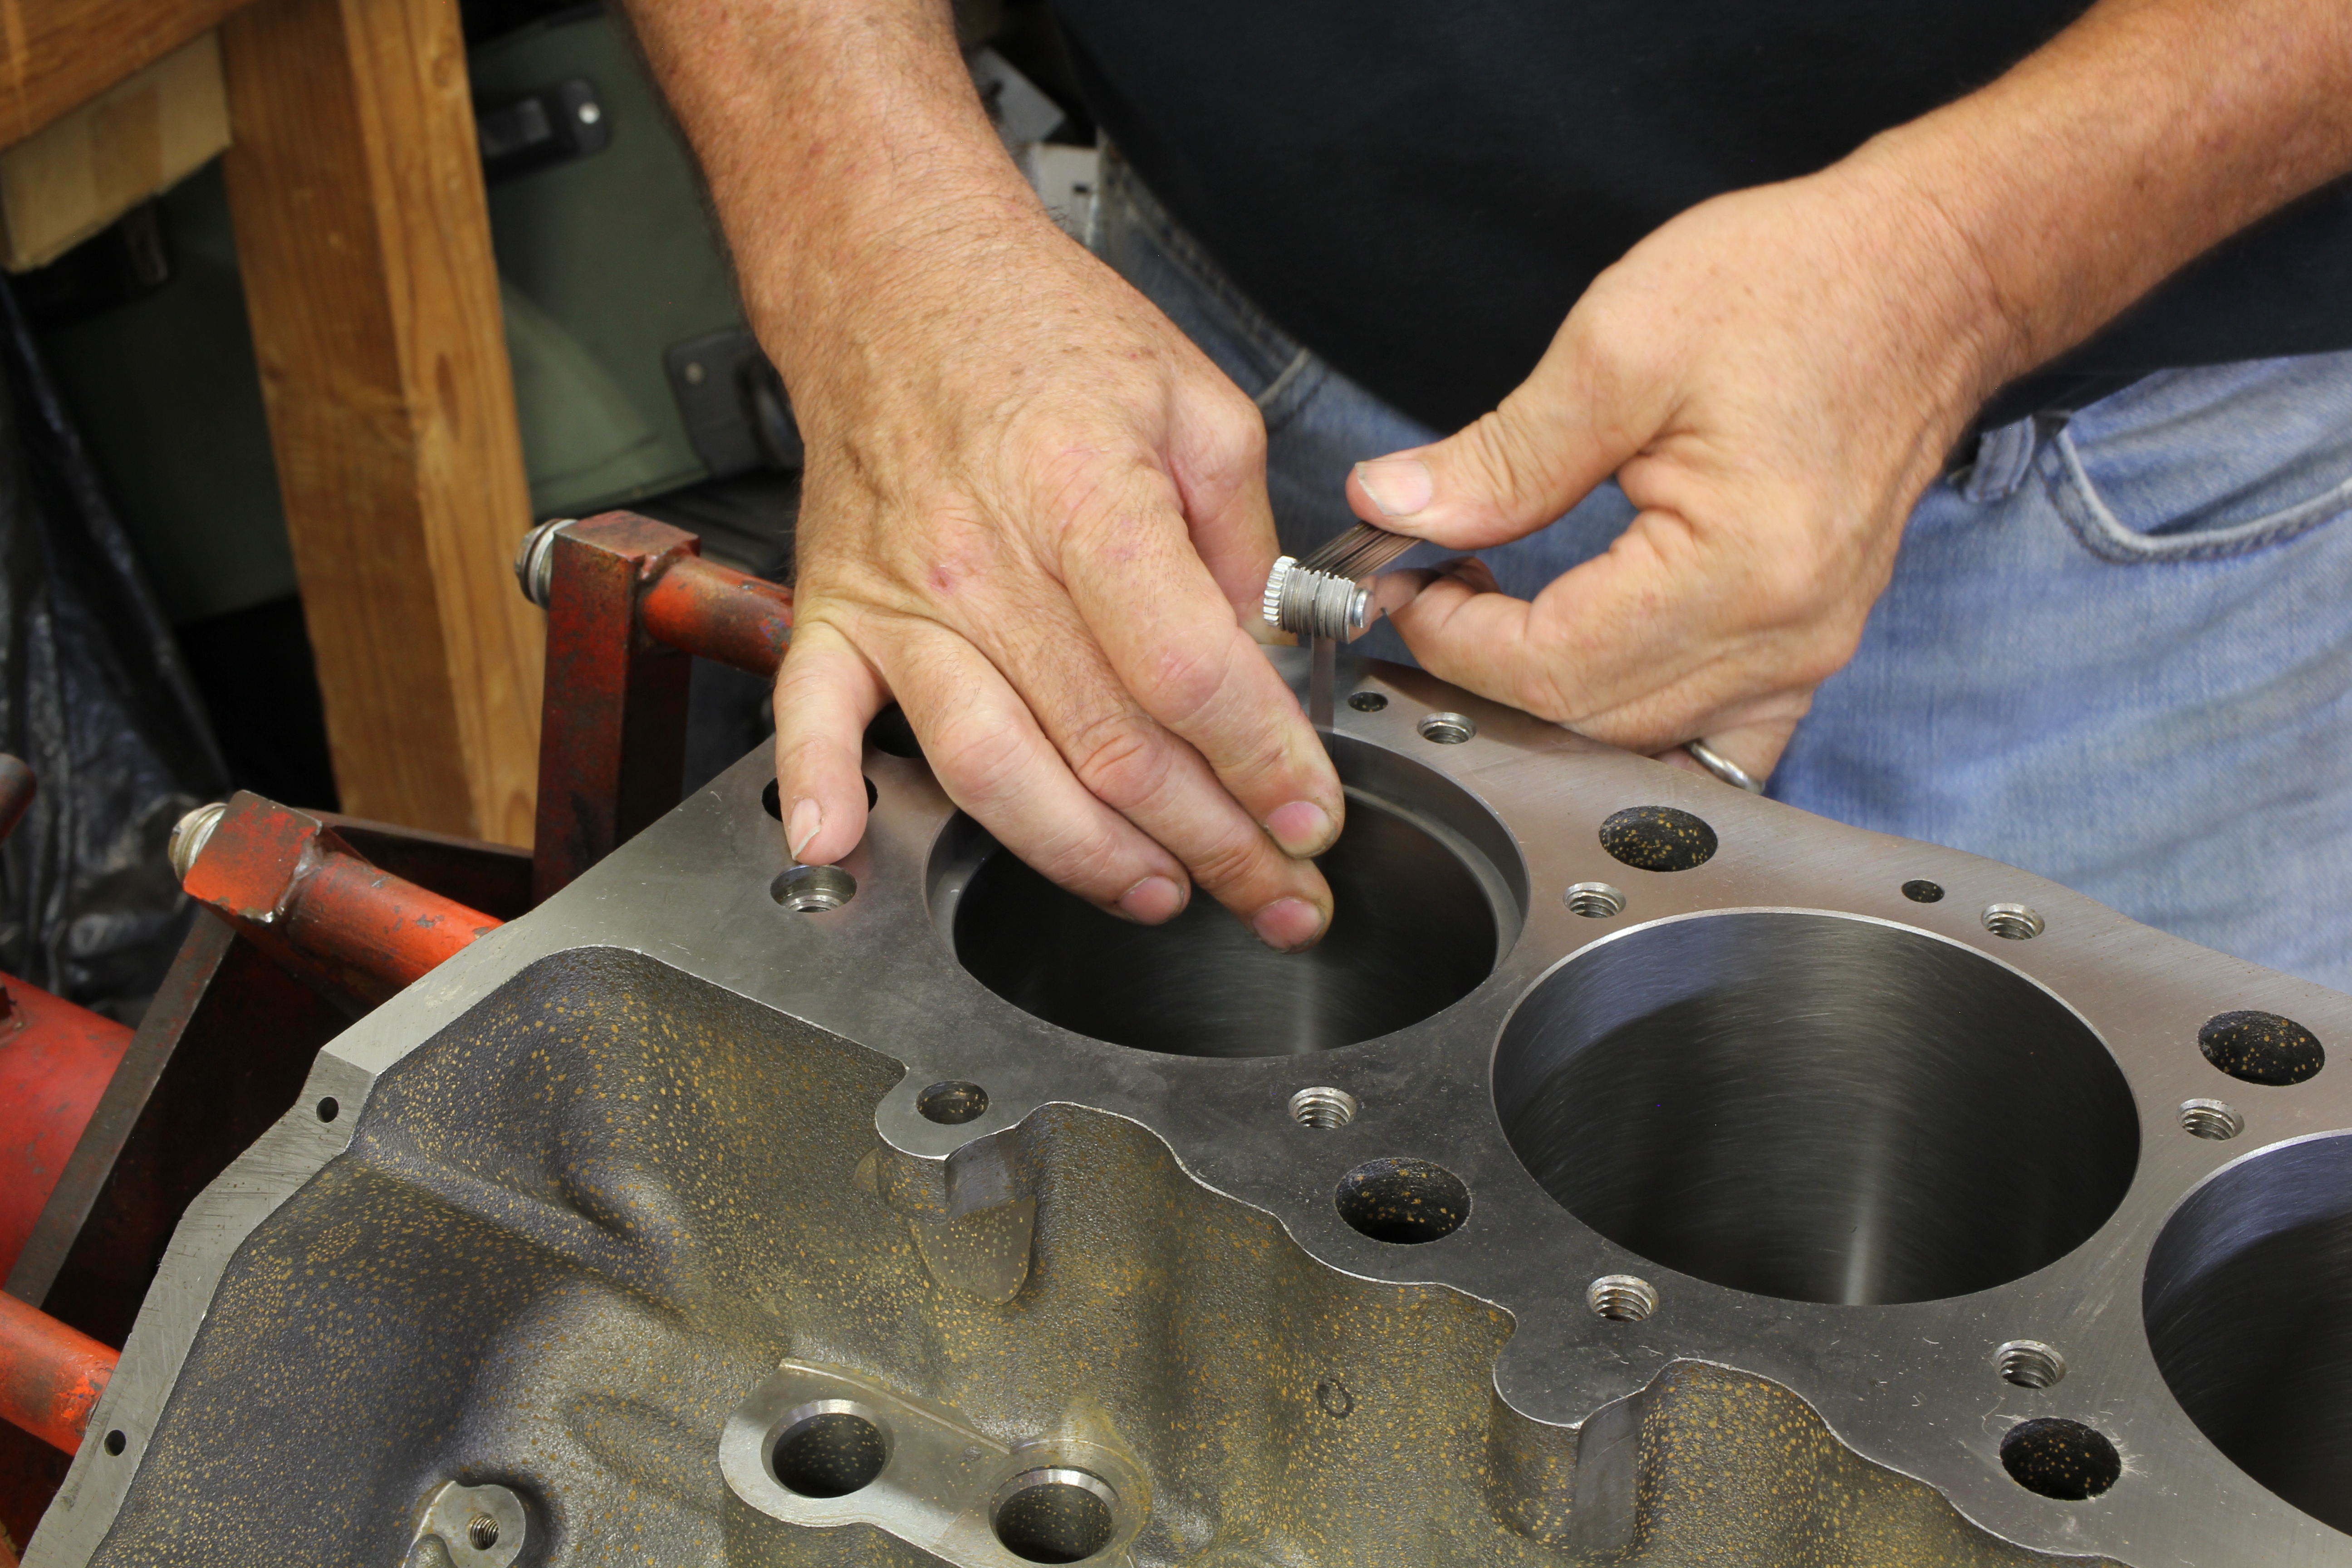
Setting ring gaps should only be attempted on a finished bore. Even a 0.001-inch increase in bore diameter will create roughly a 0.003-inch difference in the endgap. Once the ring is square in the bore, start with a feeler gauge that fits with a slight drag and work up in 0.001-inch increments until achieving a snug fit.
Heat is the main variable for setting up custom top- and second-ring endgaps. A normally aspirated street engine on pump gas will generate much less combustion temperature and pressure than a fully-prepped X275 drag engine running with 25psi of boost. That race engine will create much more heat in each combustion event, which will be transferred directly to the pistons and rings.
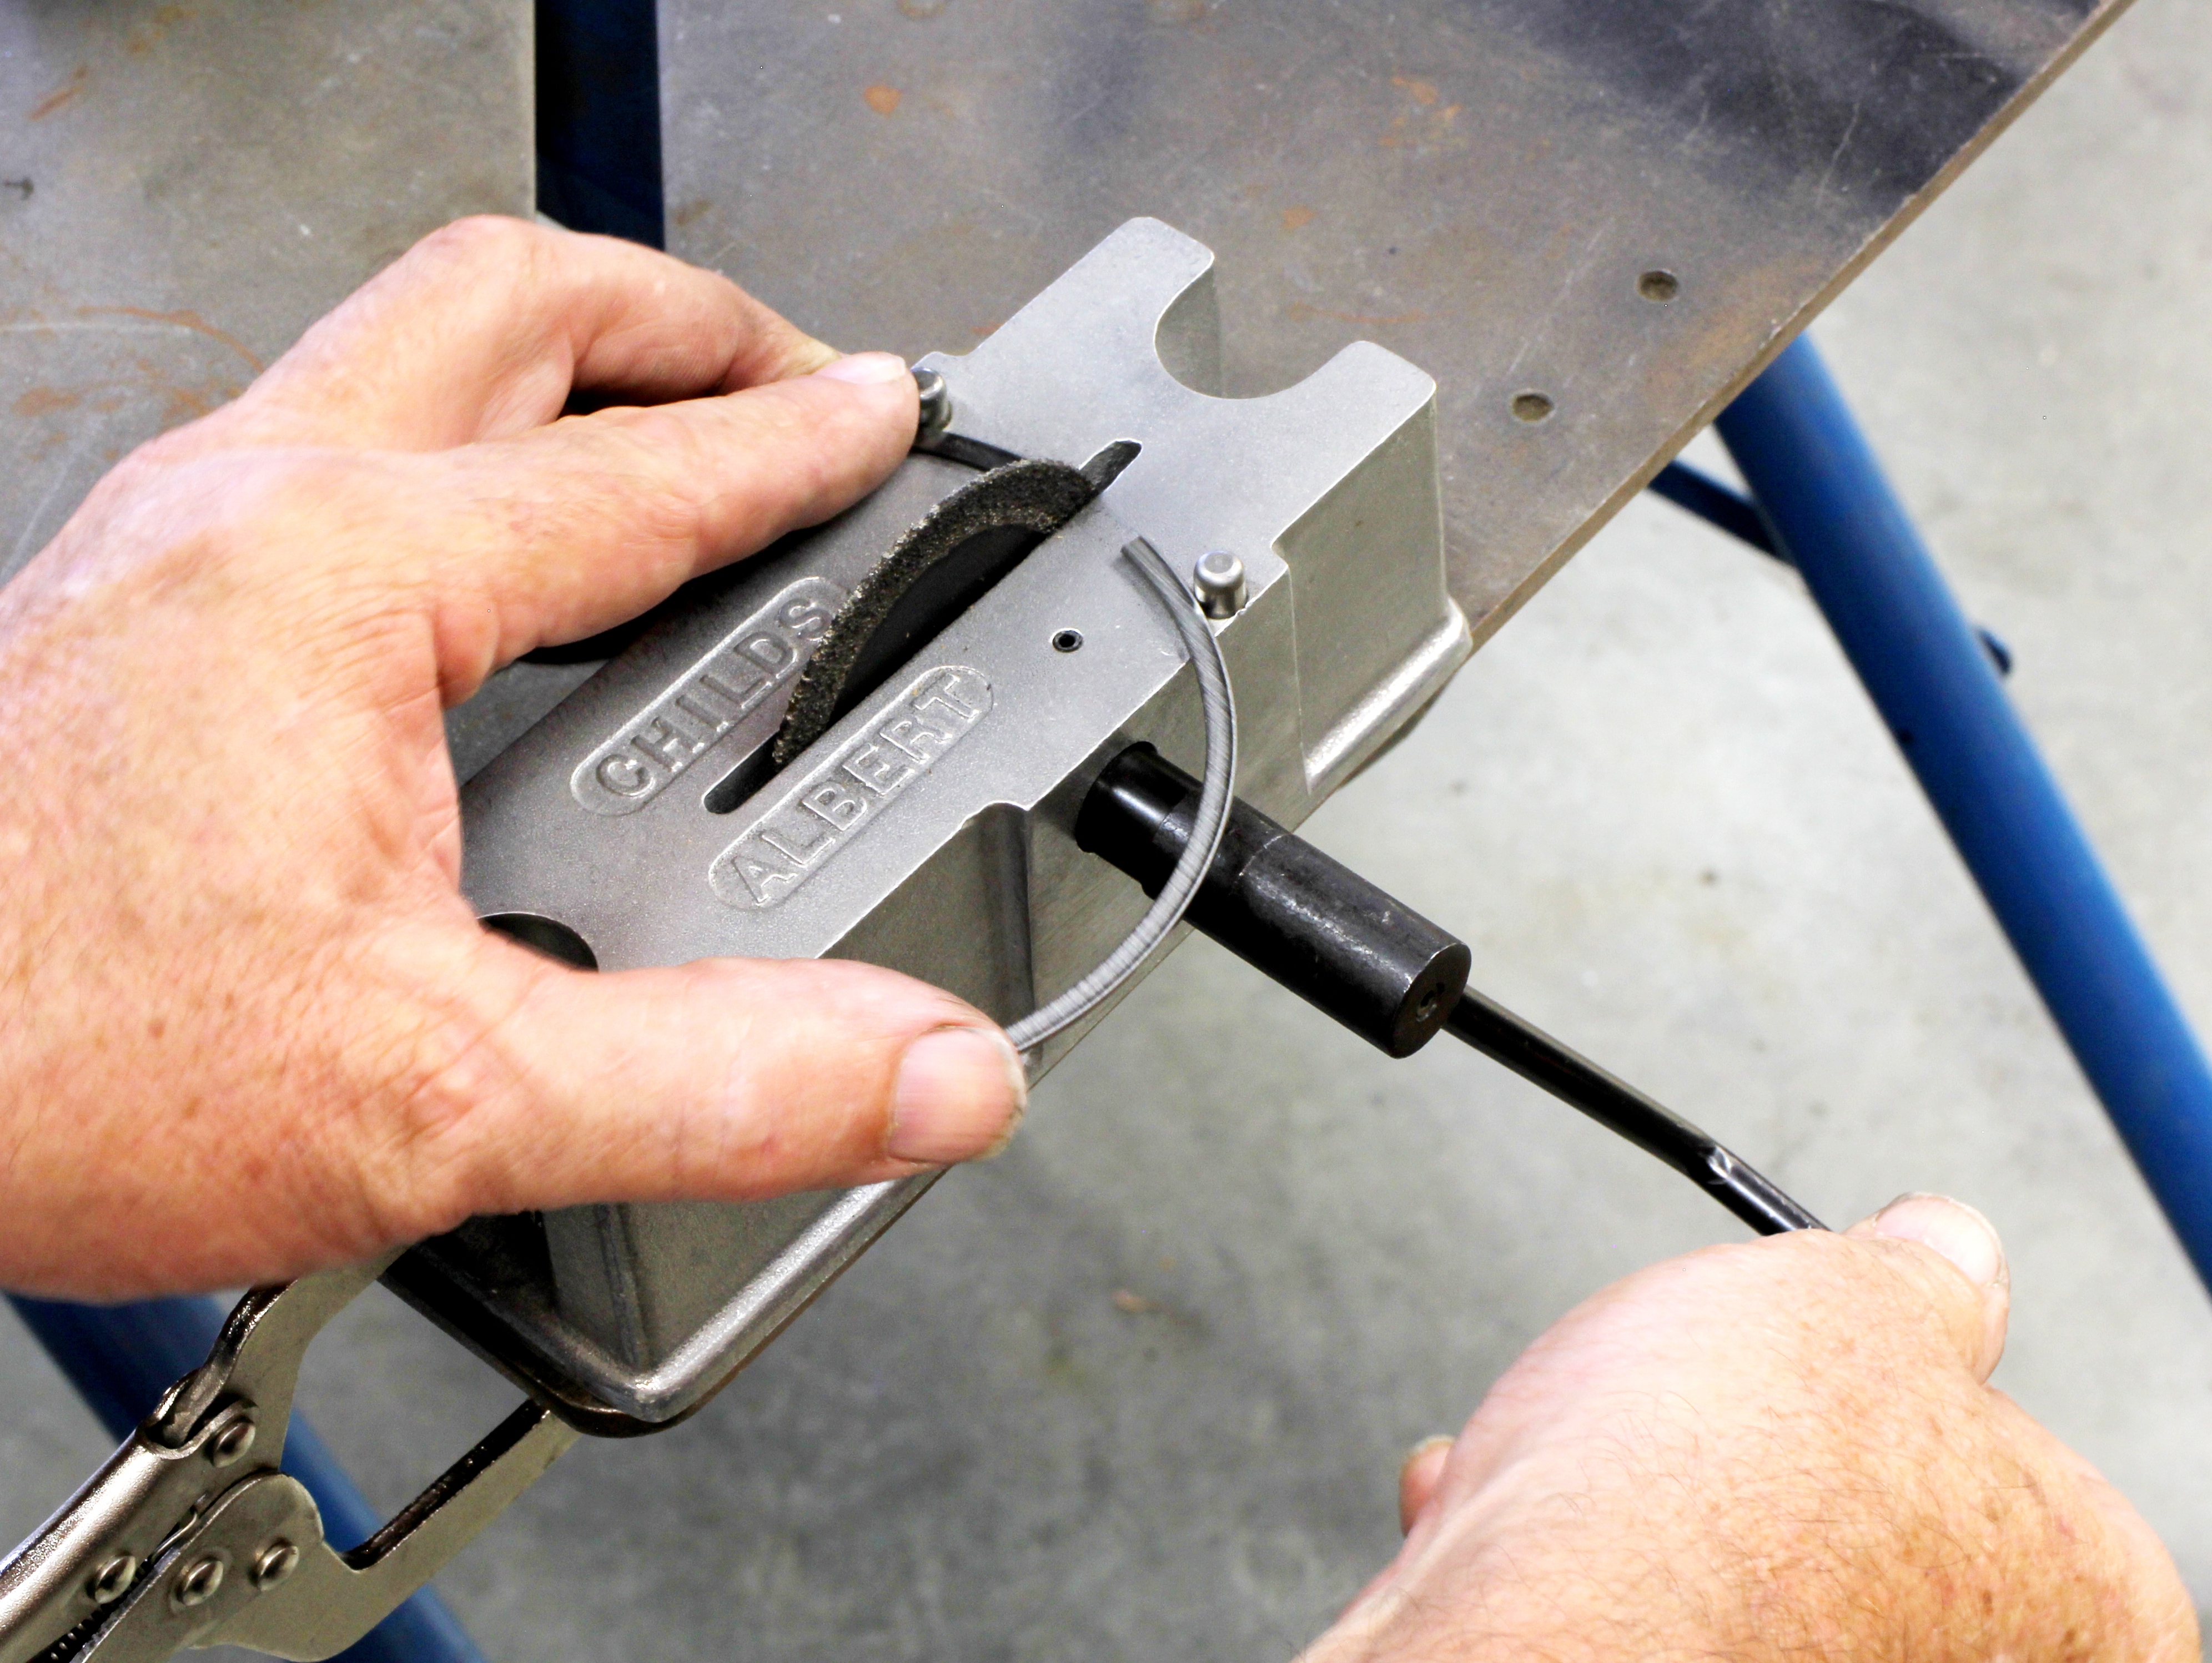
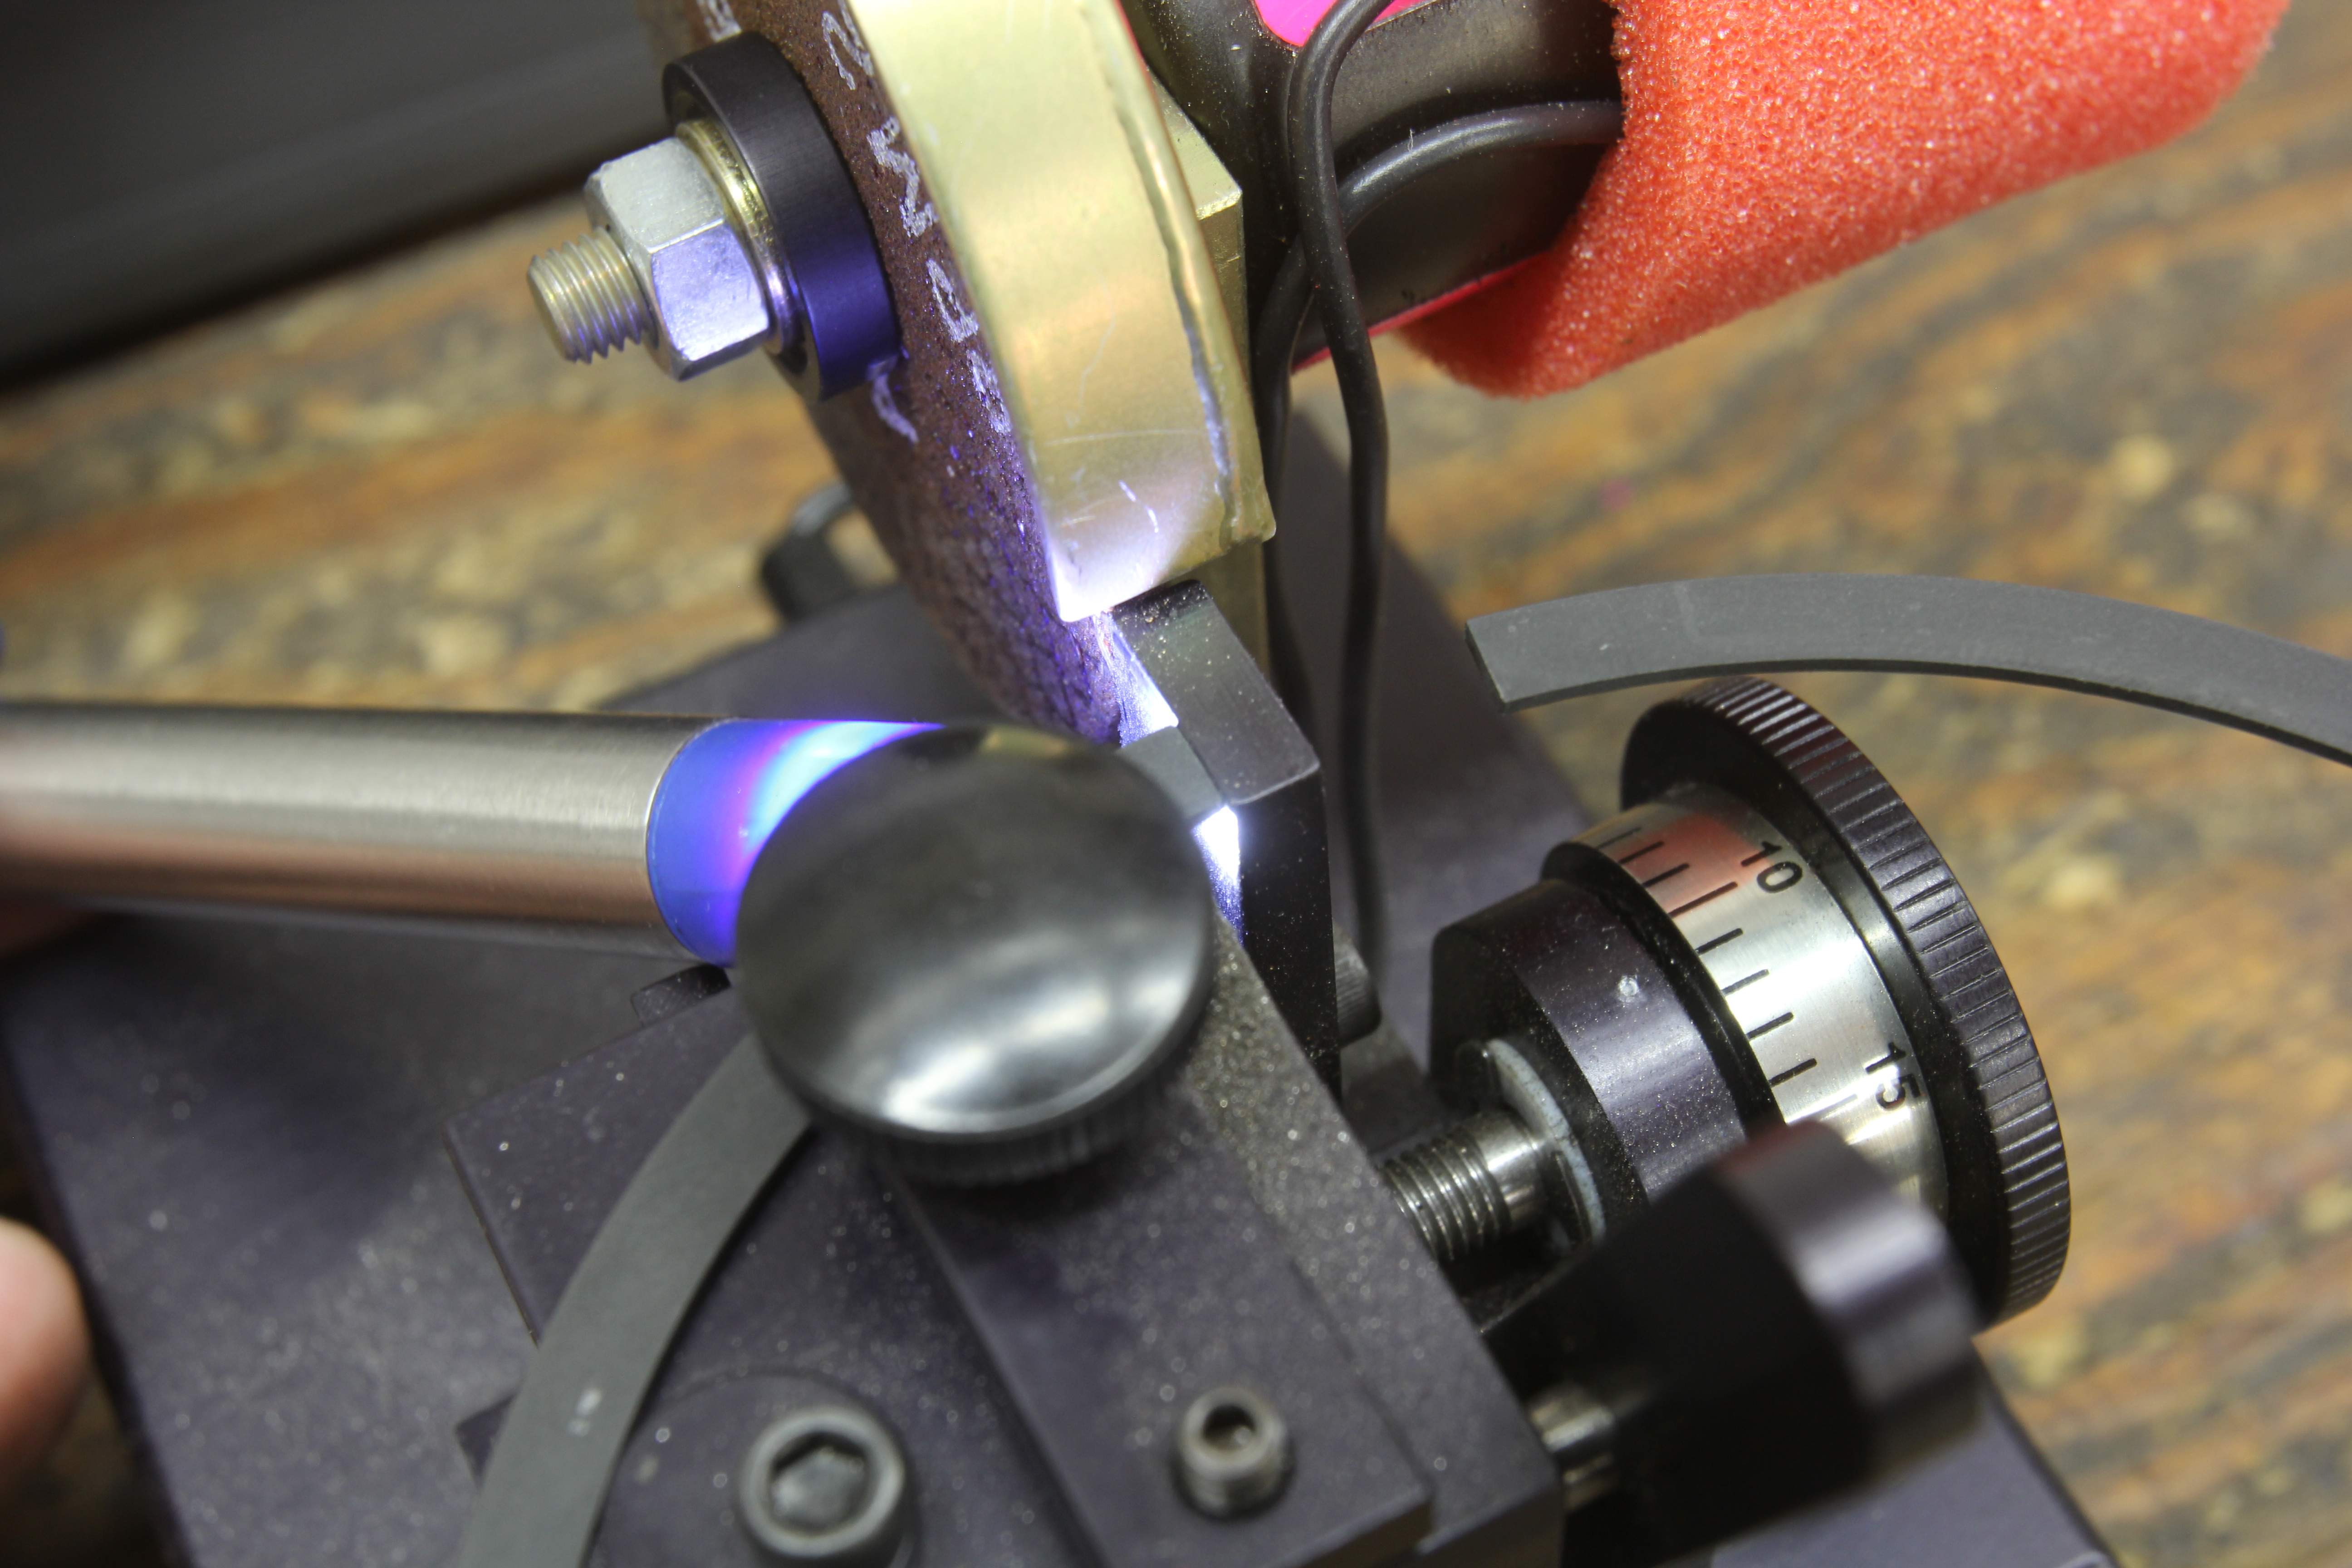
An important note when filing rings with a manual ring grinder is to always turn the handle so that the abrasive cuts inward. Usually, this is counter-clockwise. This makes the cut from the outside to the inside on a ring, and minimizes damage to the ring face. Moly facings can sometimes chip if cut from the inside to the outside edge. This is an ancient Childs & Albert tool we still use occasionally.
Belt-driven supercharged engines need even larger gaps than turbocharged or nitrous engines. The main reason for this is: a high-output supercharged engine must generate significant power just to drive the supercharger. This power does not appear on the dyno sheet, but will require more fuel to make that power.
According to engineering sources at Vortech superchargers, centrifugally supercharged Pro Mod engines demand upwards of 900 to 950 horsepower just to drive the blower. That means the engine must burn 900hp worth of additional fuel just to drive the blower. This, of course, makes more heat in the combustion chambers and subsequently requires wider top-ring gaps.
Another variable comes into play if using an aluminum block. Since aluminum grows at a much greater rate than iron, it can have a more dramatic effect on the piston-ring endgap. According to Total Seal’s Keith Jones, a builder can run a slightly tighter tolerance on an aluminum block. This is because the block will expand more than its iron counterpart. It’s always best to go with the recommendation from the company that manufactures the rings being used.
📲 𝕋𝔼ℂℍ 𝕍𝕀𝔻𝔼𝕆𝕊 𝔸ℝ𝔼 𝔹𝔸ℂ𝕂 📲•••You spoke and we listened. Our Technical Sales team has started putting together 𝘜𝘱-𝘛𝘰-𝘋𝘢𝘵𝘦 videos for all the how to questions our customers may have. 📹First up, Kevin Studaker will show you the basics to our Power Ring Filer. 💻Still Have questions ? Have a suggestion? 📧Drop us a line at media@totalseal.com and one of our specialists can review and assist with your specific inquiry. 🖥Stay tuned for more 𝕋𝔼ℂℍ 𝕍𝕀𝔻𝔼𝕆𝕊 brought to you by TOTAL SEAL PISTON RINGSSPREAD THE WORD📢 LIKE.COMMENT.SHARE
Posted by Total Seal Piston Rings on Friday, October 4, 2019
As we’ve seen, ring endgap specs are given as a clearance-per-inch of the bore. A normally aspirated 350 small-block Chevy with a 4.00-inch bore utilizing a 0.004-inch top-ring spec would only require a 0.016-inch top-ring endgap. But a normally aspirated 540ci big-block Chevy with a 4.50-inch bore would require a larger 0.018-inch top-ring endgap. The larger bore scribes a larger circumference ring, which means it will grow more when subjected to the same heat as a smaller diameter ring.

Our experience with an electric cutting tool is to treat it just like a manual and to sneak up on the cutting process rather than take all the material off in one cut.
There are also specific gaps for the second ring. If we go back to the ’70s, we can find the S-A Design book The Chevrolet Racing Engine, written by Bill Jenkins. He spec’d a tighter second-ring gap compared to the top ring. Sometime later, engine builders discovered that widening the second-ring endgap actually reduced pressure captured between the two rings.
With increased gaps on the second ring, the top-ring seal is enhanced with minimal pressure present underneath the top ring. That’s the reason for the increased clearance. There’s also a spec for the minimal endgap clearance for the upper and lower rings for a three-piece oil ring set.
Only cut one side of the ring, and make sure the grinding maintains a perpendicular angle. It’s very easy to cut the ring at an angle, which must be avoided. Shine a light under the ring to ensure the face is flush.
Now that we have established the technical specs, we can dive into procedures. To accomplish this, we’re going to need some specialized tools. For the average builder, a manual ring filer will get the job done, and there are several on the market for under $50.
You may have seen guys filing rings by pushing a ring across a file clamped in a vise. If you live on a desert island and are forced to assemble an engine, then that might be acceptable. If you don’t want to buy a ring filer, then either borrow the right tool from a friend, or just skip this part about custom-filing ring gaps. The chances of filing a ring properly with Barney Rubble’s hand file are not in your favor. You will also need a ring squaring tool to ensure each ring is square in the bore as you fit it. Straightness affects gap accuracy.
All oversized ring sets are sized 0.005-inch larger than the bore diameter. For a 4.030-inch bore, for example, the oversized ring set would be sized 4.035-inch. The first thing to do is to measure the existing gap. Even with a 0.005-inch oversize, there should be a small gap in the ring.
Start with a feeler gauge that easily fits the gap. Then, work up in thicker sizes to slightly expand the ring into the bore. By working with increasingly larger feeler gauges, we’ve seen a 0.002 to 0.003-inch improvement in accuracy.
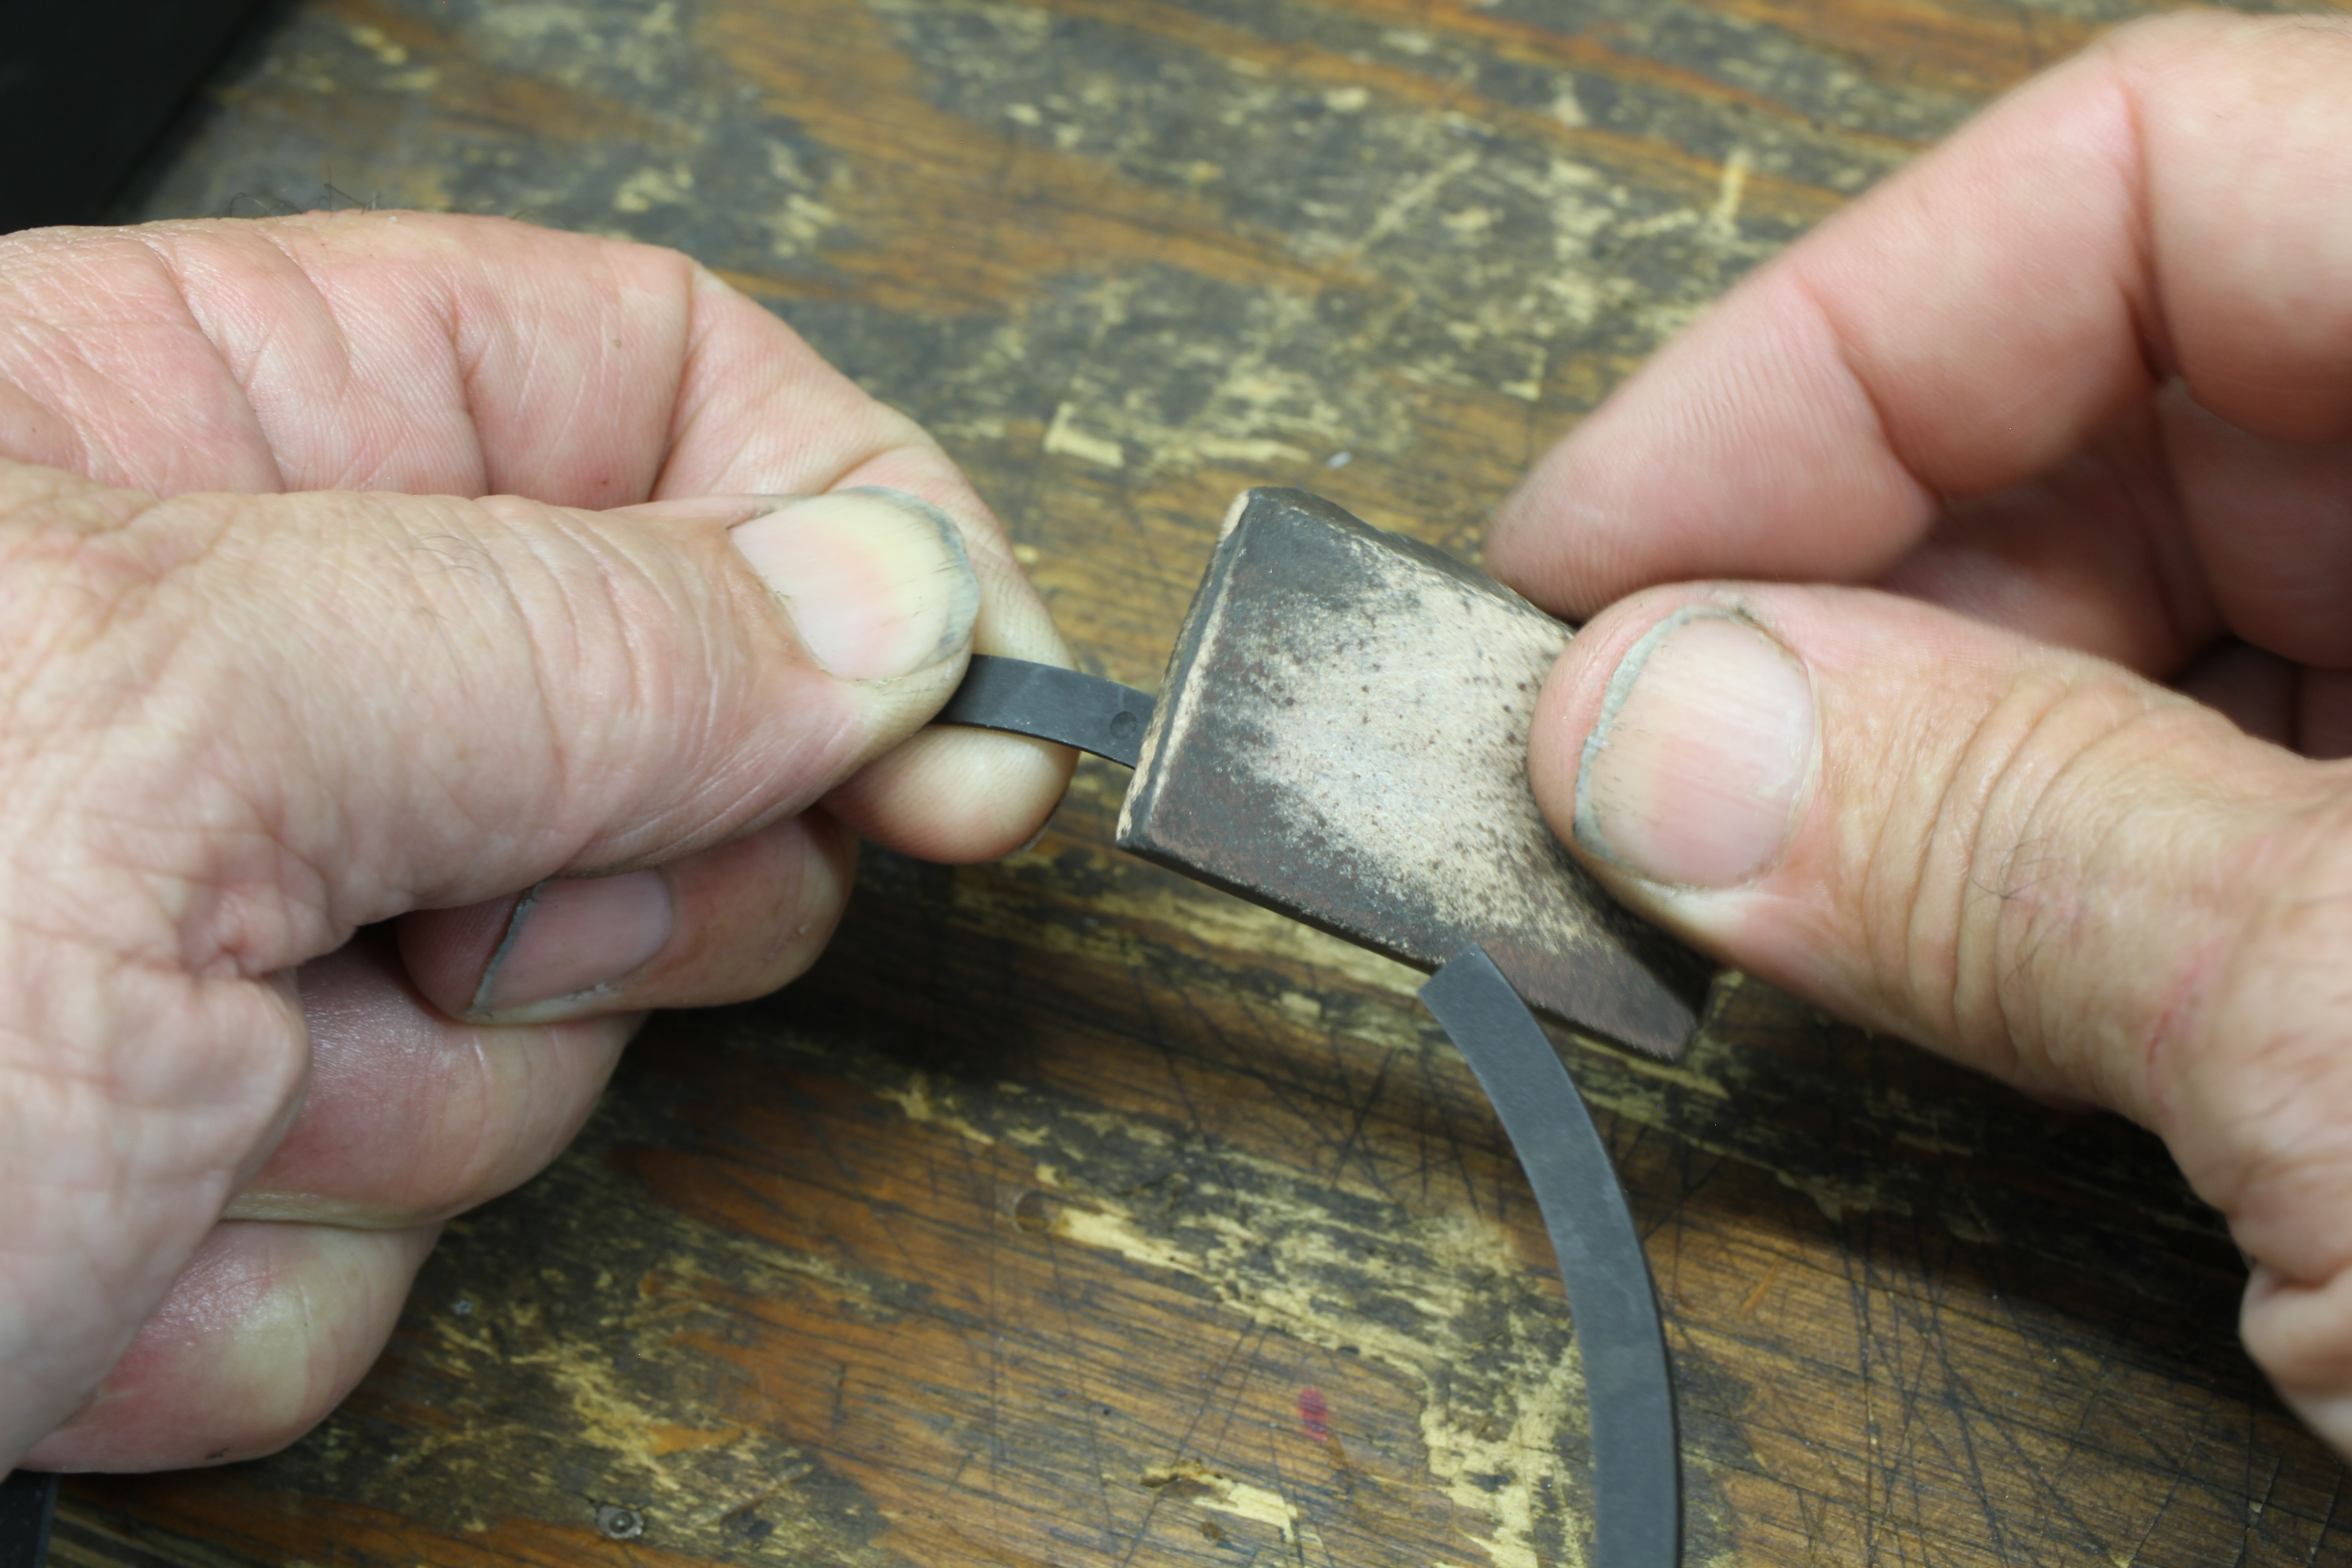
After each cut, always dress all four edges of the trimmed side with a whetstone. This will prevent damage to the cylinder wall and also the piston, when the ring is installed. It’s also a good idea to chamfer the opposite side as it’s not uncommon to find sharp edges there as well.
We like to begin the process by filing the second ring. This way, if you make a small mistake and over-shoot the gap by 0.002-inch, you won’t lose sleep over the error. Overshooting slightly on a top ring isn’t cause for concern either. Jones told us not to stress over small gap overshoots.
If we go back to a standard ring set for an LS1 that had a 0.025-inch gap for a 3.889-inch bore, then overshooting by even 0.005-inch on a 4.030-inch bore would still be within reason. This larger gap may hurt the ring seal slightly, but it would still perform properly and may not necessarily show up on a leak-down test.
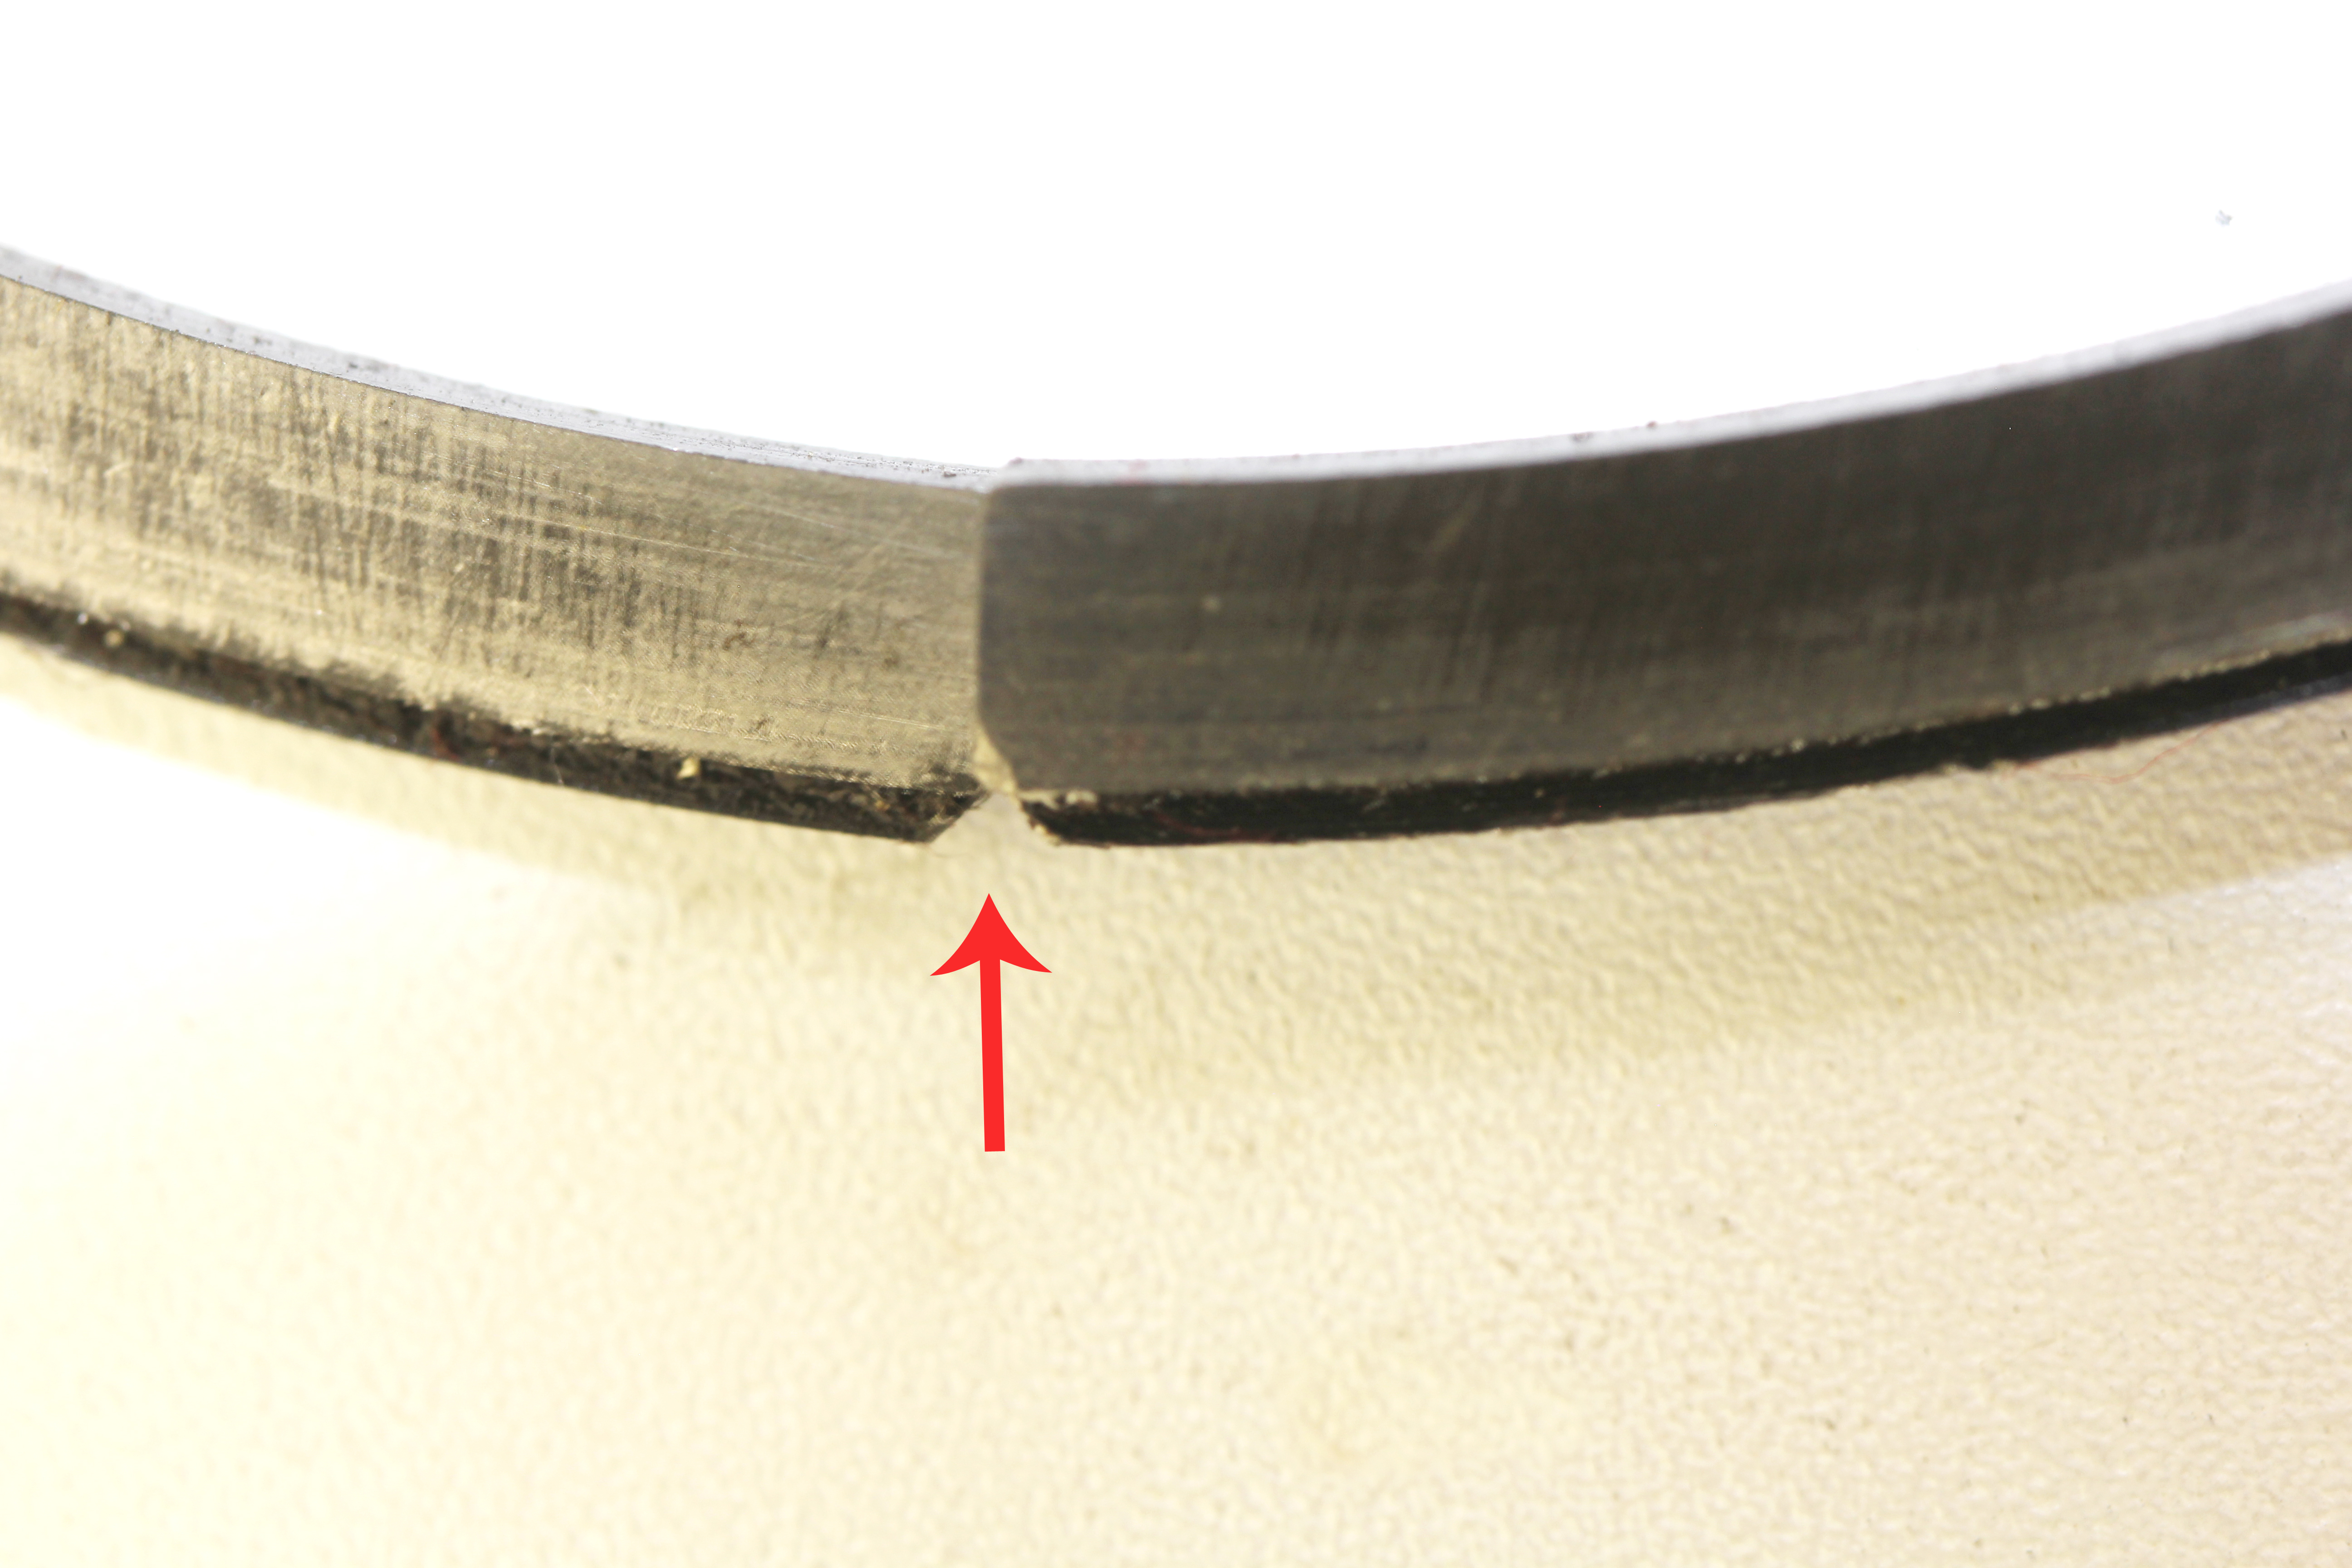
After each cut, inspect the gap to make sure the cut is square. MAHLE makes an important point about excessive chamfer. In this example, we’ve exaggerated the chamfer to illustrate what to avoid. Excessive chamfer can have the same effect as increasing the gap.
When using a manual ring filer, start by making six to ten turns of the disc with light pressure on the ring, and then recheck the clearance. On the first two or three rings, this may take several measurements to get a relatively accurate turn count on the machine.
Once you are confident in the number, it would be smart to start each new ring with roughly 80 percent of that total count. So if it takes 15 turns to establish the proper gap for a second ring, then start with a new ring at around 12 turns and measure the gap. Sneaking up on the clearance takes more time, but ensures accuracy.
After each filing operation, you must then dress the end of the ring to remove any burrs that could scratch the cylinder wall. In a MAHLE tech video, they spend a significant amount of time on this, revealing that excessive chamfer applied to the outside edge of the ring is the equivalent of increasing the gap dimension. In MAHLE’s demonstration, they showed where an excessive 0.030-inch wide chamfer is equivalent to increasing the ring-end gap from 0.018-inch to 0.045-inch.
We experimented with a used set of rings and discovered that a steel top-ring requires much more effort to both file and chamfer, while iron rings are much softer and easy to damage. This applies to cutting ring gaps as well. Cutting iron is much easier than steel top-rings, so the count will be different between a top ring and a second ring if they are of different materials.

Keith Black hypereutectic pistons are designed to position the top ring very close to the top of the piston. This applies more heat into the ring, which requires a larger top-ring clearance compared to other pistons of the same size. As an example, a 4.030 KB hypereutectic piston requires a 0.0065-inch per inch of bore – or 4.03 x 0.0065 = 0.026-inch.
This is likely more information than you expected for setting ring endgaps. But it’s clear that doing this job correctly can and will pay off in engine performance. This may be just one small step for the engine builder – but it’s an important one.