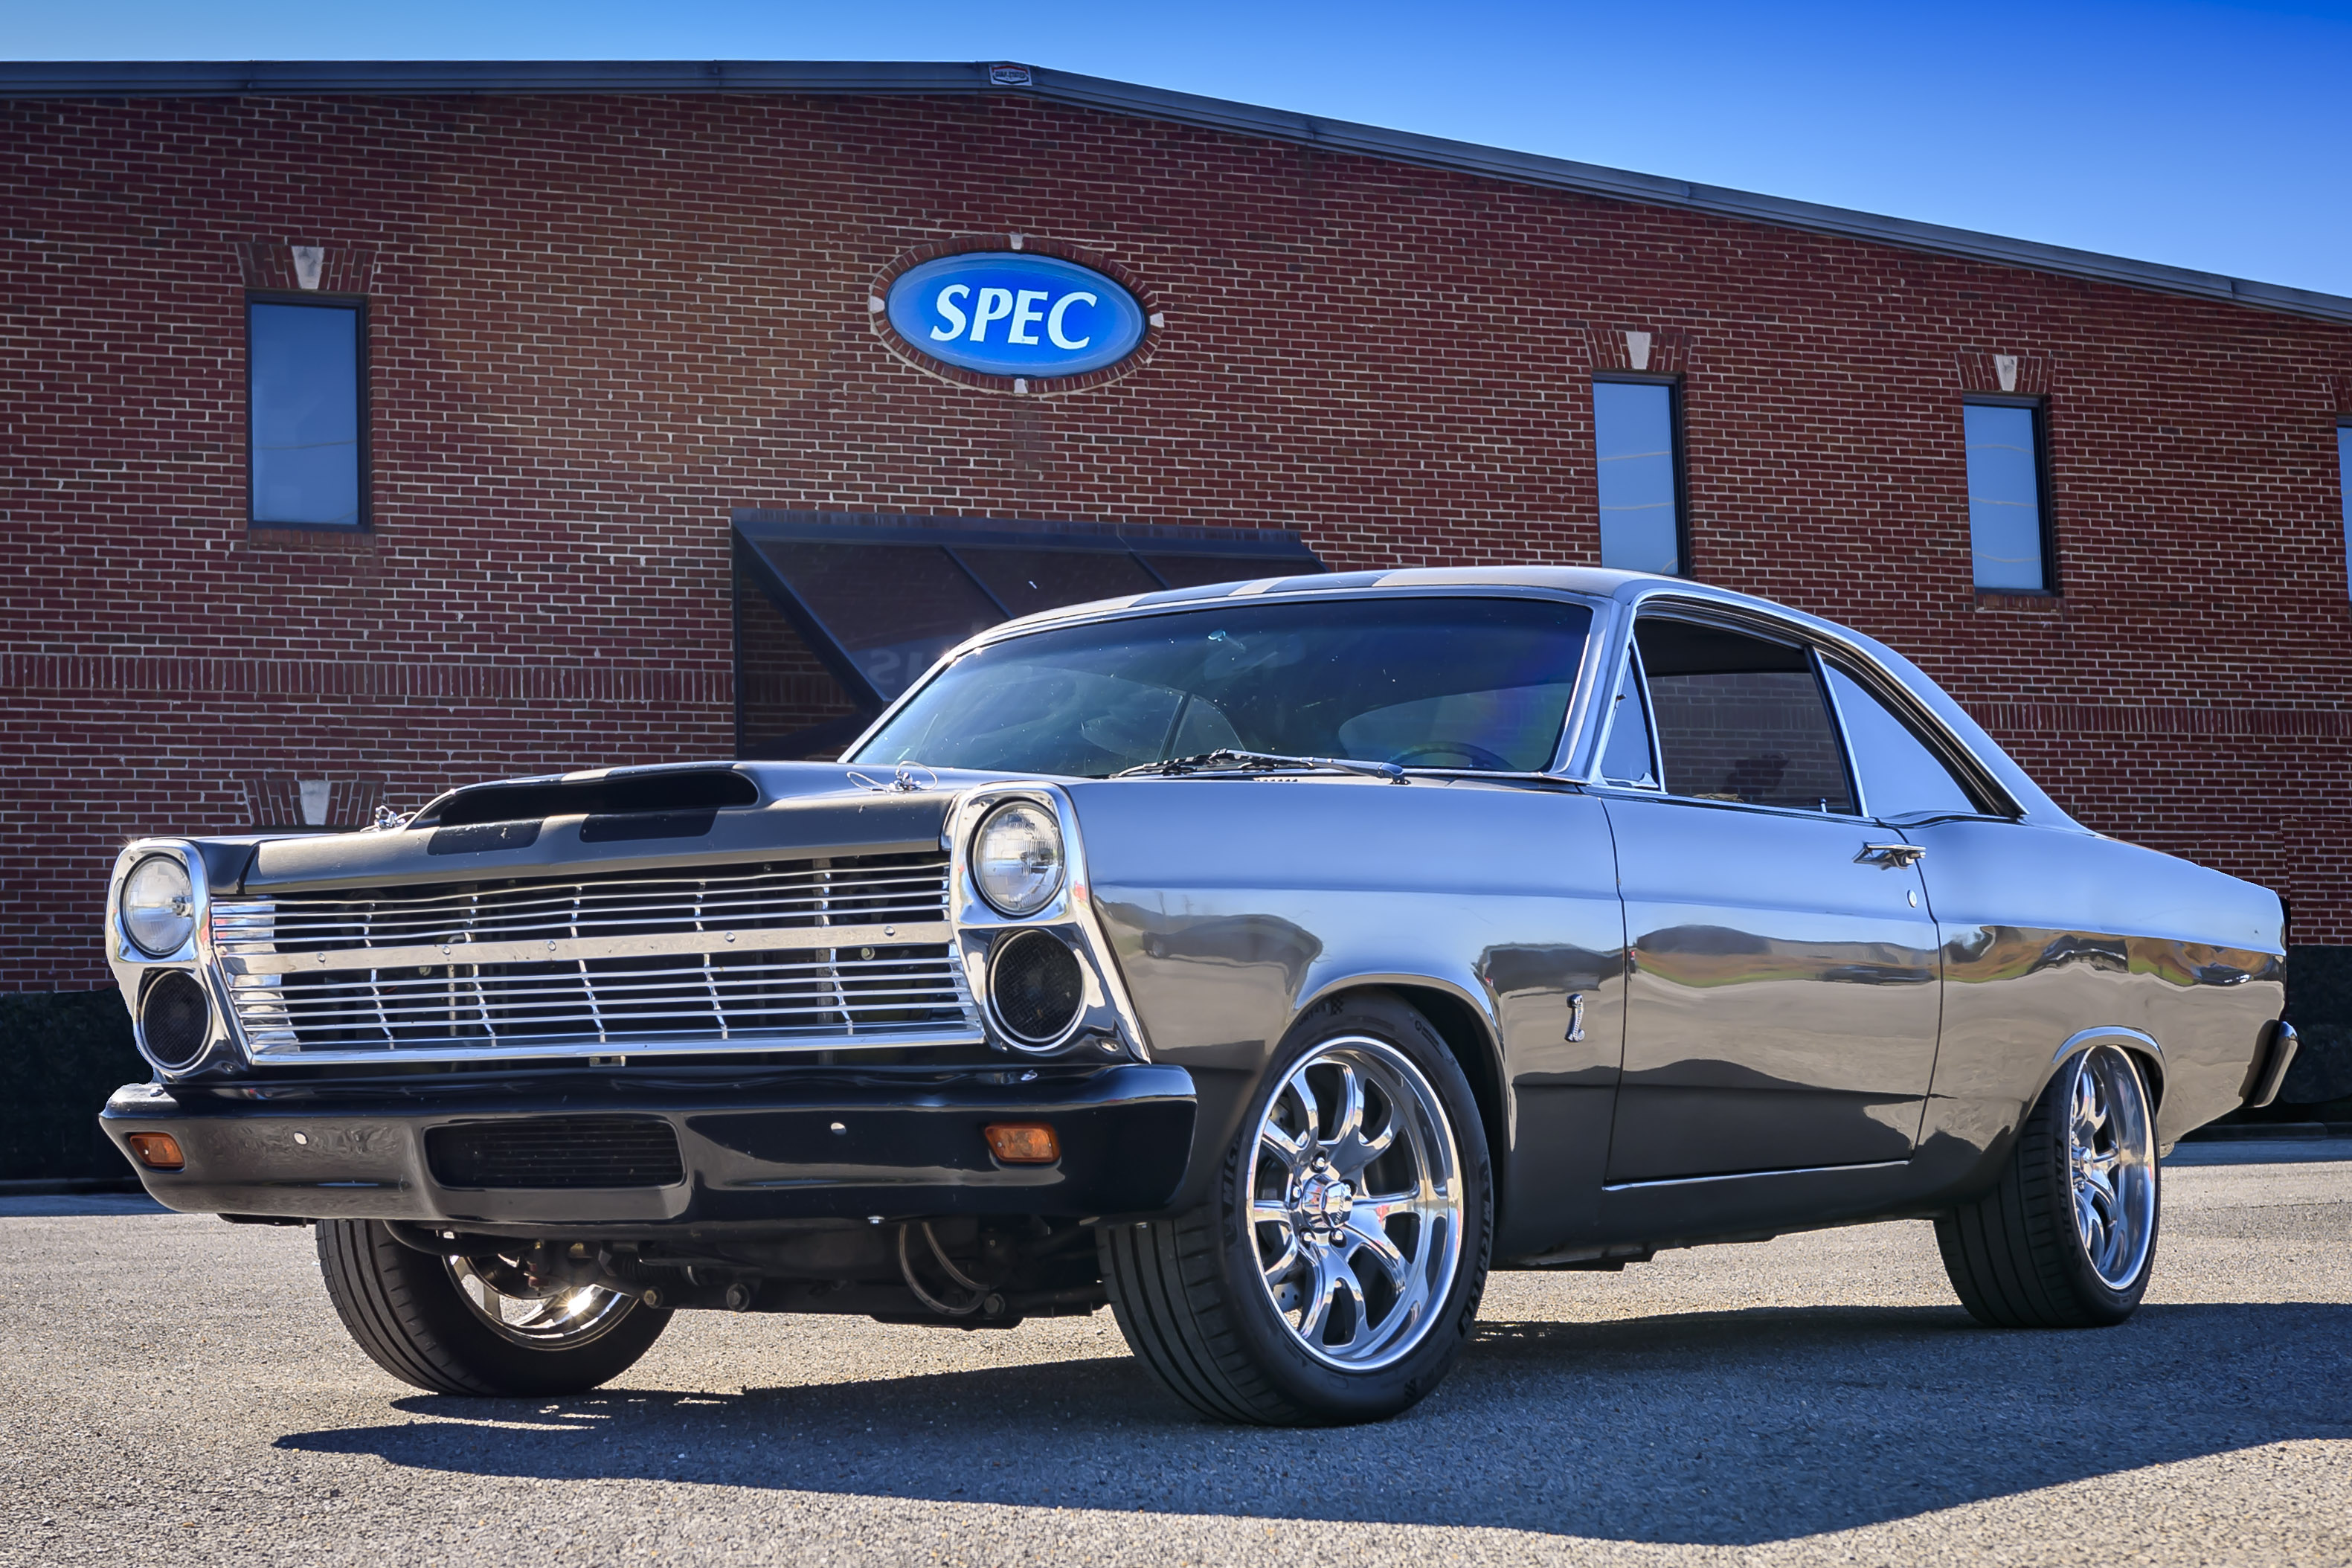
Two years ago, I purchased a 1966 Ford Fairlane restomod to use as a daily driver. Built by my dad in 2013, it’s not your average driver by any means. It has the supercharged 5.4-liter mod motor and TR-6060 transmission out of a 2009 Shelby Mustang GT500. Unfortunately, the Mustang lost a game of chicken with a tree with only 1,800 miles on the odometer! When I bought the Fairlane, the drivetrain only had 22,000 miles on it.
Since purchasing the Fairlane, I’ve spent a lot of time making the classic more roadworthy, with the end goal of driving the entirety of Route 66 in the future. When COVID hit, my overseas travel plans were canceled, so my wife and I decided to make the trip in 2020. I quickly finished my to-do list, and we embarked from our home in Memphis, Tennessee, on September 11, returning home on October 1. The entire epic roundtrip was 5,500.6 miles! But, it wasn’t without a couple of hiccups — the largest (and most worrisome) was the clutch started slipping about the time we hit New Mexico. I managed to baby it the rest of the way to the coast and the long-haul back home, but it was obvious the clutch was toast.
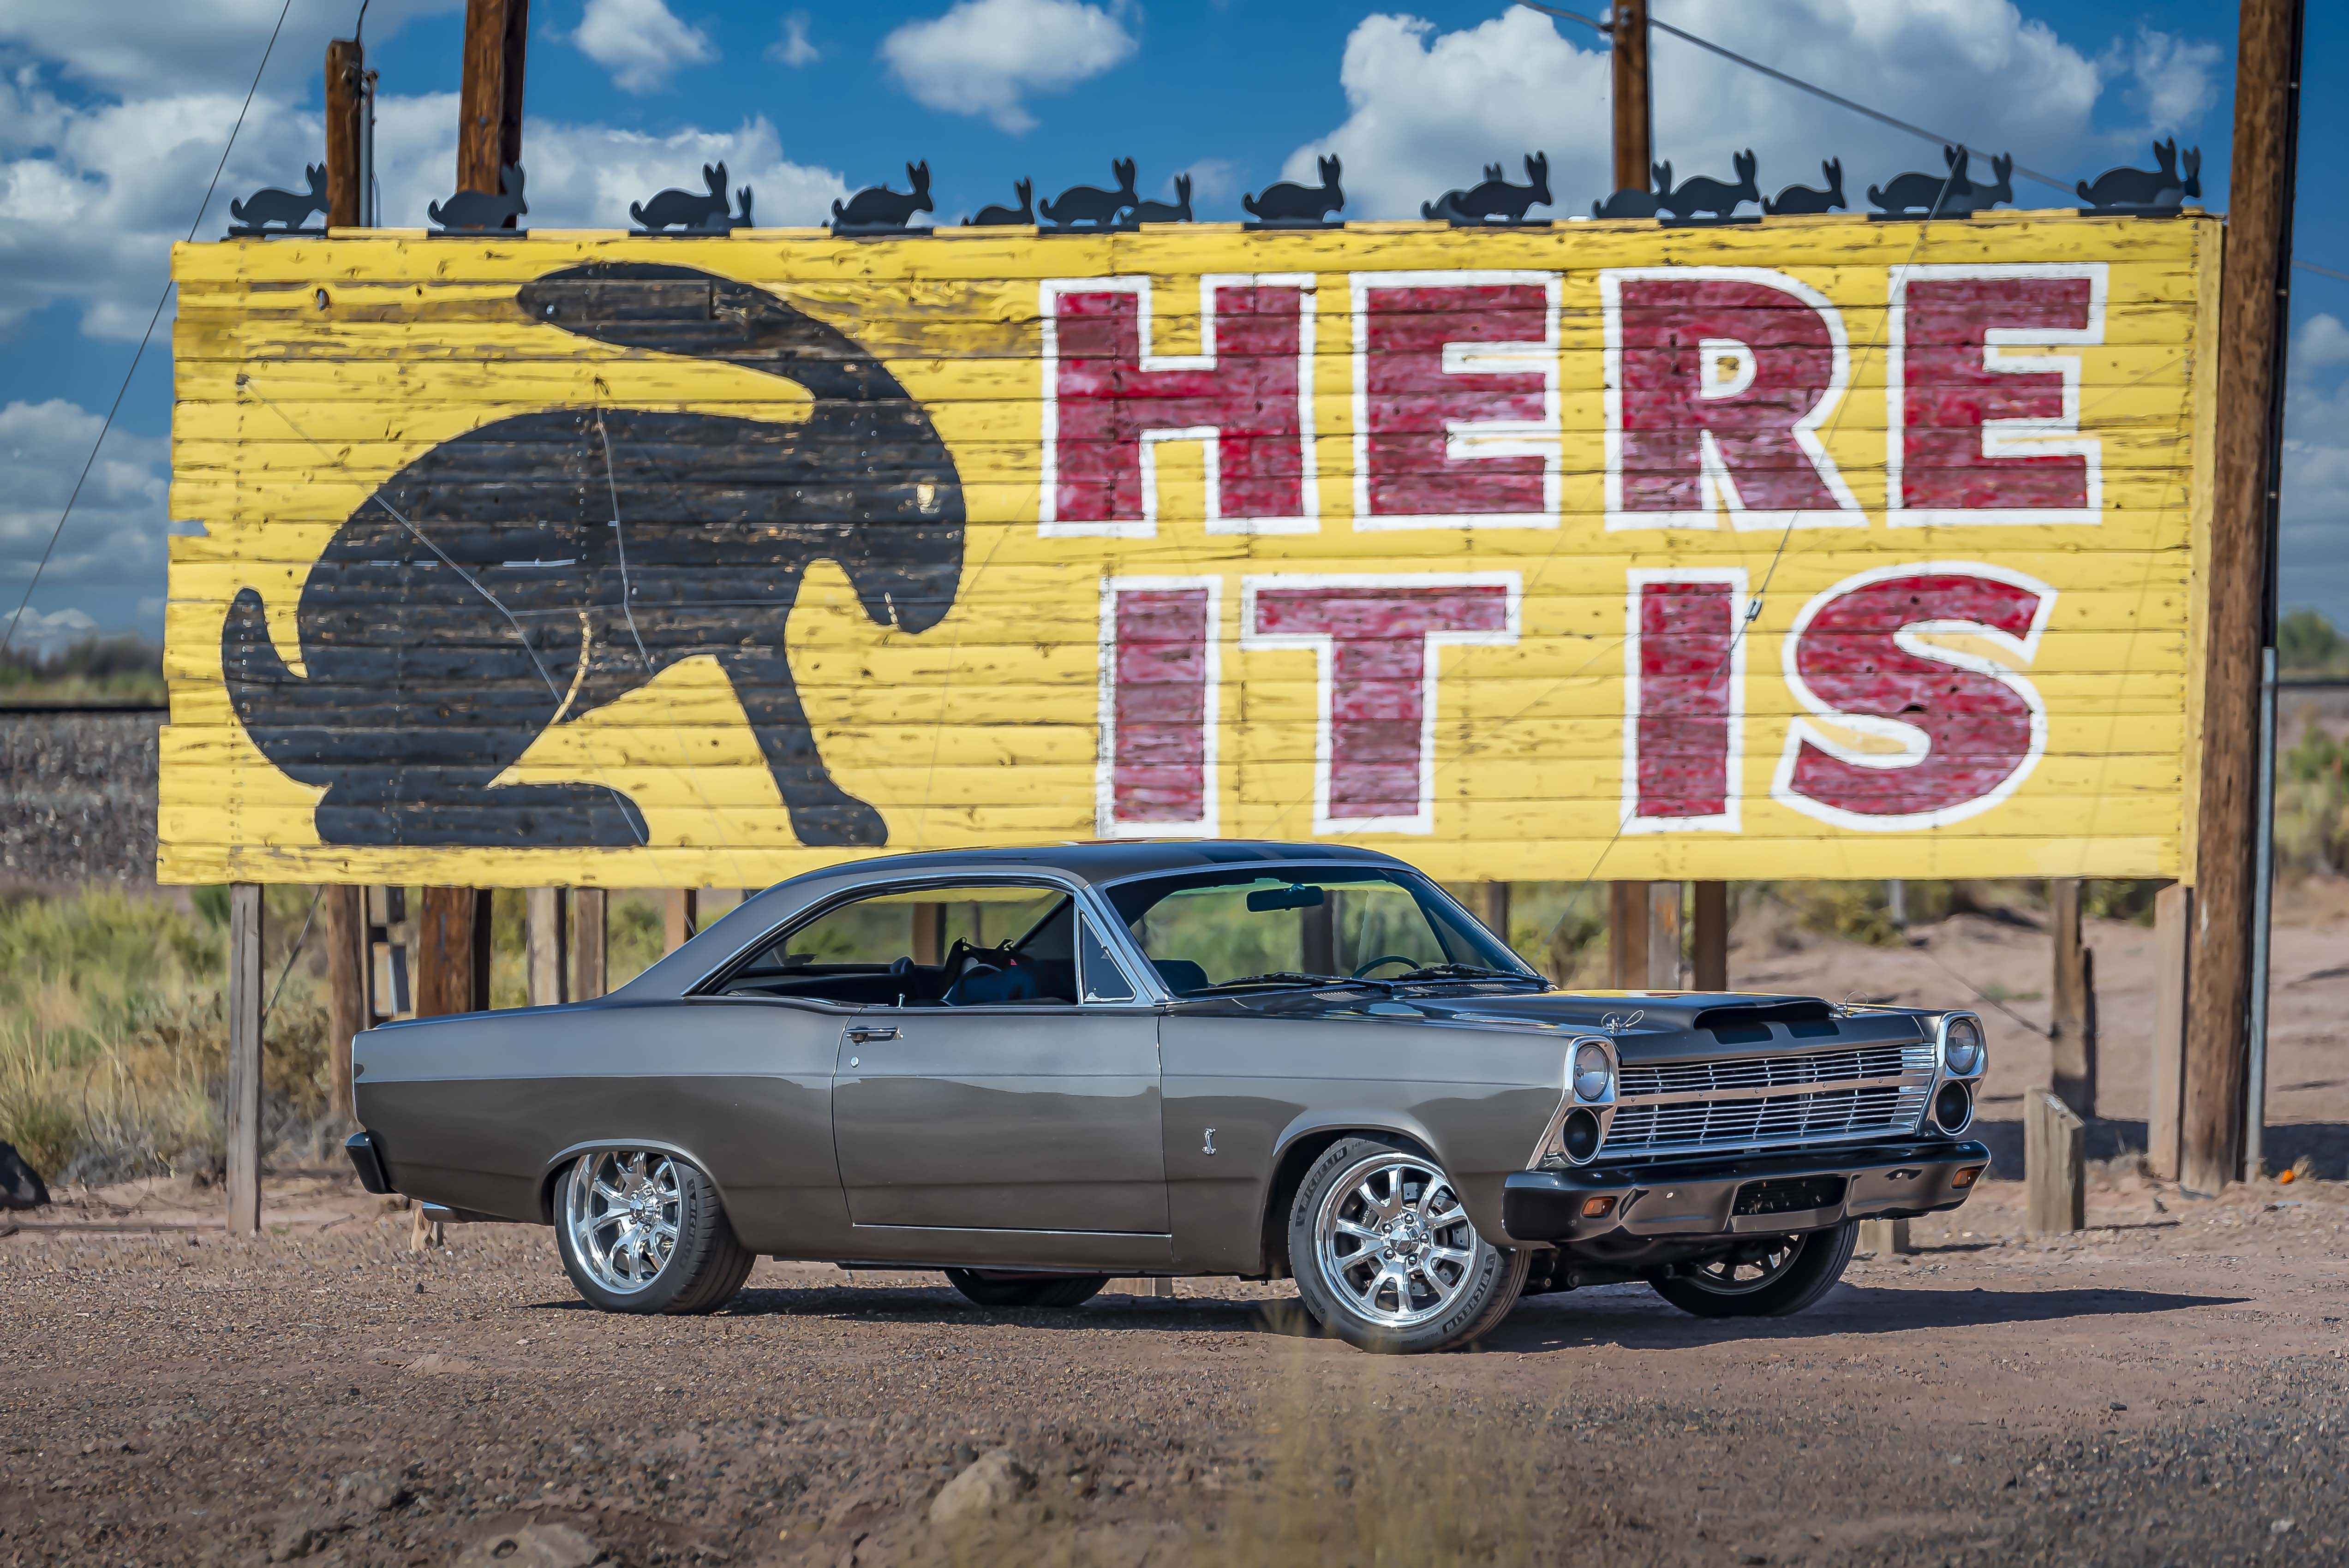
Built by my dad in 2013, this ’66 Ford Fairlane restomod (modeled to look like an R-code) has the drivetrain from a 2009 Shelby Mustang GT500! My wife and I just completed a 5,500-mile round trip on Route 66. The first time I noticed the clutch slipping was leaving the Jack Rabbit Trading Post in Joseph City, Arizona.
The OE GT500 unit is a small-diameter twin with a fairly aggressive but antiquated material… The wear window is narrow, making them short work for aggressive driving… — David Norton, SPEC Clutch
Time For A New Clutch
Once back in Memphis, I researched and found Ford seemed to have had an issue with the ’07 to ’09 GT500 clutches. There are quite a few threads about the stock clutch only lasting 5,000 to 10,000 miles. At $1,500-plus to replace the OEM clutch, I knew I wasn’t going that route. After installing a racing clutch in my “Project CrossTime” Miata two years ago from SPEC Clutch, I have been extremely impressed with its performance. Though a racing clutch would be too harsh for my daily driver, I knew SPEC offers many options no matter what I was driving.
SPEC Clutch, owned by David and Shelly Norton, is 100-percent made in the USA. David grew up racing imports and started SPEC after obliterating many import clutches. But, SPEC really grew by leaps and bounds, making a name for itself in the Mustang world on the NMRA circuit. It was a no-brainer to contact SPEC for a replacement clutch on my GT500 powertrain. When I called David, he suggested we conduct the swap at their facility in Bessemer, Alabama. I’m not one to turn down free labor, so I took him up on the offer!
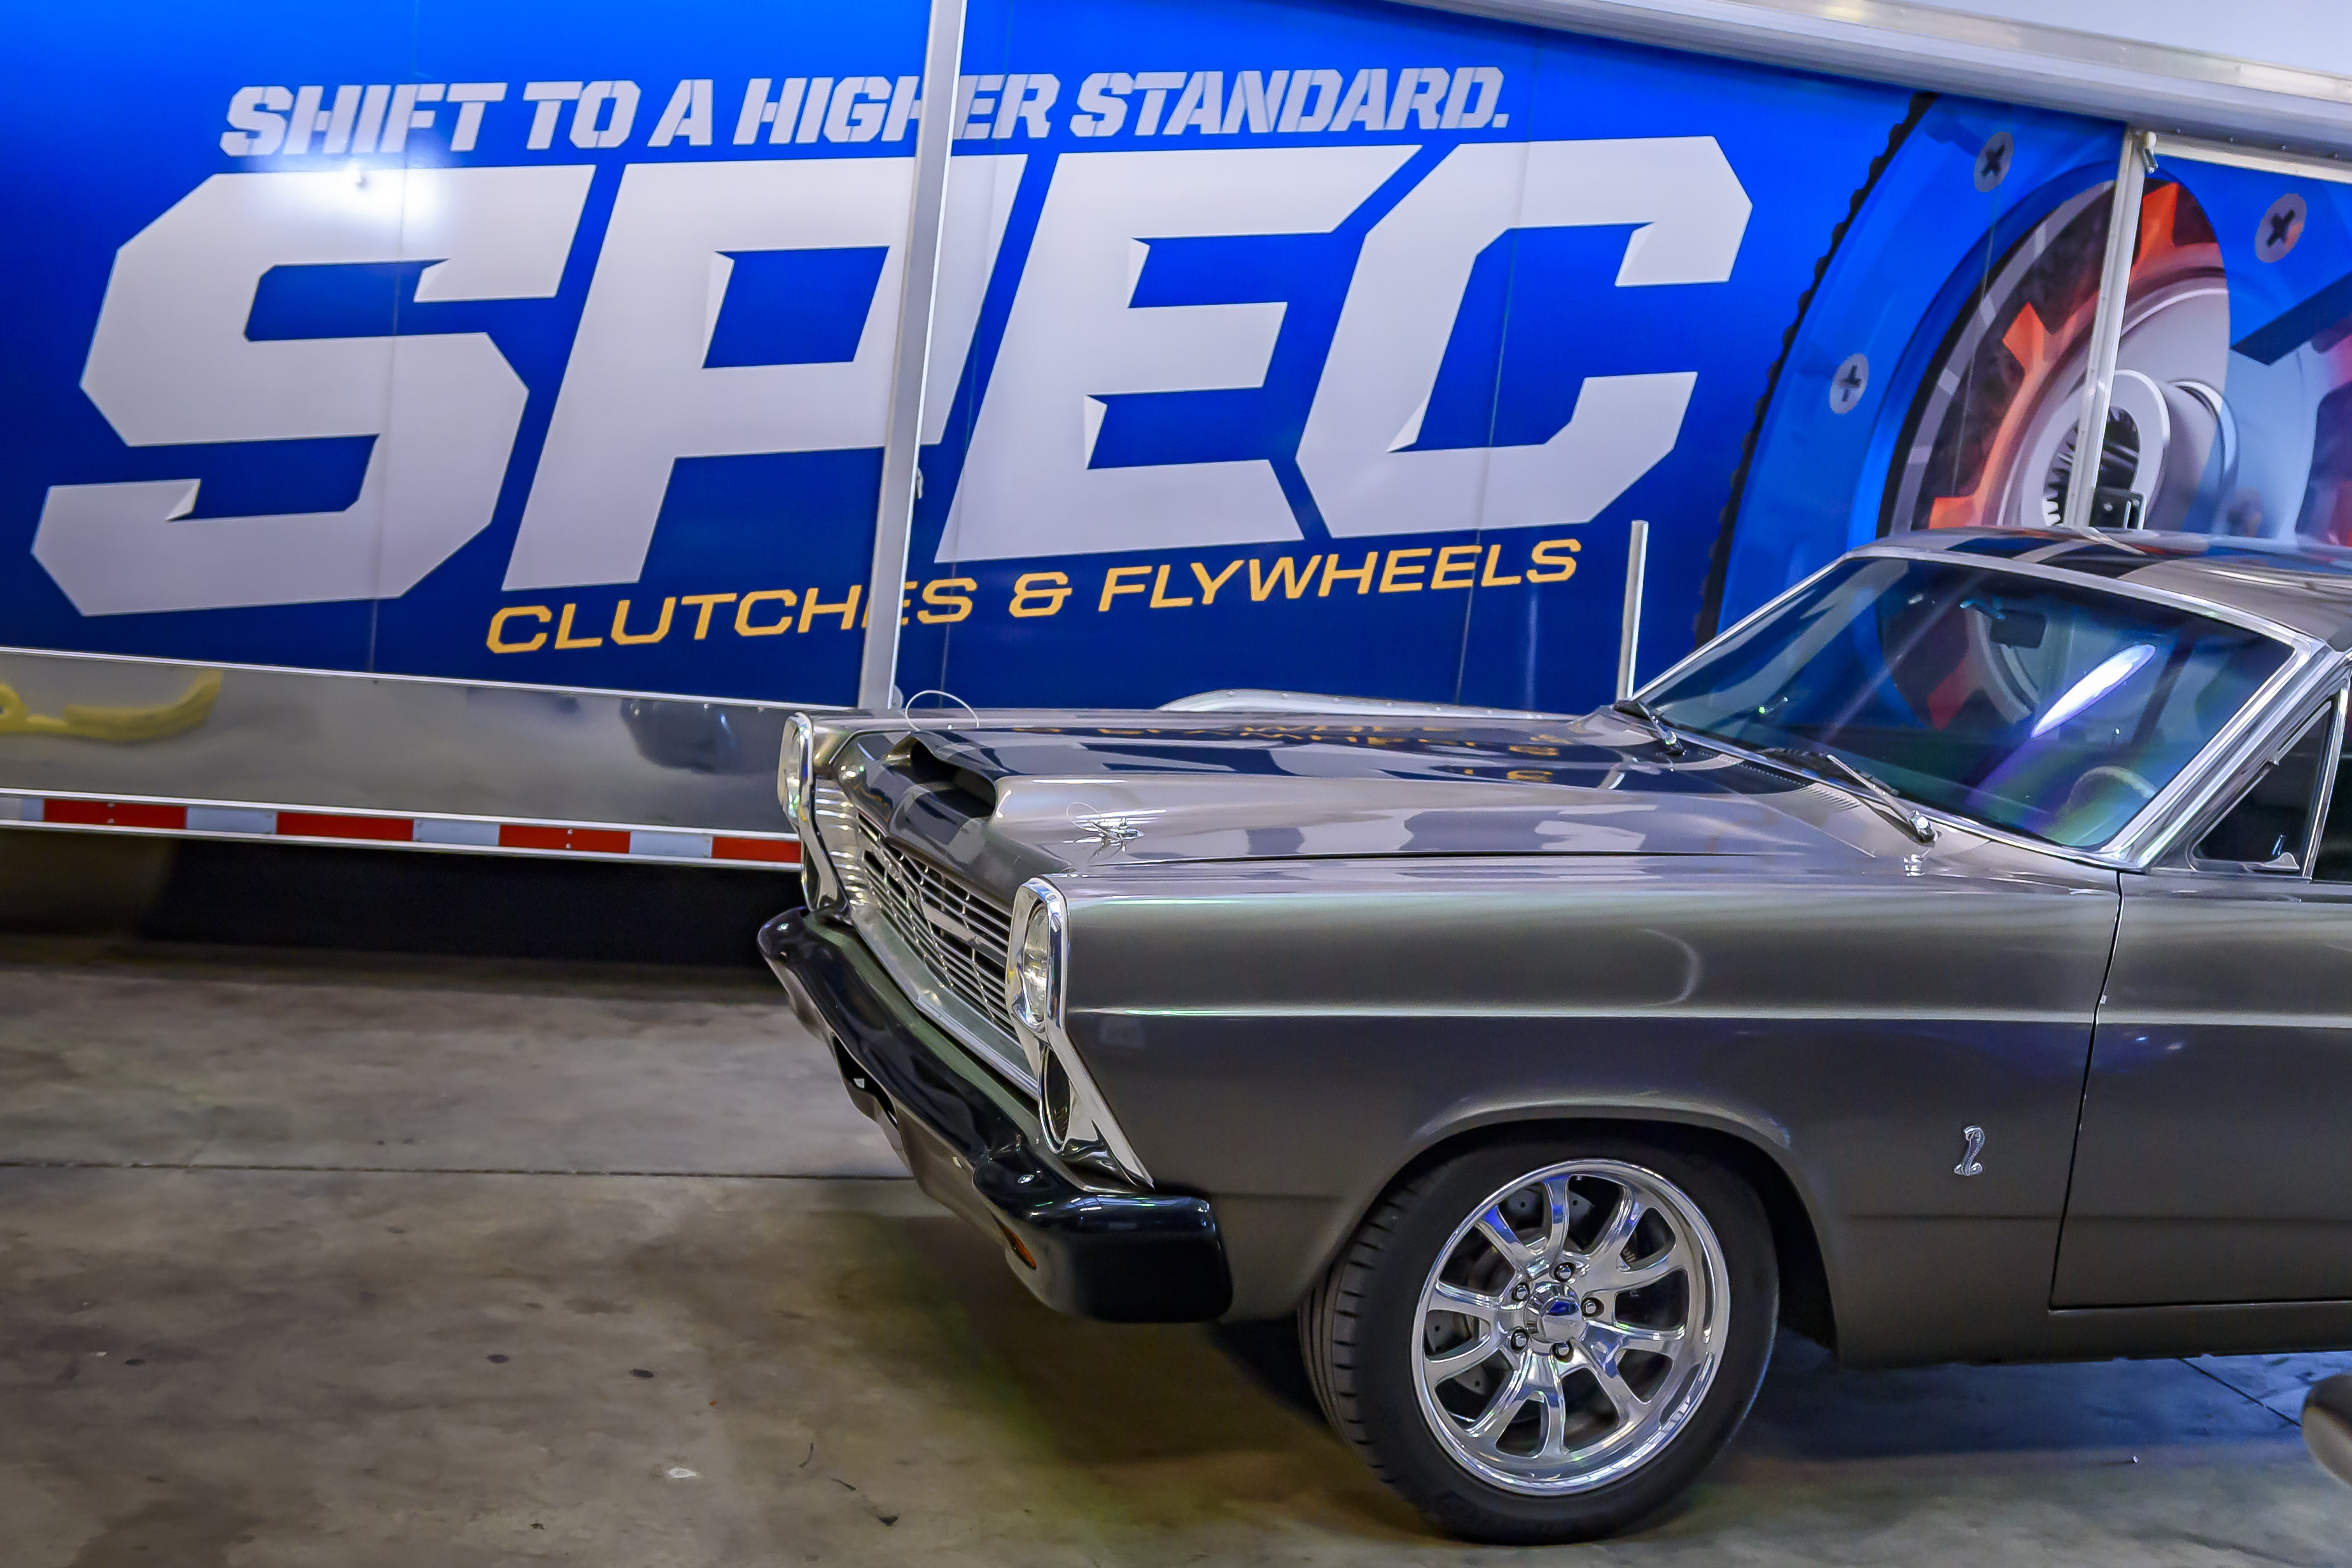
David Norton, the owner of SPEC Clutch, offered to do the clutch swap at their facility in Bessemer, Alabama. I jumped at the chance for someone else to do the work!
Removing The Old Clutch
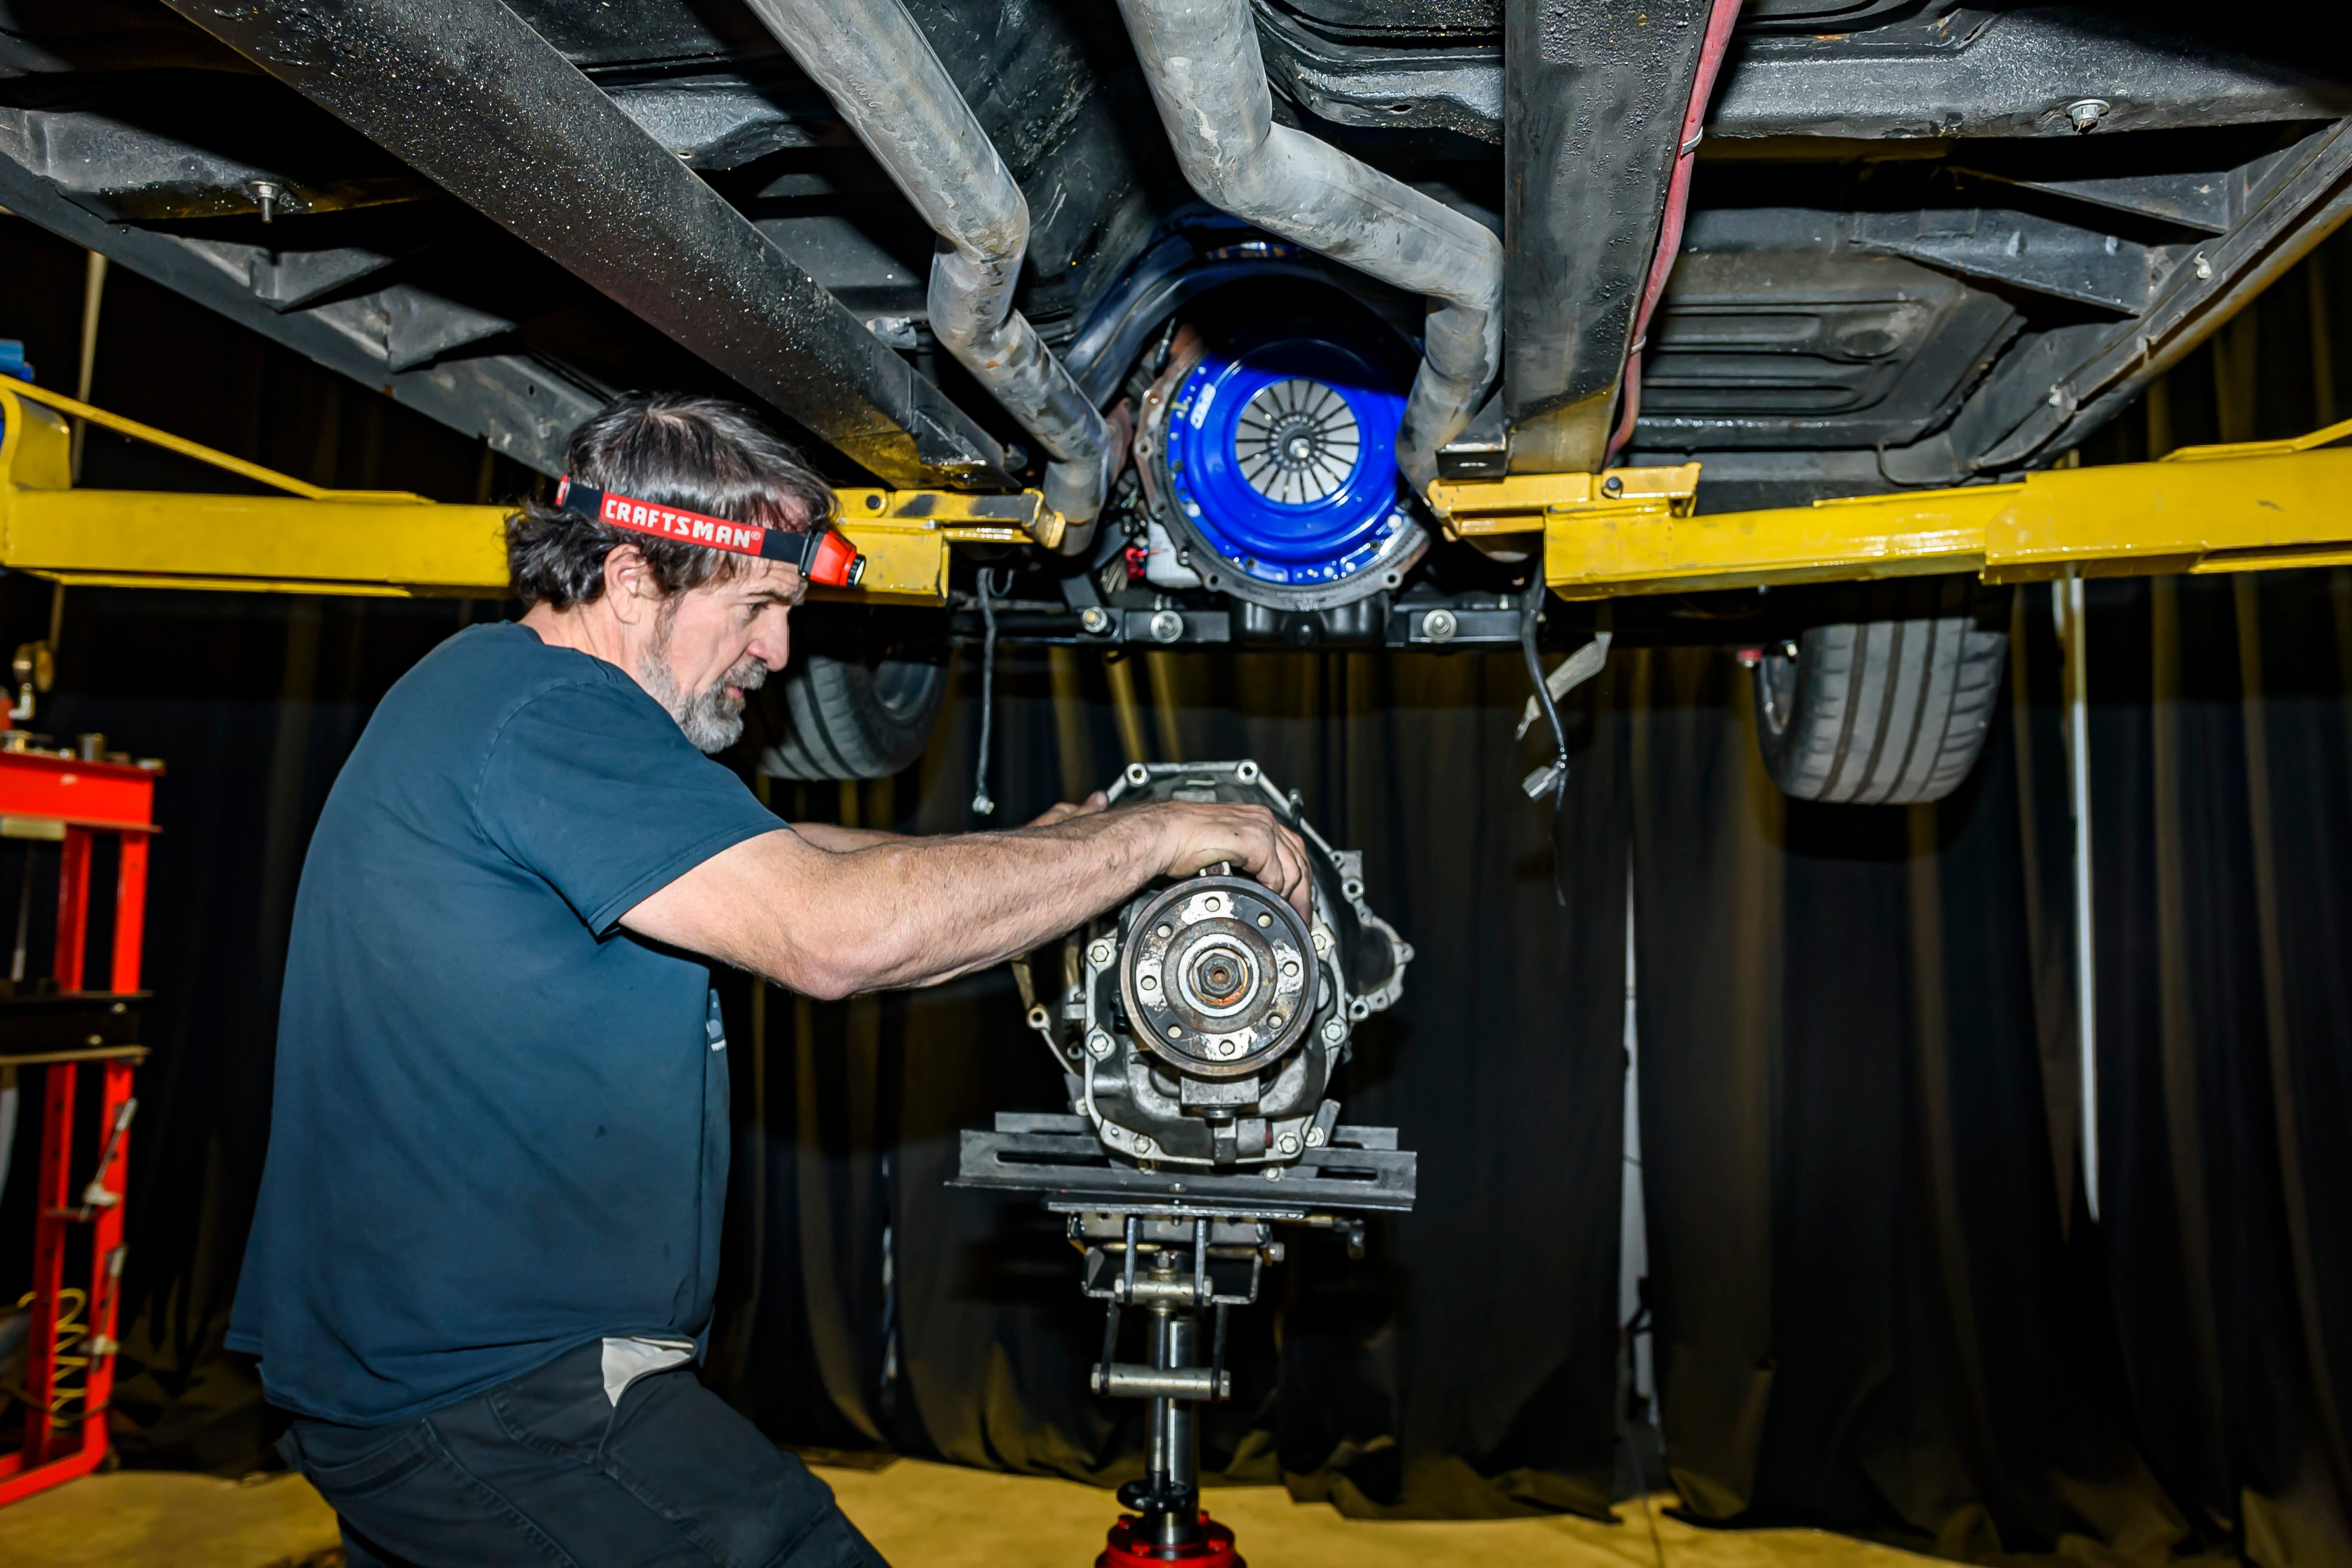
I arrived late in the afternoon and dropped off the car with Head Technician Danny Smith to look it over before we installed the clutch the following day. I knew the engine and trans went in together as a unit without a front clip on the car, so I was a little nervous if it would even come out the bottom. Danny was confident it would once he saw it, so we made plans to meet in the morning.
Installing a new clutch isn’t a super complicated affair — it’s everything around it that is! A lift certainly helps, but either way, it can be a filthy process of trying to get everything out of the way to remove the transmission. Danny’s first steps were easy. While it was on the ground, he disconnected the battery and removed the shifter. Once in the air, he pulled the driveshaft, trans crossmember, and starter.

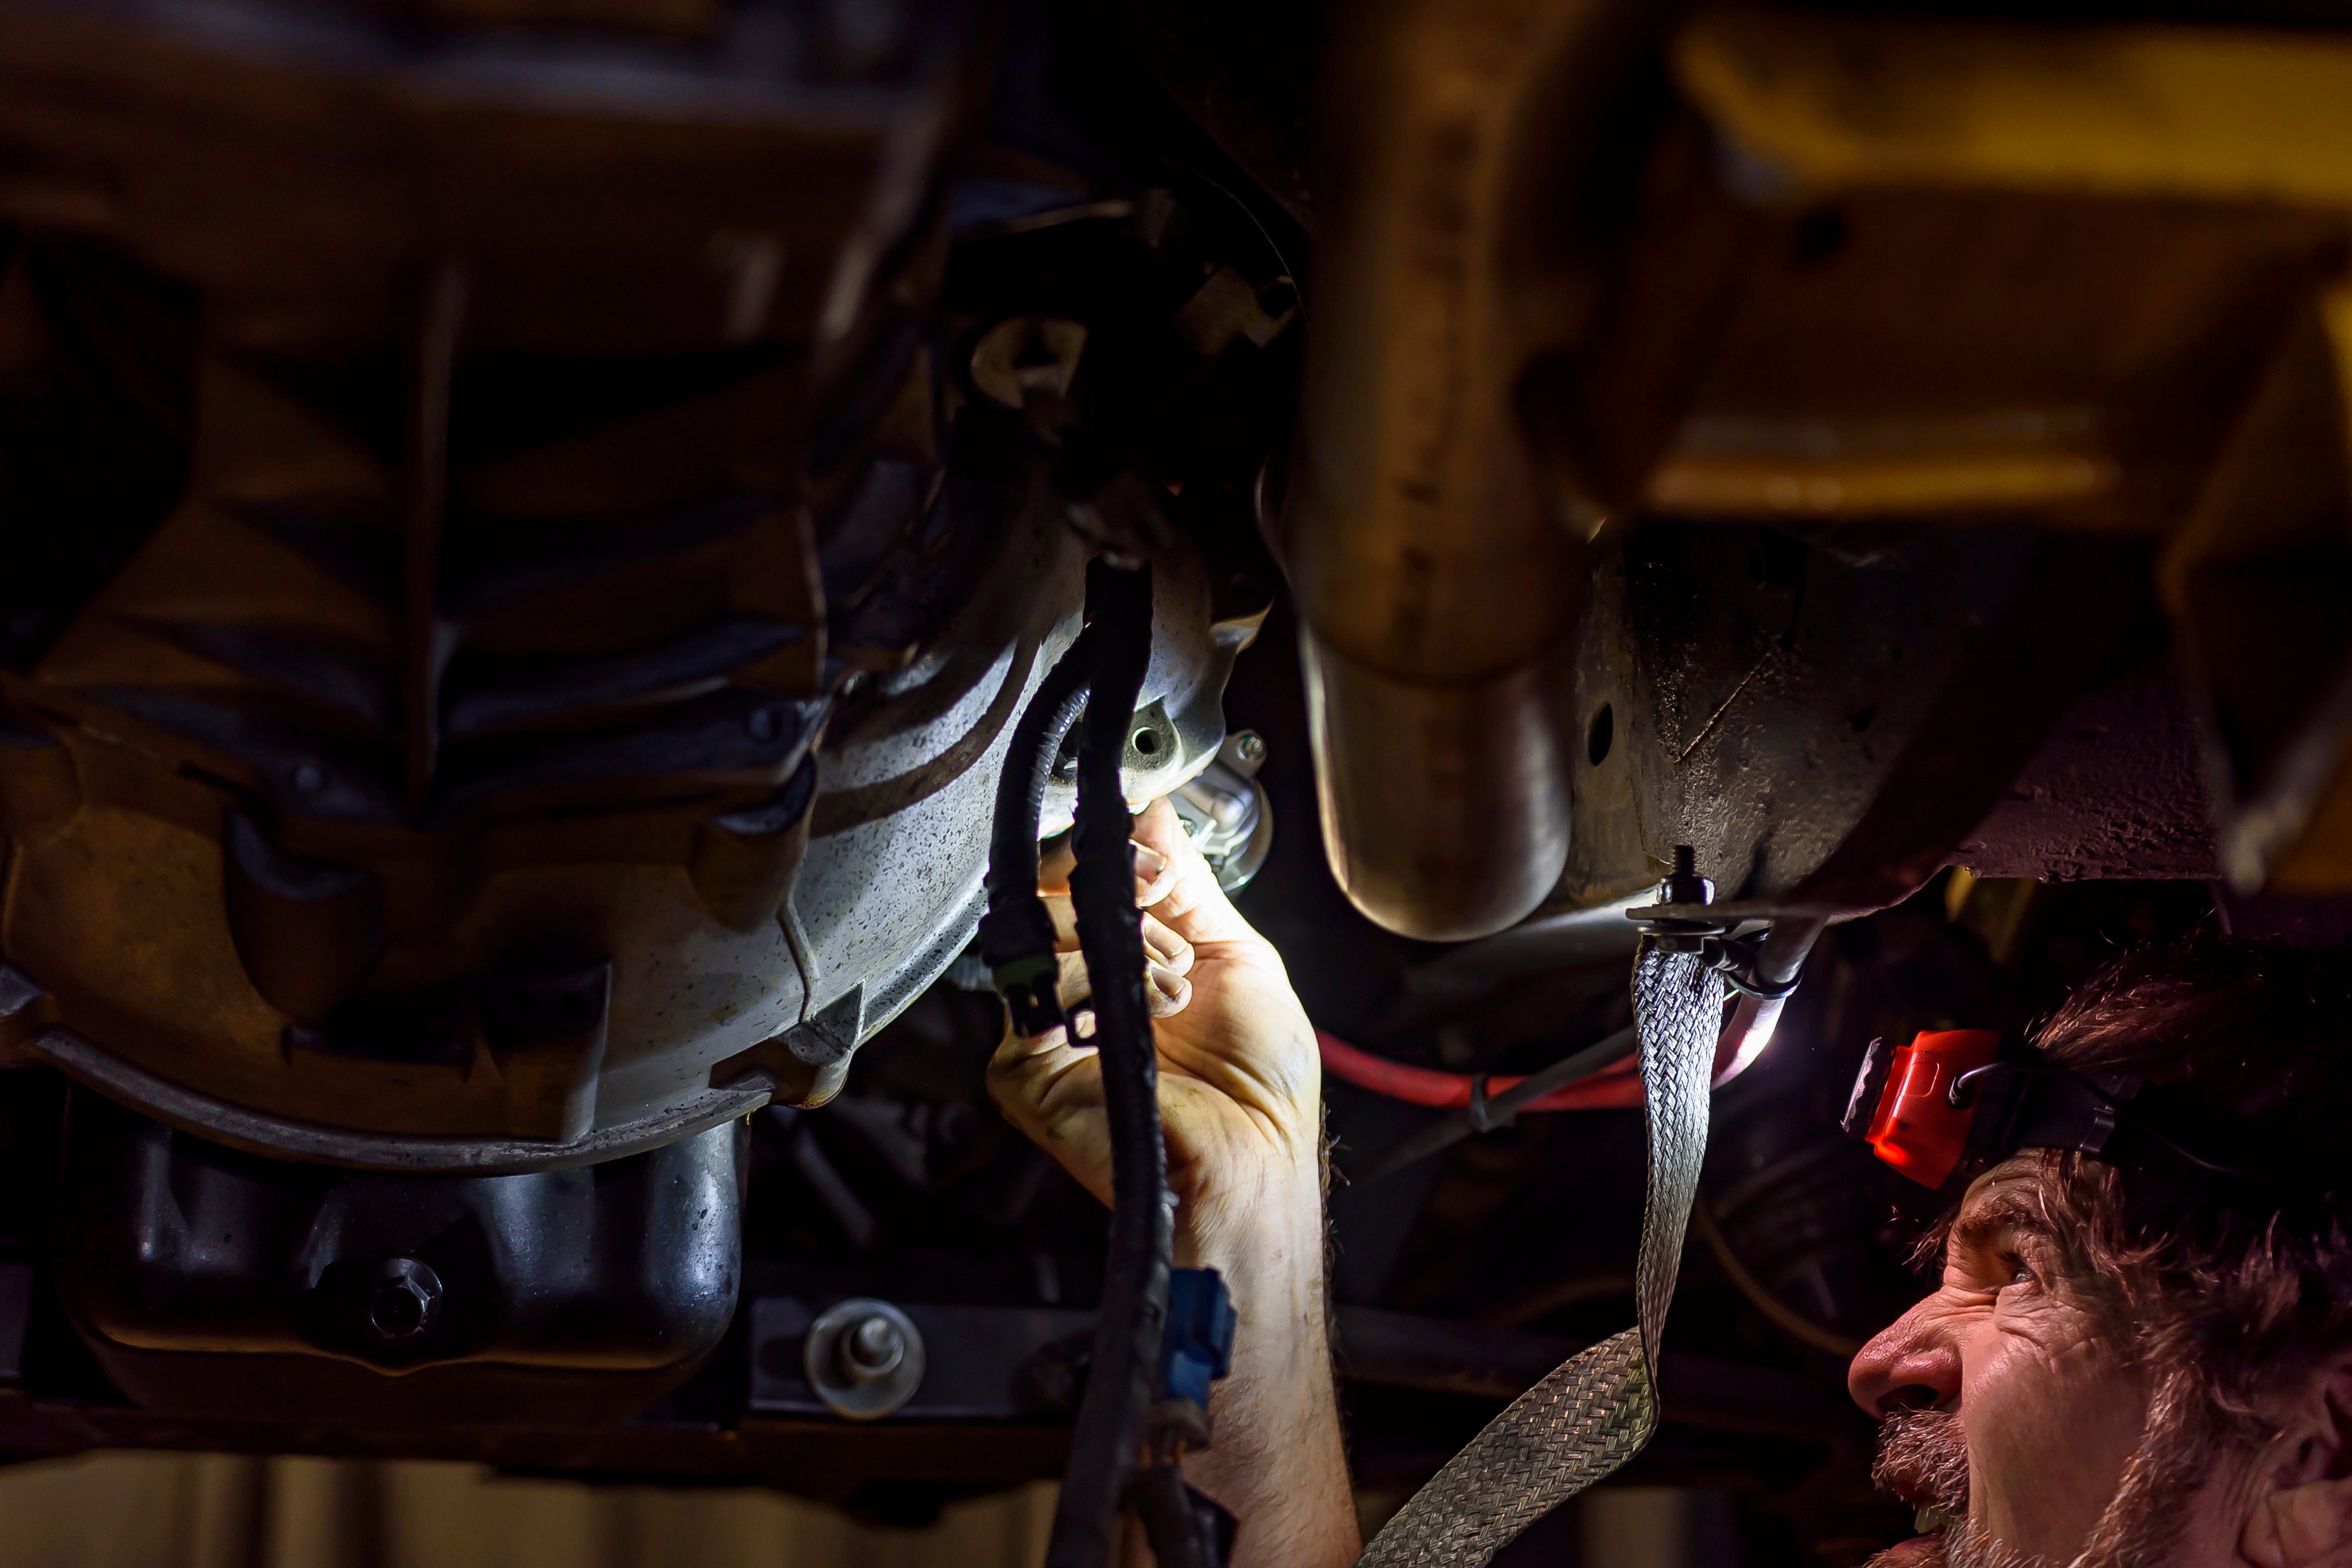
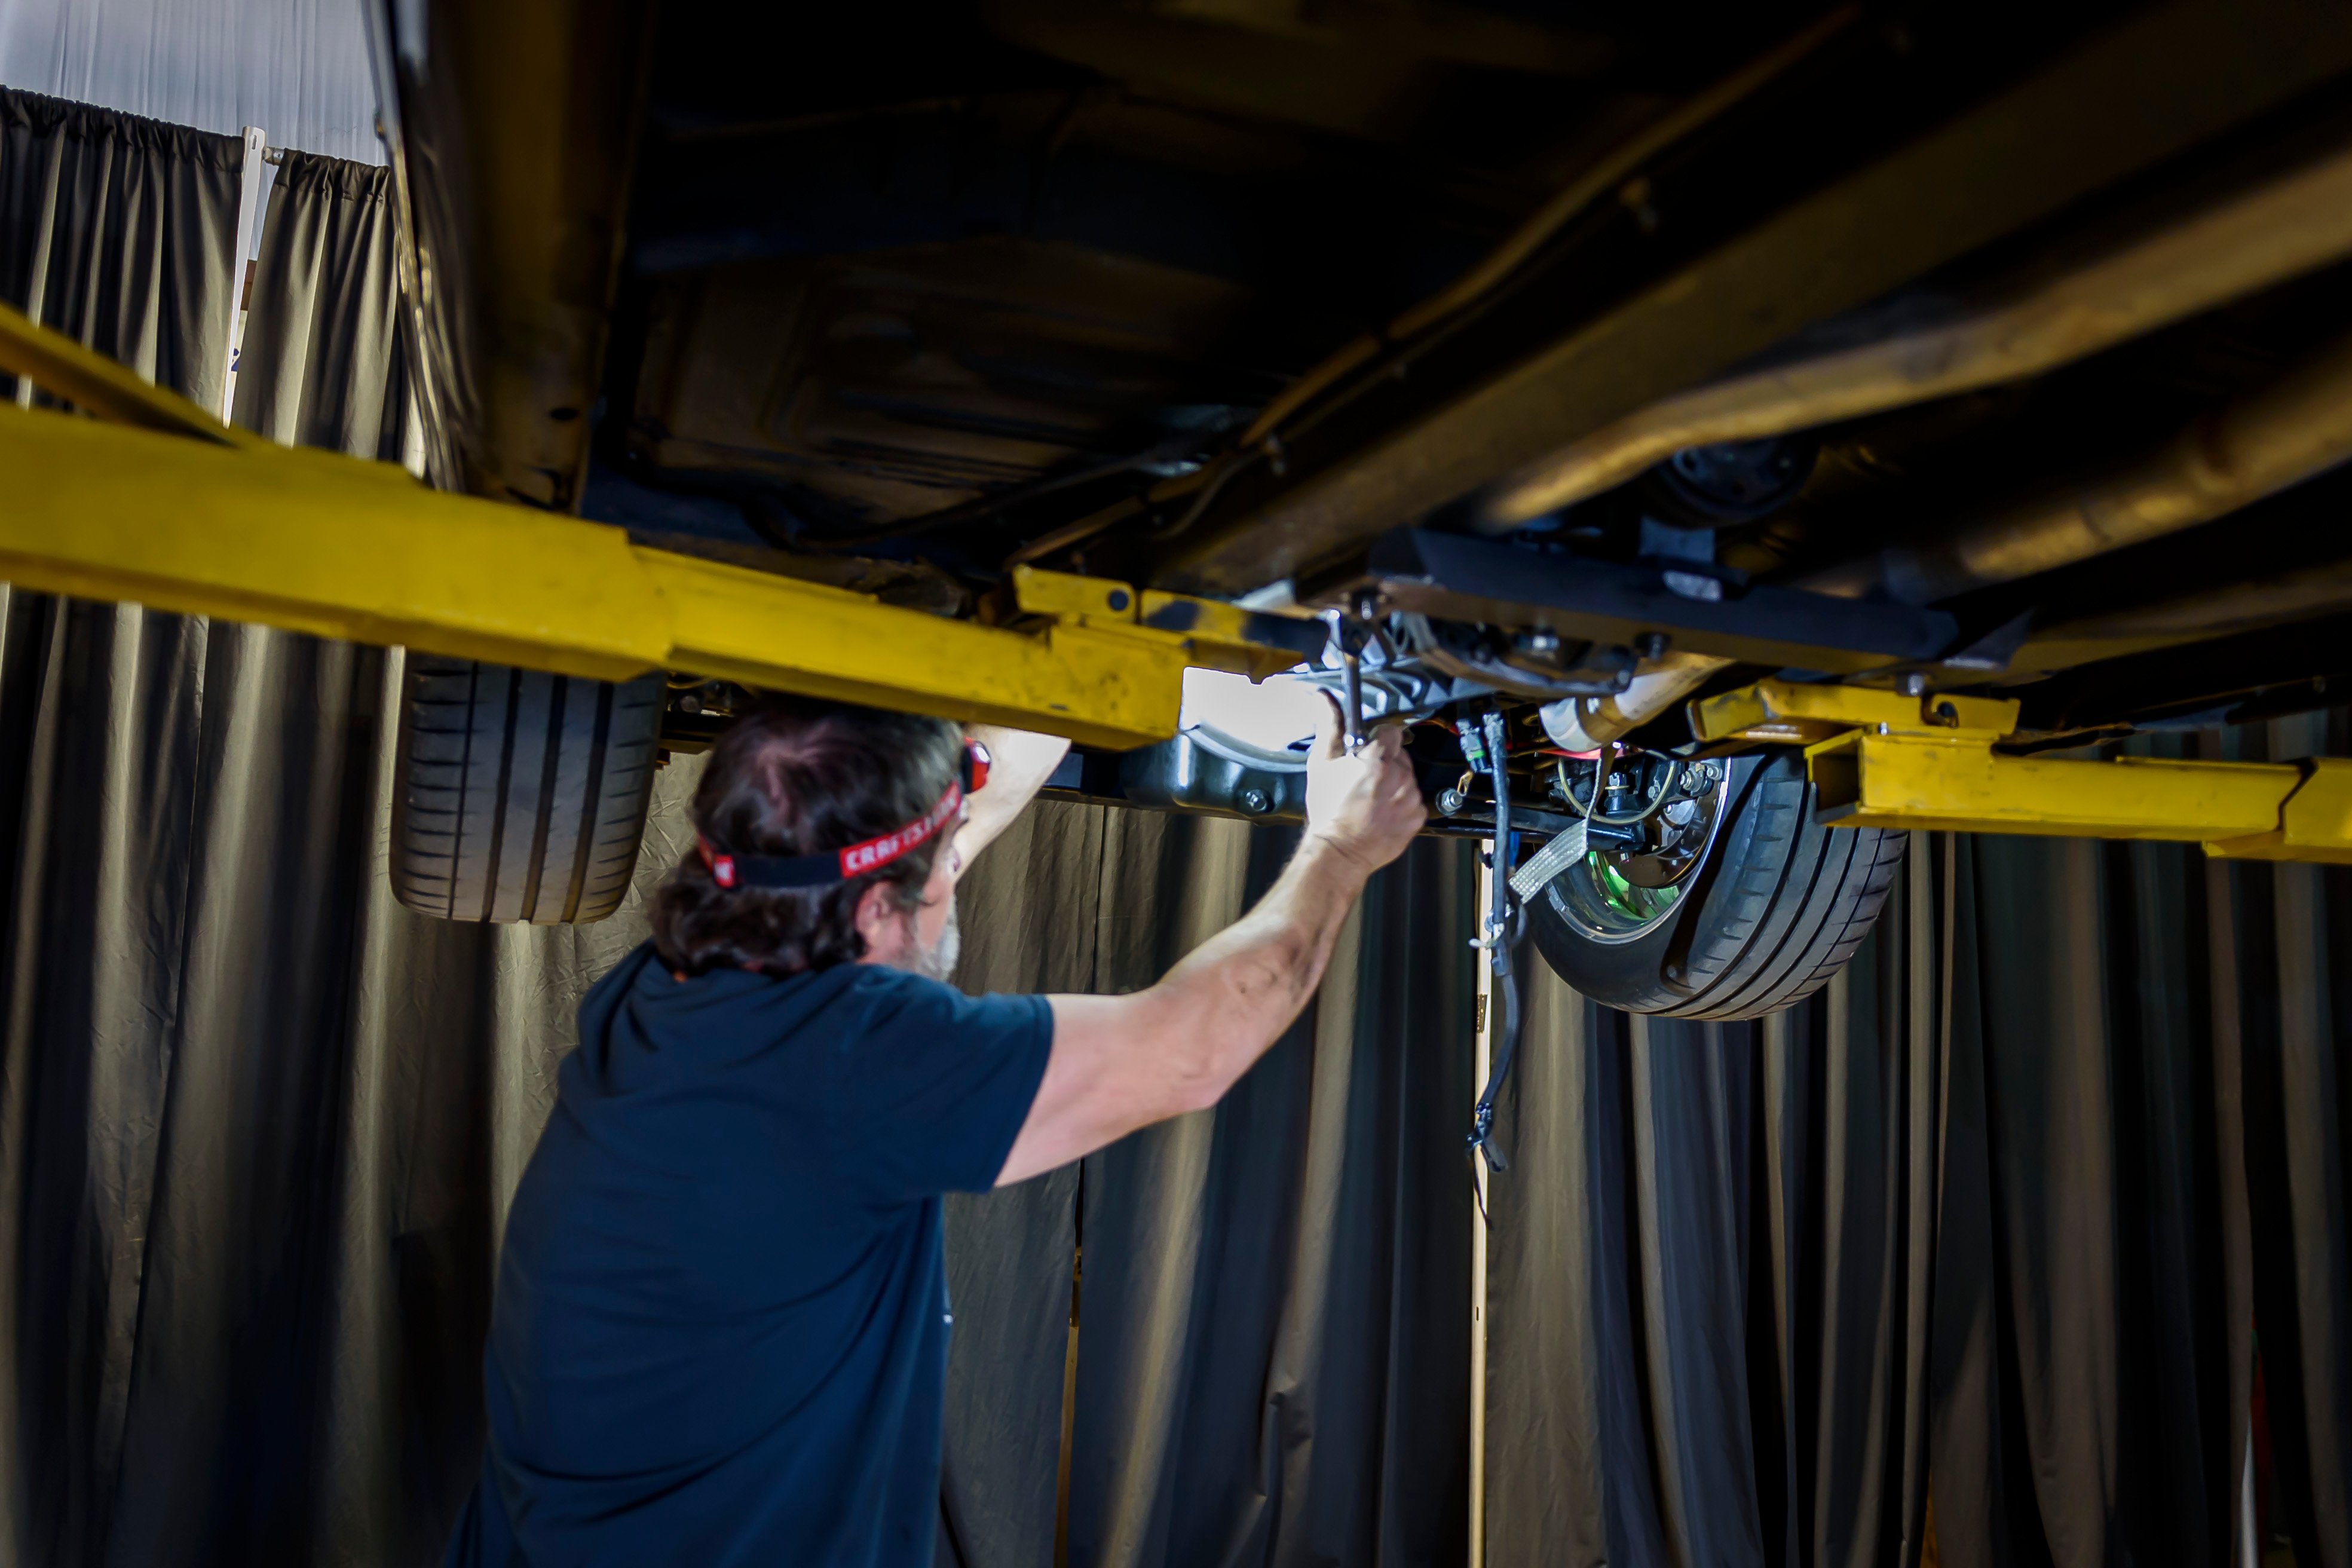
Danny Smith, the head tech at SPEC Clutch, got right to work by disconnecting the battery and removing the shifter before getting the car on the lift. Then, he pulled the driveshaft and starter, and unhooked the hydraulic slave cylinder. Lastly, he unplugged all of the electrical connections that might get in the way.
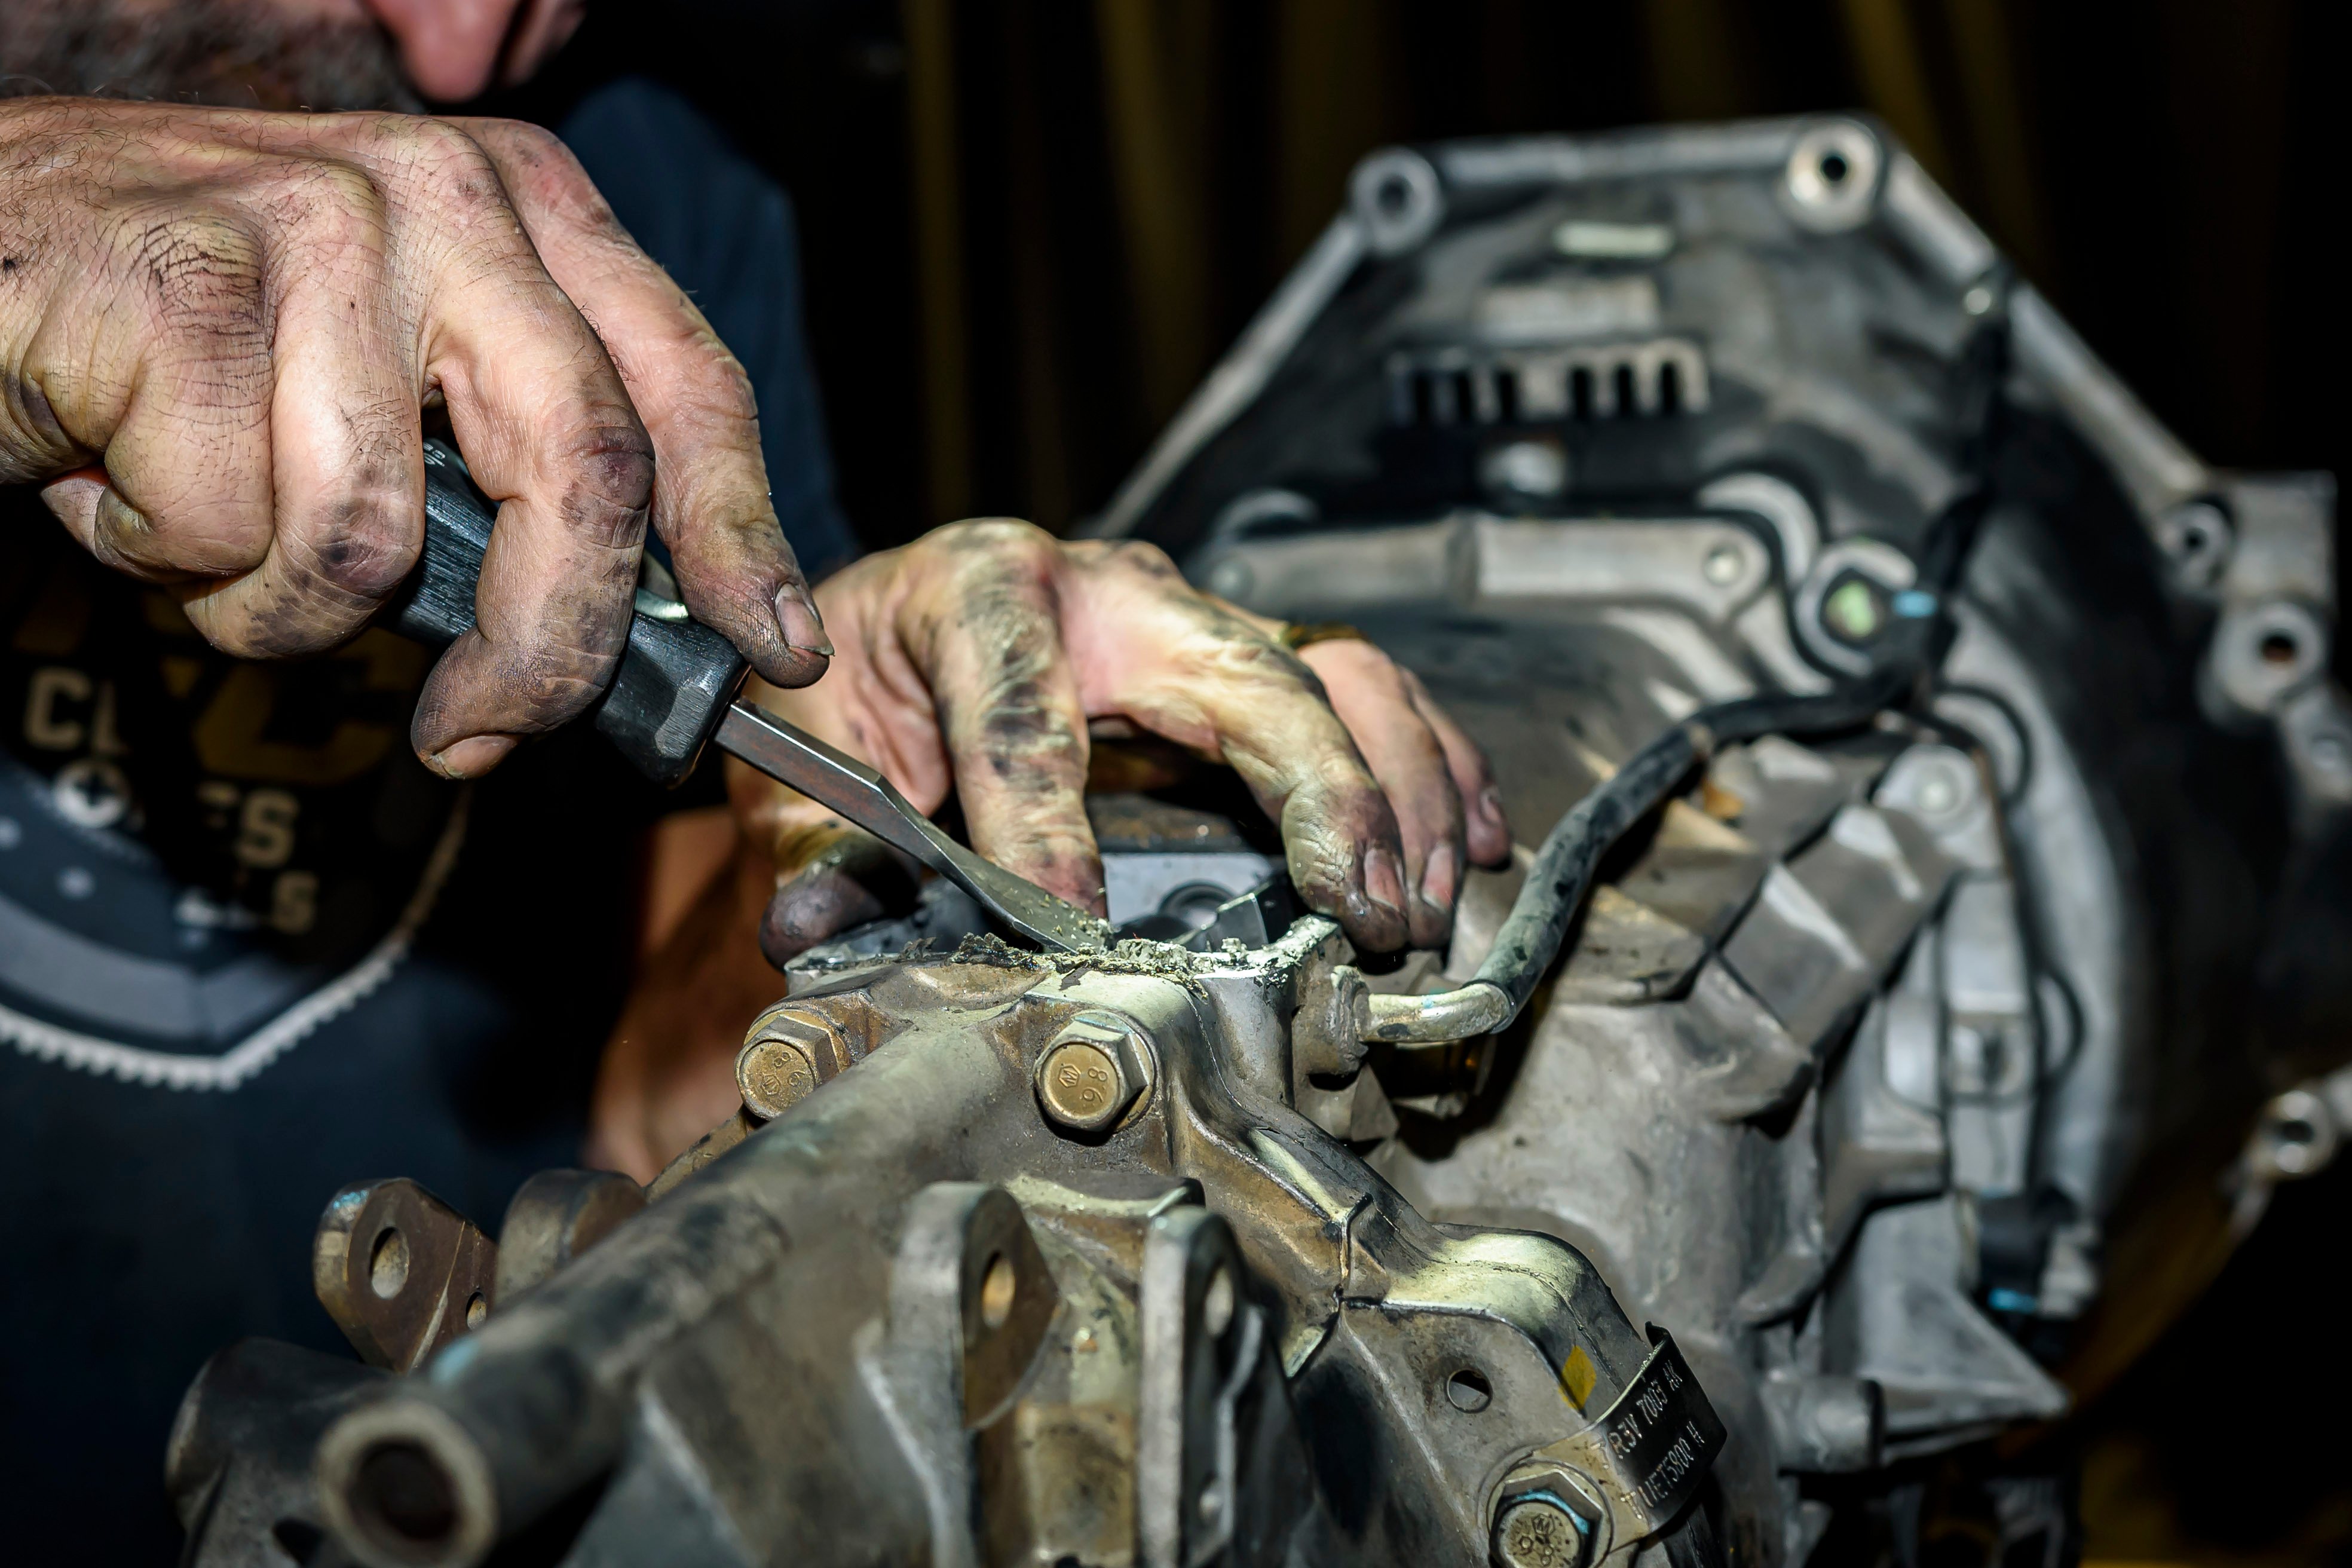
Now things start to get trickier. There is a lot of wiring going to sensors on these modern drivetrains that must be found and disconnected before you can even think about pulling the bellhousing bolts. The wiring harness is all loomed together, so it can’t move very far, and you are working in a tight area between the firewall and bellhousing. Danny did his best Stretch Armstrong impression, getting into places I didn’t think he could reach to disconnect the hydraulic clutch hose and the electrical sensors.
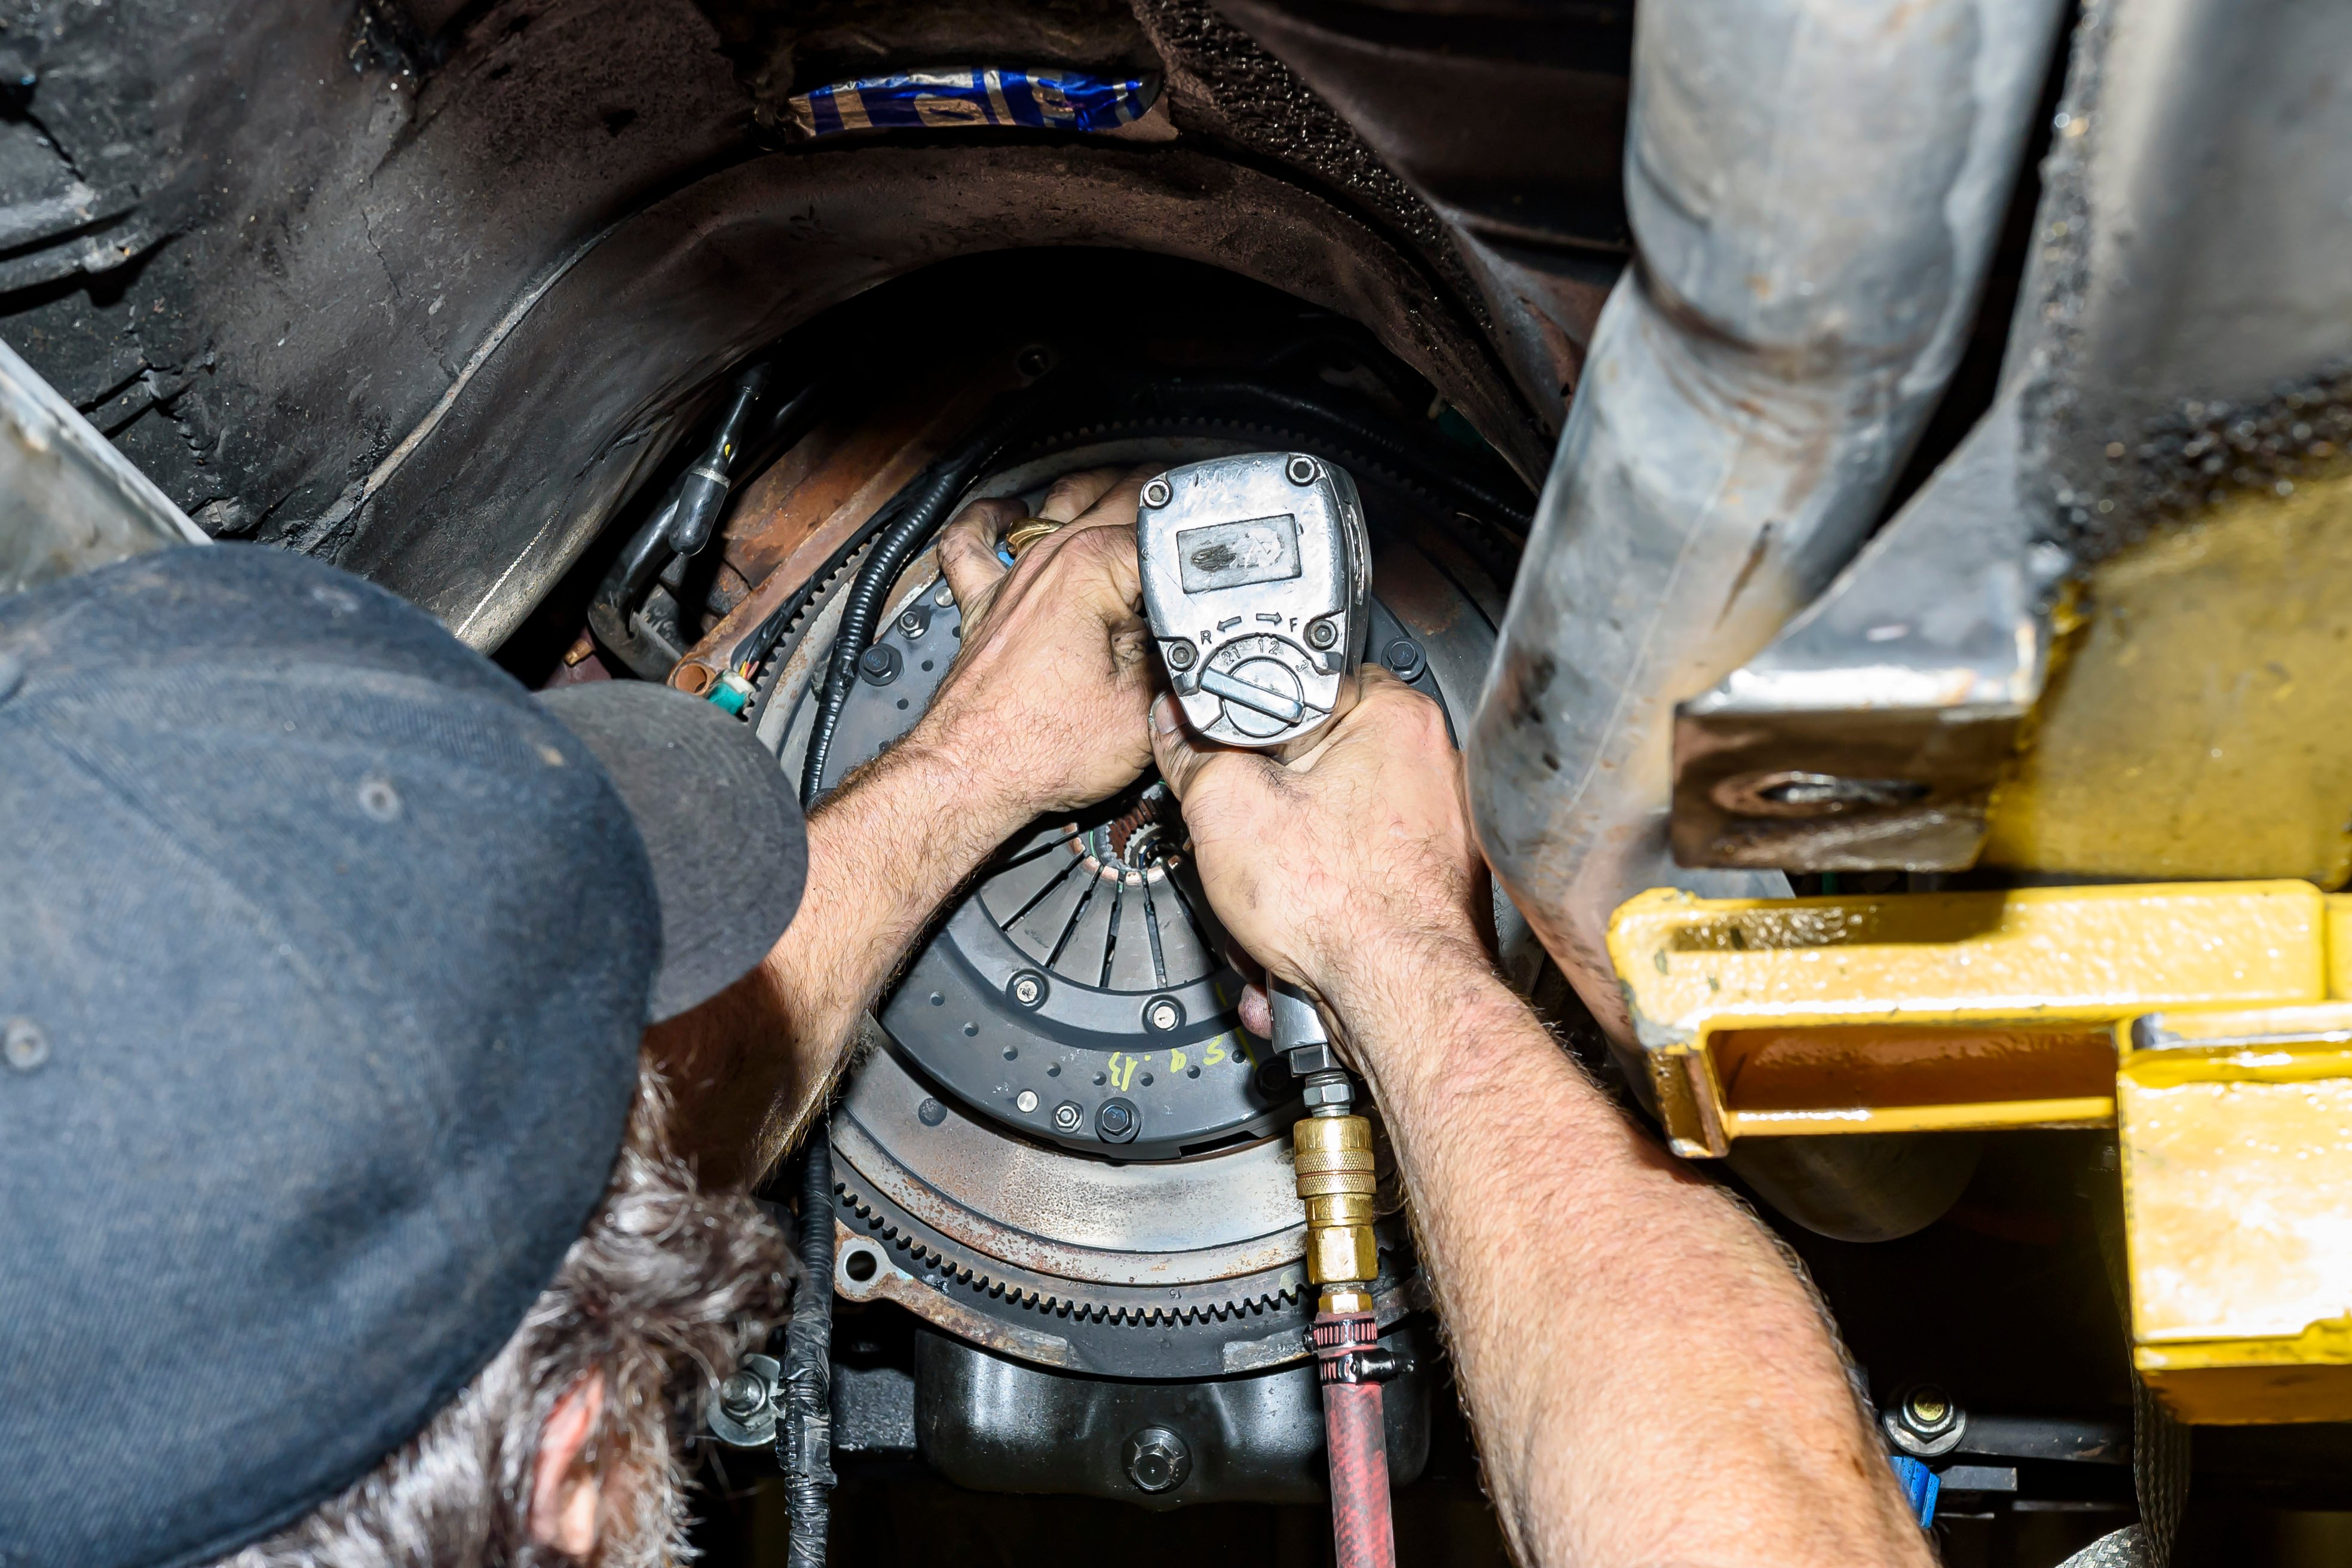
With those connections now free, he supported the transmission with a trans jack as he tackled removing the nine bellhousing bolts. A few are on top, so it’s good to have a really long extension with a swivel adapter. Once the bolts were loose, it was time for the moment of truth. Could we actually extract the transmission from the engine?
Danny used the transmission jack to support the weight as he wiggled the input shaft out of the pilot bushing. Once free, it’s just a matter of clearing the input shaft past the clutch assembly, which can be more difficult than it sounds in a confined space. Luckily, Danny was able to find about three centimeters of clearance to get it out.
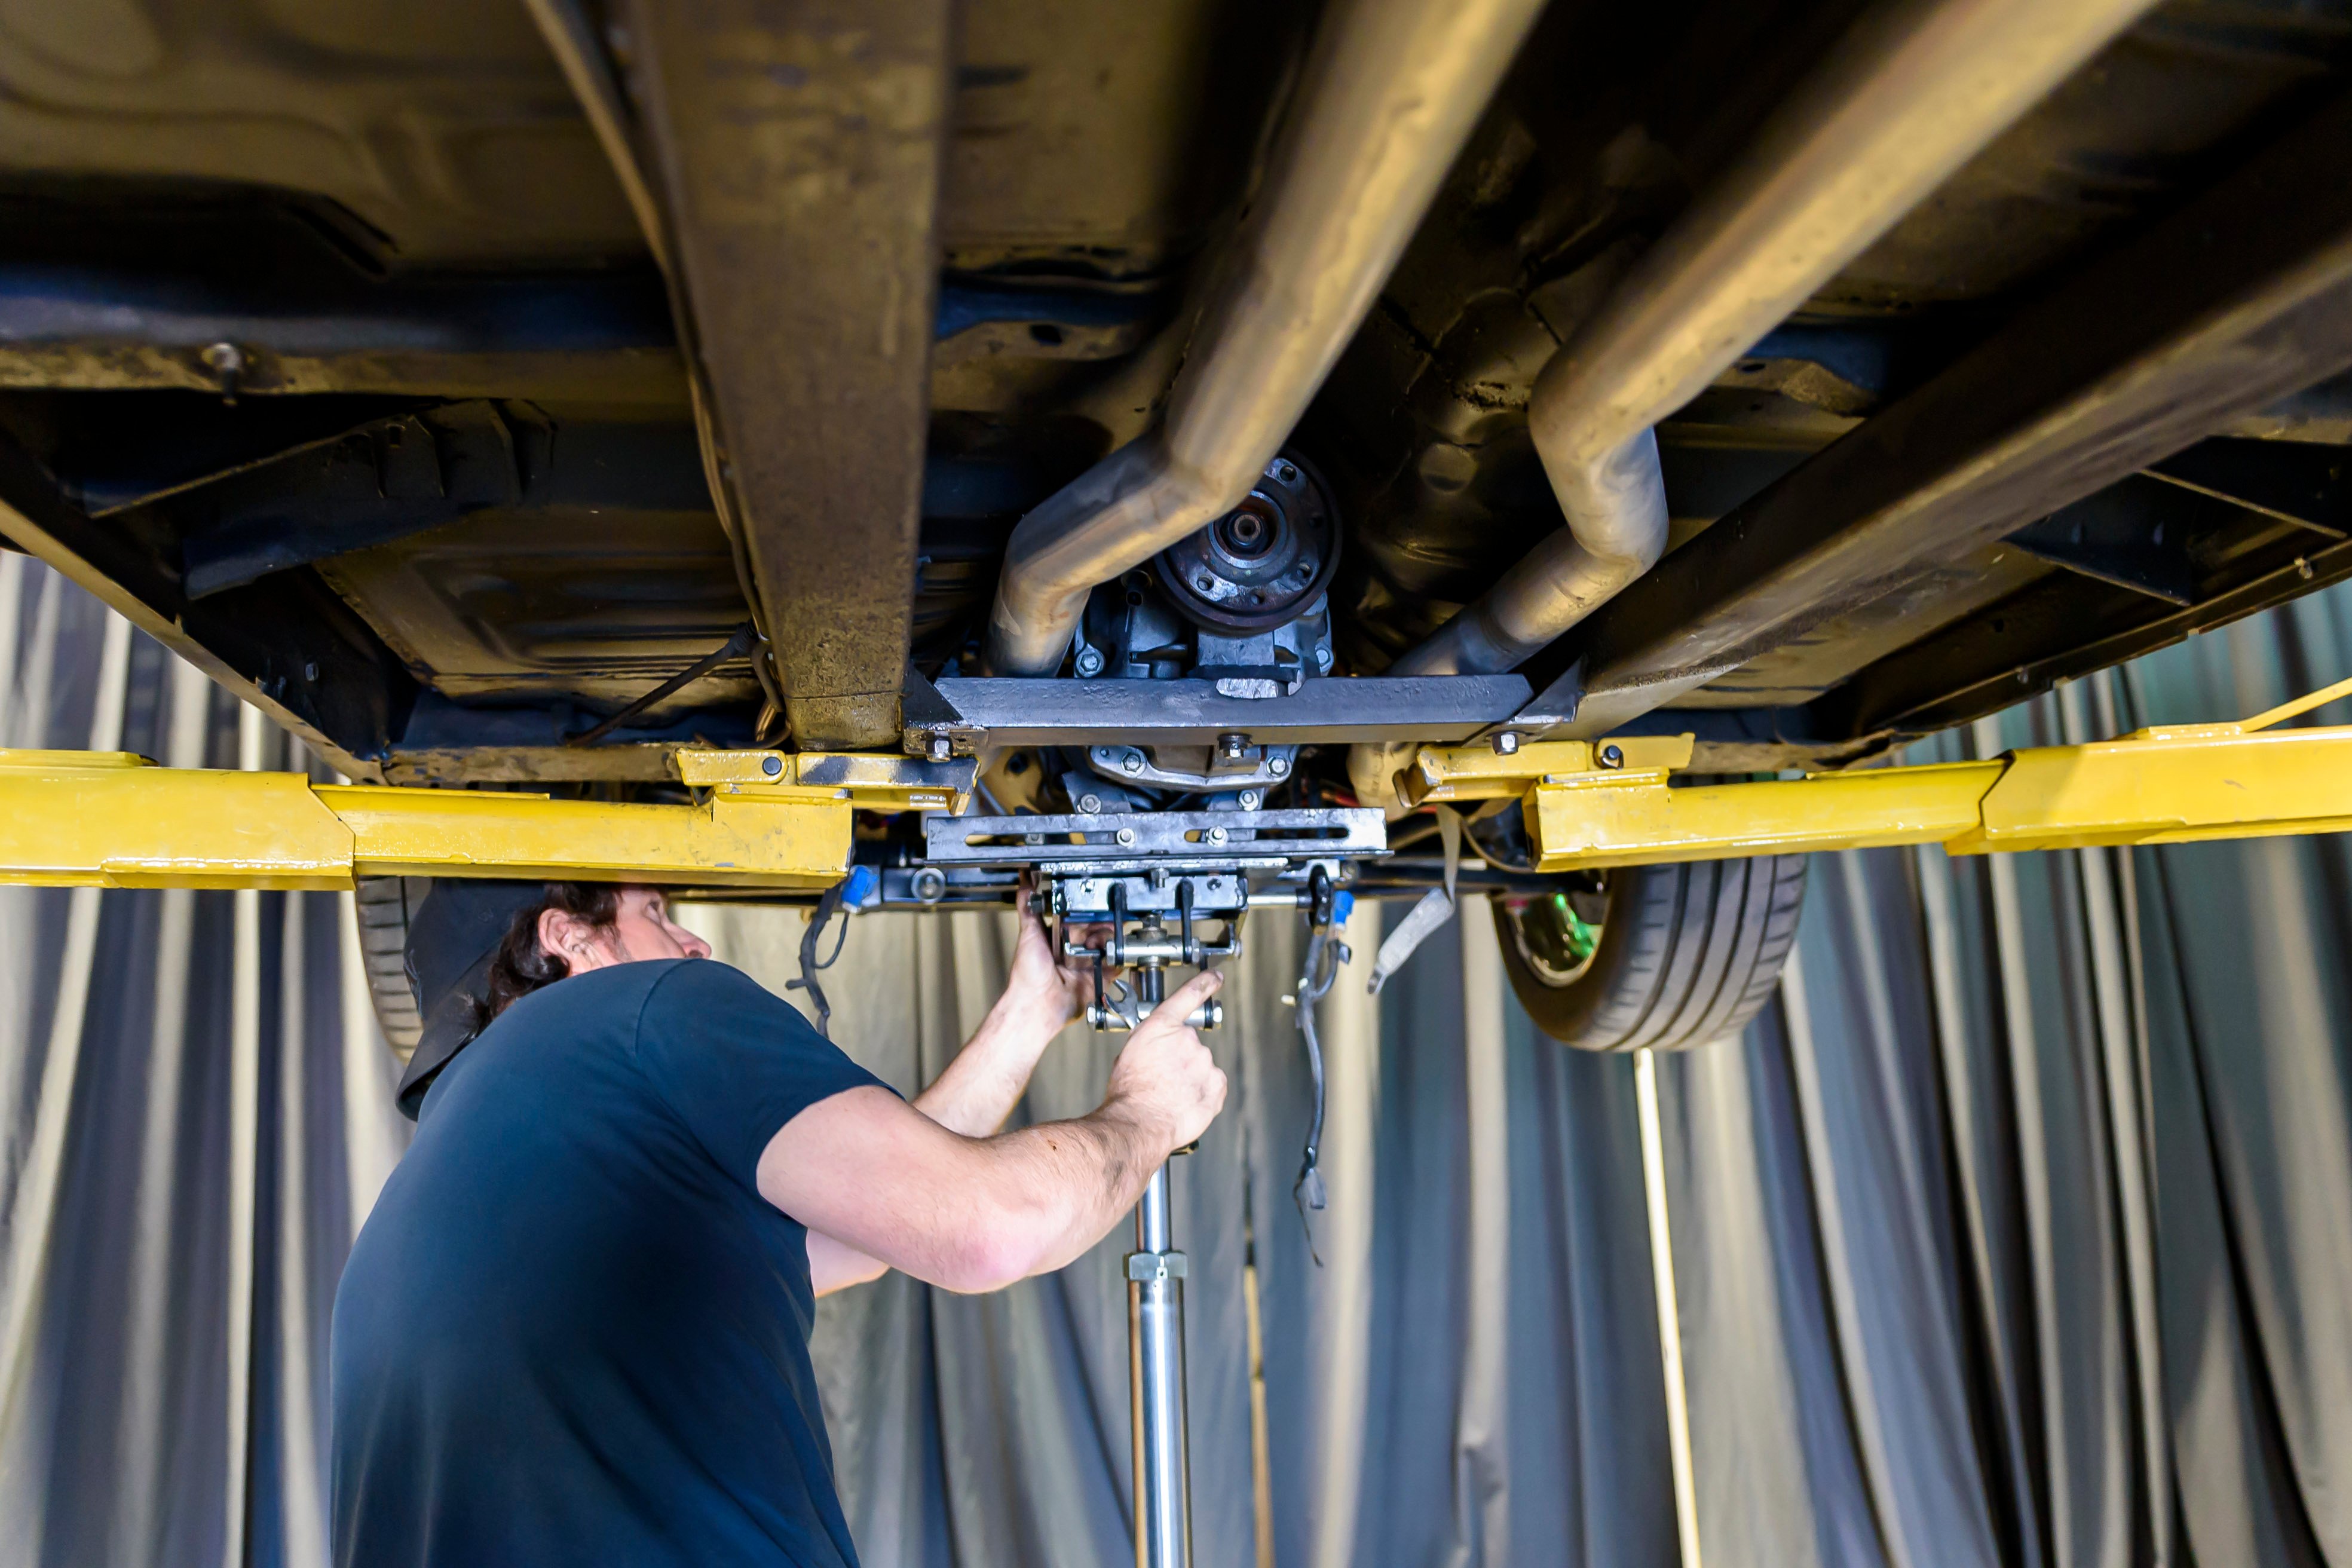


Using a lift and a transmission jack makes the process so much easier. Still, it's a tight space, and clearance is a premium. Once free from the pilot bearing, you have a little more wiggle room. Somehow, Danny managed to get the output shaft clear of the clutch housing, and we were able to move the exhaust pipes just enough to get the transmission out without disconnecting them.
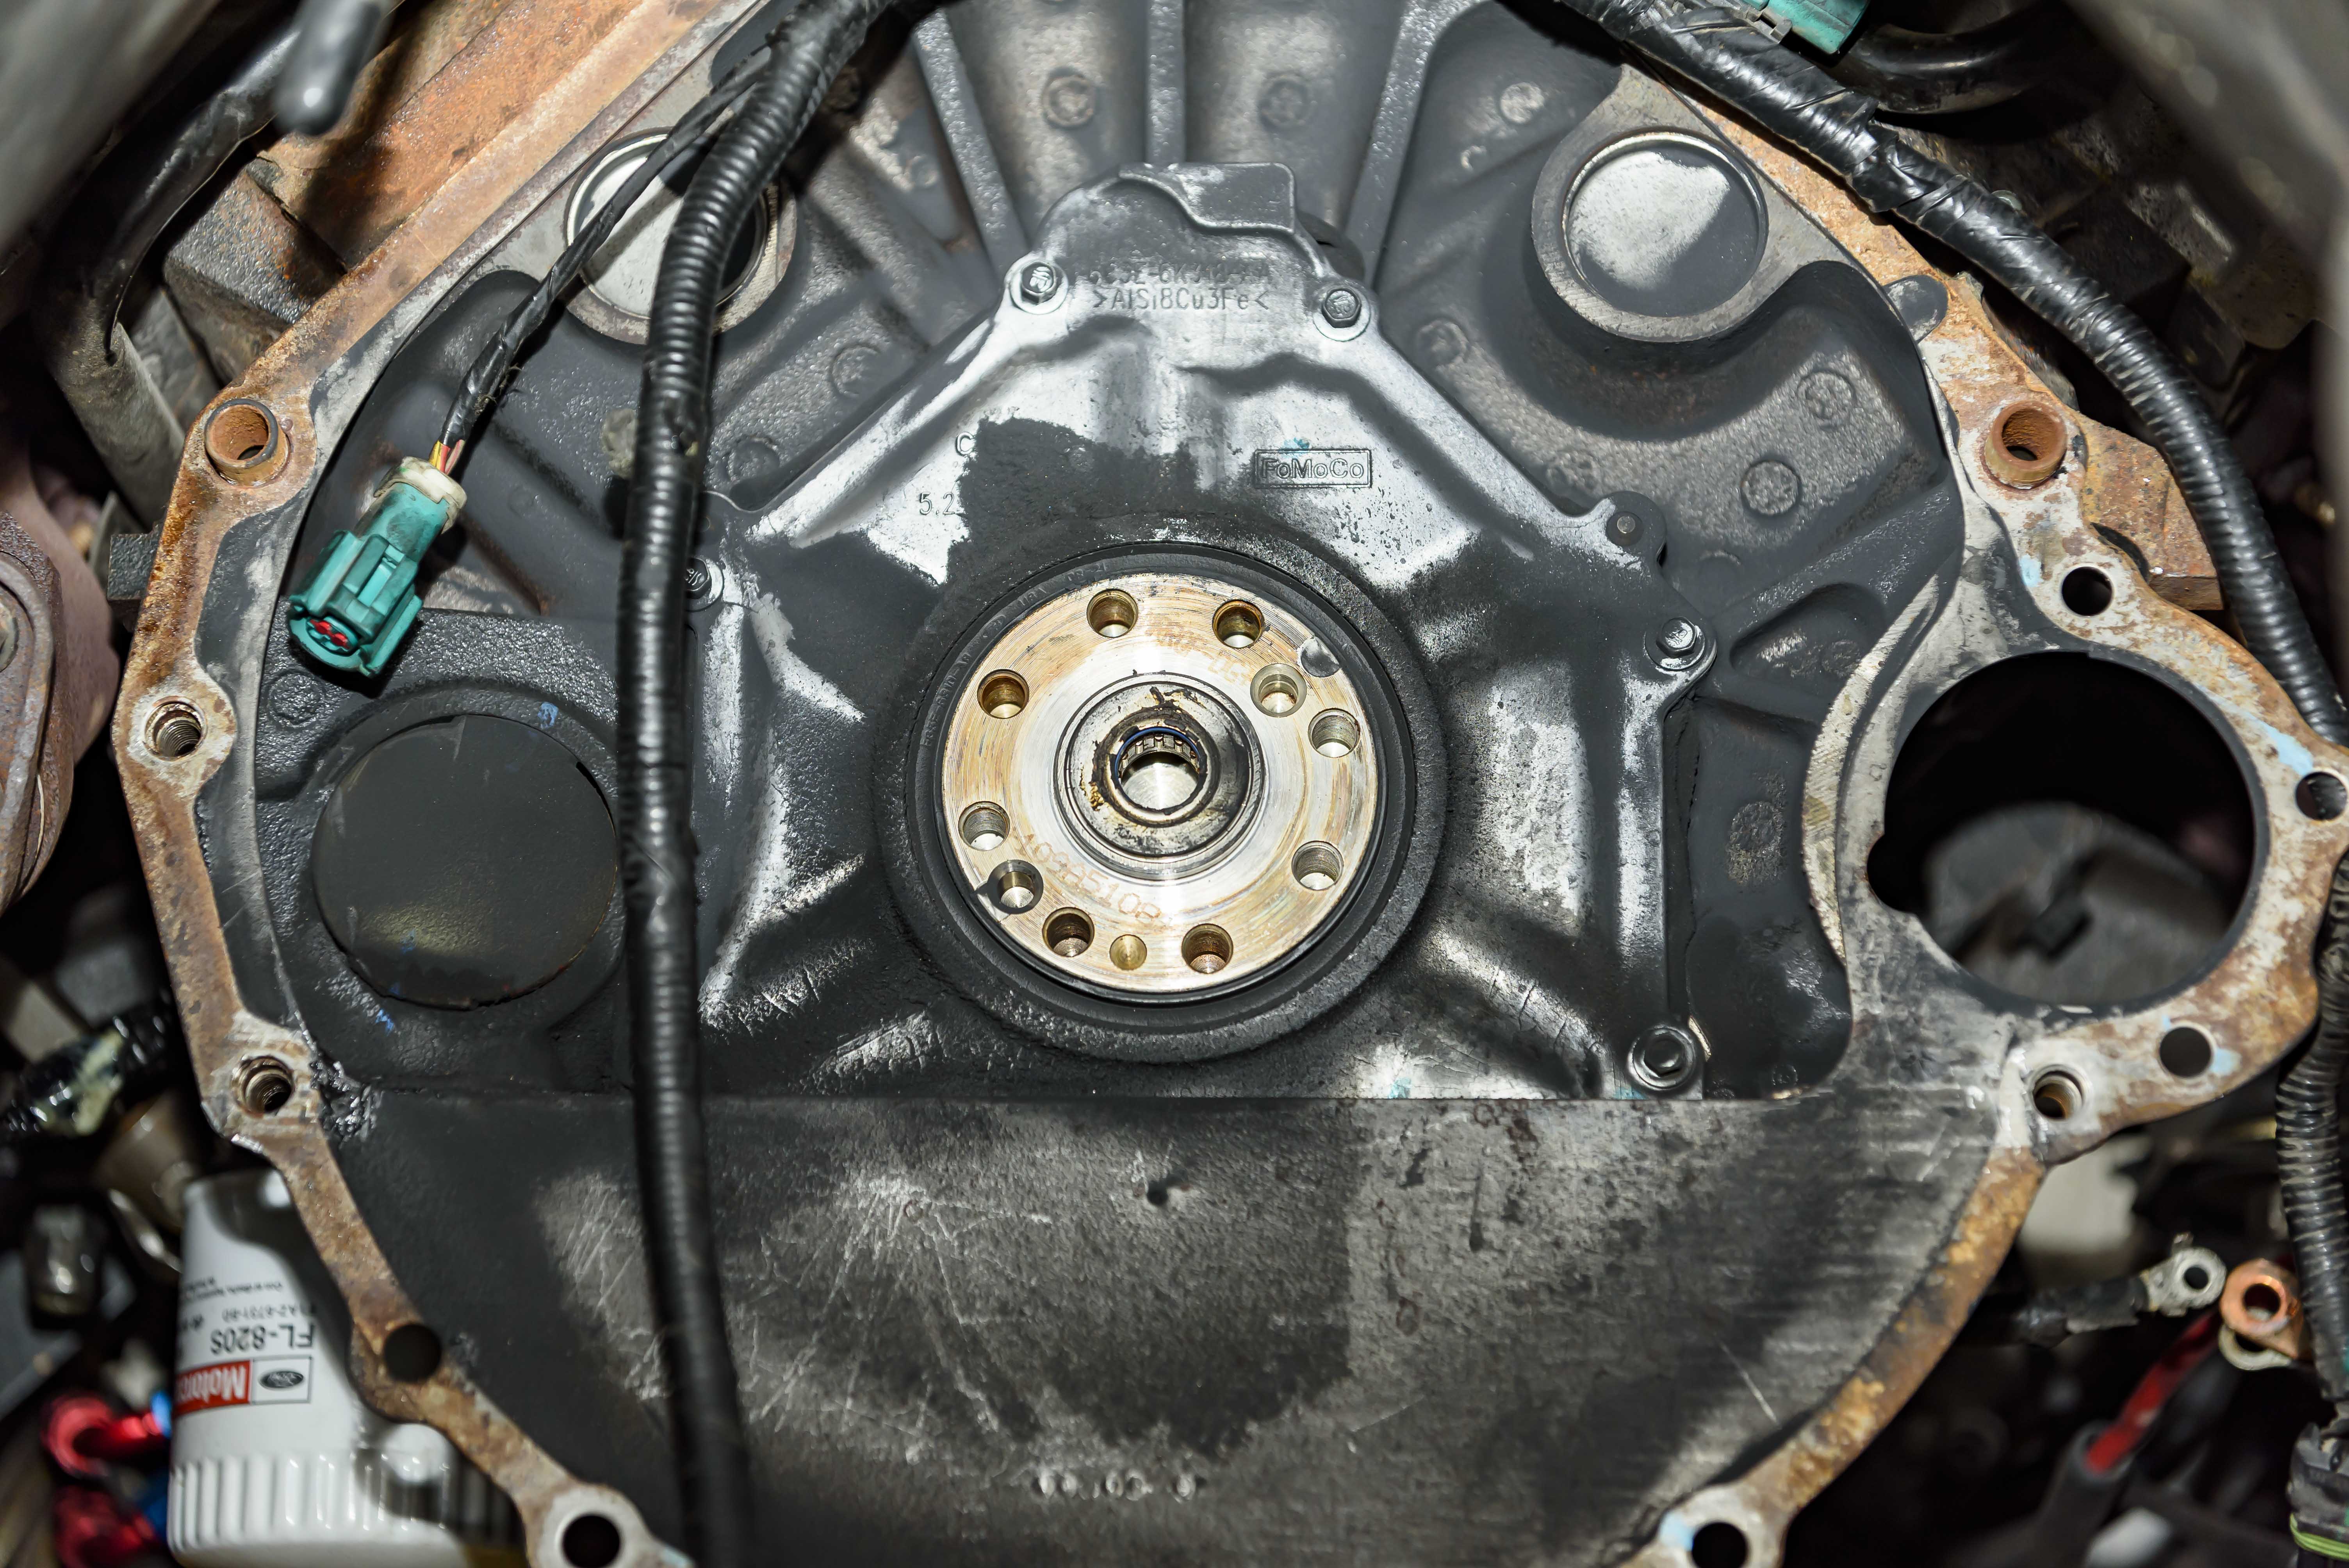
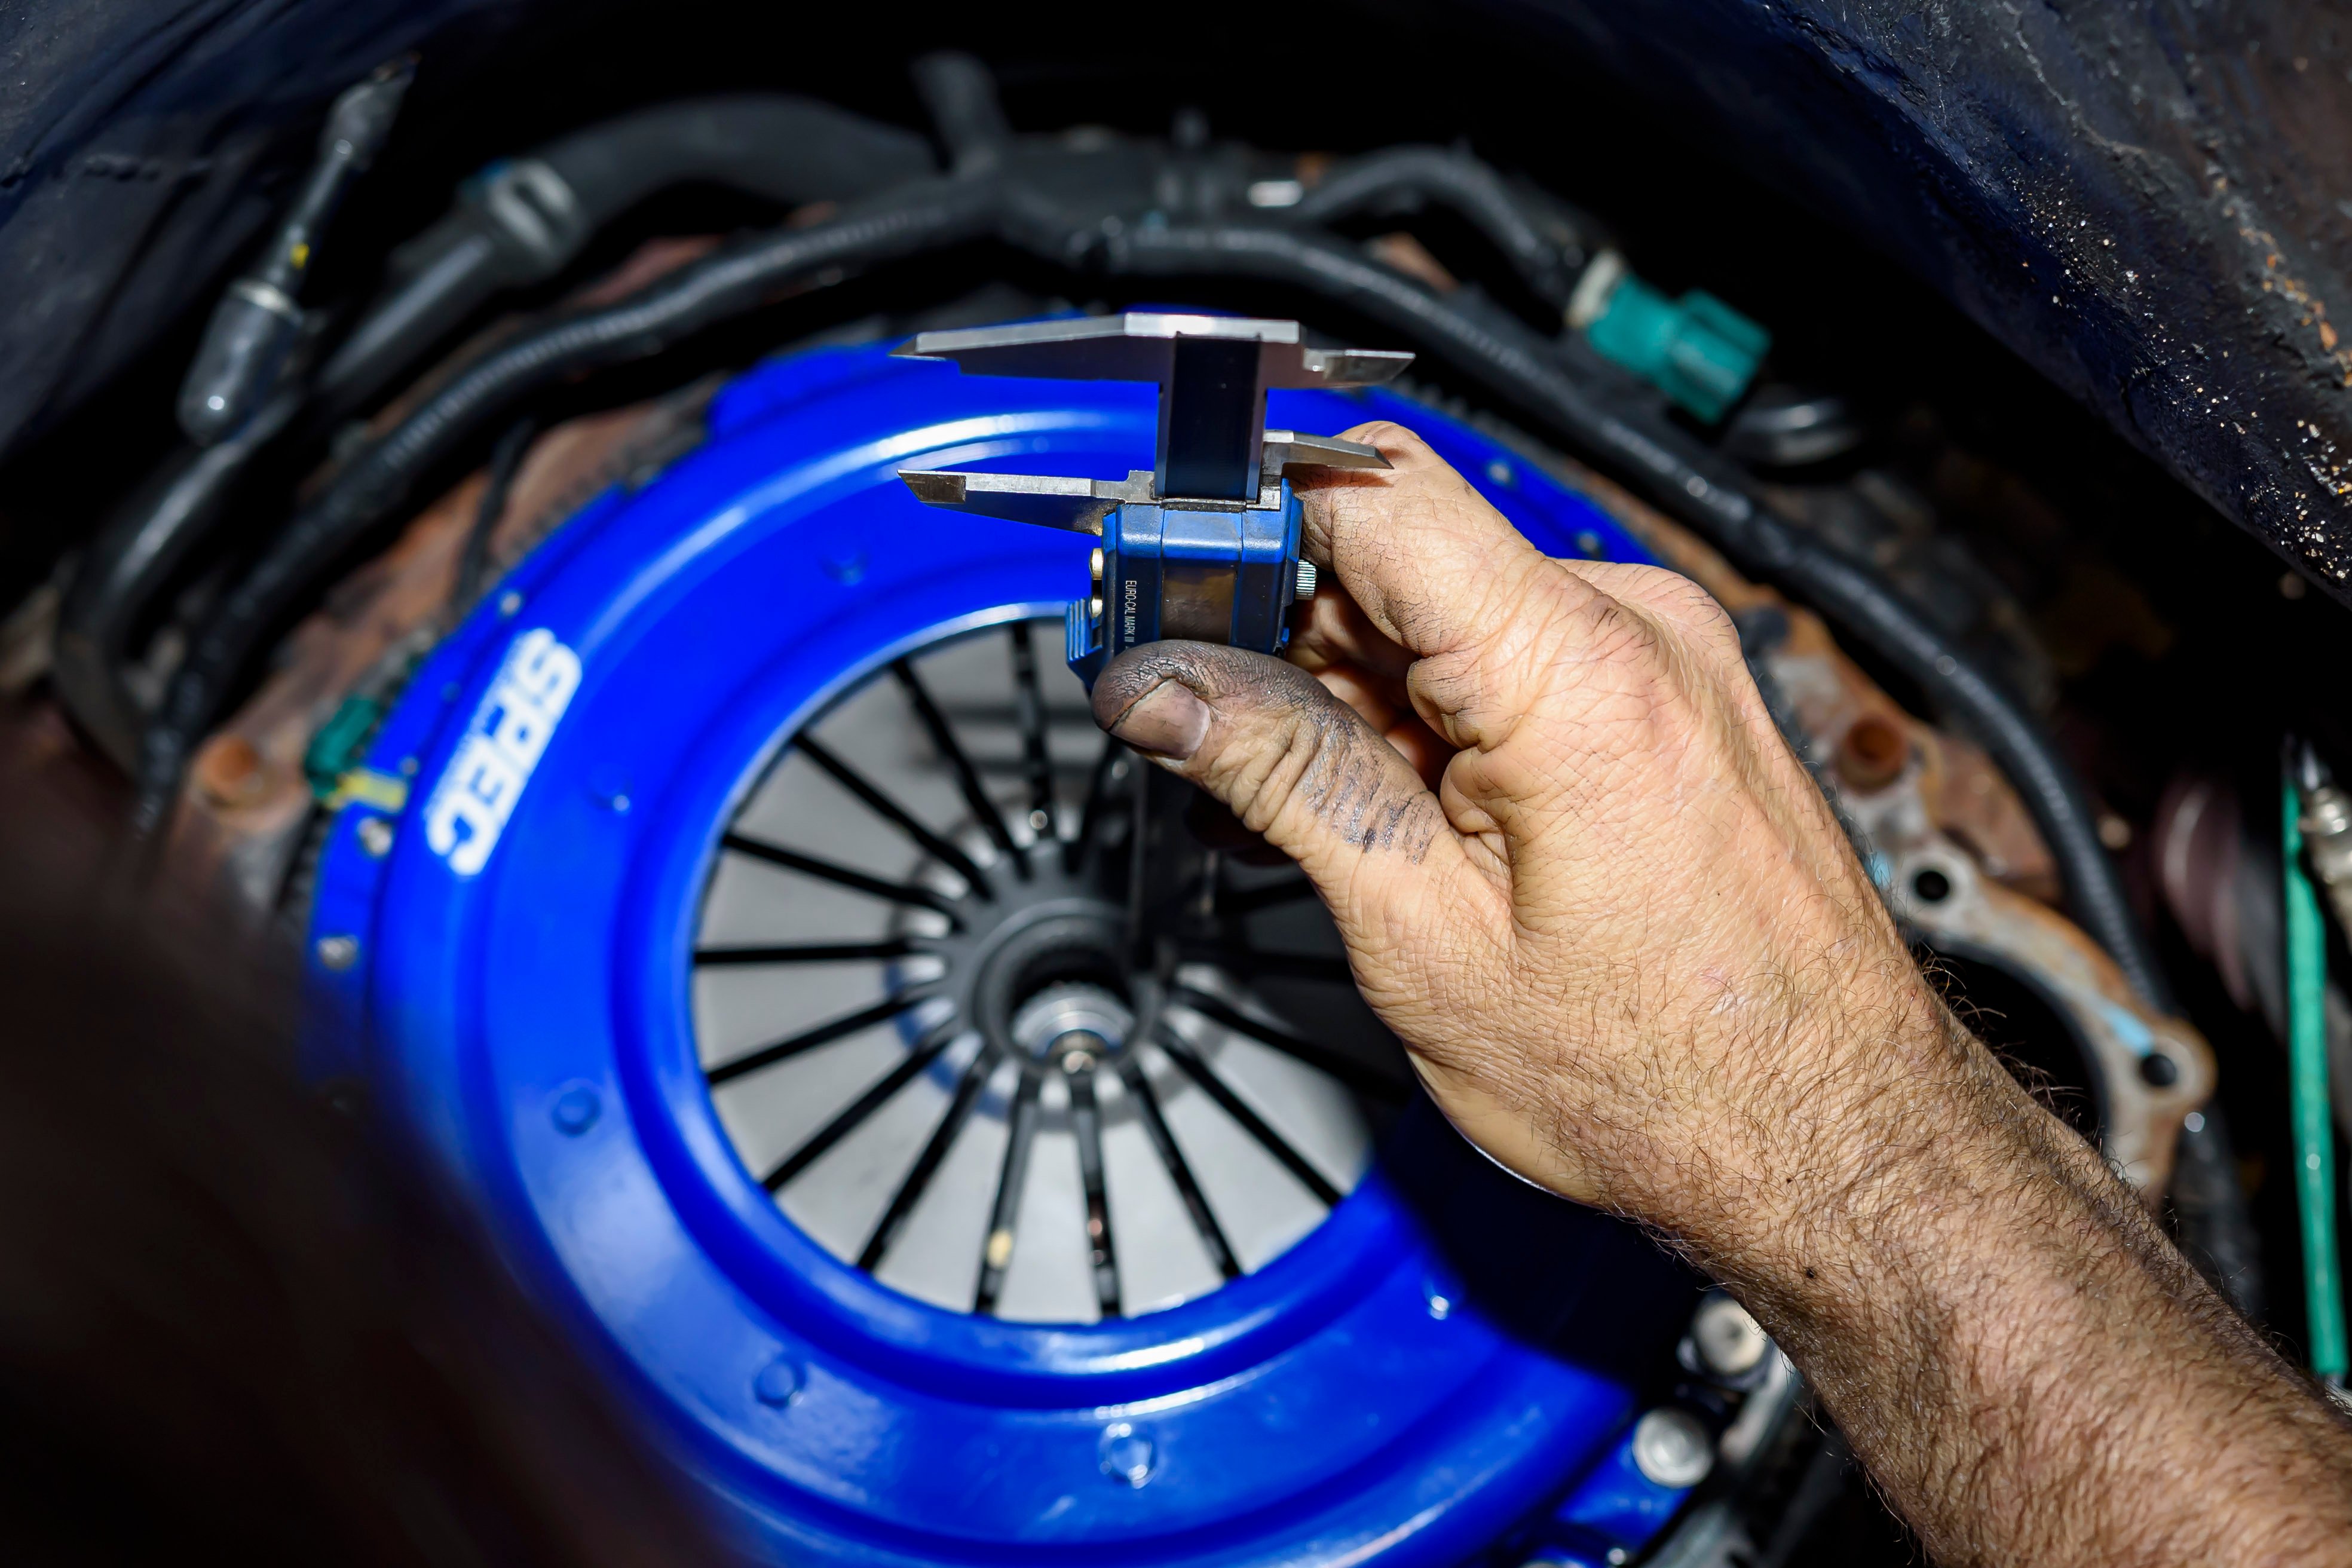
With the trans out of the car, Danny took some necessary measurements before removing the clutch assembly. First, he laid a straight-edge across the bellhousing to measure the distance from there to the face of the throwout bearing — both compressed and fully extended. Next, he spread the straight-edge across the pressure plate fingers and measured the distance to the flywheel surface. This would allow him to calculate exactly where the new throwout bearing would need to be.
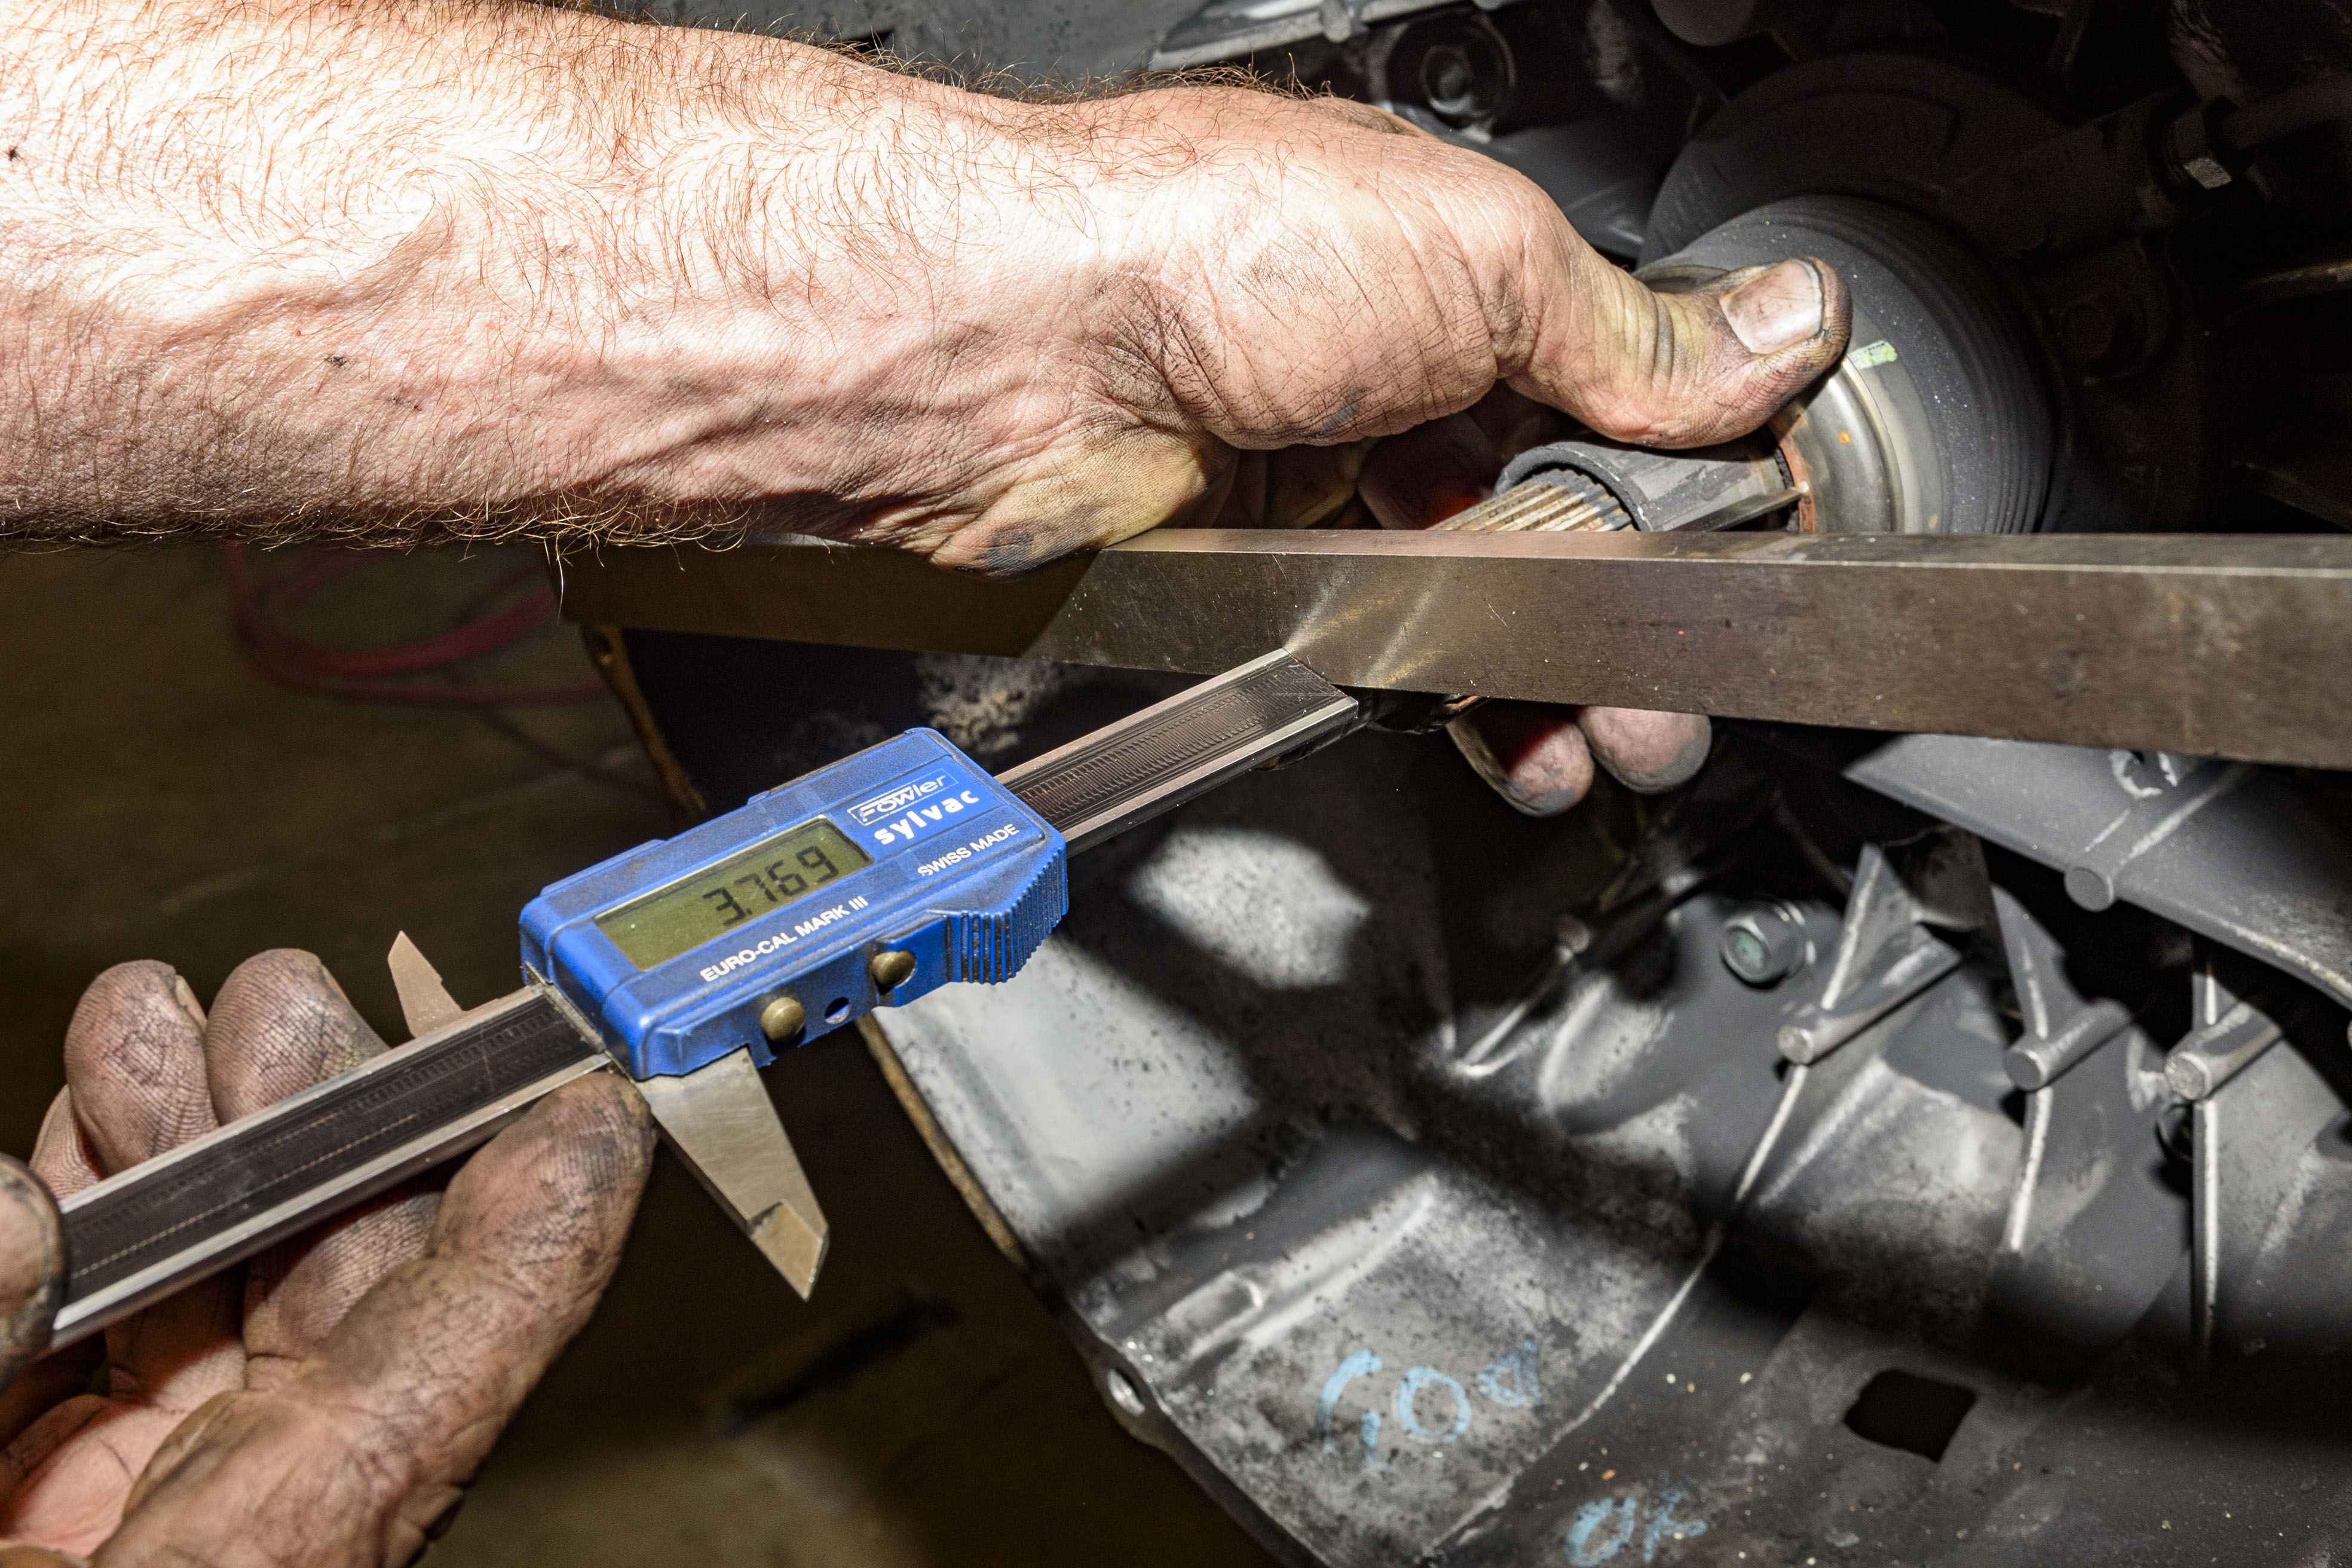
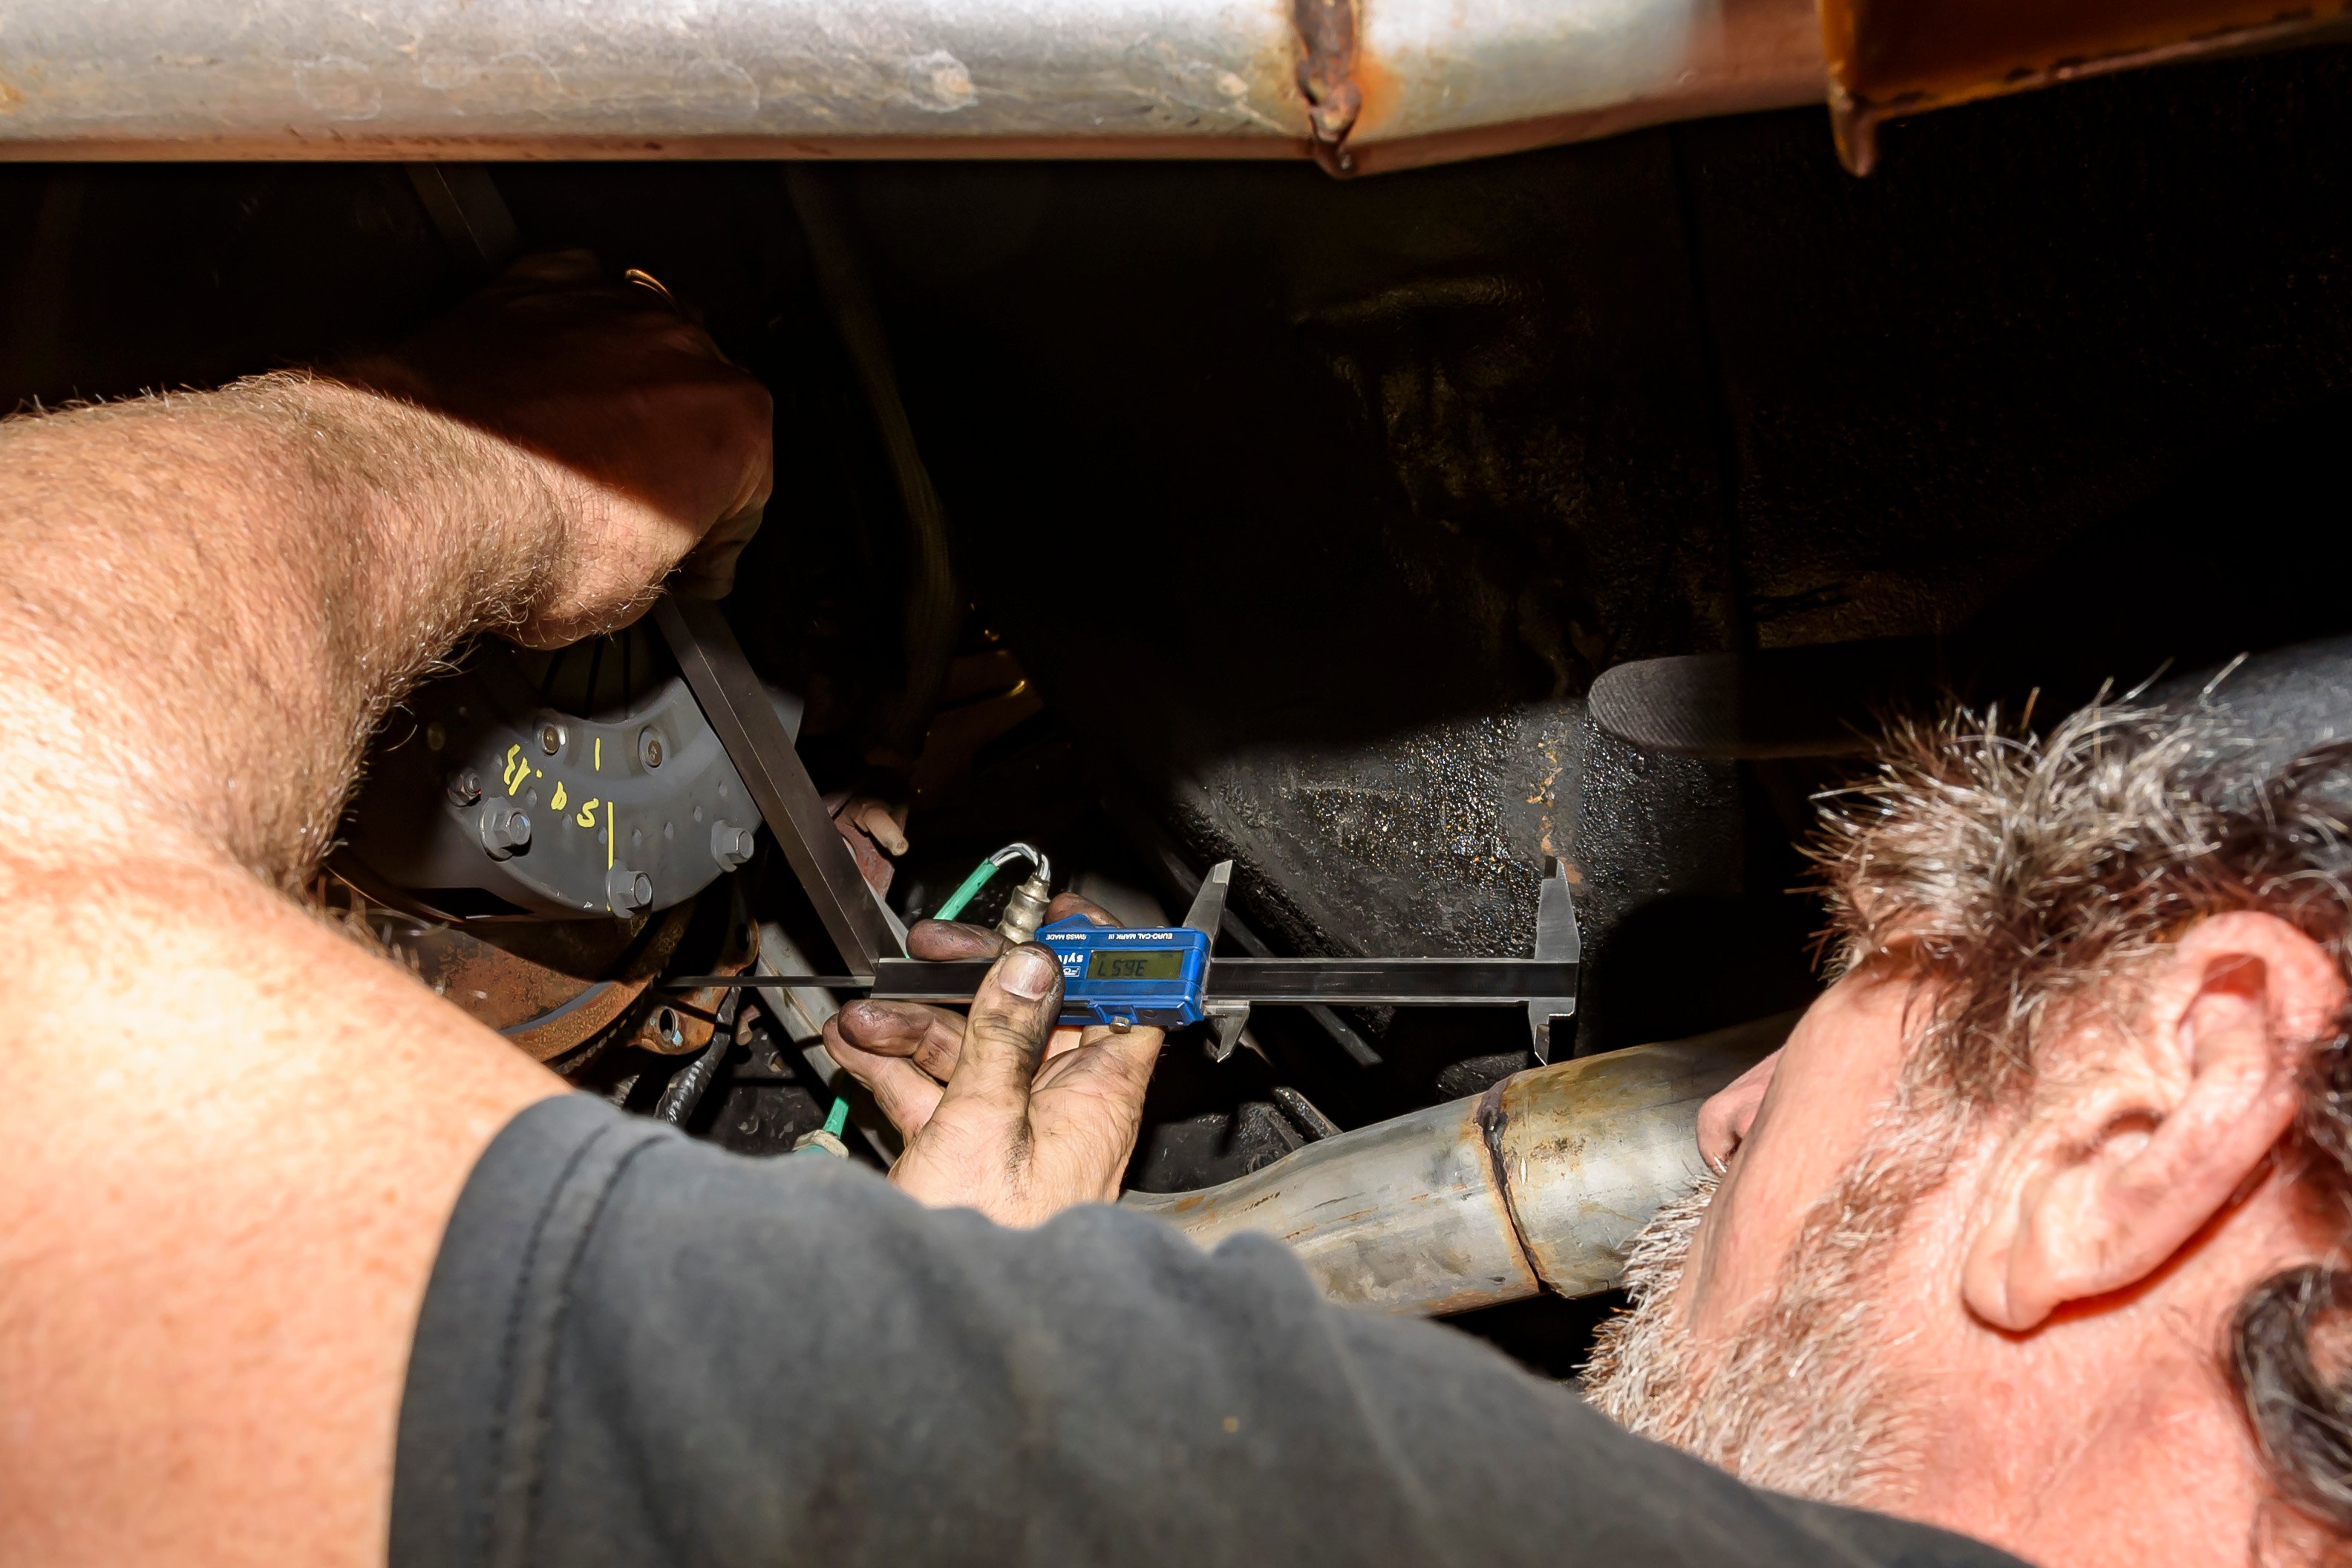
With the trans out, Danny took some important measurements to make sure the new throwout bearing would line up correctly. With a straight-edge across the face, he measured the depth to the bearing at rest. He did the same with the straight-edge across the pressure plate fingers to the flywheel.
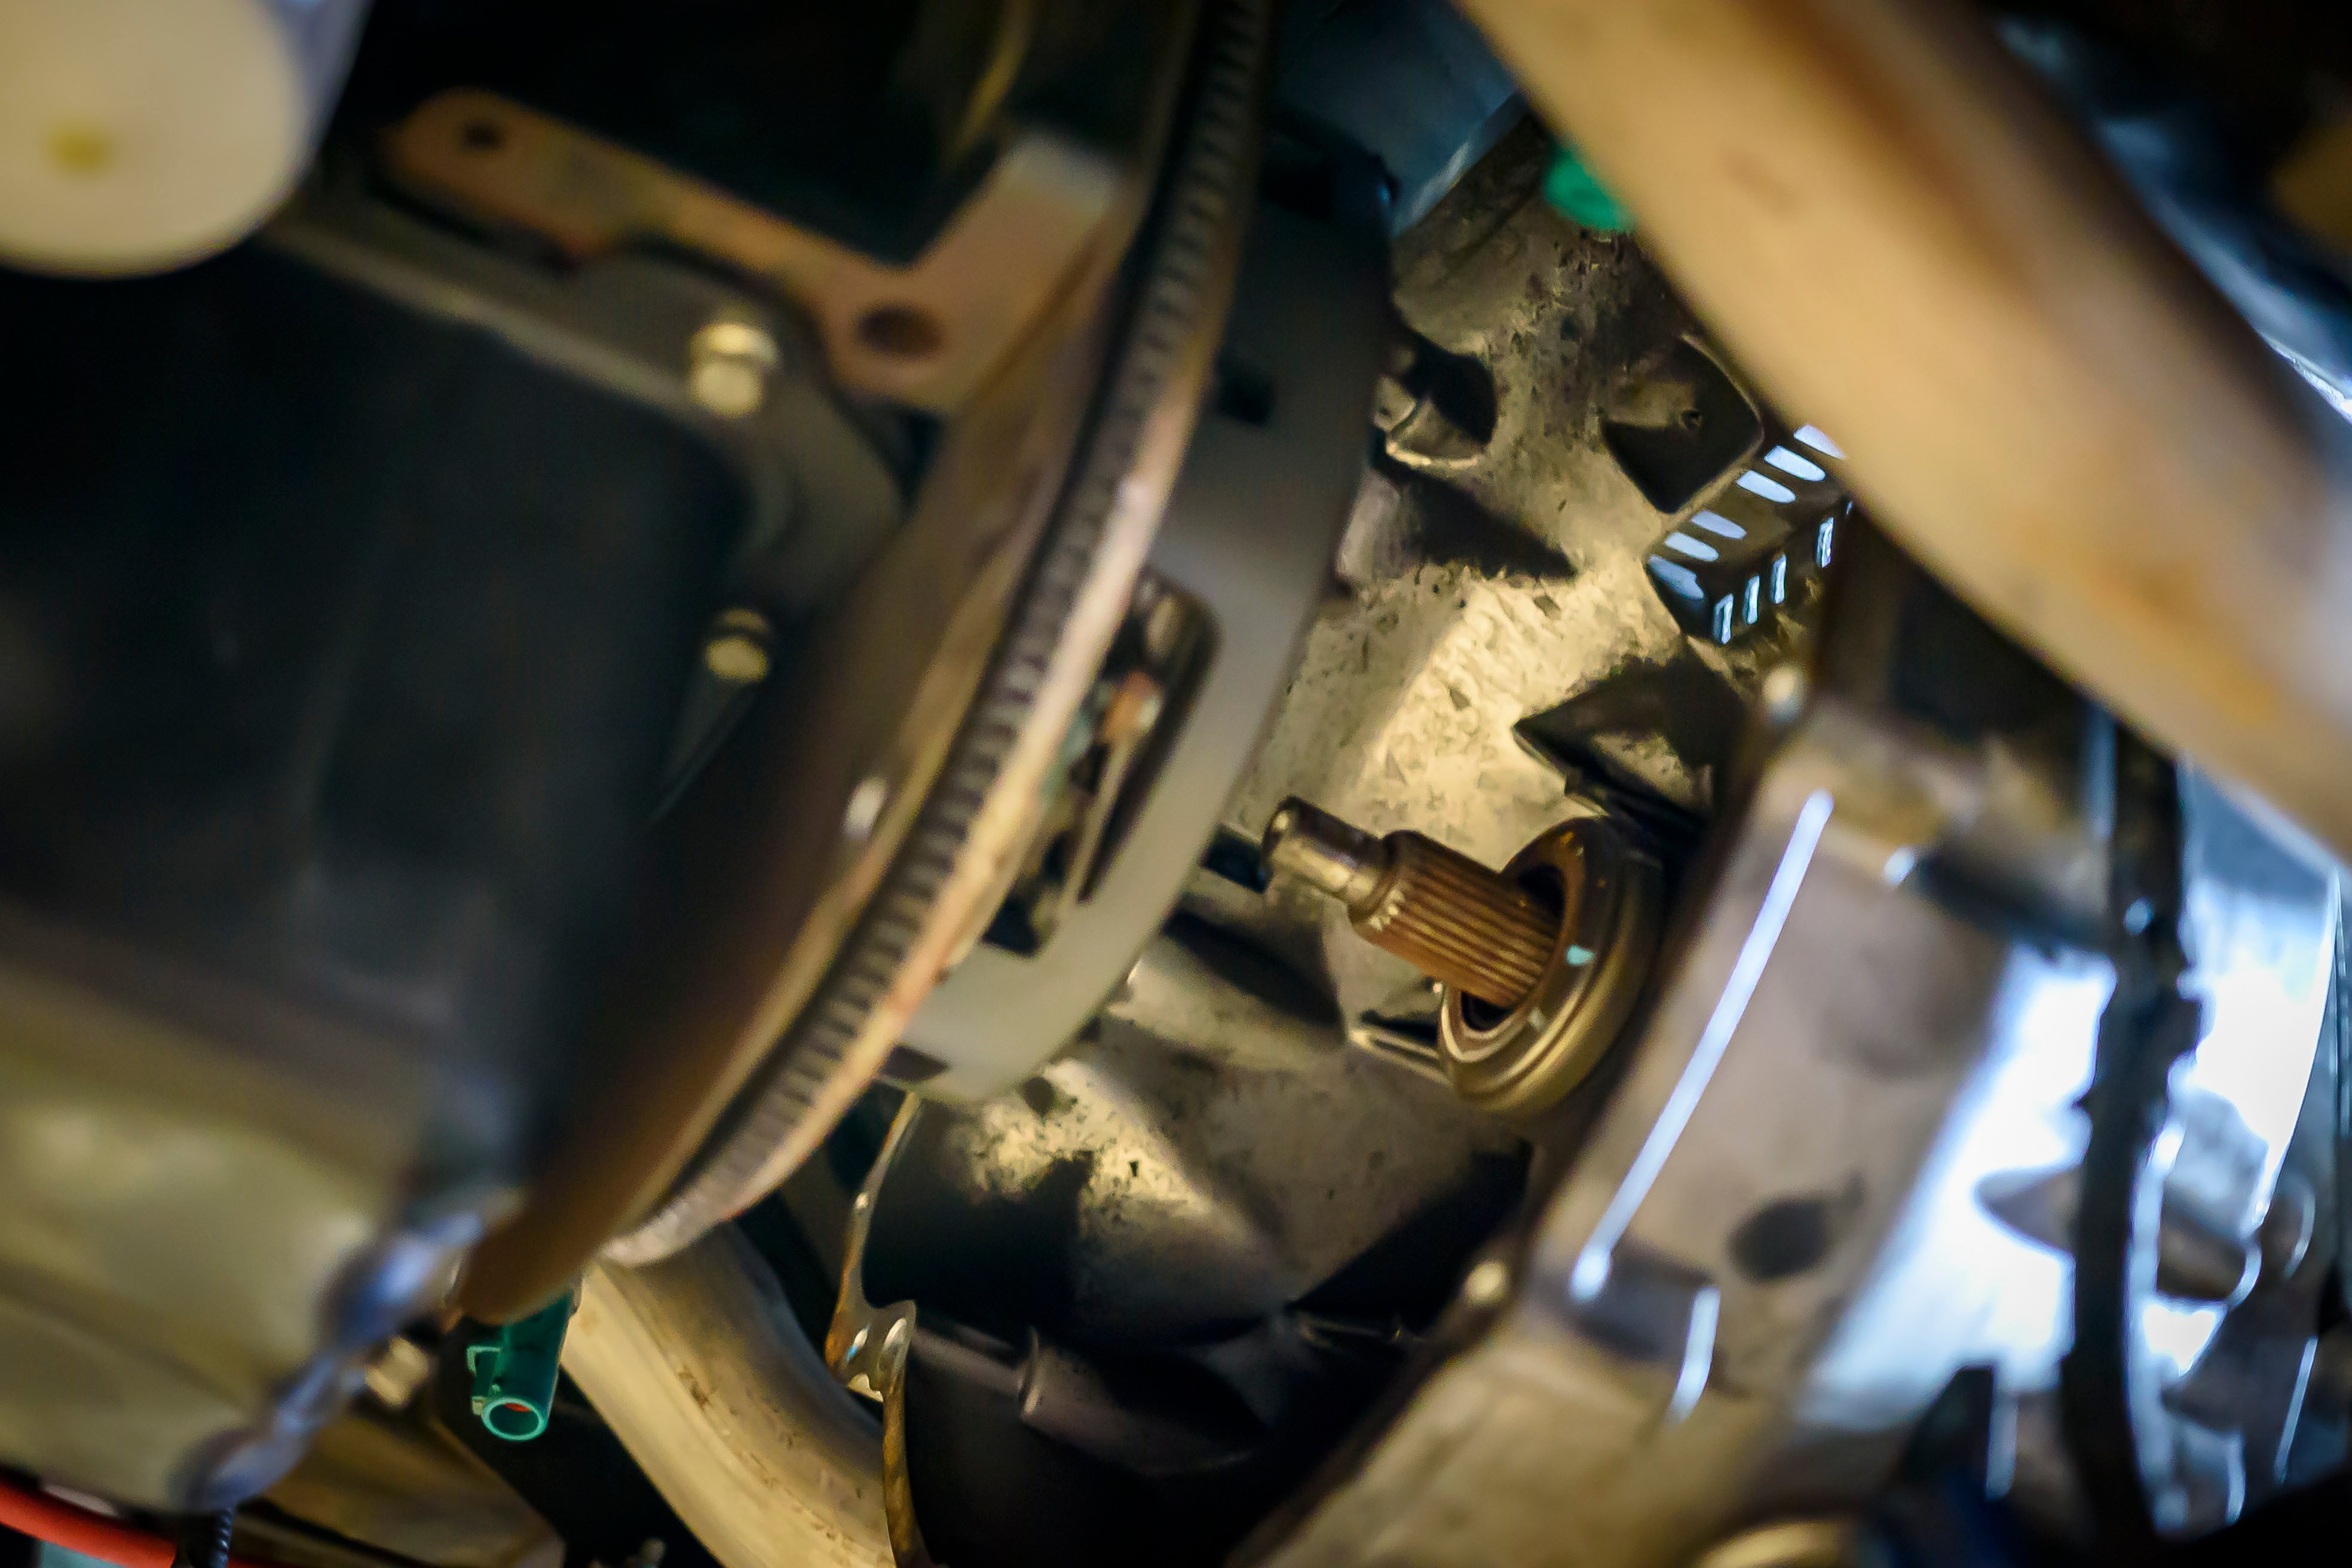
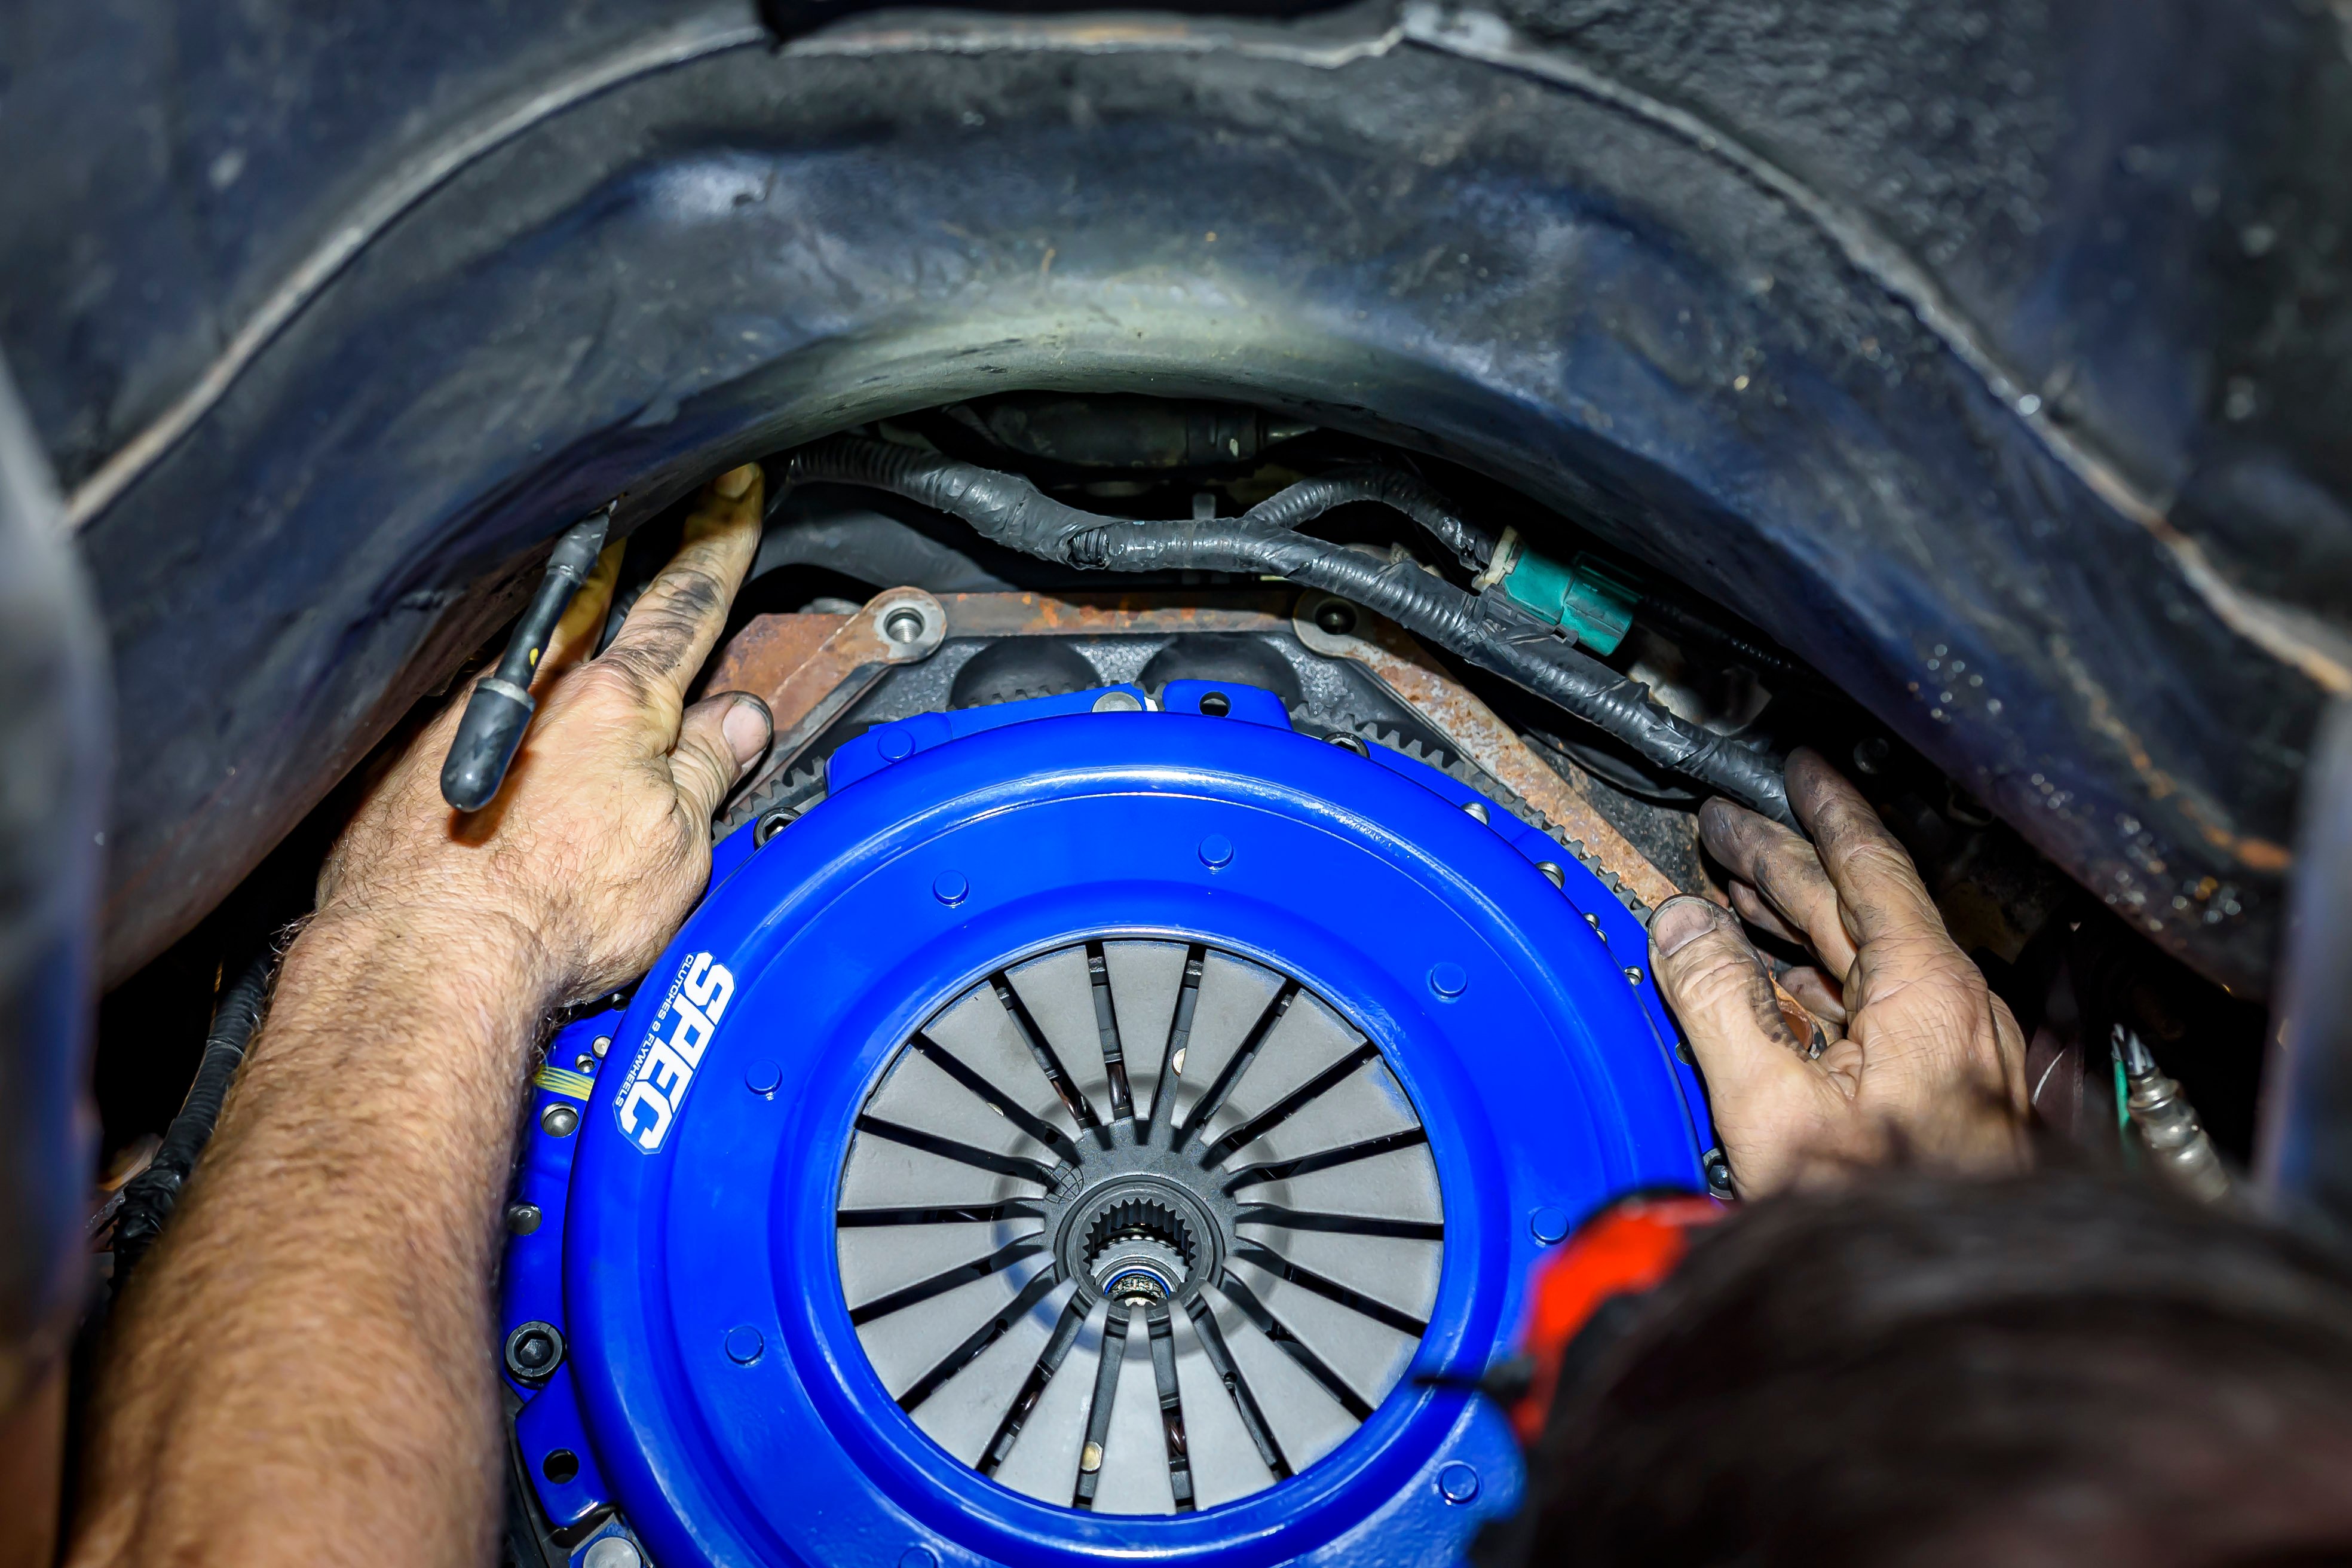
The old clutch assembly was unbolted. Glazing on the flywheel was apparent, as was a lot of clutch dust — signs that it was not happy. The clutch discs were shot; the puck material was almost down to the rivets. Danny’s final step was to remove the old pilot bushing from the crank. Then he began cleaning just as David came by to check on the progress and talk about what SPEC Clutch we were going to install.
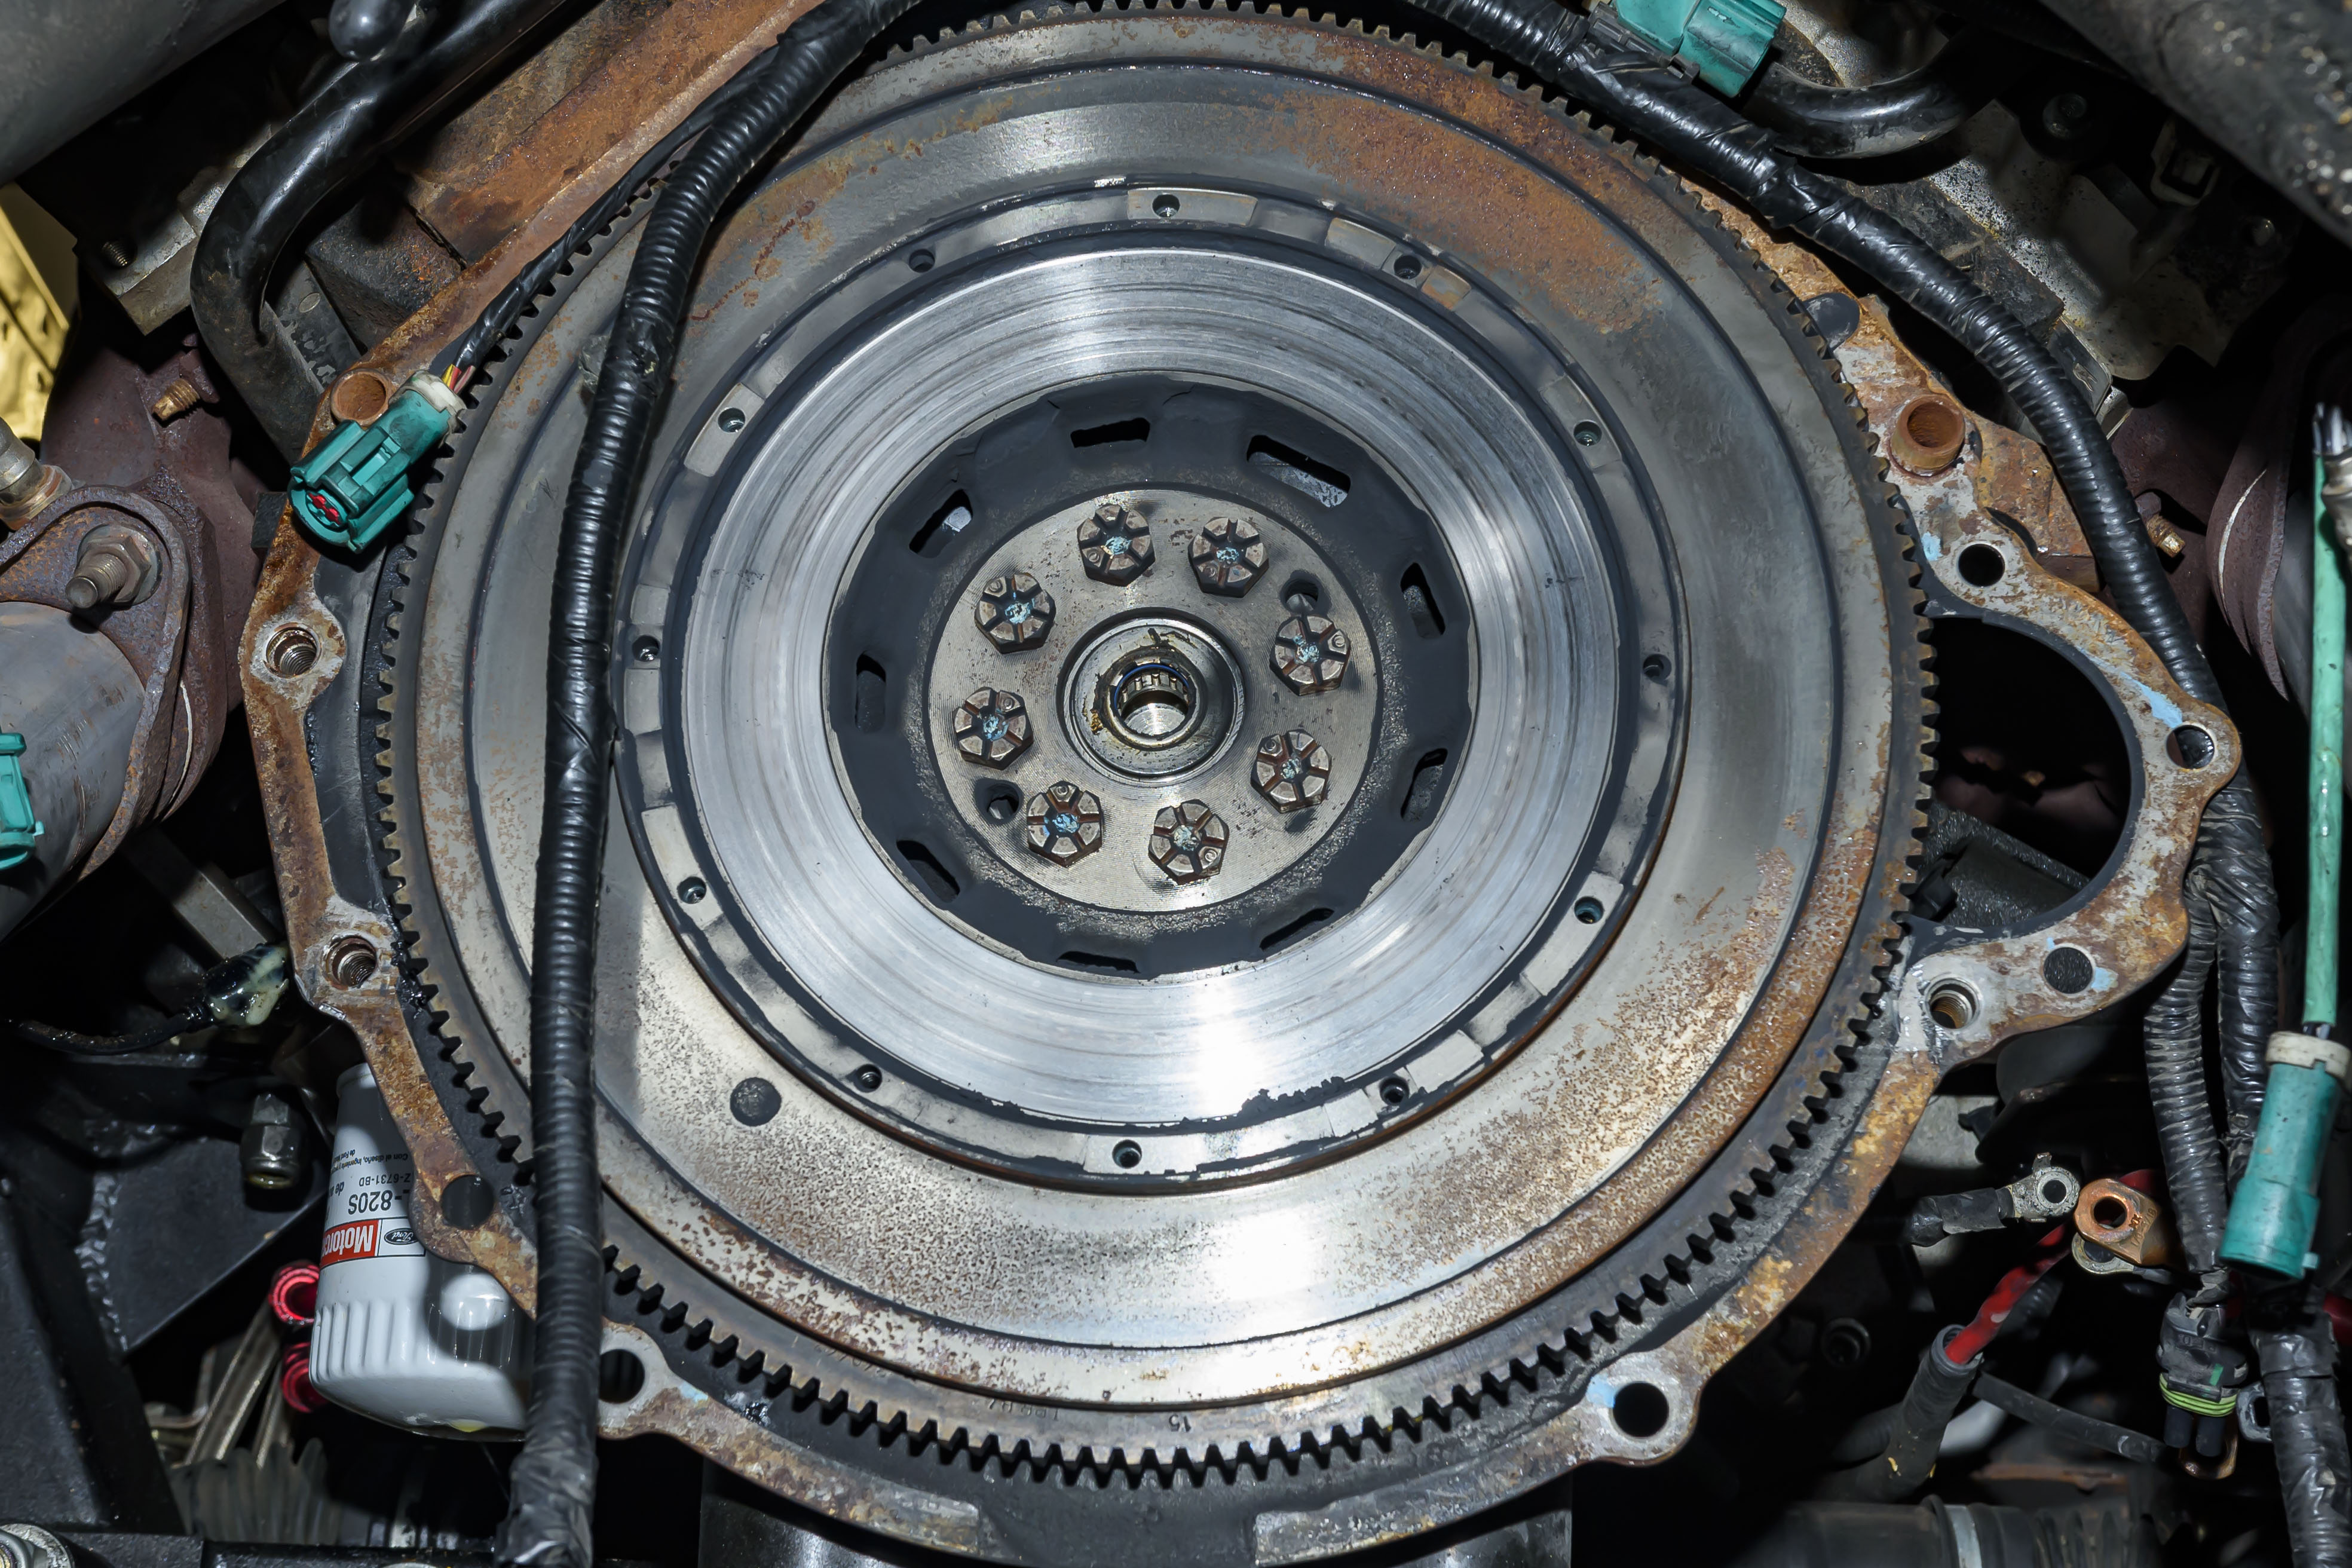
With his measurements taken, Danny removed the clutch housing to reveal the flywheel. Rust and glazing of the flywheel surface were immediately apparent. It was also apparent that the assembly had reached the end of its useful life. I guess it could make a good trophy!
Picking The Right Clutch
The best part about a premium clutch company like SPEC is that you can count on much more personal service from someone who listens, speaks the language, and understands your needs. Now, of course, they probably aren’t going to install your clutch as they did for me. But, they will help you pick the right one for your application based on the horsepower, torque, gearing, and type of driving. After listening to my complaints about the old clutch hissing, chattering, and engaging like an on/off switch, I asked David why I only got 30,000 miles out of the stock clutch.
“The OE GT500 unit is a small-diameter twin with a fairly aggressive but antiquated material,” Norton said. “Even worse, the wear window is narrow, making them short work for aggressive driving, even with stock power.” Knowing the Fairlane still had the OE six-speed with 3.55:1 gears and that I’m mostly driving in the city, David determined a single-disc clutch with a steel flywheel was the way to go. “It will provide stock-like inertia, which allows for smooth and easy take-off on such heavy cars with stock gearing.”
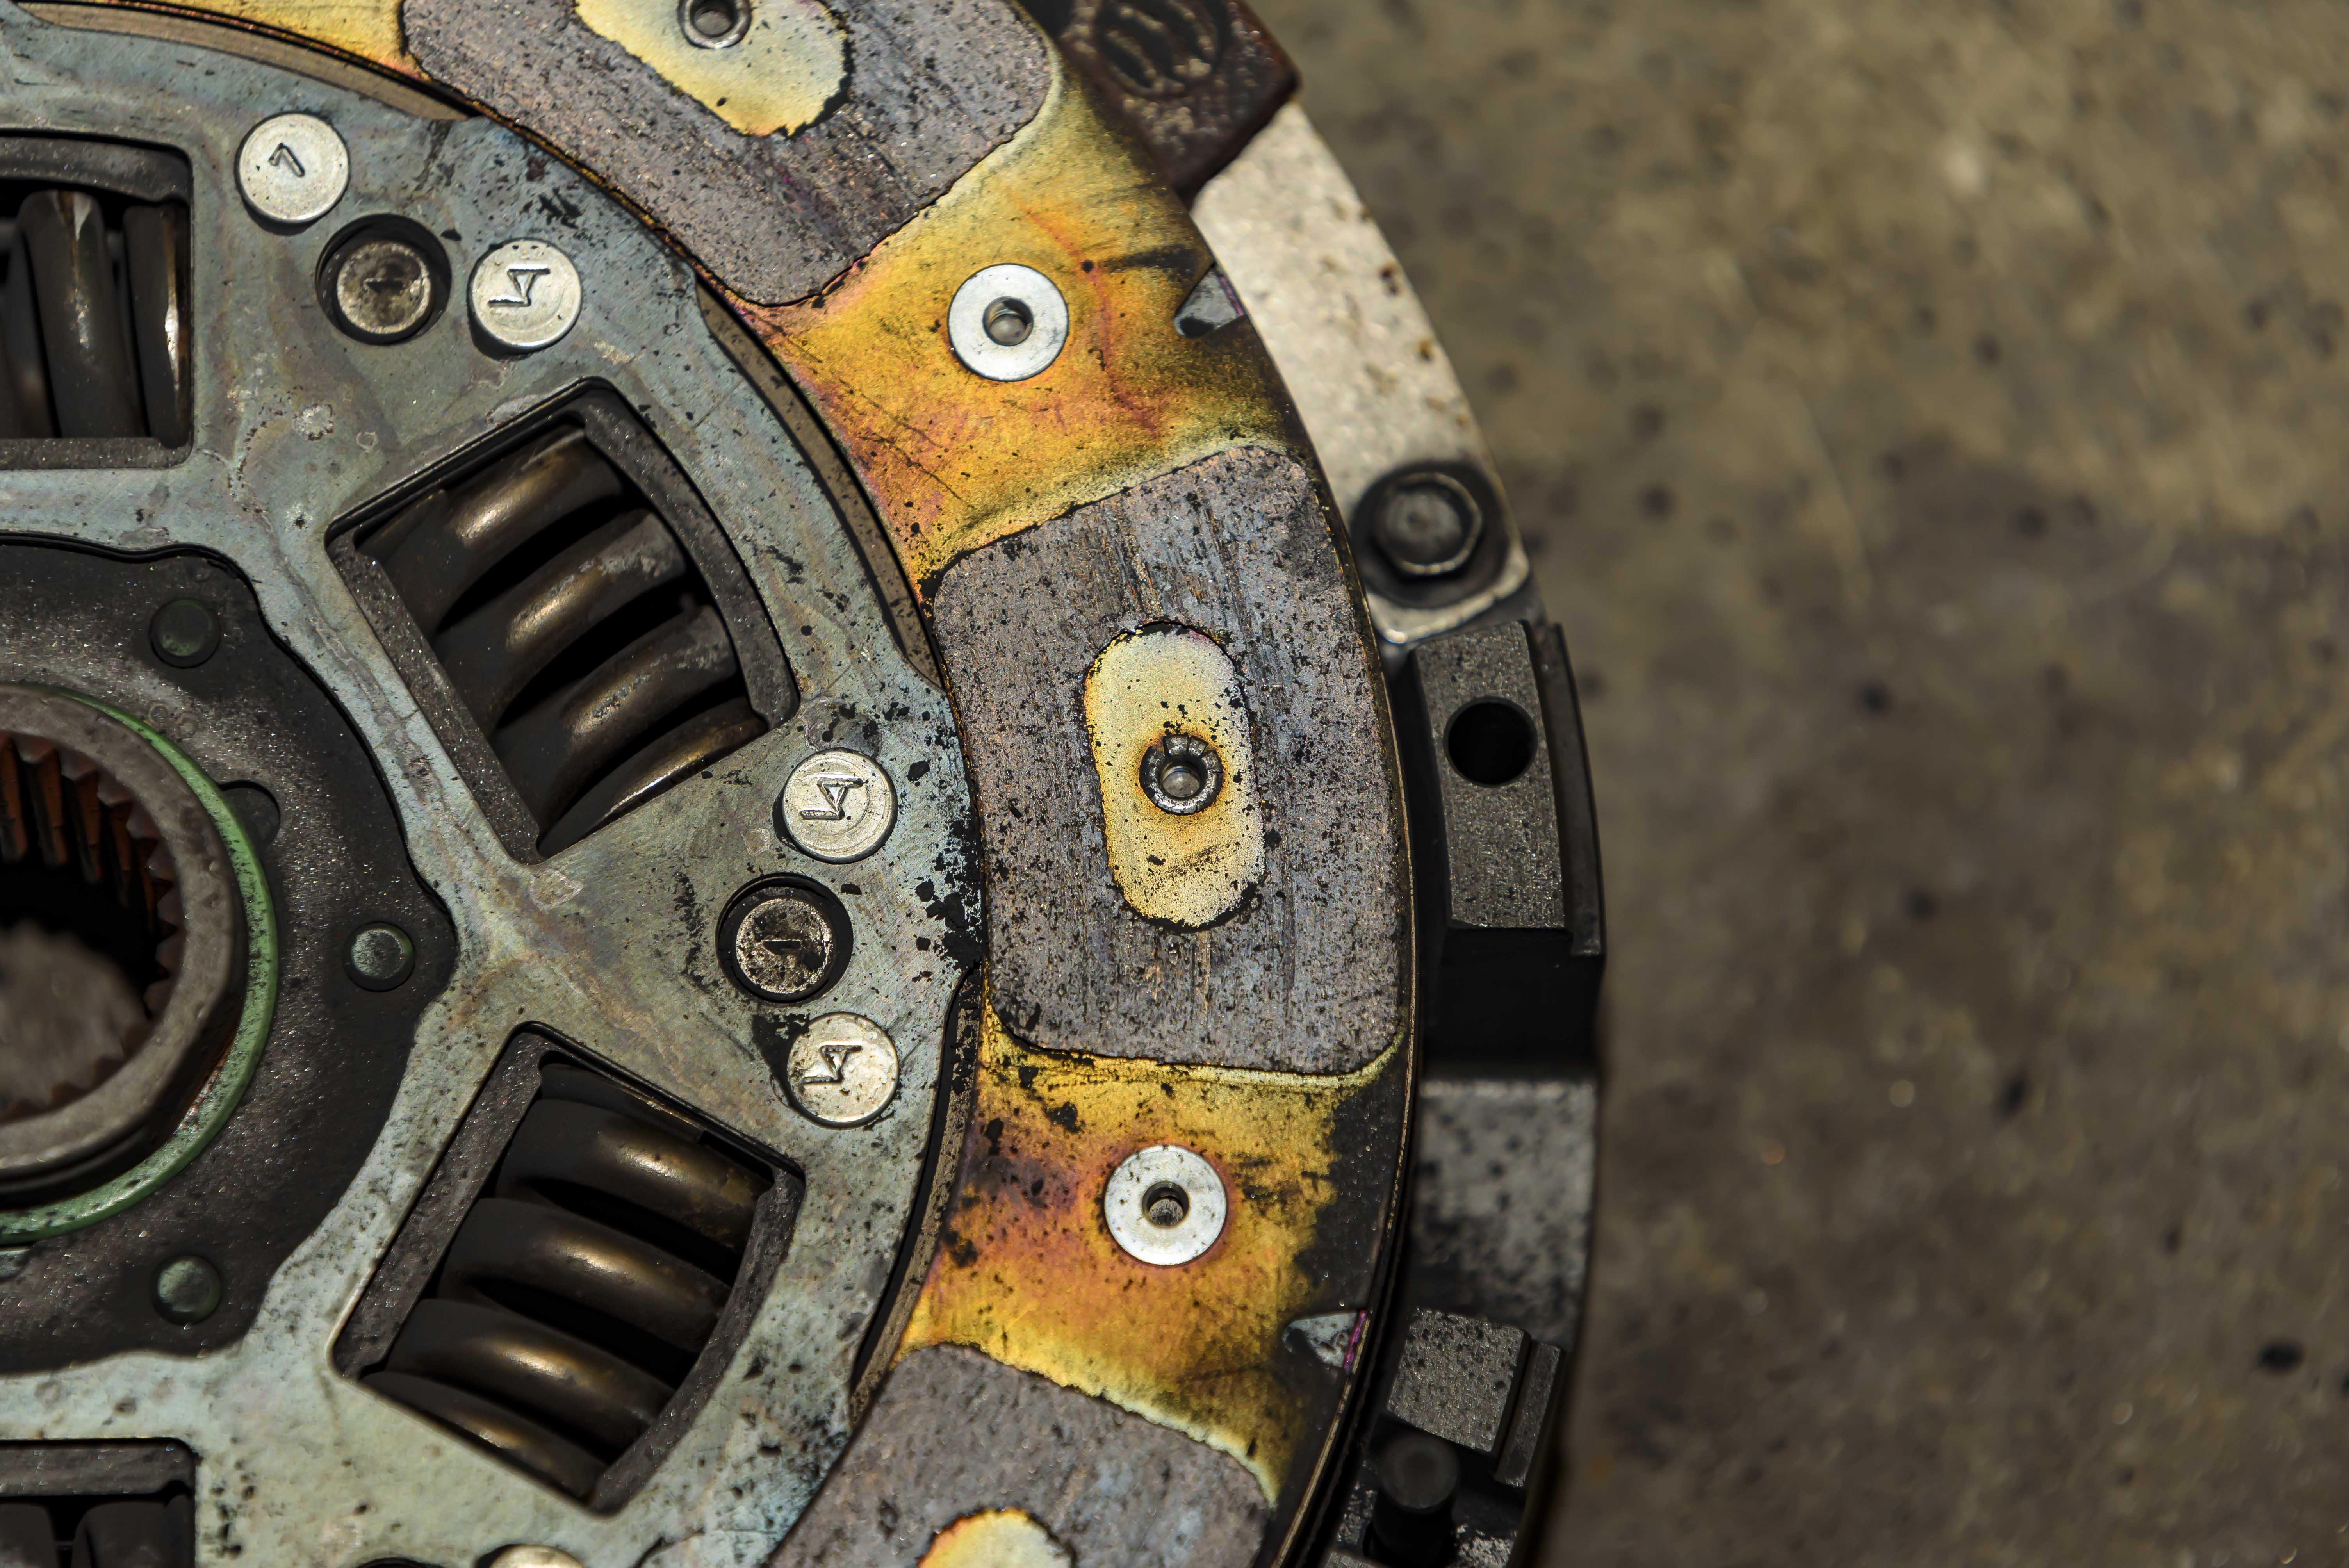
The flywheel and clutch were pretty used up. I had read one theory that said the OE flywheel was subject to rusting if the car sat for some time, contributing to the premature wear. You can see surface rust on the flywheel's non-contact surface, so there may be some truth in that statement. Either way, the clutch pucks were down to the rivets!
“Stage 2 (599 ft-lbs) would be our entry-level single-disc stage for a GT500 based on capacity,” he continued. “But, it provides better-than-stock drivability, excellent longevity, and (like all our stages) is SFI certified. It can handle any driving environment with sticky tires at its rating. Our street single-disc stages can take a capacity of up to 850 ft-lbs (Stage 3+).”
I told David I wasn’t worried about losing a little bit of horsepower or torque to gain drivability and longevity — the Fairlane already has more than the tires can handle. The single-disc would still have plenty of clamp load to take all of the torque the 5.4-liter could muster, with some left over, should I decide to change blower pulleys in the future. It would be much more forgiving when leaving a traffic light, and should last well over 80,000 miles if driven correctly. The only downside was there would be a 500-mile break-in period, which was child’s play for the number of miles I’ve been racking up.

Danny made sure to clean up all of the grime on the engine's backside and inside the bellhousing. There was a ton of clutch dust — another sure sign there wasn't much left on the discs!
Why Do Some Clutches Need A Break-In Period?
This is a question SPEC gets asked often (and I asked it too). So, here is what David Norton has to say on the subject:
“Break-in is more common sense than a do-or-die procedure; a lot of setups will work just fine without any break-in at all. It depends on the concentricity of the surfaces [no three surfaces are perfectly concentric] and how close the output is to the unit’s capacity as to whether there could be performance and longevity issues without seating. Some materials seat faster than others, as well.
“Most are familiar with bedding-in brake pads. After installing new brake pads, a car will not stop well from high speed without a break-in procedure. The same applies to clutches, though it takes longer to seat a clutch since there isn’t constant surface contact. The goal is to bed the material onto the surfaces with the lowest wear result, which means allowing it to slip or rotate the least and not getting it too hot.
“For those who may not realize what it feels like, here is some good instruction for a standardized break-in procedure. Drive around town something along the lines of 500 miles, shifting as much as possible, refraining from launches, speed shifting, and going full-throttle — especially if the car’s torque output is in the vicinity of the clutch capacity. Many interpret break-in procedures as meaning ‘no high RPM,’ but high RPM is suitable for seating when not using full throttle.
“Seating [or bedding] is defined as the minimum amount of wear that allows 100-percent of the friction material to contact the friction surfaces. Along with seating will be some natural heat cycling. Simply avoid noticeably extended slippage that creates damaging heat, which can compromise the integrity of the surfaces’ material and trueness. Basically, those who are patient enough to seat their units will realize the longest possible wear life and most consistent performance. Could they disregard it, and everything works fine? Maybe, but this is where common sense enters the equation. If you test a new unit with some power and it slips, immediately back off and drive it another 50 to 100 miles before trying again.
“There is also a process of ‘manual’ seating, which consists of controlled slipping to accelerate the process. This can work with many harder materials, as long as someone with experience does the work and knows how to avoid damaging the setup. Our sintered iron material is the only material that seats itself and is not really affected much by the process. Still, it will bed itself at the expense of the surfaces, especially without some initial temperature.”
Our process goes beyond the mass-production OE-style balancing, giving the end-user a high-end balance and setting a new standard preferred by high-end engine builders. — David Norton, SPEC Clutch
The New SPEC Clutch
The decision was made — it would be a Stage 2 single-disc clutch and pressure plate with a steel flywheel. Danny went and grabbed them off the shelf, along with a new throwout bearing and pilot bearing. We would keep the Wilwood 3/4-bore master cylinder already installed.

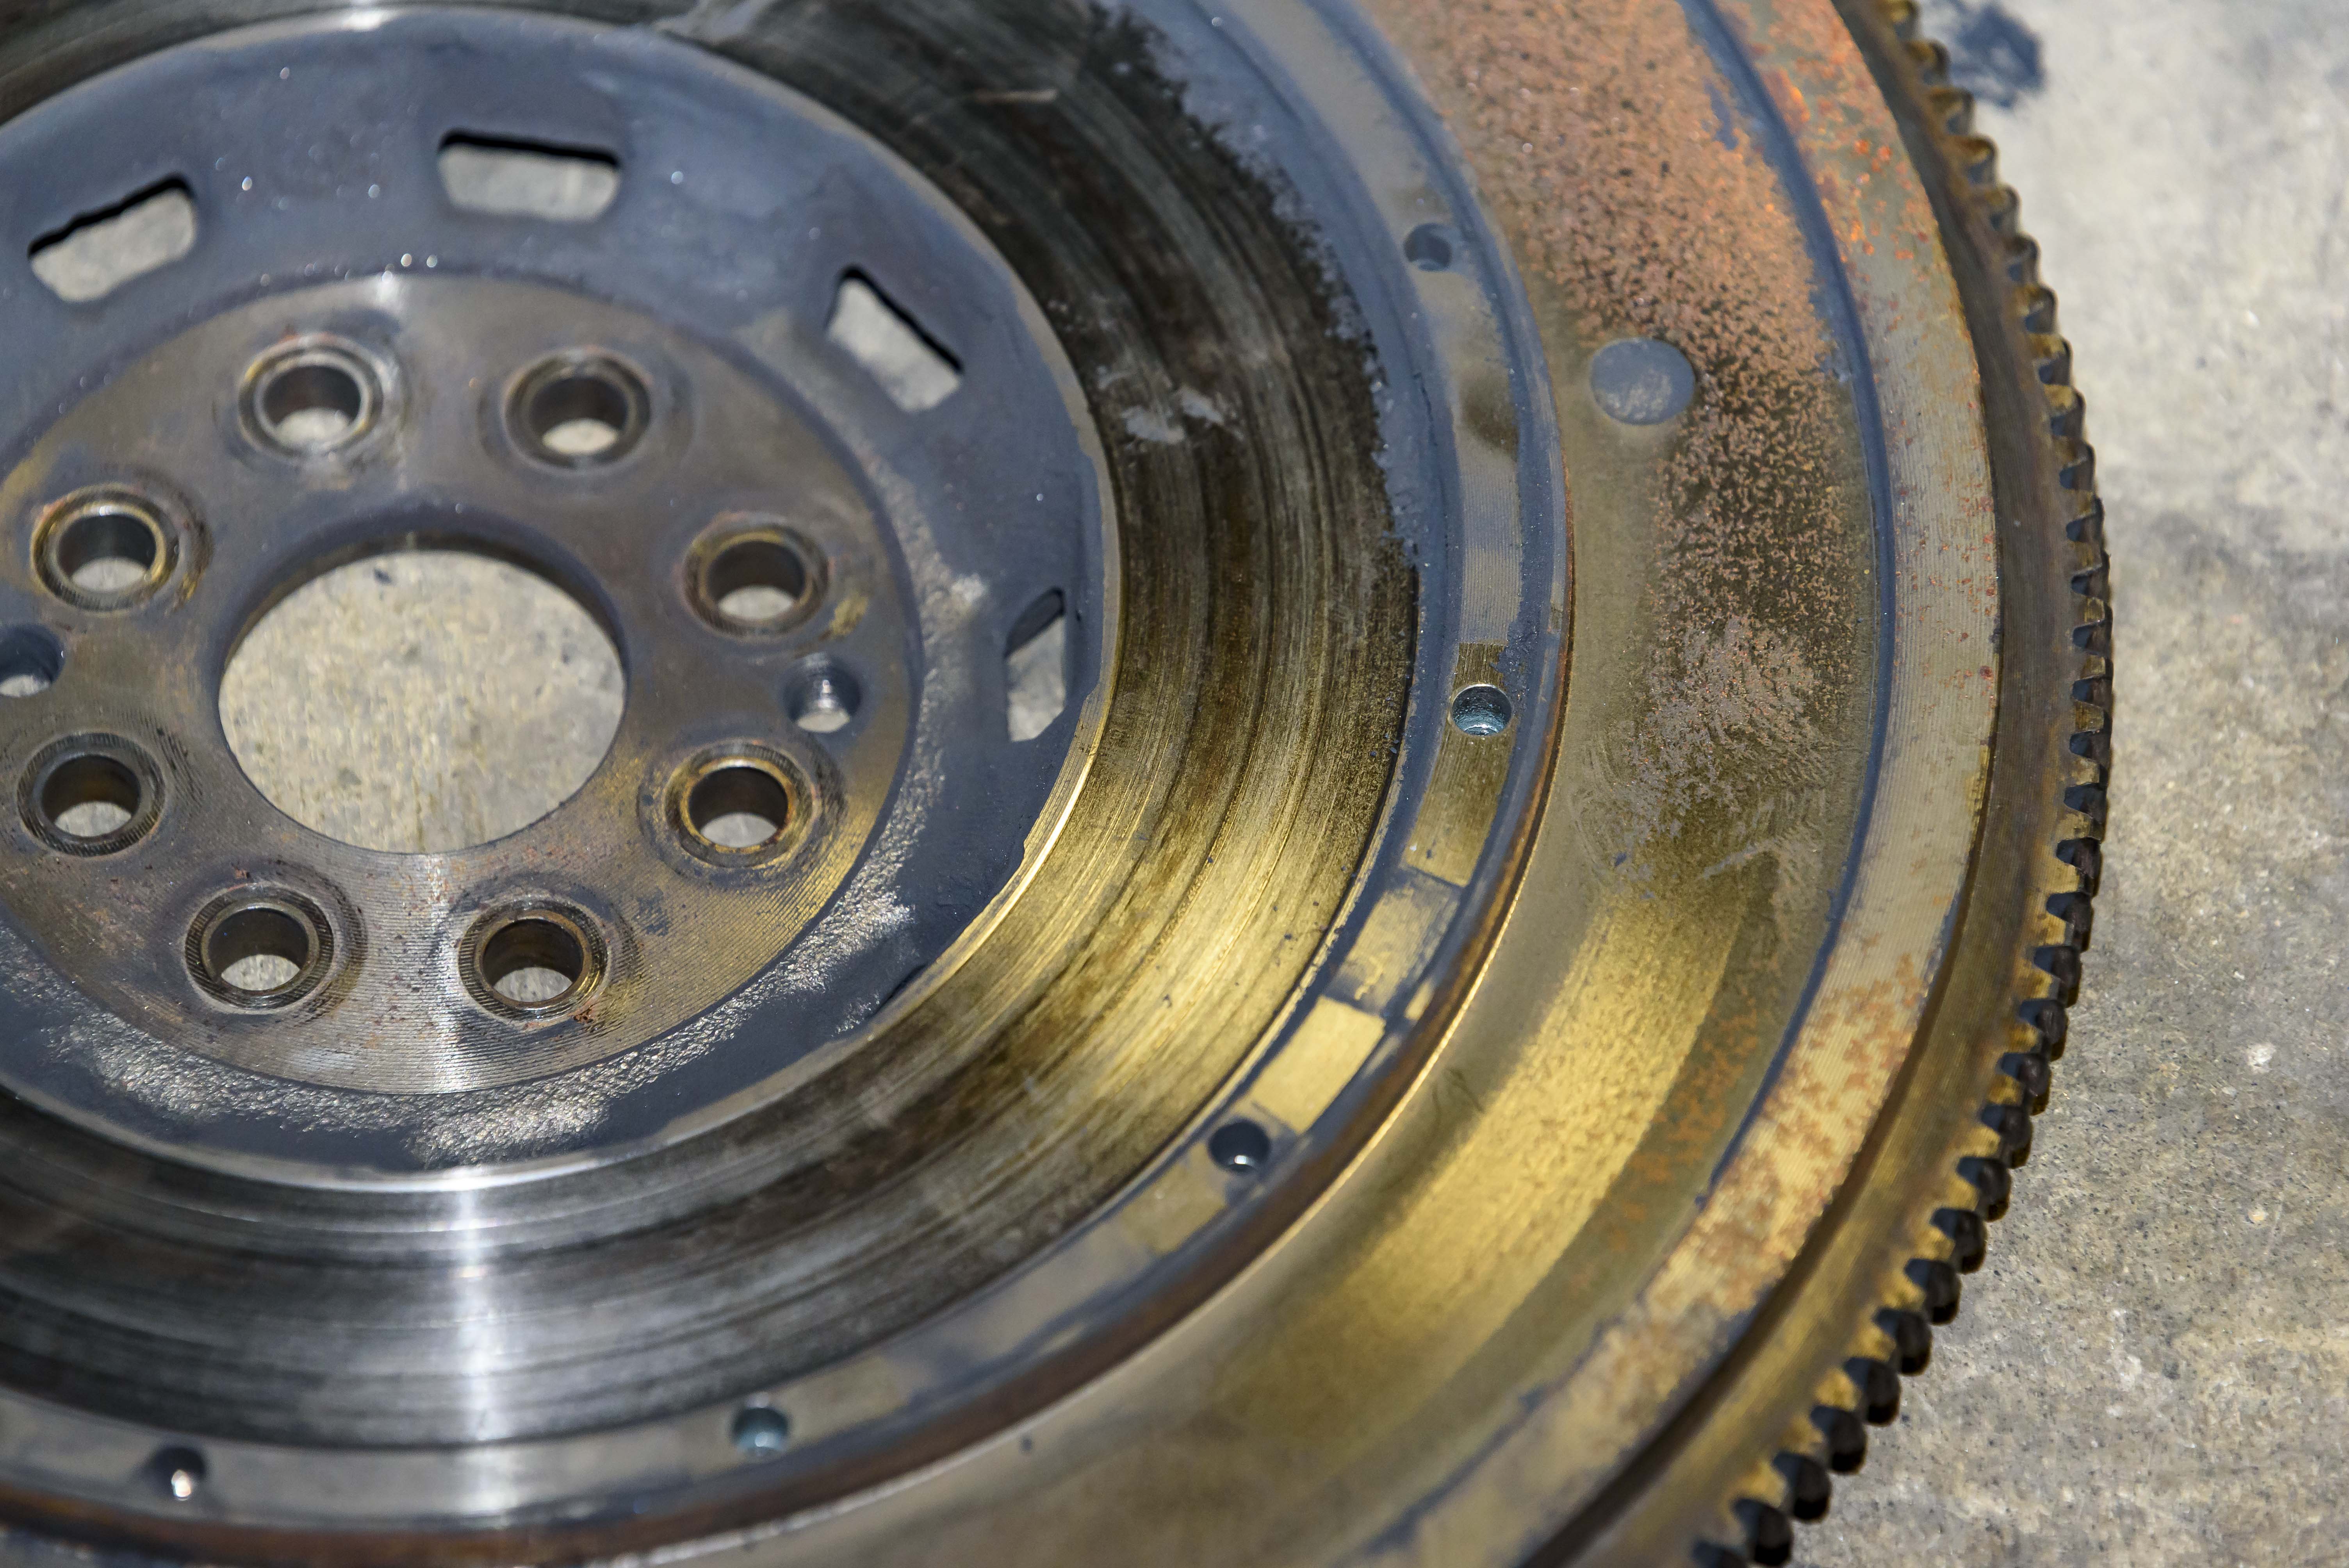
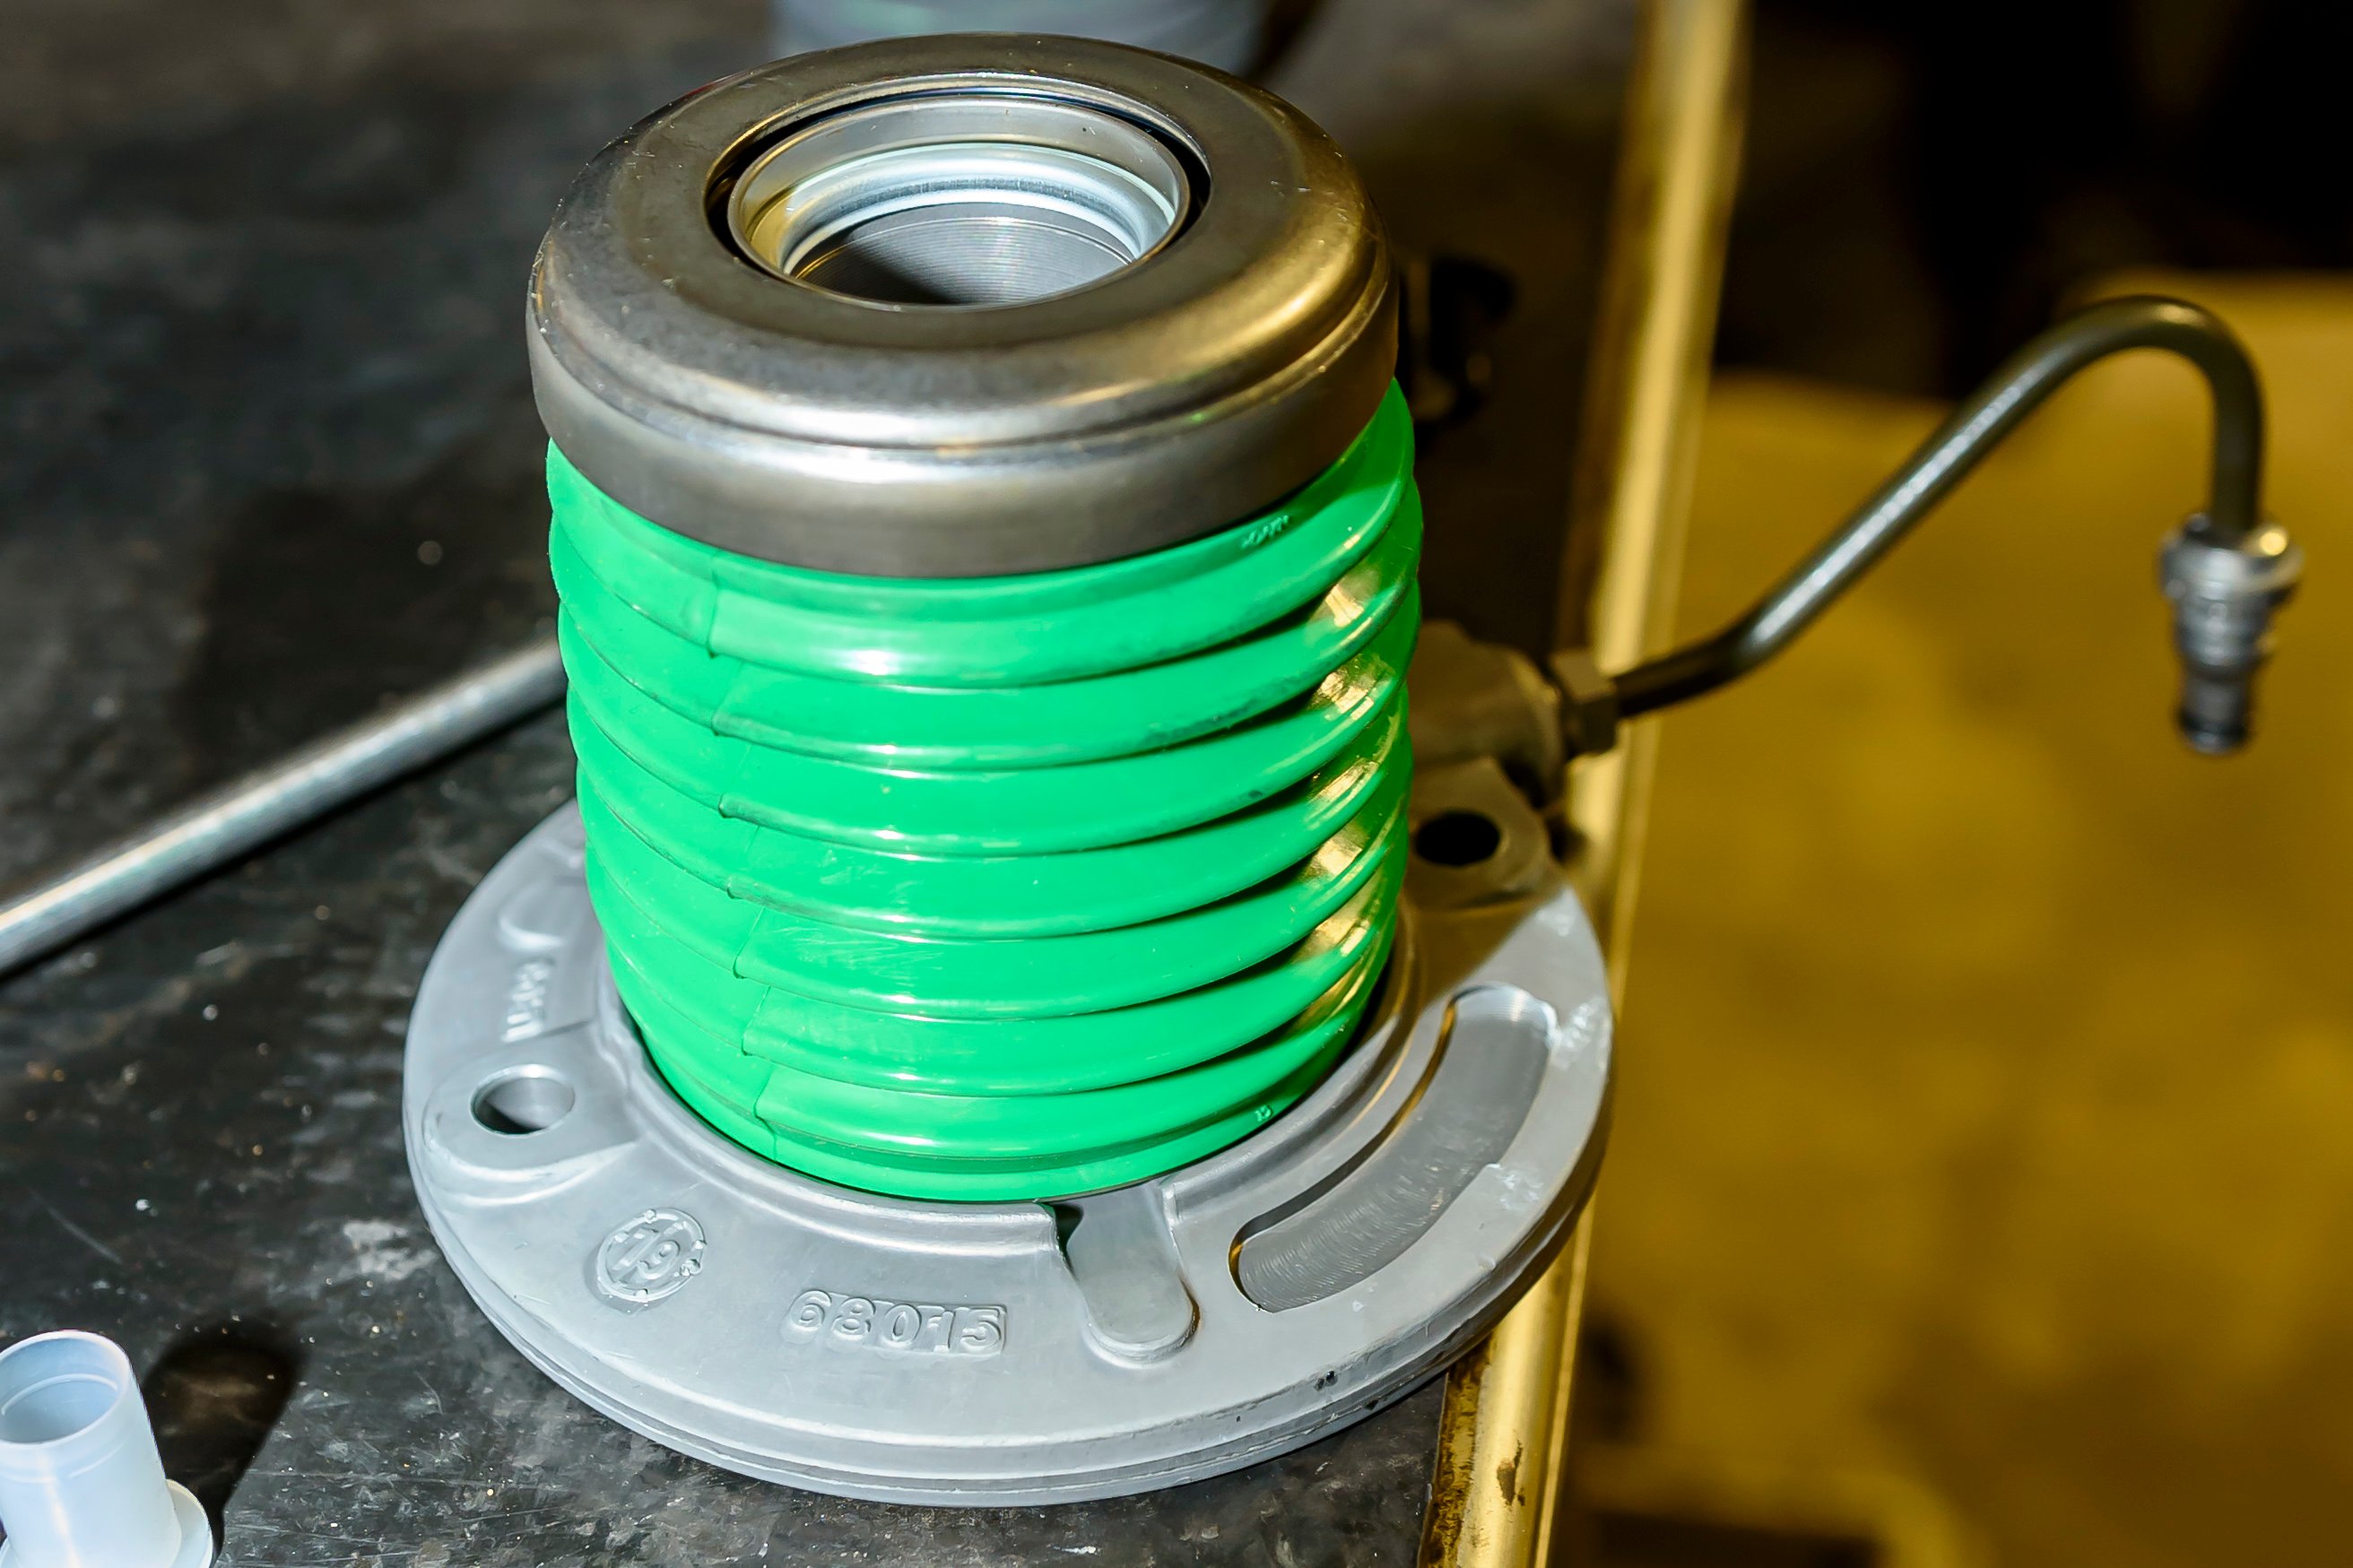
The single-disc Stage 2 SPEC Clutch for the 2009 Shelby Mustang GT500 is a gorgeous piece of machinery — a shame you never see it once installed. Note the yellow mark, which ensures balance alignment to the flywheel.
The first thing I noticed when Danny brought the SPEC clutch and flywheel assembly into the shop was how pretty it was. Bathed in blue powdercoating, the clutch housing is gorgeous and surely won’t rust. Meanwhile, the flywheel is a machined piece of art! As I examined it closer, two things stood out: 1) The clutch material covered a lot more surface area on the face of the disc and, 2) there was a yellow mark on both the flywheel and clutch housing. I asked Norton why those marks were there.
“This is perhaps the most ‘value-added’ component of our brand; it is a service that would cost more than the parts if taken to a machine shop,” Norton states. “Some clutch companies don’t balance assemblies at all. Some balance with a clutch balancer that may get it close to OE. Meanwhile, we use a top-end Hoffman balancer, modified specifically for balancing our assemblies, to maximize rotational integrity. They are the best-balanced setup in the industry because we take the time to balance each component separately and then again while bolted together. We mark both surfaces, so the installer knows precisely what orientation to assemble the unit. Our process goes beyond the mass-production OE-style balancing, giving the end-user a high-end balance and setting a new standard preferred by high-end engine builders.”
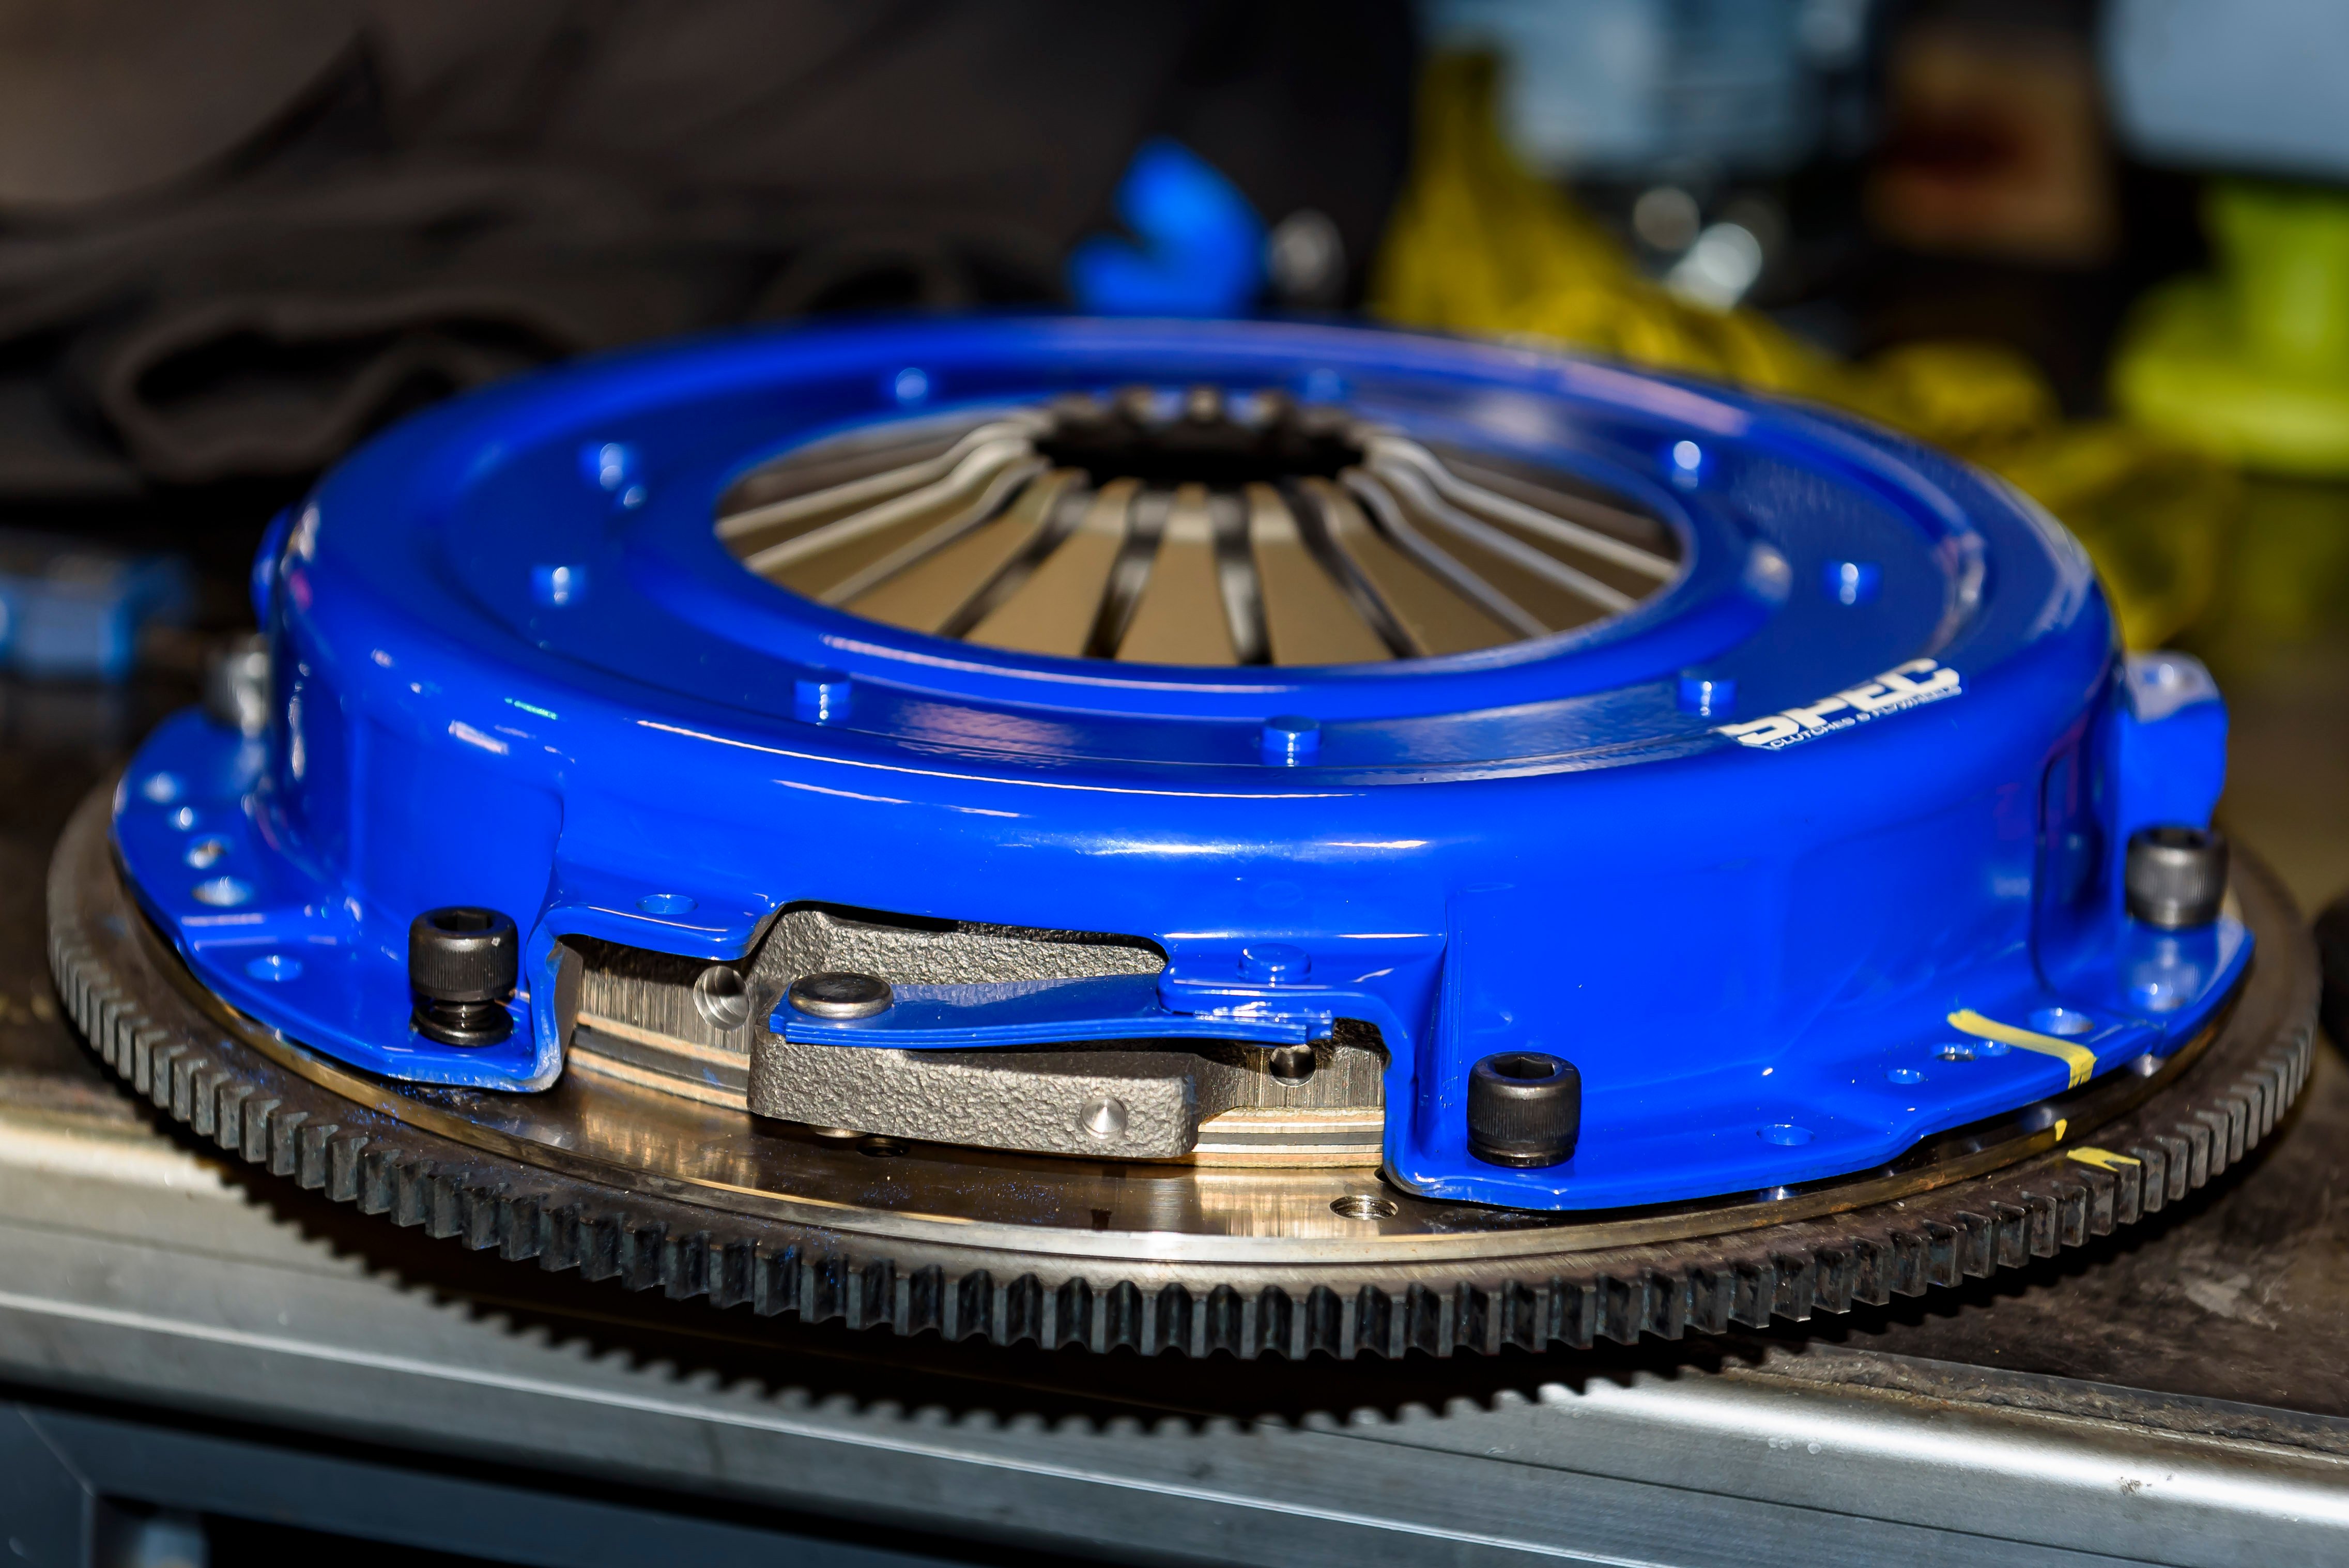

The SPEC Stage 2 single-disc clutch has much more surface area and will be more forgiving than the OE twin-disc, but still provides plenty of clamping power for the 540 horses on tap. The new steel flywheel is a machined work of art. The new throwout bearing should provide the same pedal feel as the original.
Installing The New SPEC Clutch
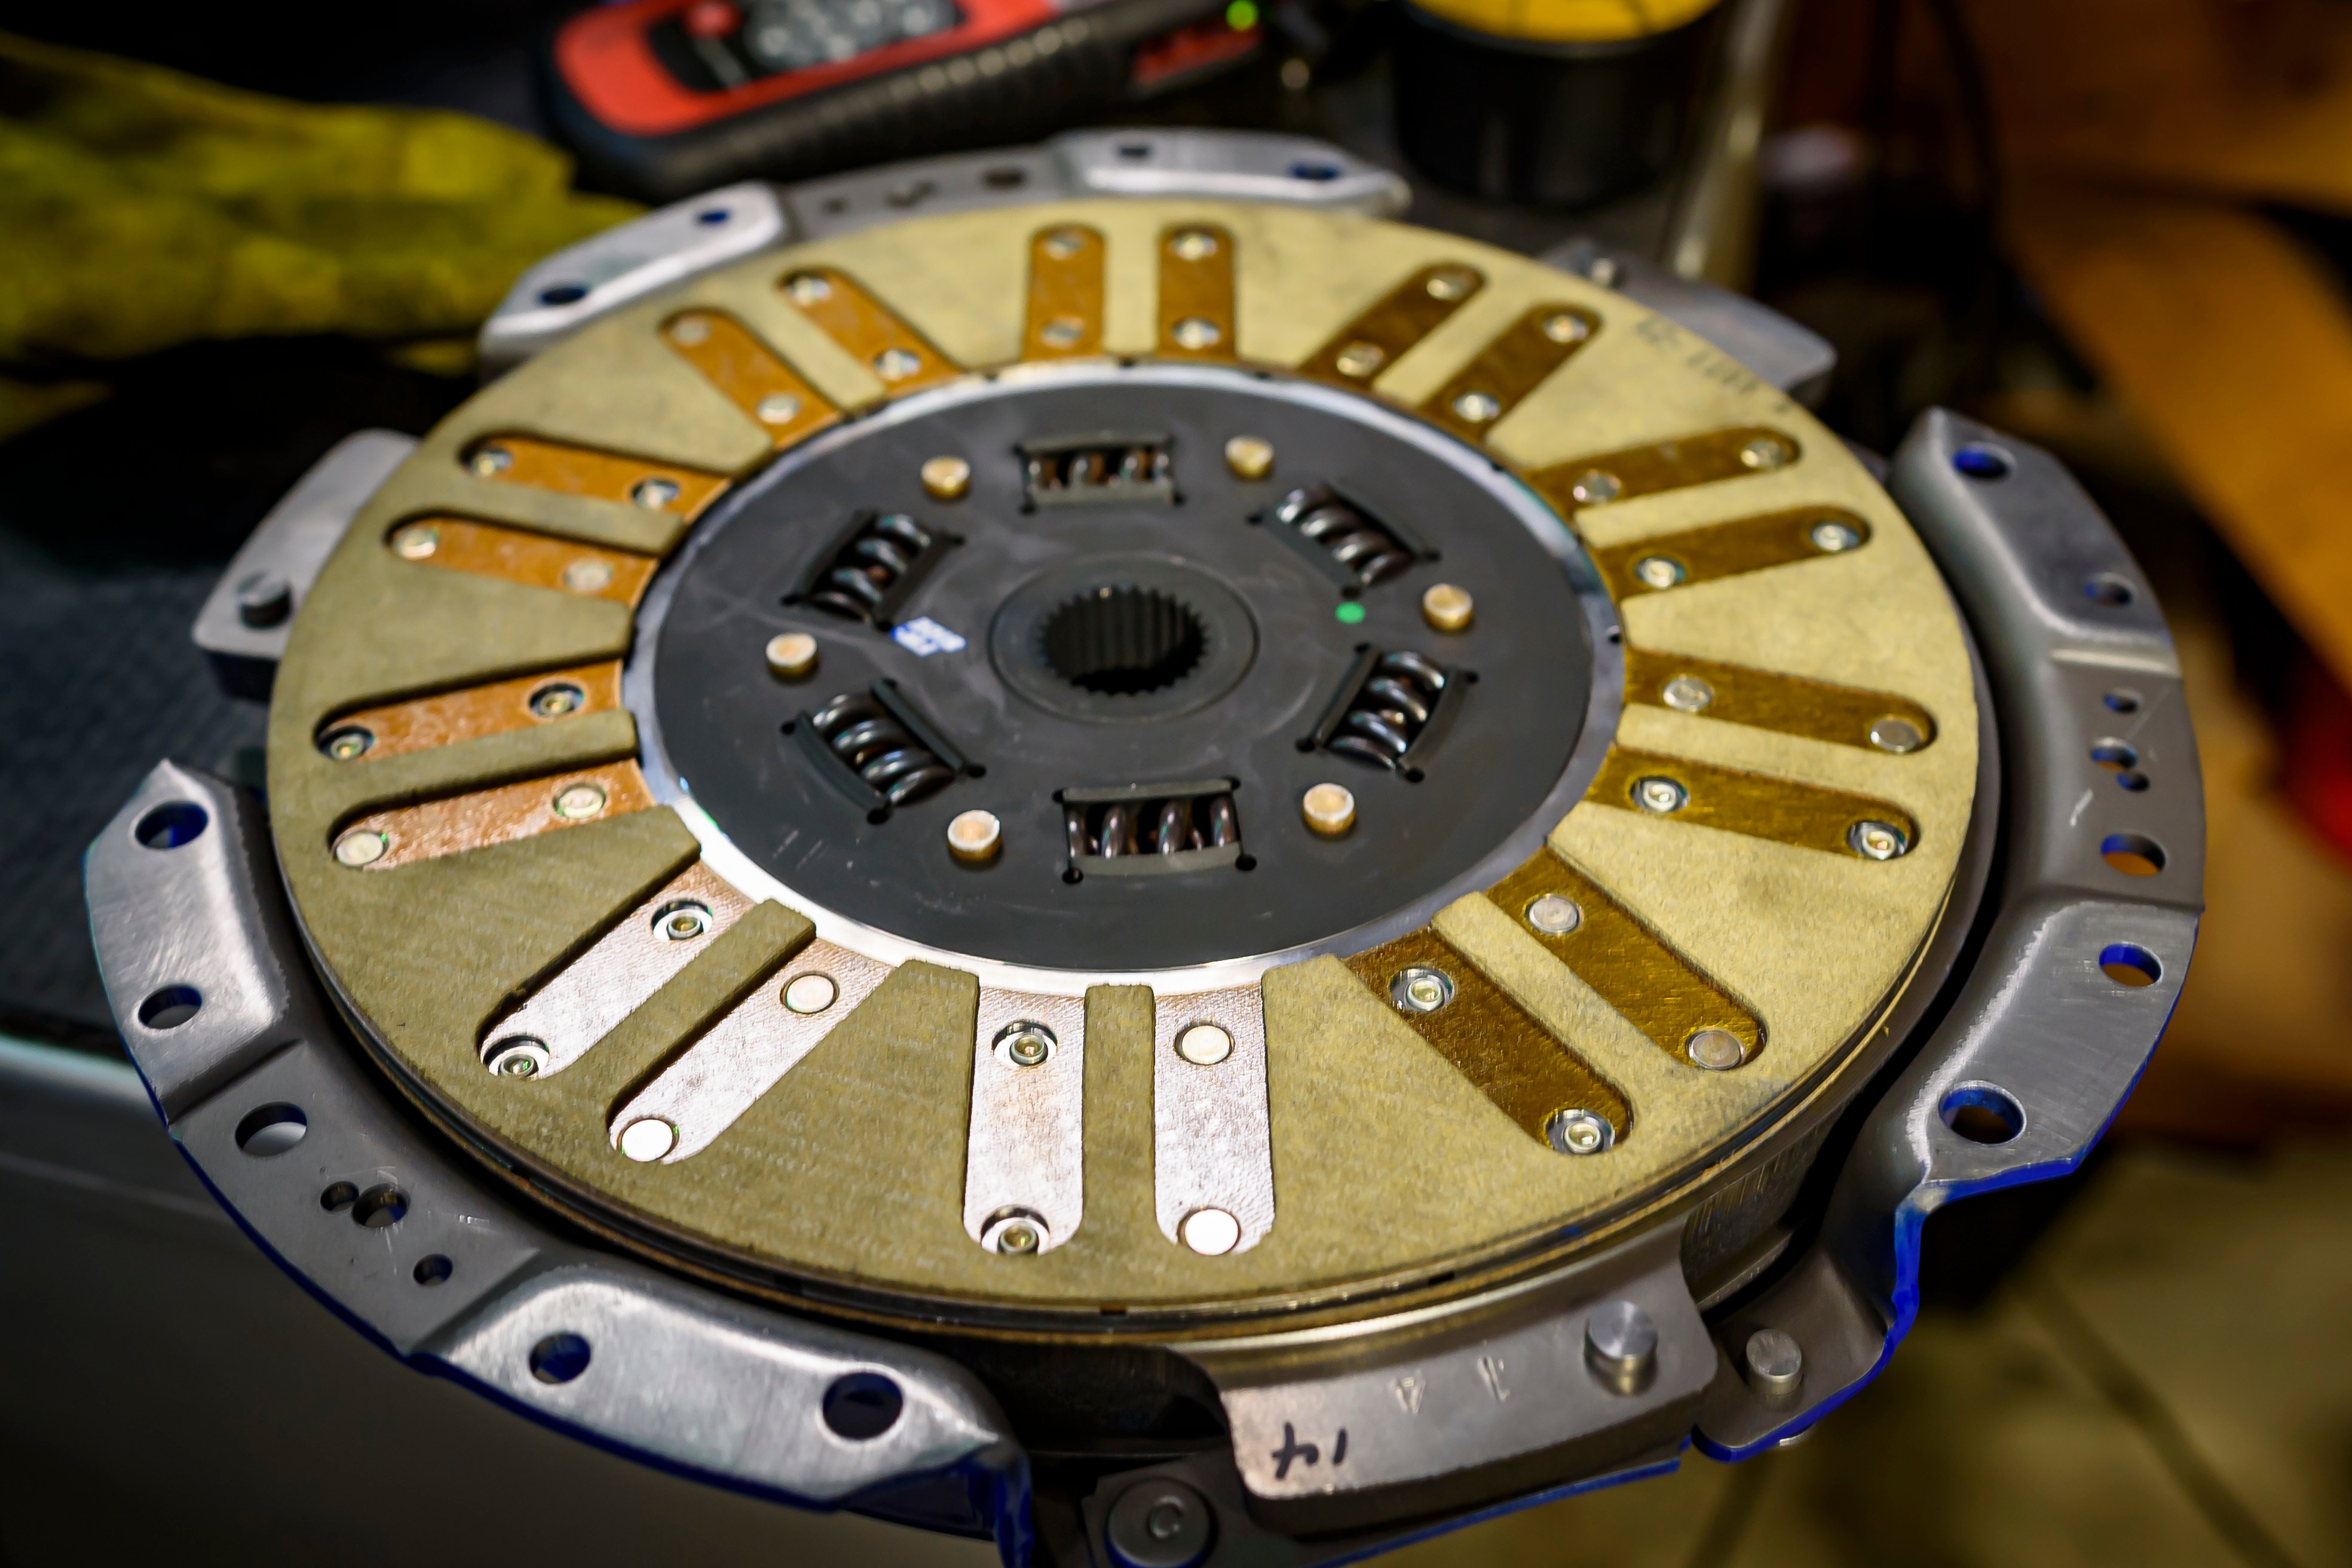
Danny’s first step was to install the new pilot bearing in the crank. Next, he bolted the flywheel to the crank and torqued the bolts in a criss-cross pattern. The clutch disc is marked with a sticker denoting which side goes toward the flywheel, so he used the plastic alignment tool supplied with every clutch to hold it in position. Then he made sure to align the yellow marks as he placed the pressure plate over it and finger-tightened the bolts. It is important to torque the bolts down evenly in a criss-cross pattern until you reach the desired specification.
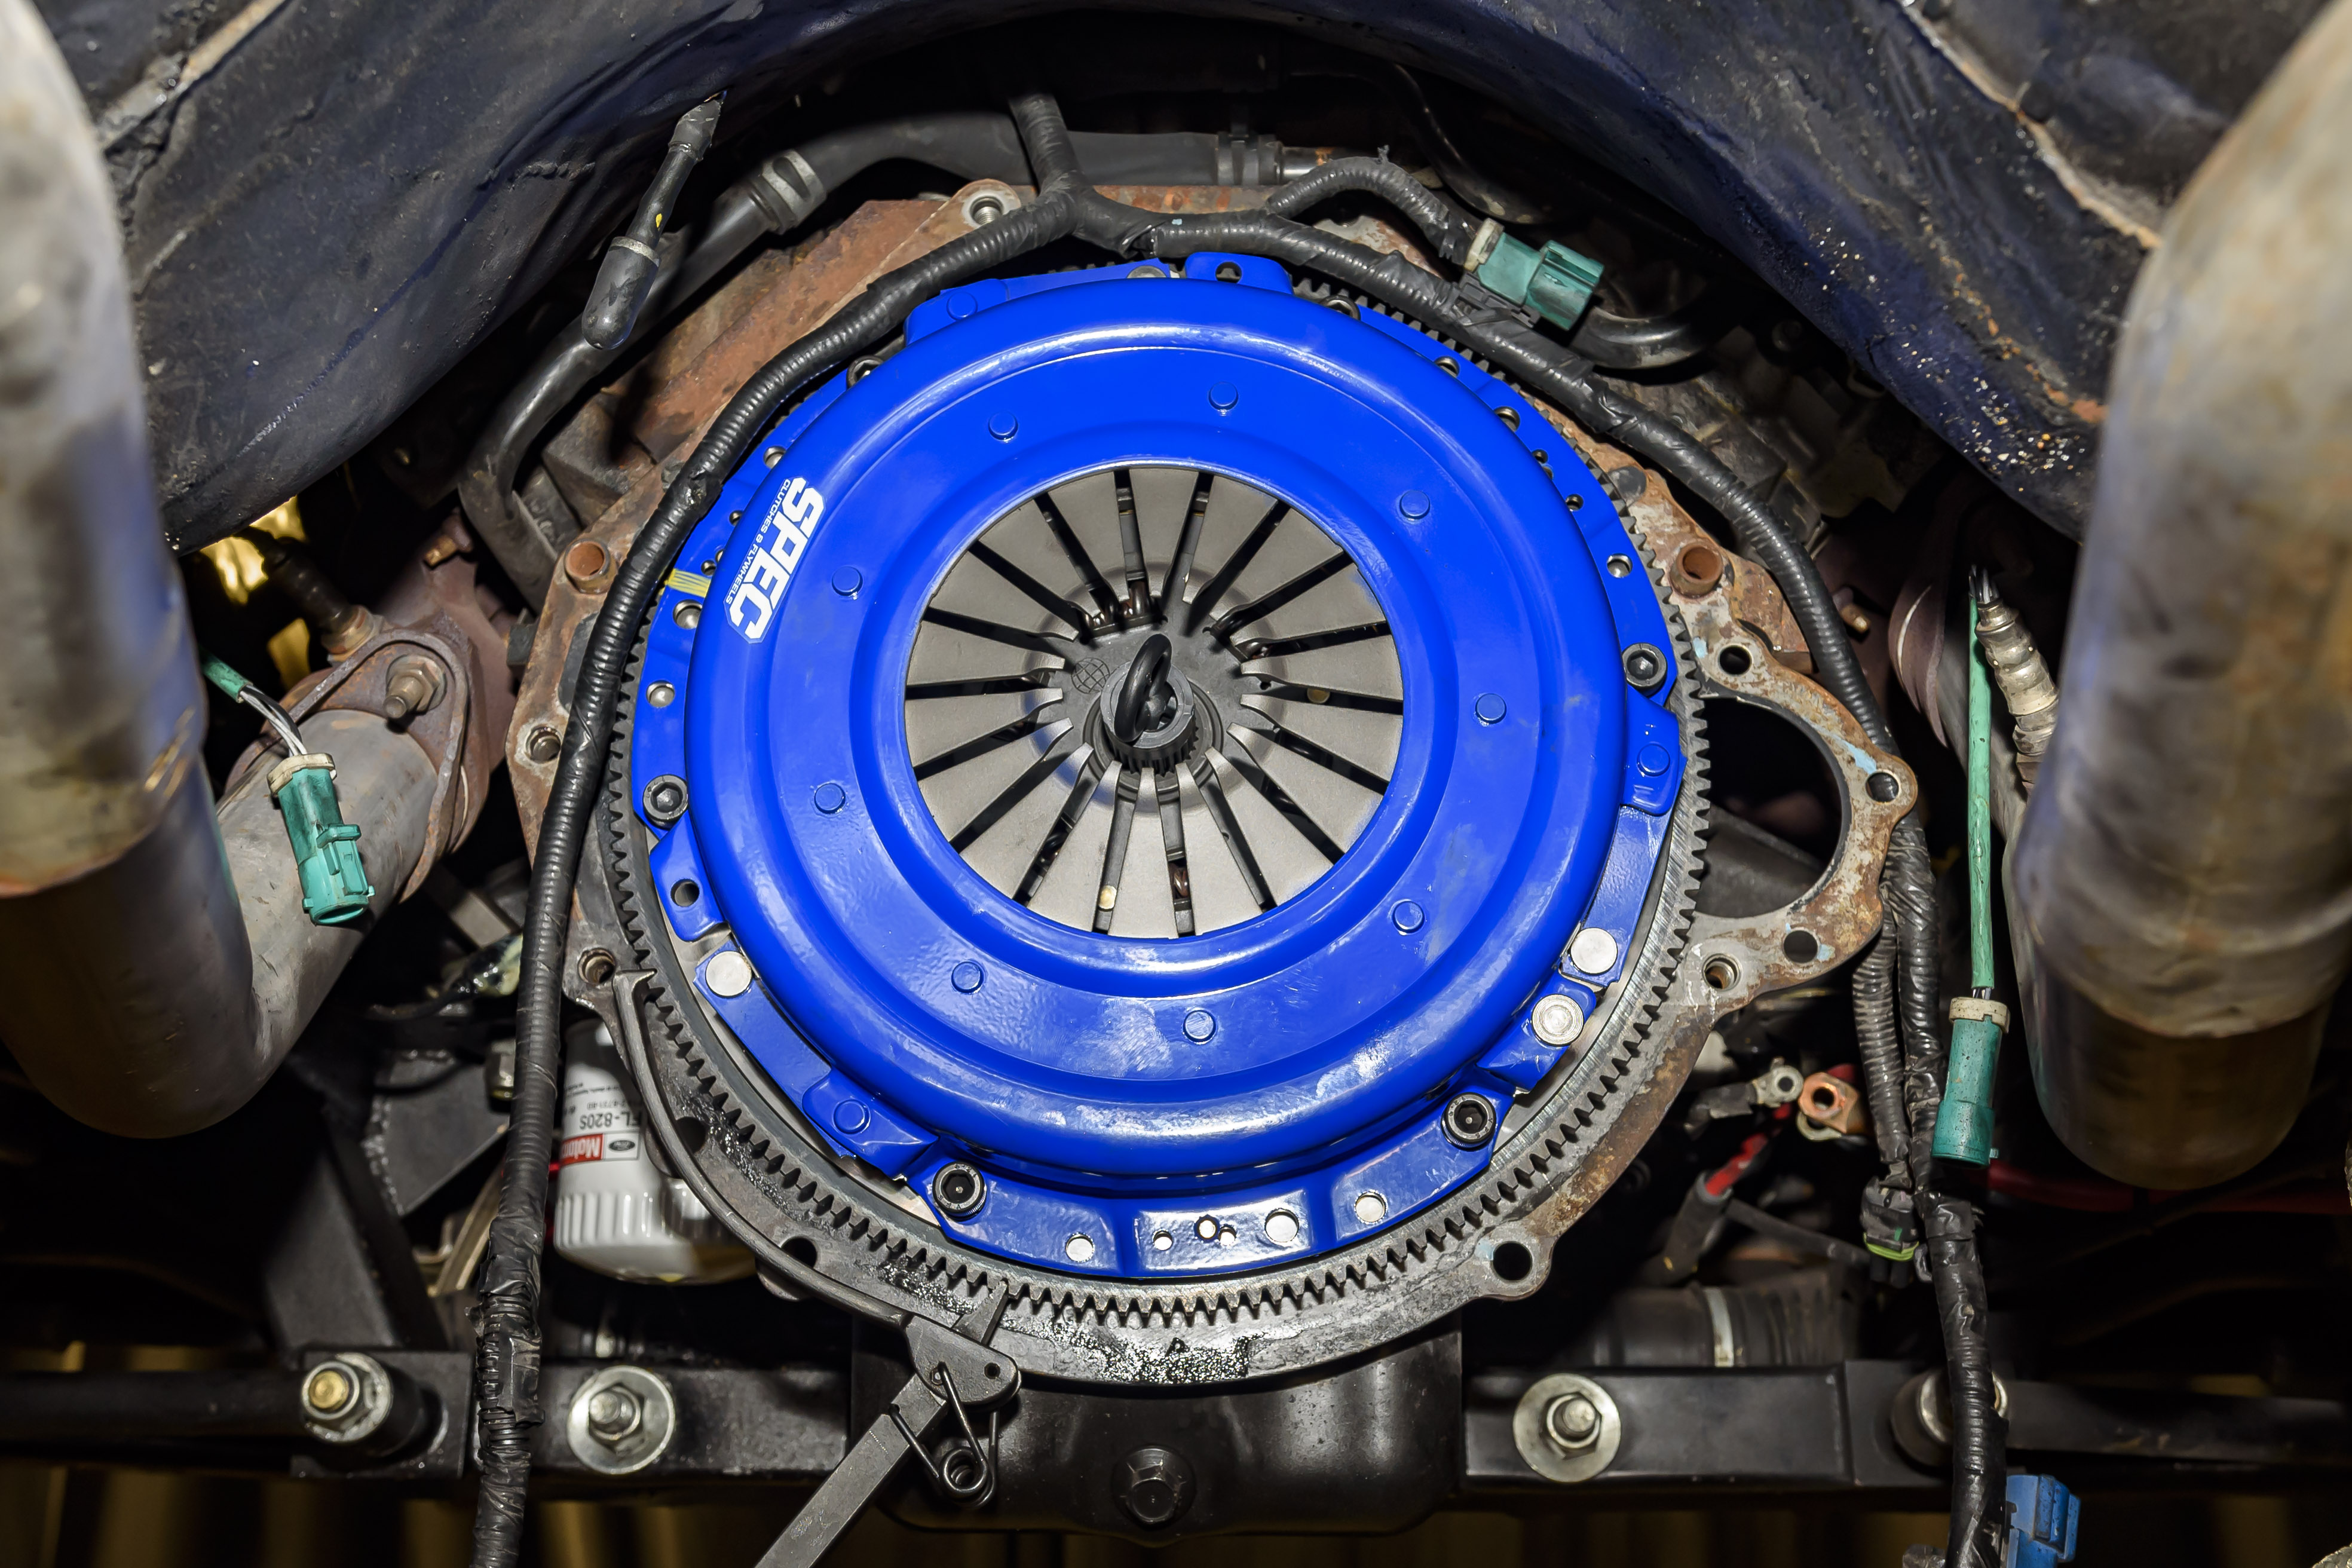
Once the pilot bearing is installed, the flywheel is torqued to the crank. Using the supplied plastic alignment tool, Danny installed the clutch disc, then aligned the yellow mark on the clutch assembly with the flywheel's mark, and finger-tightened the bolts before torquing them to specification.
Next, Danny turned his attention to installing the new throwout bearing on the transmission and checking his previous measurements. Again, he did the same procedure as before with the straight-edge, but he also verified the throwout bearing’s total travel distance from compression to extension. He then checked the depth from the pressure plate fingers to the clutch plate. Together, these measurements told him whether or not he needed a shim for the bearing to have the correct gap to the fingers. It was dead-on the money!
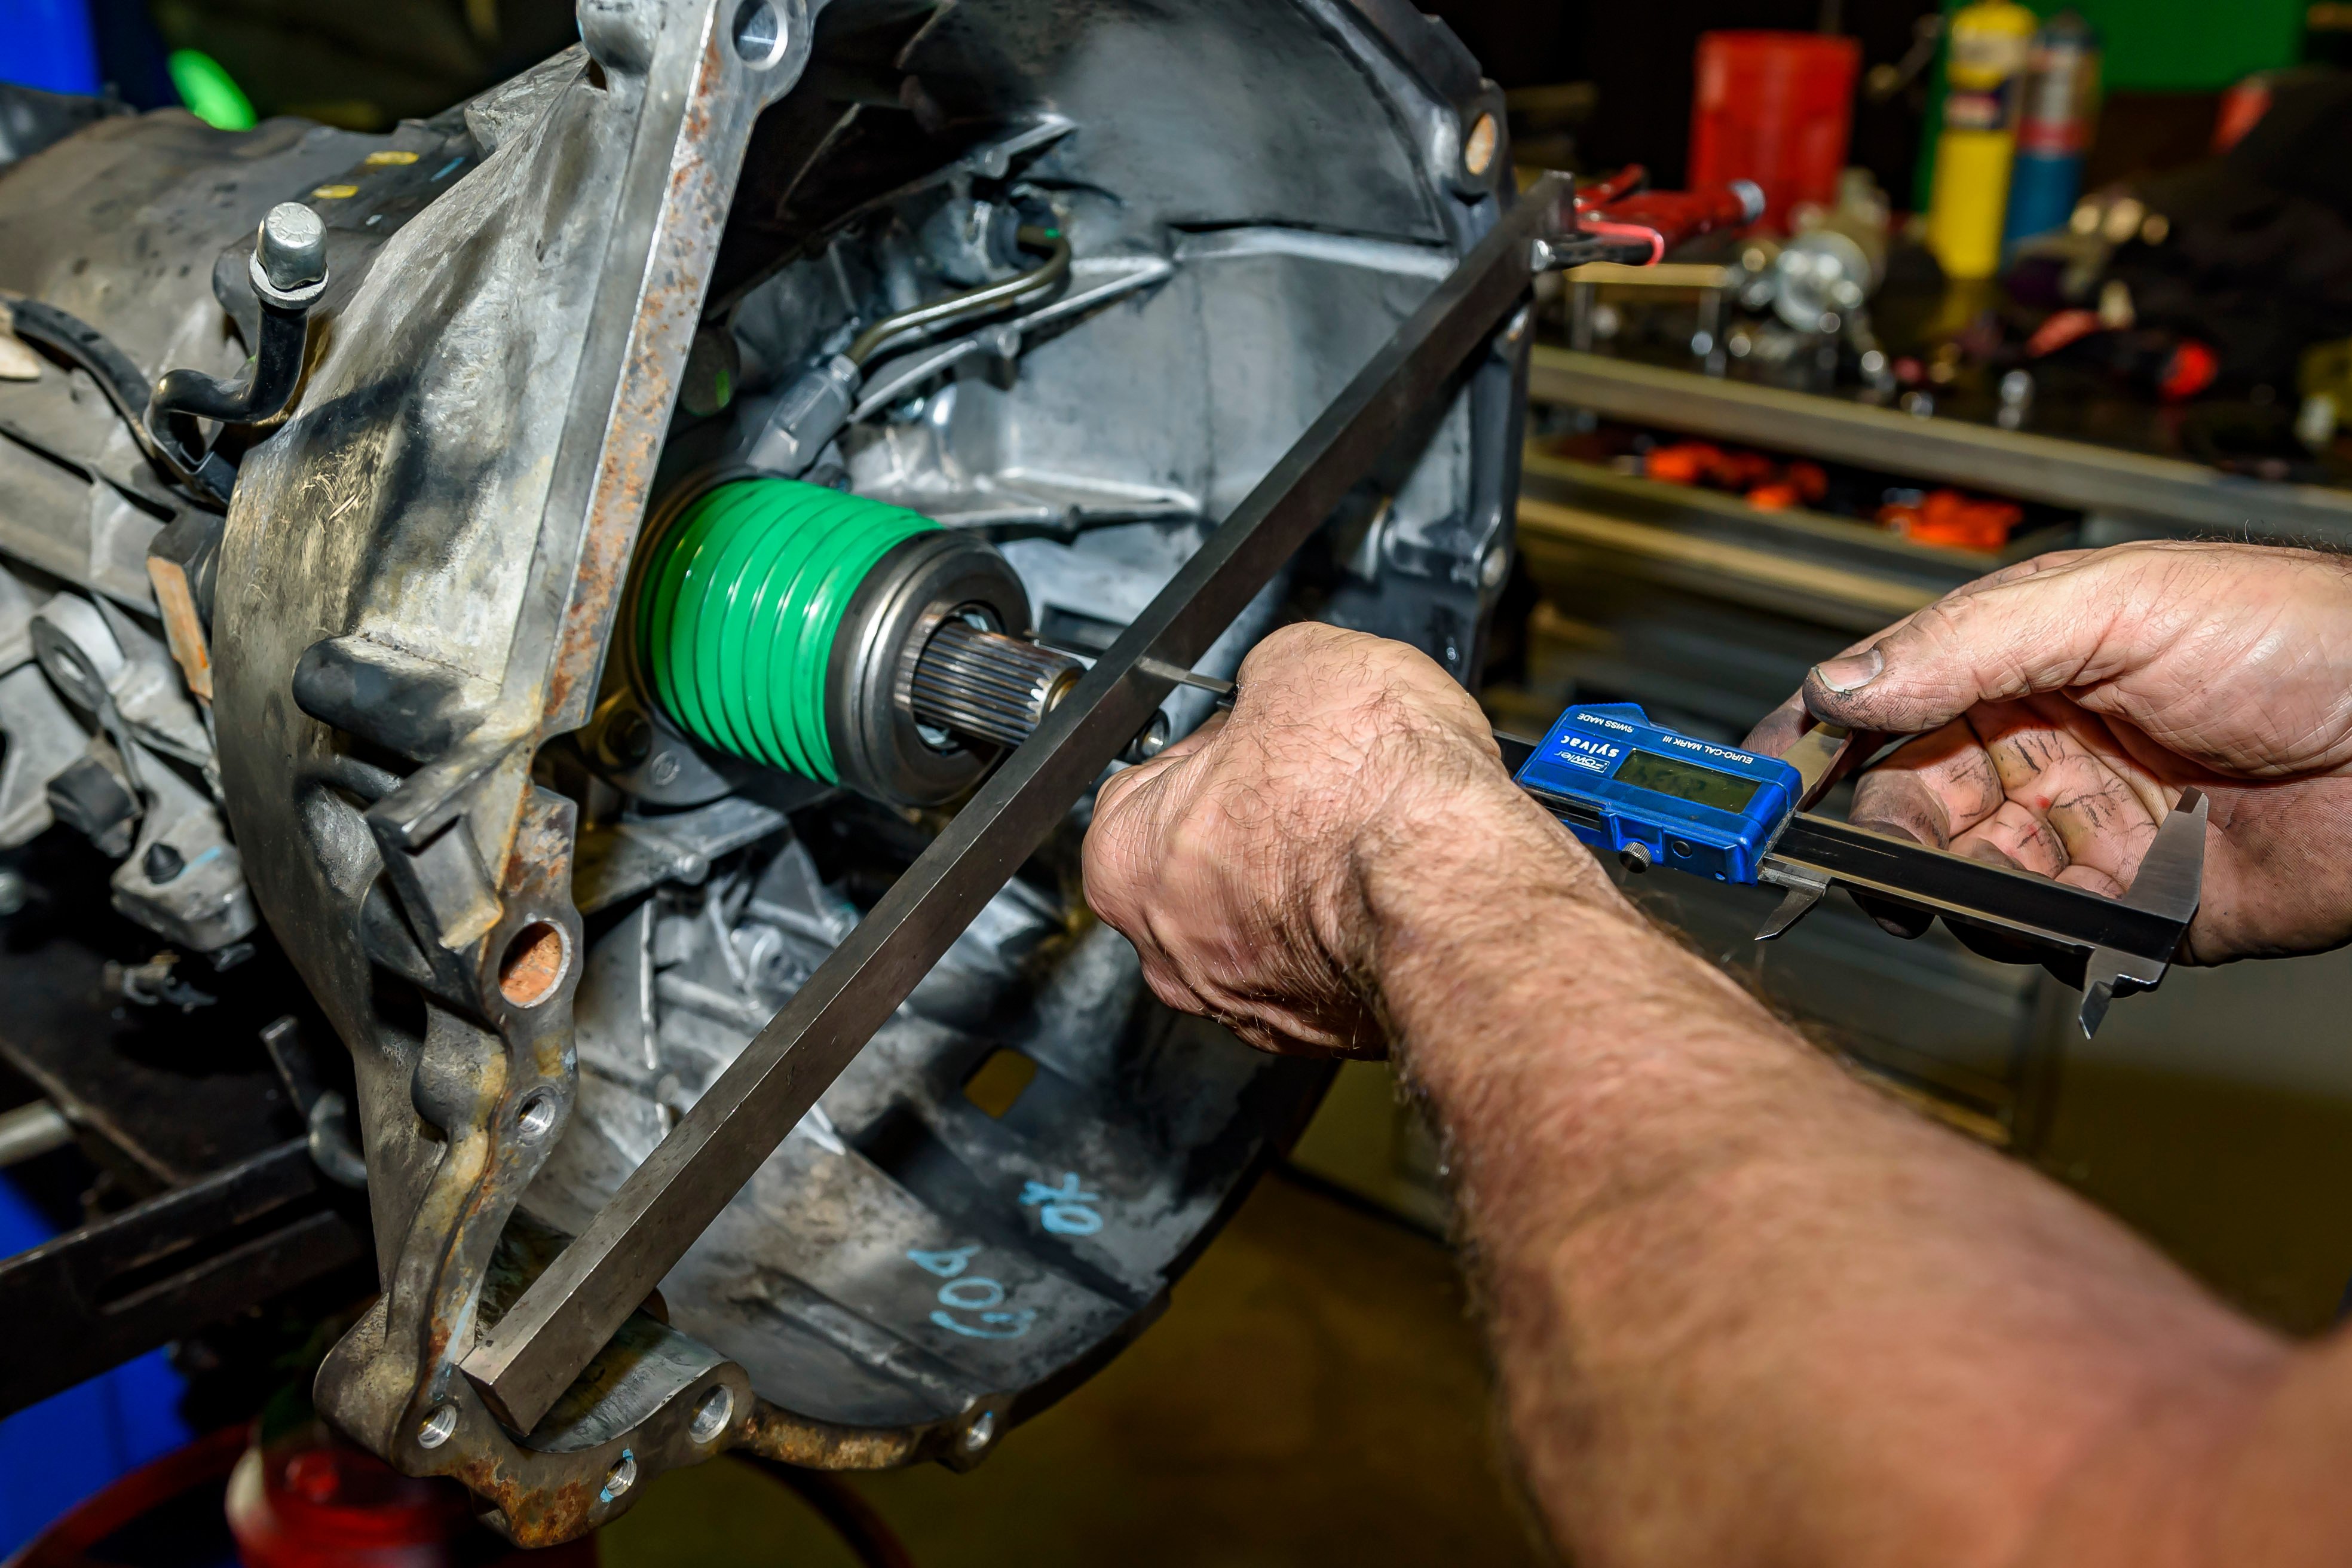


Danny retook measurements to ensure the throwout bearing would engage properly. Here's a smart little tip/tool of the trade — he uses a Galaxy Note phone to write down his measurements. This allows him to save it to his computer should he need to go back to his calculations!
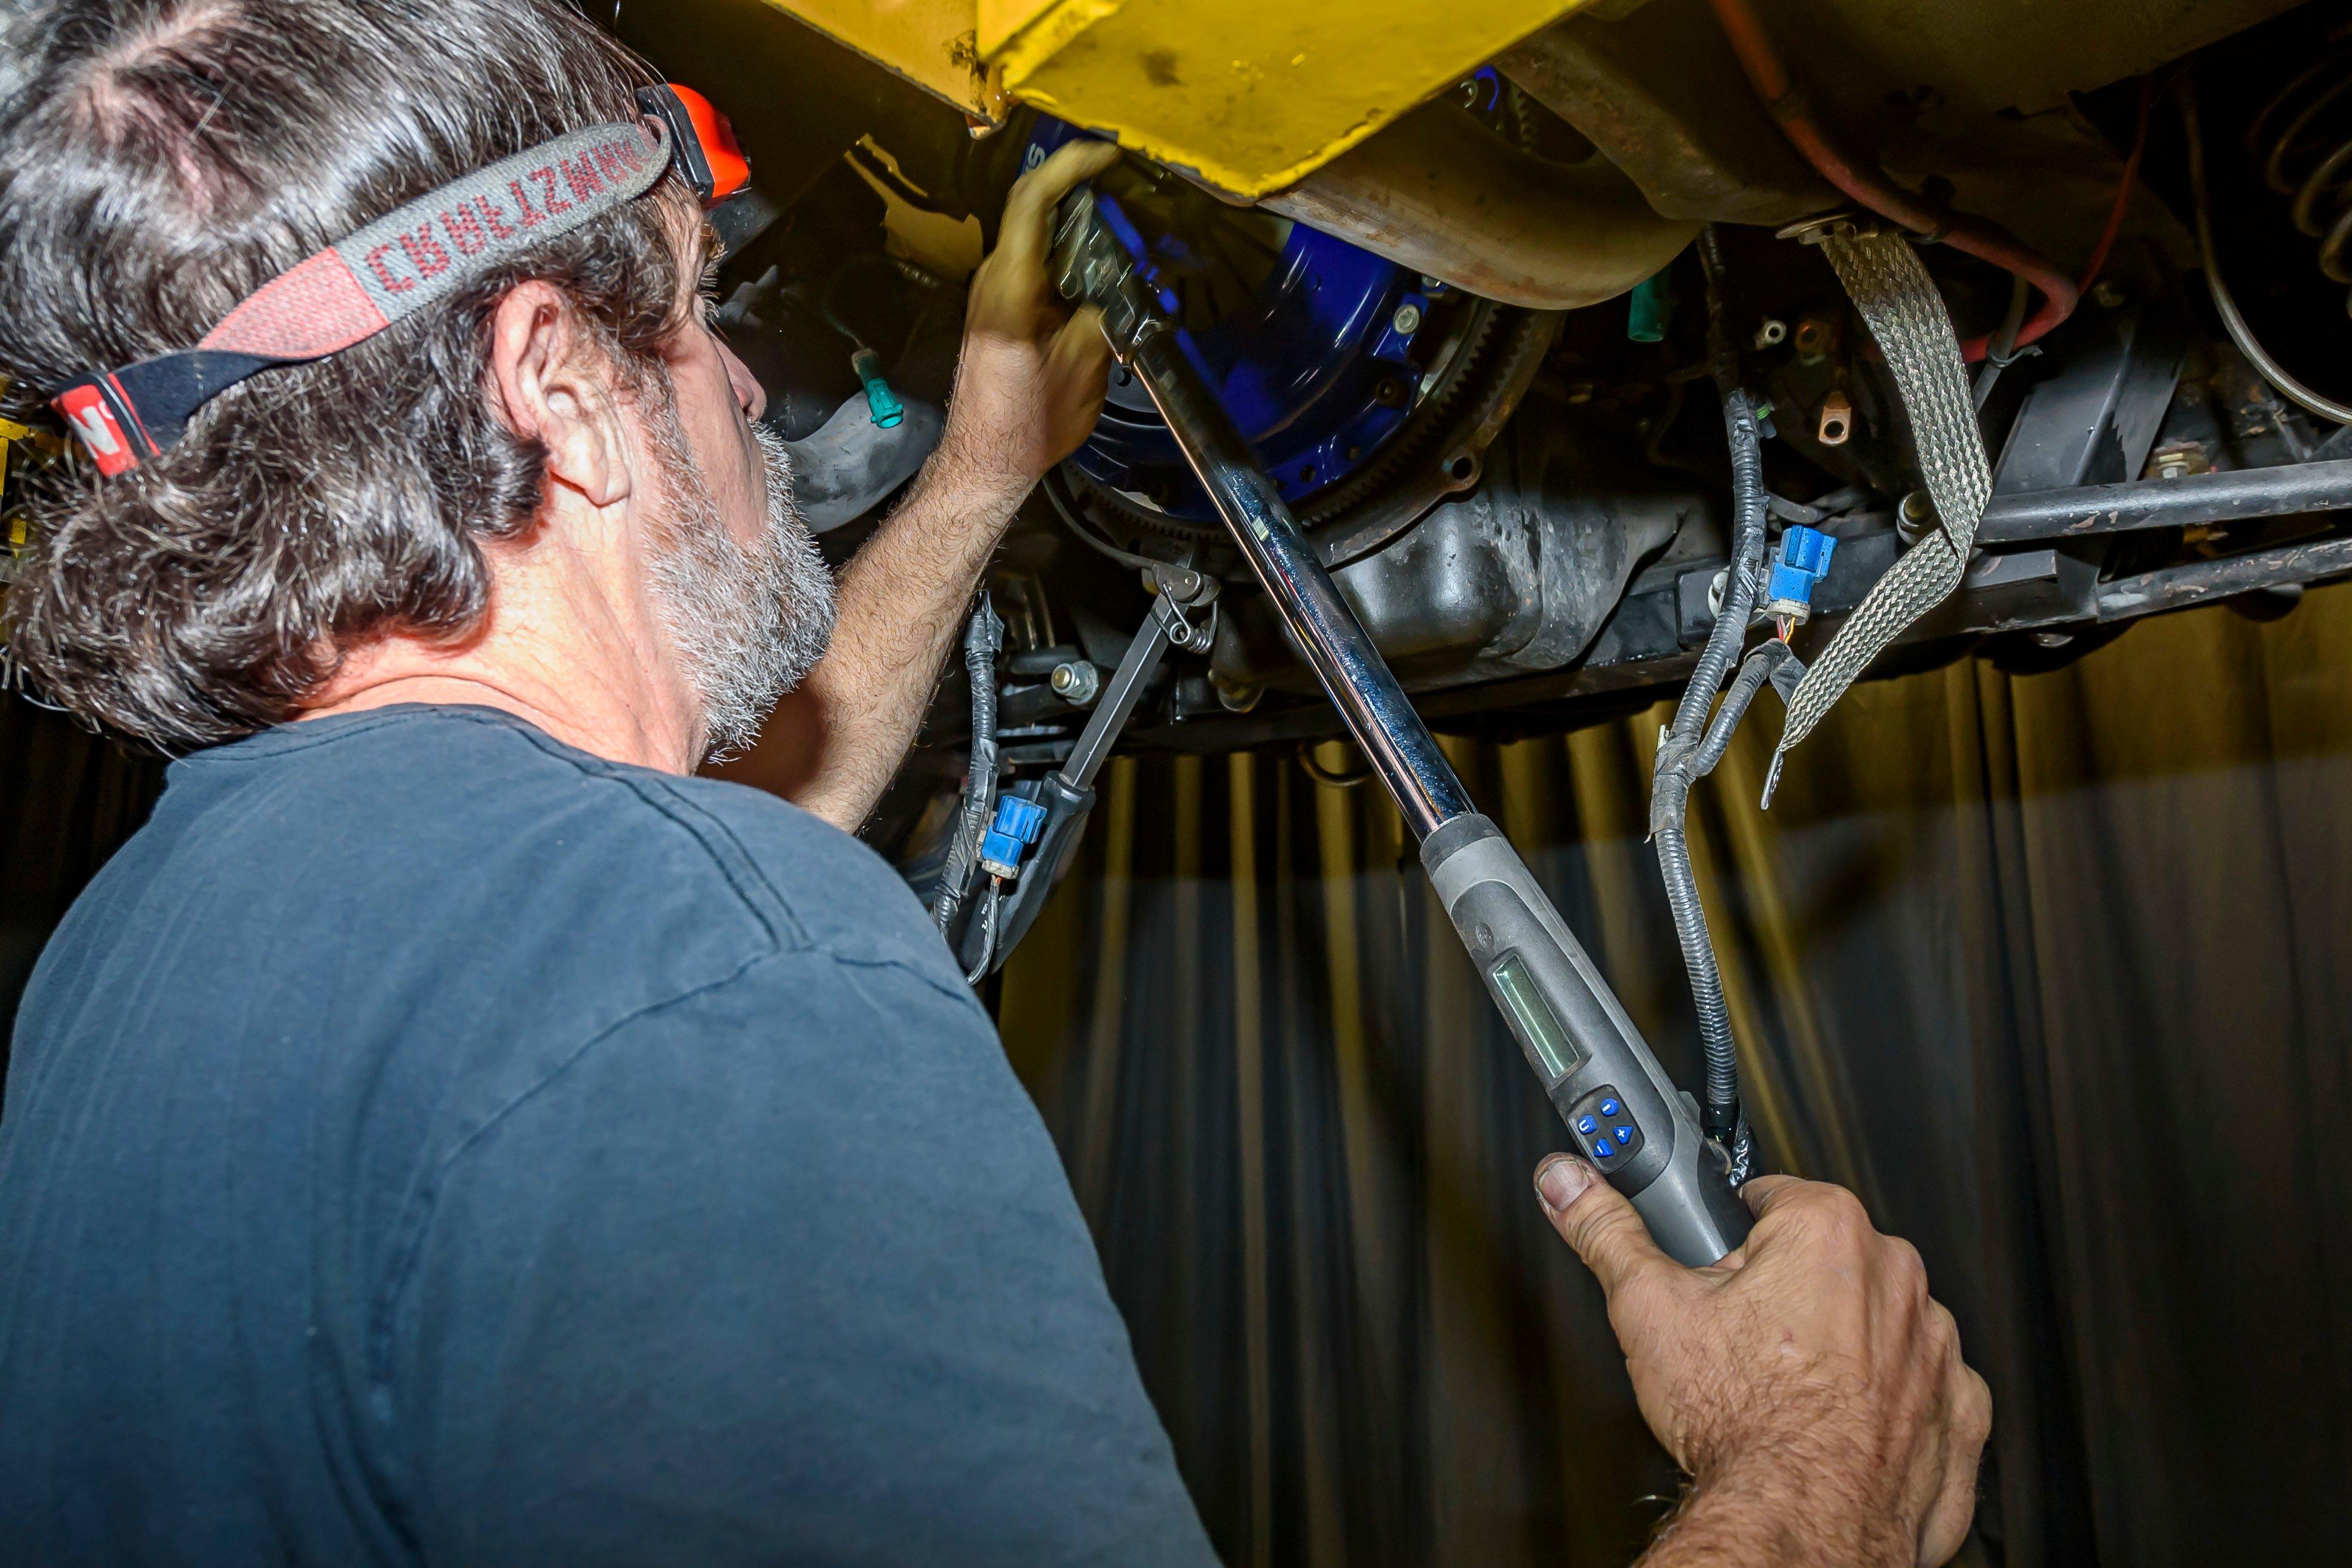
Danny cleaned off the old RTV on the shifter surface before moving the trans back into position. Making sure to move the engine harness out of the way, he carefully raised the transmission back into place and guided the output shaft into the clutch. The last inch or so can be tricky, as the trans has to be perfectly aligned with the pilot bearing. Once flush, the bolts can be finger-tightened, then torqued to specification.

That wiring harness can really get in the way. Make sure it doesn't get trapped between the engine and bellhousing before hoisting the trans up in the hole, or you could have major problems. The last inch or so is tricky, as the output shaft mates up to the pilot bushing.
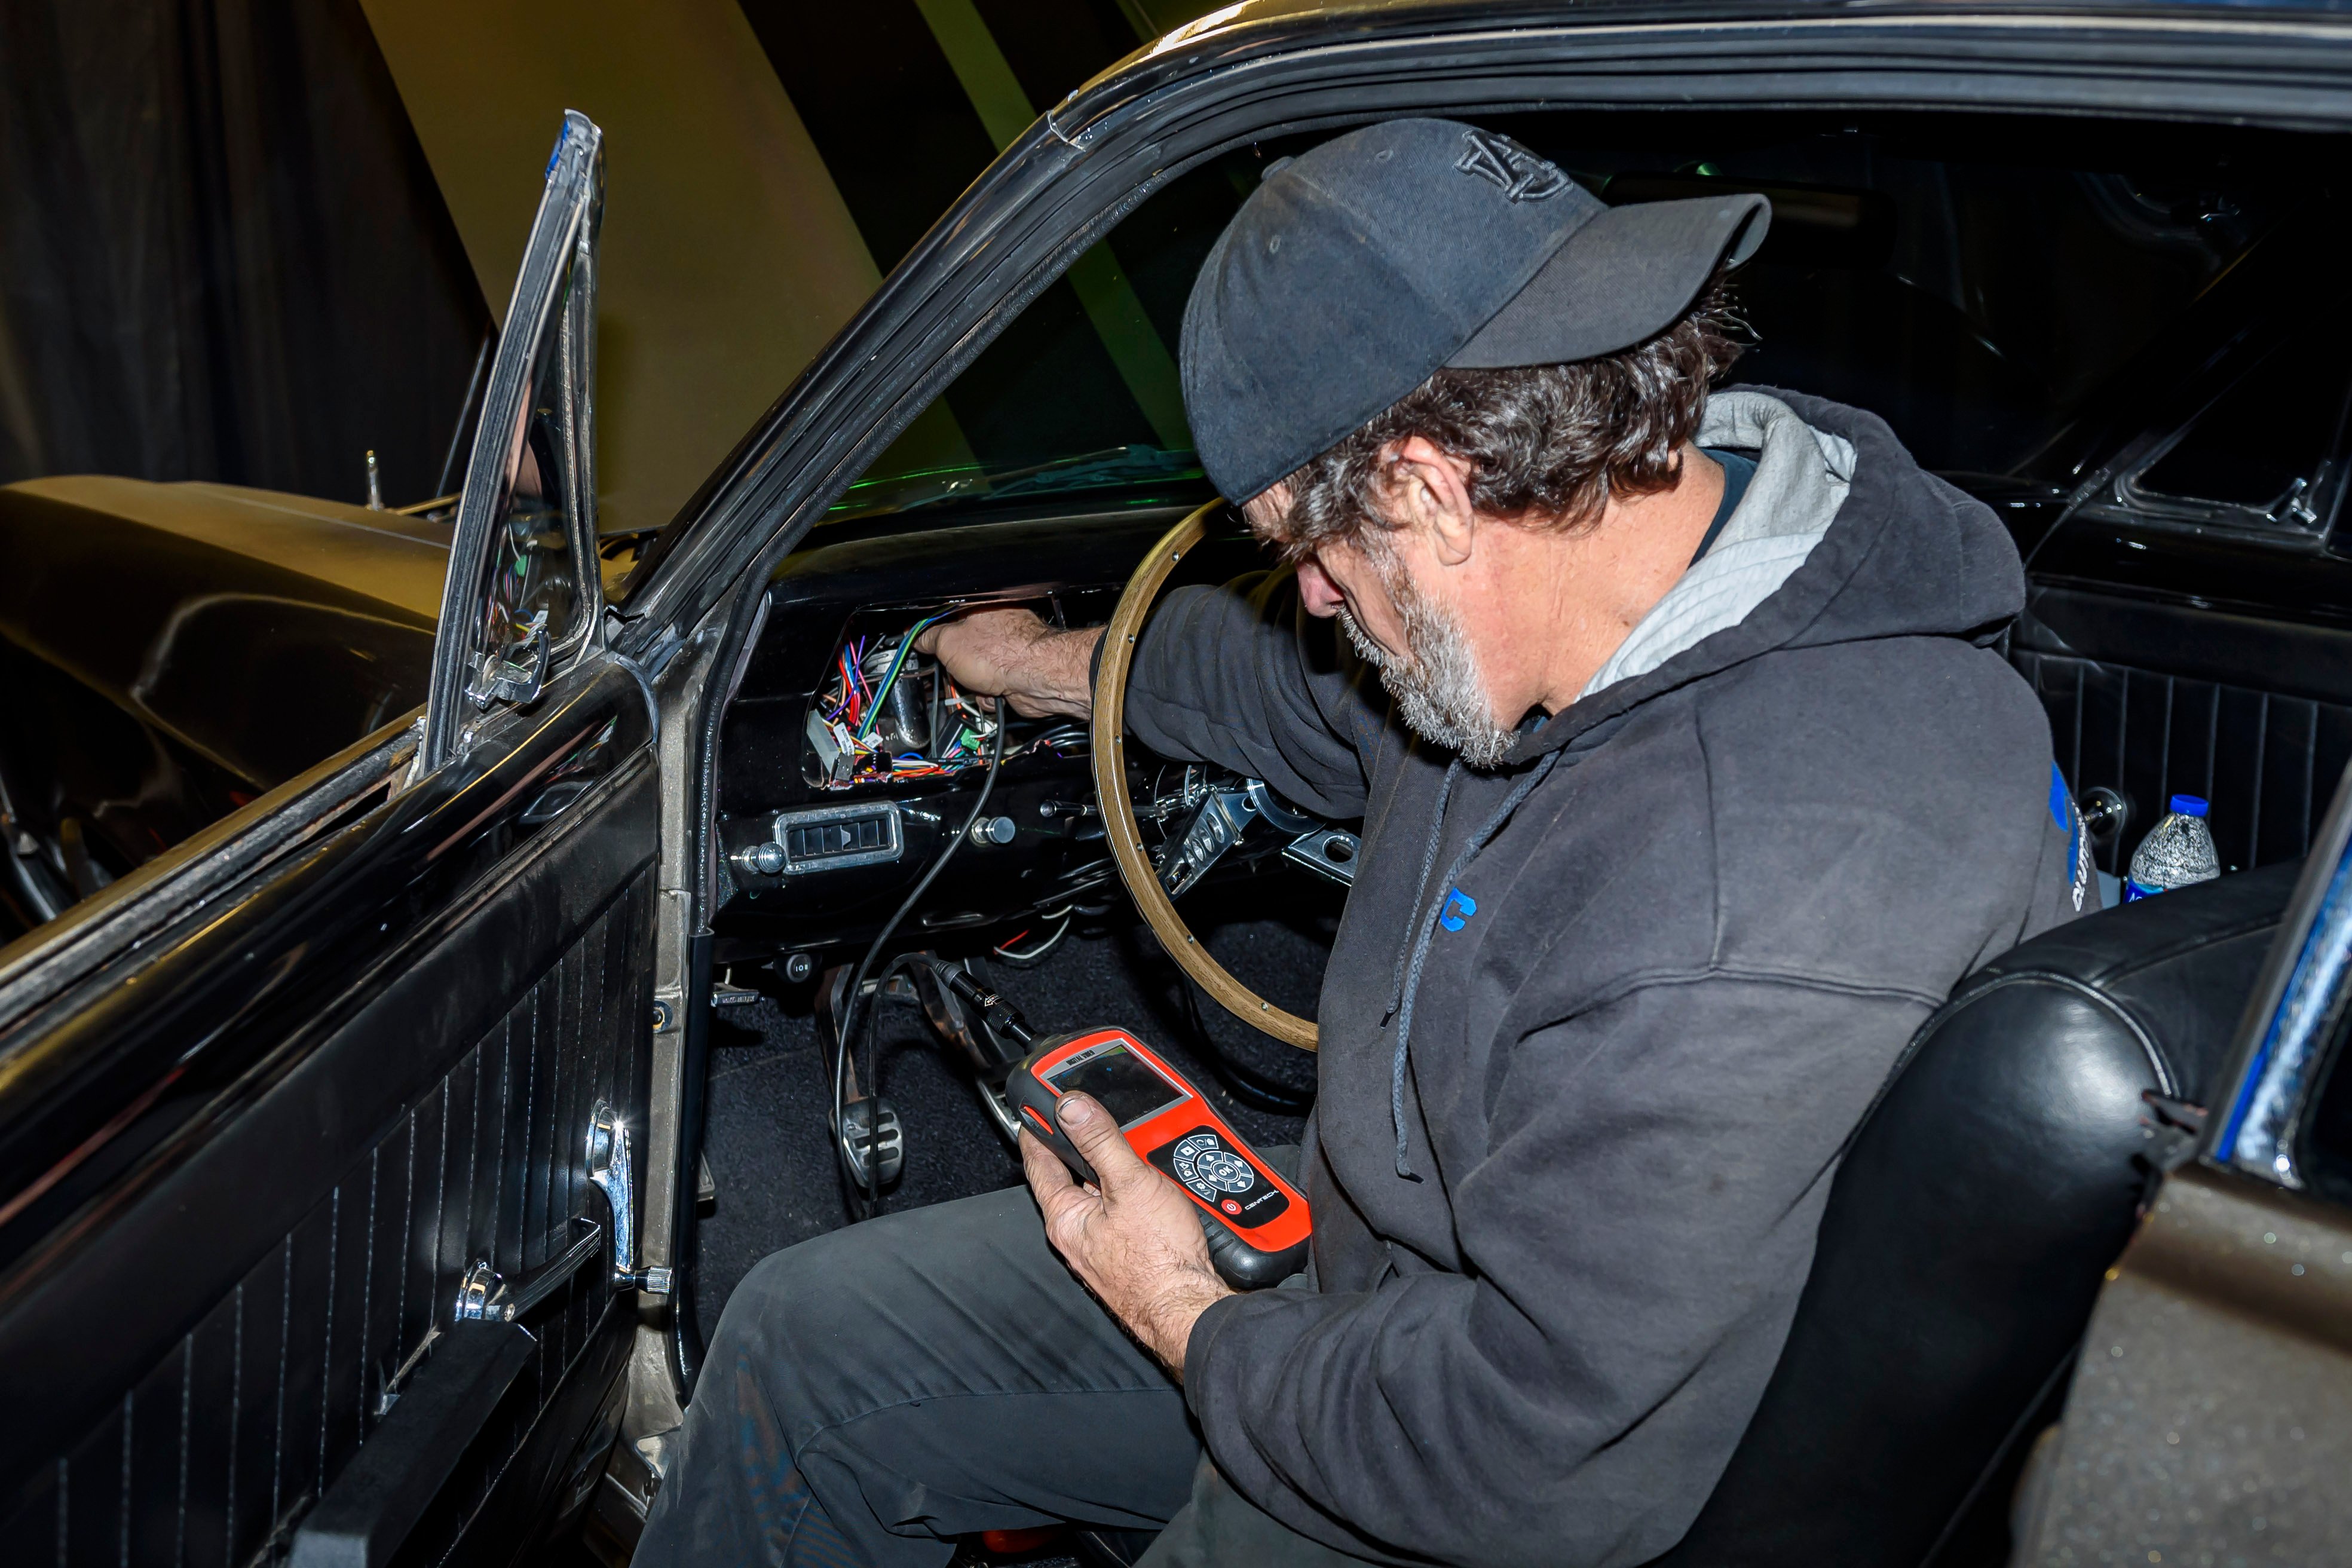
After the trans was in, it was just a matter of hooking everything else back up — hydraulic hose, electrical connections, starter, trans crossmember, driveshaft, and shifter. Before we could test it out, the final step was to top off the master cylinder and bleed the system. That is easier said than done in this car, as the master is under the dash, behind the instrument panel. After pumping the pedal for what seemed like a thousand times, we finally got pressure. We topped it off again, screwed the cap back on, and replaced the instrument cluster. Time for the test drive!

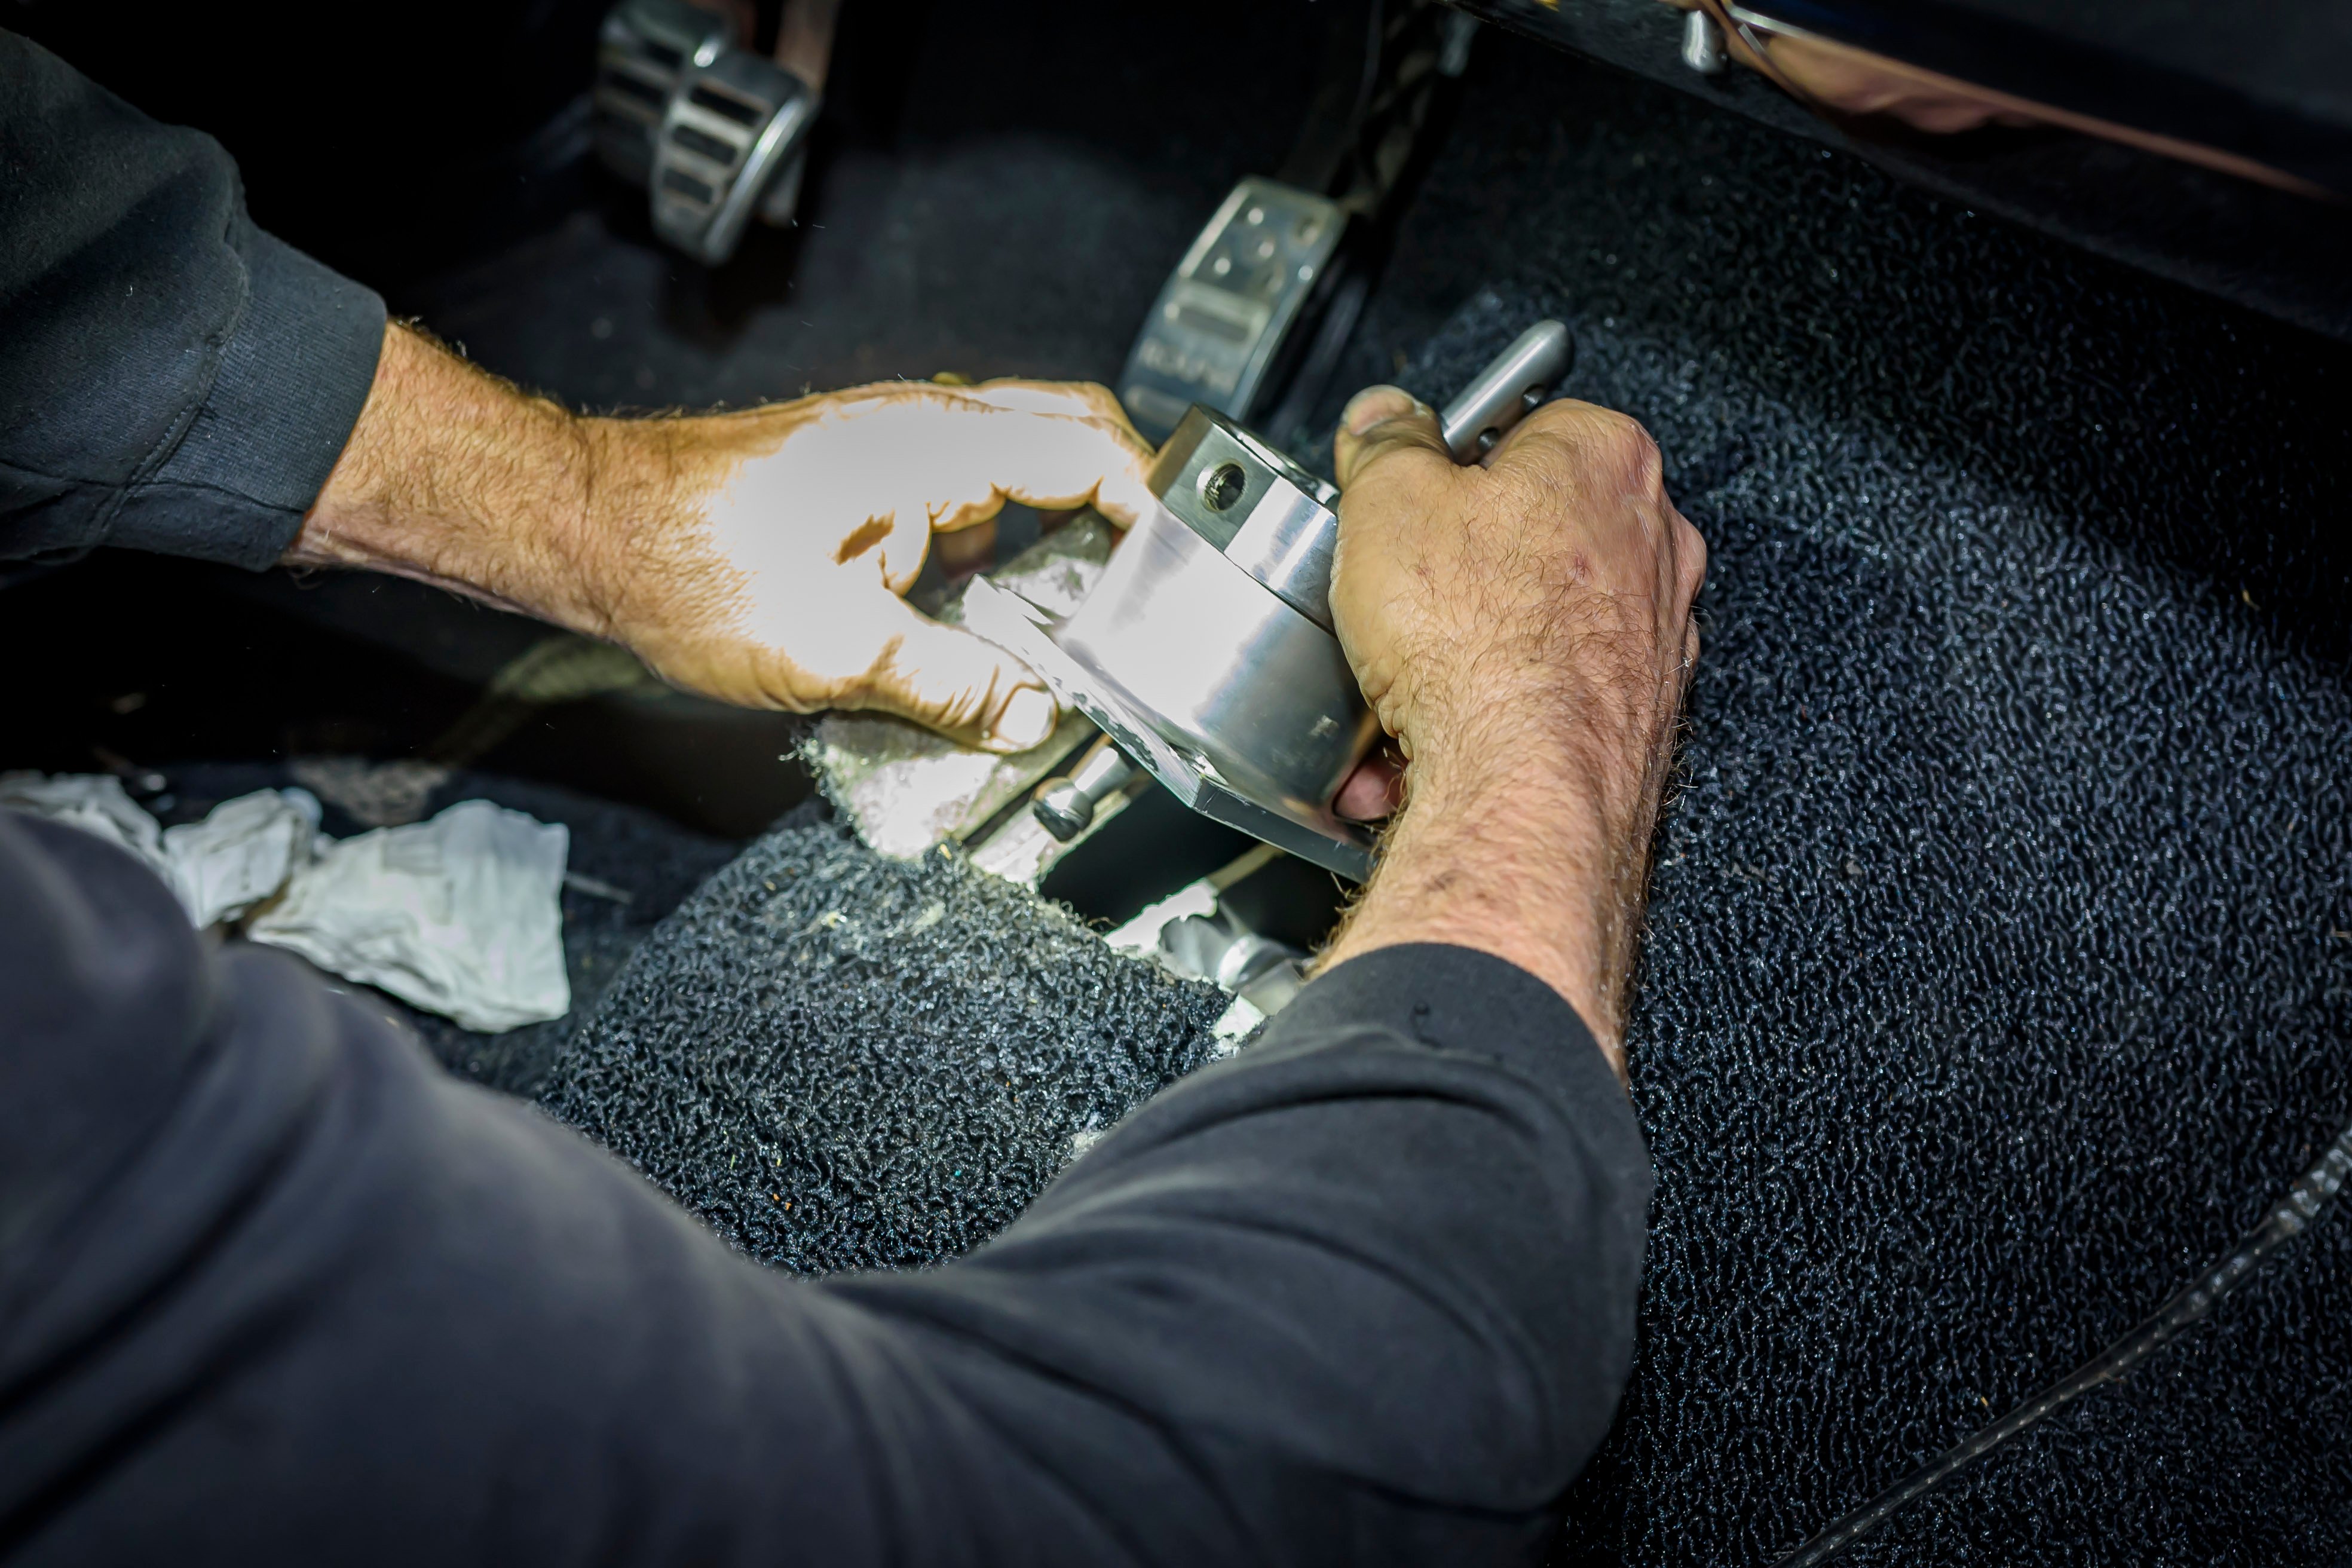
After reconnecting the electronics, driveshaft, and shifter, it was time to refill the master cylinder and bleed the system. Luckily, Danny had a boroscope so we could check the fluid level. Once it was full, it was just a matter of pumping the pedal until all the air was out and topping it off one last time.
Driving Impressions On The New Clutch
The moment I eased out on the new SPEC clutch, I knew I would like this clutch a lot better than the previous one. The pedal feel is maybe slightly springier than it was, which I like. There was no hissing or chatter on engagement, and it is no longer like an on/off switch. The window between engagement and disengagement is still narrow but not as bad as it was, and the clutch is more forgiving if you don’t have the RPM precisely right.
I’ve already gone over the 500-mile mark for the break-in period and settled into the new pedal feel. Obviously, I can’t give any impressions on the new clutch’s longevity or if there is a horsepower/torque difference because I couldn’t do any “before” dyno pulls. Still, I have a butt-dyno that tells me I’m not missing a thing. Based on how I can leave a stoplight without drama, I’m confident this clutch will last as long as advertised.
I can’t thank David enough for taking the time to listen to my needs and tailoring the entire assembly to meet them. I have to give Danny a special shoutout for doing all the work — I wasn’t looking forward to doing it by myself on my back in the garage! If you are in the market for a high-quality, made-in-the-USA clutch replacement or upgrade, give the folks at SPEC Clutch a call. I’m sure they have something for your application.
After 500 miles, I’ve really fallen in love with how much better this clutch engages over the old one. It is much smoother leaving stoplights and doesn’t chatter or hiss when I don’t have the revs perfect. I know I will enjoy it for many more years to come, thanks to SPEC Clutch!


