Regular readers are aware of the rapid progress on Project F-Word, as things have escalated quickly on our 1969 F100 project truck since being disassembled and rebuilt from the ground up. Now that the chassis and suspension are mostly sorted out, we’ve swapped a Ford Performance Gen 3, 5.0-liter Coyote Aluminator (more on that install to come) and a Tremec T56 Magnum 6-speed from Silver Sport into. This time, we go into re-designing and plumbing the fuel system to feed that Coyote.
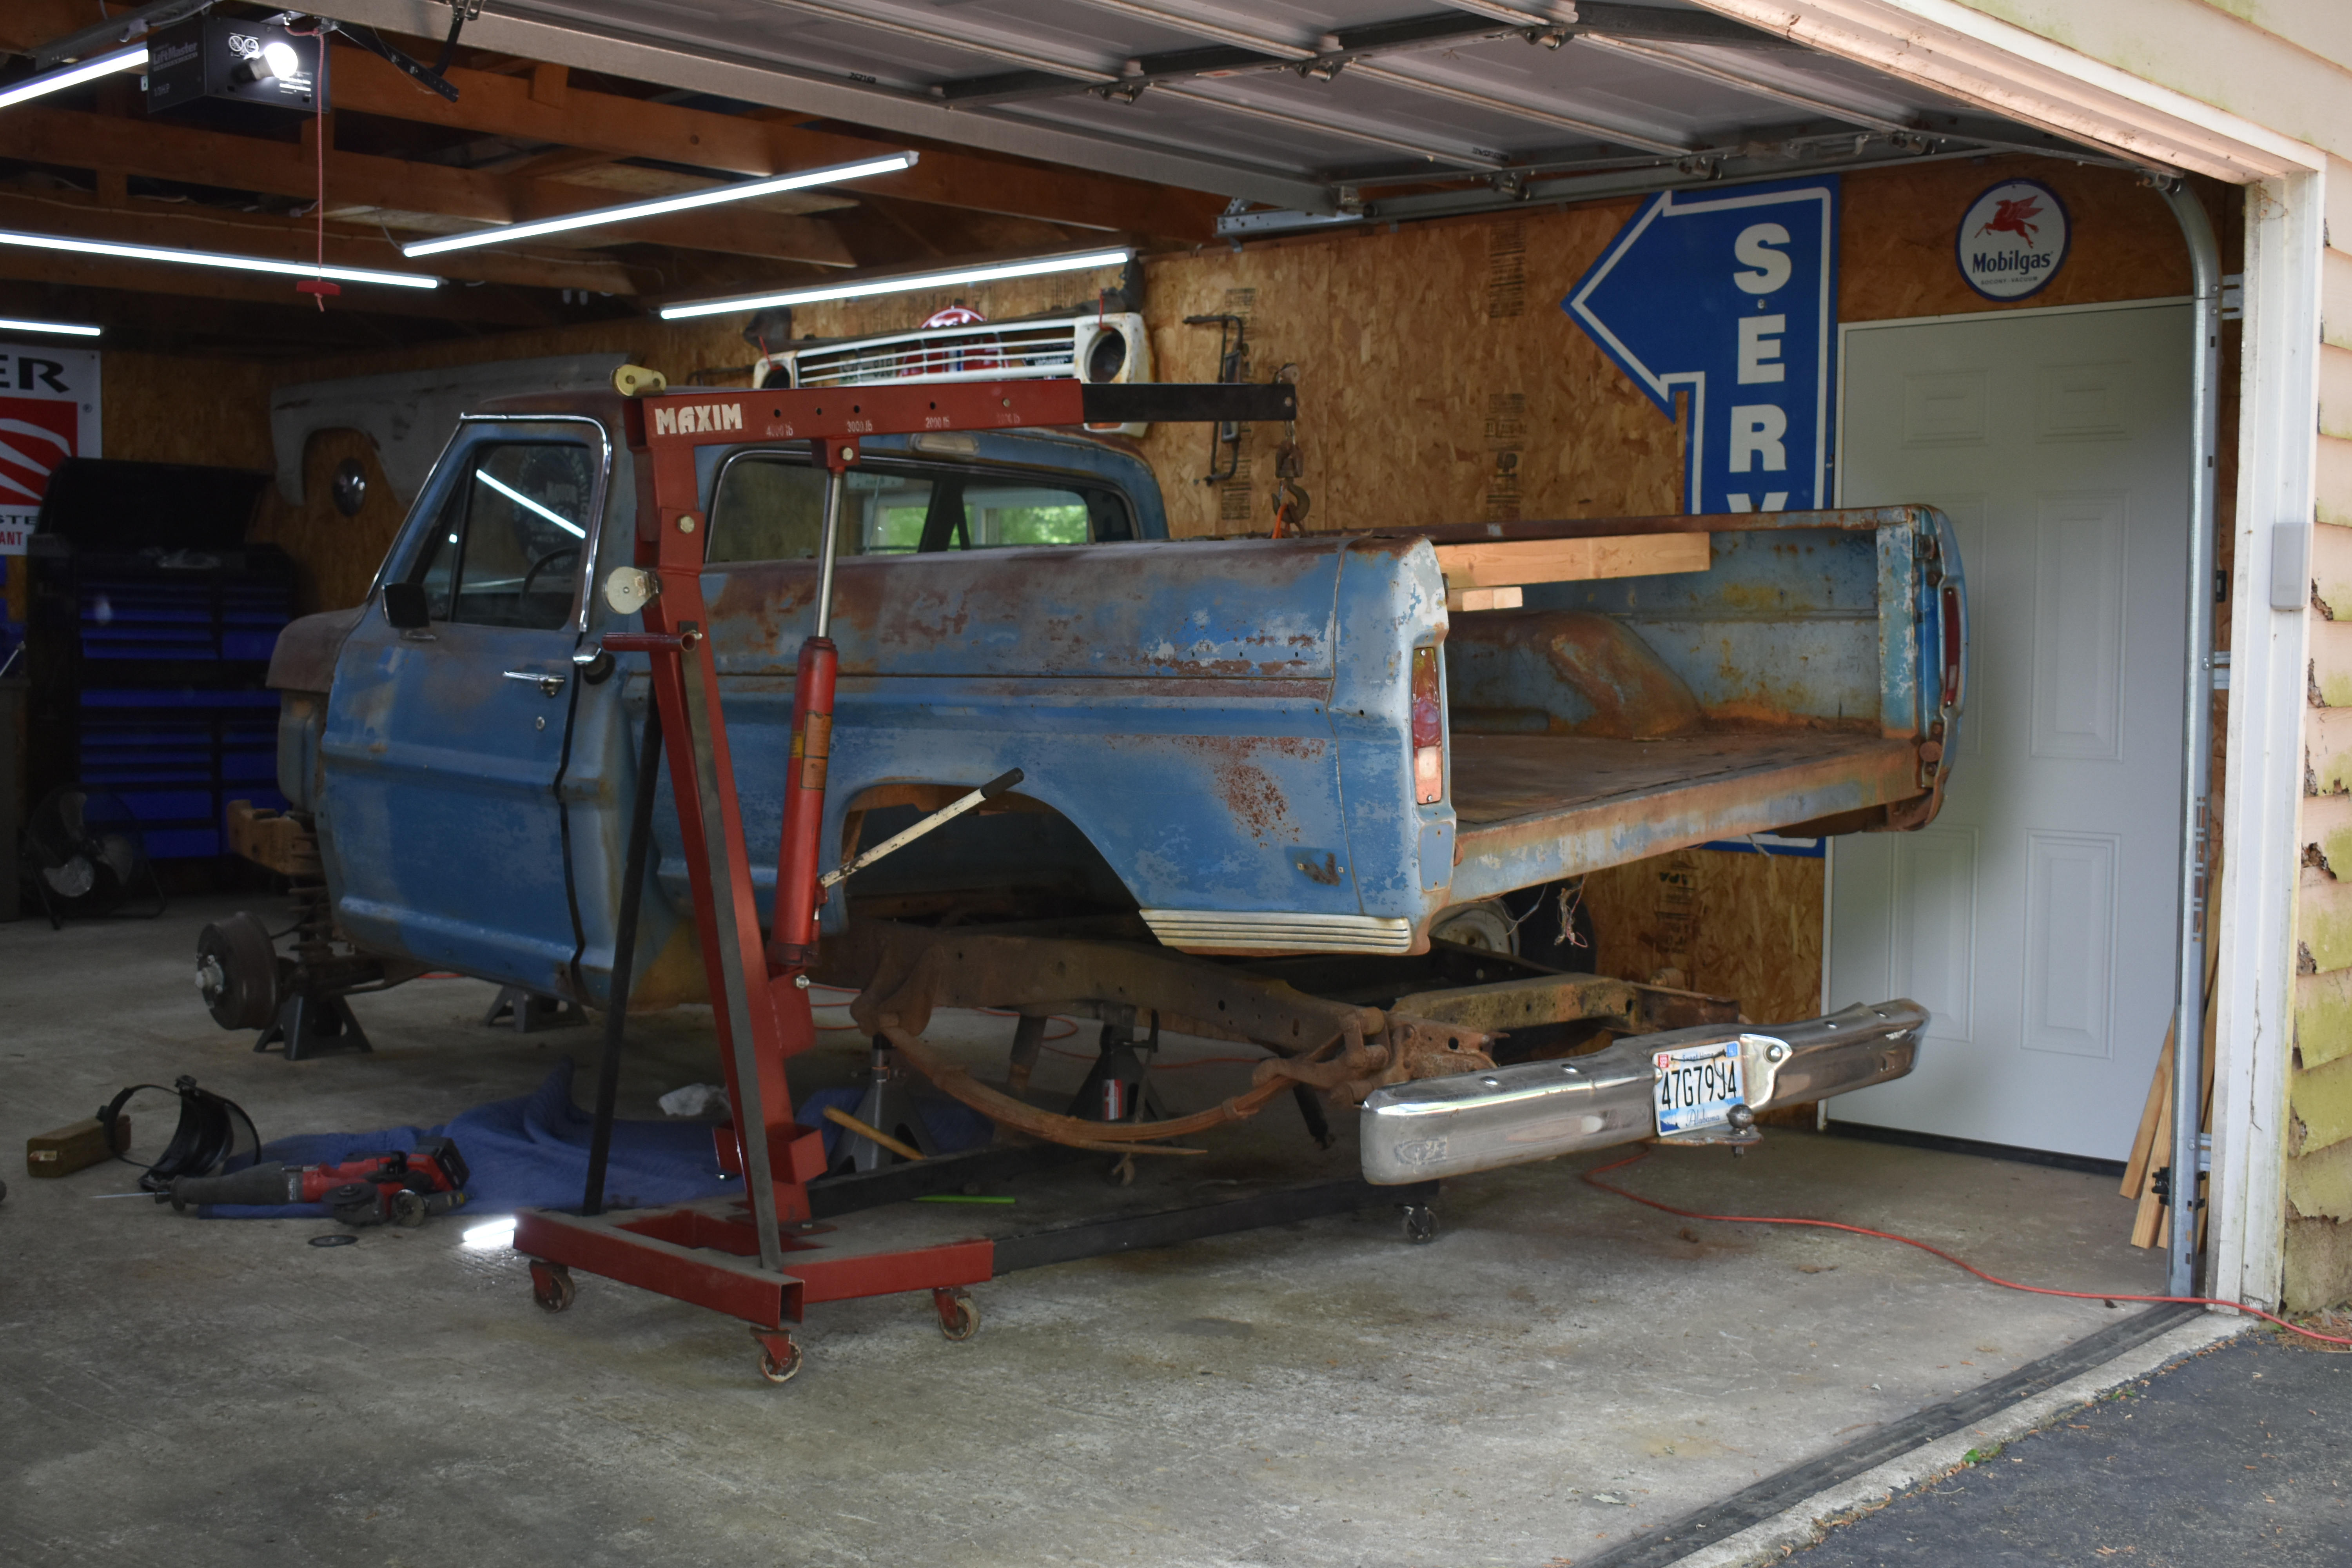
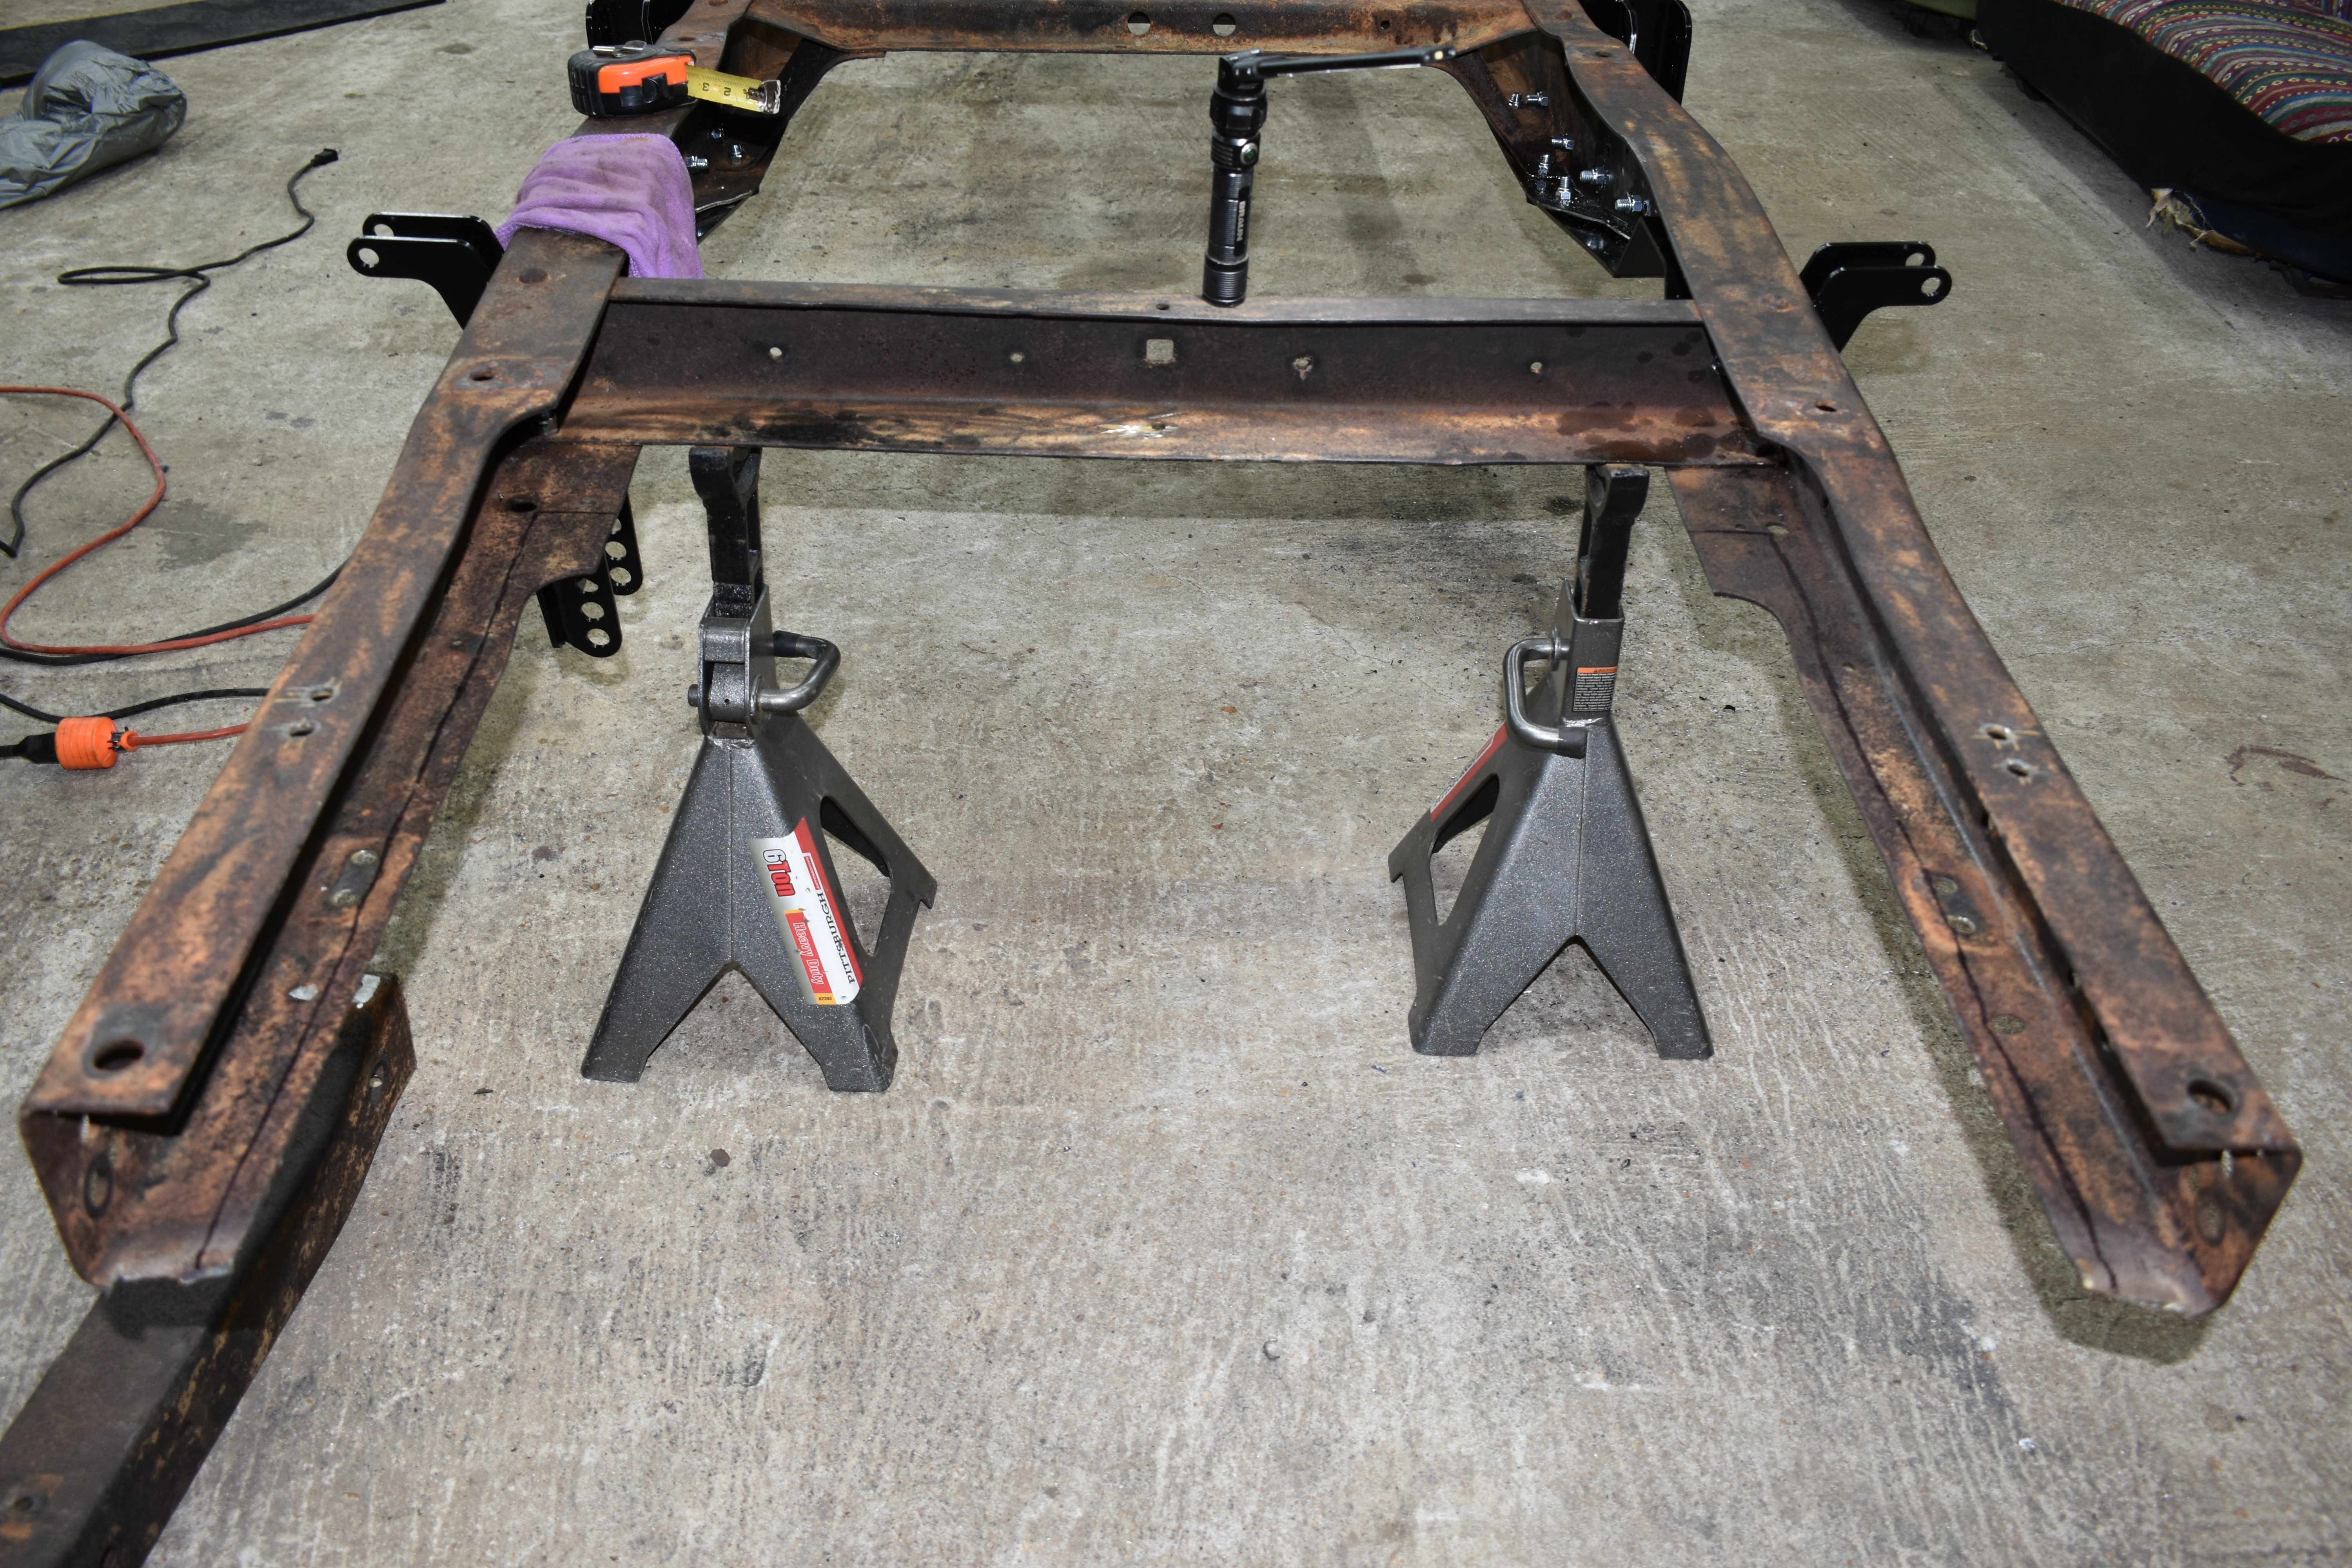
The first step in relocating the gas tank is to remove it (obviously—this truck didn’t have the stock tank anymore, saving us that step), and then yank the bed off the frame. It’s only a few bolts holding the bed in place. Of course, support the frame with jack stands!
In case you weren’t aware, 1960s trucks had their fuel tank in the cab, behind the seat; Chevy and Ford both. This is obviously not the safest location to put it—you’re essentially driving a bomb with all the fuel directly behind you at all times. That’s why it’s common for owners of these trucks to relocate the tanks to the rear portion of the truck under the bed, where the factories eventually moved them.
We have found that Holley has a neat “wish list” feature of their website where you can spec out and order all the parts you need in one step. So, we went hunting.
In the case of our project truck, which should make a lot of steam with the hot Coyote motor under the hood, we wanted to do just that—move the tank away from the driver and put it under the bed. Turns out that a 1969-1970 Mustang gas tank fits almost perfectly between the frame rails with just a tiny amount of effort. So that’s what we did, mostly using Holley’s parts along the way.
We started with the 400 lph Sniper EFI Fuel Tank System capable of supporting up to 750 horsepower. We added the renowned HydraMat Fuel Mat for good measure to prevent starvation, though the included tank does have a 4.3-liter internal baffle. The fuel system comes complete with the galvanized and powder coated tank, 400lph in-tank fuel pump, hanger, and sending unit so that all you need to do is plumb it to your fuel rails and wire it up.
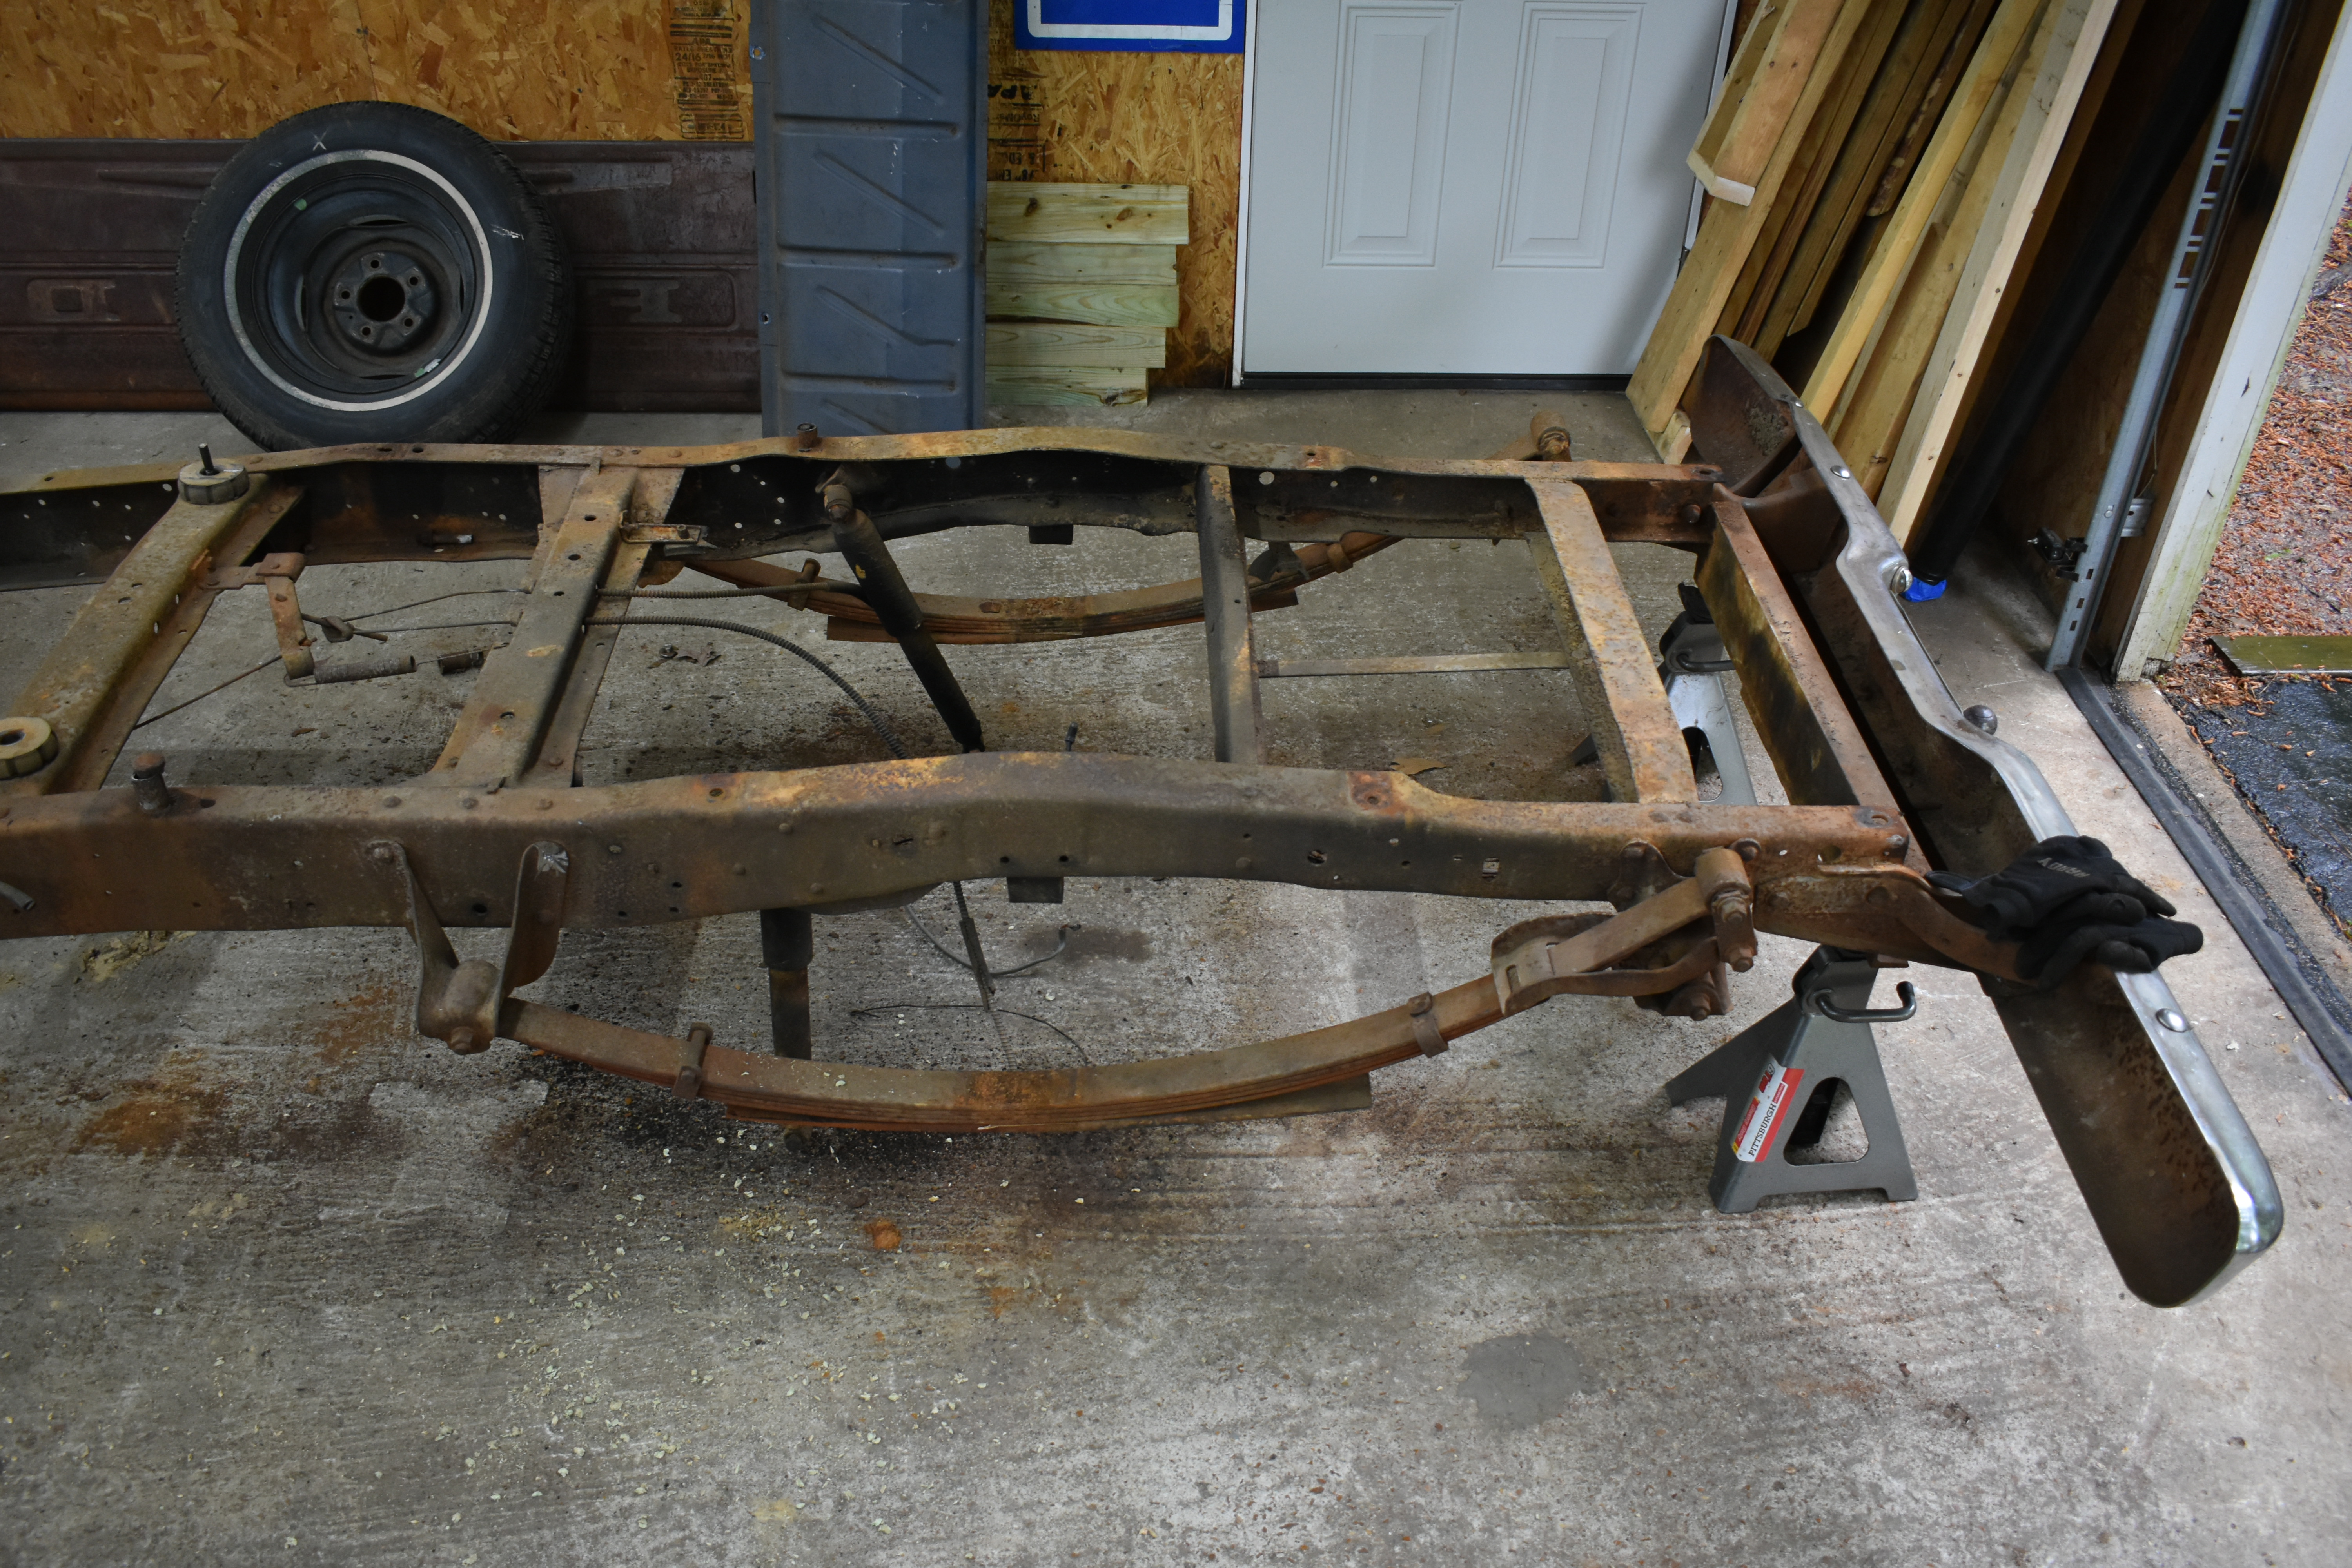
Next, remove the rear bumper and brackets from the frame to provide better access to the rear crossmember, which needs to be relocated to make room for the gas tank. (You’ll notice that we’ve totally stripped the truck at this point).
We set out to accomplish that task, starting with removing the truck bed and rear bumper/brackets to allow us to move the center frame crossmember rearward enough to fit the Mustang tank. Then we supported the rear frame with jack stands to make it sturdy.
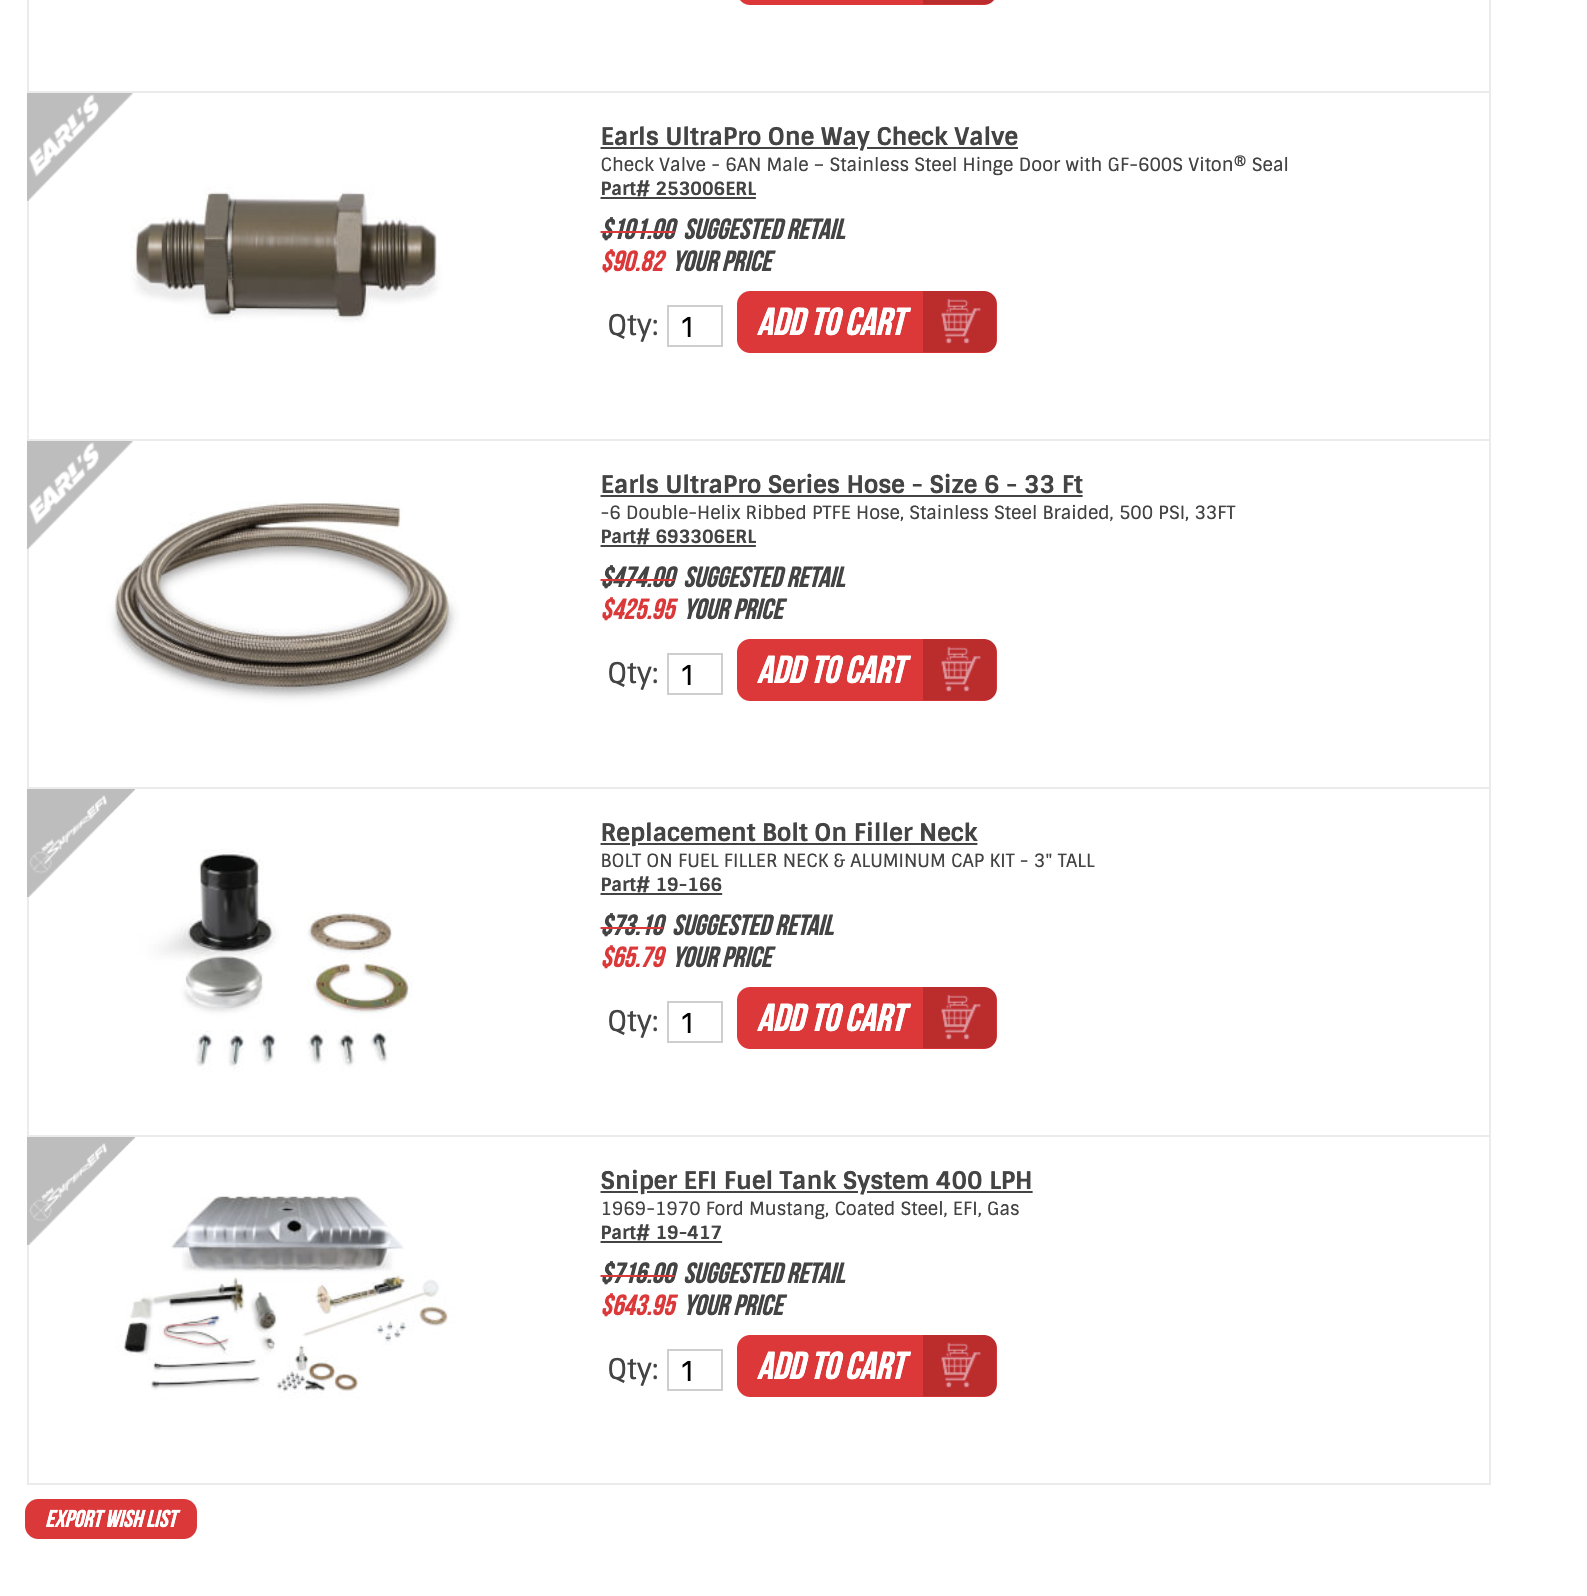
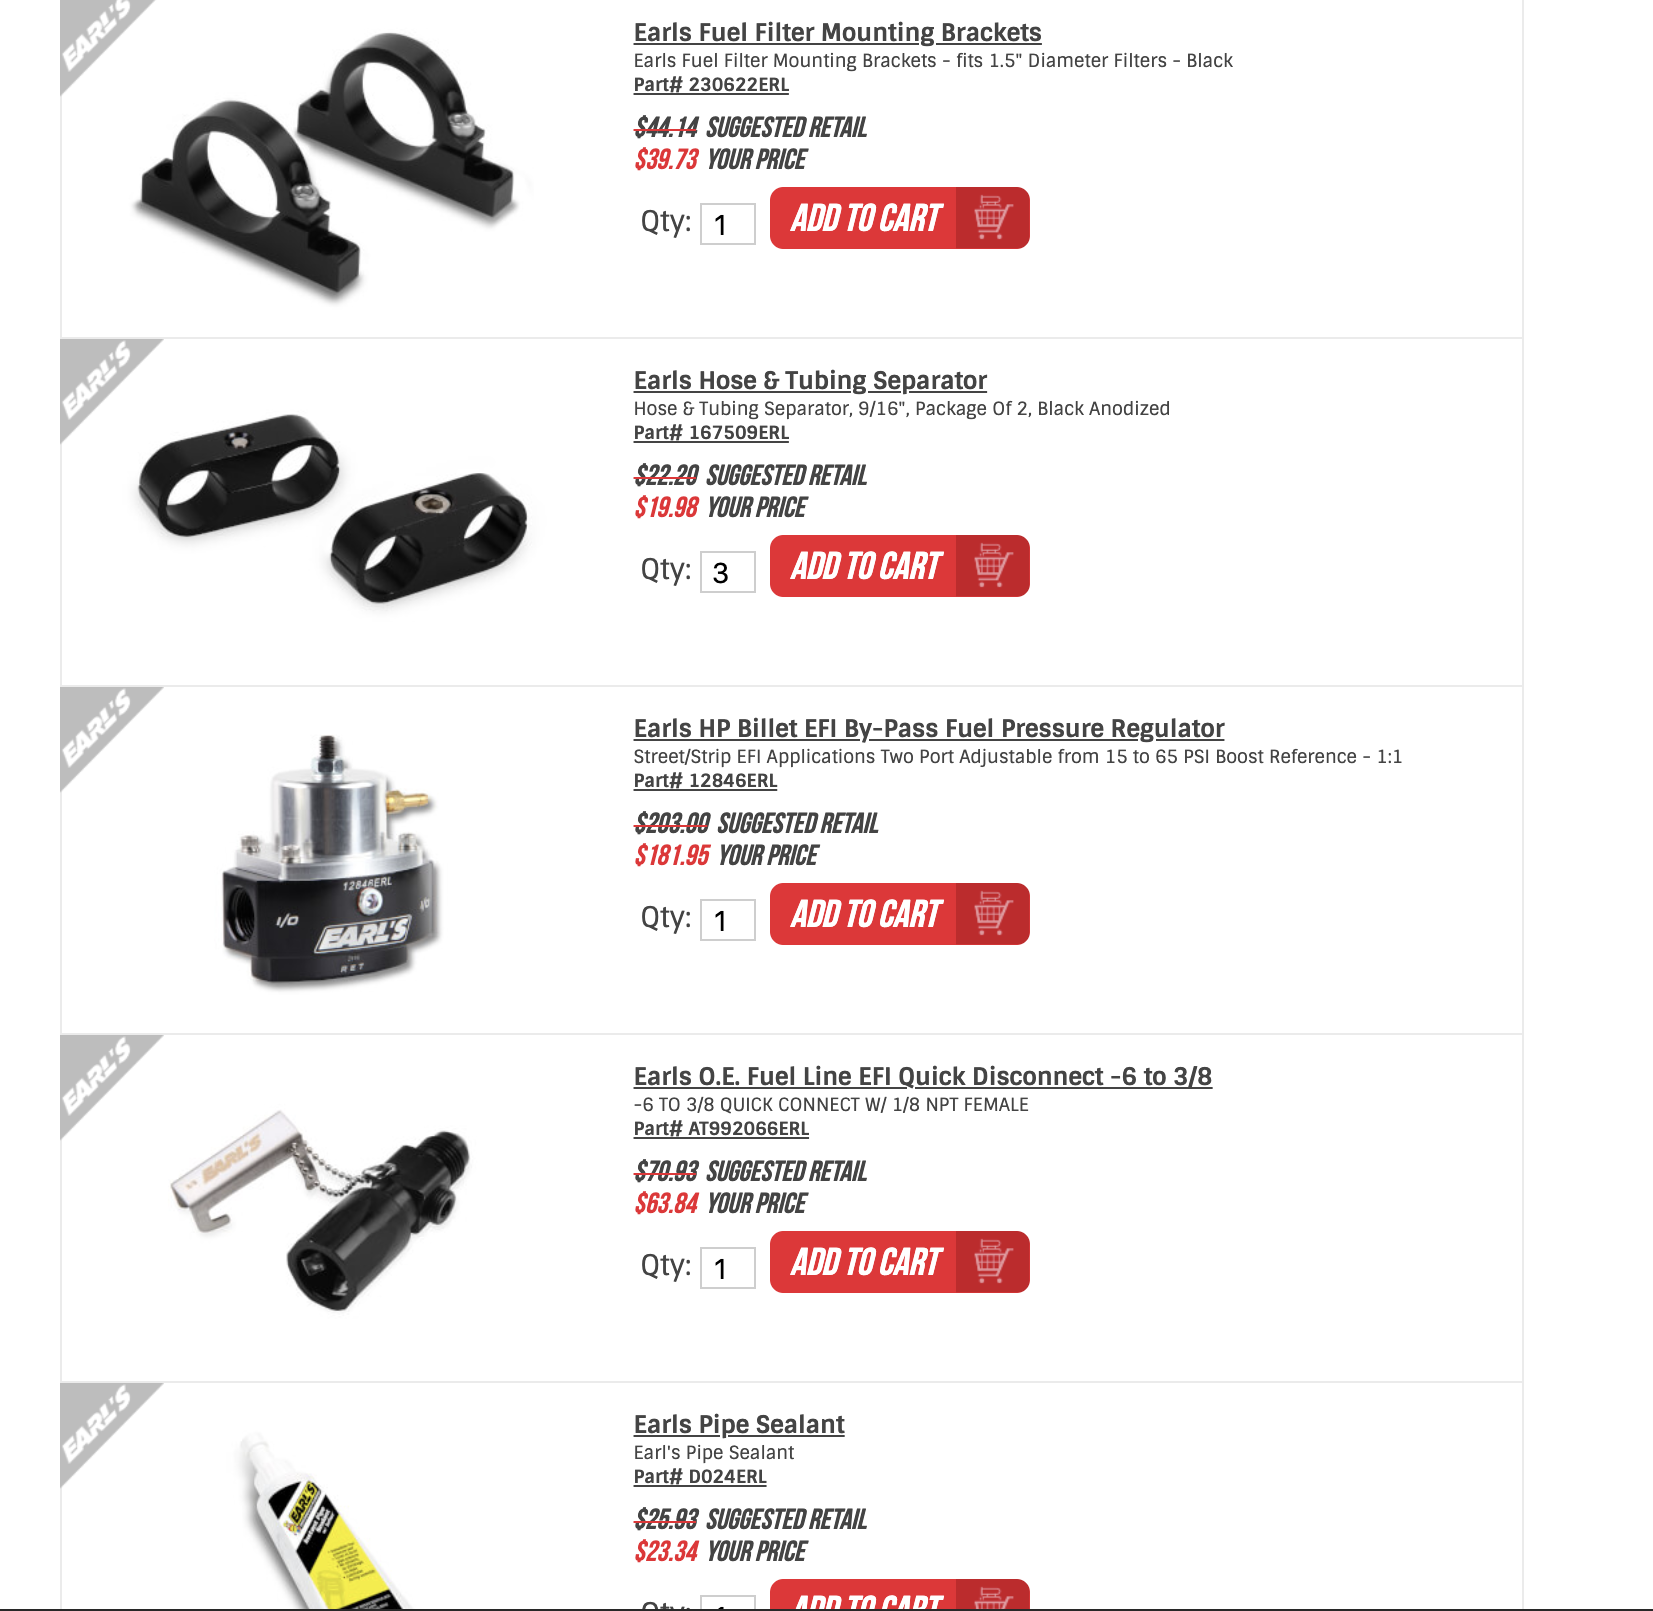
Next, we ordered up all the parts and fuel system hose, fittings, and such from Holley’s online wish list feature, and put it all together. This is a nice feature on Holley’s site—we use it all the time. Now that we have a complete, relocated (and safer!) fuel system to feed that hungry Coyote, this puppy is almost ready to hit the road and tear up a few autocrosses!
The Parts List
- Holley Sniper EFI fuel tank system (400 lph) for 1969-1970 Ford Mustang (Part# 19-417)
- Holley Hydramat (3×8) 11mm center outlet with 6 lock pin position (Part# 16-124)
- Earls 100 gph billet aluminum fuel filter – 10 Micron, – 6 AN female inlet and outlet (Part# 230606ERL)
- Earls -6 AN bulkhead nut (Part# AT592406ERL)
- Earls -6 AN Male to 3/4″-16 (Part# AT985068ERL)
- Earls -6 AN Male to 9/16″-18 (Part# AT985006ERL)
- Earls 2-piece aluminum adjustable AN wrench set (Part# 230351ERL)
- Earls 90-degree -6 AN bulkhead (Part# AT983306ERL)
- Earls Flame Guard insulation, 10 feet (Part# 571008ERL)
- Earls fuel filter mounting brackets (Part# 230622ERL)
- Earls hose and tubing separator (Part# 167509ERL)
- Earls HP billet EFI by-pass fuel pressure regulator (Part# 12846ERL)
- Earls O.E. fuel line EFI quick disconnect -6 to 3/8 (Part# AT992066ERL)
- Earls pipe sealant (Part# D024ERL)
- Earls pressure gauge (Part# 100187ERL)
- Earls straight male AN -6 to 1/4″ (Part# AT981606ERL)
- Earls UltraPro hose end -6 AN (Part# 620106ERL)
- Earls UltraPro hose end -6 AN 120-degree bent tube hose end (Part# 621206ERL)
- Earls UltraPro hose end -6 AN 45-degree forged tube hose end (Part# 624506ERL)
- Earls UltraPro hose end -6 AN 90-degree forged tube hose end (Part# 629006ERL)
- Earls UltraPro hose end -6 AN 90-degree bent tube hose end (Part# 629106ERL)
- Earls UltraPro one way check valve – 6AN male – stainless steel hinge door with Viton seal (Part# 253006ERL)
- Earls UltraPro Series hose, 33 feet -6 double-helix ribbed PTFE hose (Part# 693306ERL)
- Holley Replacement bolt-on filler neck and aluminum cap kit (Part# 19-166)
- Summit/Tanks Inc Fuel Tank Mounting Straps (Part# TNK-UMS)
Cut, Grind, Weld

To remove the crossmember, we used a grinder, chisel, and punch to knock off the rivets holding it in place. Then moved the crossmember to the rearmost portion of the frame, and flipped it upside down so the “hump” is facing down towards the ground. Finally, align the rear bed bolt holes and enlarge them to make sure they will fit the bed bolts. These are on the top side of the frame.
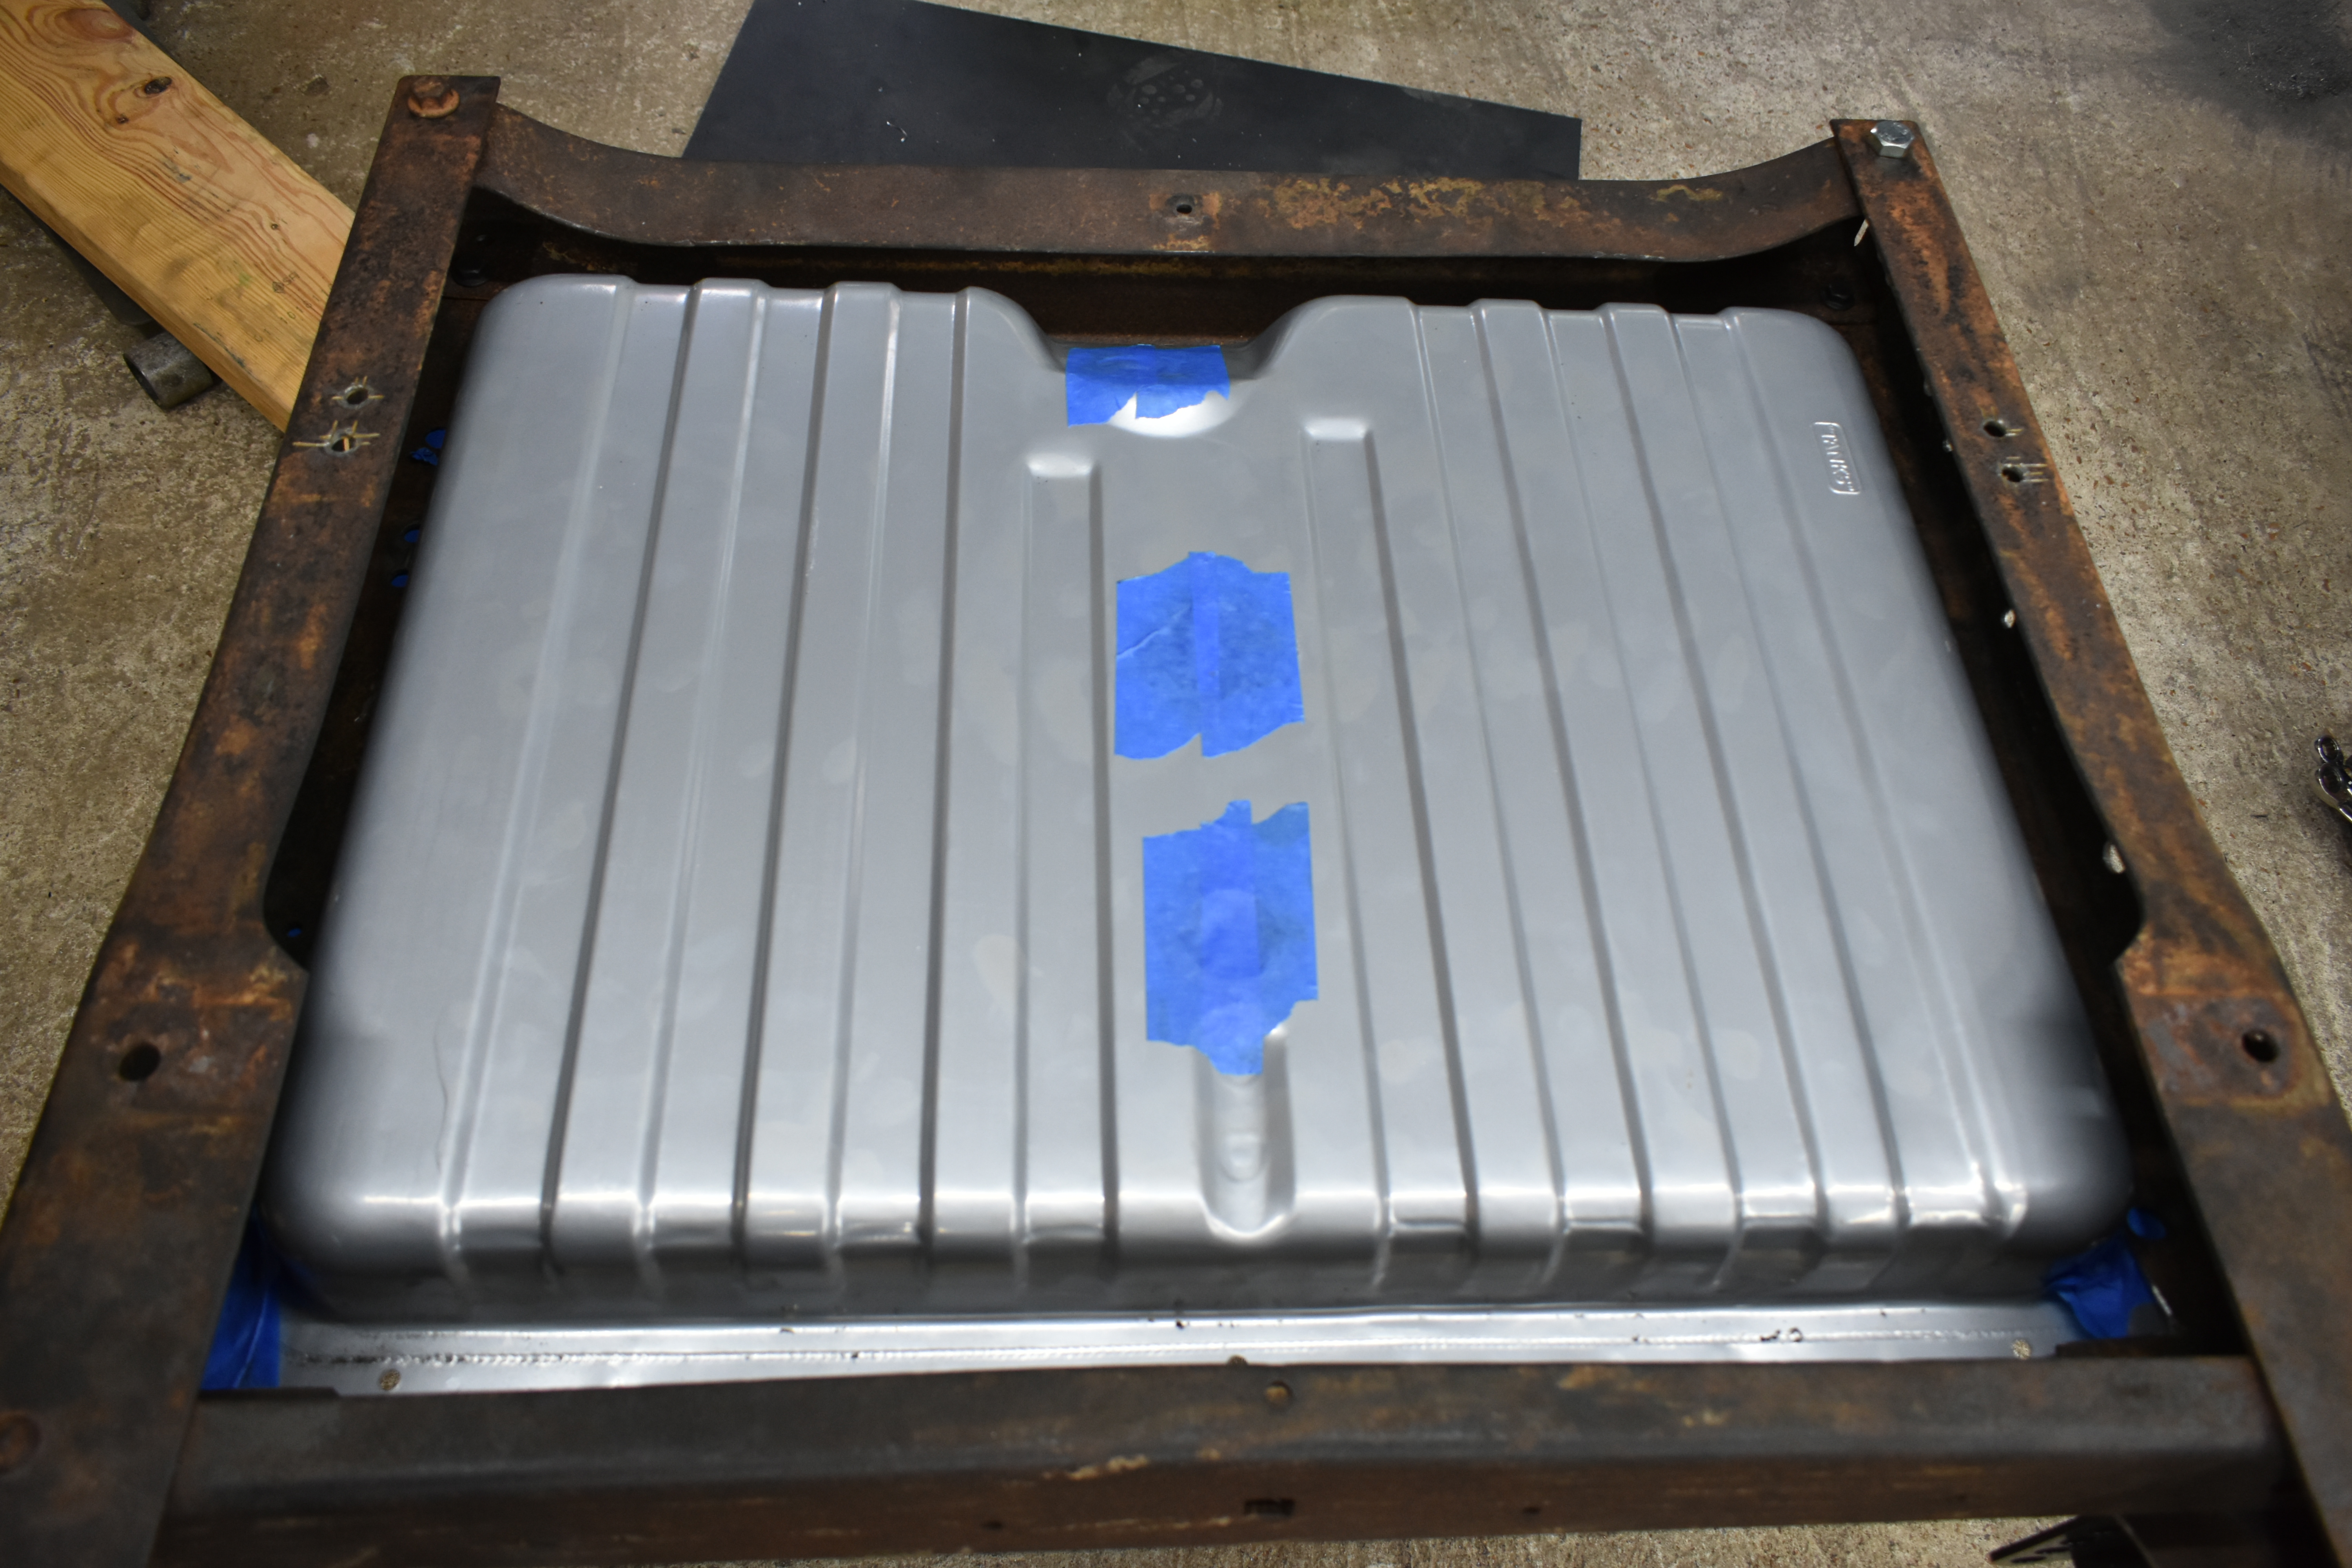
Now it’s time to mock the Holley Sniper tank into the location we have selected for it to go. After seeing that it’s very close to just slipping right in, we took some overall width measurements and removed about a half-inch of the bottom portion of the frame rail on each side. This is to allow the tank to fit flush against the rail and in the position we wanted. (If the tank doesn’t have the pump, fill, and sending unit installed, make sure to tape up the holes so nothing gets into your clean and new tank).
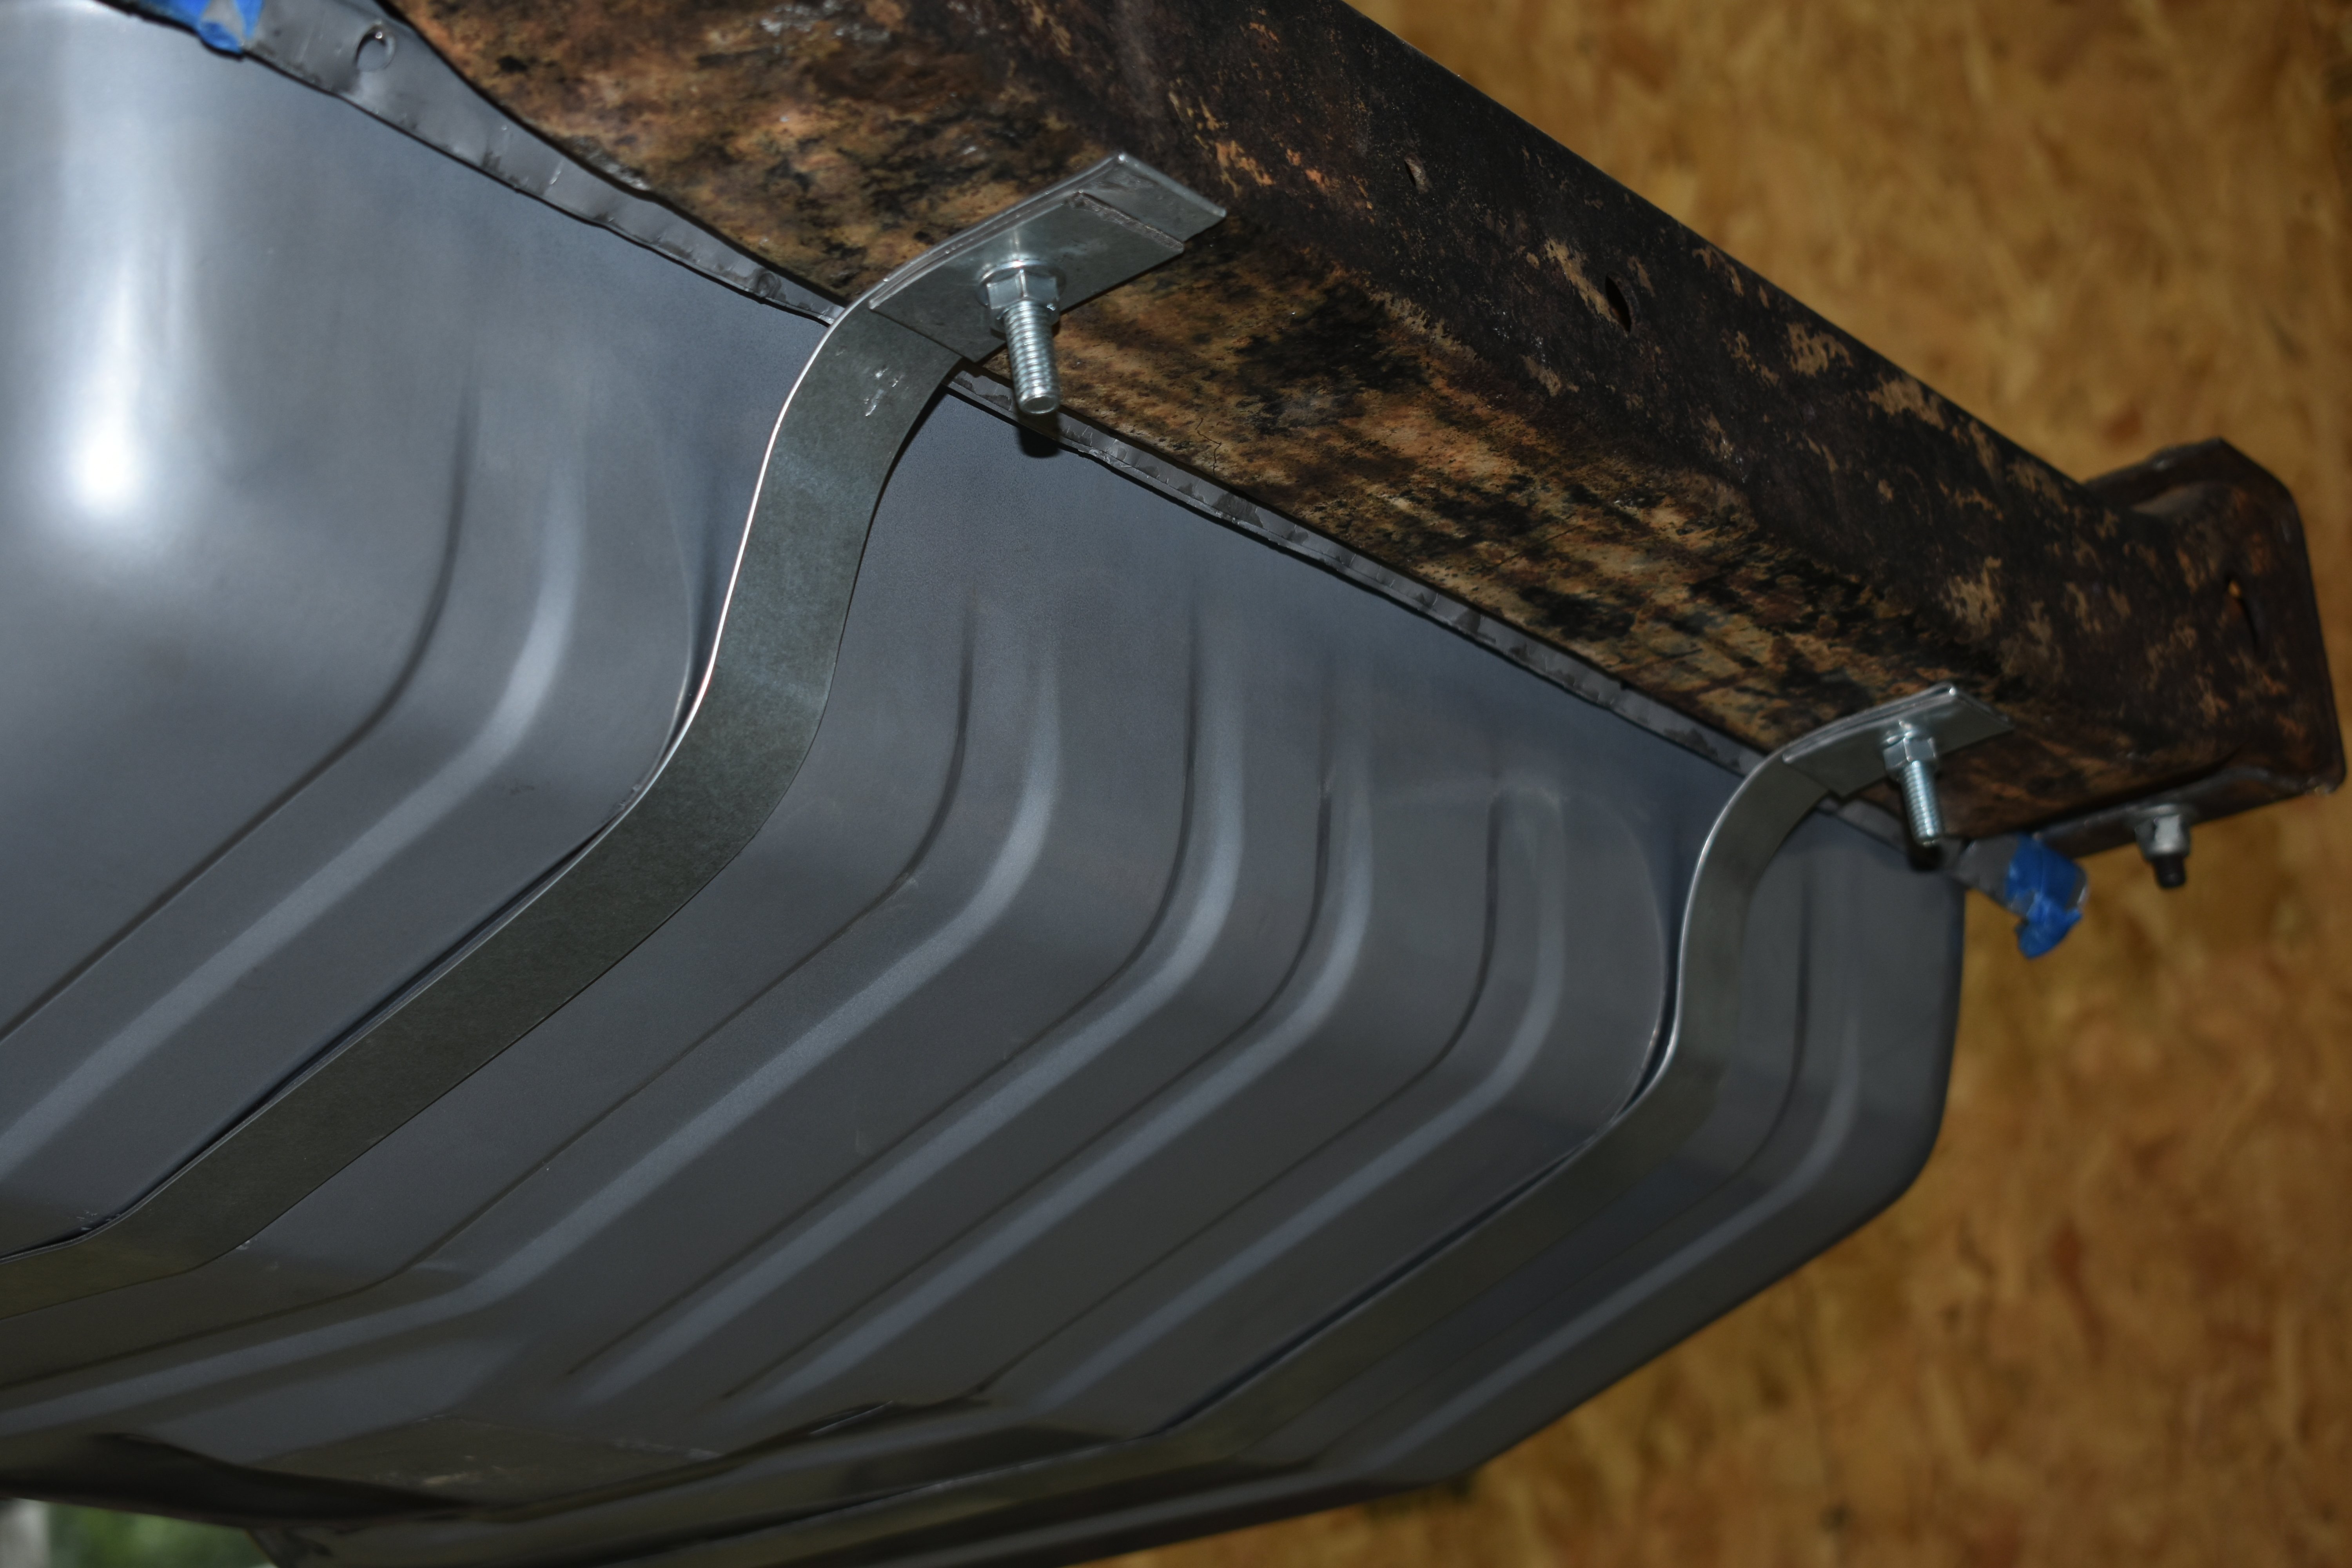
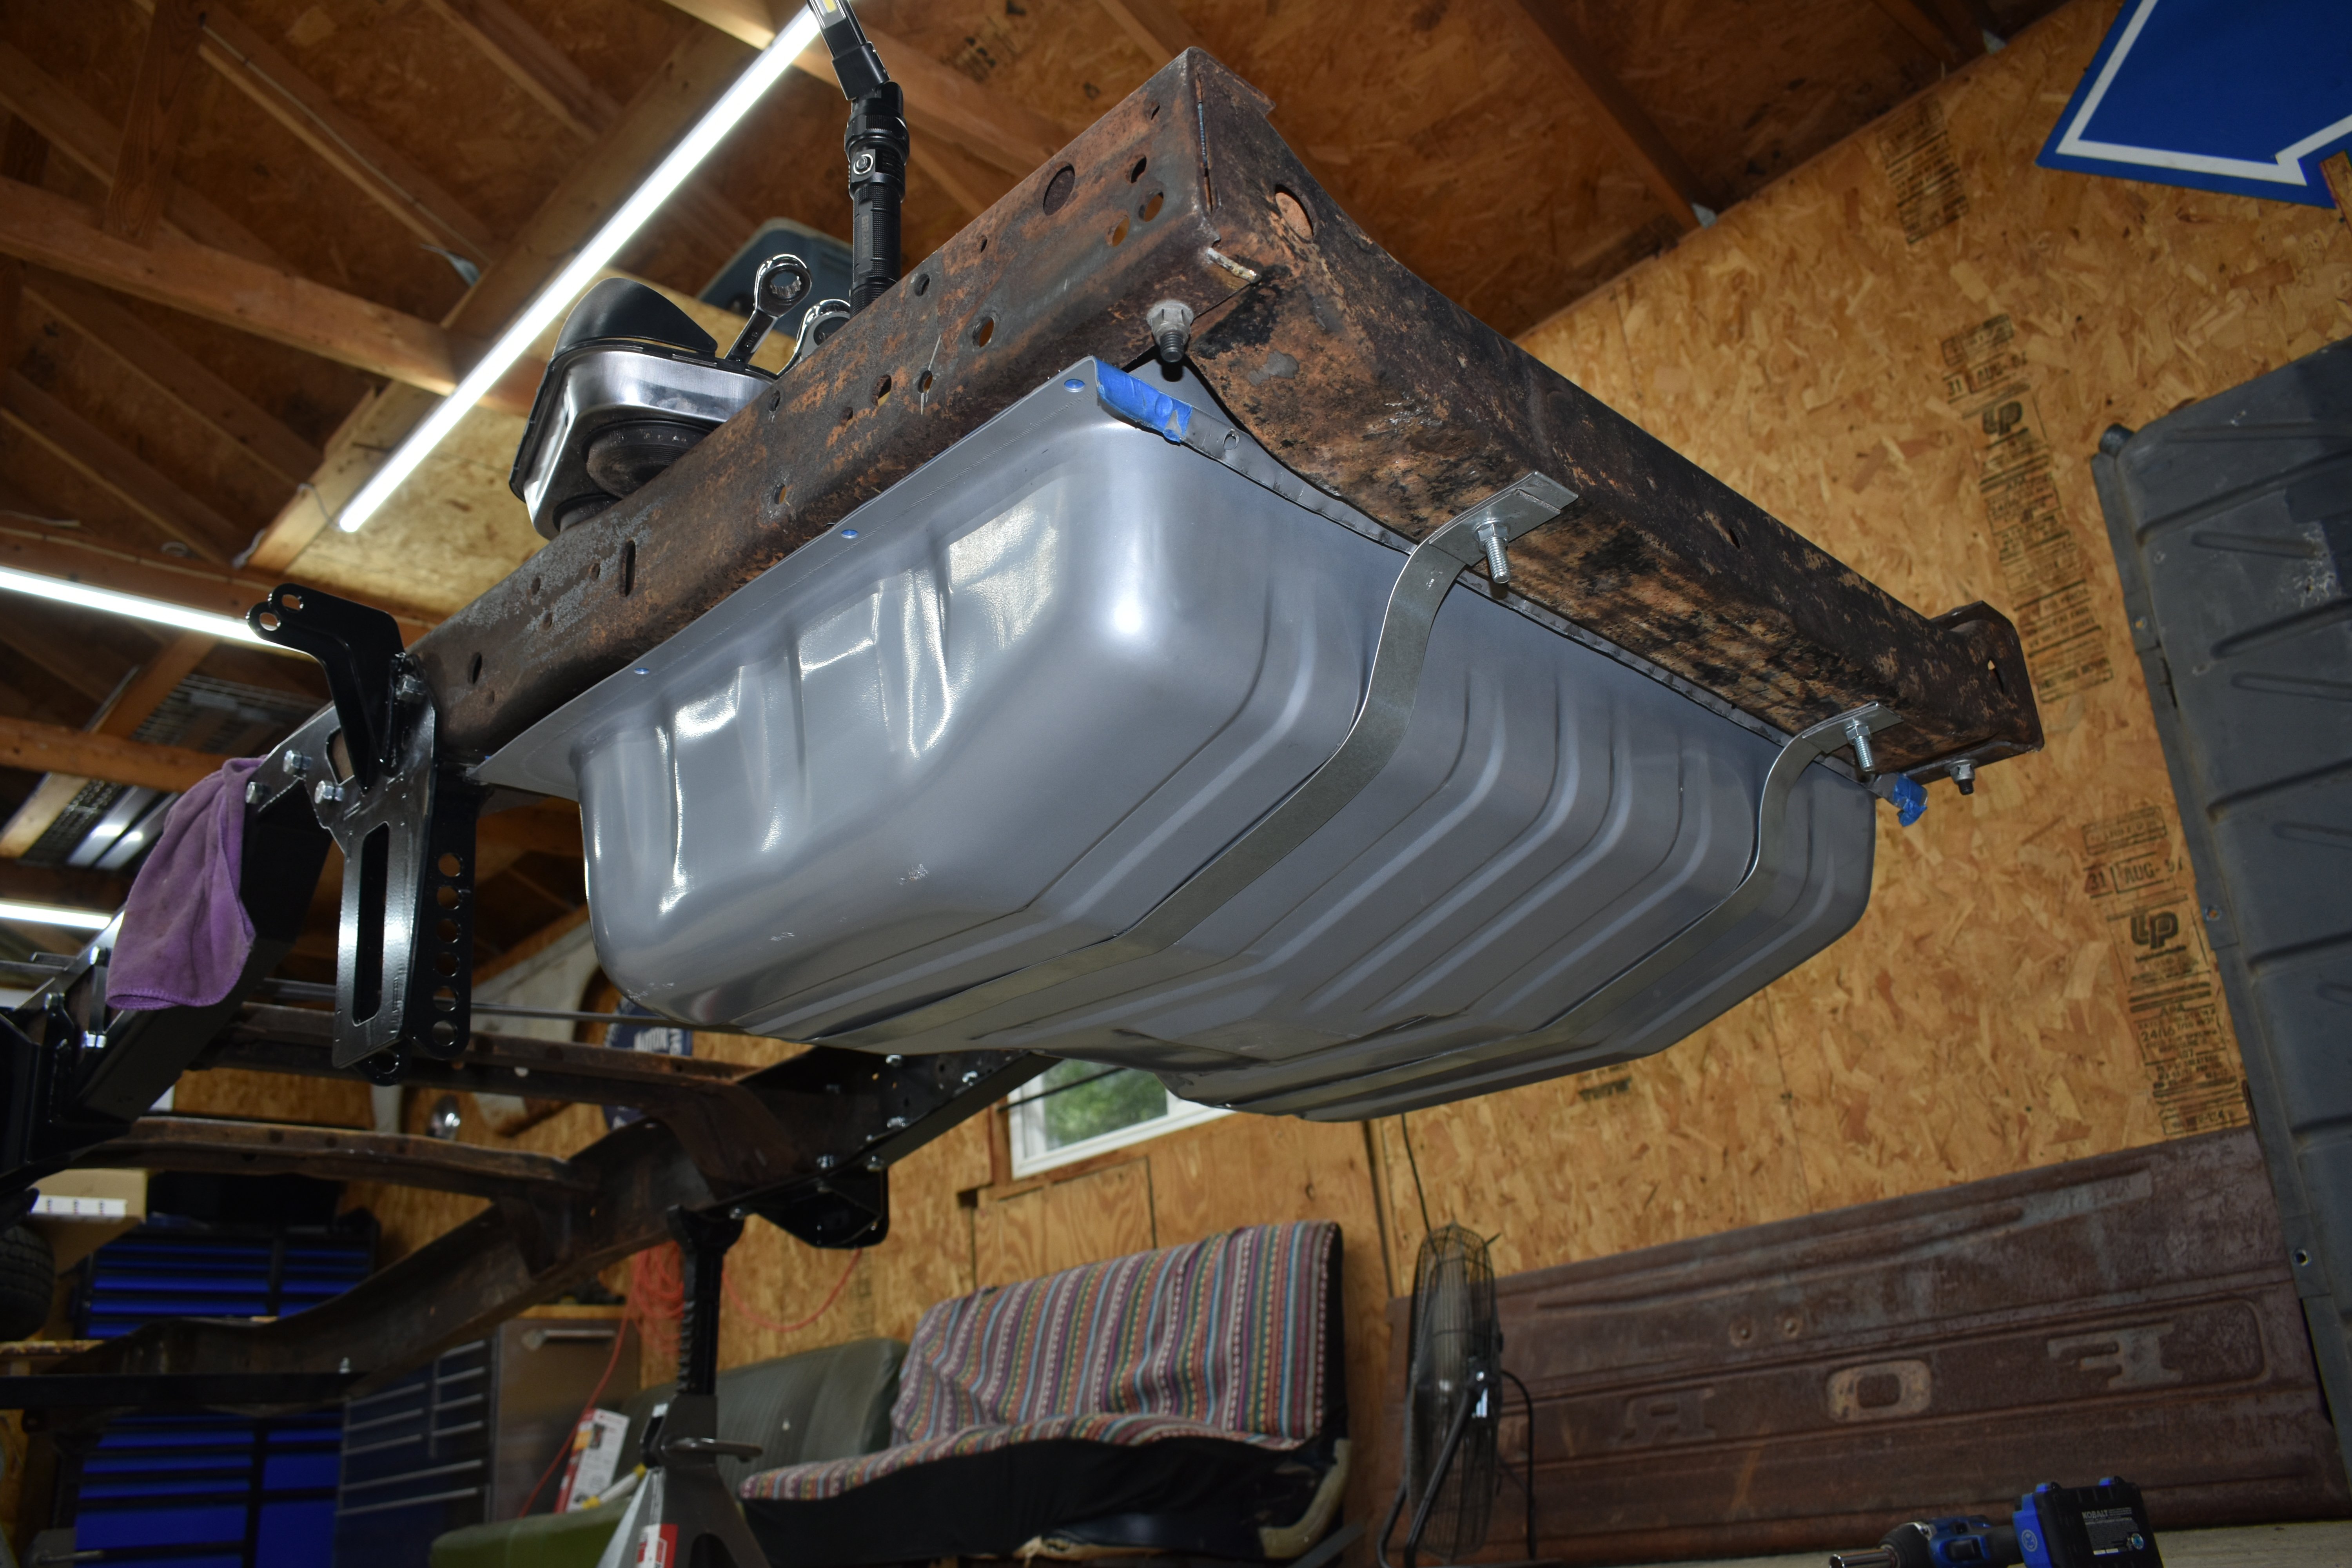
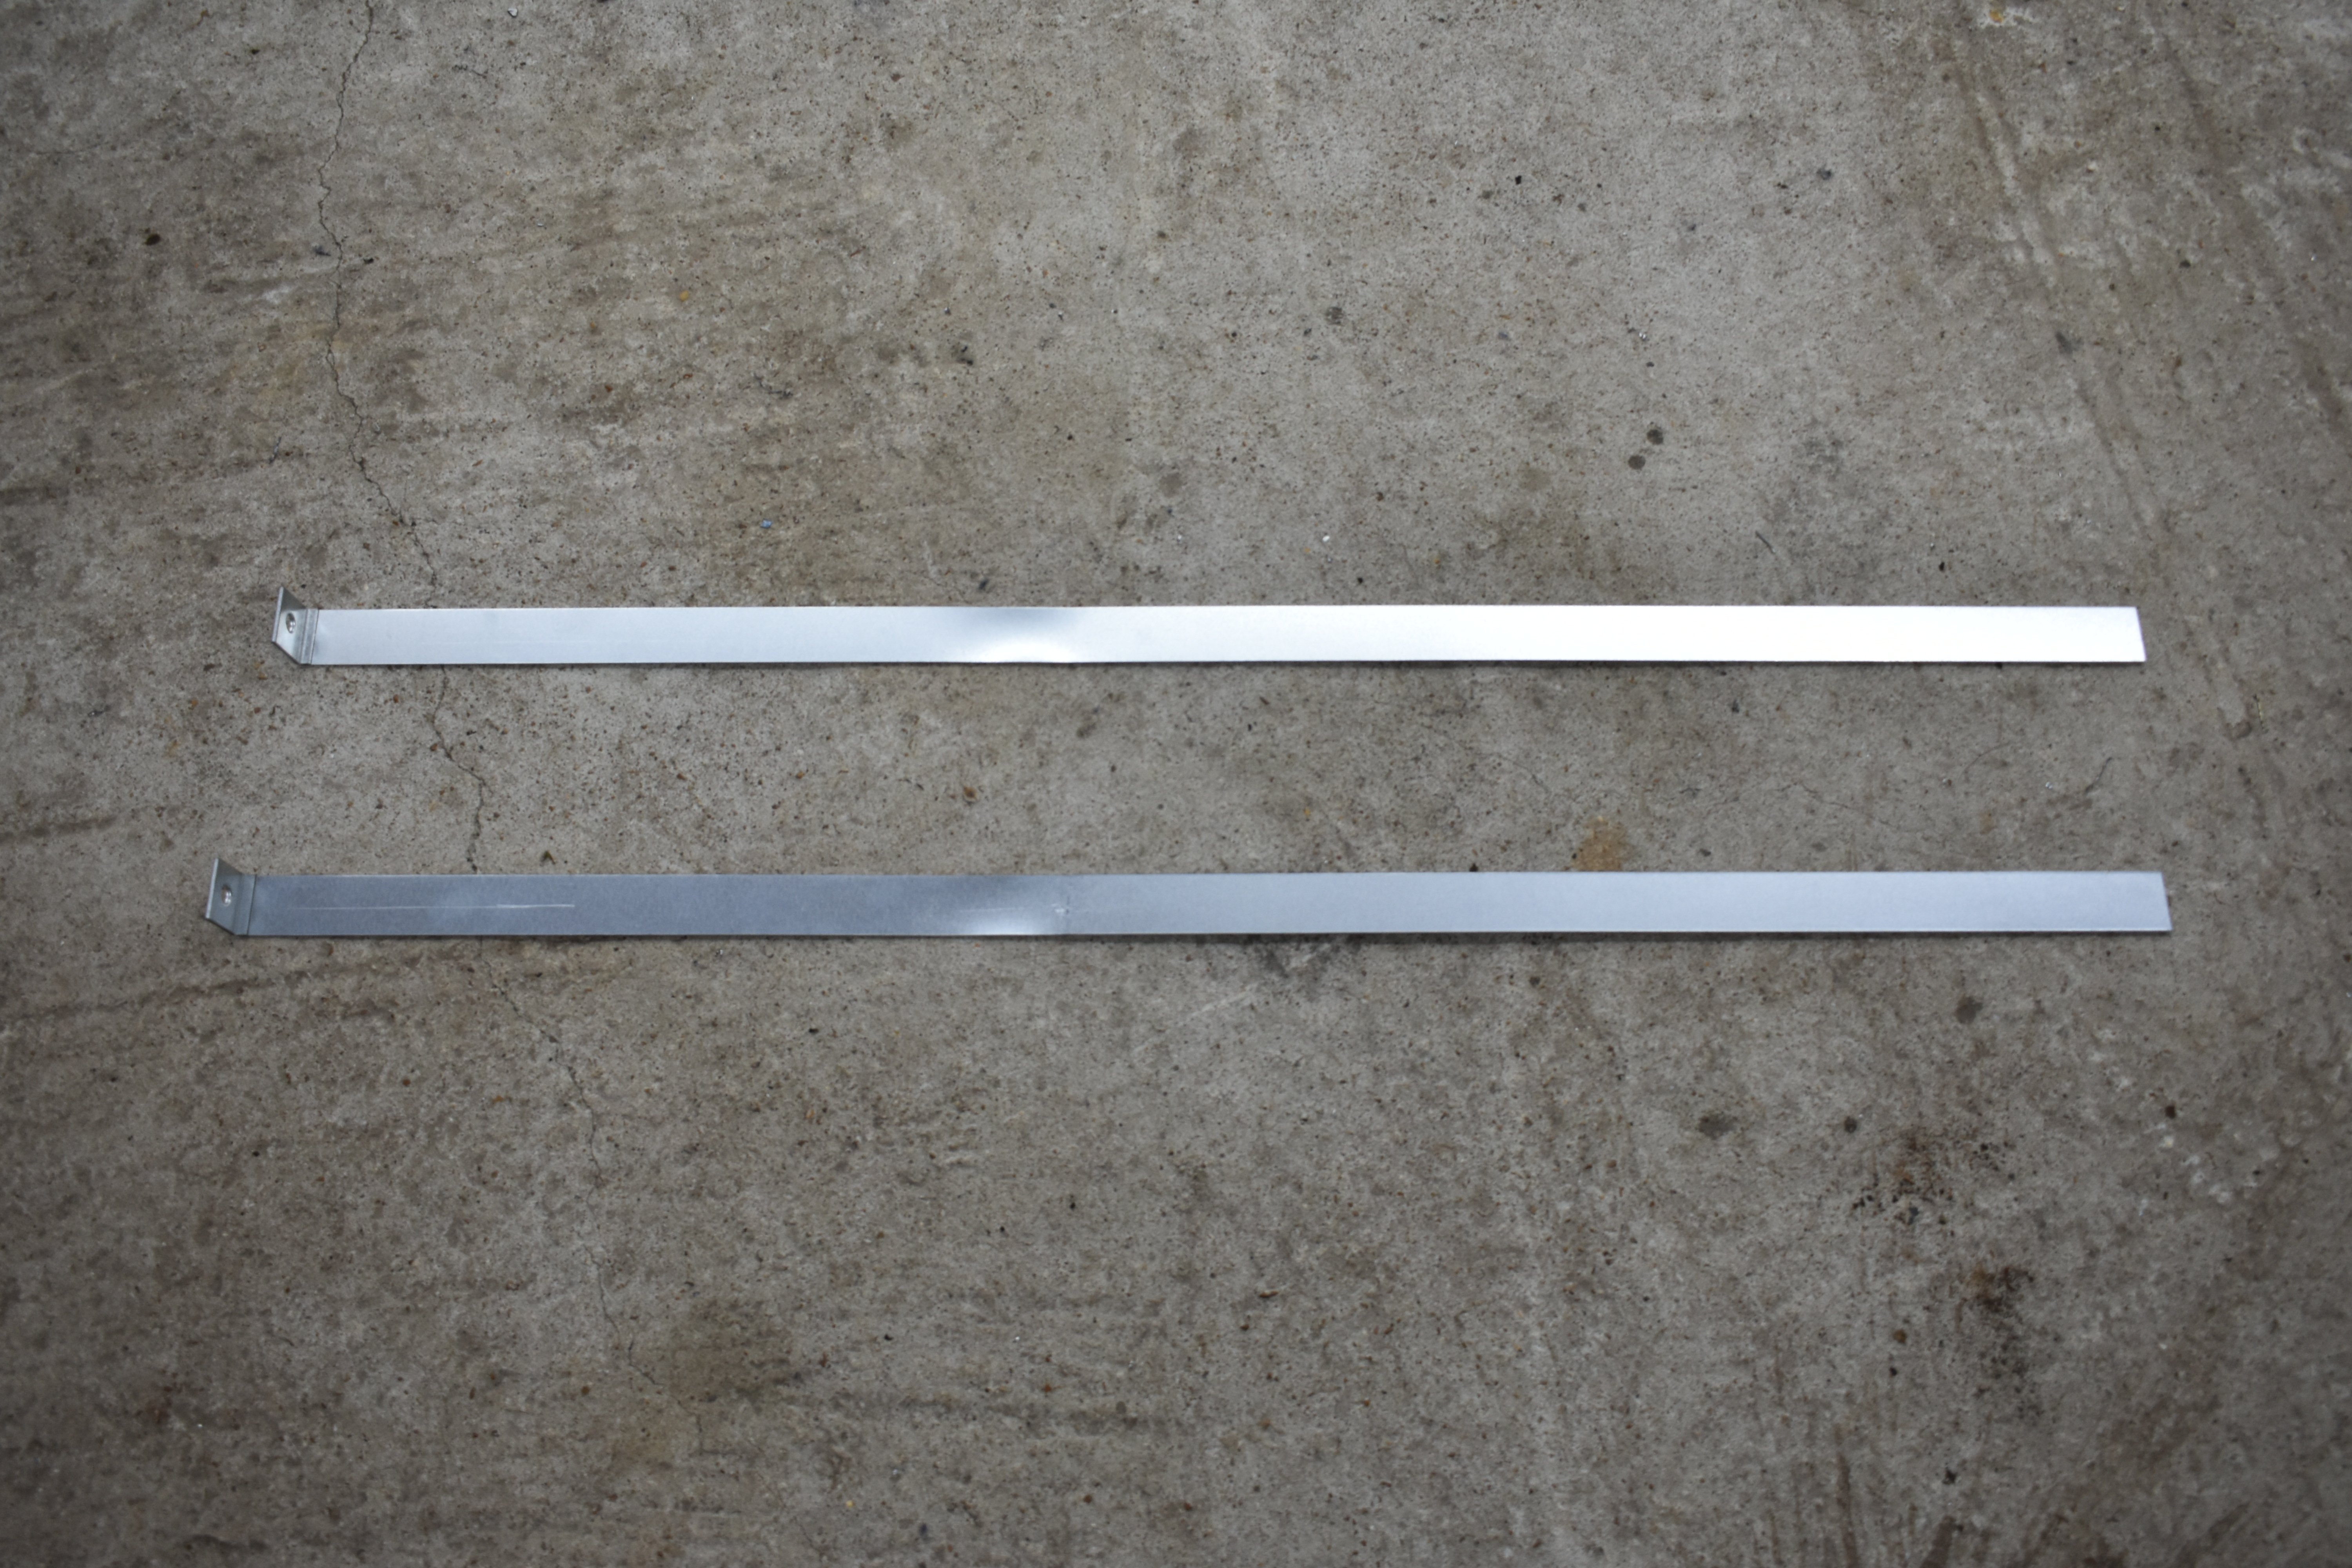
The tank is now prepped and able to slide into the proper position. We were able to work on getting the tank straps bent and into position. We purchased universal straps from Tanks Inc., and strap isolator rubber from Summit Racing, both of which were very easy to work with. The straps were galvanized for corrosion resistance and long life. There is a crossmember right behind the axle that serves as a perfect spot to secure the front side of the strap, and the passenger-side straps needed a few holes drilled large enough for the bolts and locknuts we chose to use. We put the bolts through the crossmember and tack-welded them in place so they wouldn’t spin allowing easy on/off access.


Since we have plans to autocross this truck, we went a little overboard in adding additional support. The gas tank has an additional lip past the weld where the two halves of the tank (top and bottom) are welded together. We drilled two holes through the lip of the tank and through the frame and used two smaller bolts to secure the sides of the tank to the frame directly. In order to make sure there was an easy way to keep the nuts from spinning, we used a piece of ½-inch wide steel and welded two nuts to use inside the frame from the top. (we didn’t want to tack-weld these bolts through the frame because it may be hard to get them all to line up later.
In with the New
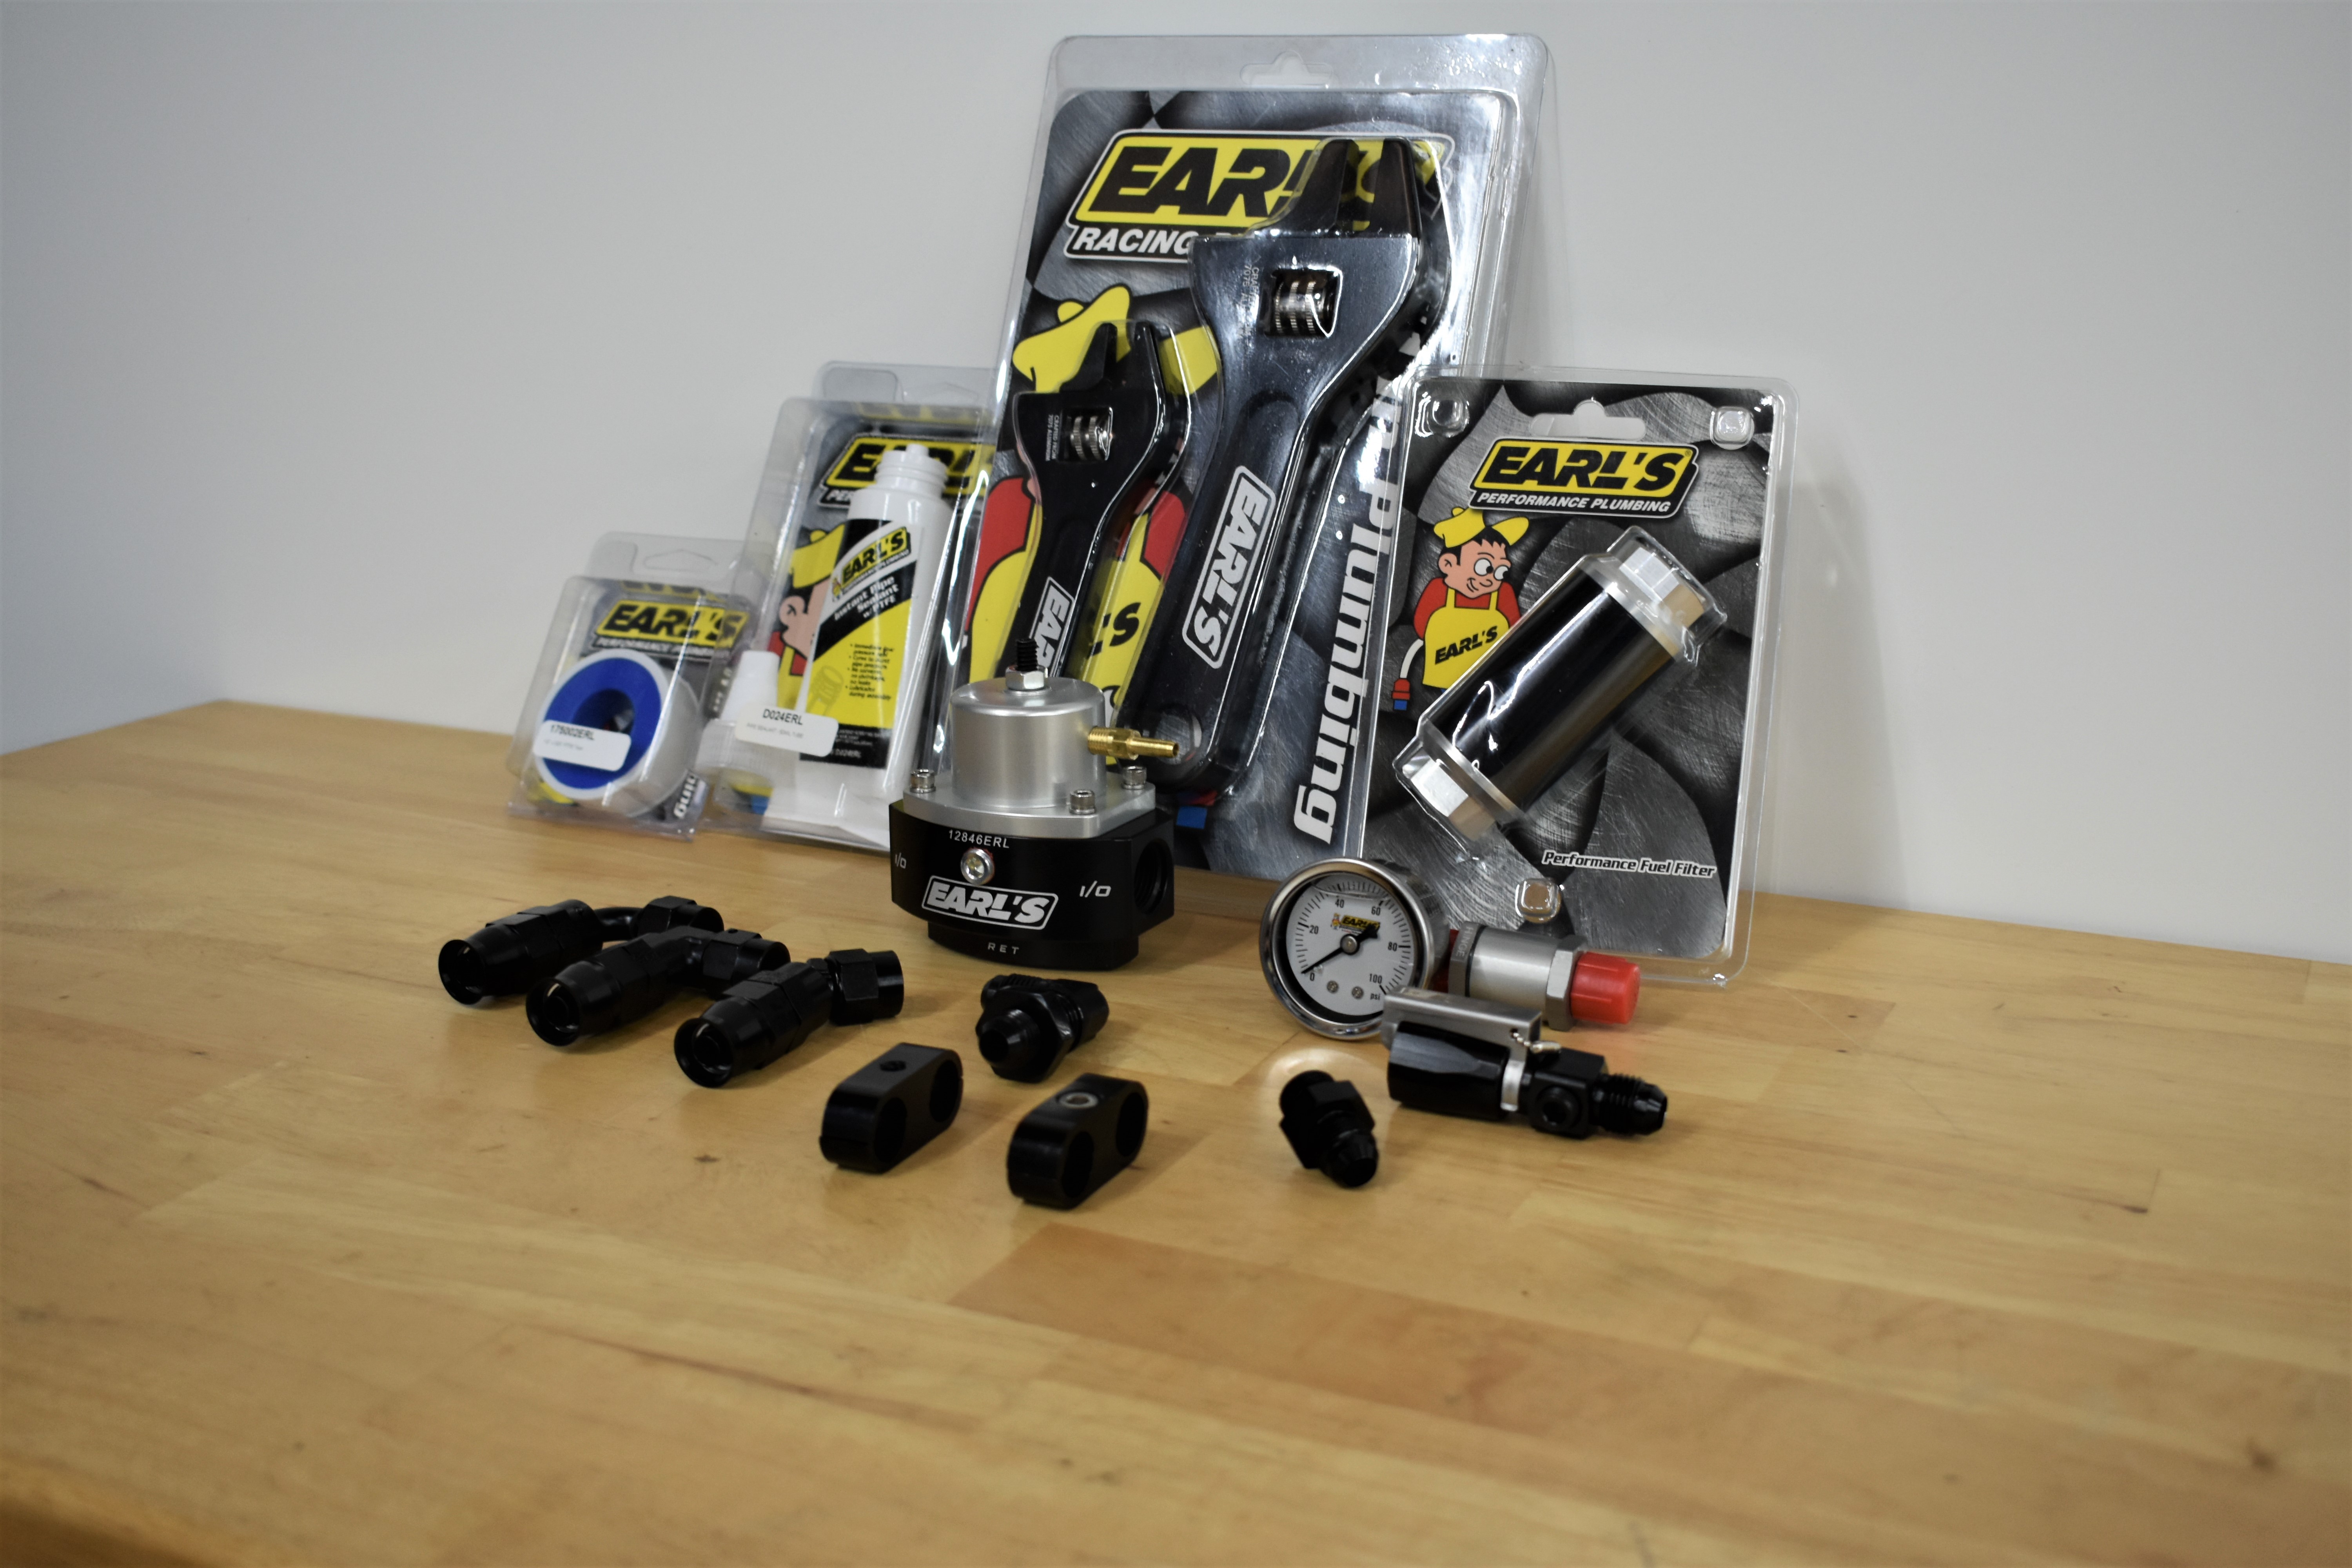
We designed and used all Earl’s Performance Plumbing for the entire fuel system. As you see in the photos, we used -6AN fittings, lines, regulator, filter, NPT sealant, wrenches, and more. We used -6 AN to 1/4″ NPT to adapt the AN line to the Holley Sniper Fuel Hat. Scroll up for a complete parts list including the 1969-1970 Mustang fuel tank system from Holley.

It is important to mention that we switched out the OE fuel sock for the Holley HydraMat direct-replacement sock to make sure we keep the fuel supply to the 400 lph pump under hard cornering. The HydraMat is like a sponge for fuel—it sucks it up from wherever it touches the fuel and keeps the pump primed.
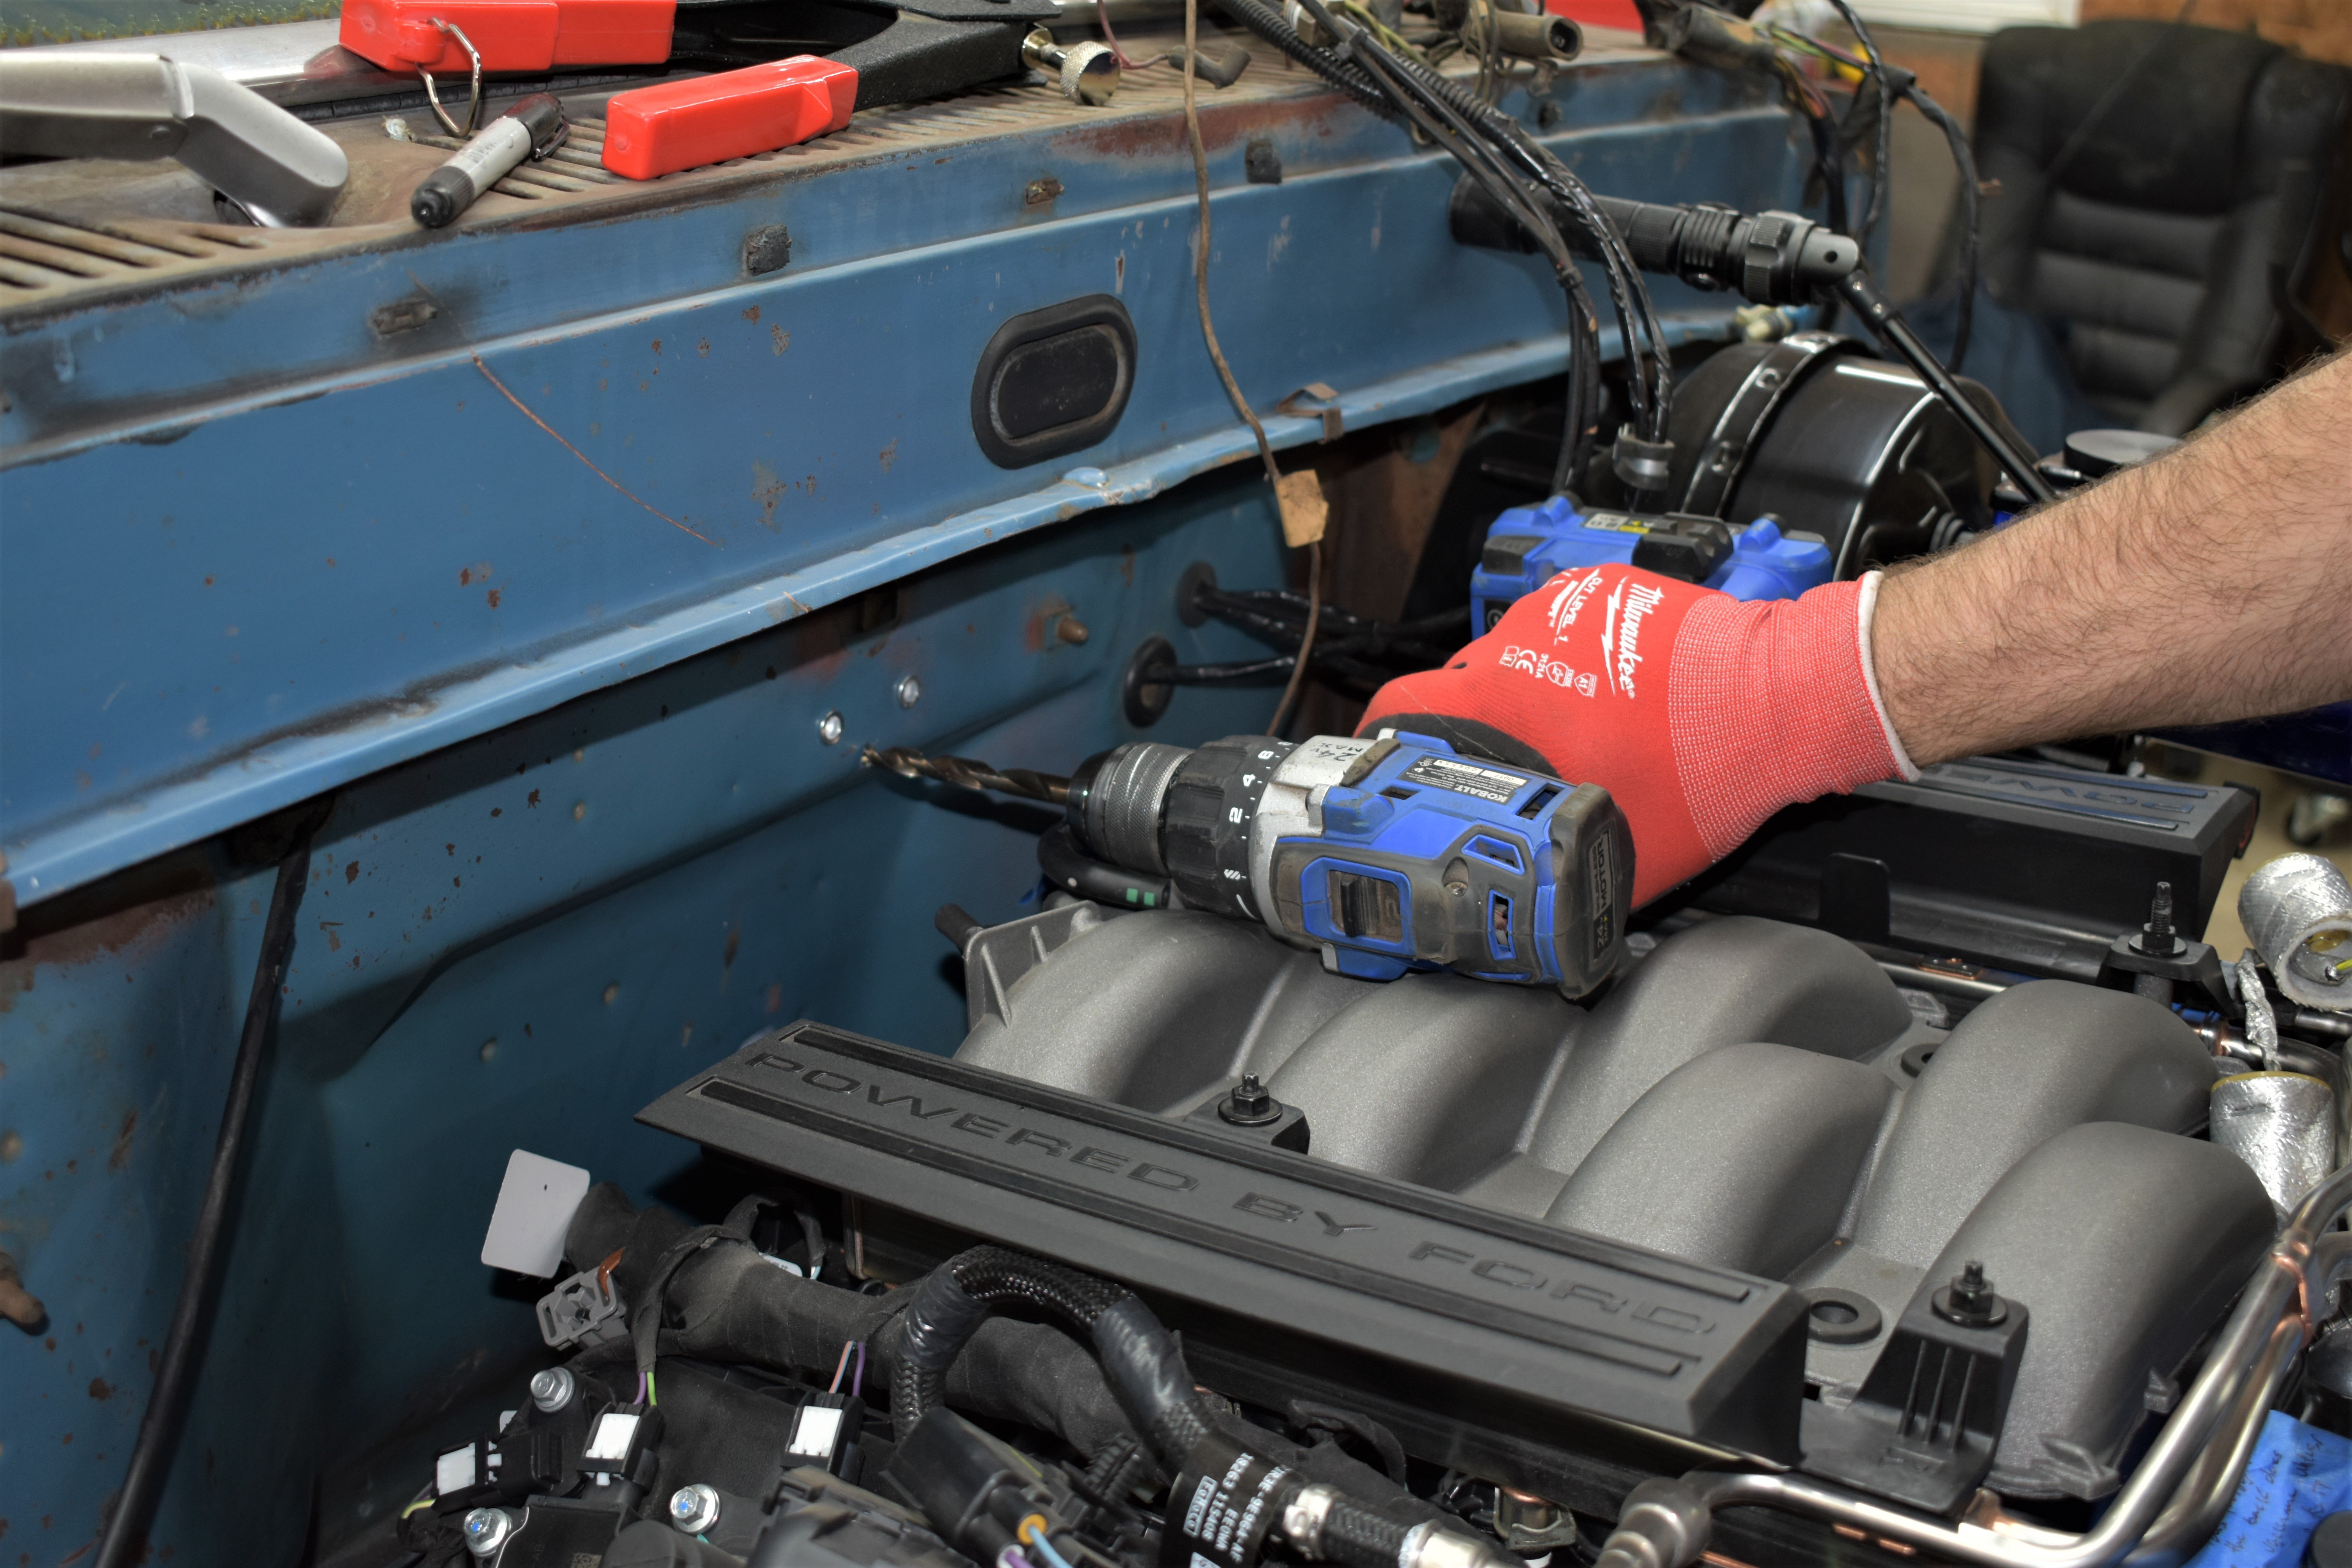
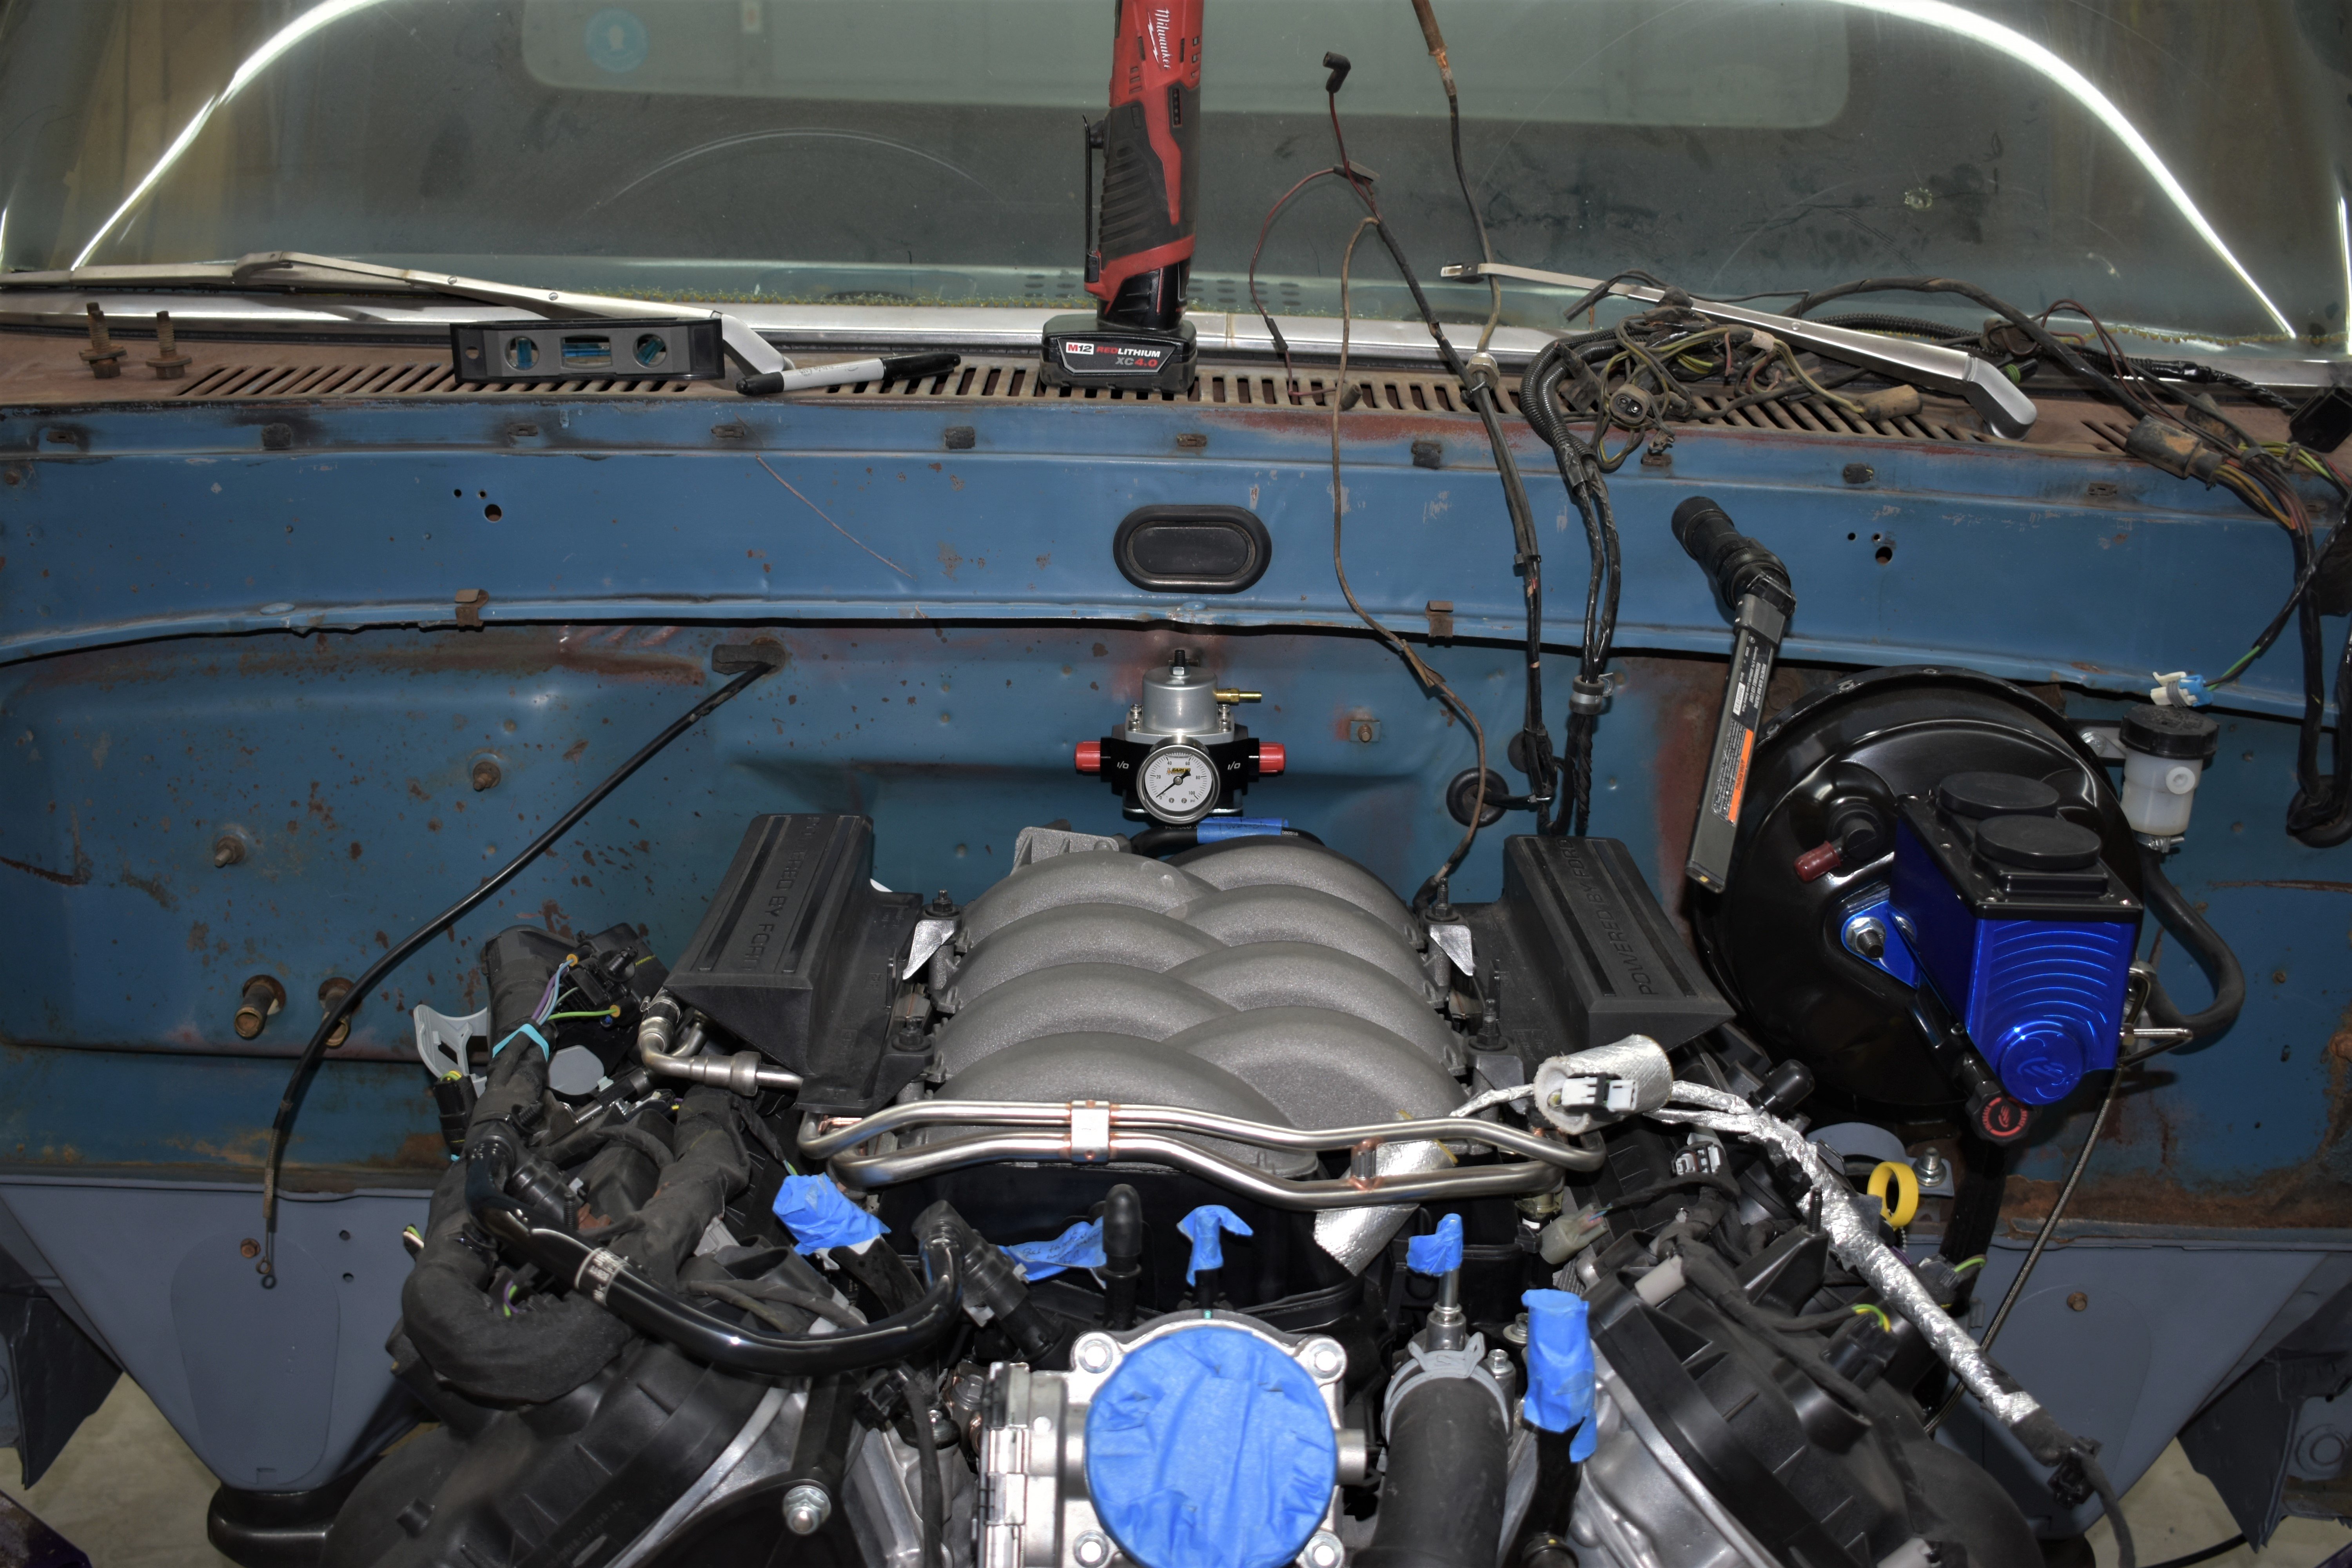
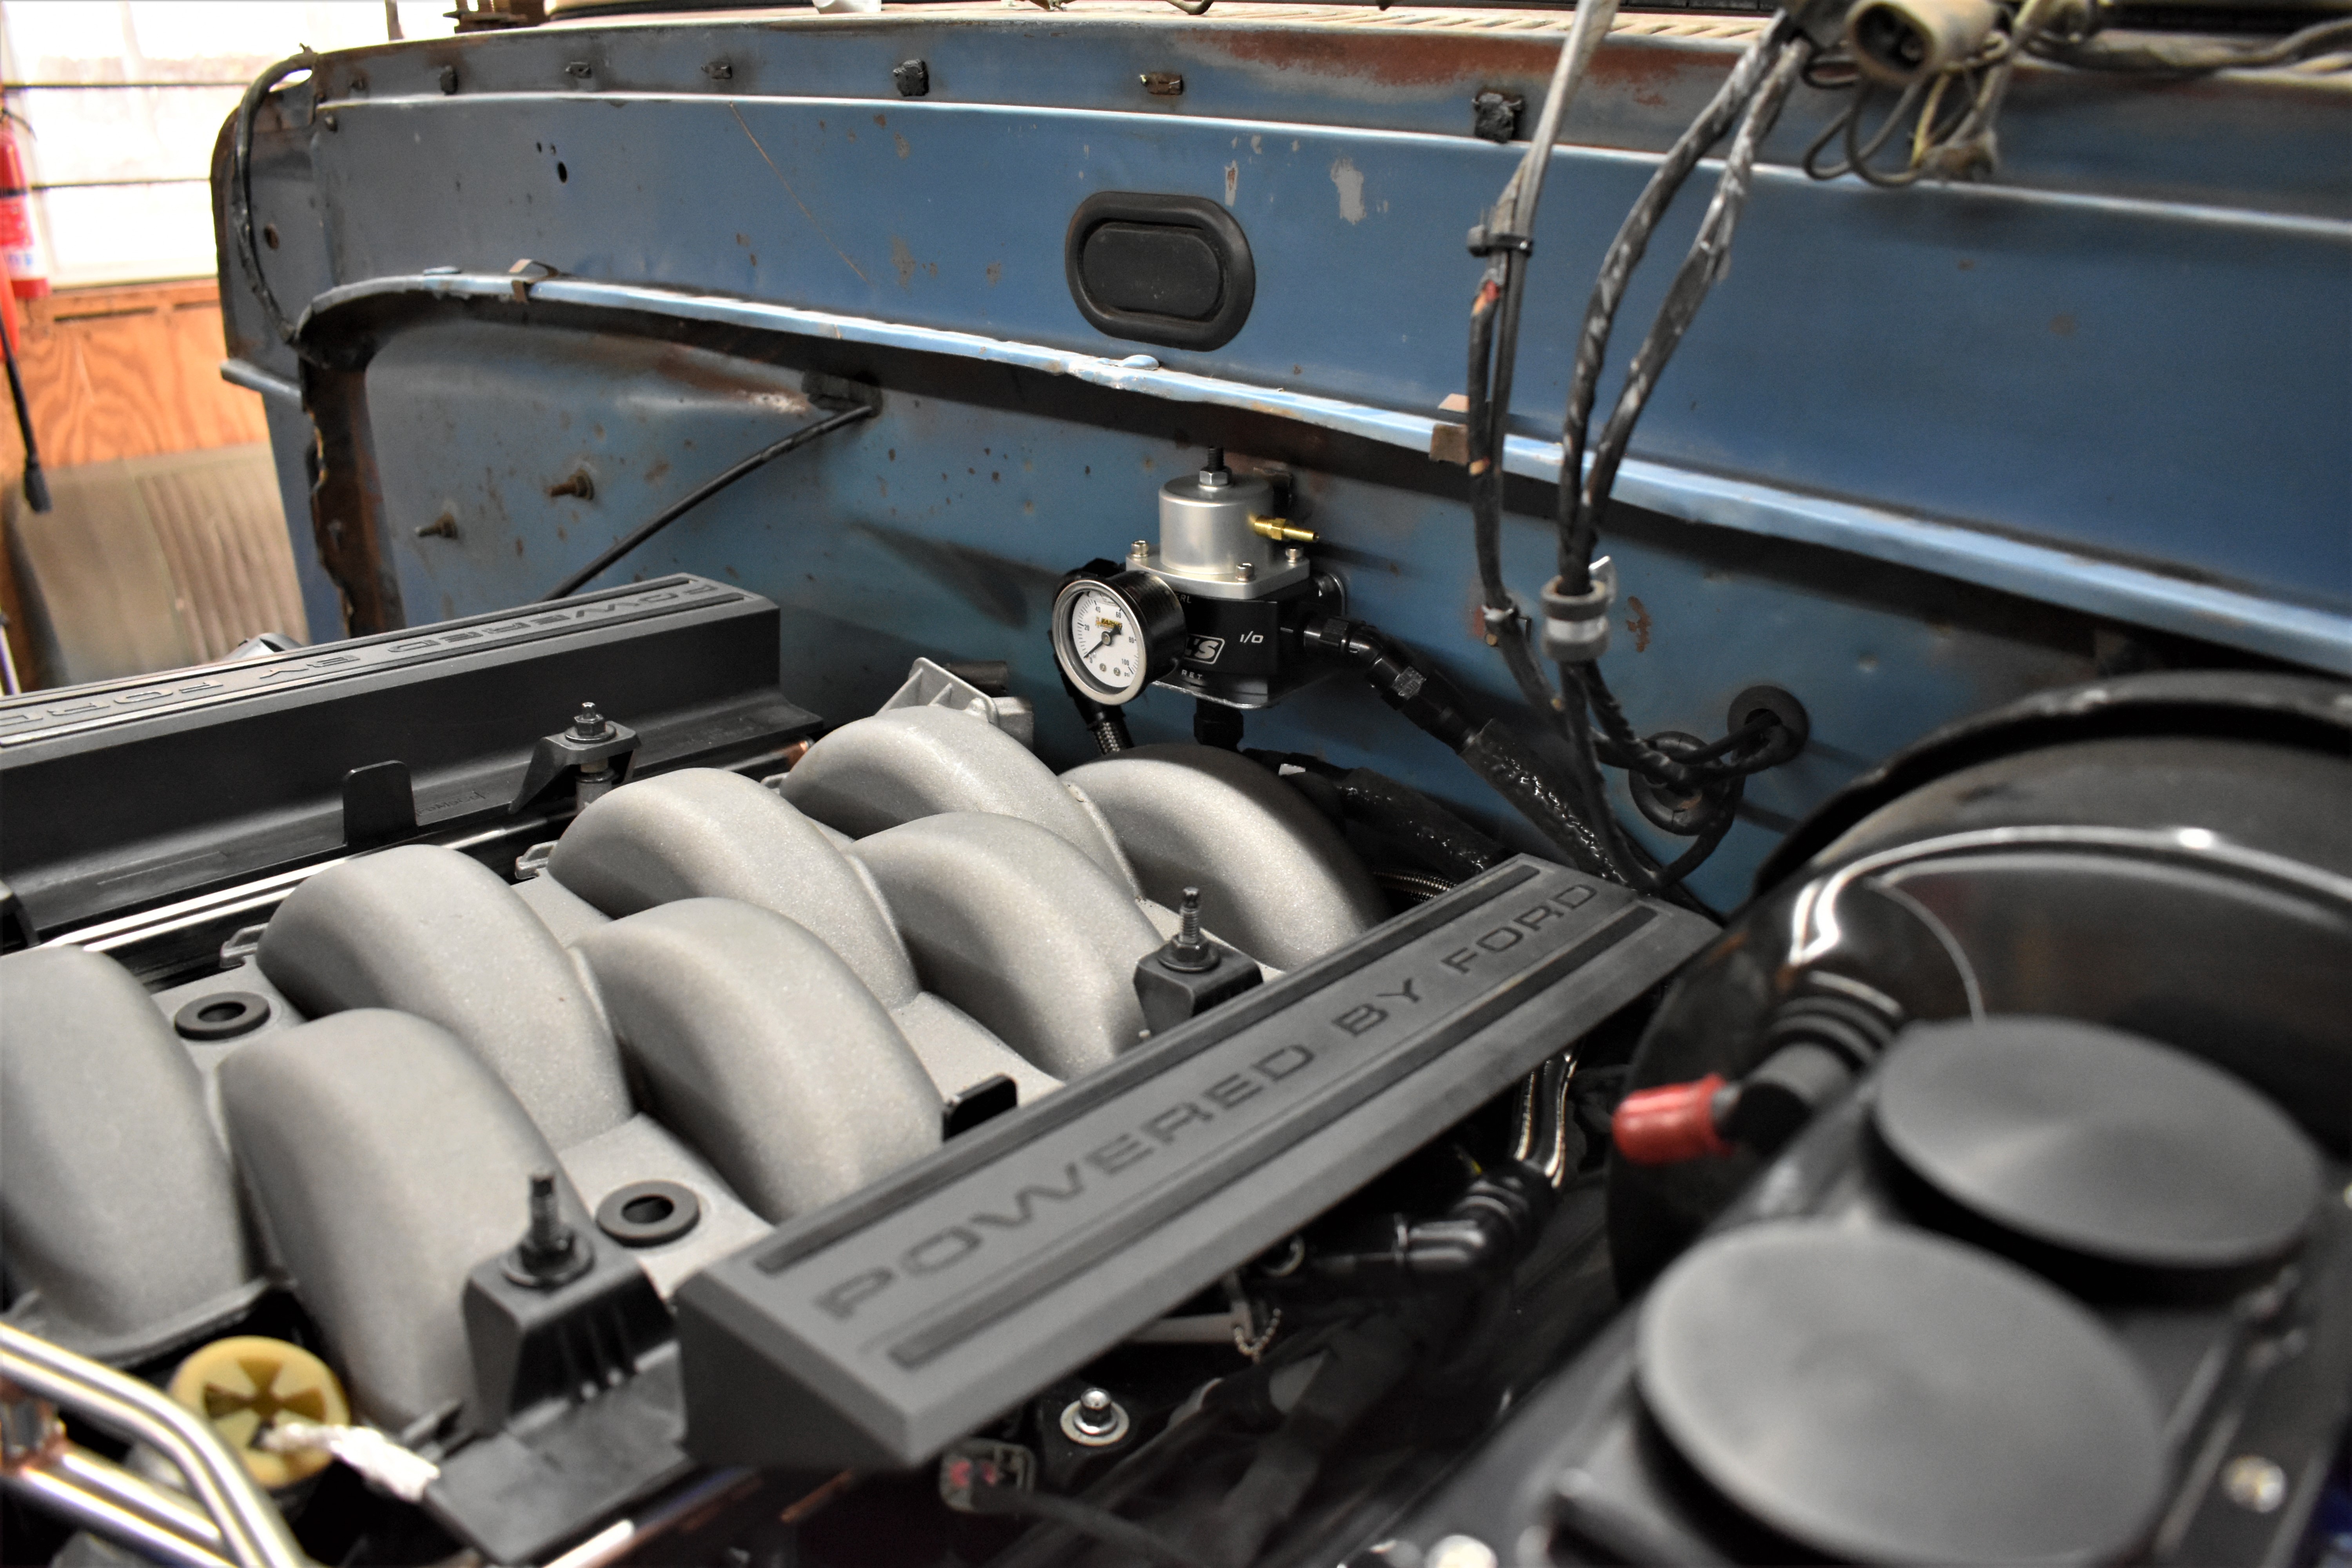
Then we had to decide where to place the regulator, wanting to position it somewhere that looks good but that was serviceable and would give us access to the gauge in case we needed to diagnose something with the truck. So, it was decided to mount the regulator on the firewall right behind the engine. We drilled the firewall and installed some threadserts to mount it.

Next, we decided where to mount the fuel filter. We wanted to mount all the hard parts first that are in a fixed position and then run the lines, and found a nice spot between the suspension inside the frame rail that would be easy to service.

The check valve goes on the outlet side of the filter, as seen here. It’s the silver-colored little part on the right side of the Earls filter.
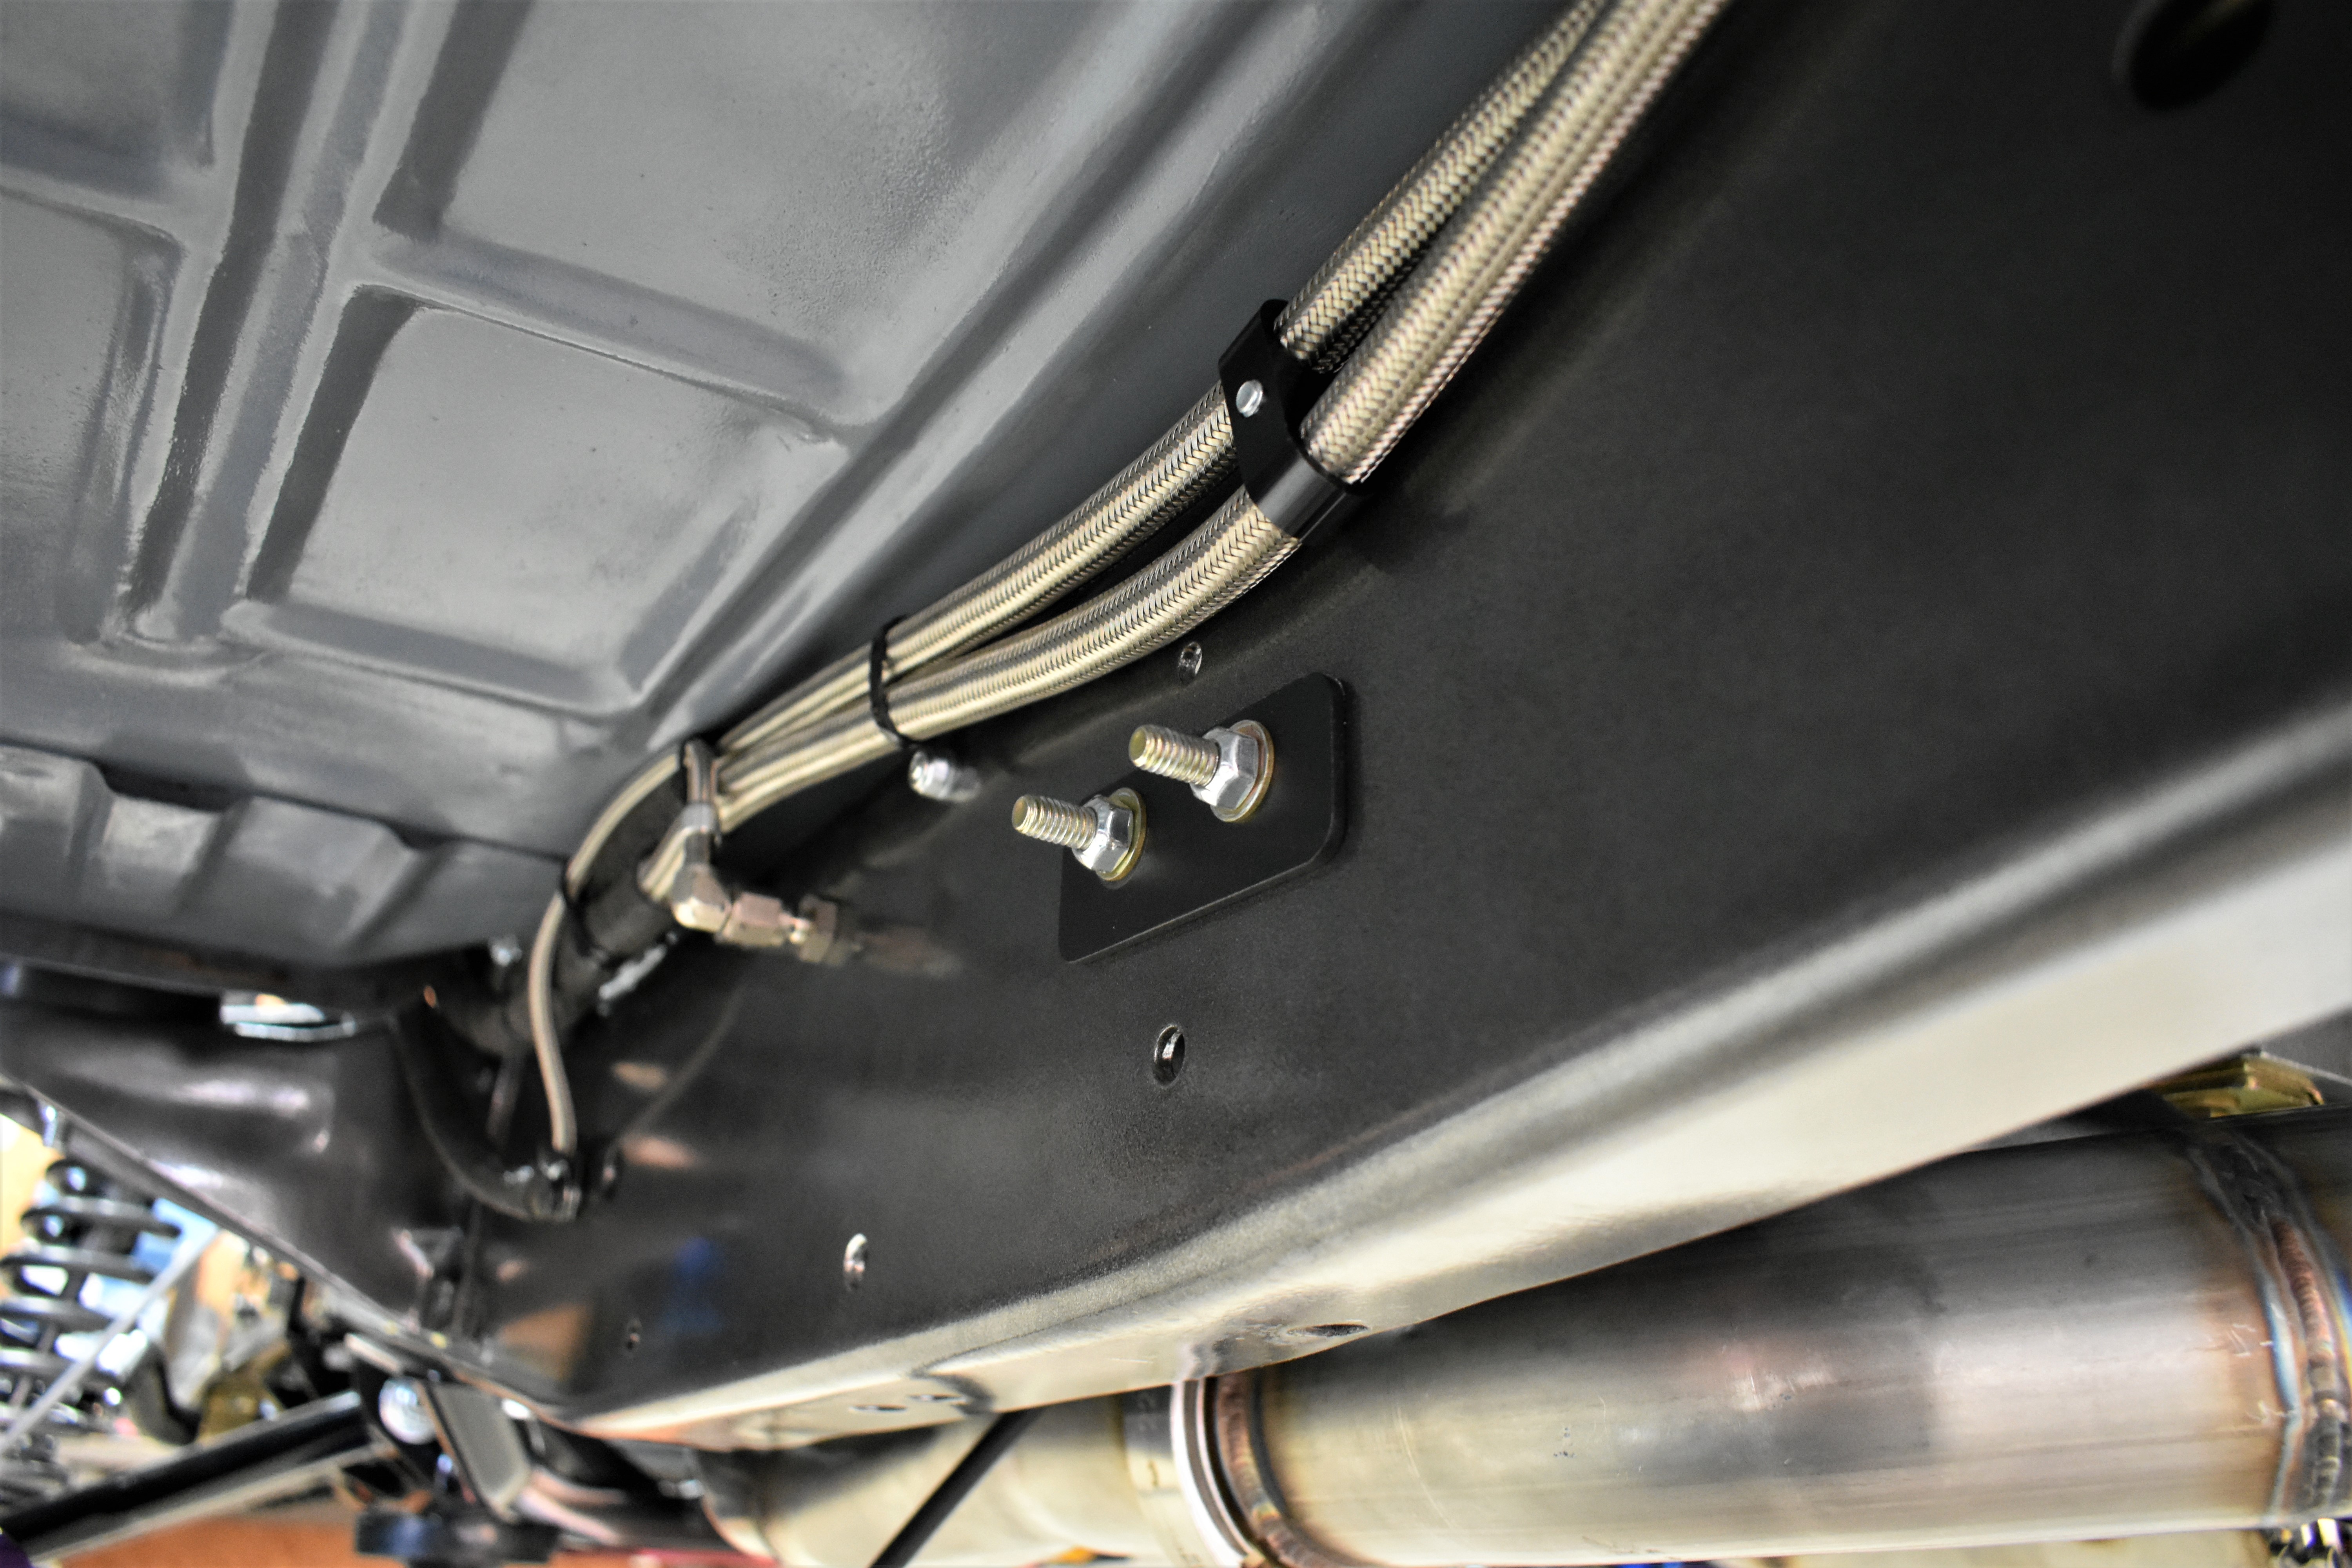
We wanted to keep all of the lines inside the frame rail to keep them out of harm’s way, so we ran them through the rear crossmember to the Earl’s fuel filter then secured them to the frame using Earl’s hose and tubing separators. These are excellent clamps that made mounting and securing the lines simple.
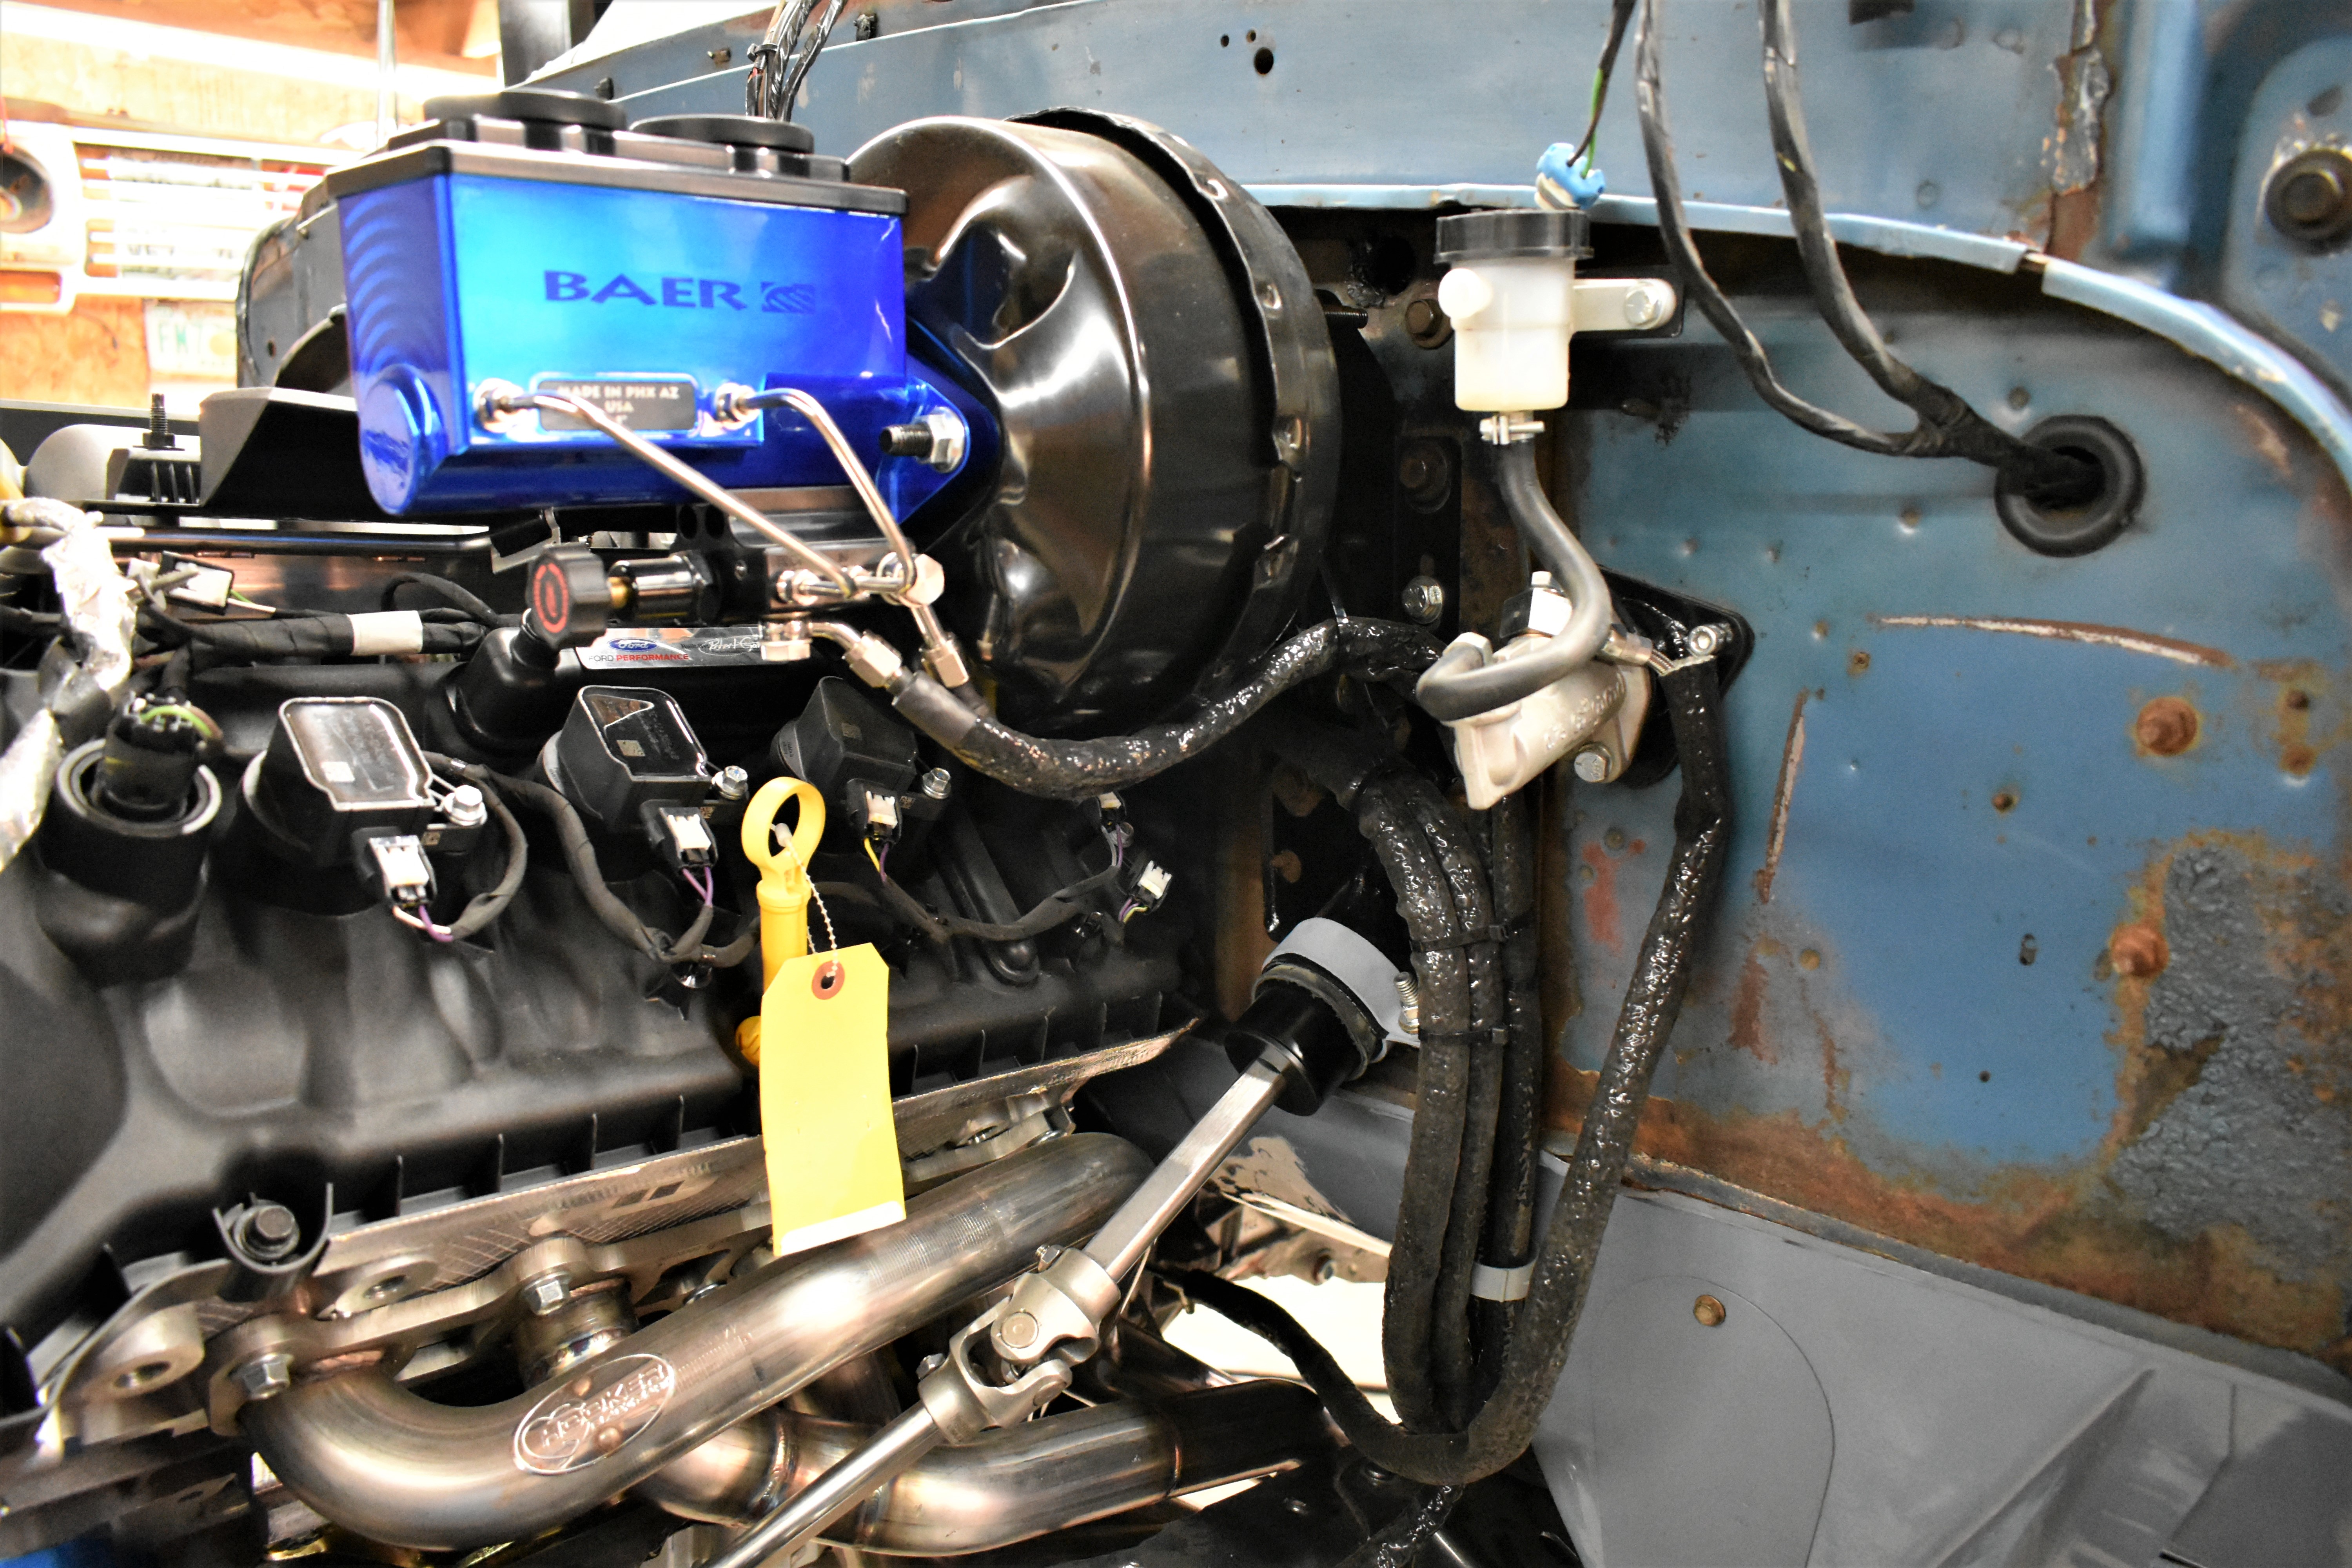
Here is where we had to get creative—we were approaching the mid-pipe and long tube headers section of the truck and really wanted to keep the lines away from the hot headers. We ended up using Earl’s bulkhead fittings to go through the frame to transition the lines to the top and outside of the frame for the last few feet of the run. In this photo, you can see the bulkhead transition and then again, the use of the Earl’s Hose and Line separators. We used Earl’s Flame Guard Insulation to make sure that any heat around that section of the line wouldn’t be an issue and would keep the fuel nice and cool. We have used this product in the past with our brake and clutch lines with great success.
From here it was just a matter of measuring and assembling the remaining lines to make all the connections for the return line. To make the final connection to the OE fuel rail we used the Earls O.E. Fuel line EFZI Quick disconnect fitting that converts the OE ⅜ fitting on the fuel rail to 6AN.
See You Next Time
In the next episode, we’ll go into greater detail on the Gen 3 Aluminator installation. And we’ve also got some steering upgrades to go with our modern suspension…not to mention everything else to get this rusty old farm truck into fighting shape. Stick with us!