Let’s face it, in modern times, we’ve become spoiled with the number of pre-engineered engine accessory front drives on the market. Between the extensive R&D put into them, and the gorgeous, show-quality machine work, an aftermarket front drive is a simple bolt-on affair that looks good and works well. Unfortunately, they carry a hefty price tag as well. Besides the cost, the fact is, those kits didn’t exist in the ‘90s, so they aren’t an option for the Retro 5.0 project.
However, we still need to run front accessories, since this project is striving to be as close to real-world as possible. That means we’ll be diving into period-correct components that fit both the theme of the project, as well as meet the performance demands we’ll be placing on the engine. One thing to note, that we didn’t even consider until we really started to dive into the accessories, is that even though we started with a complete front drive mounting system on the donor engine, the ’93 Thunderbird arrangement is completely different from a Mustang of the same year, so we had some rearranging to do.

There are a variety of different pump designs available from Milodon for the small-block Ford. For this project, we opted for a direct-fit ’86-’93 high-volume pump in the OEM counter-clockwise rotation.
Starting With The Water Pump
While on the surface, picking a water pump seems easy. In reality, it was one of the more challenging choices of this project. If we went with an electric water pump, it would simplify the belt routing, and free up horsepower, but wouldn’t be a fair representation of a stock engine as a baseline. So, we decided on a mechanical water pump.
Now, the debate became, do we run a “Mustang-correct” reverse-rotation water pump, or “cheat” and run a standard-rotation pump. To clarify, the 1986-’93 Mustangs came with a water pump that spins in the opposite direction of the crankshaft (the water pump spins counter-clockwise and the crank spins clockwise). For the dyno, a standard rotation water pump — available on earlier models of small-block Ford — would have made belt routing extremely simple. However, we decided that it wouldn’t be “correct” for this project.

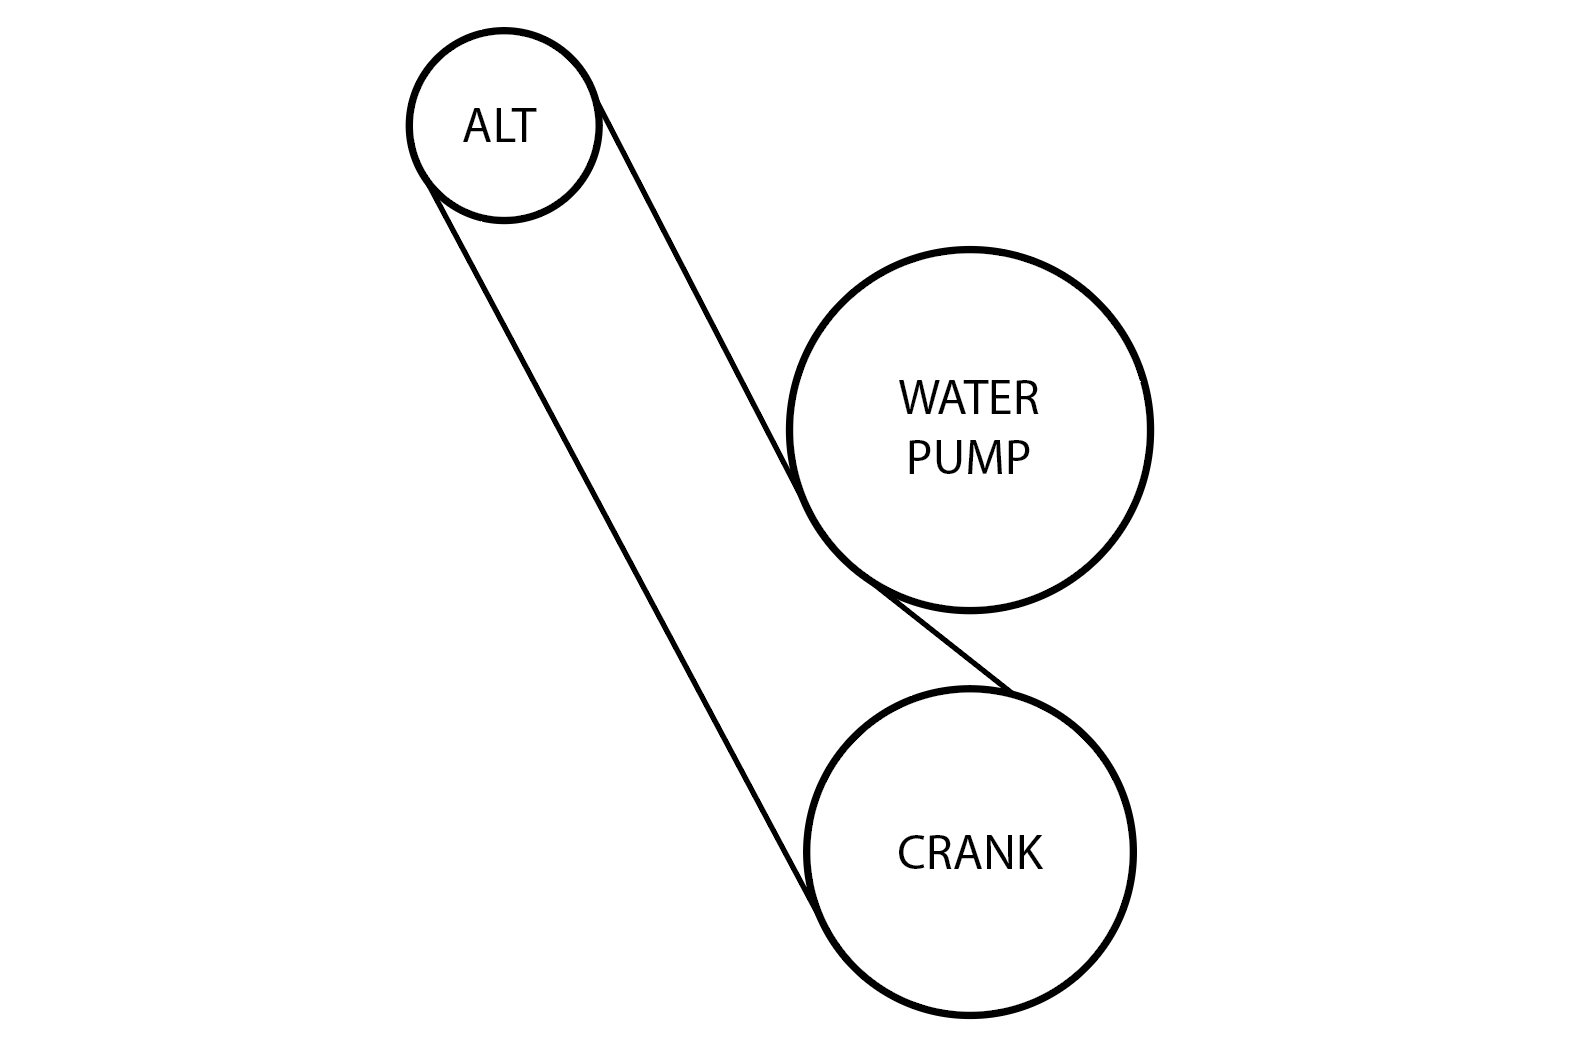
On the left is the belt routing with a standard-rotation (clockwise) water pump. On the right is the routing with no driver's side accessories and a reverse-rotation (counter-clockwise) water pump. We opted for a reverse rotation pump so it would work once the engine is in the car with accessories, but also wanted a little more belt wrap than the diagram on the right offers.
Milodon makes seven variants of small-block Ford water pumps, and we opted for Milodon’s P/N: 16233 high-volume reverse-rotation water pump, designed specifically for the 1986-’93 Mustang. They offer the pump in both standard volume and high-volume variants, as well as in a standard-rotation variant, with all of the spacings and outlets in the correct locations for any 1979-’93 Mustang front accessory drive.
All of Milodon’s water pumps have improved tolerances to improve the efficiency of the pump, and are made from high-quality aluminum castings with heavy-duty bearings installed. The Milodon pump should not only withstand the rigors of the engine dyno for all of our tests, but also work quite well once we put the engine into its eventual spot in the engine bay.
Alternator Considerations
In our minds, not running an alternator on the dyno was never even an option. At the end of the day, this is a street engine, start to finish, and not running an alternator wouldn’t make sense. Since this engine won’t be turning any insane RPM, there were no special considerations needed in the selection process. It was just a straightforward process of selecting the output we wanted and matching that with the application.
We turned to Powermaster for their recommendation of an alternator since, admittedly, alternators are not our specialty. Among their offerings, Powermaster offers a set of dedicated Ford-style “Race-Prepped” alternators, designed to be a direct fit with Ford bracketry (and is listed under the Fox Body-specific section of Powermaster’s catalog as well). They are available in 12-volt, 16-volt, and “XS” variants, the latter of which is adjustable all the way up to 18.5 volts. Within each voltage variant, they are available in 100-amp and 150-amp versions. Then there are the colors. Four finishes are available — chrome, polished aluminum, natural aluminum, and black.

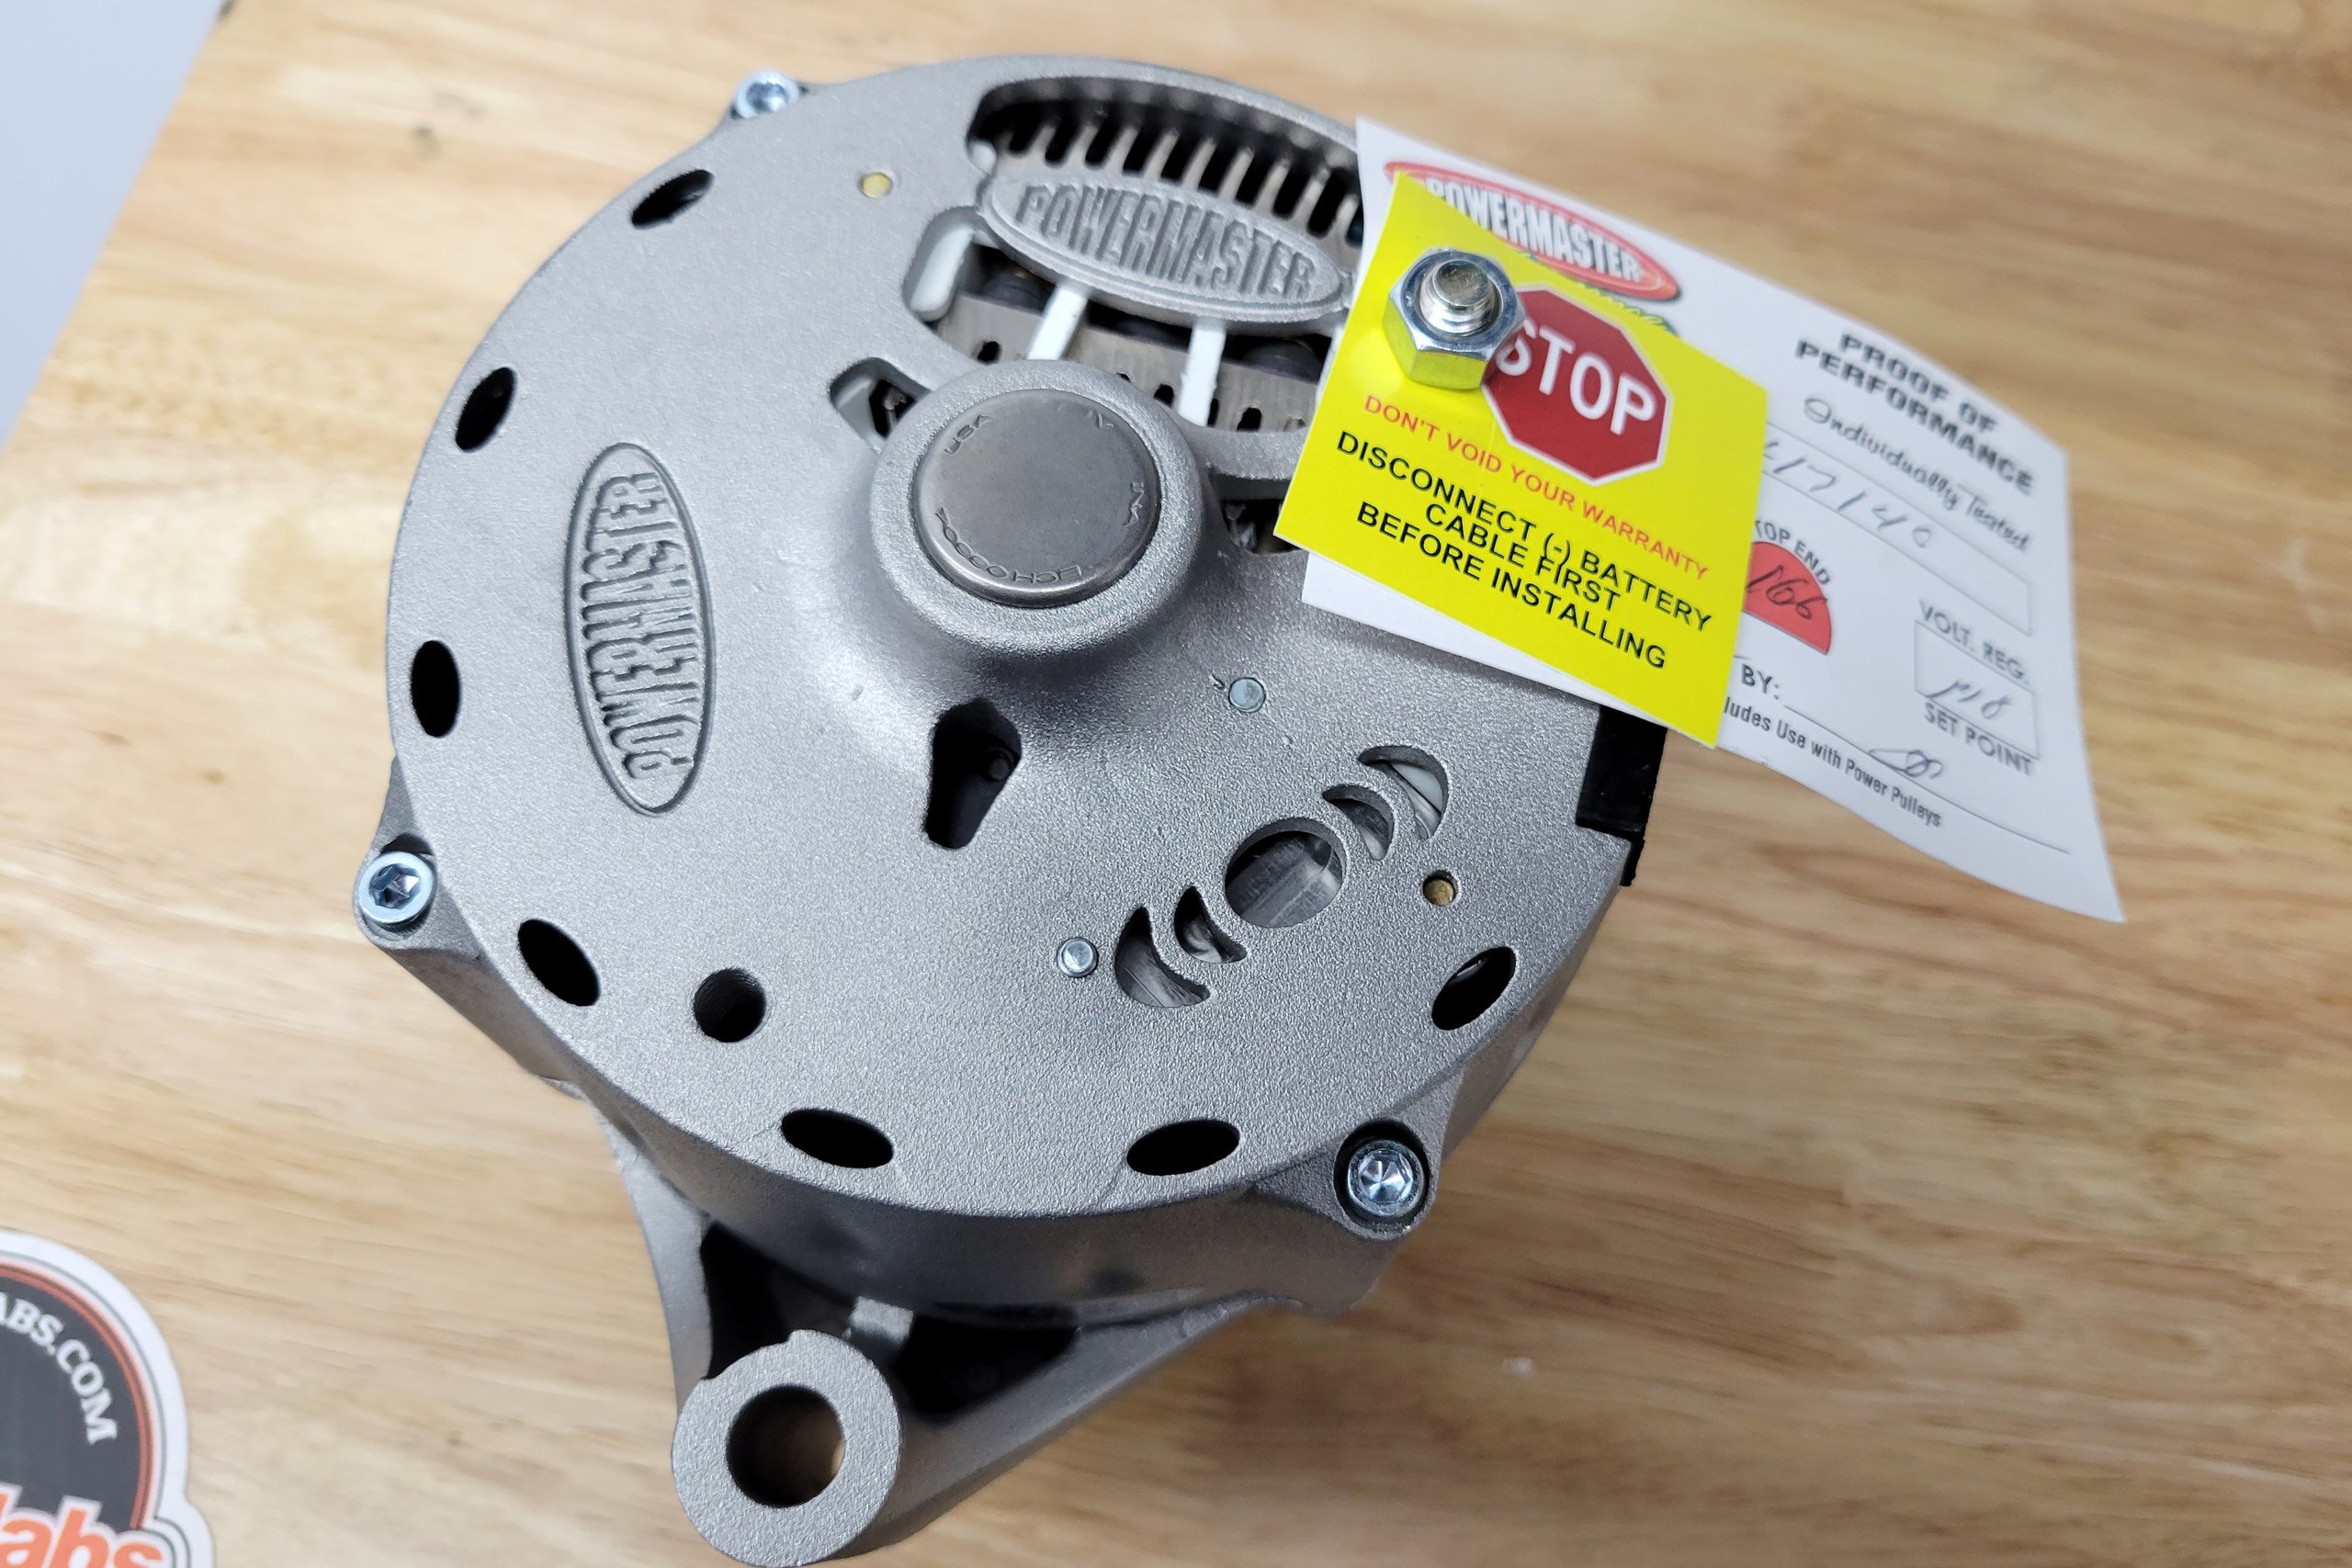
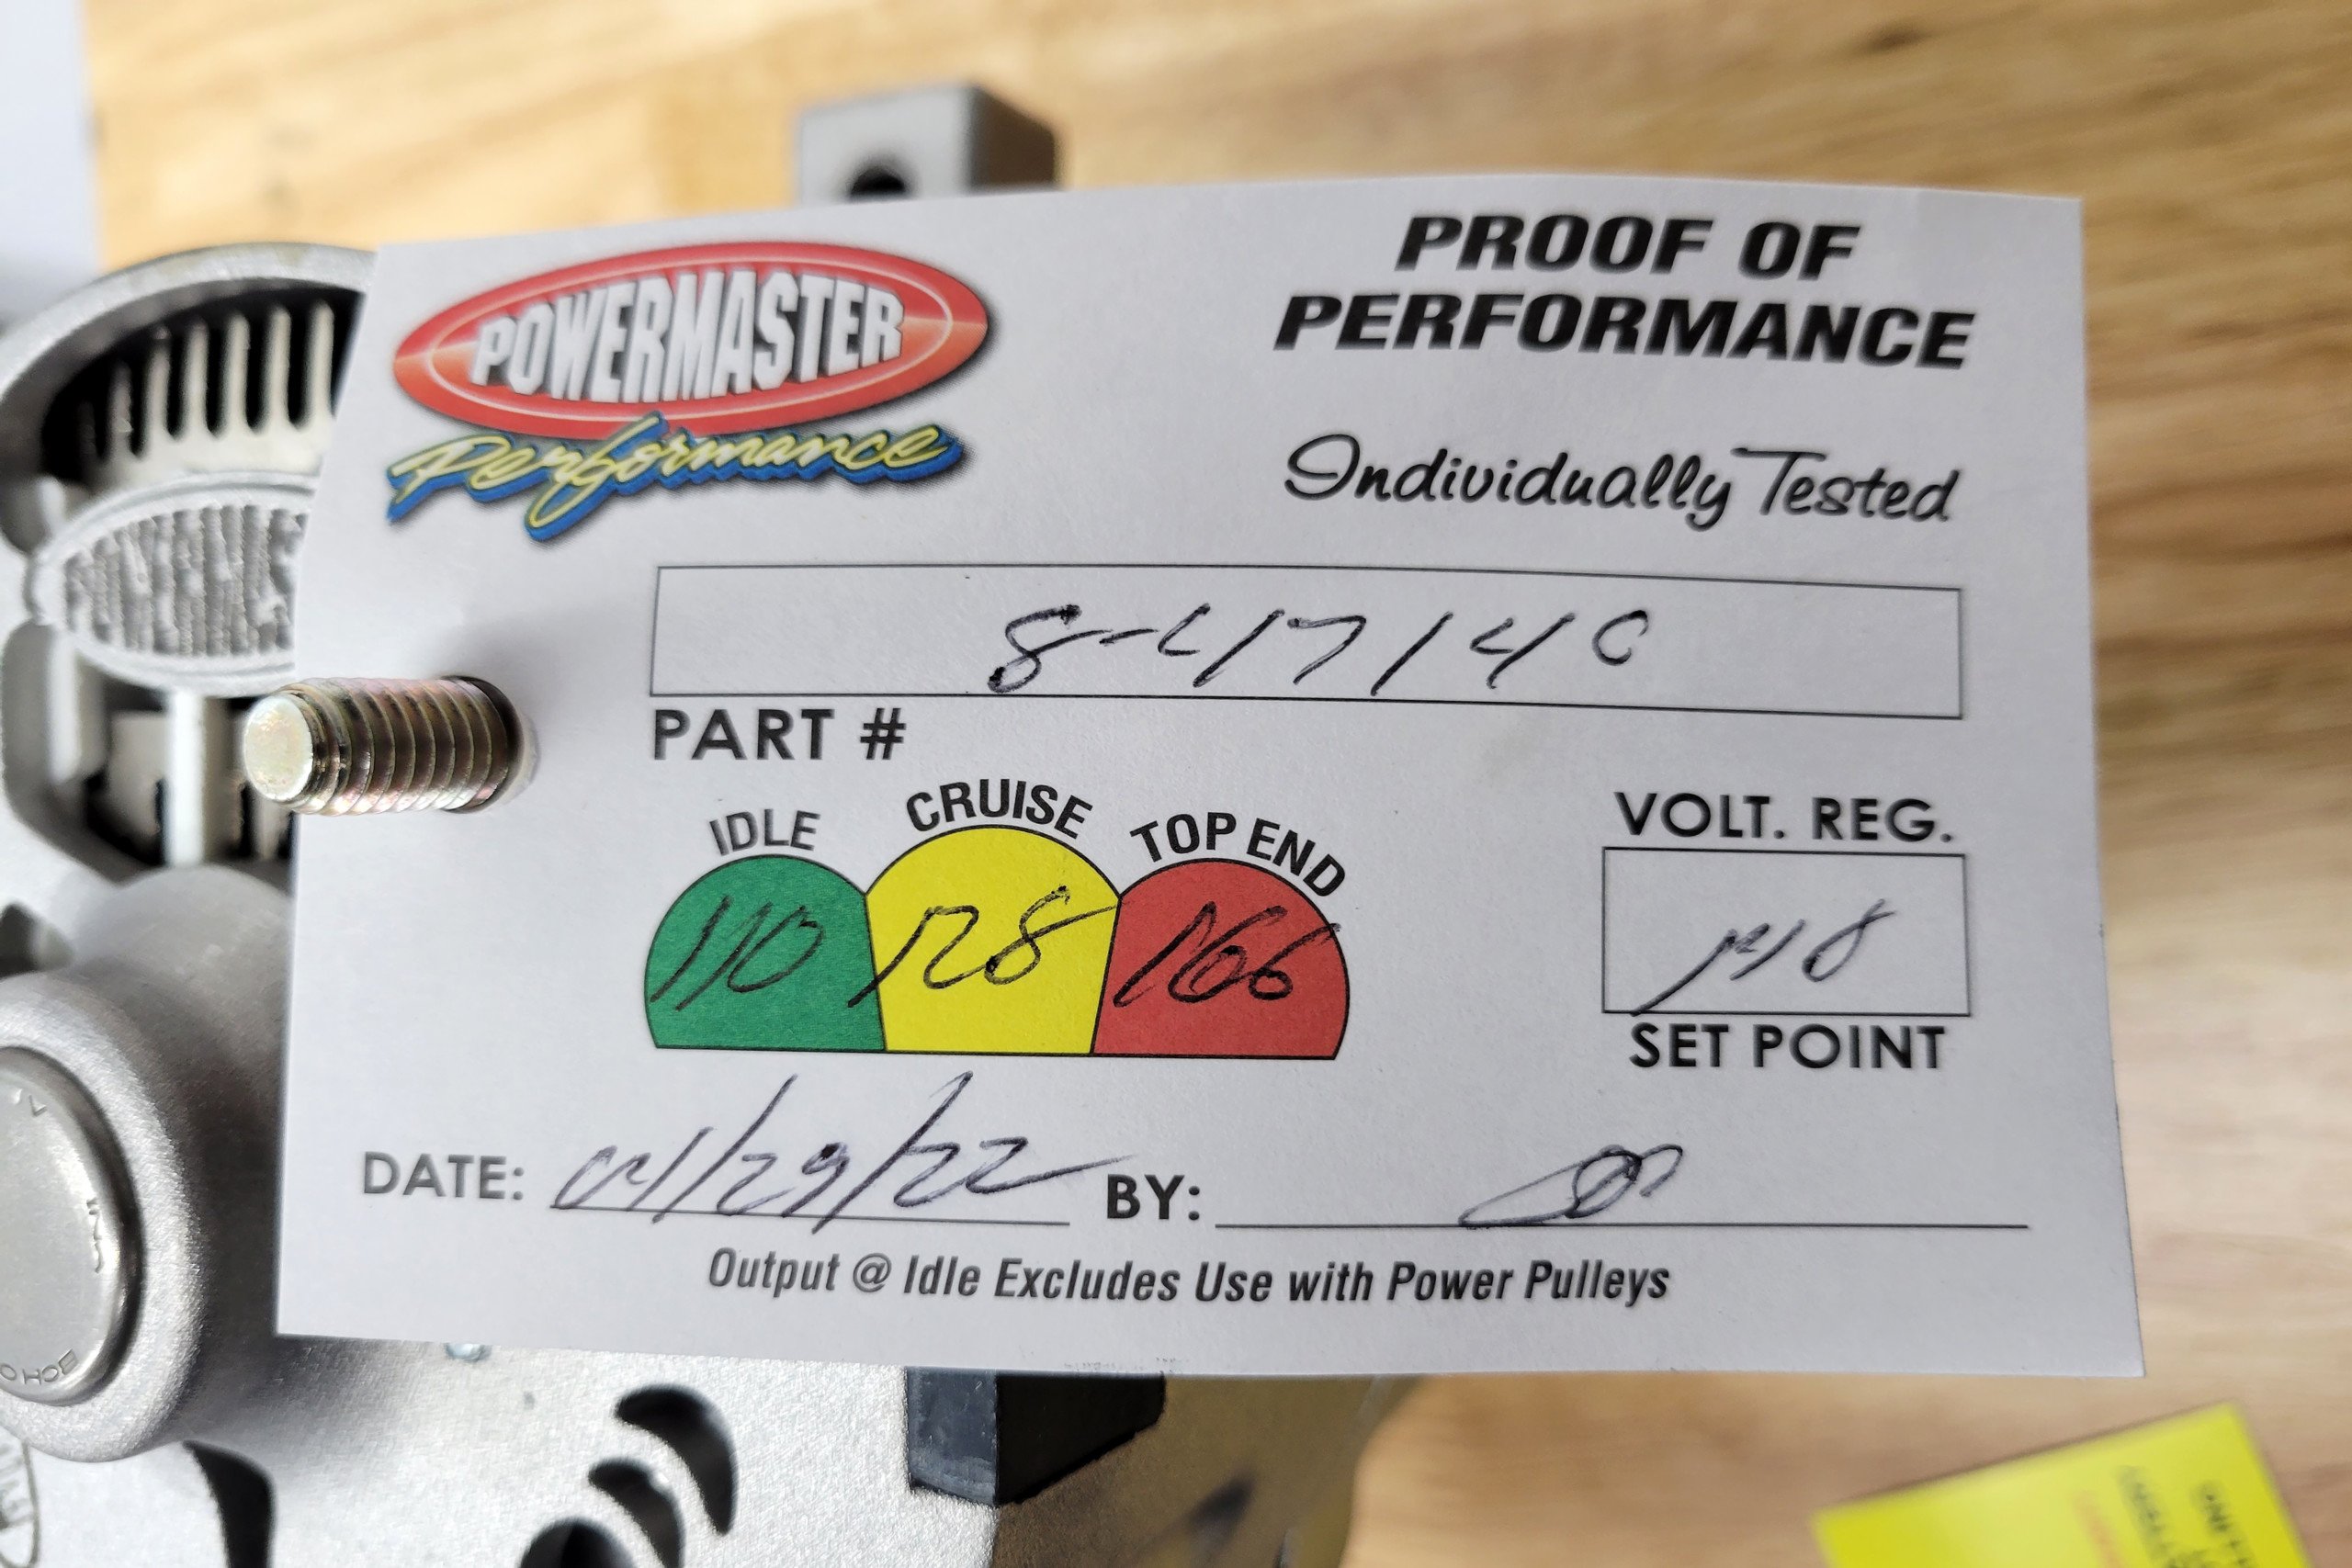
The Powermaster direct-fit Fox Body alternator bolts right into the factory bracketry (or anything designed to fit the factory alternator). However, this model puts out way more than the OEM unit, with the peak output of this 12-volt model testing at 166 amps.
Since we’ll eventually be running a significant amount of electronics in the car, Powermaster recommended the 12-volt, 150-amp configuration. And, since we really don’t have an aesthetic theme going with this engine, we opted for a simple natural aluminum finish (P/N 8-47140). The alternator features a true one-wire operation and is designed to put out 100 amps of current at idle, 125 amps under cruising conditions, and 150 amps at peak RPM. With a maximum operating speed of 18,000 rpm, that limits you to about 6,200 rpm with the supplied 2.0-inch alternator pulley and stock crank pulley. However, with our underdriven configuration (more on that further down), that same 18,000 rpm ceiling translates to 9,700 rpm without exceeding the alternator’s design envelope.
Since we have the factory front drive bracketry for a Thunderbird instead of a Mustang, we tossed the cast OEM pieces and opted instead for Powermaster’s billet “high-mount” bracketry.
Remember how we mentioned earlier that the 1991-’93 Thunderbird front drive mounting brackets are different from a 1987-’93 Mustang’s? We should note that means location, not the actual fit of the components. But, since we didn’t want to reuse the T-Bird arrangement, Powermaster had an easy fix for us. They offer four different billet aluminum bracket kits — three different mid-mount bracket kits designed for standard-rotation water pumps (due to belt geometry) and a high-mount kit for reverse-rotation serpentine belt systems (P/N: 732).
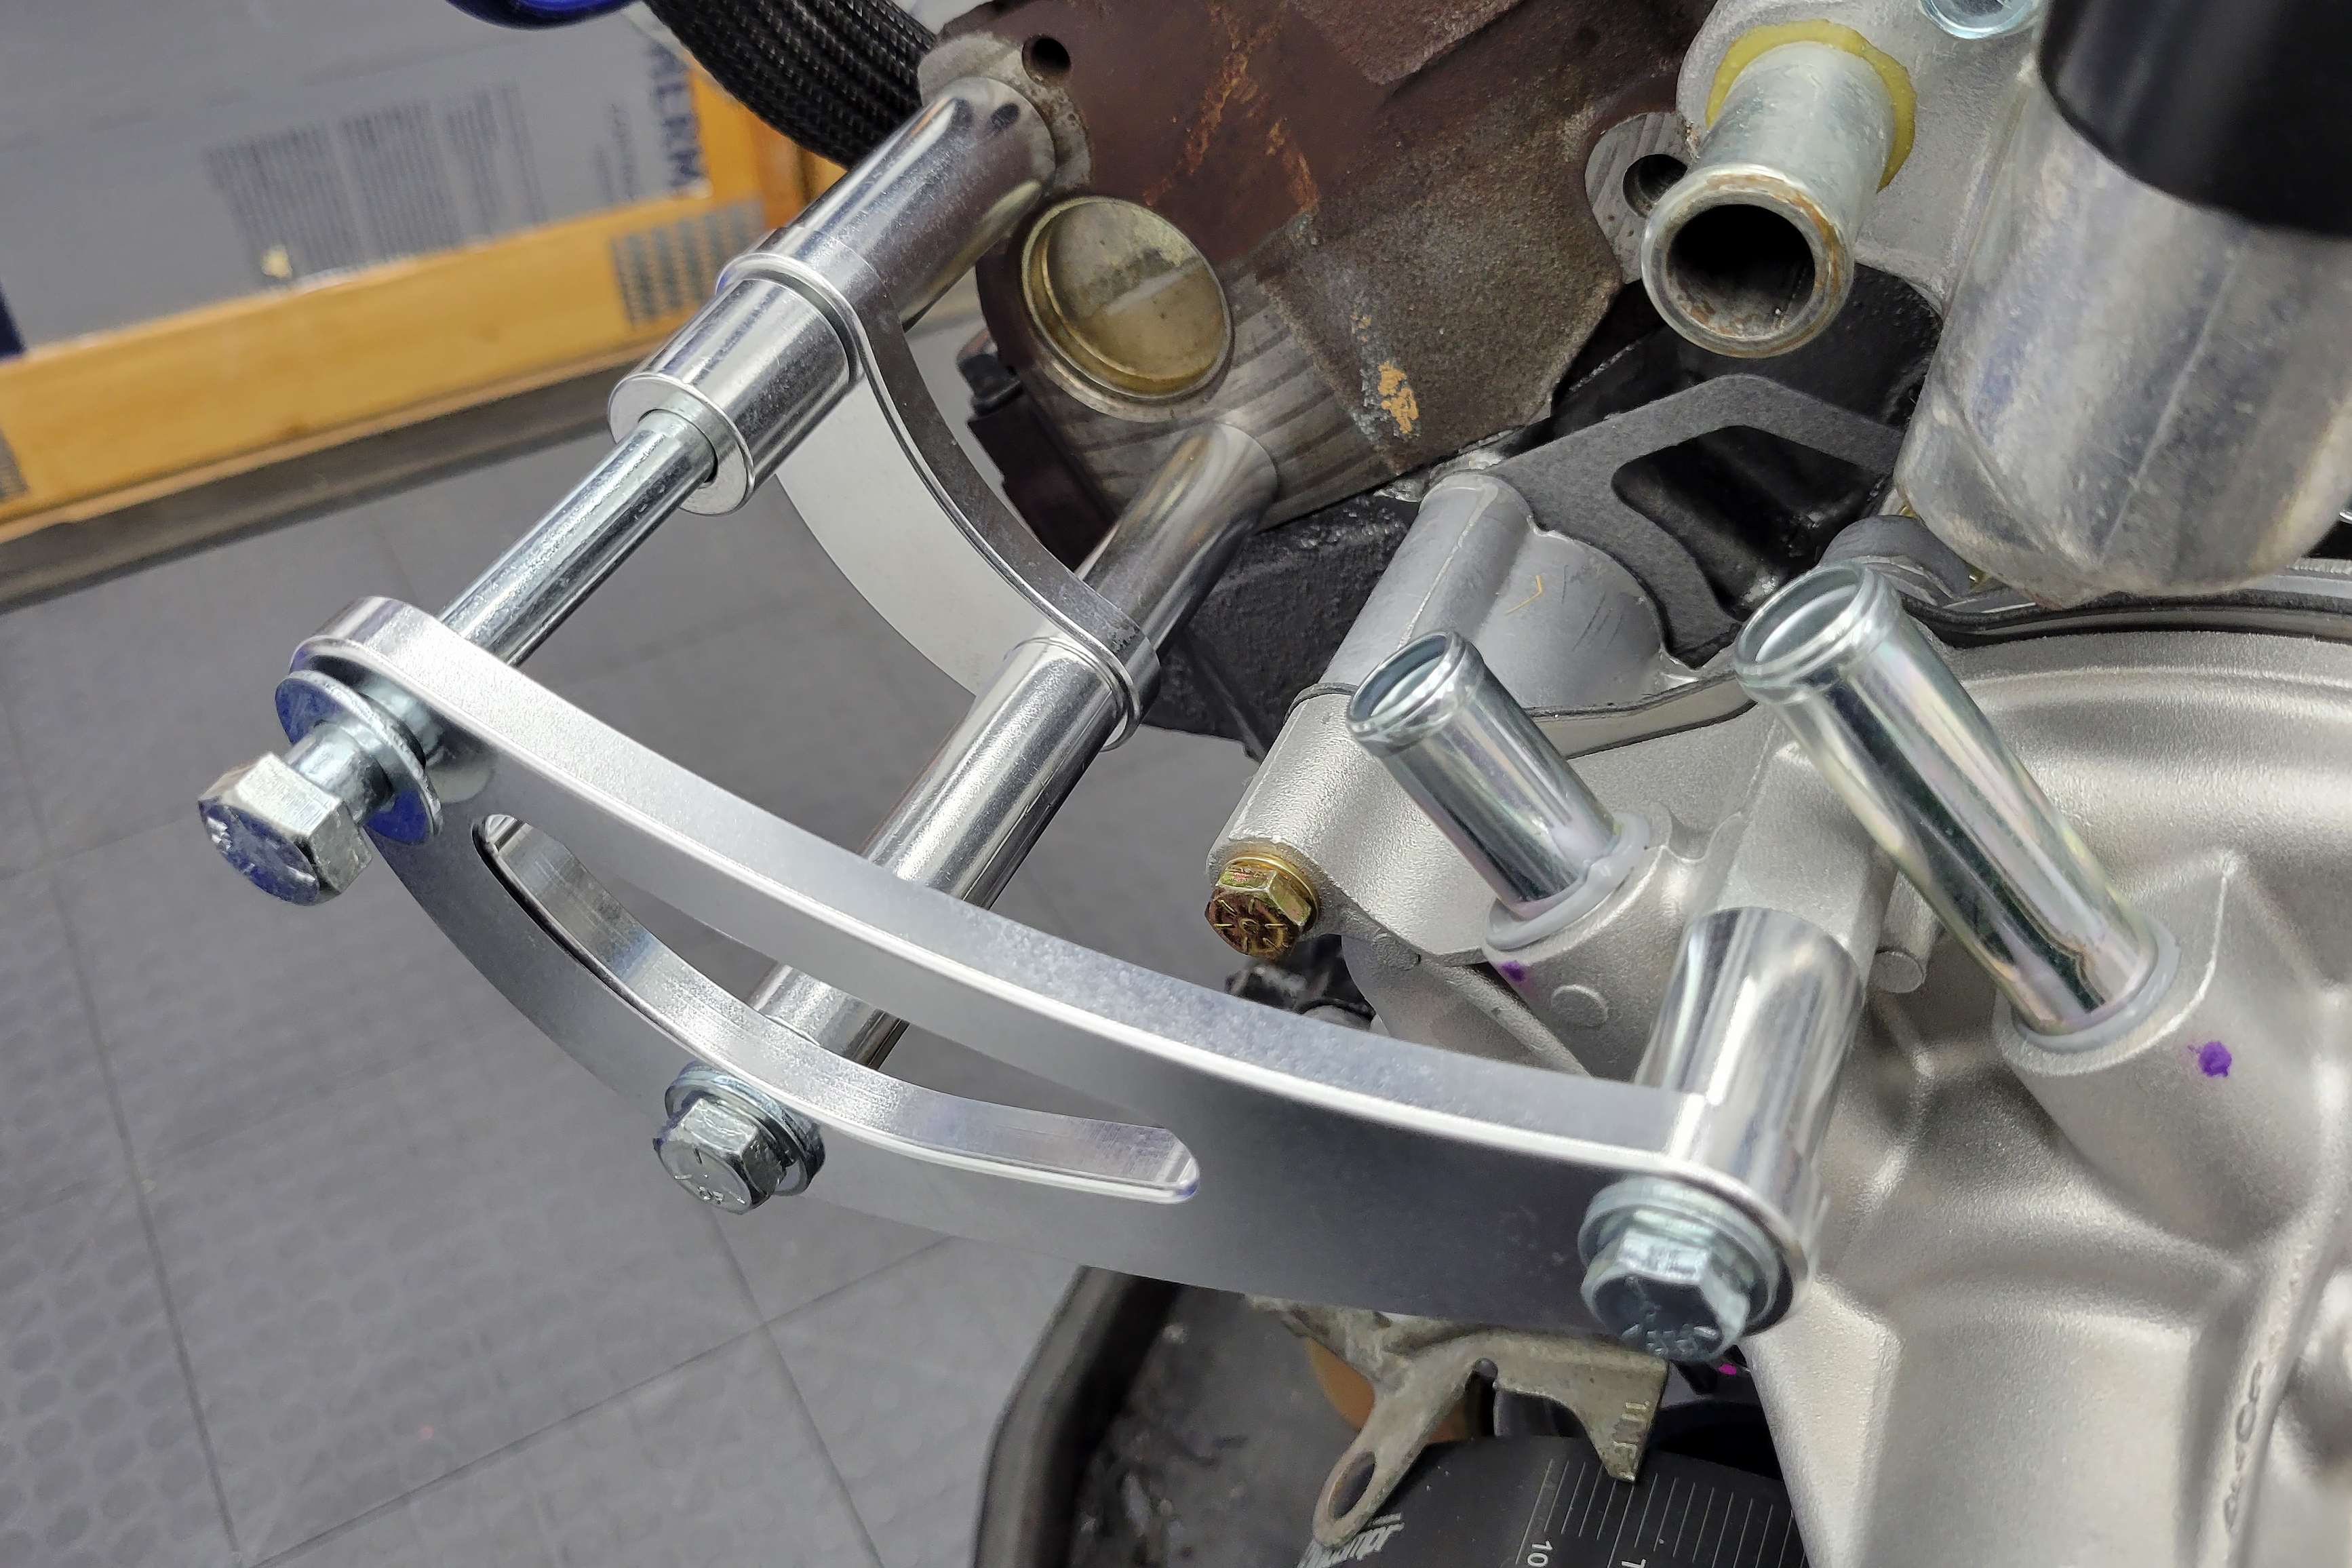
The kit consists of a stout billet aluminum main bracket that uses three bolts (two to the cylinder head accessory holes and one to the water pump) with properly-sized aluminum spacers to correctly position the alternator pulley. It also incorporates an adjustable support rod for the second alternator mounting hole, which ties into a driver-side water pump bolt. Using counter-threaded rod ends, the support rod is adjustable to both fine-tune the position of the alternator, or act as a tension adjustment if you were to eliminate the automatic tensioner from the setup. To say this kit fits well straight out of the box is a strong understatement.
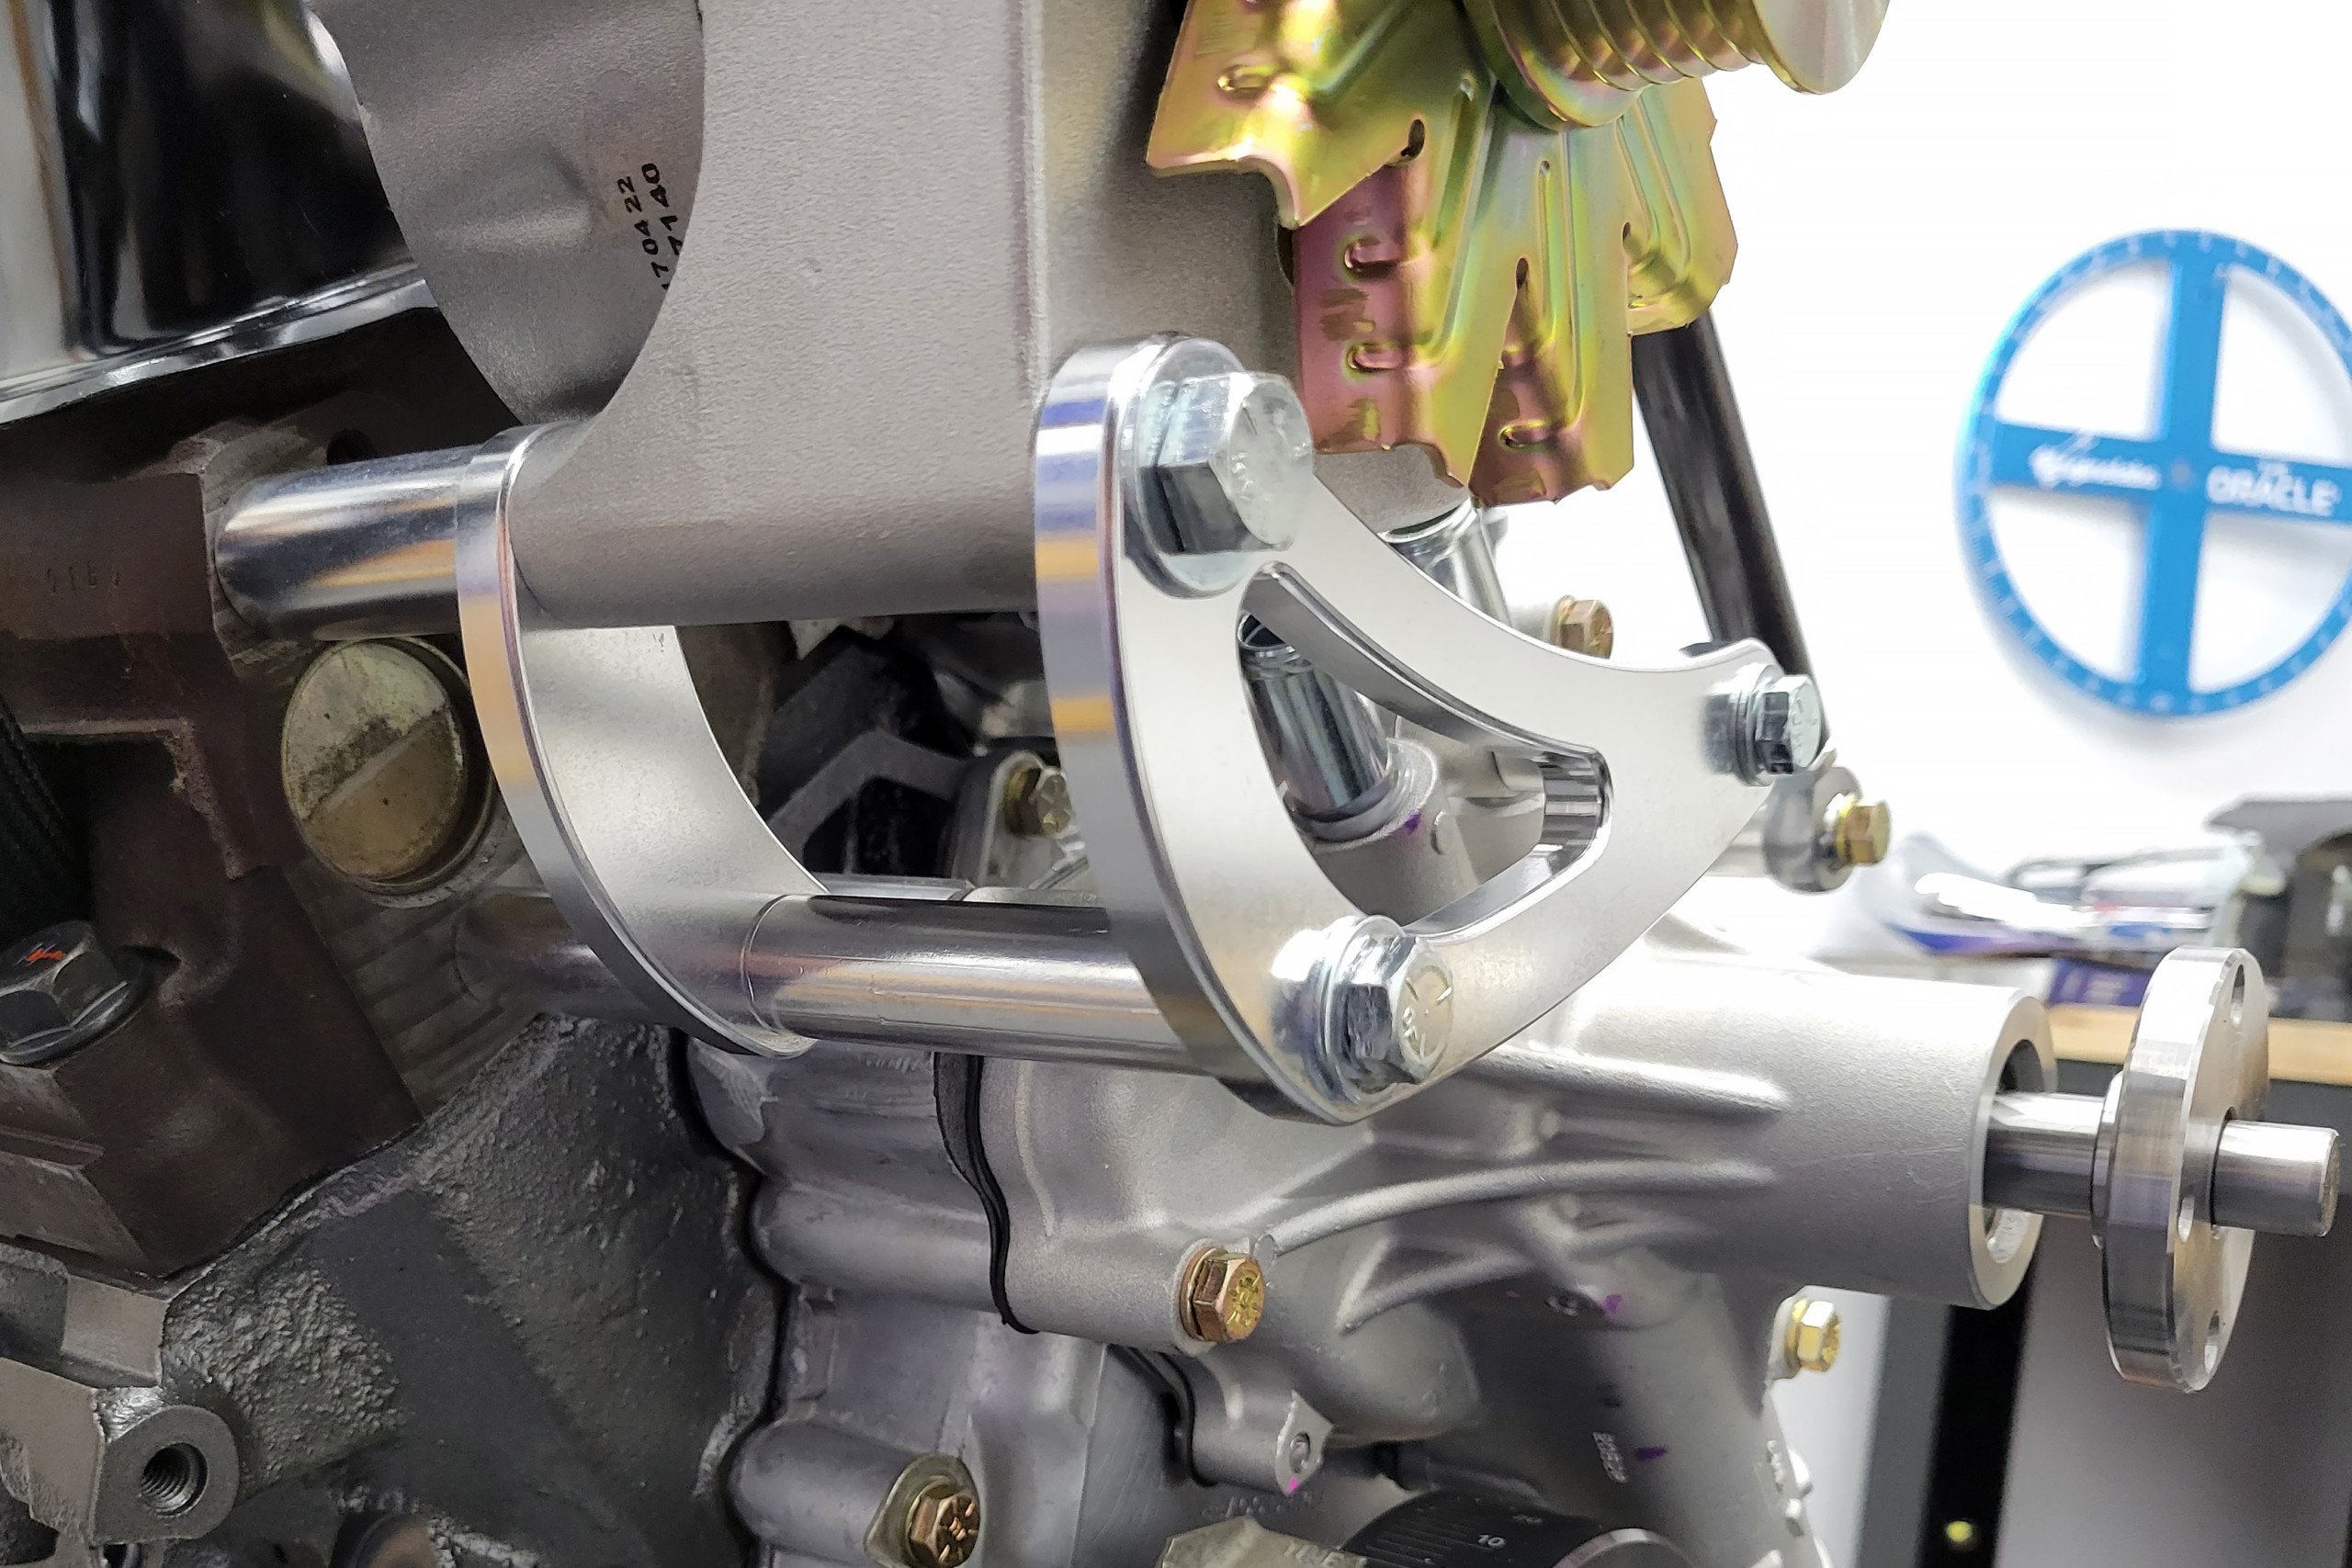

Besides bolting on like it came from the factory, the beefy mount is easily adjustable, thanks to the counter-threaded rod and heavy-duty rod ends.
Deleting Air Conditioning And Power Steering
Obviously, we won’t be running an air conditioning compressor or power steering pump on the dyno. While the Powermaster kit is designed to locate the serpentine belt in a manner that will still drive the water pump pulley in the correct direction without either of those pullies, it will do so with a less-than-stock amount of belt wrap. That will work for most applications, but since our goal is to beat the snot out of this engine on the dyno, we felt more wrap was desirable.
In order to accomplish this, we knew we needed to position a pulley on the driver’s side of the engine. We found the Trick Flow air conditioning eliminator bracket (P/N: 51500600), which relocates the OEM belt tensioner to a high-mount driver-side location. The bracket mounts similarly to the alternator bracket mounting, but on the opposite side of the engine. Unfortunately for us, this bracket also wants to occupy the same water pump bolt hole as the alternator support rod.

Here you can see how the Trick Flow A/C eliminator bracket mounts. The larger open bolt hole is for the tensioner mounting bolt, and the two lower holes allow for two different mounting angles. If you aren’t using a power steering pump, you’ll need to use the provided spacer and either reuse the factory bolt, or, in our case, threaded 7/16-inch rod while we wait for a 6.5-inch grade-8 bolt to arrive.
However, since we have a lathe in the shop, we can make pretty much anything we want. After some quick measuring, we realized that all we had to do was remove the thickness of the delete bracket from Powermaster’s supplied rod-end spacer, and all would be well. Just to be safe, and not risk damaging our original spacer, we just whittled out a new spacer altogether from some 1-inch 6061 aluminum bar stock we had laying around from another project.
Now, we realize that not everyone has a lathe at their disposal, so another easy fix would be to simply stack an appropriate number of 5/16-inch washers to take up the space between the water pump and rod end. Since the washers will be sandwiched between the bracket and water pump flange, there would be plenty of stability and support. Plus, if you aren’t using this specific A/C eliminator bracket, this is a complete non-issue.

Since the Powermaster alternator bracket and the Trick Flow A/C eliminator bracket want to use the same hole, we had to modify the spacer design a bit. If you have a lathe, you can simply shorten the Powermaster spacer to 1.125 inches. If you don’t have a lathe, you can find a 5/8-inch spacer, or stack up 5/8-inch worth of 5/16-inch washers.
Arranging The Pullies
With everything securely mounted to the front of the engine, the next step was to mount all of the pullies. Rather than reusing all of the stock pullies from the Thunderbird’s front drive, we decided to go with one of the most ubiquitous Fox Body Mustang upgrades from one of the most ubiquitous Mustang performance companies: A set of underdrive pullies from Steeda Autosports.
Like the last article, we conferred with Steeda about using underdrive pullies right out of the gate. The general opinion was, since underdrive pullies are so common, it didn’t even make sense to bother cleaning up and reusing the stock pullies (and in the case of the water pump pulley, we’d have had to source an entirely new stock pulley).
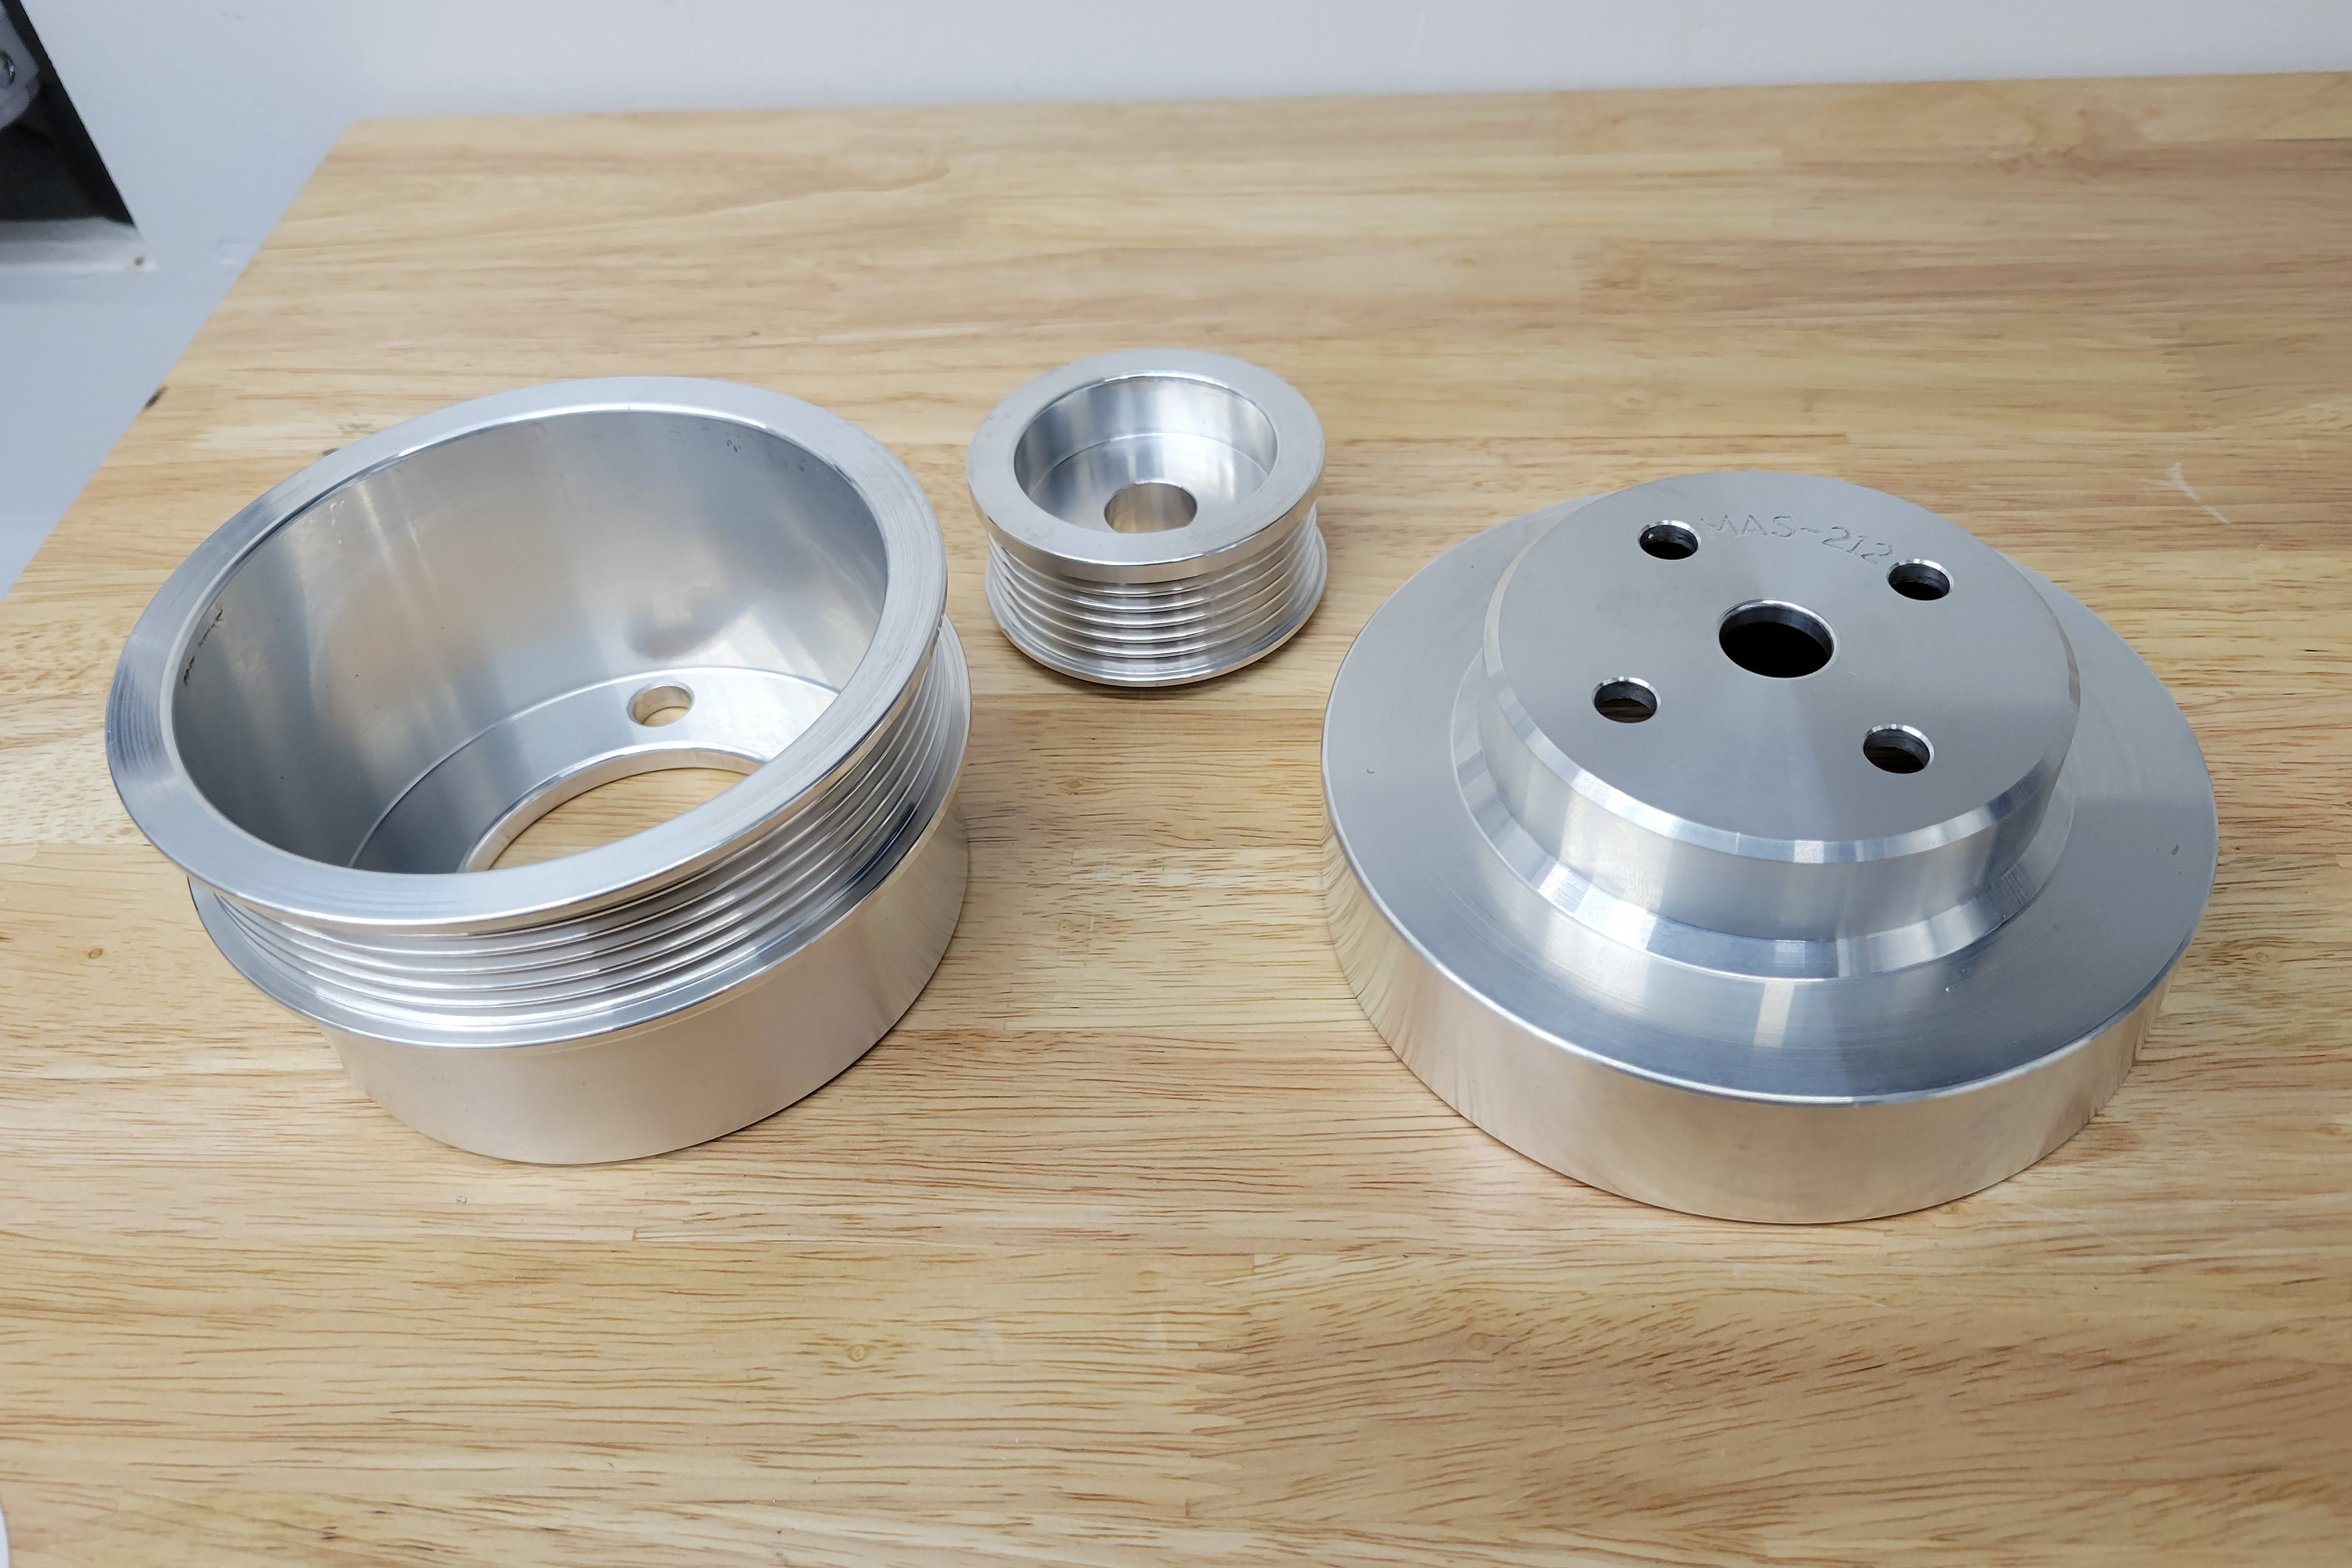
The BBK underdrive pulley kit Steeda sent comes with a 4.75-inch crank pulley (left), 2.46-inch alternator pulley (center), and a 5.25-inch water pump pulley.
The BBK kit that Steeda sent to us is a three-piece kit made from aircraft aluminum with an eye-pleasing polished finish that adds a little pizzaz to our front drive. The crankshaft, alternator, and water pump pullies are designed to free up horsepower over the factory pullies by slowing down accessories by a carefully calculated amount. Slow the accessories down too much and you get potential charging or cooling issues. Another cool feature of these pullies is that they are designed to keep the overall length of the belt the same as stock (in a stock configuration, of course).
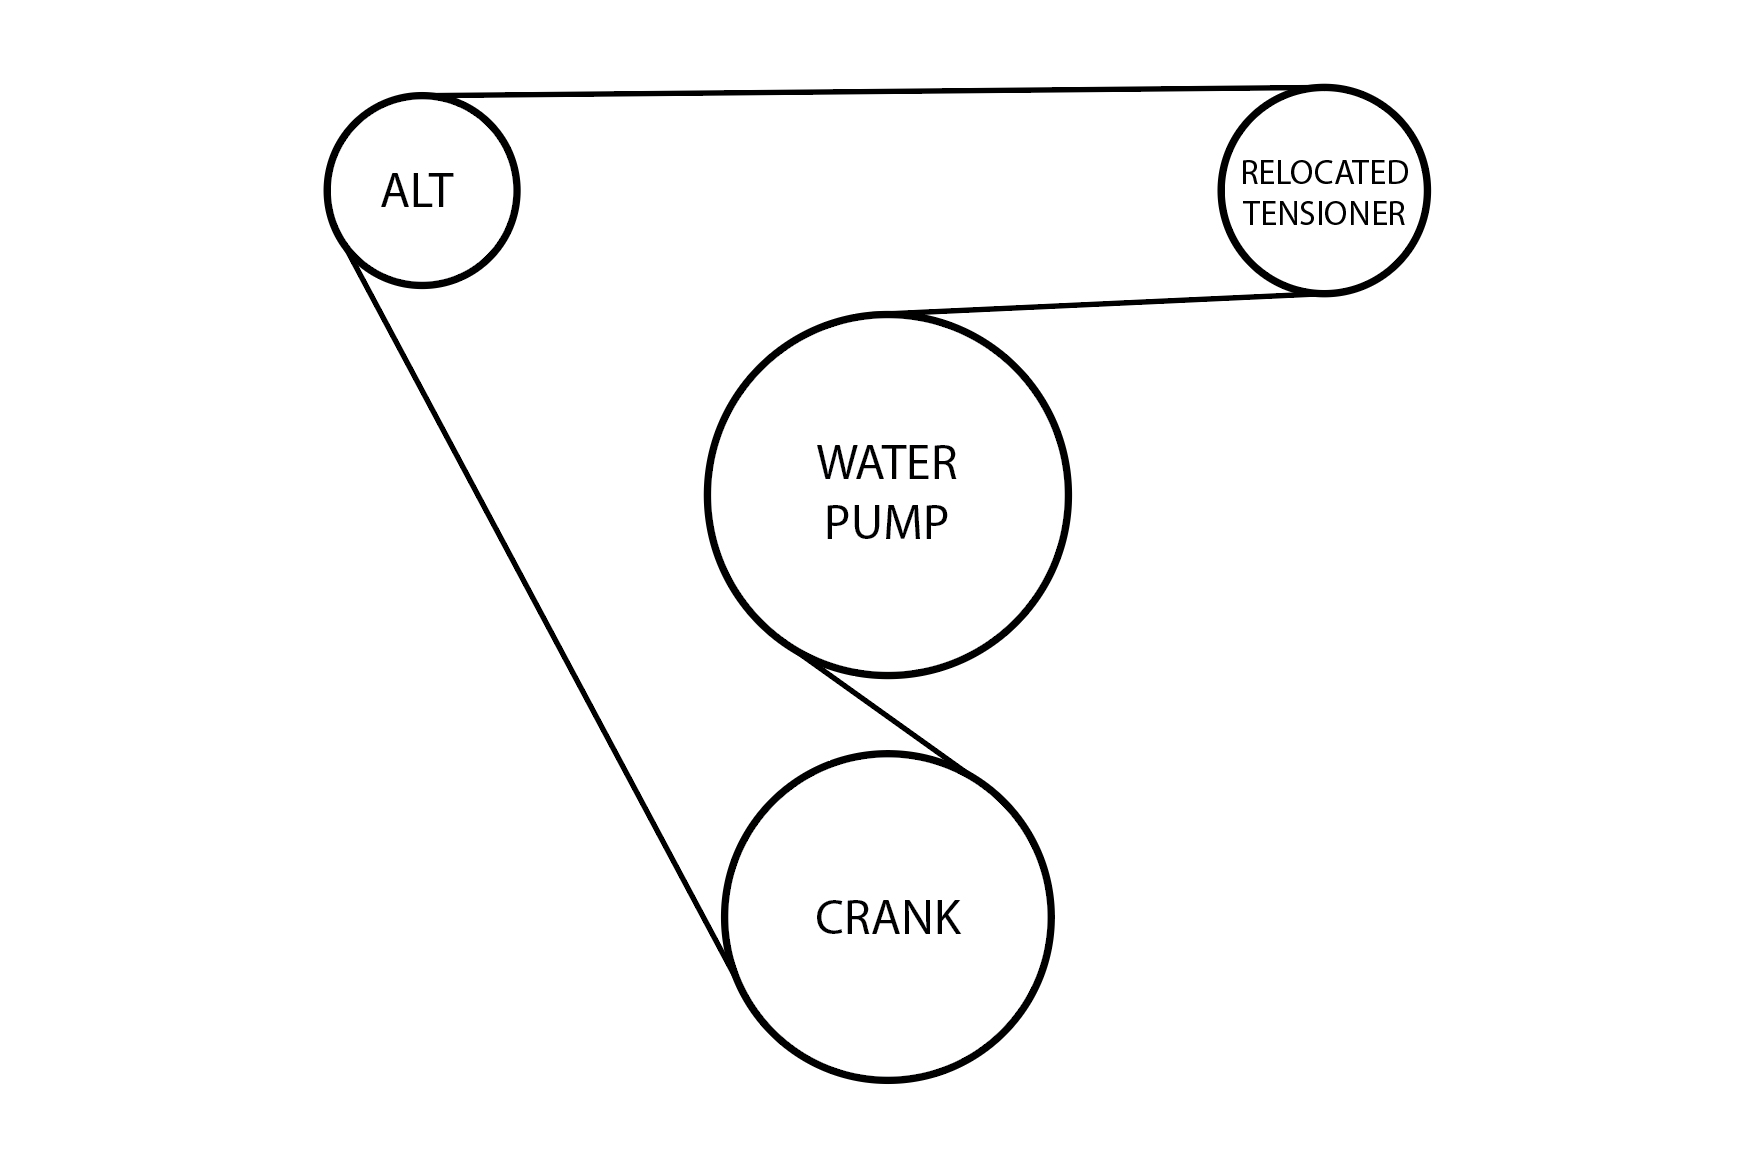
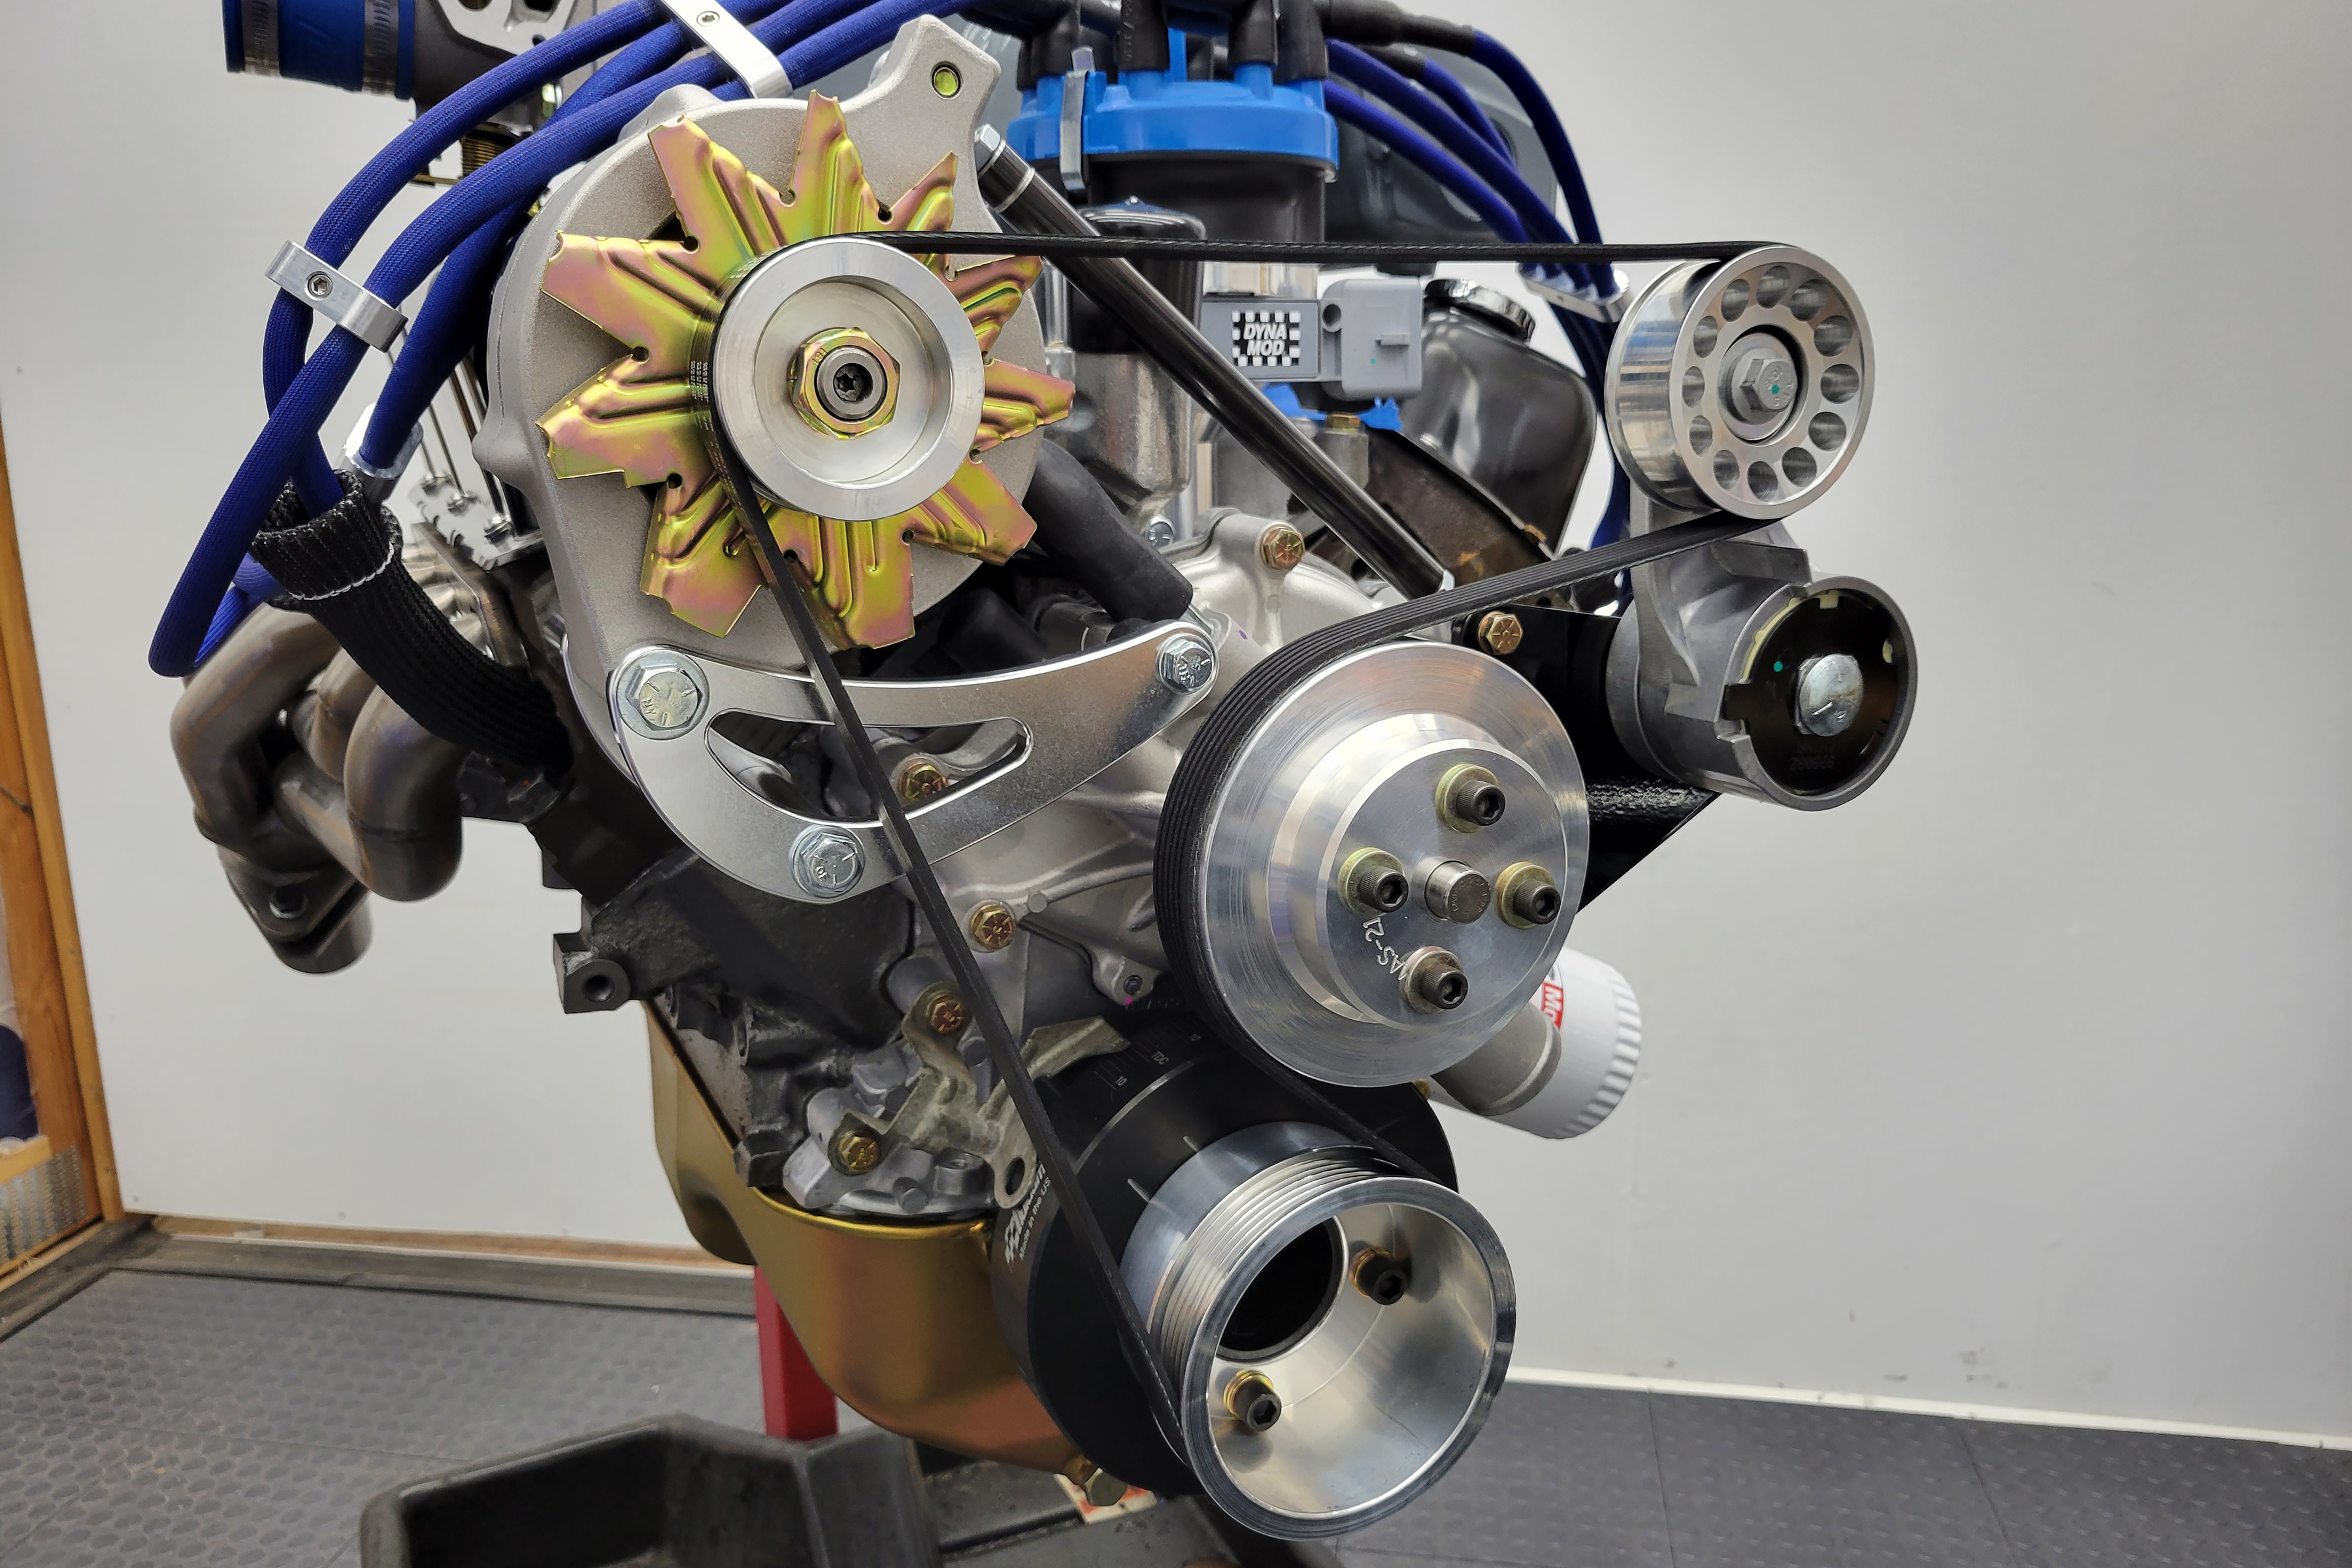
Our final serpentine belt routing for the engine. Note that the stock tensioner comes with a smooth pulley, and in this configuration, the grooved side of the belt is riding against it. With Steeda’s pulley design, it should be fine and will give us much more belt wrap on all the pullies.
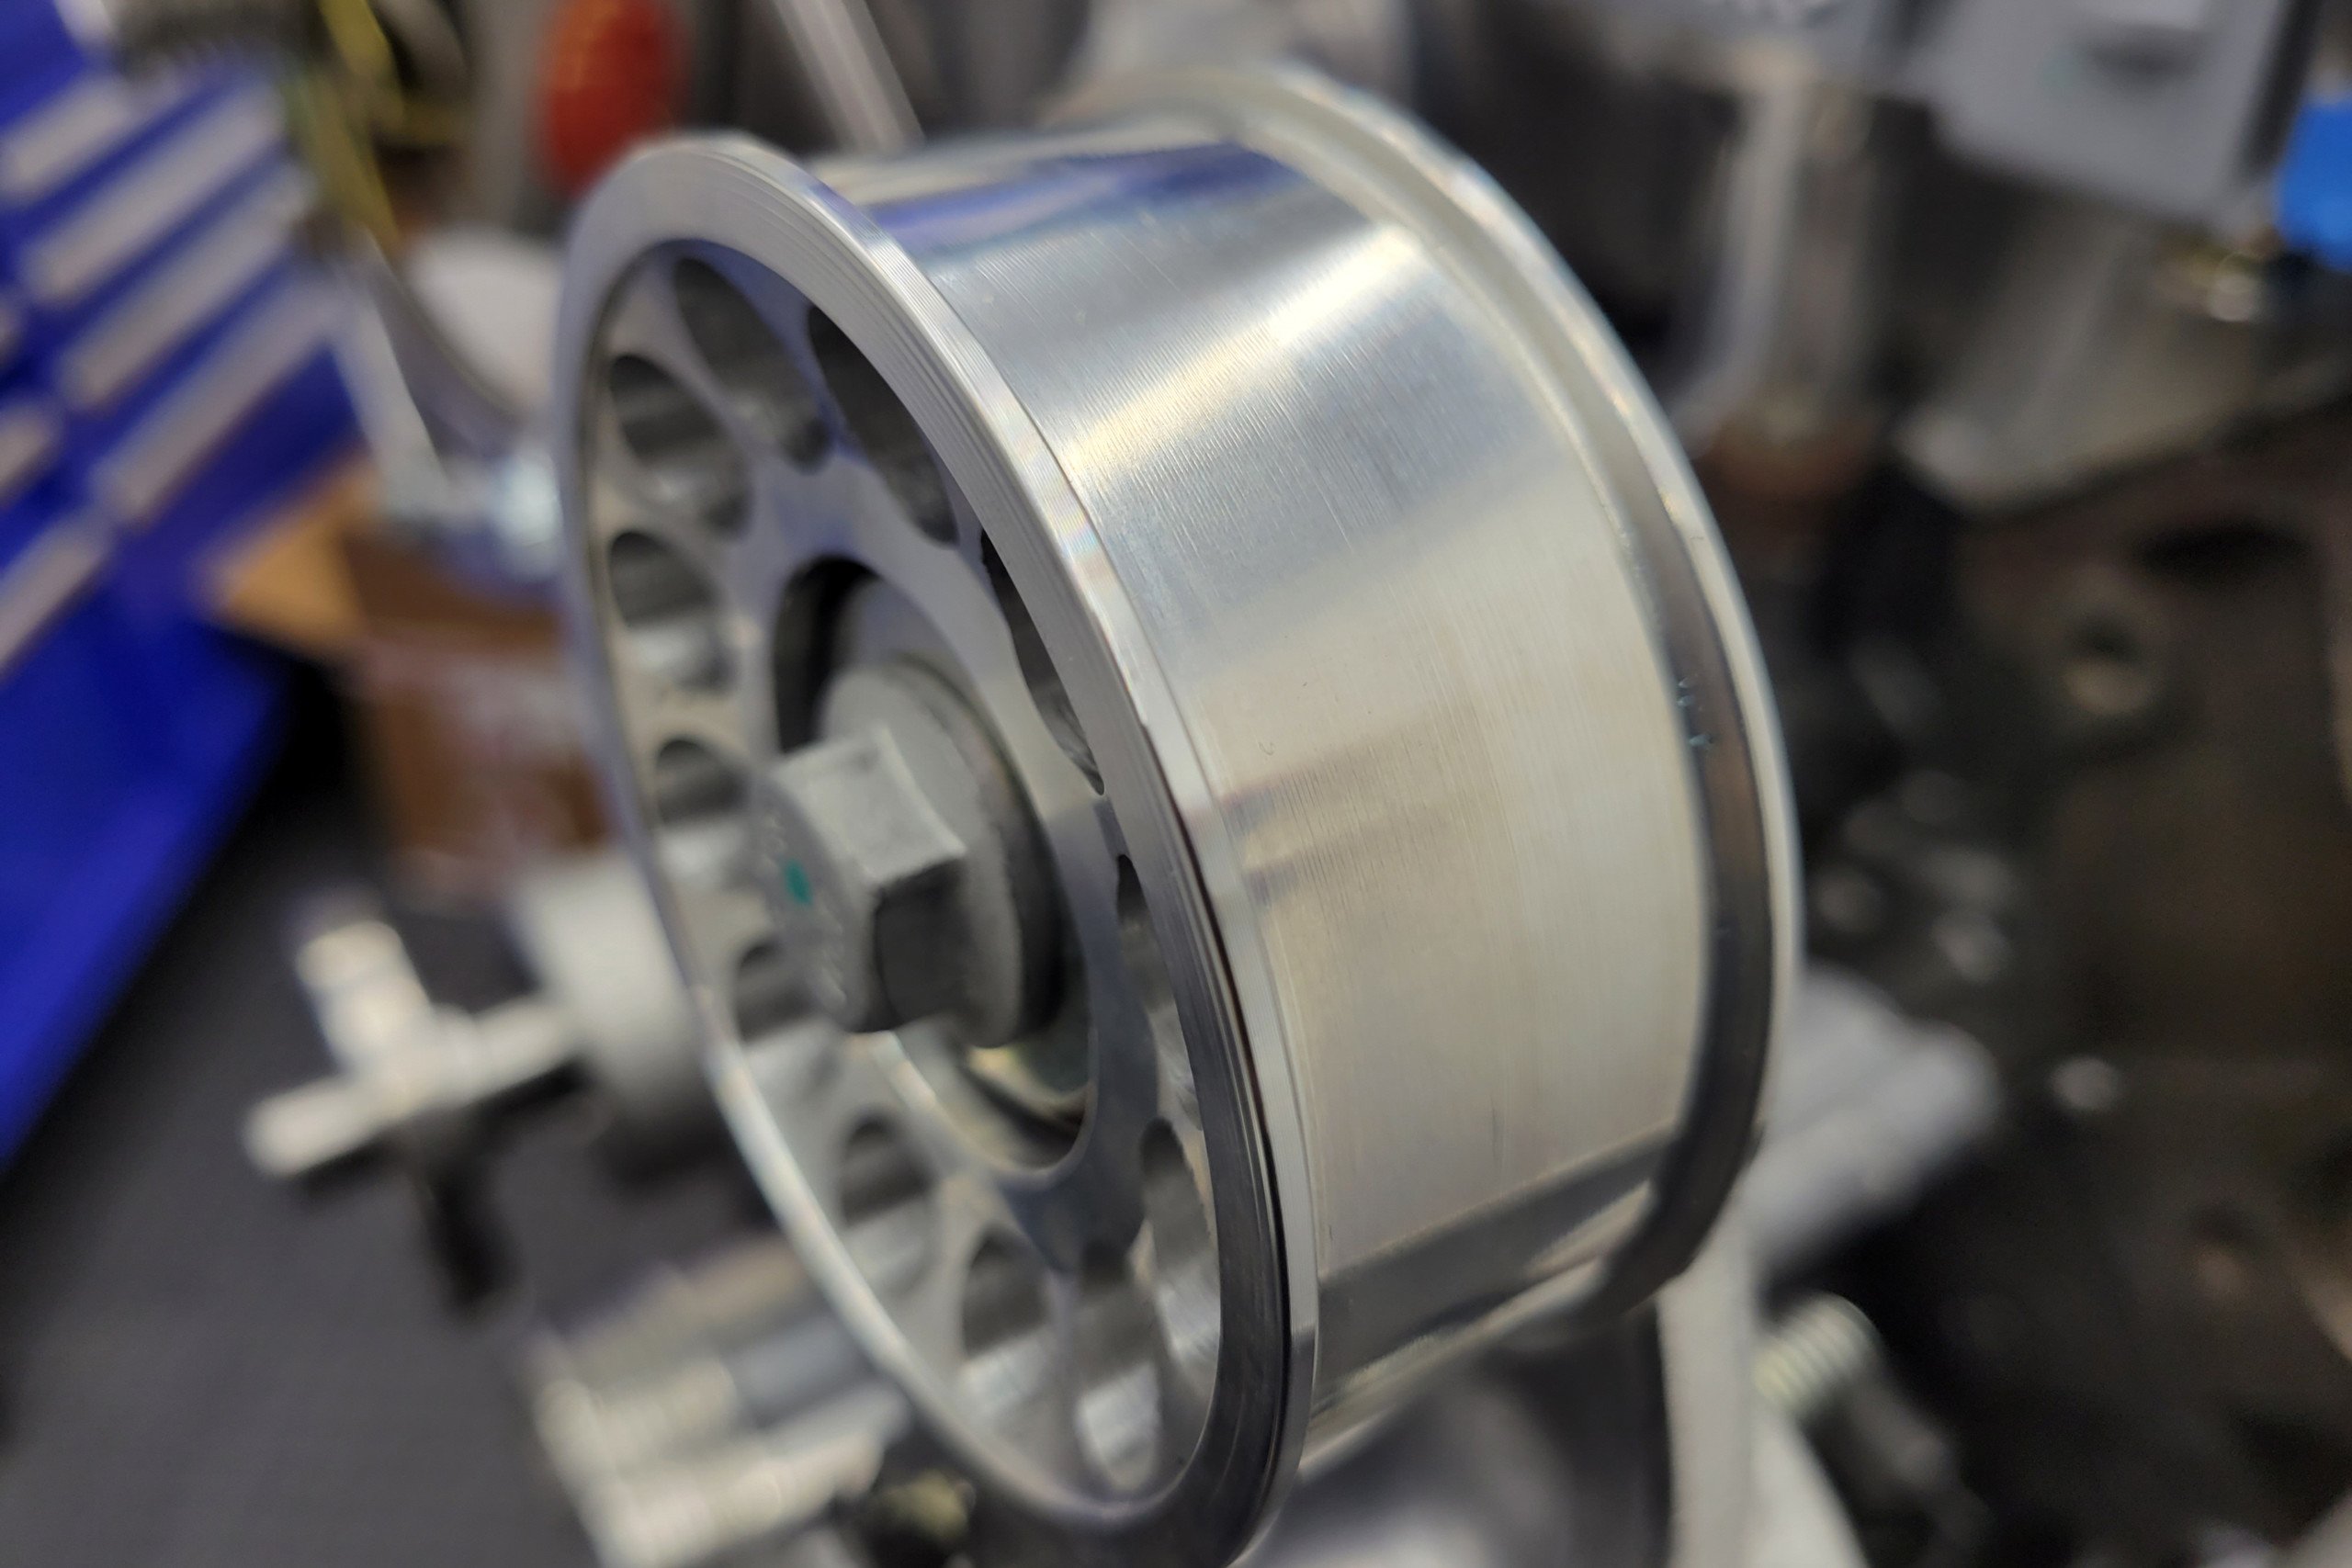
Additionally, Steeda manufactures a billet aluminum belt tensioner pulley, that replaces the OEM plastic idler on the tensioner arm. Besides looking great, the Steeda pulley is made with a high-end bearing for long-lasting performance (in fact, it’s likely the pulley will outlast the tensioner itself). Speaking of tensioners, once again, the Thunderbird-specific tensioner is a different part than the Mustang tensioner. We had to purchase a new tensioner anyway, as the T-Bird unit was shot.
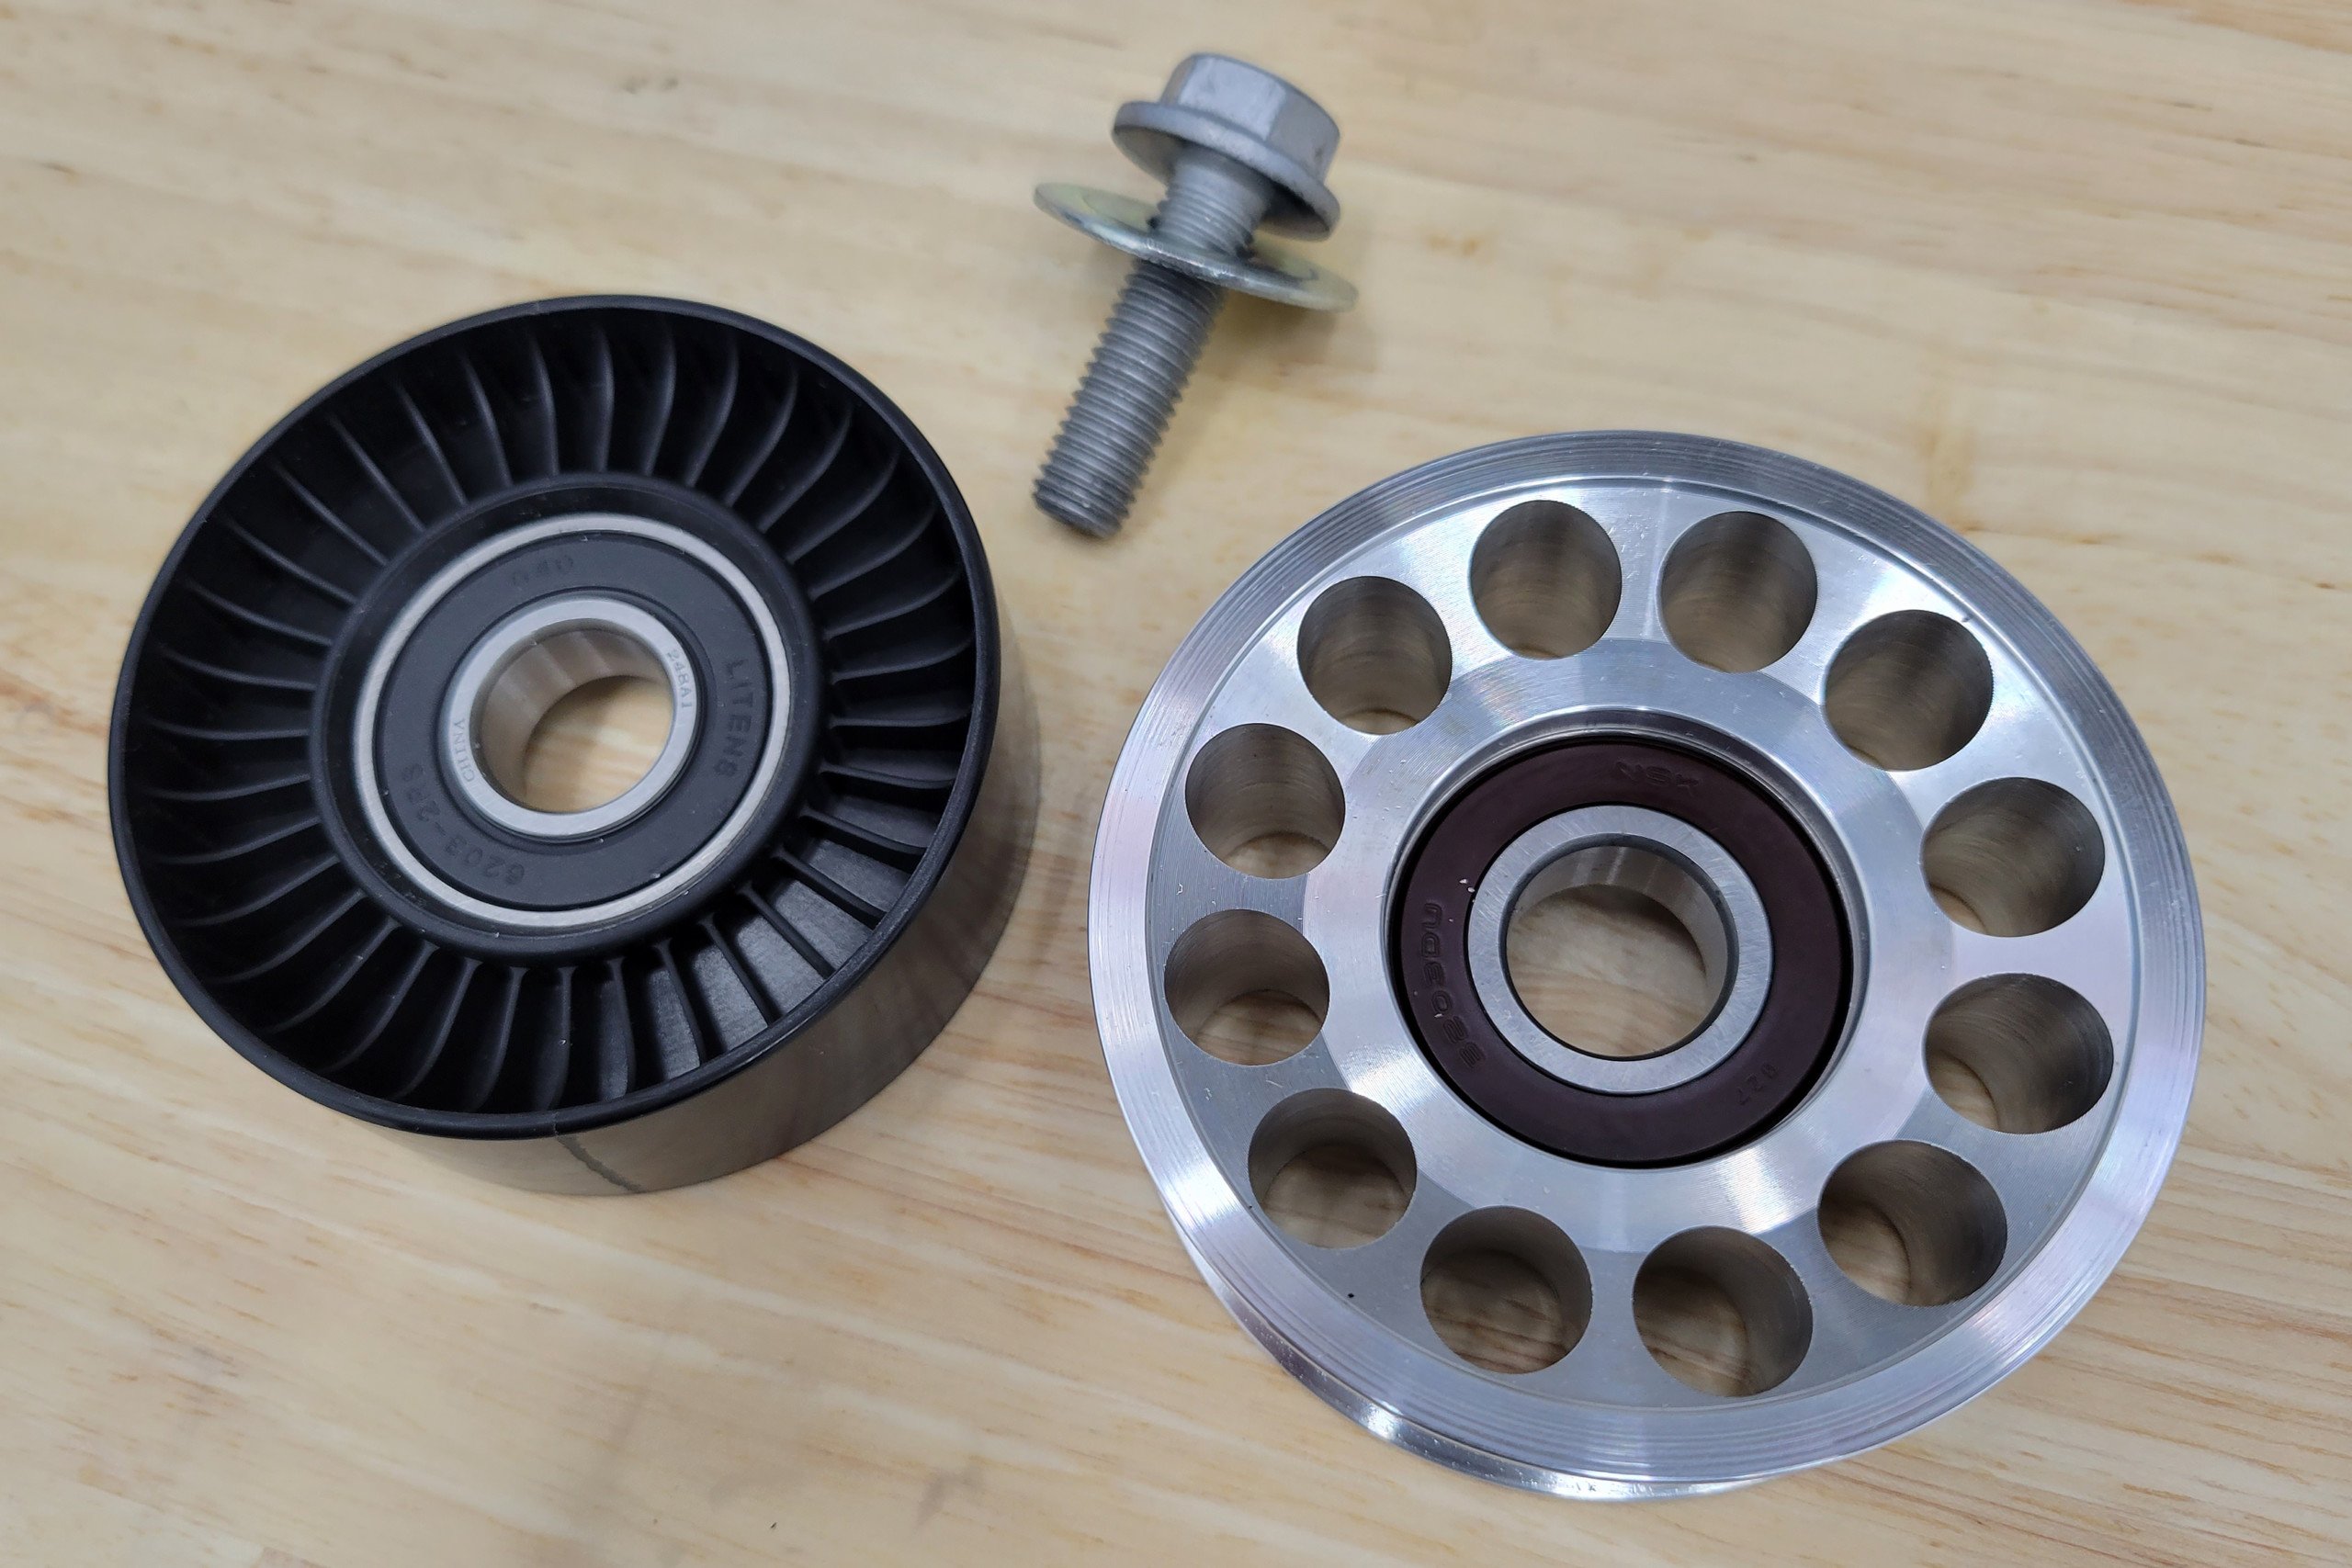
The Steeda tensioner pulley is a direct swap for the OEM pulley. In our new configuration, we have the grooved side of the belt running against the tensioner, so the pulley's side rails help provide a little extra peace of mind.
One final major benefit of the Steeda aluminum pulley for this project is its design. While its surface is slick, like the OEM pulley, it does have guiding sidewalls to prevent the belt from walking. While this might not seem like a big deal in the OE configuration, where the tensioner acts on the smooth side of the belt, in our relocated position, the pulley acts on the ribbed side of the serpentine belt. Those sidewalls add some stability, since the pulley isn’t grooved.
Measuring For A Serpentine Belt
With everything bolted together and looking shiny and fresh, it was time to take measurements for our custom front drive arrangement. The instructions that came with the Trick Flow bracket gave a suggested length of 59.25 inches, and the underdrive pullies are designed to not change the length of belt required, but we’re of the “measure twice” mindset.
The tensioner mount on the delete bracket has two options, and since a 59.25-inch belt (and anything thereabouts) wasn’t in stock anywhere locally, we used the “shorter” of the two mounting options, which made a total belt length measurement of 56 inches, according to the tailor’s tape (which works much better than the surveyor’s string we tried at first). Usually, you’d add 5/8-inch to this measurement to account for belt thickness. We then subtracted an inch to put some tension on the belt tensioner, giving us a total belt length of 55-5/8 inches.
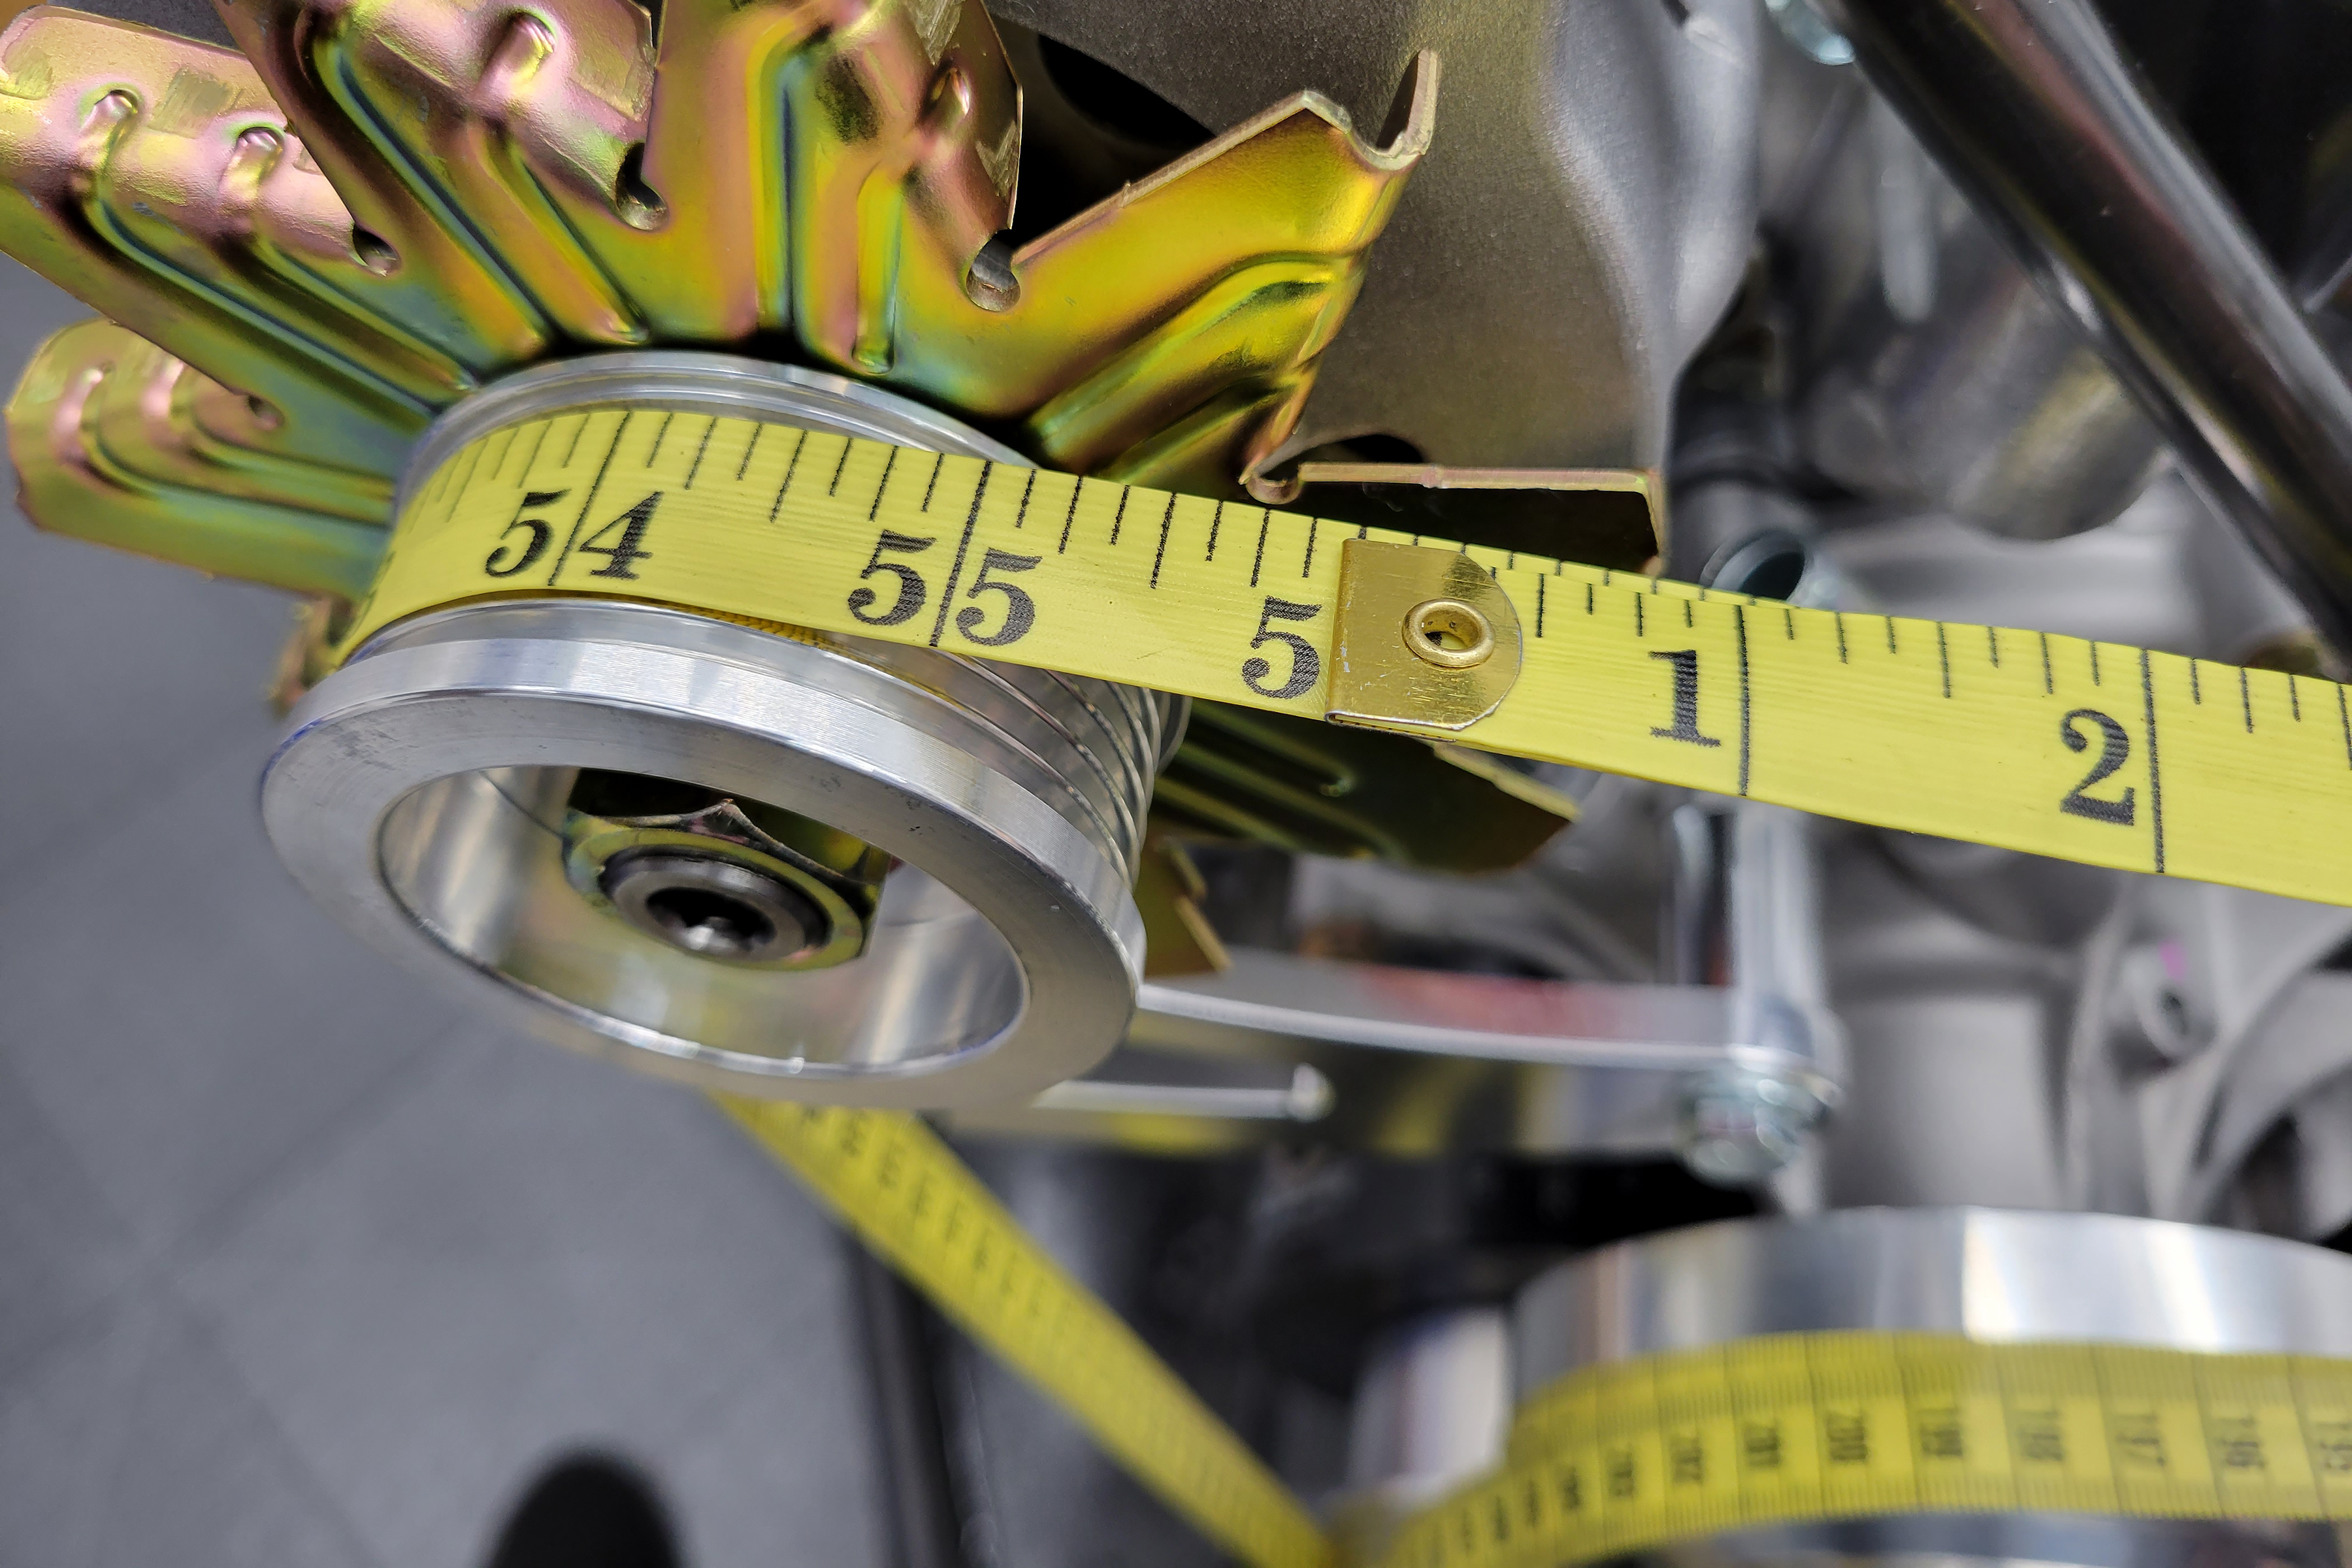
Measuring for the new belt is made much easier with a tailor’s tape. Here, we took the measurement with the tensioner maxed out, added 5/8-inch for the overall thickness of the belt, and then subtracted an inch to pull the tensioner in a bit. We could probably go shorter than 55-5/8 inches to put the tensioner more towards the middle of its range of travel, but belt availability played a part here.
With that, the front drive on the Retro 5.0 is sorted. We have a killer alternator in a solid mount, we have our tensioner relocated to provide solid wrap on the Milodon reverse-rotation water pump, and a whole lot of function with a little bit of bling thanks to Powermaster, Steeda, and BBK.