From the beginning, we’ve been outfitting Project Magneto with the finest components designed for the drag strip. Christened after comic book super villain-turned-hero, Project Magneto holds the belief that ordinary, stock S550 Mustangs pale in comparison to their modified counterparts, and in all honesty, we can’t disagree. However, there was a hurdle – our aim wasn’t to compete with factory stock S550s; we had shifted our focus to the pinnacle of S550, Ford’s Shelby GT500.
Yet, a small obstacle stood in our way: we were attempting to challenge the reigning champion without equalizing the circumstances by shedding significant weight. Instead, we had to refine our build to ensure optimal traction on the track, all the while preparing to introduce more power when the time was right.

Process Of Elimination
Building a car mirrors a process of refinement through elimination. Executed correctly, this process can be premeditated to prevent being sidelined at the track due to mechanical failures. This approach logically holds the most merit, contingent upon an understanding of the thresholds inherent in your chassis’ components. Given that the S550 chassis has already reached tenured status, we had a good idea of what we needed before we smashed the gas when the third yellow bulb lit. Furthermore, considering the dwindling availability of tracks, we were committed to eradicating any vulnerabilities before another track met its unfortunate demise.
When we initially acquired Magneto, it rolled on 19-inch stock wheels with cheap tires. Unfortunately, this wheel size is not optimal for achieving the ambitious goals we had set for the car’s performance. To compound matters, the previous owner seemed to prioritize burnouts and aggressive driving over tire safety, evident from the 255-series rubber that once displayed distinct tire grooves but now resembled bias-ply slicks. Given our decision to remain naturally aspirated for the interim, we managed to procure a set of RC Components Street King wheels and wrapped them in Mickey Thompson ET Street S/S rear tires and ET Street front tires.


Our new tire configuration consistently yielded an eighth-mile time of 8.19 seconds, accomplishing a 1.99-second 60-foot time on multiple occasions. Not super impressive, but as we found out, the 31st state apparently does not believe in traction compounds. With the wheel and tire setup addressed, our focus shifted to ensuring that in the event of successful traction, our stock driveline and suspension systems could withstand the impact. Most crucially, we were determined to eradicate the notorious S550 wheel hop, a phenomenon inherent to its independent rear suspension.
Aware of Steeda‘s pioneering efforts in S550 drag racing, particularly in the realm of naturally aspirated setups, we leaned on its expertise. Utilizing Steeda’s wealth of knowledge, we incorporated several components, including the Steeda Ultimate Stop The Hop Kit, Steeda front coilovers, Steeda Pro Action Single-Adjustable Shocks, Steeda rear drag springs, and the Steeda drag race rear sway bar, among other elements.


The drivetrain underwent another round of modifications, introducing lightweight alternatives to the factory components while enhancing overall strength. Once more, we turned to Steeda’s website and technical support to procure its Hardcore IRS Differential Support Brackets. These brackets not only fortified our factory rearend but allowed us to retain the lightweight aluminum housing. Remember, weight is the enemy of performance and the iron rear differential is far from light. We swapped out the factory two-piece driveshaft for a carbon-fiber one-piece unit manufactured by QA1. The final standoff against forces of tensile strength and traction came in the form of our axles, which were substituted with stout counterparts from The Driveshaft Shop.
Our build had now evolved to a stage where it could effectively transmit power better than before, but even with these improvements, it remained considerably distant from matching the GT500’s potency at its stock power levels. Thus, it was high time for us to look into the realm of forced induction. While a “no expense spared” naturally aspirated build sounded interesting, let’s be real here, the Coyote engine is already impressively efficient, but what it lacks most is the cubic inches to sustain substantial naturally aspirated power gains.
The Hunt For Forced Induction
Forced induction is not an unfamiliar concept for the Coyote engine. Well ahead of the 2011 Mustang’s introduction to consumers, the engineers at Ford Motor Company‘s V8 engine program were well aware that enthusiasts would subject the Coyote to substantial levels of boost. While the engine’s internal components were engineered to withstand the increased pressure, the factory oil pump gears might have been overlooked or subjected to cost considerations. Given our commitment to exhaust all possibilities, it was apparent that we would be swapping out these gears for a billet assembly.

Fortunately, Melling Engine Parts offers comprehensive drop-in replacements for the oil pump gears, catering to both budget-conscious individuals seeking individual gear replacements and those opting for a complete oil pump assembly. This range includes standard, high-volume, and high-pressure options. While the task might sound straightforward, it’s important to note that the process is neither swift nor effortless. Nonetheless, the advantages surpass the time invested, particularly when one considers the potential harm that can arise from a malfunctioning oil pump gear. With our oil pump system reinforced, we were fully ready to embrace the power of forced induction!
To be honest, our staff was torn between a twin-turbocharged setup or a supercharger kit. We had to remain 50-state legal, which most supercharger companies have been able to work around, but the final kill for the turbocharged dream was the fact only a handful of companies produce a complete turbo kit within our budget that didn’t require additional fabrication (which would entail both downtime and dollars).
Ironically, while our internal deliberation raged, VMP Performance unveiled their California-compliant supercharger kit. Admittedly, this addition posed the challenge of potentially compromising traction upon launch due to powerband. However, we had devised a few strategies to mitigate this issue through tuning. Additionally, the prospect of collaborating with VMP was something we had long anticipated, as their comprehensive kits offered an all-inclusive solution that aligned perfectly with our requirements.

The God Of War’s Adopted Son
As you’ve likely discerned from our approach to the build, we prioritize future-proofing the setup or, at the very least, establish a solid foundation for future upgrades. After all, if the car ends up moving out of state, the last thing we want to do is completely repurchase a supercharger kit to make more power. Hence, the Loki Level 1 Supercharger Kit will serve as the linchpin of our current supercharger build, designed to facilitate seamless progression to VMP Performance’s ODIN Level 2 specifications at a later juncture.

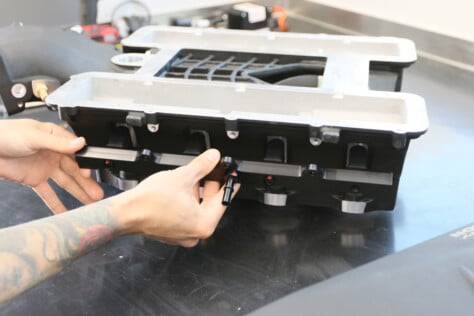
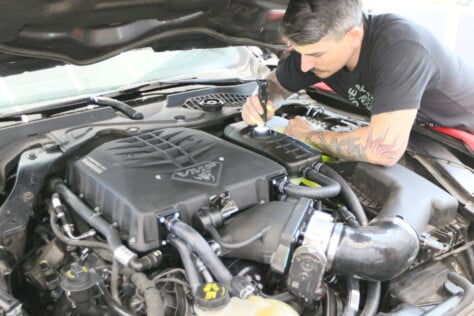
For the time being and within the confines of California’s watchful eye, we’ll adhere to CARB legality by retaining the stock airbox and throttle body. However, the VMP-perfected Magnuson supercharger will be our weapon of choice for Project Magneto. This supercharger kit boasts an array of impressive features, including Eaton TVS 2.65L rotors, a generously sized front inlet, and distinct overhead intercoolers. Notably, it stands as VMP’s most formidable supercharger unit ever crafted, packing substantial power potential.
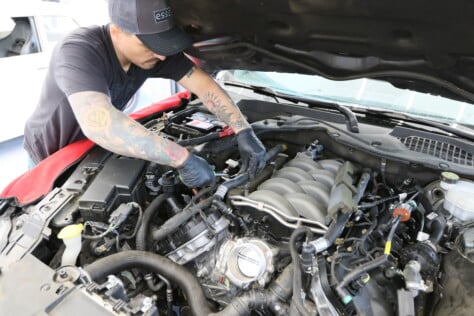
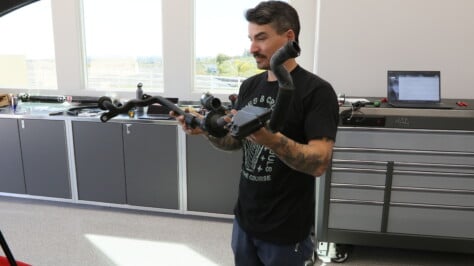
With our UPS driver painfully earning his wages, our front door quickly became inundated with VMP Performance labeled boxes. The quick shipping times meant we were eager to get to work! Installing a supercharger kit is no small task though. However, following VMP Performance’s installation video allowed us to install their Loki Level 1 Supercharger Kit over the weekend. This included installing the supercharger, pulley, heat exchanger, cold air intake, throttle body, fuel rail, injectors and fuel pump booster.


Bolting On More Power
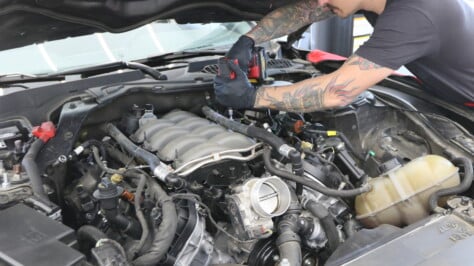
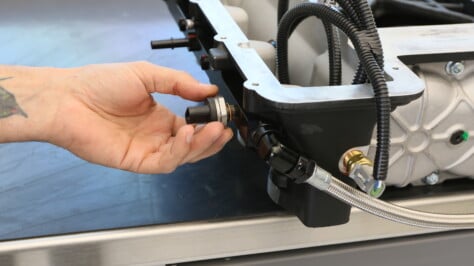
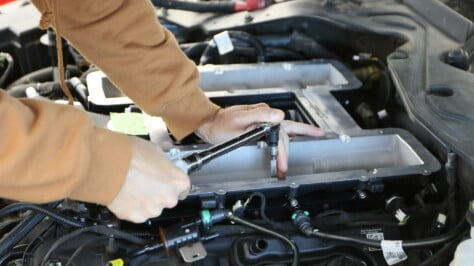
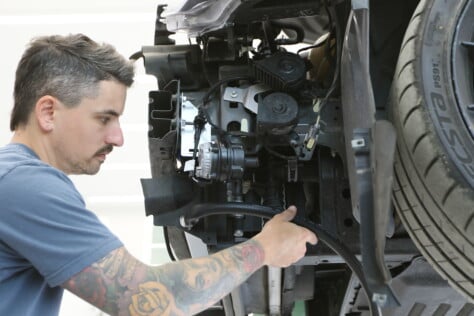
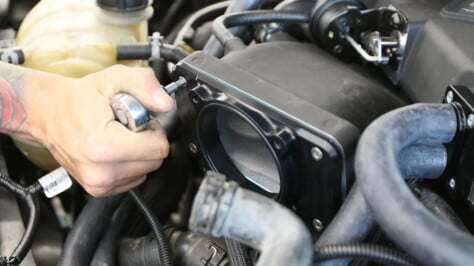
With the Mustang elevated on the lift, we were ready to roll up our sleeves and get down to business. Our initial course of action involved disconnecting the battery cables and removing the factory airbox and intake manifold. On the workbench, we prepped the supercharger for installation by detaching its lid and fitting the VMP billet fuel rails, accompanied by Ford Performance 56-pound fuel injectors. We routed the crossover fuel line behind the supercharger, and blocked off any fuel rail openings on the rails as guided. Next, we transferred the factory MAP sensor and fuel pressure sensor to our revamped setup. We then installed the vacuum block-off plates and ran new vacuum lines.


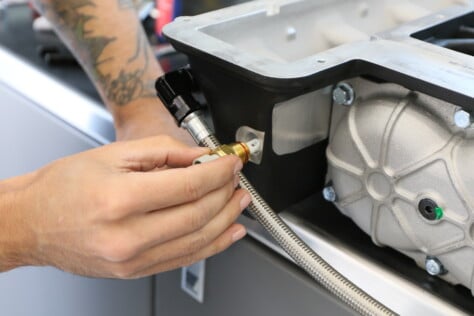
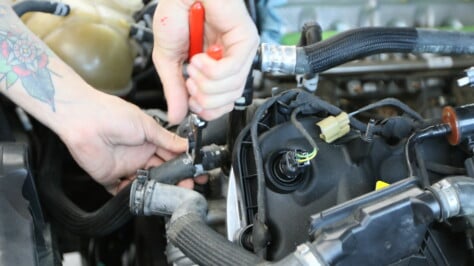
Once the lower portion was prepared, our focus shifted to the cooling hoses. We drained the radiator and disconnected the upper hoses. Utilizing the surplus space, we seamlessly substituted the metal heater tube affixed to the head with a VMP-provided alternative. Employing the hose cutters thoughtfully included in our order, we trimmed and re-routed the intercooler coolant hose to ensure proper fitment. Moreover, we exchanged the original factory radiator overflow tank hose for a VMP version.

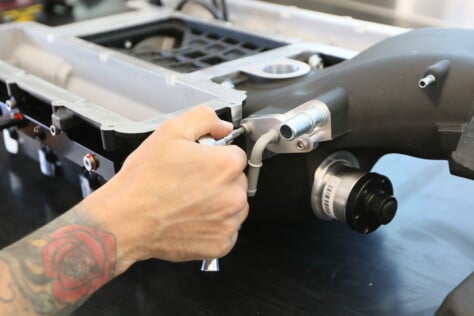
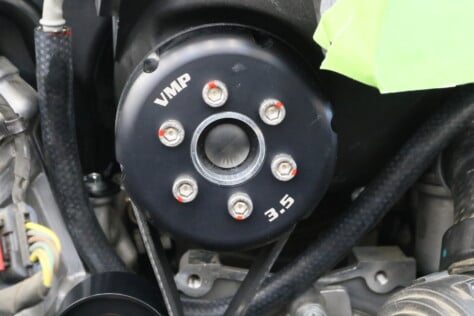
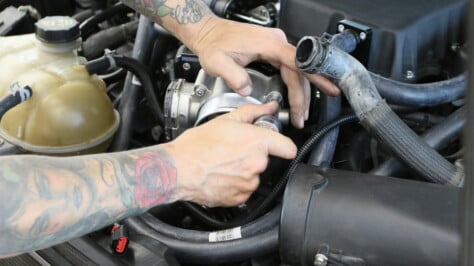
The excitement truly began to materialize as we lowered the lower half of the supercharger onto our Coyote engine. In a bid to secure the supercharger steadfastly, we applied blue Loctite on the bolts, adhered to the prescribed cross sequence for torquing, and then torqued them down to 177 in-lbs. With this lower half mounted, we replicated the torque sequence and blue Loctite for the supercharger lid.


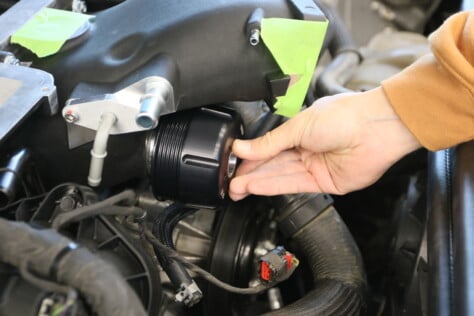
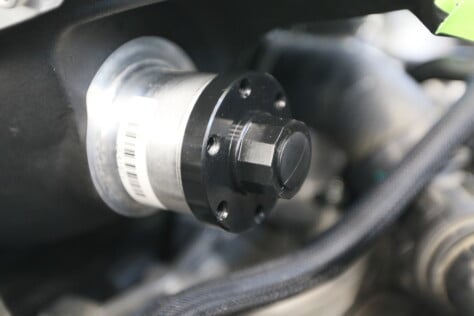
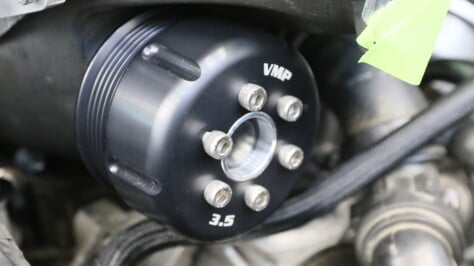
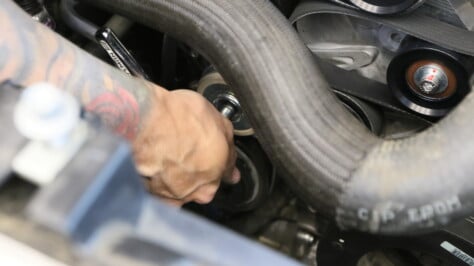
Our engine bay was starting to resemble the supercharged workhorse we desired to see. We still had work to do though, so we loosened the water pump bolts, removed the serpentine belt, water pump pulley, and the bolts securing the timing cover. This allowed us access for installation of the billet VMP bracket and the supercharger pulley. The supercharger pulley is a little more involved with a hub that secures the 3.5-inch pulley. Staying consistent with our approach, we utilized blue Loctite once again when fastening the provided idler pulleys to the bracket and tensioner bolts on the timing cover, before reinstating the belt.


Exchanging Heat
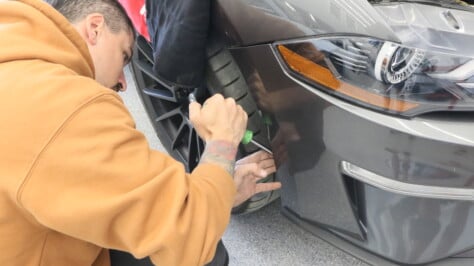
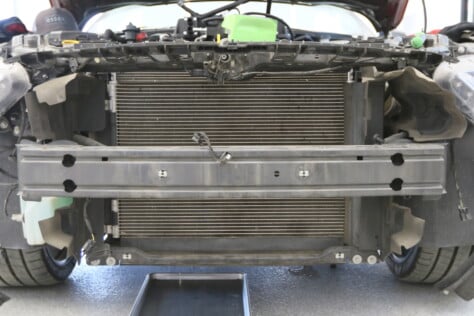
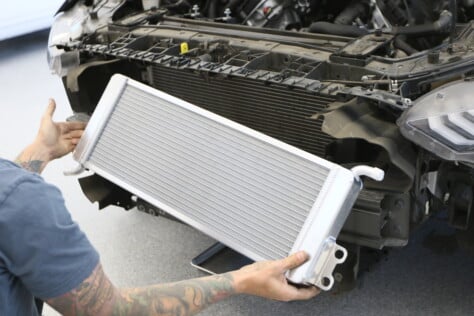
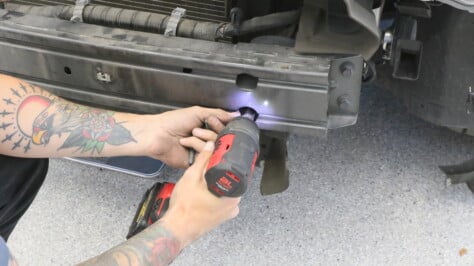
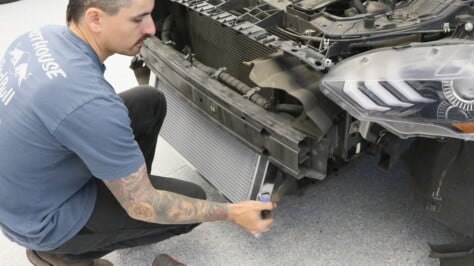
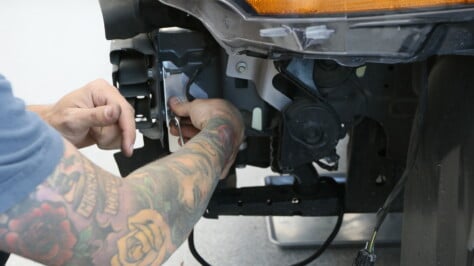
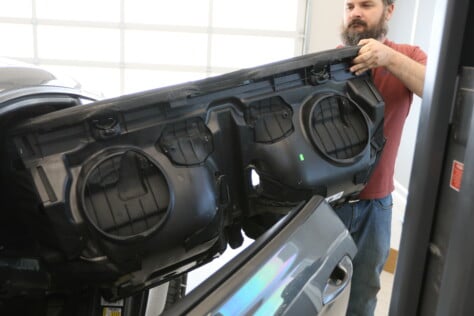
Next up was installing our heat exchanger onto the front of the vehicle. However, in the context of modern cars, particularly the Mustang, this step wasn’t a straightforward one, as we had to dismantle a significant portion of the front end. We dislodged the front bumper via the push pins and clips situated on the bottom and sides. This was followed by the unbolting of screws positioned on the top of the bumper. With the bumper cover removed, our attention shifted towards the active grille component secured with clips and linkage, interconnecting the lower and upper fins. Now that we had accessed this new dimension of the car, we were able to trim the plastic shield to fit the heat exchanger.


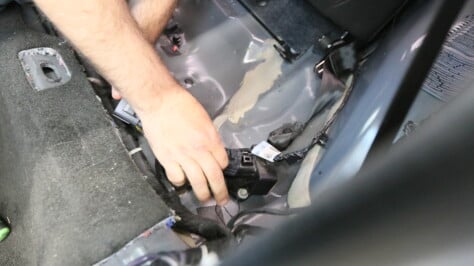
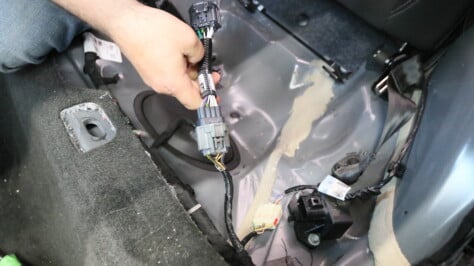
Back at the workbench, we proceeded to insert the bushings into the four eyelets on the VMP heat exchanger. These four eyelets secure the heat exchanger to the chassis via the four crash bar bolts. From there we routed the wiring of the heat exchanger pump to the side of the bumper support bracket, a pathway that ultimately led us up through the engine bay and into the fuse box. We grabbed power from the terminal and zip-tied our fuse neatly to the factory harness.


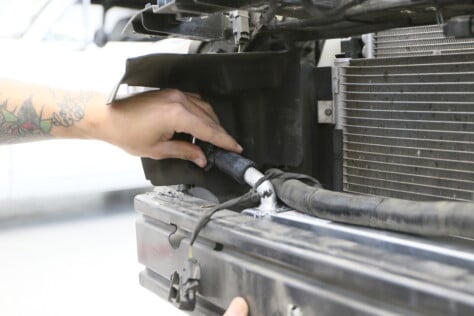
Before we reinstalled the front body work of Project Magneto we had to install the heat exchanger pump. VMP supplied a pump bracket with the supercharger kit that tucks it nicely out of view and all the associated hoses were cut to length. To clean up our install, we drilled the bottom of the crash bar to keep the wires nicely tucked out of the way. For those who like to work in the garage until 2 a.m., much to the chagrin of your neighbors, you might skip this step as the sounds that resonate from the crash bar had dogs barking all over southern California.


Boosting Fuel Pumps And Adapting Throttle Bodies
Given that our current supercharger kit only exerts a modest 11-12 psi, we opted to postpone the installation of new fuel pumps for the time being. Instead, we capitalized on the kit’s plug-and-play fuel pump booster, a component easy to install by simply removing the rear seat. With the seat snacks vacuumed out, we affixed the fuel pump booster with Velcro.


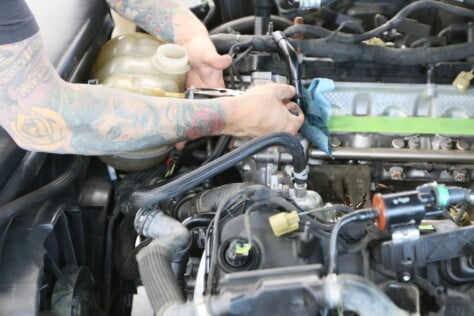
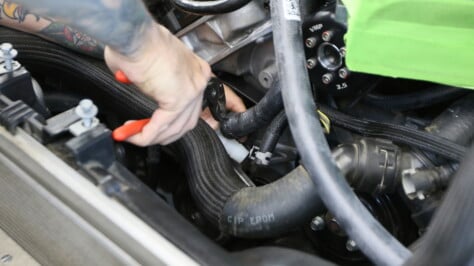
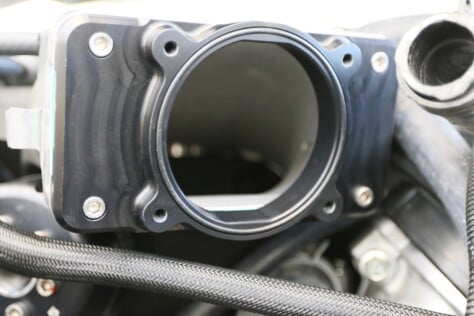
Returning to the engine bay, we proceeded to attach the supercharger inlet to the OEM throttle body adapter. This move preserves CARB legality and allowed us to maintain the stock airbox. With this component securely in place, the final steps entailed installing the air filter and using the included Gates heat shrink to ensure the durability and stability of the hoses connecting to the intercooler.
Off To The Rollers
Following the successful resolution of a surging issue arising from the contact between the hood insulation and the blower, we eagerly proceeded to the dyno to embark on the tuning process. To streamline this endeavor, we had the advantage of utilizing an SCT X4 performance programmer that adhered to 50-state legal regulations. We acquired the VMP-built tune through email and proceeded to upload it to the SCT device through a USB data transfer cable. Through the OBD II port, we promptly flashed the tune to our ECU before the car even hit the road.

Unfortunately, the drawback we faced lay in California’s gasoline offerings, which do not reign supreme. Instead, we’re left with a fuel quality akin to the “Michelob Ultra” of fuels, with a maximum octane rating capped at 91. We’ve also recently learned that certain brands use fuel additives (cleaners mostly) that burn hotter and trick the ECU into thinking it’s an even lower octane, which only compounds the problem.
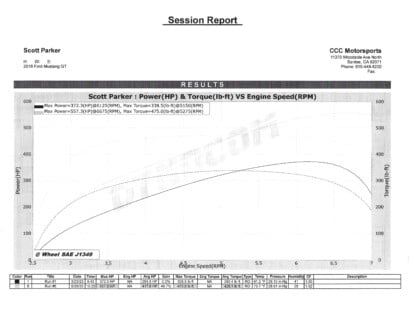
Despite contending with a lower octane rating, the outcomes were still impressive, yielding 557.3 horsepower at only 6,675 rpm (accompanied by 475 lb-ft of torque) on CCC Motorsports’ dyno. To provide a point of reference, when we initially ran the Mustang on the dyno in stock form, it made 372.3 horsepower and 338.5 lb-ft of torque. The incorporation of our supercharger kit had translated to a remarkable 49.7-percent increase in power, even in the face of a 12-degree Fahrenheit temperature increase. However, that was not exactly a clean dyno pull. It ended prematurely because we believed that we had a bad tank of gas (even bad for 91 octane). We’ll cover our subsequent dyno testing in the next story, but the true potential for power lies in a transition to E85 fuel, coupled with the requisite fuel pump adjustments, or at least an elevation in octane rating comparable to the rest of the United States.

Track Attack
While dyno figures are great for bragging rights, we knew the true test of our newfound power would have to be validated by the numbers on a timeslip. Once more, we loaded up and headed out for a chance to tackle the 1320 with a fresh tank of gas and hopes of not only besting our previous records, but getting close to what some of the local 2020-plus GT500s see in the eighth-mile. As we rolled into Barona’s facility for a private track rental, the heat joined us.
At 80 degrees ambient air temperature, we opted to reduce the tire pressure to 20 psi in an attempt to achieve better traction off the starting line. Traction control was turned off, and we utilized the line lock feature for a brief burnout. Our launch strategy involved starting at 1,200 rpm and rolling into it. This resulted in a 60-foot time of 1.77 seconds and an eighth-mile time of 7.88 seconds at 98.93 mph.
Subsequently, we allowed the vehicle to cool down before making another attempt, this time increasing the launch rpm by 500. During this run, we achieved a 60-foot time of 1.79 seconds, completing the eighth-mile in 7.46 seconds at 98.93 mph.
However, due to the track being coated with oil from another vehicle, our waiting period stretched to nearly 90 minutes before we were able to make another run. While not our ultimate attempt, our third run yielded the most favorable results. This time we disconnected the ABS module responsible for maintaining traction control and chose to launch without the gradual acceleration, resulting in a 60-foot time of 1.70 seconds and completing the eighth-mile in 7.32 seconds at a speed of 98.5 mph (that’s about an 11.4 in the quarter-mile).

Despite our efforts, we were unable to replicate the success of our previous runs and ultimately decided to conclude our efforts for the night. The Coyote ran well and did not experience any of the same issues we saw on the dyno. In fact, we sent our SCT data logs to VMP that night and the only issue their calibration team could find was a hint of timing retard due to our lower octane Cali gas.
What’s Next For Project Magneto
Even with favorable conditions at Barona, there was a persistent sense that our tire choice was more aimed at when we were in stock form, versus the new supercharged setup. If time had allowed, we probably would have experimented with the shock settings, but at this point, it seems like the tire and track conditions are more of a limiting factor. We’re also curious to either get our hands on better gas or check out some custom tuning from VMP, rather than relying on the preconfigured tune (or both).
Considering the majority of the GT500s on track are running 6.7 to 6.9-second passes, we still have our work cutout for us. However, with a softer tire, we should be able to squeeze past the 5.2-liter Predator-powered stallion with our 50-state legal noble steed. But if we plan to really hurt the feelings of these powerhouse performers, we’re going to need better fuel and probably more boost! Hopefully, if all things work out, we’ll be able to put the car on the track at Mustang Week 2023 and see how it does! Stay tuned…