If you’ve been following the progress of Project Payback, our Pro Touring 1968 Pontiac GTO, then you know it was not meant to be left behind in any capacity. We’re leaving nothing to chance, including the driveline where we had installed a Chevrolet Performance T-56 Magnum on one end of our Schwartz chassis, which has a Moser 9-inch on the other end. It seemed the only logical way to connect the two on this high-revving, stick-shift beast was with a carbon fiber driveshaft. QA1’s REV Series Custom Driveshafts immediately came to mind.
If you haven’t been following the build thread, the car (and its owner – that’s me) have relocated to North Carolina. Before it left California, Best of Show completed the install of the fiberglass hood and decklid along with the billet hinges and hood pins to mount them. Then it was hauled off on a transport for the east coast, headed directly to Innovation Performance Technologies in Aberdeen, NC. IPT has taken stock of the condition of the car, and with new leadership and direction behind it – there will be changes. Stay tuned to the build thread and to @ProjectPaybackGTO on Instagram, so you don’t miss anything!
Carbon Fiber is a Gearhead’s Gold
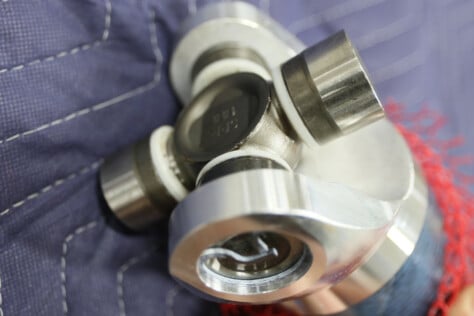
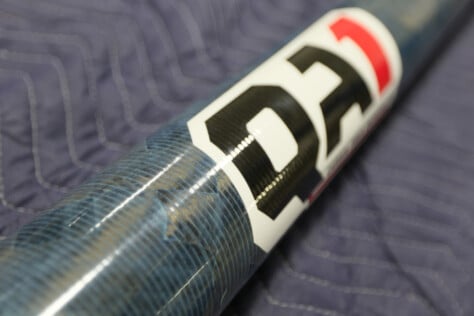
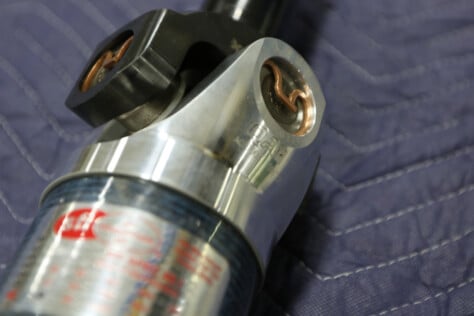
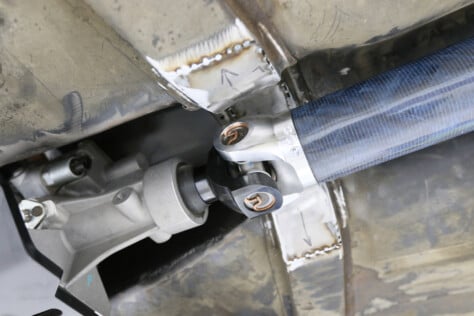
Years ago, I was fortunate enough to attend QA1’s open house ahead of the Street Machine Nationals in Minnesota, and I was immediately impressed with the manufacturing process on its carbon fiber driveshafts. QA1 winds the carbon fiber in-house using 3M Matrix Resin, which is a key part of creating a driveshaft which is both lighter and stronger than steel or aluminum. CNC-machined forged chromoly yokes and U-joints made of high-strength alloy (1350 in our case) can be found at either end, which are glued with a proprietary 11-step bonding procedure. A great deal of time in development was spent on this step, working hand-in-hand with 3M’s Aerospace and Technology division to develop a procedure similar to what’s used in passenger jet manufacturing.


Each QA1 carbon fiber driveshaft is harmonic and torsion tested as well as dynamically precision balanced. Rather than adding weights, QA1 mills the flange and has a few other small adjustments (like shims) to bring it into balance. For peace of mind, it is also serialized and for $35 extra it is SFI certified.
“QA1 is one of the few driveshaft manufacturers that wind their own tubes, setting us apart from the competition,” stated Marketing Manager Dave Kass. “Instead of sourcing from a commercial supplier, we specifically design and manufacture each driveshaft for high-performance vehicles. This control allows us to optimize the wind angle and overall torsional stiffness, letting the driveshaft twist slightly under torque like a shock absorber for your drivetrain.”
In my personal observations, this has led to a smoother operation without resorting to a multi-piece design as seen in mass-produced modern OEM vehicles with strict NVH standards and cost concerns. So at the end of the day, you have a driveshaft which is lighter, stronger, and smoother in operation – meaning more power to the ground with no drawbacks.
“The filament winding process is a fascinating process to watch,” Kass continued, “it involves several steps, but some of the highlights include starting with spools of carbon fiber that are fed through a network of spindles, eventually winding themselves around a steel mandrel. The carbon fiber is wound back and forth until the desired thickness is reached. This creates the unique wind angle and appearance, while also being incredibly strong and capable of handling thousands of horsepower and pounds-per-feet of torque.”
While the strength and weight benefits are seemingly obvious with running a carbon fiber driveshaft that is properly designed, it doesn’t stop there… Should something happen and the driveshaft actually break – carbon is much safer when it shatters than aluminum or steel that can come through the floor or become a dangerous projectile for bystanders.
“I know there are many driveshaft options out there, with aluminum and chromoly being popular choices,” said Kass. “But I urge any racer to consider the significant advantages of carbon fiber, especially the major safety benefit. The racetrack is unforgiving, and several external factors, like crashes, broken suspension links, or worn U-joints, can result in driveshaft damage. Unlike aluminum or chromoly, which can rip through the underside of your car (even with a hoop), carbon fiber disintegrates and looks much like the bristles of a broom. This significantly reduces the risk of injury and equipment damage in an accident.”
The downside? Cost. That’s it. Let’s not mince words, at over $1,500 in starting price a carbon fiber driveshaft is a far cry from a steel driveshaft you’d put in a street/strip car. But this is no budget build. I’ve got empty pockets as does every other Pro Touring owner that’s not independently wealthy. This was no time to try to save money – not at the expense of safety or the sort of driveline vibration that can kill your transmission (I’ve seen a T-56 case crack because of driveshaft vibration). Payback’s LT4 will spin a good bit of RPM, make a healthy amount of power, and be put to its paces regularly. We are planning accordingly.
Custom Driveshaft for a Custom GTO
Since we are building a 1968 Pontiac GTO with a 2018 Camaro ZL1 engine 6-speed manual and transmission nestled into a completely aftermarket chassis with a Ford 9-inch rearend – our driveshaft needed to be made to order to our specifications. Keep in mind that we set the engine back as far against the firewall as possible for weight distribution:
- 52.5-inches centerline to tailshaft housing
- 31-spline output shaft on trans
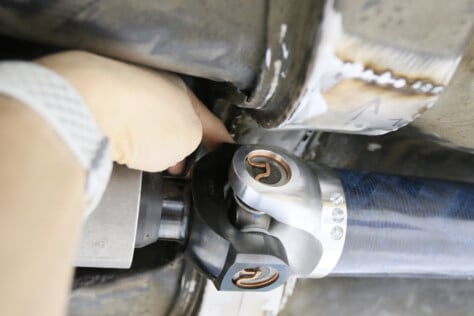
- 1350 U-joint for 9-inch rearend (for up to 2,000hp/1,500 lb-ft)
- SFI certified
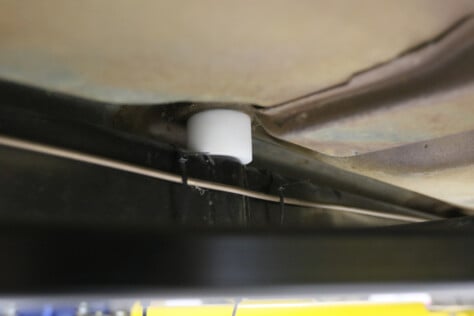
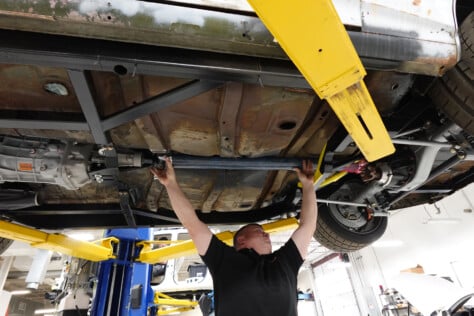
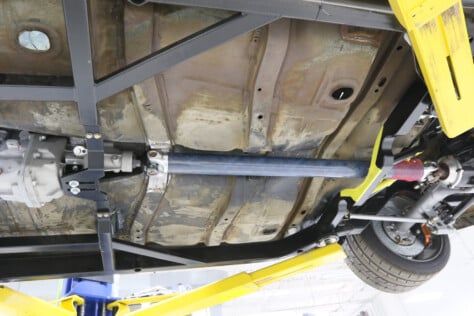
In just a few weeks, QA1 shipped out a 3.2-inch diameter carbon fiber driveshaft and it was up to IPT to make it fit in our very tight tunnel. Keep in mind, the factory driveshaft was smaller in diameter and the frame probably did not sit quite as close to the floorboard. When installing the Schwartz chassis, we custom-made the body mounts out of Delrin and cut them to size. The reason for doing this is that 50-plus years and many hard miles bring the metal out of shape, and the only way to make it truly level is to adjust the thickness of the body mounts. It also gives you the advantage of tucking the frame up further under the body, but of course that affects drivetrain clearance and possibly the driveline angle as well.


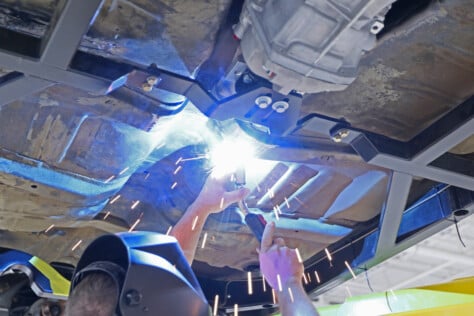
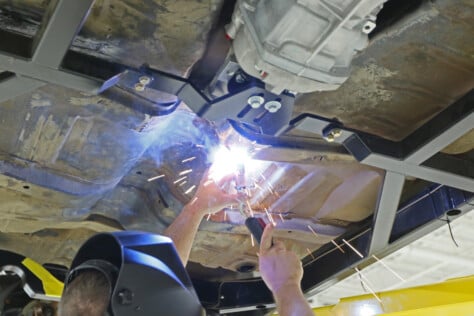
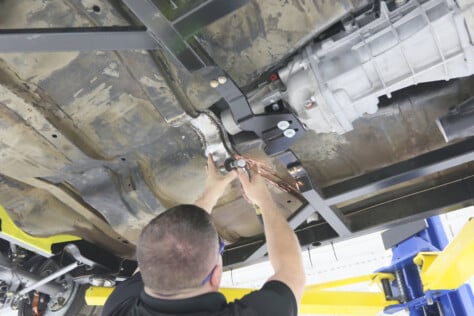
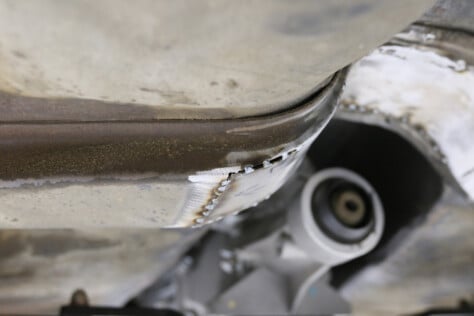
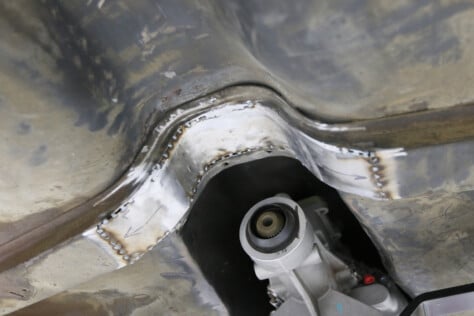
Since we already had a pretty optimum 2-3 degrees of driveline angle, we were very reluctant to change the frame mounts but knew the larger driveshaft would not fit as-is. With a more hardcore track build, cutting out the tunnel and making it from scratch would have been the move. However, the street-going nature of this build allowed us to get away with trimming the floor brace which gave us ⅜-inch clearance at the tightest spot. This was the least amount of space that Shop Foreman Crimson Sanders was willing to sign off on, and thankfully we just made it. This floor brace measured 1-inch thick and by cutting it down and fabbing a flat piece of steel in its place, we were in business. Crimson MIG welded the fresh steel and ground it clean.
For added insurance, we may also swap out to a thinner and stiffer trans mount from the current rubber piece. While scanning the car, Crimson also spotted a few areas like the brake lines that require some tweaking for safety. We’ve got a long way to go and a short time to get there. I hope you’ll keep following along.