
In case you forgot about Project Payback, our Pro Touring 1968 Pontiac GTO, it’s been down but not out. And while it’s been down, we have decided to give our Gen V LT4 a full check-up at Prestige Motorsports. Frankly, it’s been sitting for a very long time and we were not confident how well the engine was sealed up. But it also gave us a great opportunity to add some small upgrades to our 720 horsepower package.


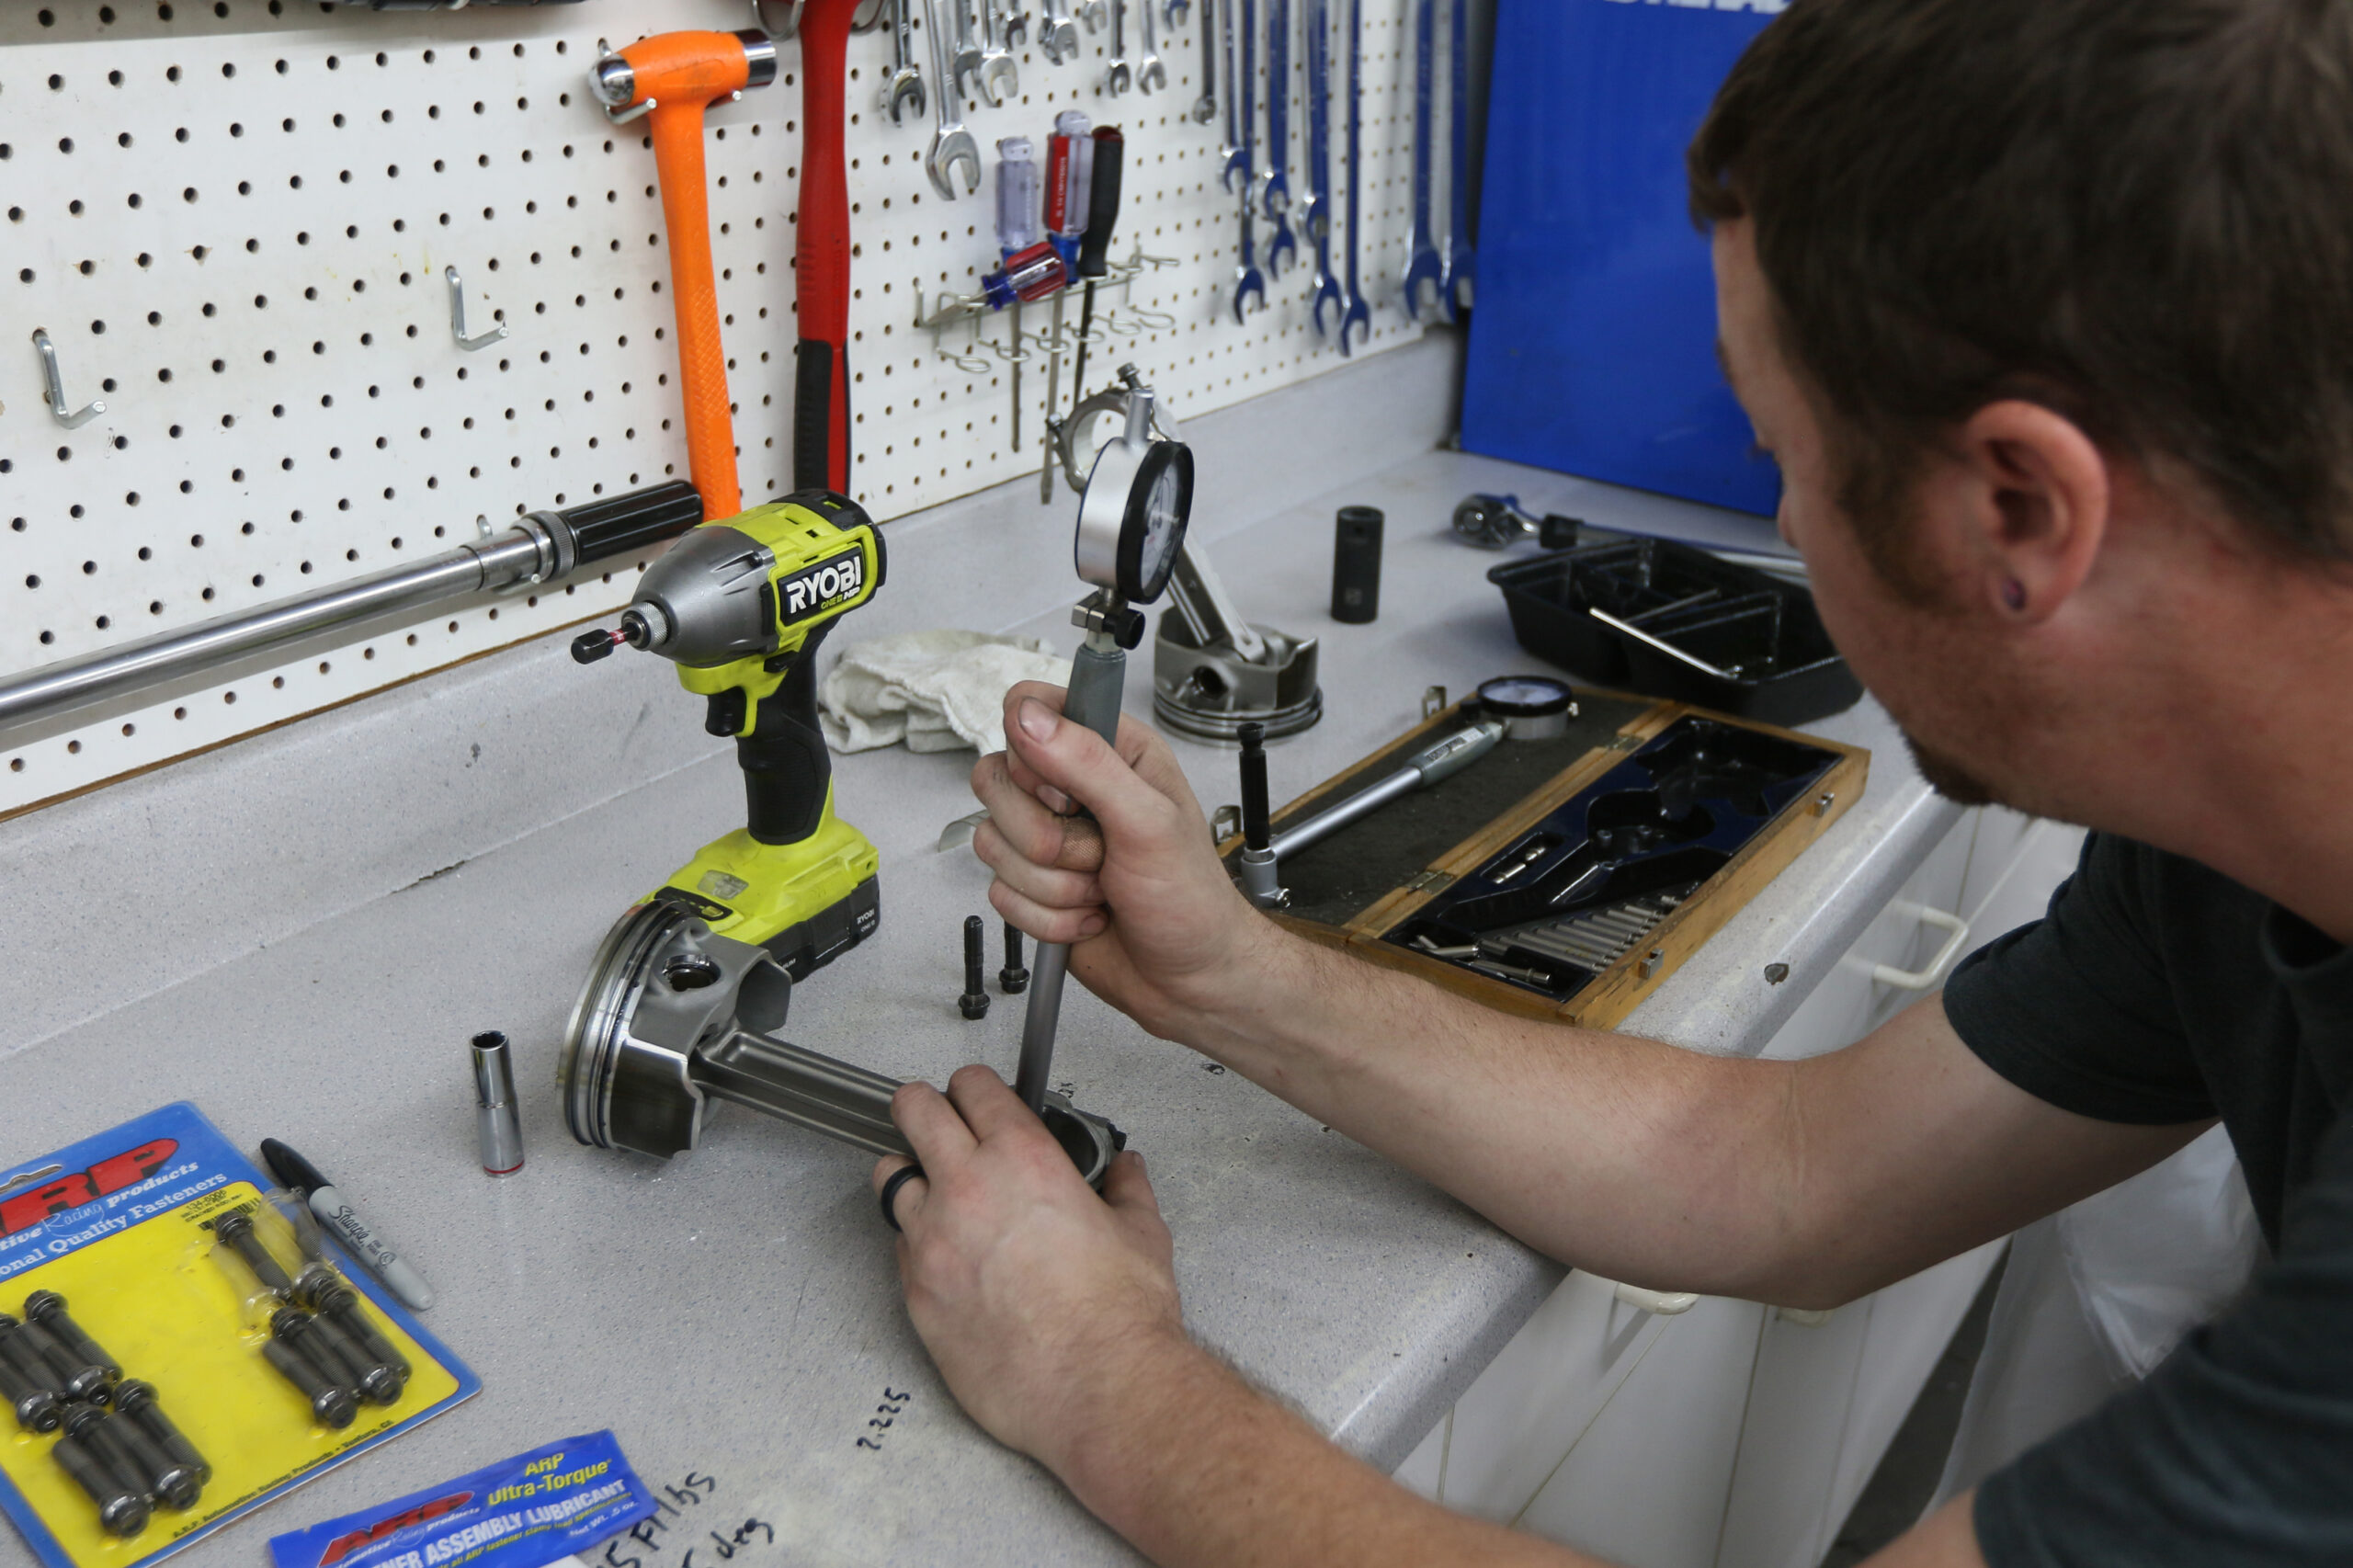
Since we were opening up the bottom-end to take a look at the rod bearings, we had no intention of using the stock rod bolts. However, this posed a potential problem with the factory LT4 connecting rods. The factory rods use a cracked cap (meaning it’s fractured into two pieces instead of forged that way), which can go out of round and distort with the increased clamping force of the set of quality fasteners. Thankfully, being able to remove the rods and measure the clearances with calibrated equipment in a high-quality machine shop allowed us to verify the clearance.


It should come as no surprise that ARP2000 (PN 234-6301) was the rod bolt of choice, with 200,000 to 220,000 psi of strength. But, more importantly, ARP2000’s strength is being temperature stable – an important factor with a part being actively splashed by well over 200-degree oil – originally designed for use in steam powerplants.
Once the bottom-end was buttoned up, we decided to leave the rest of the engine stock for now. But, we couldn’t bear to leave the factory LT4 supercharger lid as it looked like every other crate engine swap. Harrop Engineering not only offers a complete 2650 swap, but also billet lids for the factory 1700 blower as well as other accessories. Several colors and finishes are offered, but we stuck with the natural machined finish with the intention to powder coat it later. It looks like jewelry, and the extra money is well worth it (and, honestly, a drop in the bucket compared to the rest of the build).
The Install
For starters, we are happy to report the cylinders, bearings, and the rest of the bottom-end looked spotless. Our LT4 had a solid health check from Prestige, which was relieving to hear. If you didn’t know, the LT4 rods are basically the same as the LT1 rods. They have some additional machining, but are still a cracked cap, powdered-metal rod and not nearly as robust as the forged steel LT5 rods.


After disassembling the engine, the next step was measuring the rod journals with the stock bolts, and then comparing them to the ARP2000 bolts. With the ARP bolts, the bearing housing bore was 2.1019 inches, which gave us a clearance of .0028. With the stock bolts the housing bore was 2.1016 inches, which gave us a clearance of .0025. There was a .0003 difference between the two bolts, which was deemed negligible and safe in terms of the clearance.
“You are going to gain three-tenths of oil clearance, which is livable,” stated Senior at Prestige Motorsports. “The dimension, how it affects radial pressure, the crush of the bearing is never always corresponding. Luckily, it stayed pretty round.”


The Harrop lid was a pretty plug-n-play swap. The stock bolts that line the perimeter of the factory lid were removed and swapped over as well as the gaskets. There are four round gaskets in the center of the lid that Darin used grease to keep in place when flipping the lid over.


What’s Next
Our metal work seems to be never-ending on Project Payback, and we called in some reinforcements to bring this scrapper back to life at Schwartz Performance. Yes, the very same Schwartz that built the chassis is taking on the rest of the GTO build to take it to completion. We’ve been in touch with Jeff Schwartz over the course of the project, and he’s built so many six-figure Pro Touring cars in his Illinois-based facility that when the project continued to drag we knew we had to bring him in. Once the shell has been squared-up and made into one piece, Schwartz will prime and paint it before starting reassembly.

You might also like
First Official Winner of the 2026 TMI TRIM Road Tour Announced
The first official winner of the 2026 TMI TRIM Road Tour announced at GNRS is a 1955 Chevy Bel Air featuring a custom TMI interior.

