
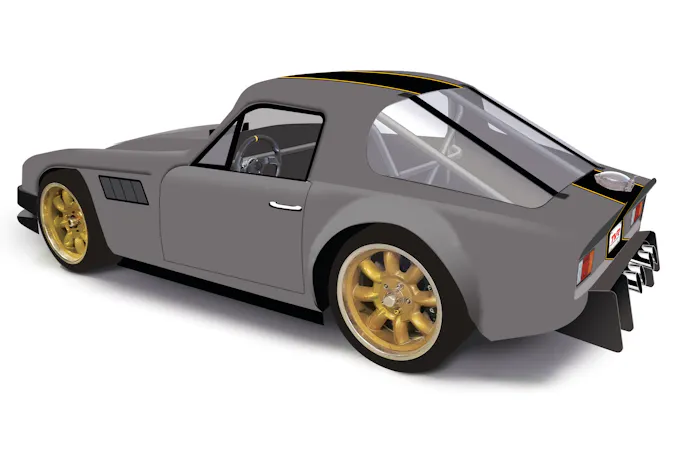
When last we visited the build, Project T-Rex (a restomod 1974 TVR 2500M with a 5.0L Ford Coyote powerplant) received its important driveline components: A McLeod “Mag Force” dual-disc clutch assembly, a TREMEC TKX five-speed transmission, and an SFI 43.1-rated chrome moly driveshaft from Mark Williams Enterprises that was mated to the Art Morrison Enterprises Multi-Link IRS via a Sonnax yoke. The finishing touch came in the form of a custom-built four-inch shift handle.
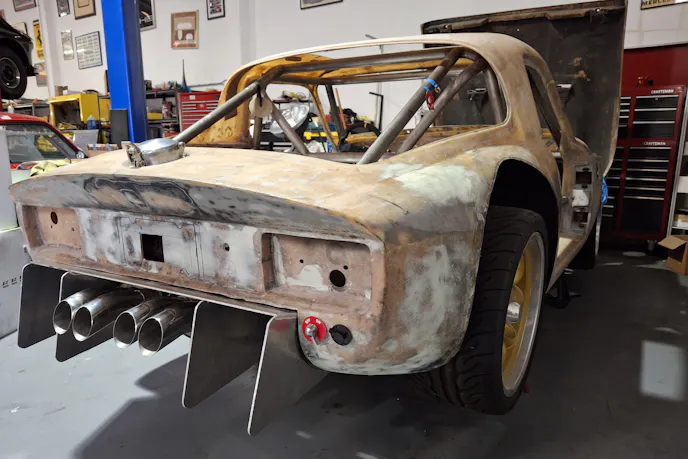
Next on the agenda was fabricating a diffuser for the rear to aid in aerodynamics while also showcasing the Borla “Boomer” mufflers — a perfect solution to T-Rex’s limited space. There simply wasn’t room for standard mufflers in the OEM location in front of the rear end, and hanging them in full display aft of the rear end is reminiscent of the iconic Jaguar XKE.

The purpose of the diffuser is to accelerate and expand the airflow from the vehicle’s underbody, creating a low-pressure zone that helps generate downforce. Needless to say, it also adds an aggressive “race car” panache.
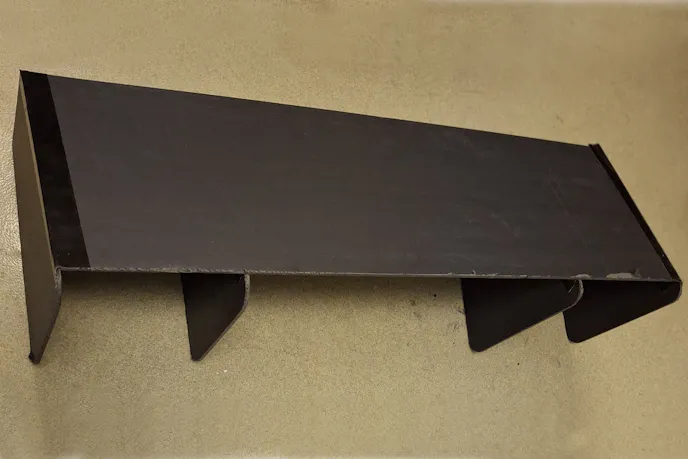
As it turned out, the TVR’s rear roll pan could be modified to accommodate a 4-foot wide diffuser, with the outer strakes (fins) attaching to fiberglass supports molded into the factory pan. After clearing out the area a mock-up was built using 3/16” foamcore poster board. The inboard strakes were positioned to clear the mufflers. A trial fit confirmed the design.
Then the model was disassembled and the pieces traced on a 3/16-inch sheet of aluminum. The five elements were cut out on a bandsaw, edges finished, and MIG-welded into position. After installing the diffuser, using ARP polished stainless steel bolts (20 percent stronger than Grade 8 hardware), it became apparent that the tail pipes protruded a bit much, so they were trimmed back 1 ¾-inch closer to the diffuser.
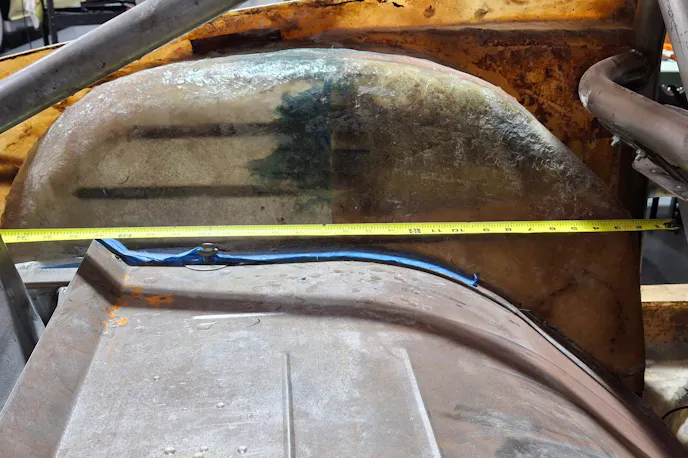
Another mod to the TVR’s body came in the form of enlarged rear wheelwells. This was accomplished by using the same mold that produced the 30-inch wide front wheelwells, but only using just over half of it. The back half of the OEM tub was removed and the enlarged section glassed in place. To finish the job a thick, textured truck bed liner paint was added and painted flat black to match the front.
Now there’s ample clearance for the rear tires, with 27-28-inch diameter rubber slated for use. We’ve also upped the rear wheel width to 12-inches to provide additional “bite.” Wheels are 18-inch diameter “Team III” models from ET that pay homage to the 8-spoke “Minilite” wheels popular on Trans-Am and other vintage race cars.
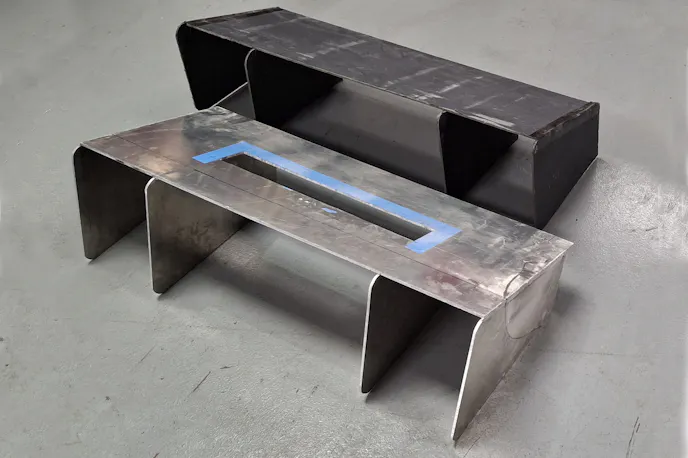
It’s almost an understatement to say that the confines of T-Rex are limited. Cramming a big DOHC Coyote into the engine bay of the TVR where a Triumph I6 engine formerly occupied used up a significant part of the OEM battery mounting position, so logic dictated relocating it to the rear of the vehicle … where space is also at a premium.
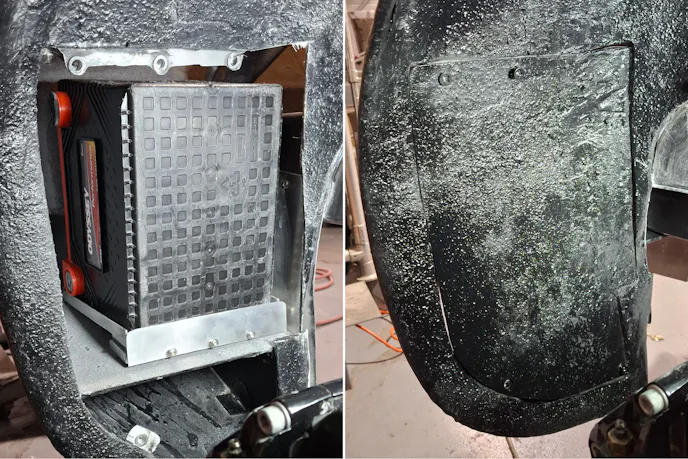
We also know that putting as much weight as possible in the aft end of the car is beneficial to front/rear weight distribution. The good news is that there was a wee bit of room in the right rear corner of the body (formerly occupied by the fuel filler neck and line — now relocated to the center of the rear deck). The bad news is that the frame rail, gas tank and roll back rear strut made it impossible to mount the battery and have access to it from the trunk area.
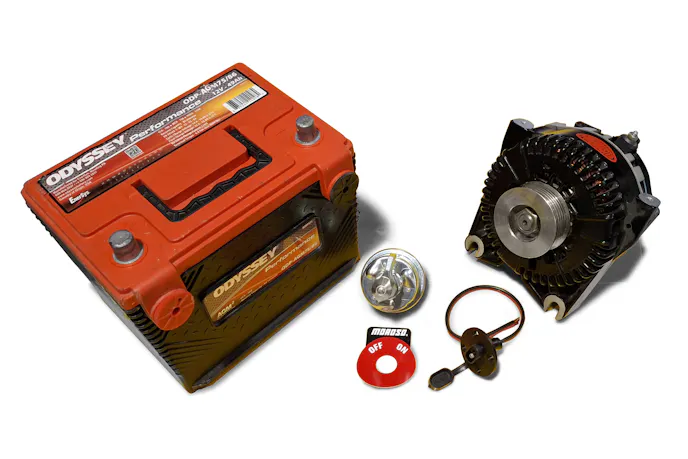
The solution? Build a door in the wheelwell for access to the factory trunk shelf. The problem was compounded by the fact that the smallest battery we could find would only fit if installed on its side. “No problem” said Odyssey’s Alan Kohler, “As long as it’s not mounted upside down you’ll be OK.” It’s a gel-type battery.
The battery, an Odyssey AGM75-86, measures a compact 6.8- x7.2- x 9.5-inches. More importantly, it has both conventional posts and SAE side-mount terminals. This is a significant consideration, as the EFI controller works best with a dedicated power source. The battery’s juice will be preserved through use of a Moroso shut-off switch that’s accessible from the rear of the car, per many racing association rules. A small remote plug was mounted next to the shut-off switch to facilitate trickle-charging.
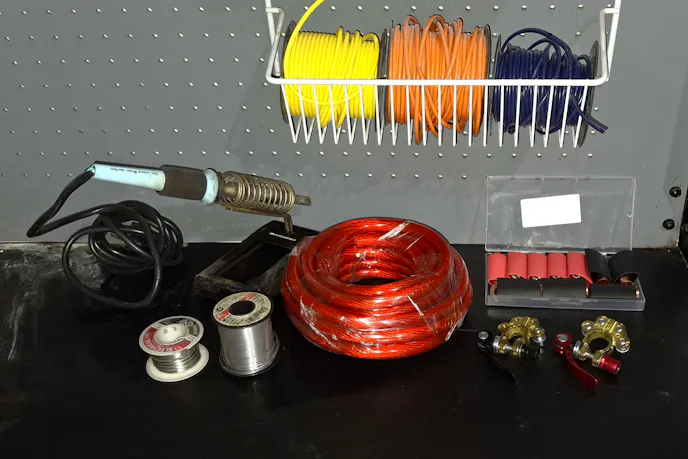
Next on the agenda will be commencing with the wiring. And given the uniqueness of the build, an “off-the-shelf” wire loom for T-Rex is not in the cards. We’ll start by doing a detailed schematic and research the optimum size wire to employ for each function ranging from hefty 0/1 gauge for the starter to smaller sizes for the ECU, gauges, lights, etc. Documenting the length of each wire is important, as the draw needs to be factored into the equation. Powermaster Performance, the manufacturer of the alternator and starter used on T-Rex, has a handy chart in its catalog that shows what to use.
Let the fun begin!
You might also like
Student-Built ’68 Camaro Gets A New Beginning
Remarkably, the students designed and built the cantilever rear suspension themselves and used QA1 coilover shocks.

