

Back in the 1960s and early 1970s, musclecars had it all: style, performance, sound, and class. They ruled the road at a time when gas was still in the double digits, and before many had ever heard of a catalytic converter. But nothing in this world is perfect, and even a sunset has its faults.

Our Hellwig Install Included:
- 1-3/8-inch tubular front sway bar (PN 55903)
- 7/8-inch adjustable rear sway bar (PN 6909)
- Hardware (washers, nuts, bolts, bushings)
- Bushing lube
- Instruction sheet
An example of this would be a vintage musclecar’s handling. As awesome as these cars were overall, the handling left plenty of room for improvement.
The OEM setup was adequate for going in a straight line, but show it a hard corner at speed, and the results could leave you stuck in a ditch.
Up until twenty years ago things like body lean, understeer and oversteer were all acceptable handling characteristics of the automobile. We were accustomed to thinking that’s how cars were supposed to handle.
However, thanks to the advances in modern suspension technology, aftermarket companies like Hellwig Products help bring the handling characteristics of classic musclecars up to date.
With the Pro-Touring trend set at full steam ahead, one of the first modifications you can do to improve handling is to install front and rear sway bars. They provide a solid foundation to build upon, and they can really improve the mannerisms of any musclecar.
To get a further grasp on Hellwig’s components, we got in touch with David Wheeler, Sales and Marketing at Hellwig. When it comes to sway bars and handling, Wheeler is the suspension guru and he gave us plenty of tips and tricks for installing the sway bars.

Our Project Car
Our ’65 Plymouth Belvedere test subject is powered by the truly rare 318 Poly V-8, that has seen a complete rebuild with some high performance upgrades. So when ready to improve the handling of this Mopar B-body, it was time to ring up Hellwig for front and rear sway bars.
We offer adjustable bars for the enthusiast looking to fine-tune their vehicle’s handling capabilities. -David Wheeler

Instead of going all out with a complete suspension makeover, we decided to see what kind of difference a simple front and rear sway bar install would make. A pair of sway bars are a modest upgrade that fit just about any budget, and they can easily be installed in a short amount of time.
It may be hard to believe today, but the Belvedere left the Detroit assembly line without any sway bars at all (they were an option in those days). Although we had previously swapped in a generic sway bar in the front for the sake of improved handling, we felt that our Plymouth deserved better.
The Hellwig Front and Rear Sway Bars
A complete suspension makeover can cost thousands, and it’s quite a bit of work to install new control arms, spindles, shocks and brakes. But we wanted to start with the basics, and that’s just what Hellwig provides in the form of their 1-3/8-inch tubular front, and 7/8-inch solid adjustable rear sway bar.
These bars include many features; not only is the rear bar three-way adjustable, but the 4140 chromoly steel is strong enough to keep it from bending during hard cornering. The hollow front bar is 1/8-inch thick, so this provides a strong sway bar in the front, while offering less weight over the front of the car, where you would least want it.
The rear sway bar is solid, which helps keep the extra weight over the rear tires where you do want it, while still offering a bit of flex. Both bars have been powdercoated from Hellwig in Black Hammertone, which, according to Wheeler, helps keep the bar in place and the lube from seeping out of the bushings.
We figured if the results show any real progress towards modern handling standards, perhaps we will continue to improve upon the old Mopar’s suspension at a later date.


The front sway bar (left), and rear sway bar (right) packages were powdercoated in Black Hammertone and equipped with everything needed to make the install an easy bolt-in affair.
Baseline Testing
Prior to installing our sway bar package, we needed to perform a test to compare the before and after results. The Plymouth wouldn’t be seeing any serious road course action soon, but since we drive it quite regularly to shows and to the office on occasion, we were more concerned with everyday handling.
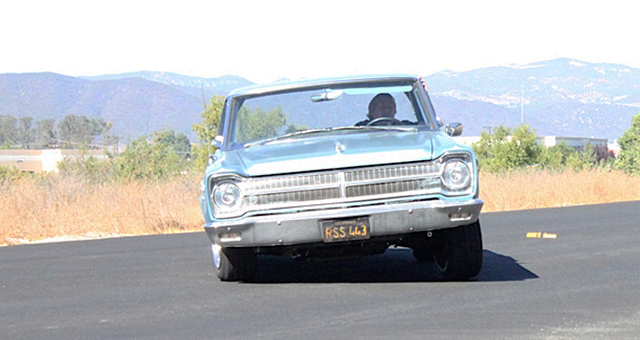
Here's how the Plymouth handled prior to our Hellwig upgrades.
Body roll was clearly evident during our test drive, and it’s fair to say that the handling left a lot to be desired. With every turn, it felt like we were driving a boat on a lake, rather than a musclecar on the street.
Keep in mind, this initial road test was without any sway bars installed – just the way the car came from the factory. We would never go as far as considering a stock, mid-60s Chrysler B-body dangerous, but modern automakers wouldn’t market a car with such handling characteristics like this today.
We knew that the handling was poor, and that hard cornering was very dramatic – almost exaggerated. After making our initial road test, we realized how badly the Plymouth’s handling was and we anticipated the Hellwig sway bars even more.
Even the generic sway bar that had previously been installed was not getting the job done, the fitment was poor, and the way it mounted was sketchy. We removed it for our baseline testing, to get a better assessment of how the car handled from the factory.
It isn't absolutely necessary to use a lift for this type of install, but it does make the job a bit easier. The generic sway bar is seen in this picture. Away it goes!
Installing The Front Sway Bar
Test drive over, it was time to head back to the shop, and install the Hellwig sway bars. We put the Plymouth up on the lift, and planned out the installation following the instructions from Hellwig. While it might seem that it’s an easy install, following the instructions can save time and get you back on the road just that much quicker.
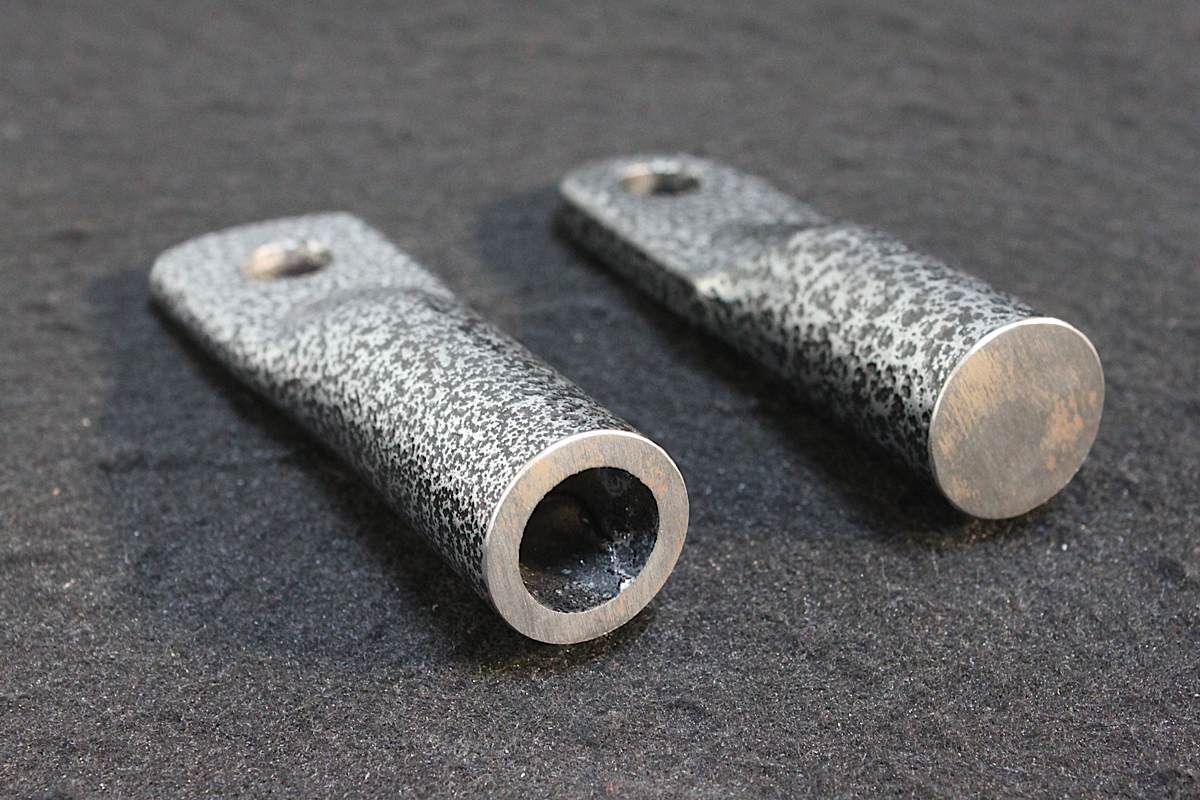
Looking at these cutaway examples, you can see the thickness of the hollow front bar and solid rear bar. The hollow bar gives up some weight in the front without sacrificing strength.
While it’s not necessary to use a lift for an installation like this, we did so for the ease of installation and for editorial purposes. It should be stated that whenever you install a sway bar on a vehicle, it should be done with the suspension loaded.
If you’re installing sway bars in the driveway, simply driving the car up on a set of ramps will give you plenty of room to get underneath and to access everything you need. The wheels should not need to be removed to install a sway bar.
As part of a complete kit, Hellwig includes everything needed in terms of hardware to get the job done: end links, bushings, bushing lube, nuts, bolts and washers.
“These pieces work on all 1964-70 Chrysler B-Body vehicles,” said Wheeler. Depending on your specific application some drilling may be required. We recommend that upon installation it’s best to keep weight on all four tires if your car requires drilling.” Holes need to be drilled in the proper places with the sway bars at rest, so this is an important step.
We recommend that upon installation it’s best to keep weight on all four tires if your car requires drilling.
Our Belvedere only required drilling two additional holes up front since we had previously installed a sway bar that consisted of drilling a hole in the k-member. Unlike the generic sway bar kit that mounted in place with only one bolt, the bracket Hellwig provides for mounting the front bar is meant to stay in place, and it bolts in solid.
We gathered everything needed to attach the new Hellwig front sway bar. We started by lubing up the D-shaped bushings that allow the bar to ‘twist’ while the brackets hold the bar in place. The lubricating grease not only helps eliminate potential squeaks and rattles from happening, but it also prevents the bushings from cracking and deteriorating from age.


Prior to installing the Hellwig sway bars, we lubed up the D-shaped bushings enough to prevent our sway bars from squeaking, and above all else, cracking and deteriorating over time. Our shop dawg, Dean, then attaches the D-bushing to the sway bar after the lubricating grease had been applied.
With the front bar installed, we collected the end-link bushings and set them up according to the instruction manual. It’s important to make sure that the bushings and the washers line up properly, and in the proper order. The end-link is mounted to the shock absorber bolt, and a new, longer bolt is provided in the kit.
Some say that the bushing should be somewhat loose, but Wheeler disagrees with that. He states that they should be snug, like you would when tightening a bolt on a shock absorber, being sure not to over tighten them.
There are four bushings per side, one pair to insulate the mounting bracket and the other insulates the the end of the sway bar. As the bar twists, these bushings help to keep the bar in place and eliminate the metal to metal contact. Hellwig’s instructions clearly illustrate how to install them properly.


Upper left: Hellwig's mounting bracket is far superior to the flimsy bracket that came with the generic sway bar kit. Lower right: the end-link attaches with a new shock bolt that comes with the kit.
Installing the Rear Sway Bar
Front bar installed, we took to the rear of the Belvedere with the adjustable rear bar that we had ordered from Hellwig. This is where we had to break out the power drill to install the rear end-links and sway bar.
We applied grease to the end-link bushings prior to installation.
While in the process of installing the rear bar and end-link package, we had to drill two holes (one on each side of the frame, four total) so we could create mounting points for the end-links.
We marked our drilling points with a marker and used two different sized drill bits. The first, smaller drill bit was used to create the bolt holes, while the second drill bit was used for inserting the frame spacer that fits inside the rear framerail. This spacer allowed us to tighten the bolt on the end-link without damage to the framerail itself.
With the mounting holes drilled out, we took to our work bench and broke out the lubricating grease once again. This time it was for the bushings that fit inside the end-links and were part of the mounting hardware.
Prior to installing the rear end-links, we lubed the outside of the bushings. The grease does double duty, as not only does it keep the bushings from squeaking, but it helps get them into place for installation as you can see from the picture above.
This is how our rear end-link hardware went together. You can also see the spacer that Hellwig includes in the kit. It's intended to prevent the frame from collapsing when you tighten down the mounting bolt.


After we had both the end-links bolted to the frame, we were ready to install our sway bar. The Hellwig kit came with two U-shaped bolts that help mount the sway bar to the rear differential housing, and care needs to be taken that nothing comes between them and the housing, like brake lines. Another bracket is placed over the ends of the bolt to give a flat surface for the sway bar bushing to mount to, and the bushing clamp is placed over the bushing and the clamp nuts are snugged up.
It’s best to keep the nuts loose enough to move the mounting locations until the bar and clamps are centered on the axle housing. With the sway bar attached at the end-links, the bar can be easily centered into position and the nuts can be tightened down.
With the end-links mounted to the frame, we installed the rear sway bar to the axle housing and bolted it up.


Final Results
After we had the sway bars installed and everything was tightened down it was time to get our car back on the ground, and drive around the block for final testing. Taking the same corner at the same speed (30 mph), you can even tell in the pictures that there was quite an improvement in the way the car cornered.
The Plymouth was far more planted, giving our driver more confidence than ever before. Body roll was almost non-existent, with very minimal lean in the corner. We took the same corner several times, trying to get the car to display some lean, but it just wasn’t happening. Needless to say, we were very happy with the way the car handled now.


Same corner, same speed. As you can compare from the two photos, there's quite a difference in the way the car handled.
Remember, we set the rear bars in the comfort setting, not the pure performance adjustment, so the handling was set more for real world driving. “We designed the rear bar to allow adjustability for street or autocross handling,” said Wheeler. He recommends that you don’t try the firmest setting first, especially when driving with a rear sway bar for the first time.
The car will have different handling characteristics, and over/under steer can become a factor. Wheeler suggests the softest setting first and adjusting it firmer one level at a time until you get the handling you prefer. There are three settings, and we started with the end-link furthest out until we have the need to adjust it further.
We designed the rear bar to allow adjustability for street or autocross handling.
We could only imagine what this car would be like with a complete suspension upgrade, with new upper and lower a-arms, adjustable coil-overs and the like. In the coming weeks we might just have to find out firsthand how much of a difference these bars really made. In March of this year, we hope to see some track time at Willow Springs.
Whether you’re a classic musclecar owner looking to seriously compete in autocross challenges, or if you’re just a casual enthusiast wanting better handling from your cruiser, then check out Hellwig Products’ Street Performance section to see what they have to offer. You won’t be disappointed.


This is the finished product after we installed the new Hellwig sway bars. Note the clean installation and the hump in the front sway bar (left) that's intended to clear the lower radiator support brace. The rear bar (right) looks right at home in the Belvedere, and helps eliminate body roll in ways Detroit could have never imagined in 1965.


