

Earlier this year we were excited to see the premier of Dakota Digital’s new VHX Instruments for Fox body Mustangs. The company currently offers replacement instruments to upgrade the gauges in Mustangs from 1979 all the way up to 1991. 1992 and 93 models saw a slightly different bezel, although we’d be pretty sure a retrofit to an older bezel would allow the use of this cluster as well.
Since Project Rehab was built one model year before Ford began equipping 5.0 Mustangs with 140 mph speedometers and our gauges were less than reliable at best, we decided this was an opportune time to do an upgrade, especially considering the extensive work we did early on with the interior. With multiple options available the final part number is determined by the options chosen. In our case we ordered part number VHX-87F-MUS-S-R. The “S-R” at the end of the part number indicate that we specified silver faces, with red night time illumination.
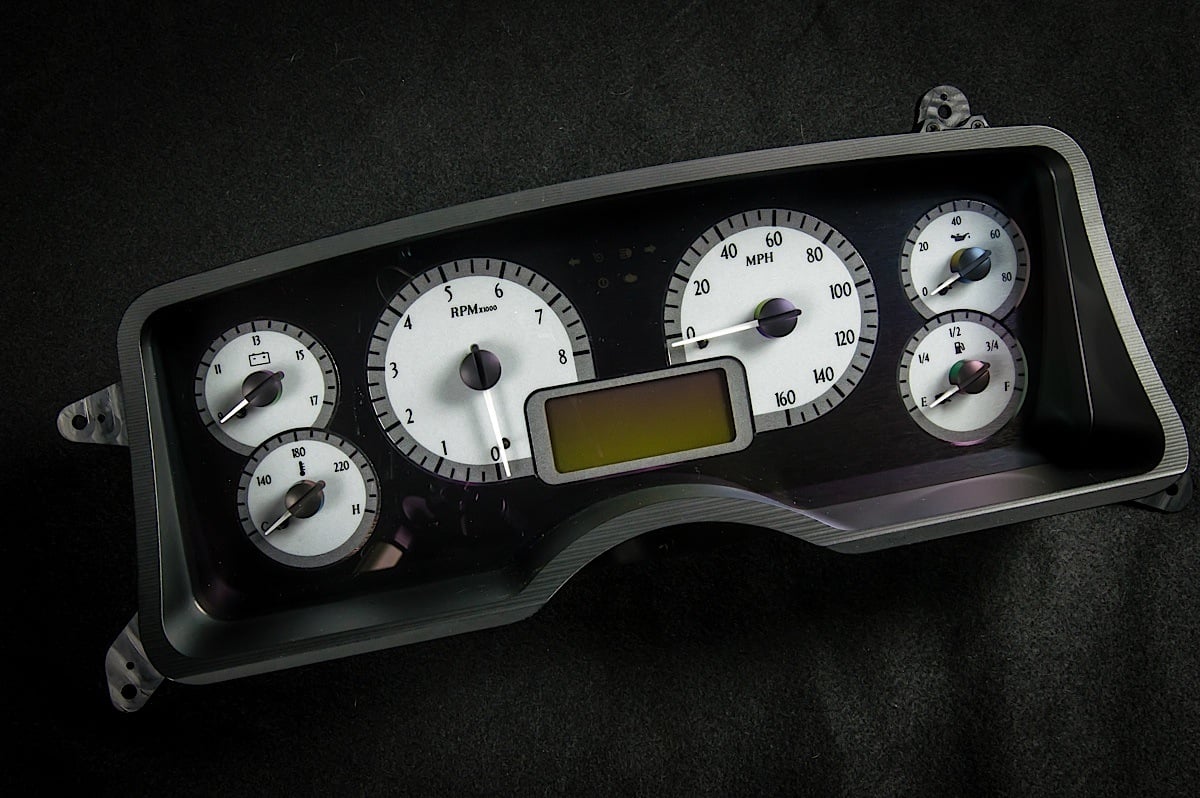
We specified our Dakota Digital VHX Instruments for Project Rehab with silver faces, white needles, and red illumination. Other available options include blue illumination, carbon fiber with red accents, carbon fiber with blue accents, and coming soon black with white letters and white illumination.
Now Is The Fox-body’s Time
The older muscle cars are getting up there in years, they’re harder to find, and their popularity has made them more expensive. Cars like the Fox-body offer an affordable alternative, with the same amount of thrill. -Scott Johnson, Dakota Digital

We spoke with Scott Johnson at Dakota Digital about why the company has turned their attention to late model muscle cars like the Fox-body. Johnson told us, “The older muscle cars are getting up there in years, they’re harder to find, and their popularity has made them more expensive. Cars like the Fox body offer an affordable alternative, with the same amount of thrill.” Johnson also mentioned that they’ve received a large amount of customer input requesting such a product for the Fox market.
The VHX Instruments for the Fox-body is based around the same components that drive Dakota Digital’s popular street rod and muscle car applications. The VHX system debuted in 2010; it centralizes all inputs to the instrument cluster to a single remotely mounted control box and transmits them via a CAT-5 network cable which is routed to the back of the instruments assembly. No other connections to the main instrument panel in the dash are needed. “When we developed the VHX system we wanted to do more than just build a set of analog gauges,” says Johnson.
The gauges utilize stepper motors to provide precision movement. According to Johnson the stepper motors have been rated to millions of cycles, and they actually have several test mules at Dakota Digital headquarters that have been cycled over 10-million times.
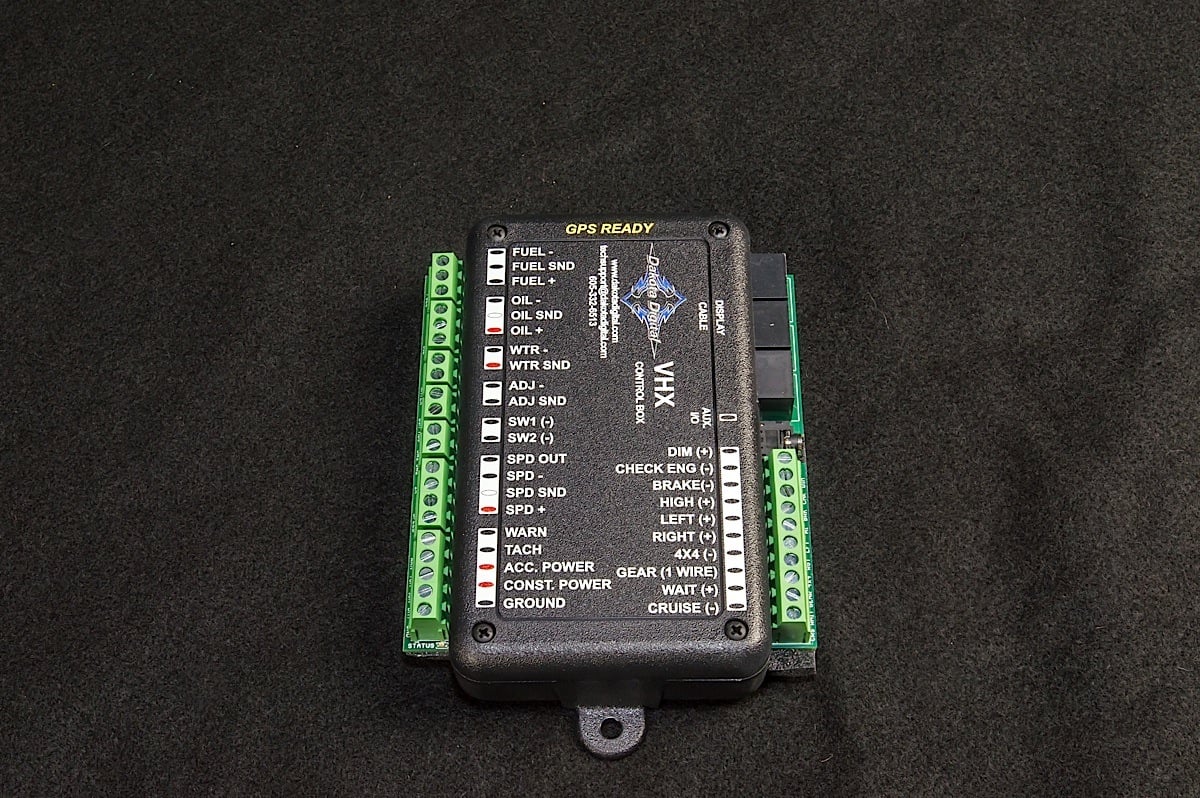
The brains behind the VHX instruments, the VHX control box. All gauge inputs are connected here – a single Cat-5 network cable supplies power, and signals to the VHX instruments.
Stepper motors allow for speed and accuracy; their hollow output shafts also allow an LED light to be placed on the back of the motor, supplying light through the shaft and illuminating the needles. All of the instrument lighting is done via LED, which should ensure long life, and consistent illumination.
The Fox body system was developed through Dakota Digital’s new product development process, which according to Johnson typically takes 13 weeks from the time an idea is approved to the time the first prototypes are built, tested, verified, and marketing begins. “Everything from the design, research and development, and building the clusters is done at our South Dakota facility,” says Johnson. Since the Fox-body instruments are built around existing VHX technology, this 13-week process is possible with the main obstacles becoming machining the housing, designing the appearance and packaging.
What’s In The Box

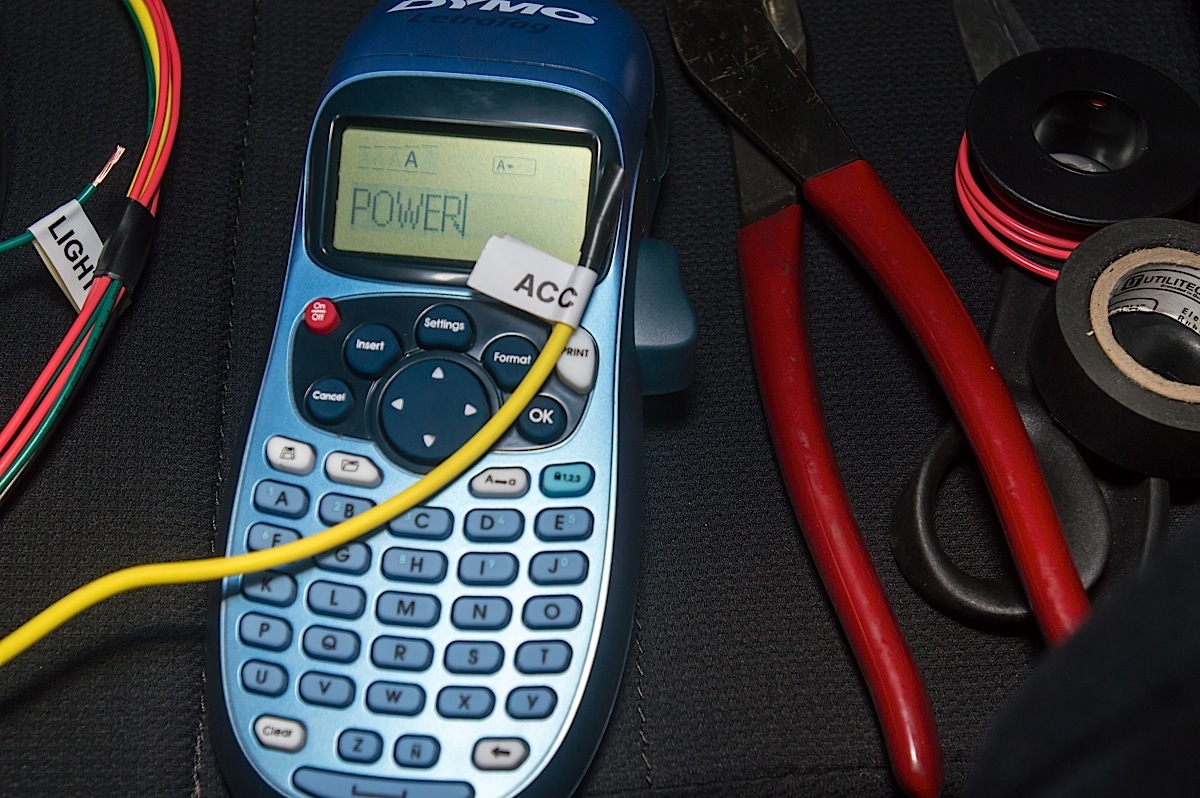
Label It
A wiring job of this size requires some means to identify each wire. With over 20 connections to make, there aren’t enough colors in the insulation rainbow to use a unique hue for each individual connection. The solution is a cheap label maker from a local big-box store. For less than $20 this proved invaluable in keeping all our connections organized during installation. Those labels will also be valuable should we need to do any future troubleshooting with our wiring.
The VHX is a major upgrade for the Fox-body, bringing the car’s gauge technology into the 21st century. Dakota Digital includes detailed instructions along with new senders for vehicle speed, oil pressure, and coolant temperature. The VHX system is compatible with a wide variety of fuel level sending units, including the 20-150 ohms unit that is used in all 87-93 Fox-body Mustangs, and the 73-10 ohms used in 79-86 models. The original cable driven speedometer is replaced with a new electronic speed sender.
More Than Just Gauges
The VHX instruments can do more than just display basic gauge information. Users can customize warnings for the temperature, volts, and oil pressure. The system also warns of low fuel, and can even trigger a shift light, warning light, or another activated device through the customizable menus. Performance data like 0-60 time, and 1/4 mile performance can also be displayed. Any instrument’s current reading can be displayed digitally on the LCD monitoring screen, and a variety of Dakota Digital modules can be added to the system to display information on things like transmission gear lever position in automatic cars, and even monitor air pressure in air spring outfitted rides.
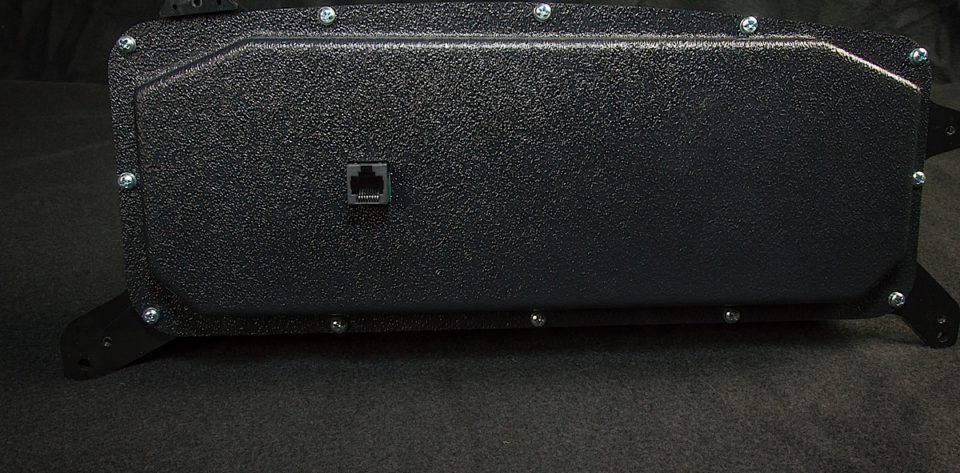
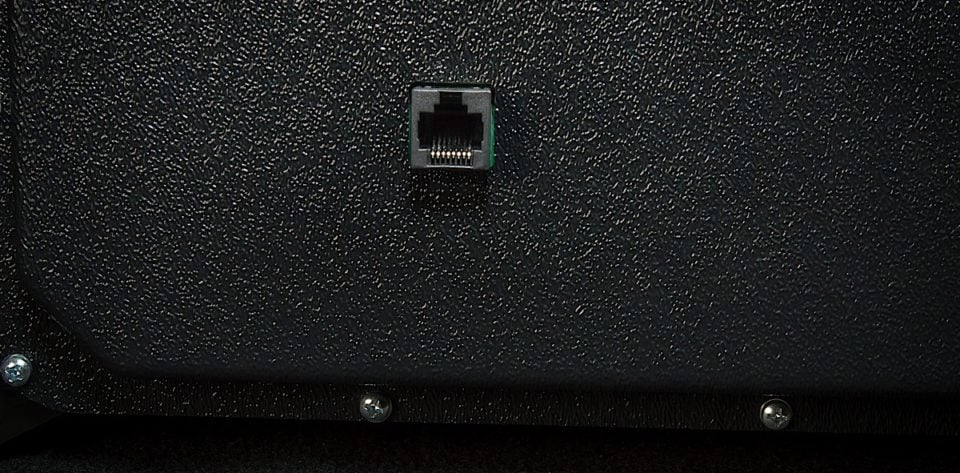
The back of the VHX instruments, gone are the bulky original connectors, with their always too short harnesses, as well as the ancient speedometer cable. Everything is routed through a single connection via a Cat-5 network cable, the same kind you use to connect a computer to a LAN.
Getting Gauged
This system can be installed in one day, but you will need to spend some time with a test light, wiring diagrams, and digital multi-meter to verify circuits for the 22-plus connections that must be made.
While we will have documented all the wires we tapped into, it is imperative that you spend the time to verify each of these circuits yourself, as different years or even assembly dates could cause variations in the harnesses. The use of high quality wire to route your connections to the VHX box is crucial and pay close attention to the directions. Since Project Rehab has no radio, we mounted our VHX box inside the center stack where the radio would normally go.
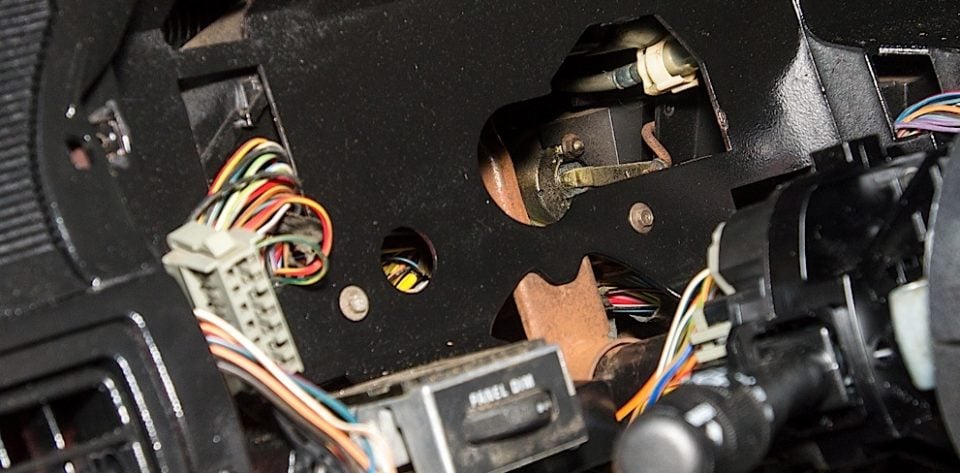

Left: Installation starts by removing the covers from the steering column, the knee panel, instrument cluster bezel, and the stock instrument cluster. We then used a test light, as well as digital multi-meter, and various wiring diagrams we found using Google searches to test, and verify we had located the correct circuits for each feed needed. Right: We installed our VHX control box in the radio slot since we have no stereo currently installed. We left our wires long enough to later move the box if we choose.
We began by removing our old instrument cluster and consulting a couple of different wiring diagrams to figure out which wires to tap into. We drew constant power from our engine compartment mounted junction box and added an in-line 10 amp fuse near the connection to the VHX box to protect the circuit and the box. We ran an 18 gauge ground wire to the chassis, securing it with a self-tapping screw and connecting it to the VHX box.
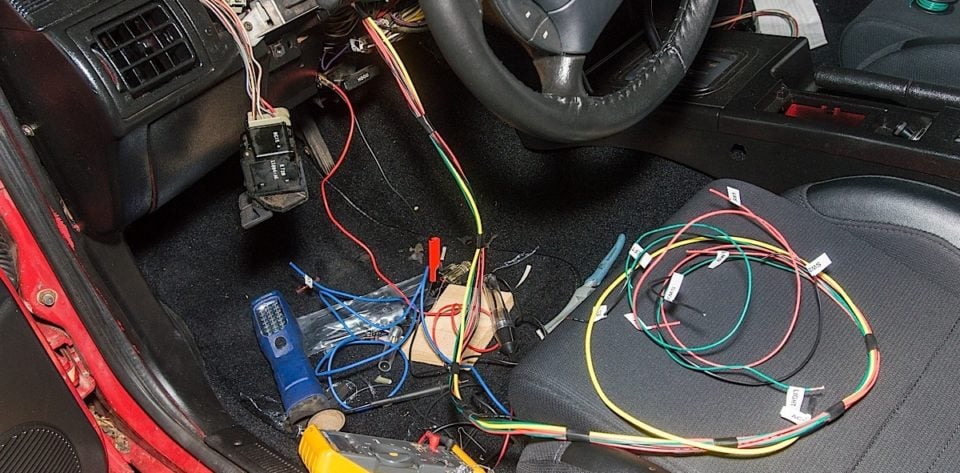

It's not spaghetti, but it can look overwhelming. We had to tap into the inputs for key on power, lighting, turn signals, tach signal, check engine light, high beams, and fuel level, as well as run wires for the VHX control switches, and supply three ground connections, one for the VHX box and one for each control switch. The secret here is to take your time, and label everything.
When we developed the VHX system we wanted to do more than just build a set of analog gauges. Scott Johnson, Dakota Digital
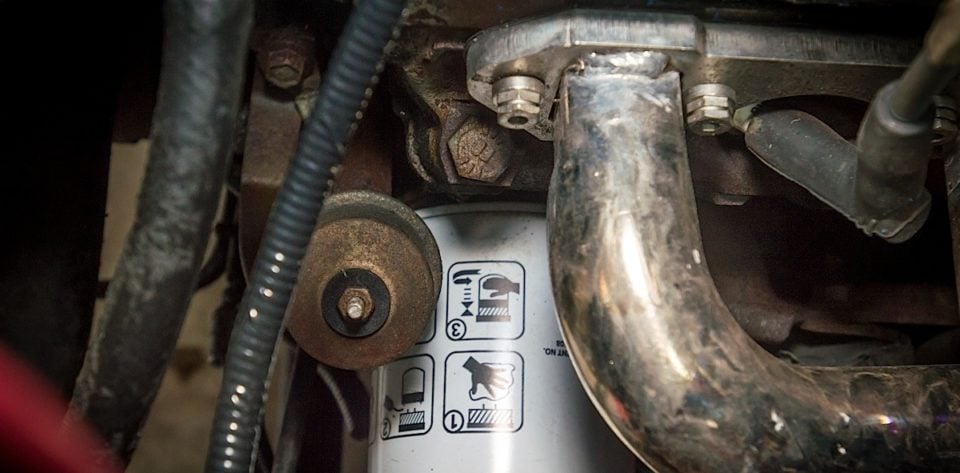
Dakota Digital provides sending units for the coolant temperature, oil pressure, and vehicle speed. We replaced each of the original factory senders with these new ones, and routed their wires carefully through the old speedometer cable grommet in the firewall, and then to the VHX box.
The majority of the other wires were drawn from the OEM instrument cluster harness or harnesses in the steering column:
- ACC Power: Red/Yellow wire on driver’s side connector.
- Constant Power: From 12-volt junction under hood, fused with 10 amp blade fuse.
- Ground for VHX: connected to chassis with self-tapping screw.
- Ground for SW1 and sw2: connected to chassis with self tapping screws.
- Fuel Send: Yellow wire on passenger’s side connector.
- High-beam: Green/Black wire on driver’s side connector.
- Dimmer: Blue/Red wire on Pass side connector.
- Tach: Output from ECM harness 5 volt signal.
- Right turn signal: Blue/white wire on driver’s side connector.
- Left turn signal: Green/white wire on turn signal switch connector in column.
- Oil, water, and speed all connected via included connector harnesses.
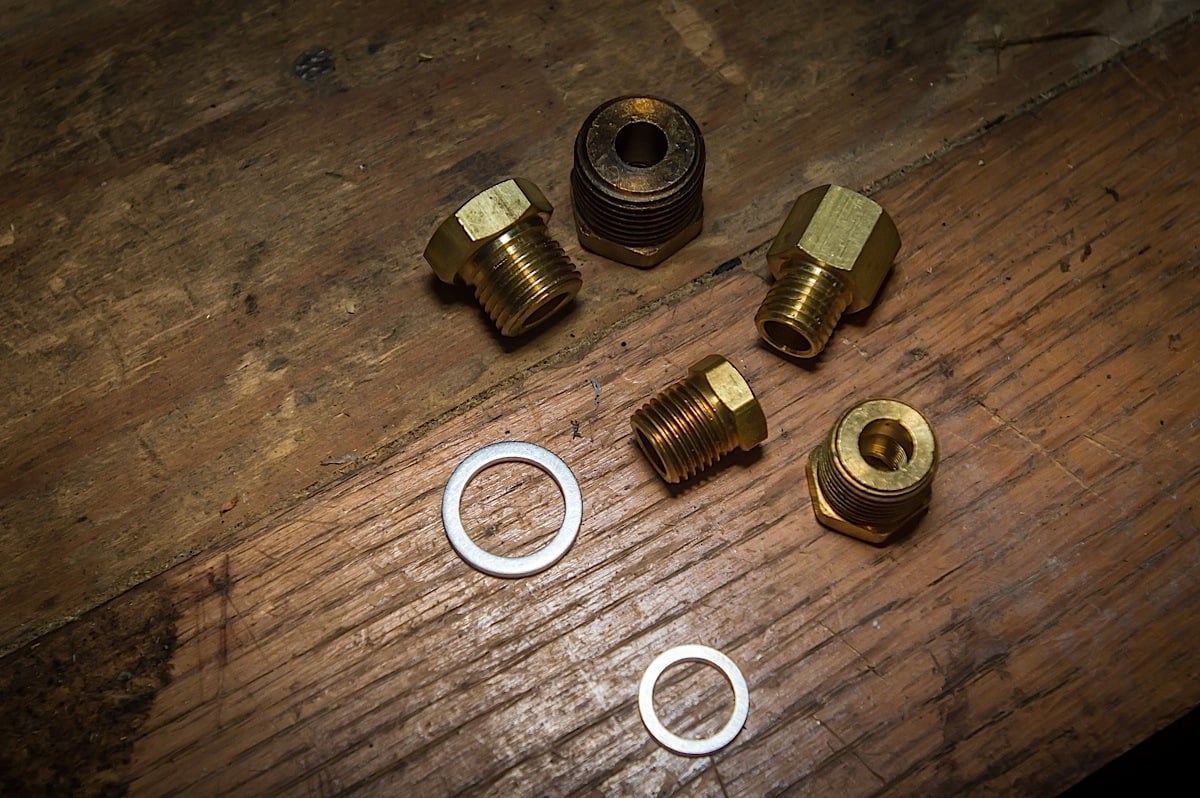
An adapter is required to install both the coolant temperature sender and the oil pressure sender. Dakota digital provides multiple adapters with the kit allowing it to be used with a variety of manifolds and configurations.
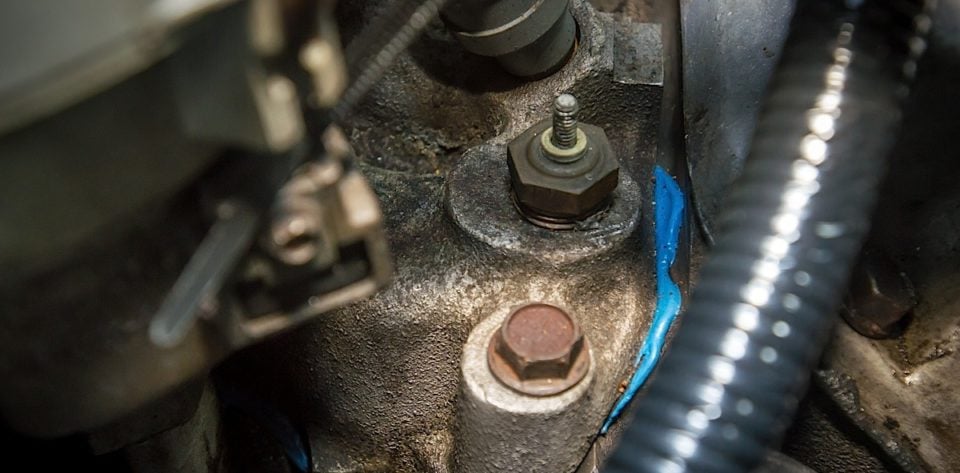

Top Row: The old school tech that the factory instruments used for inputs. Left to Right: The diaphragm style oil pressure sender design dates back more than 50 years. The single wire coolant temperature sensor never seemed to give us much of a reliable reading. The speedometer cable had seen better days, the needle bounced, and the cable easily pulled out of the instrument cluster. Bottom Row: Dakota digital provides new senders for each of the components listed in the top row, their replacements are pictured installed directly below them.
We used high quality heat-shrink, solder-less (butt) connectors for each connection. The system also requires two control switches, listed in the instructions as SW1 (switch one) and SW2 (switch two). These need to be connected to a ground on one of their wires, and the other wire connected to the VHX control box. We drilled two 3/8-inch holes in the factory instrument surround bezel next to the dimmer switch control and mounted the VHX control switches there. Since they only require a ground to operate owners can choose to mount these anywhere they see fit, although we suggest somewhere with easy access so they can be operated for adjusting the instruments and accessing their other functions.
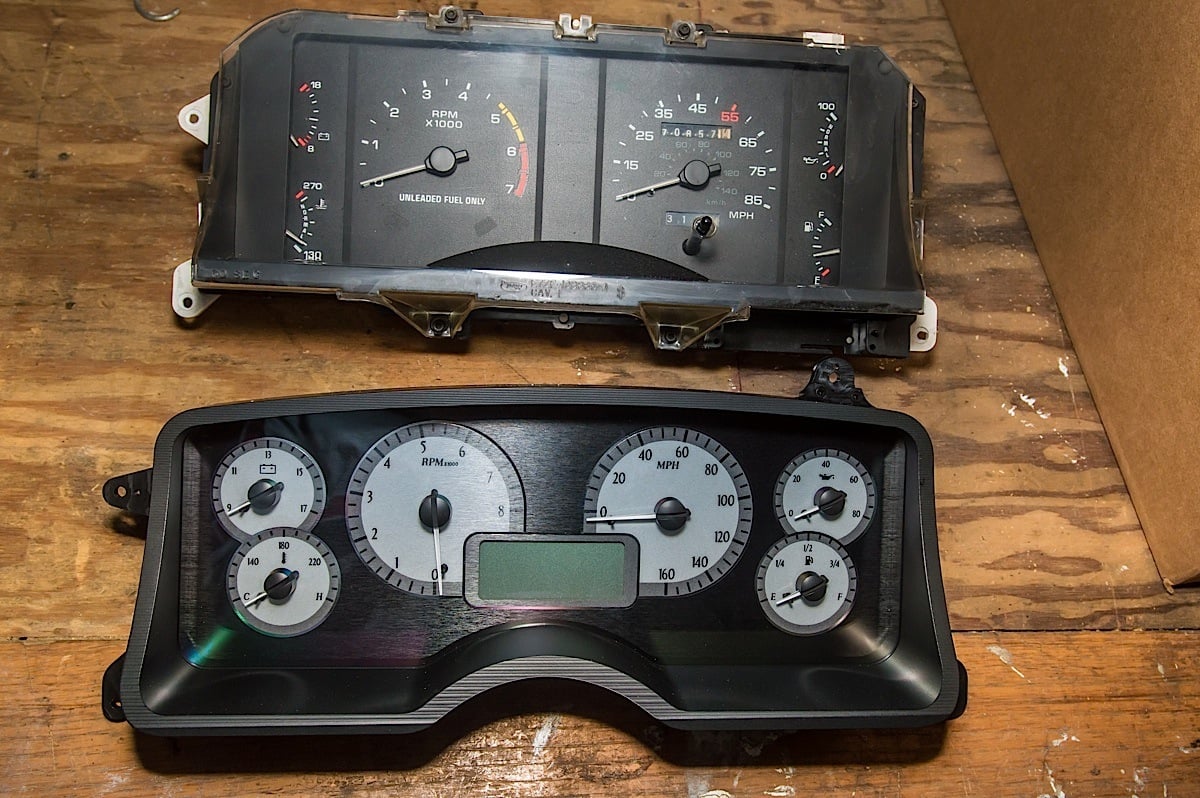
The VHX instruments offer a number of improvements over the stock 1988 units. Aside from the technological advantage and accuracy, they’re also easier to read, and better looking.
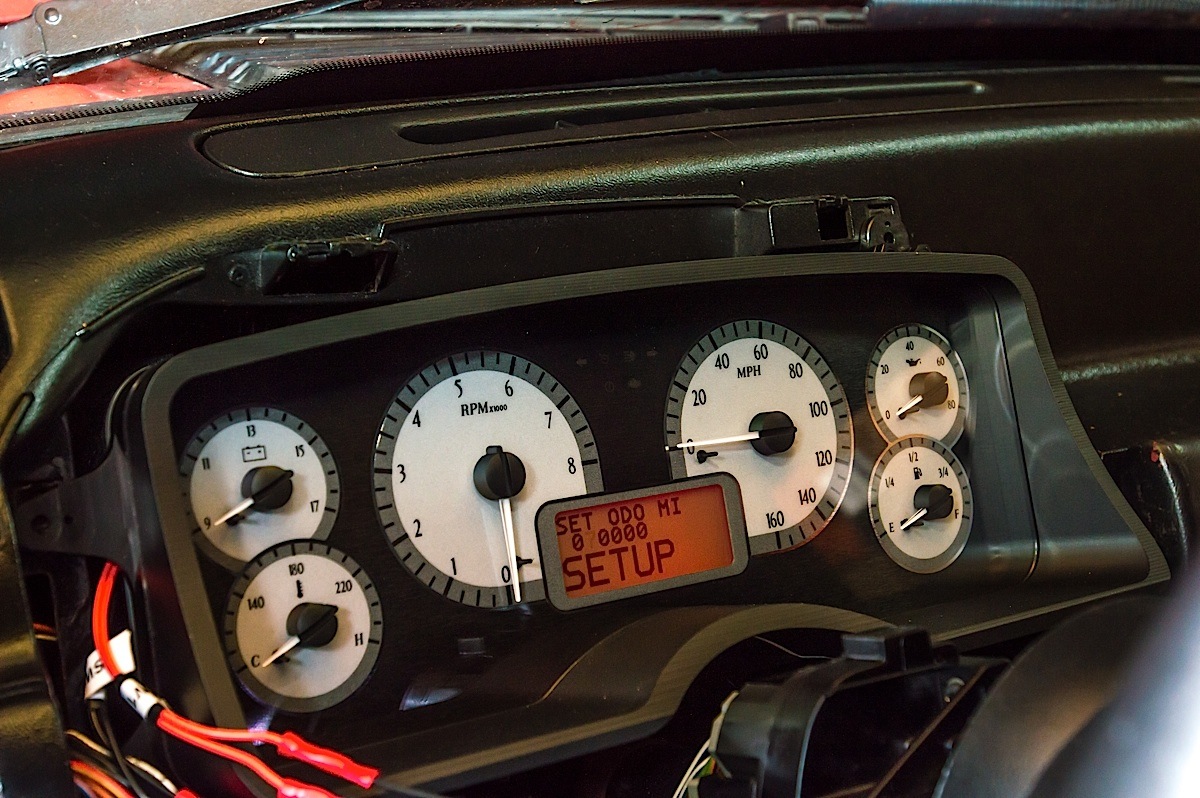
Setup
The VHX system must be setup once installed. Owners can go back anytime and change the settings as needed with the exception of the odometer mileage. Dakota Digital allows the odometer mileage to be set one time within the first 100 miles of operation, after 100 miles the system will automatically lock in the odometer if it has not been set by the owner. The only way to reset it after locking it in by the user, or automatically is to send the assembly back to Dakota Digital.
We followed the instructions for setup, selecting the correct fuel level sender, tach signal, and updating speed, temperature and voltage warnings, and setting the clock.
Before closing things back up we checked the operation of all instruments, even test driving the car briefly to get the speedometer calibrated. Dakota digital includes easy to follow setup instructions and the setup process takes just a few minutes.
To setup the speedometer the car must be driven, there are two options. An auto-cal setting will attempt to adjust the cluster automatically and involves using the control switches to trigger when the car is being driven over the course of a measured mile. There is also an adjust mode for fine tuning. An interesting note, according to Johnson if and when we change our transmission or rear differential gearing, using adjust mode or auto-cal we can easily compensate for the changes and set the speedometer to read correctly, without the need to change the speedometer drive gear mounted on the speed sensor.

Test Driving
The first thing we noticed about our Dakota Digital VHX instruments is how stunning they are when illuminated. The red illumination is beautiful, and looks high-tech and modern, especially compared to the dim, barely visible lighting of the OEM gauges, which were suffering from several bulbs that had ceased functioning, but which we’ve always found lacking even when these cars were new.
Due to issues with our transmission we have yet to do a quarter mile test, or a 0-60 test, however we can tell that with the tachometer set to fast update (it can be set slow, med, or fast) it does an excellent job of keeping up with our right foot.

While the daylight view offers a clean appearance, it’s the night time view that is stunning to look at. LED illumination provides consistent lighting, and the brightness is adjustable by over 30 levels, with optional dimmer control as well.
The Dakota Digital VHX Instruments system for Fox-body Mustangs is an ideal way to update and upgrade the gauges of an aging car, especially one like Project Rehab where extensive interior upgrades have already take place. We look forward to more reliable readings, as well as being able to actually read our instruments at night. With an MSRP starting at $795 (options may change the price) and multiple face and lighting options available, the gauges are competitively priced, and sure to be a hit with Fox-body fans everywhere. If you’re considering replacing or upgrading your faded, worn, or malfunctioning instruments, the VHX Instruments from Dakota Digital should be at the top of your shopping list.


