
Most of the people who own a Mopar also know that aftermarket parts, specific to Mopar, are going to be rare and hard to find. While there are a few companies that specialize in Mopar, many larger companies cater primarily to the Blue Oval or Bowtie crowd, and often offer up very little for the Pentastar crowd. But that is changing as the Pro-Touring movement is infiltrating the scene, and companies like QA1 have begun to fill a much needed void with Mopar enthusiasts.
Many early Mopars have K-members with torsion bar suspensions, and there weren’t many options – until now.
The Mopar A-, B-, and E-body cars from the ’60s and ’70s have one thing in common: they are suspended by torsion bars and K-members. For decades, whenever someone wanted a stiffer suspension they installed a thicker torsion bar, typically using the B/RB or HEMI application, but were still left with stamped control arms and a front strut bar that pivots on rubber bushings.
One way to strengthen the control arms is to reinforce them by welding sheet metal to the underside of the arms, by boxing them in. This makes the arms stronger, but it also has a drawback: it adds weight – unsprung weight – to the front suspension.
The strut bars are designed to locate the lower control arms and keep the proper geometry; but rubber bushings give way because they compress or get brittle, and they allow slight movement of the control arms. This additional movement wears on the bushings in the control arms, and eventually the suspension can get a little sloppy.

QA1 addresses these issues with their new Mopar suspension components, and they give these old girls exactly what they need: some love and attention. QA1’s control arms are tubular, giving them a nice, custom look. But being tubular isn’t just for looks, because the tubes add strength, keeping the arms from twisting and flexing like the factory parts do.
The purpose of the strut bar, contrary to what some may think, is to keep the lower control arm perpendicular to the lower control arm pivot – not to adjust caster. With rubber bushings, the strut bar pivots on the bushings at the K-member, and they begin to wear and eventually deteriorate.
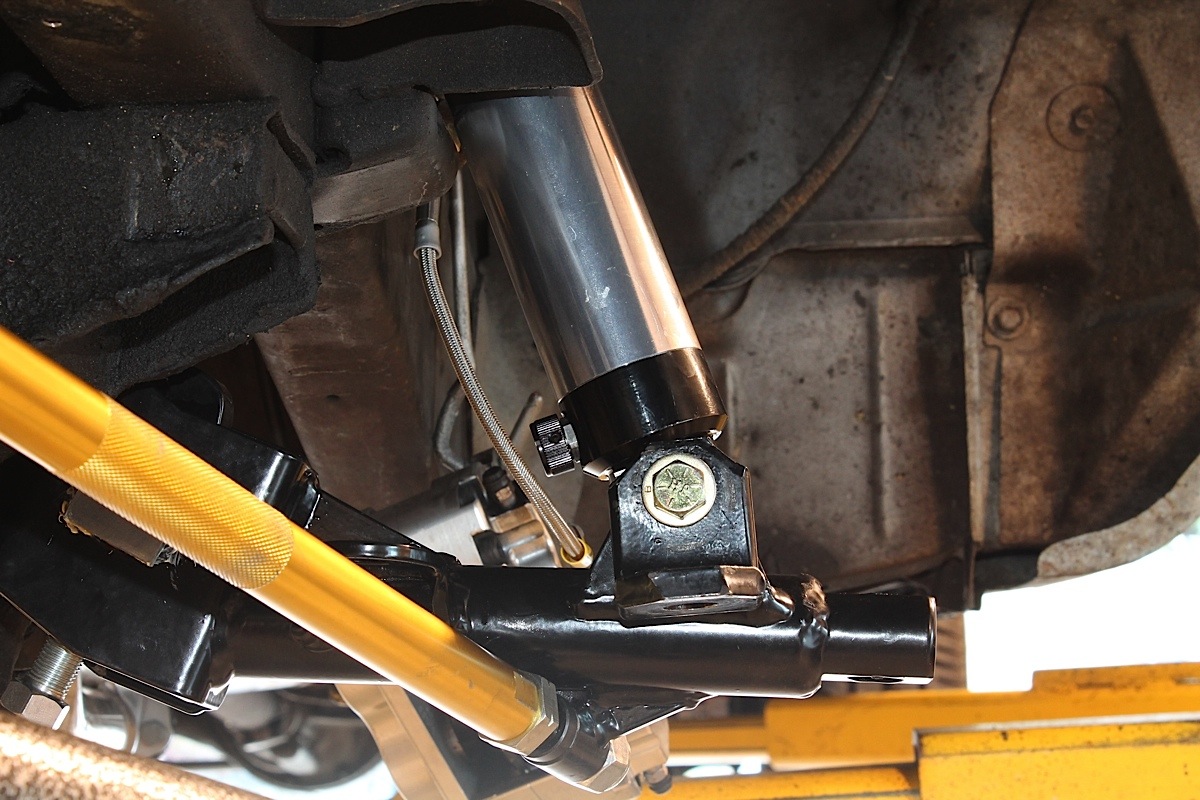
QA1’s dynamic strut bar mounts solid to the K-member, and utilizes a Heim-joint pivot that allows the bar to stabilize the lower control arm and keep it in place. It’s also adjustable so that lower control arm alignment can be set properly. The strut bar is anodized, and constructed from 6061-T6 aluminum for both strength and weight savings.
Topping off our install was a set of QA1 Stocker Star single-adjustable shock absorbers. The dampening is adjustable in about 15 increments, giving us the ability to adjust the dampening rate of the shocks when we go racing, and turn them back down for the trip home. These shocks allow you to make further adjustments to the way a car handles by firming up one end of the car stiffer than the other, which can help affect over/understeer. For seriously hard core racers, QA1 also offers double-adjustable shocks so you can adjust both the impact and rebound separately for fine-tuning your shock absorbers.


The single-adjustable Stocker Star shock absorbers allow us to fine tune the suspension for daily driving - or hitting the curves.
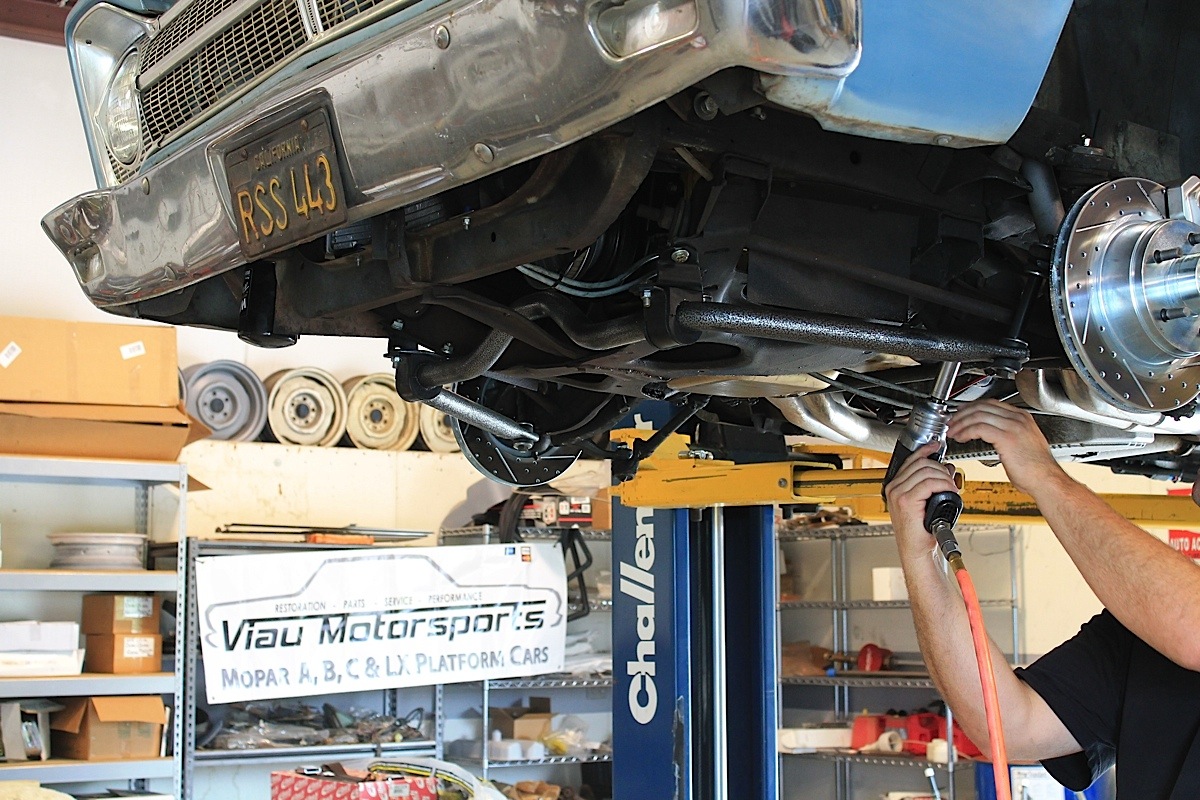
We wanted to install these QA1 components in our 1965 Plymouth Belvedere, because we road race this car and we needed some major improvements in the front end. We needed full control of our camber and caster, without worrying about the stress that hard cornering can put on old parts that weren’t designed for the kind of driving we are doing. But, we also like to drive the car on a regular basis, so we are getting the best of both worlds with adjustability – and the drivability that allows us to drive the car on the street.
We took our Belvedere to a local Mopar specialist, Viau Motorsports, because they not only know Mopar, but they have spent a lot of time with the 1962-65 B body cars. Marc Viau, owner, has also built some exceptional cars, including this 1964 Belvedere we featured a couple of months ago.
Viau and Aaron Bourdage, lead technician at Viau Motorsports, have been building these B-Bodies for quite a few years, taking them completely down to a shell and building them up better than the factory did. They were quite impressed with the overall quality of the QA1 suspension components and were ready for the real test – back at Willow Springs.
Weight Savings With QA1 Components
The first thing we wanted to do was to compare the weight of the QA1 components with the factory components. These aren’t huge parts, so we didn’t expect to see weight savings of more than about 10%, but what we did expect was the strength that these parts will provide.

QA1’s control arms are stronger than the original arms, firming up our front end.
We first weighed the upper control arms, and found that the factory and QA1 arms are roughly 6 pounds each. But if you add the weld-on support plates to the factory upper control arms, you’ve added about a pound, making the reinforced arms about 7 pounds each.
The Lower control arms from QA1 were about 10 pounds each, and the factory arms were 11 pounds each. Adding reinforcement to the lower control arms added another pound, making them about 12 pounds each.
The dynamic strut bars from QA1 were about 5 pounds for the pair of them. The factory strut bars weighed about 4 pounds each, making them about 8 pounds for the pair.
With QA1’s Mopar tubular control arms and dynamic strut rods, we were able to save a total of about 9 pounds on the front end of the car over the reinforced factory control arms and strut rods. Even the reinforced factory control arms are capable of some flexing, but that flex is eliminated with QA1’s tubular design, with gussets on the upper control arm for strength.


The factory control arms are fine for cruising, but they aren't strong enough for road racing, and they're already bulky enough.
Suggested Parts To Replace
Before beginning this project, we looked at parts that will need to be replaced, and also which parts are a good idea to replace once the suspension is apart. The upper ball joint is included with the upper control arm, but the lower ball joint is bolted to the steering knuckle, and it’s a good idea to replace them if they are old or worn. We replaced our ball joints during a front brake conversion a few months ago, so we were good to go.
An alignment is necessary whenever you replace lower control arms, making it the perfect time to tighten up that steering.
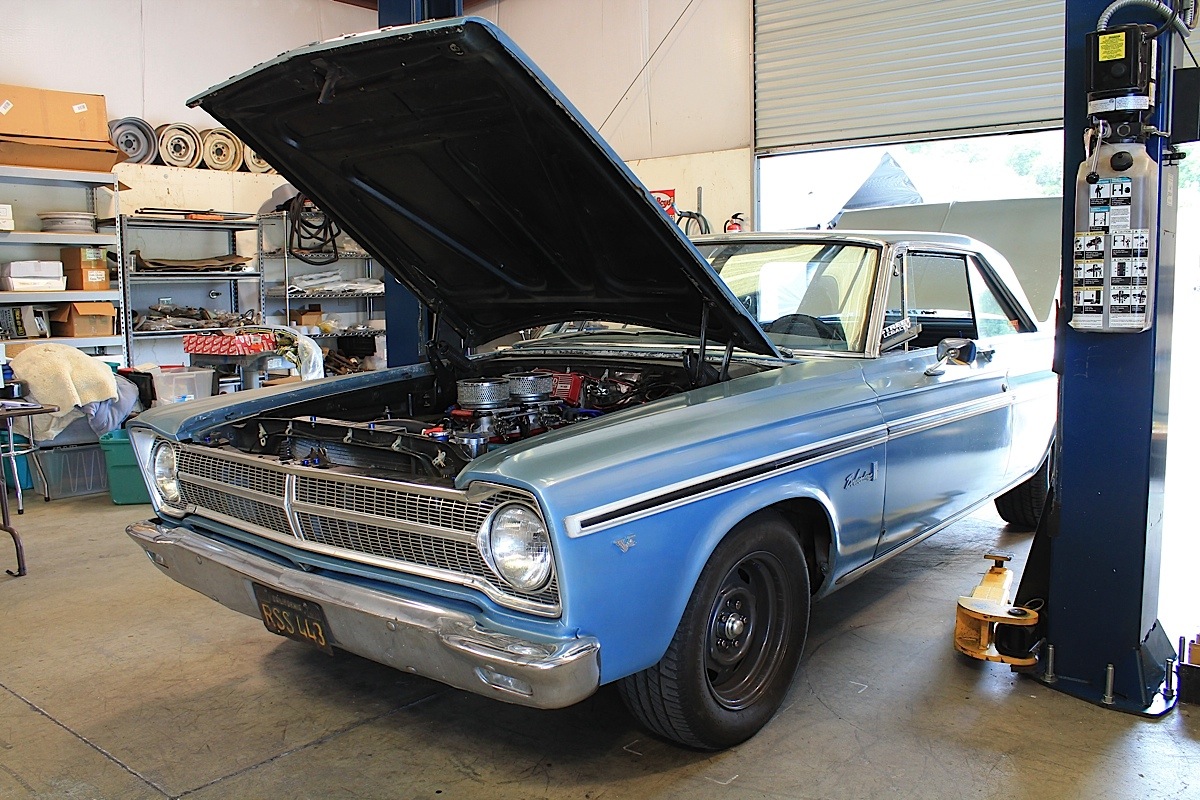
Anytime you’re replacing the lower control arm, it’s necessary to get a front end alignment done as well. Since we were unbolting the tie rod ends, that’s the first part that we decided we would replace. We also had to dislodge the torsion bars, and seeing that they are as old as the car, we took this opportunity to replace them with thicker torsion bars for better handling. We’re taking this car back out on the race track, so a stiffer suspension is part of our goal with this project.
For the parts that we needed to replace, we reached out to Classic Industries for tie rod ends, tie rod sleeves, and thicker torsion bars. Classic industries provides replacement parts for popular classic GM vehicles as far back as the mid 1940s, and also for Mopar A, B, and E body vehicles from 1961-76. You can find both original replacement parts in their catalogs, and they’re also a distributor for many aftermarket performance parts as well, such as QA1.
We ordered a pair of outer tie rod ends (part #ES319RB), inner tie rod ends (part #ES319LB), and tie rod sleeves (part #ES319SB) from Classic Industries, and decided on a set of 1.03-inch Hotchkis torsion bars (part #H19367), which is stiffer than our stock bars, at .920-inch. The new bars will make the ride a little stiffer, but increases our handling immensely.


Thicker Hotchkis torsion bars equate to a heavier spring rate, giving us a firmer ride, but better cornering abilities.
Front Suspension Upgrade With QA1
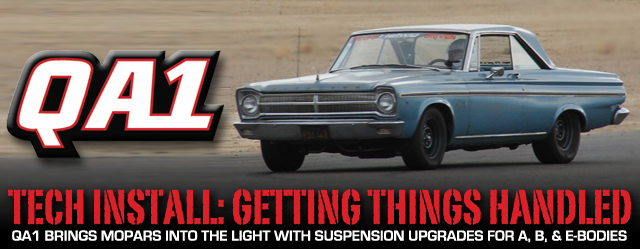
Having a lift isn’t mandatory for this upgrade, but it helps a lot. It can be done on jacks stands – if you’re comfortable working on your back. This upgrade can be a one man job for those who have experience, but with any suspension job a helping hand is always welcome.

To slide the torsion bar back, we removed the retainer clip at the back end. A little persuasion was all we needed.
In order to remove the lower control arm, the torsion bars needed to be slid back enough to clear the pocket in the control arm. This was done by first removing as much tension from the suspension as possible, then by removing the clip at the rear of the torsion bar. Since we replaced the torsion bars, we slid them out completely.
With the torsion bars removed, each component of the front suspension was also easily removed. The calipers were unbolted and set aside, the outer tie rod ends were removed from the lower ball joint/steering arm, and the shock absorbers were discarded.
We retained our lower ball joints because they were fairly new, but needed to remove the upper ball joint from the knuckle. This can be done on a bench or on the car, either way, the entire front suspension needs to be disassembled.


Ball joints can be stubborn, so be prepared to fight with them a little if conventional tools don't cut it.
The front strut rod was unbolted, and the only way to remove it was to slide the lower control arm back; this was much easier with the torsion bars removed. We removed the lower arms completely, removing the knuckle and lower ball joint from the arm first.
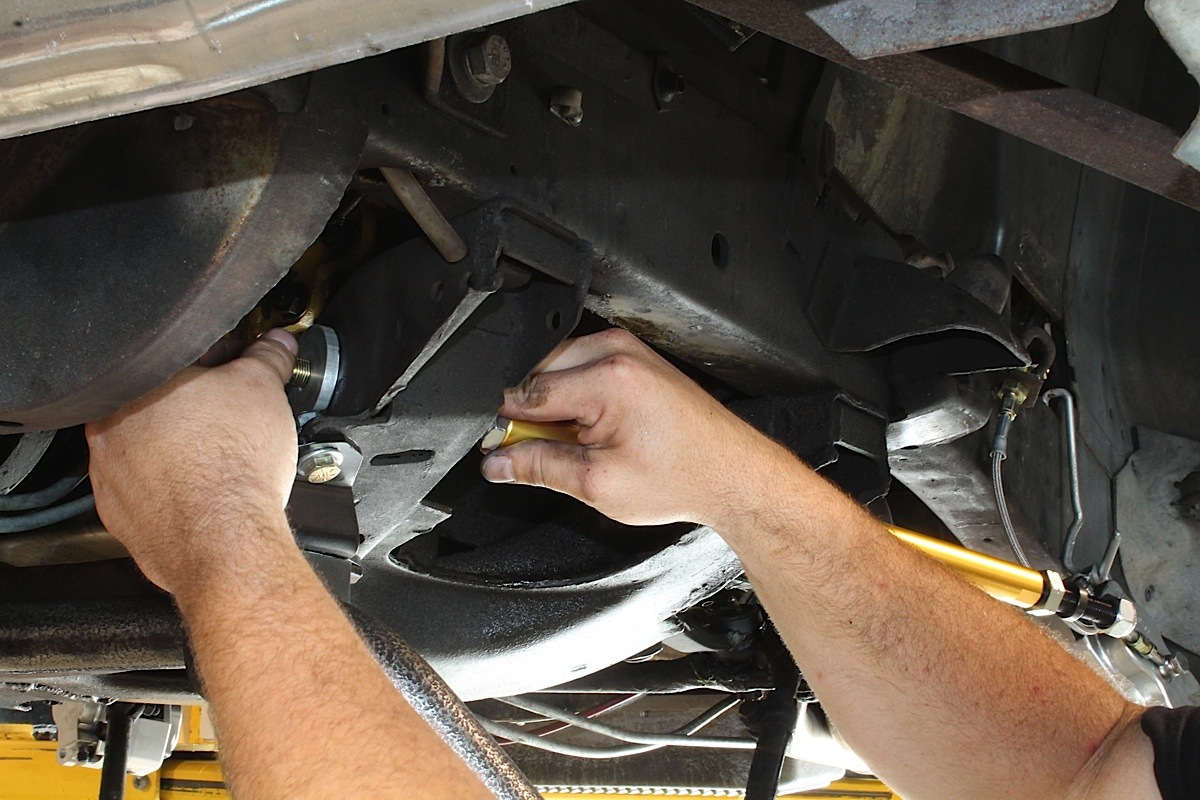
With both sides disassembled, we cleaned up the areas where the new components would be installed. We paid particularly close attention to where the front strut rods mounted to the K-member.
The billet aluminum mount on the strut rod needs to sit flush inside the K-member, and we noticed some flashing from the factory welding, and cleaned it up with a disc to make the surface smooth. Rubber bushings are forgiving of these imperfections, but a solid mount needs a flat, smooth surface.
The factory strut rod was loosened to remove the control arm, then both could be removed. There was a little clean-up needed in this area; rubber bushings are more forgiving of imperfections.


We installed the strut rods into the K-member and snugged up the mount, and then installed the lower control arm into the rear of the K-member. The alignment of the lower control arm is critical here. The control arm must be perpendicular to the mount, and it must have full movement without any binding.
 The sole purpose of adjustment in the strut rod is to align the control arm so there is no binding. As we tightened up the strut rod at the control arm end, we continued to check the movement to make sure there was no binding.
With the lower arm and strut rod assembled, the new torsion bar was slid into place. We made sure to grease up the ends of the bar to make it easier to slide it into the pockets.
It’s always recommended not to use a channel-lock or vise grips to slide the torsion bar in or out, as it can damage the bar and make it difficult to install/remove. A little persuasion with a soft mallet did the trick for us, and the torsion bar was in place, and locked in with the new retainers.

The new torsion bars went in easily; they’re heavy, so we were careful not to scratch them as they were installed.
The new upper control arms were mounted in the stock location. We used QA1’a Eccentric Camber Bolt Adjusters in place of the factory adjusters. The QA1 adjusters are a bit beefier than the factory, with thicker eccentric washers that allow for an adjustment range of -2.5 to +2.5 degrees from the factory settings. The comparison in size on the adjusters was very noticeable, and they can be used with either QA1 or factory control arms.
The QA1 upper control arms have a lot of reinforcement built-in, with gussets and a reinforcement around the upper ball joint. They’re also greaseable, with zirc fittings built in at the pivots. These arms come assembled, with bushings, sleeves and the upper ball joint installed.
QA1 has included the torque specs for all parts in their instruction sheets, and these specs should be followed, regardless of what the factory manuals say. While these components are direct replacements, they are also made of stronger materials and the torque specs and installation instructions should be closely followed.
Top: Adjust the strut rod so that there isn't any binding on the lower control arm. Bottom: The QA1 camber bolt adjusters were used to attach the upper control arm; here they are compared to the stock adjusters.


We reinstalled the knuckles and brake calipers, and attached the outer tie rod ends. It’s best to leave the upper control arm adjusters loose because an initial adjustment is needed so that the car can be taken to the alignment shop. We used the new torsion bolt adjusters from QA1, which are made from high strength alloy steel, with zinc plating for protection. These, too, can be used with either the QA1 lower control arms or factory.
The tubular control arms are made from 1020 DOM tubing for strength, and are CNC laser cut for accuracy. -Damien Brase

The QA1 Stroker Star shocks were installed, front and rear, cinching up the suspension upgrade to our 1965 Belvedere. QA1 has designed all of these components to be used with either factory, or the other QA1 components.
Damien Brase, Technical and Product Support Specialist said, “We designed these parts to work with the factory parts, and they are a great upgrade for the front end. The tubular arms are made from 1020 DOM tubing for strength, and are CNC laser cut for accuracy.”
After QA1 acquired CAP Auto, they listened to the feedback from customers and went back to the drawing board and improved upon the designs. Brase said, “We scanned the parts and design into SolidWorks and made sure the design would meet the strength requirements we specified.” All of QA1’s products and designs are done in-house at their Lakeville, Minnesota, address.
Top: The hardware we received from QA1 was far superior to the stock hardware that it replaces. Bottom: The entire set up installed - saves weight and is stronger than the factory parts.


QA1 also also makes a tubular replacement K-member that works the same way – with factory parts or with QA1’s suspension components. The B-body K-member is designed for 1966-72 Mopars, as the engine mounting is a couple of inches further back than the 1962-65 B-bodies.
It’s not uncommon for some builders to use the later K-member in the early cars, but that will require some modification of the engine and trans mounts. QA1 doesn’t recommend this, but rest assured their K-member fits just like the factory K-member, allowing for more clearance for headers and oil pans, and is used with the factory steering box. So all of these components are direct replacement parts, requiring no modifications for their specific applications.
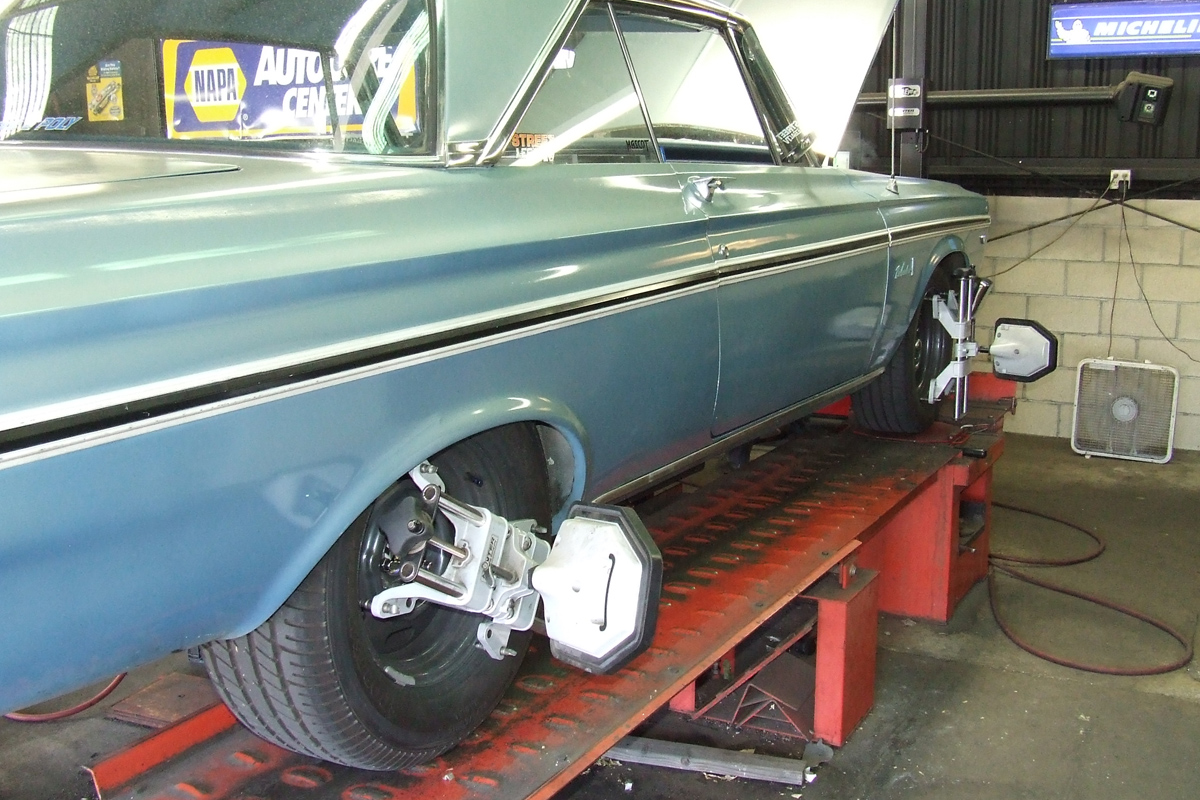
An alignment was mandatory after replacing the control arms, we also set the camber and caster for the type of driving we’re going to be doing.
Driving Impressions
We did a bit of a “shop alignment” to get the car squared away for the alignment shop, where the tie rod ends/sleeves we received from Classic Industries were used. We opted for a full, four-wheel alignment because we want this car to perform – and that it does.
We installed our QA1 single-adjustable shock with the knob to the inside, making it easier to make adjustments. Start in the middle, and adjust as necessary.
We had the shocks adjusted as recommended – set about half way – for the initial drive and then made adjustments from there. There are settings in the instructions for the various driving styles/intentions, from street use to drag racing.
Starting at the middle on the adjustment will give you a good starting point so you can make incremental adjustments to fit your driving style. With the new, stiffer torsion bars we got from Classic Industries, and the stiffer settings on the shocks, our first drive was a bit bumpy and it was clear that we had a much firmer ride than before. We made small adjustments, one click at a time, on the shocks until we reached the desired feel.
We only had Hellwig sway bars on the car before, and it felt like it handled very well. Now that we have taken all of the slop out of our suspension due to the worn out bushings and soft shock absorbers, we now have a car that handles better than many of the cars on the street today. With the stiffer suspension, and the camber/caster adjustments we made at the alignment shop, we were ready for the track again.
There’s one more adjustment that was made before we hit Willow Springs again, and that was to install a set of 18-inch Weld Racing wheels with Mickey Thompson Sport Comp tires. That completed the package – and gives us just a little bit more of an edge to catch up to the modern cars on the track.


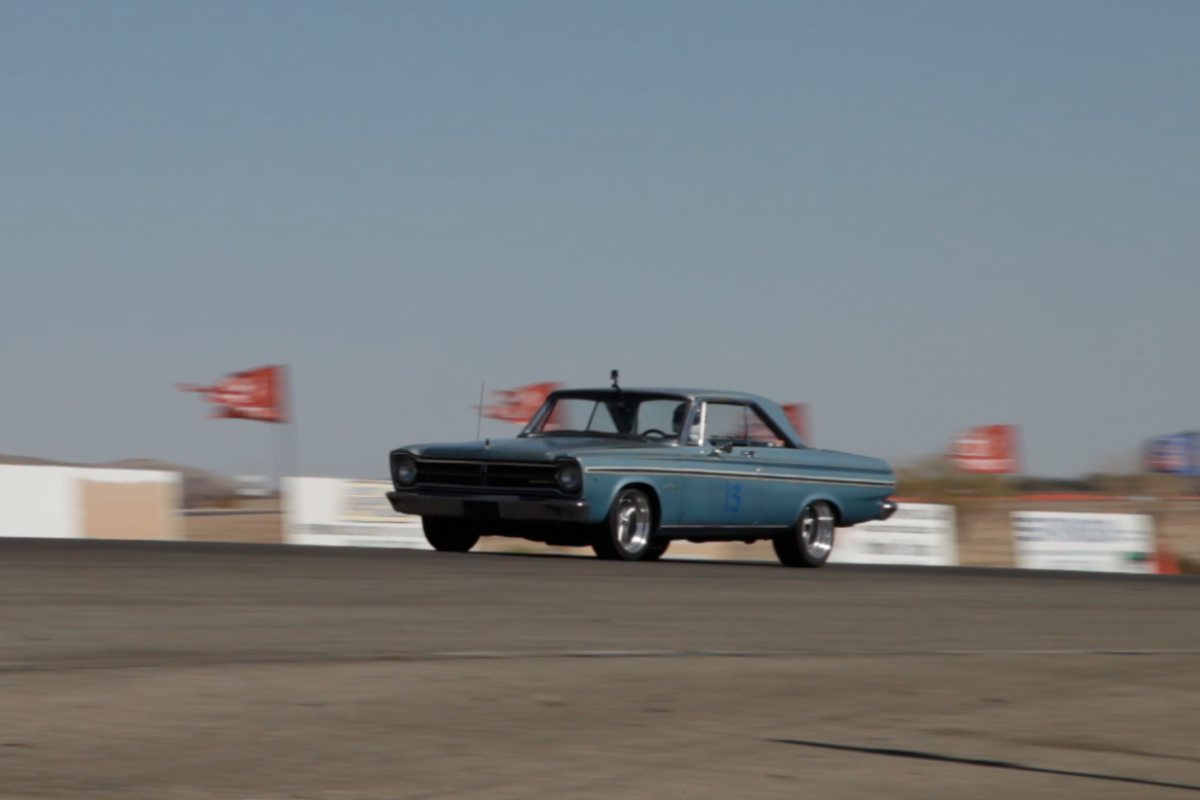
While the Belvedere is no match in horsepower for Juan Lovato's supercharged HEMI Challenger, we were able to close the gap in the big sweeper, hitting speeds in excess of 100 mph.
We hit the track at Willow Springs with lots of modern Mopars and though they were faster in the straights, we were able to keep up with many of them in the corners, especially the big sweeper. It’s a great feeling when you have the old dog out on the track and can catch the young pups in the turns, the car impressed everyone with its ability to keep up – and to hold its own. The combination of all parts work well together to make this Belvedere a contender at the track.
Keep in touch with QA1 on their Facebook page, and keep their web site amongst your favorites. Brase said, “This isn’t the last of the Mopar products, so stay tuned and check us out at SEMA this year for some new products.” We’ll be keeping an eye out, and share it with you live from SEMA when QA1 releases more suspension products for your Mopar, Ford, or GM vehicle.


