
 When it came time to assess the sort of powertrain updates Project Sucker Punch would receive, we had two things in mind: an increase in horsepower that could properly handle modern highways and an engine build that we could complete in the convenience of our own garage. With the help of BluePrint Engines and Edelbrock, Rod Authority picked up BluePrint’s 383 ci short-block and Edelbrock’s DIY Performer RPM E-Tec 435 kit. The upgrade brought our ’54 up to a 10.0:1 compression ratio offering viable power for a car that will be daily driven and occasionally see track time.
In our exclusive video, our staff worked together to assemble Project Sucker Punch’s new engine over the course of a day. It shows the ease and accessibility that this short-block and top end combo afford those wanting to get hands-on with their projects. We wanted to do something to show people that projects like this can be accomplished with the help of a couple buddies, some elbow grease, and a pack of beer.
 Originally housing the factory 235 ci I6, the car owner, Aaron Hahn of Power Automedia’s motor eventually succumbed to wear and tear. Now more than ever he was convinced and determined that a modern update was necessary. Soon after the 235 ci blew, Aaron swapped a V8 sourced from a wrecked Nova he and a friend had come across in North Hollywood, but that was almost a decade ago.
With more under-the-hood experience, heightened expectations, and a desire to build a sturdy motor from the ground up we recently gave Sucker Punch the update that a classic deserves.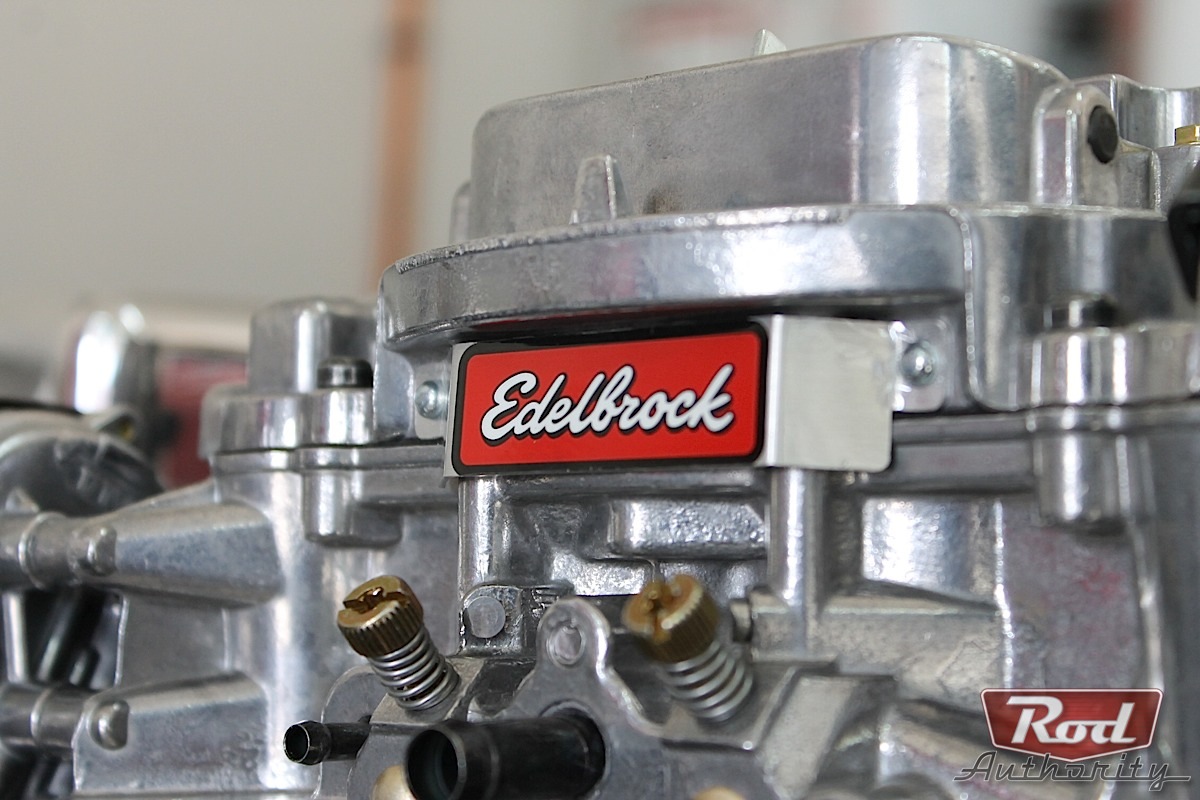


BluePrint Engines, Ensuring A Stout Base For Your Next Project
BluePrint Engines provides an eclectic variety of V8 short-blocks to address your next project. Currently, they offer Chevy 355s, 383s, 496s, Chrysler 408s, and Ford 347s. These premium cores are stringently selected and undergo quality testing that ensures they meet BluePrint’s resilient operating standard.

BluePrint Engine’s GM 383 Overview
- PN: BP38316CT1
- 4-bolt main
- ARP main studs
- 1-piece rear main seal
- Passenger side dipstick
- Align honed main bearing hone
- Cylinders honed to within .0002 straightness & roundness
- Cylinders sonic tested for thickness
- New forged crankshaft
- 3.75-inch stroke forged Mahle pistons
- Forged rods wit 150,000 PSI bolts
- Hastings moly rings
It’s good to know that options are available to fit the bill, literally. What you get when you go through BluePrint is the peace of mind that all the necessary steps have been taken to prep a block and bring it back to optimal condition. In the case that you’re in the market for an affordable new casting, BluePrint has those available as well. The following are just some of the features you can expect from the techs at BluePrint:
Engine Blocks:
- Seasoned, hand-picked cores, max bore .040 (’69-’79 driver’s side dipstick)
- Cylinder wall thickness sonic tested
- Cylinder’s bore angle corrected to be 90-degrees perpendicular to crank centerline
- Decks machined parallel to crank centerline
- Right and left side decks machined equal distance from crank centerline
- Main bearing bores align-honed to correct size and straightness
- Cylinders computer honed to tolerance of .002-inch
- Screw-in oil galley plugs installed in place of soft plugs
We asked Dru to expand on the benefit of plateau finishing over a traditional hone, “Plateau finishing is beneficial to a fresh block for many reasons, but the simplest explanation I could give is that it aids in a shorter break-in time. It helps with oil retention and piston ring lubrication among other things.”
According to BluePrint, plateau finishing is a step above simply honing your cylinders. While piston rings are left to finish the break-in process this takes time and also shortens the life of your rings. The essence of plateau finishing is that it mimics what rings do as they break in the cylinder walls. By getting them as close to the condition that your rings would operate in after optimal break-in, less ring wear occurs.
Crankshafts & Rods:
- BluePrint premium casting (10-10 max grind)
- Black light magnafluxed
- Stress relieved and shot peened
- Indexed and stroke corrected during grinding
- Oil hole chamfered for improved flow
- Super micro-polish for superior finish
Great care is taken on BluePrint’s part to ensure that its customers can get right to work on their engine builds by taking out the hassle of hunting down a block, assessing its true condition (sometimes post-purchase), and hauling it over to a machine shop only to have more wait-time tacked on.


Edelbrock’s DIY Crate Engine Kits Take Parts Matching Out Of The Equation
Now that we had a short-block we were confident in, we looked to Edelbrock to help us bring it to life. While some of you may enjoy sitting hours-on-end putting together a parts list, checking to make sure everything is compatible, then waiting for each part to trickle in through mail, we had a very different idea of enjoyment–getting our ’54 hooked up so we could fire it up and get her on the road.
We have eliminated the guesswork. –Smitty Smith, Technical Sales Coordinator, Edelbrock

Smitty continued, “More importantly they get our tried and true matched power package components as most of our kits were originally our recipe…we have eliminated the guesswork and everything will work together.”
 Smitty, being down-to-earth as he is, knows that finance is a topic of concern for most consumers, “We understand not everyone can afford to purchase a big ticket item…sometimes they need to obtain parts as they can afford them.”
The value of these kits lies in the fact that, just like BluePrint short-blocks, Edelbrock takes all the hard lifting upon itself and leaves only the enjoyment of wrenching for us as consumers. When you factor in the convenience, mitigation of fitment/compatibility error, and a complete and total package that can be assembled in one day–the value of these DIY top end kits really starts to become apparent.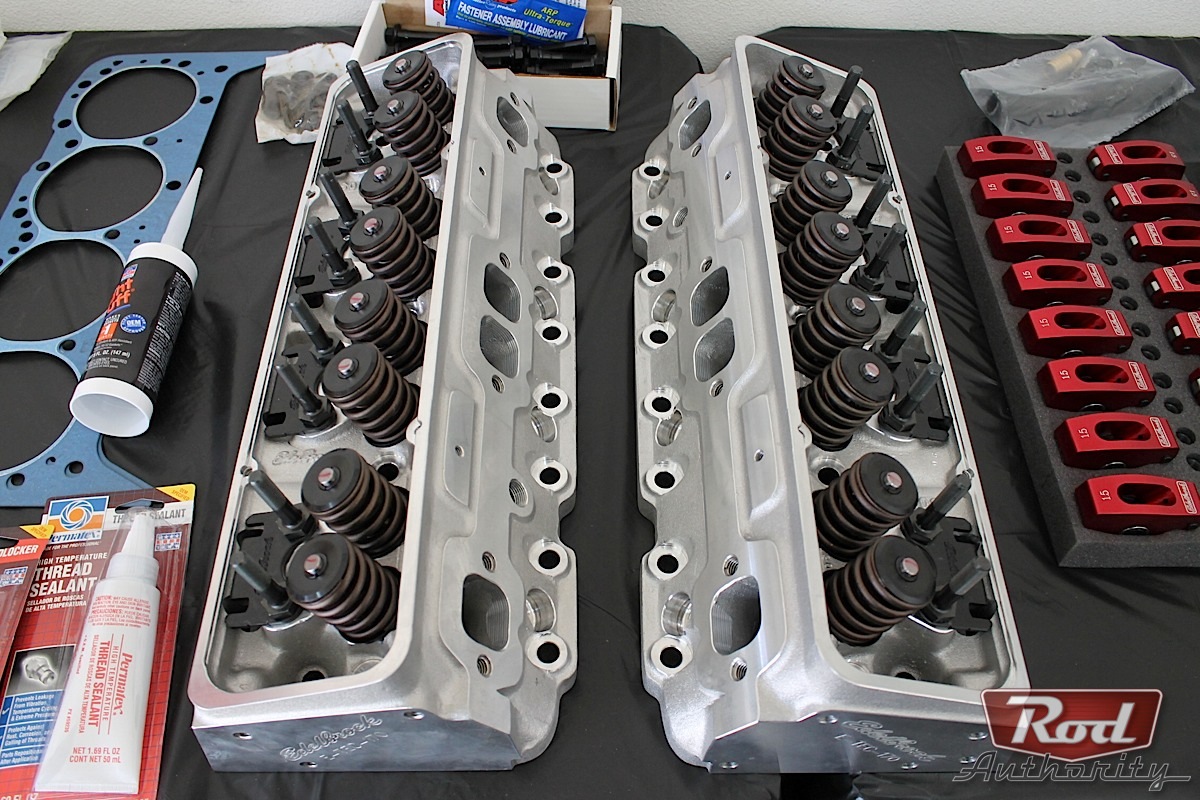


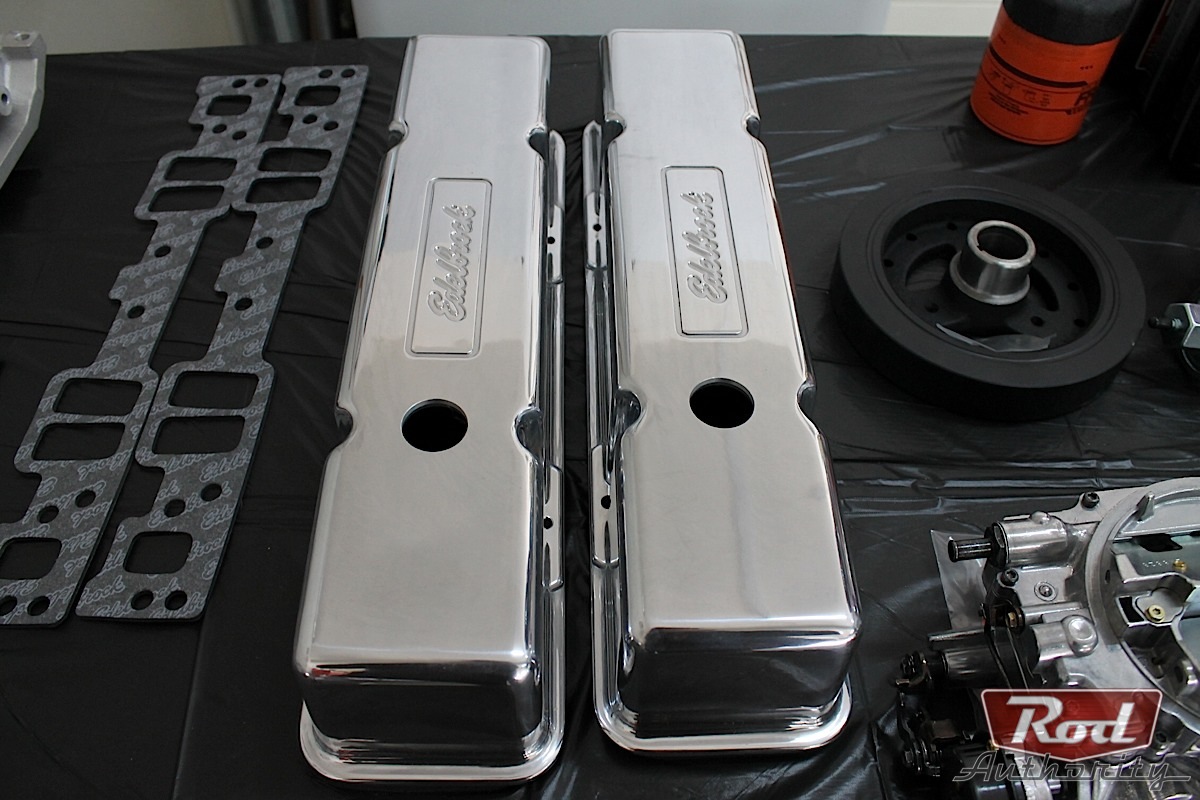


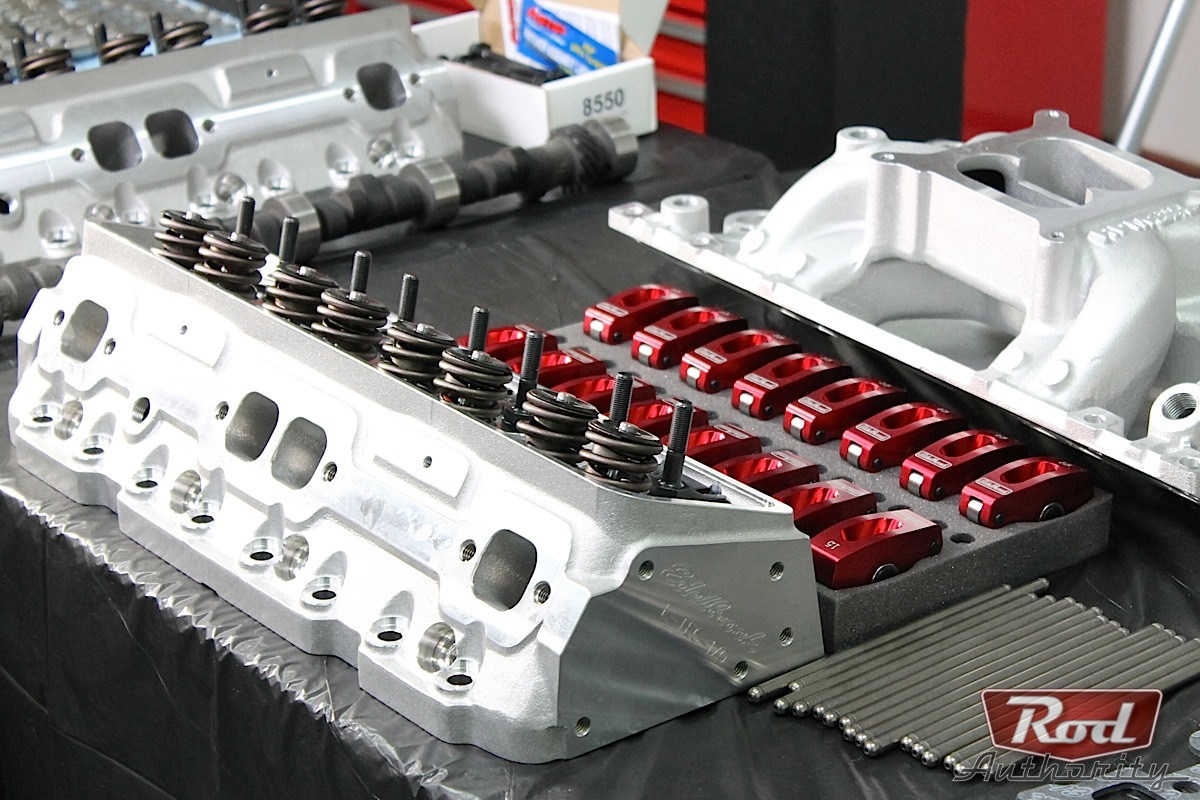
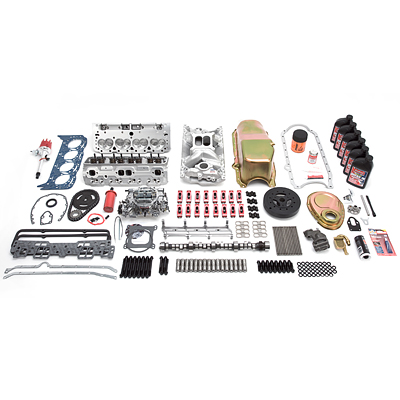
DIY Performer RPM E-Tec 435 Crate Kit Contents
- Thunder Series AVS Electric Choke Carburetor 800 cfm (PN: 1813)
- Rollin’ Thunder Camshaft (PN: 2204)
- RPM Air-Gap Vortec Intake Manifold – Natural Satin Finish (PN: 7516)
- Performer RPM E-Tec 170 Cylinder Heads (PN: 60975)
- Cylinder Head Bolts (PN: 8550)
- 7.191-inch Push Rod – Set of 16 (PN: 9653)
- 1.5:1 Ratio Roller Rocker Arm Kit – Set of 16 (PN: 77770)
- Hydraulic Roller Lifters – Set of 16 (PN: 97384)
- Lifter Guide & Retainer Plate
- Timing Chain Cover
- Crankshaft Balancer
- Distributor
- Ignition Coil
- Oil Filter Adapter, Oil Pump, Oil Pump Shaft, Oil Pump Pickup, Oil FIlter, Oil Pan, & Gasket
- Cylinder Head Gaskets, Intake Manifold Gaskets (PN: 7235), Valve Cover Gaskets, Fuel Pump Gasket, & Timing Cover Gasket
- Edelbrock Premium SAE 30 Break-In Oil – 6 Quarts (PN: 1074)
- Torco Engine Assembly Lube (PN: 1075)
- Edelbrock Gasgacinch (PN: 9300)
- Thread Sealant & Silicone
- All necessary hardware & instructions for installation
Q&A With Smitty Smith Of Edelbrock
Rod Authority: What are some of the differences between your Performer RPM E-Tec 435 and Performer 310 kits?
Smitty Smith: “The main difference between the 310 hp and our 435 hp kits, or crate engines is the compression ratio difference, the camshaft lift and duration, and intake runner volume. The higher horsepower engines will have larger intake runner volumes, make more power, and will run at higher RPM.”
RA: To give prospective customers some direction when purchasing, what application is each best suited for?
Smitty: “The most important thing is how they intend to drive their musclecar or hot rod. If it is a cruiser and maximum horsepower is not a factor, most cruisers can stay with smaller cfm carburetors. If they’re after every last bit of horsepower then most should use a larger cfm carburetors. It’s a similar scenario for our top end kits, which were derived from our total power package concept. With the 310 hp kit, these are primarily used in cruiser situation vehicles and the higher horsepower level kits are used in musclecars and street/strip hot rods.”
RA: How does Edelbrock determine the best cfm to run in their kits when choosing carburetors?
Smitty: “We determine the size of the carburetor by the size or cubic inch of the engine in normal street driving situations. For example, on domestic V8s up to 300 ci we suggest 500 cfm, on 300-400 ci we suggest 600 cfm, on 400 ci and up we suggest our 750 or 800 cfm carbs. Furthermore, the power level of each engine combination may vary and become a factor. For example, on our crate engines under 400 hp we use 500 or 600 cfm carbs. On engines over 400 hp like small block Ford 347 strokers and Small Block Chevy 350s and 383s we use our 800 cfm carbs.”
RA: Can you close with some tips in regards to the assembly of your DIY crate kits?
Smitty: “One of the more important details or tips for any consumer doing an install or assembly of our kits is to read everything we supply and to get familiar with all the parts and components that are included. Read everything twice and do the assembly once. Just like anything else, make sure that you are capable of achieving your goal. If there is ever a doubt, do not hesitate to contact us here at Edelbrock, LLC at (800) 416-8628, Monday through Friday, 7:00 a.m. to 5:00 p.m. PST.”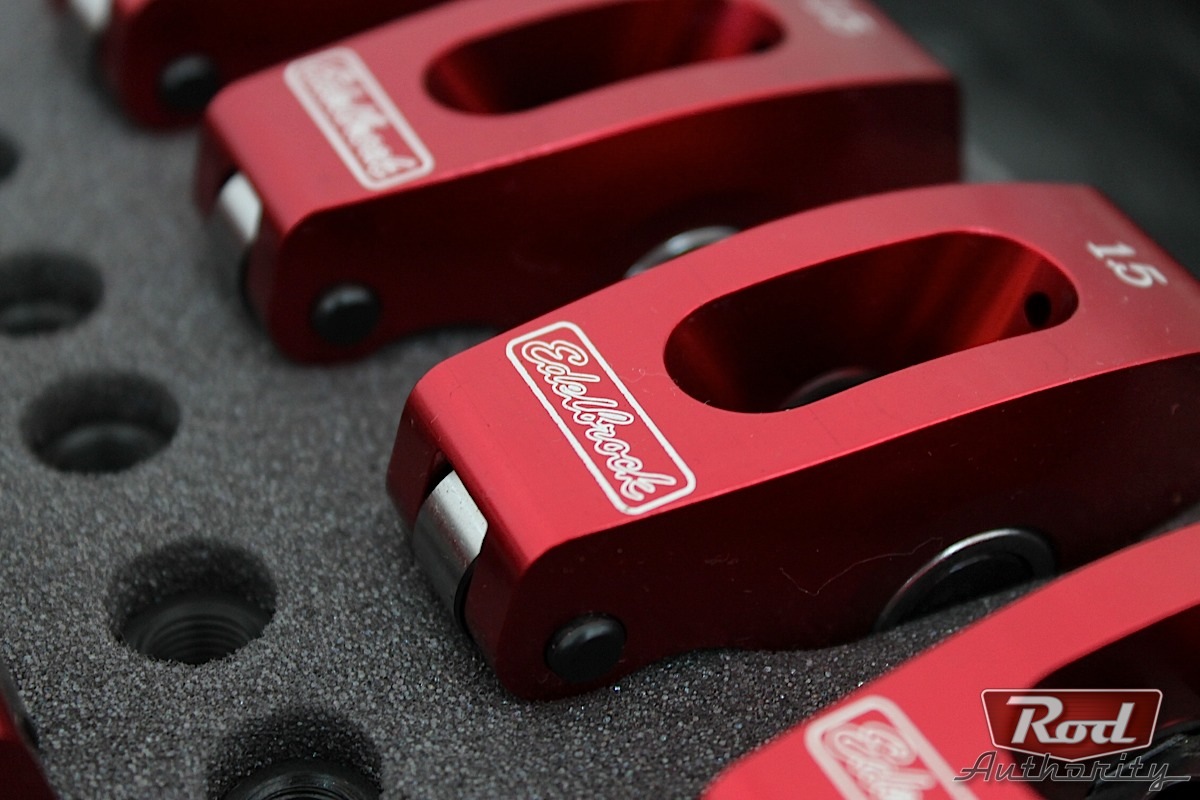
Getting Down And Dirty–Engine Assembly And Mounting In A Day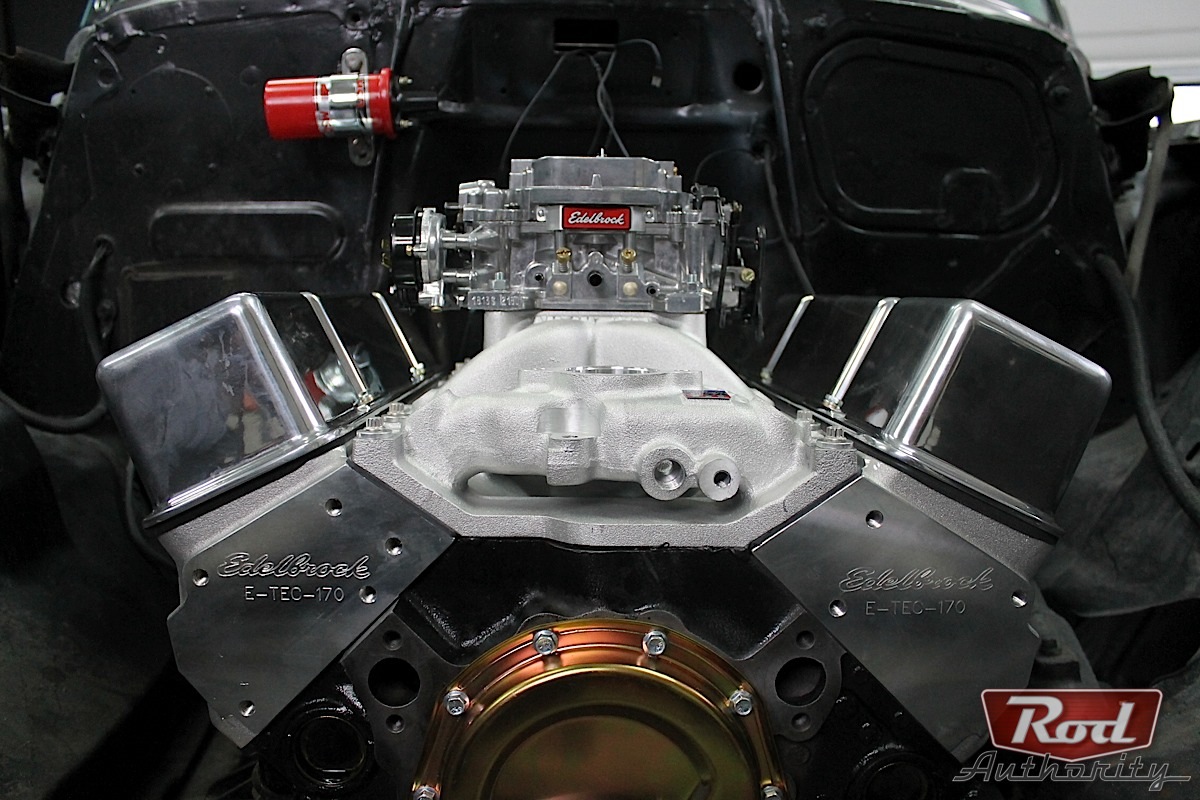
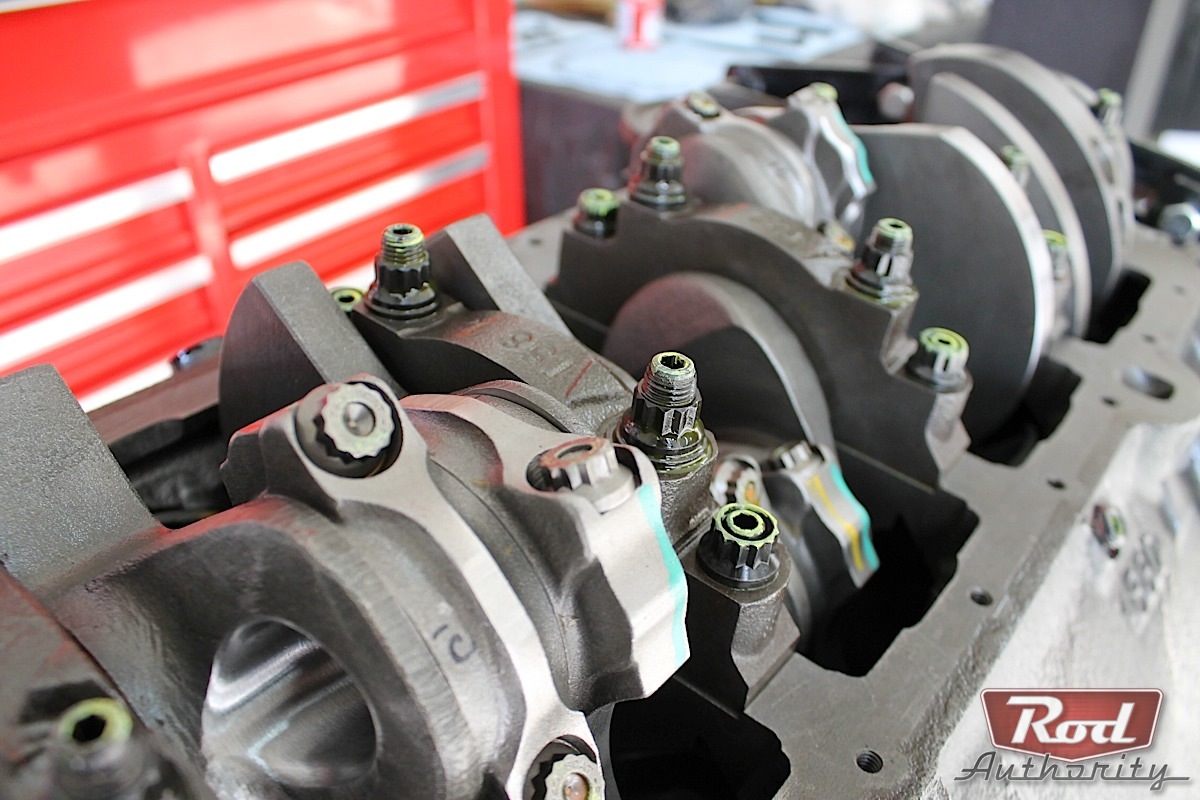
We got up at the break of dawn to prep our workspace for engine assembly. With the BluePrint 383 short-block on the stand all that was left was to break open and group all the parts contained in two Edelbrock shipping boxes.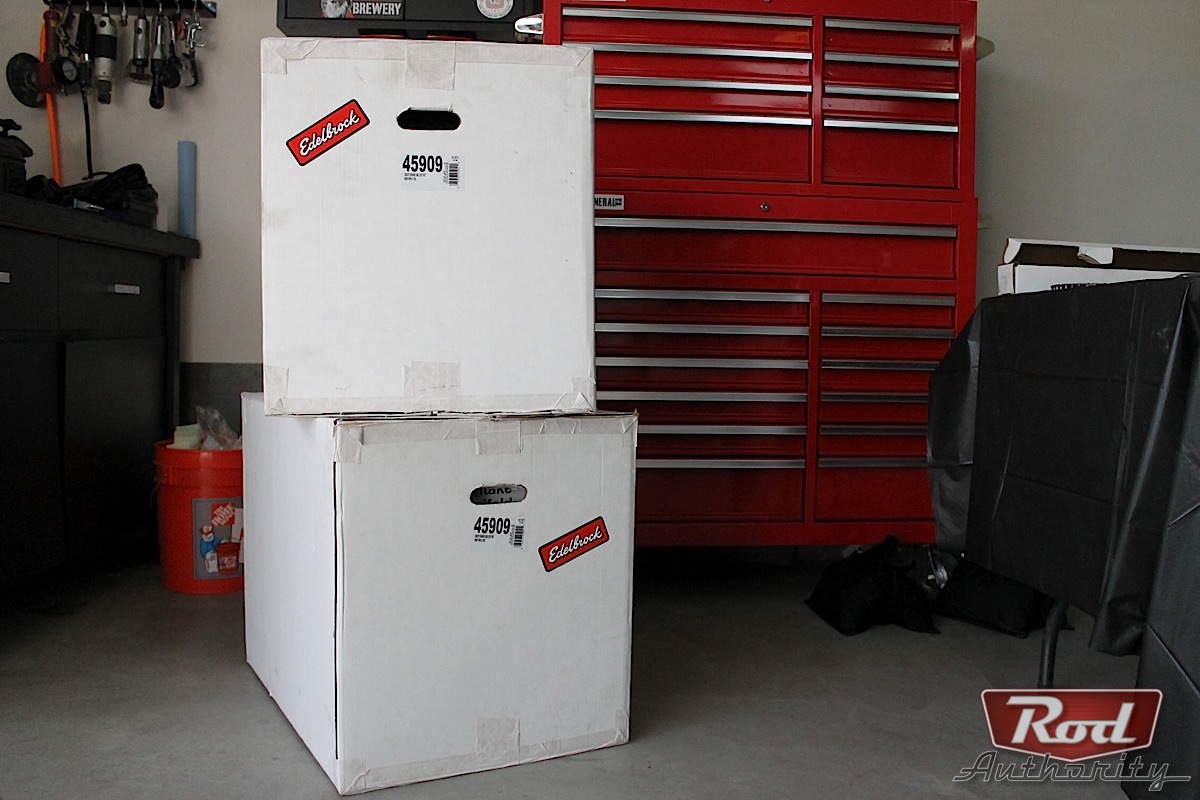


Even with a short-block in as pristine a condition as BluePrint’s, proper care was required on our part to prep the block’s surfaces. Using a shop rag and some lacquer thinner we wiped down the block’s mating surface, piston tops, and cylinder walls–we made sure to rotate the crank to expose each cylinder wall and give them a proper wipe down. After prep it was on to assembly. Using the supplied Gasgacinch, we applied two thin coats to the timing cover mating surface and on one side of the timing cover gasket. By letting the Gasgacinch tack up for about one minute we built up a nice hold to mate the two.

After prep it was on to assembly. Using the supplied Gasgacinch, we applied two thin coats to the timing cover mating surface and on one side of the timing cover gasket. By letting the Gasgacinch tack up for about one minute we built up a nice hold to mate the two.


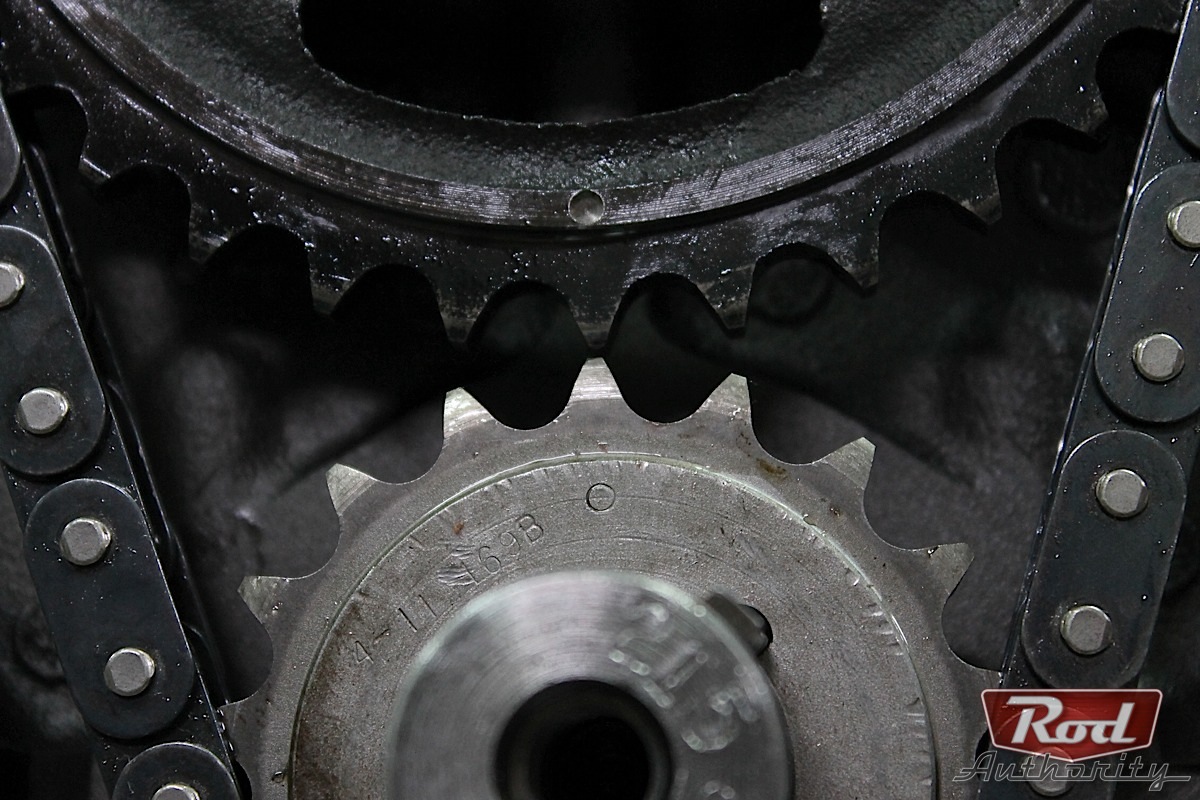
Once the camshaft was seated, we put our timing sprocket, timing chain, and timing gear together. During this step it’s important to remember that the timing sprocket and timing gear are lined up according to Edelbrock’s instruction manual that come with the kit.
3/8-inch of chain slack is recommended to avoid premature bearing failure. After torquing down the three cam gear bolts to 20 ft.-lbs. we rotated the engine clockwise while applying fresh engine oil to the outside of the timing chain.
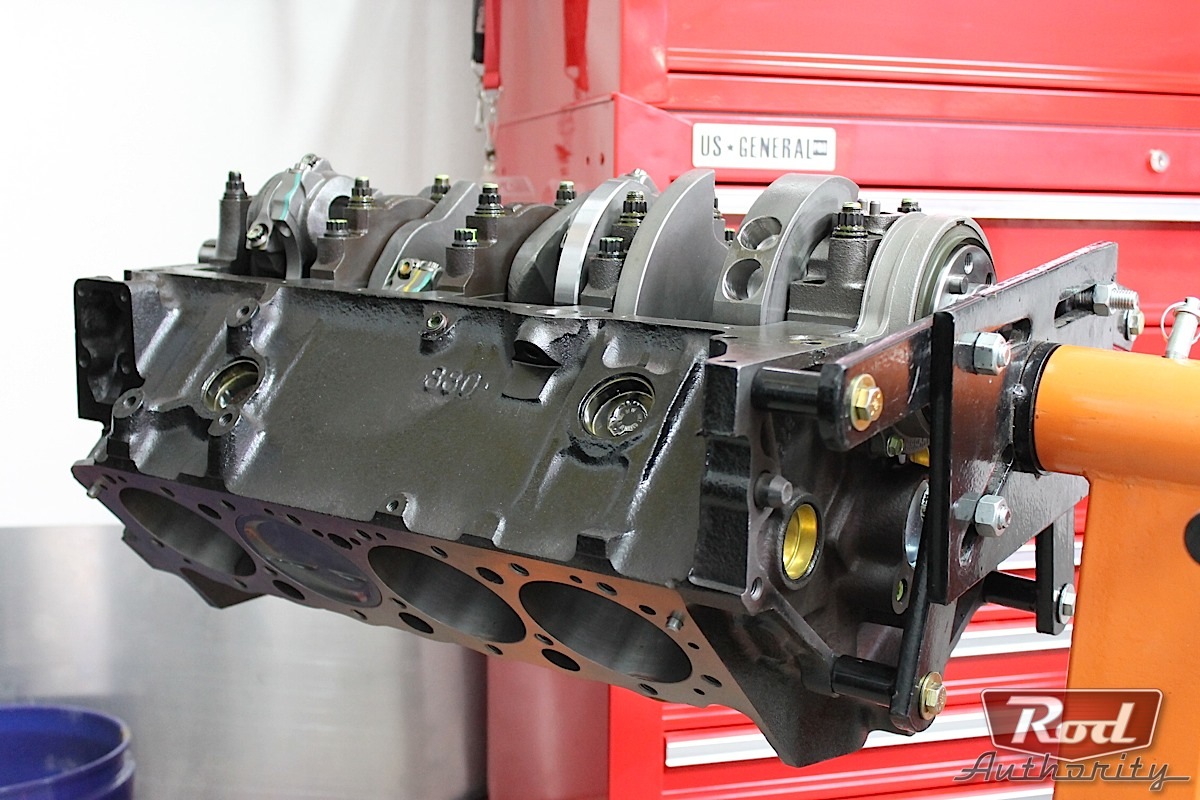
With the timing cover on we flipped our 383 over. We then installed the oil pump assembly and oil pickup torquing it down to the block at 65 ft.-lbs.


Using a small caulking gun, apply a thin bead of gasket maker to the block’s oil pan mating surface. The four corners of the front and rear main seal should get a thicker bead of gasket maker.
After installing the oil pan gasket on the oil pan mating surface we applied another layer of gasket maker using the same procedure as the captioned photo above.
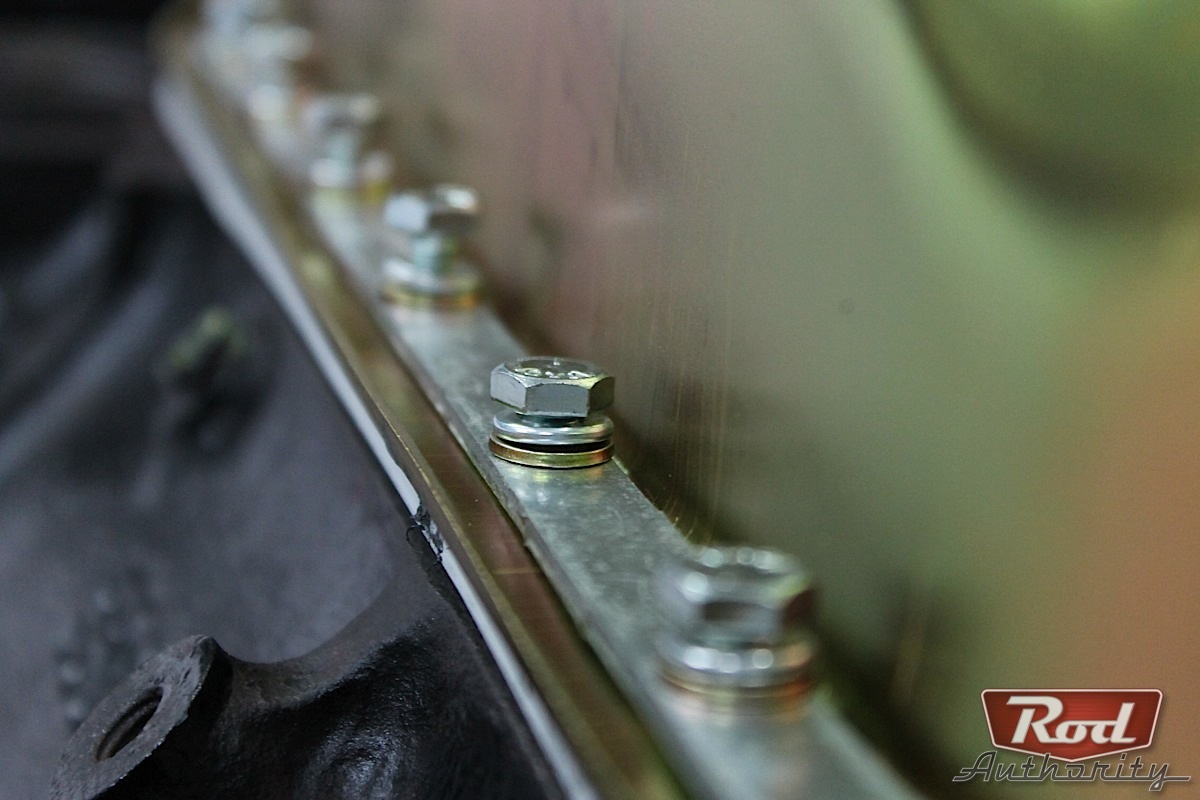 When torquing down the oil pan’s side, front, and rear bolts we made sure to stay within the number stated on Edelbrock’s instruction manual. It is important not to over-tighten these bolts as it will end up squeezing out the gasket and gasket maker.
Once that was done we installed the oil filter adapter using two oil filter adaptor bolts torqued to 8 ft.-lbs. After applying a little oil to the gasket of the supplied oil filter we installed it then moved onto the fuel pump.
Using the same method that was done on the timing cover mating surface, we applied two thin layers of Gasgacinch to the fuel pump mating surface and on one side of the fuel pump gasket.


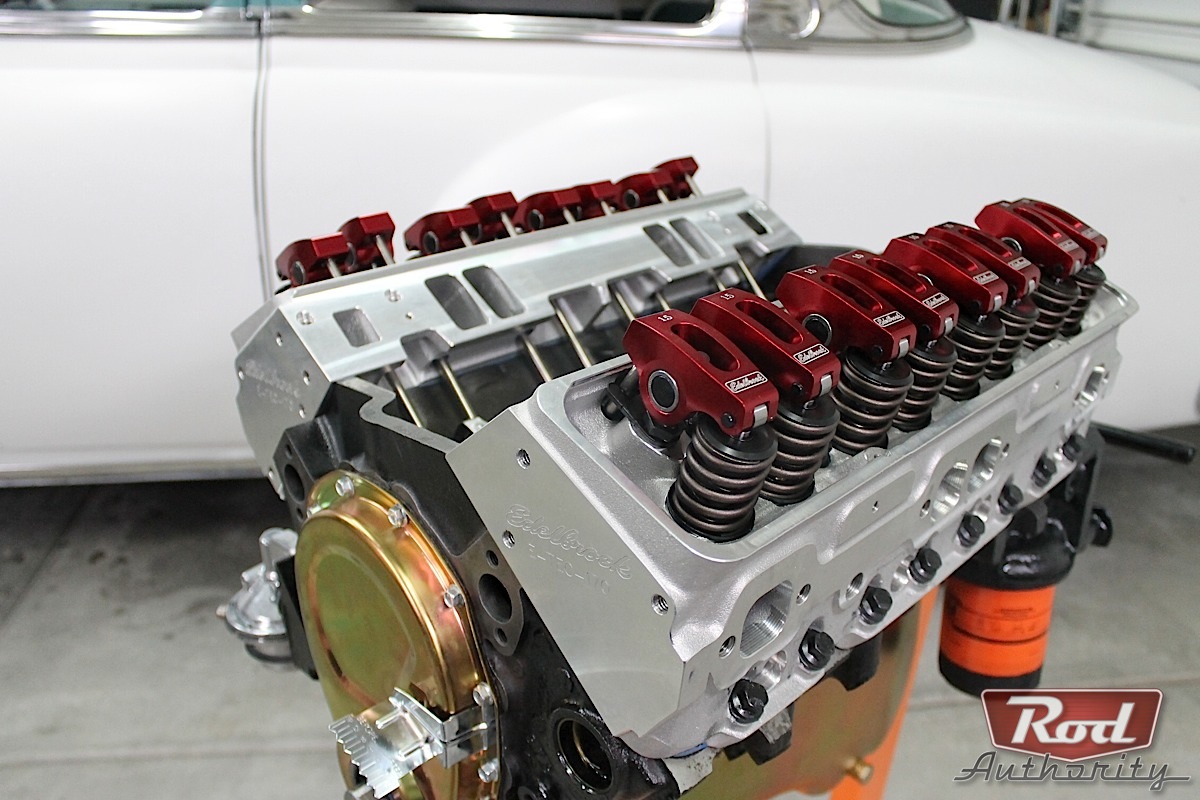
Now that the timing assembly, oil assembly, and fuel pump were in place it was time to move onto the assembly of the top end components. Assembly lube was applied to the bottom and side of our lifters before inserting them into the lifter valley.


Make sure to position the oil hole towards the rear of the engine.
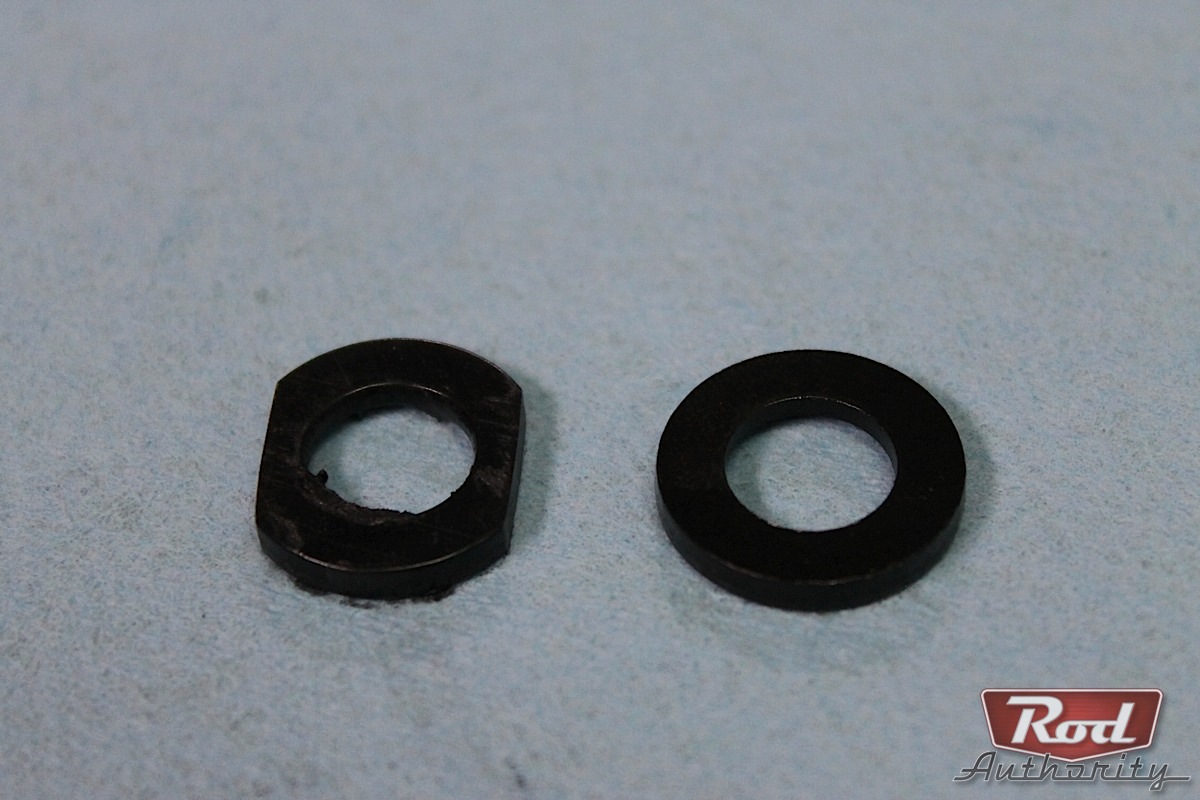
Because of the larger valve springs used on Edelbrock heads, the washers included in this kit will not clear the two center springs when installed. Using a bench grinder or equivalent, grind down two of the washers included in the head bolt kit.
At this point our lifter guide plates were seated, factory lifter retaining plate was torqued down to 18 ft.-lbs., ARP lube was applied to the back of the head bolts, and our two center washers were prepped. The next step was getting our Performer RPM E-Tec 170 Cylinder Heads ready to be mated to the deck of our 383.


Using our fingers, we applied a thin layer of gasket maker around all the water jackets on the block. Following that, we applied a very thin bead of gasket maker from the top of the cylinder head mating surface to the first left and right bolt holes.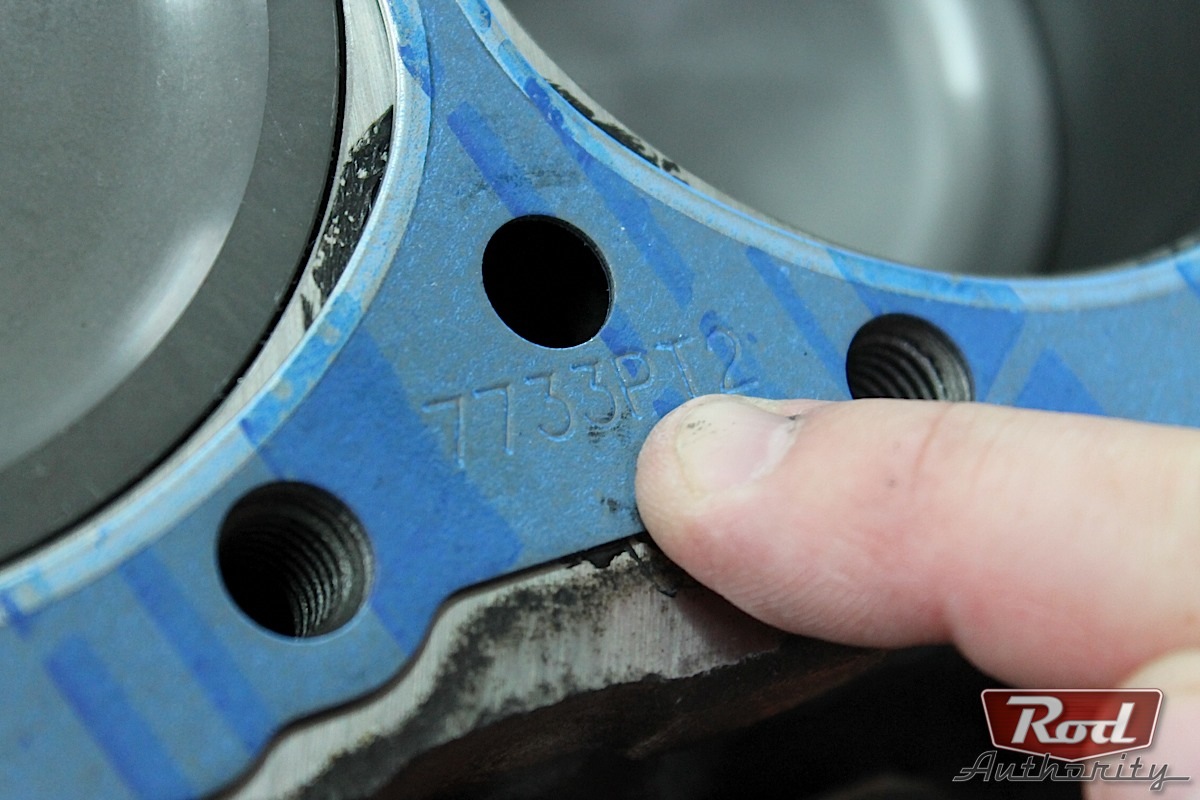
Note that when installing the head gaskets we double checked to make sure that the head gasket part number was facing up. Once mated to the deck we applied gasket maker just as we did above.

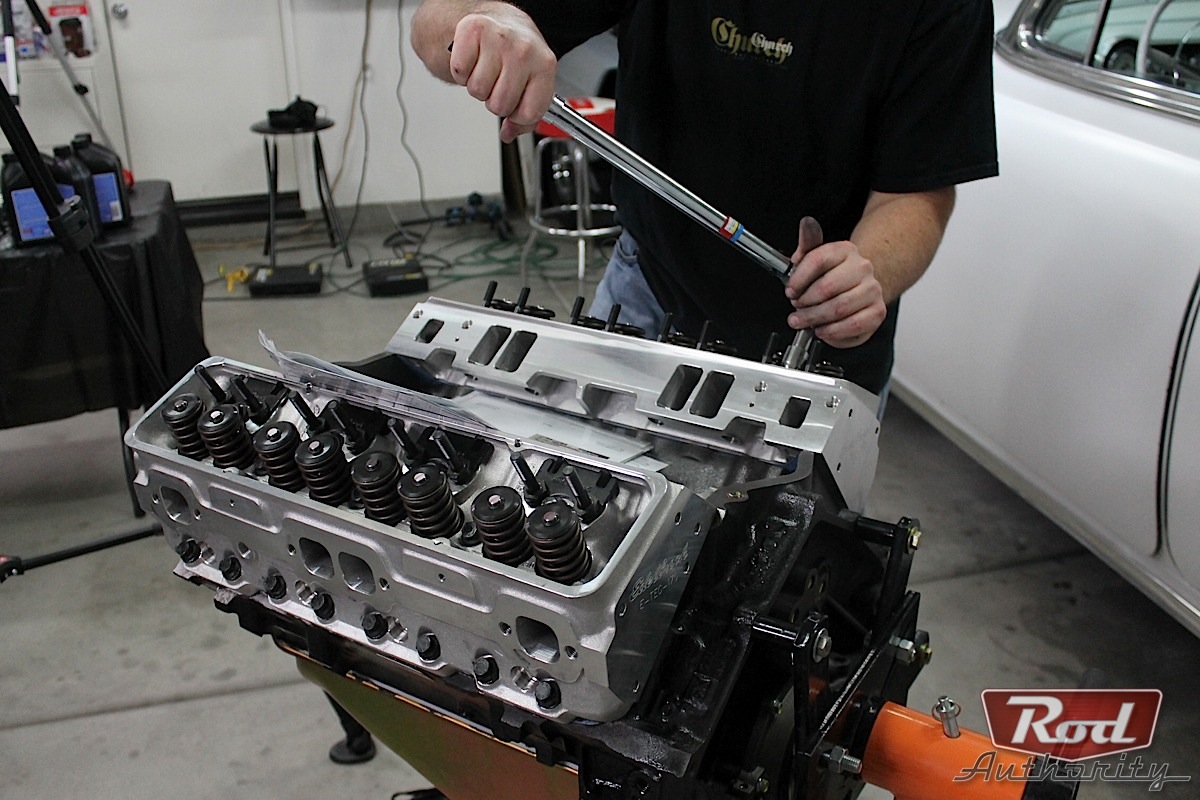
Using a torque wrench and torque sequence provided by Edlebrock’s instruction manual we torqued the bolts down to their final specification in a total of three passes; 35 ft.-lbs. on the first pass, 50 ft.-lbs. on the second pass, and finally to 70 ft.-lbs..
Now that we had our heads secured to the block we proceeded to finish up the valvetrain by installing our 7.19-inch pushrods and 1.5:1 ratio roller rocker arms. Once the rocker arms and push rods are secured it is important to note that the engine should not be rotated. Cylinder #1 needs to be at TDC firing position to install the distributor.

After prepping our head/manifold mating surface and applying gasket maker to the front and rear mating surfaces of our 383, we secured our RPM Air-Gap Vortec intake manifold. All that was left was the installation of our 800 cfm carburetor, valve covers, harmonic balancer, and the distributor.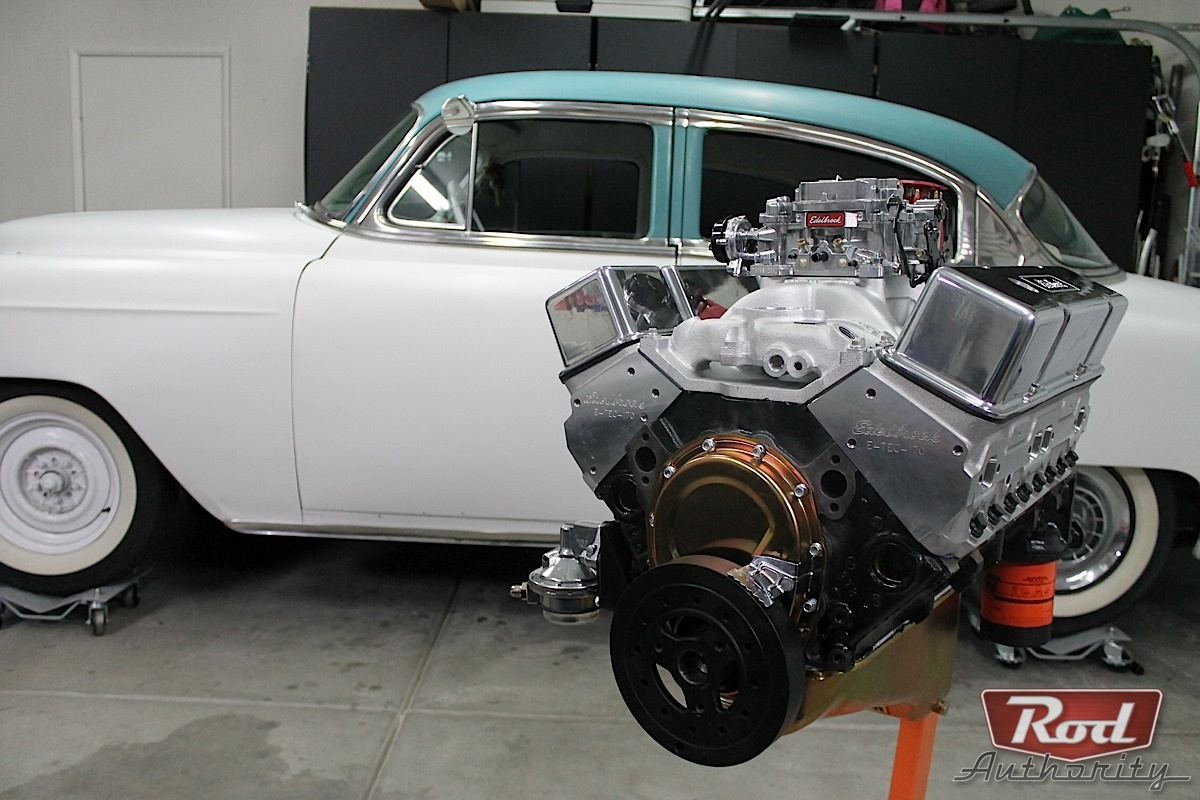


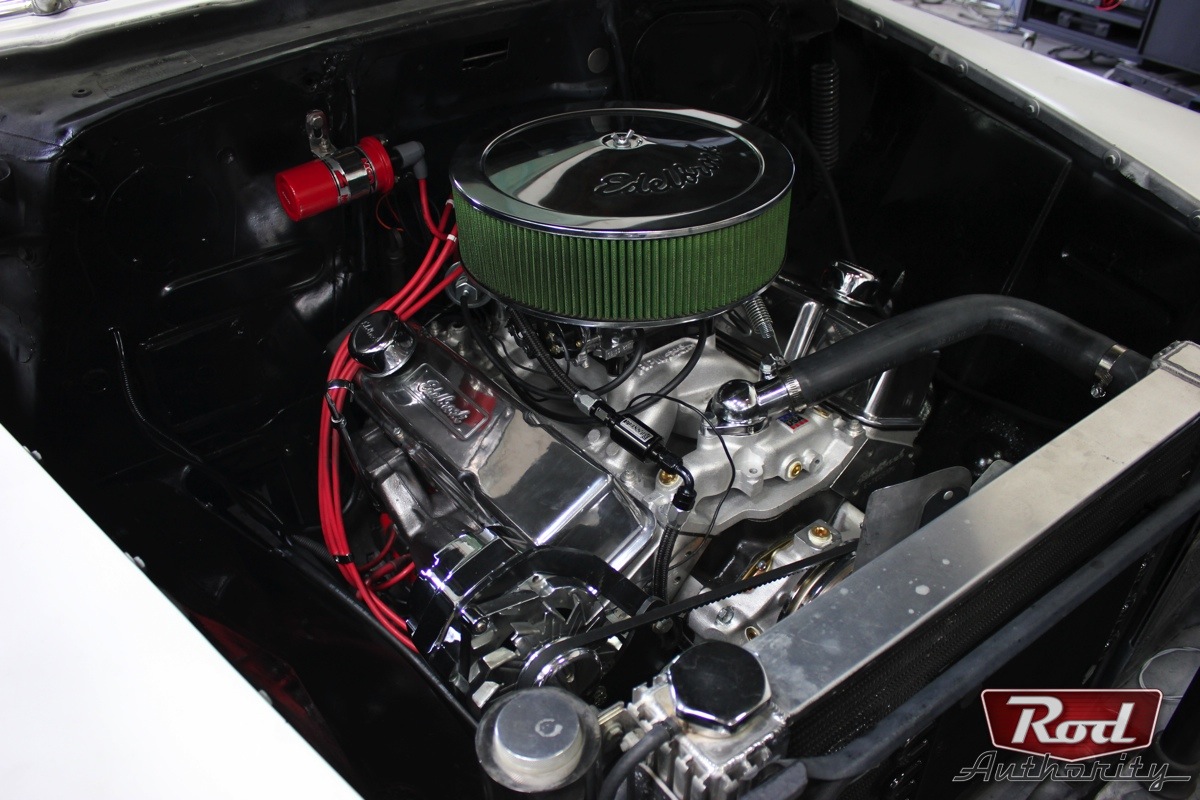
With the break-in process currently underway we’re getting Project Sucker Punch ready for the dyno so stay tuned. We asked Aaron to give us some closing thoughts on his impressions of the new engine setup and the build process as a whole, “Putting this engine together was a real breeze–the instruction manual was just perfect. It basically made everything step-by-step easy to do. It went together within a day: we fired it right up, pulled it out of the driveway, and away we went.” He continued, “The ’54 is tons more fun to drive–it’s been reliable and we haven’t had to make any adjustments to the carburetor since break-in. It’s more power than I need and now I can now roast the tires with a blip of the throttle, what’s not to love?”
Aaron hinted that his plan for updating the power of his ’54 doesn’t stop here. Keep a look out as Rod Authority winds up and delivers a sucker punch with the installation of an Edelbrock blower assembly.
Edelbrock’s DIY top end kit provides practically everything to build your motor in less than one day. The few parts that weren’t included, but Edelbrock recommends with the use of their kits are as follows: Edelbrock short water pump (8810), Edelbrock throttle bracket (8032), Edelbrock fuel pump (1721), MSD wires (31239), and MSD starter (5095).
Check out Rod Authority’s exclusive gallery below to see more photos from the build process of Project Sucker Punch’s 383 stroker.


