Things are moving along with Grandma, our faithful ’78 Malibu that is sporting a 25.5 Chassis Engineering cage and the Musi/Edelbrock 555 crate engine stuffed full of Edelbrock nitrous goodness. As you saw in the last installment, the “ever cheerful” Mike Ryan – our Fabby – finished the interior cage work on Day 12, and has moved to bottom side of Grandma to add some stiffness to the frame, and to build a transmission cross-member. In order for Mike to fit the new tubes and supports in place for welding, the drive train needed to be mocked up, and we’ve just been dying to get the Edelbrock/Musi big block crate motor into the engine bay along with the TCI Pro-X Glide. Plus, we figured we’d show off a little bit of our new Lemon’s race headers.

Mocking up the Drive Train
The first step in this mock up process was to take the Monster crate engine and bolt a brand spankin’ new TCI Pro-X Powerglide Transmission to it. A long time ago, the Powerglide transmission had a reputation as being a little weak in the knees for real power applications, but that was – a long time ago. TCI has perfected taking a stock power glide and making it durable enough to handle just about anything that you can throw at it, but this isn’t a stock glide. This is a TCI Pro-X, and it uses an upgraded case to handle up to 2,000 HP.
Once the big block and the glide were together, we lifted the assembly into Grandma’s engine bay with the Cornwell engine hoist and load leveler. We have to give the Cornwell Tools big props on the load leveler. Attempting to put the engine/transmission combo into the engine bay while the car is on a two post lift is no easy challange, even with the fenders and grill removed. The load leveler simplified what would have been a difficult, and somewhat dangerous task. Finally, we added the Lemons 2-1/4 inch header tubes so that Mike could fab up the steering system ensuring that there was plenty of clearance.

Lemon’s Headers – A Work of Art
The Lemons headers we ordered are a pretty special set up for g-body chassis like Grandma. Lemon’s is one of the only exhaust header companies that specializes in race-type (read: seriously BIG tube) headers for Muscle Car big block applications in early cars.
With our Lemon’s headers, each bank has four 2-1/8-inch headers that step into 2-1/4 inch stainless tubes, which merge into a 4 inch collector. On each side, two of the header tubes route outside the frame and the other two run along the inside of the frame. These headers are designed for the engine mounted in the stock location, but will not fit with with clutch linkage or column shifter linkage.
We are using the TRZ/Flaming river steering rack, so we had already planned on moving the steering column for clearance. We also planned on rerouting the master brake cylinder lines for clearance too. While we were mocking the drivetrain out, we made note that the transmission cross member would have to be fabricated to allow for the massive 4 inch collector.
Transmission Cross Member – Making a 25.5 Legal X-Member
For the 25.5 SFI spec, we needed to build our Transmission cross member within certain parameters. Mike’s next step was fabricating the transmission cross member. Starting by bolting on the Energy Suspension Transmission mount to the tail shaft extension of the transmission, we were able to locate the mounting position of the cross member.

Mike set about fabricating the cross member and transmission mount by measuring and custom fitting pieces of plate steel together, joined by tack welding the metal. This would form the trans mount that would attach to the mild steel cross-member.

Once the cross member pieces were custom fit, tack welded and double checked for fitment, Mike TIG-welded the entire assembly. While we were already under the car, we needed to add a couple more tubes for support and safety. The tranny mount and bar ran perpendicular to the “stringer” tubes, or the floor bars, which go from the rear end mount cradle forward to the frame near the front wheel well area.
These bars are required for 25.5, and provide extra crash protection and frame support. It is cheap insurance and makes the chassis strong as a tank without weighing like one.

With the engine mounted and the transmission mounted in place, test fitting the steering assembly could begin. Steering is extremely important, even in a straight line car, so making sure that the rack placement and steering shafts had good clearance and proper geometry was essential at this stage. The steering shafts would have to be rerouted because of the larger engine and the manual rack and pinion upgrade. Yet again, Mike would have to custom fabricate the entire steering column and rack mounting. We are going to do a more detailed article on this in the future with some more photos, but for now – you can follow along.

TRZ/Flaming River – Manual Steering Rack Conversion
Mounting the steering rack started with removing a mounting pad from the engine cross member. This little mounting boss serves no purpose in this particular chassis, so cutting it off was of no consequence. With the mounting boss removed, the manual steering rack was bolted to the spindle steering arms so that proper rack placement could be determined. The TRZ steering assembly came with two mounting brackets that need to be welded in to place in order to mount the steering rack.

It took a little patience to grind and massage the steering brackets so that they would form a close “air tight” fit to the crossmember. Getting this tight fit is key to a good TIG weld. Keeping in mind that it is easier to take off metal than to add it, Mike made several trips to the grinder, taking off a little bit at a time then test fitting the mount to the frame until it was perfect.

Massaging the mounting brackets until they made an “air tight” fit
There are two brackets that need to be welded to the frame that support the steering rack, and each bracket needs to be custom fit for the best results. Mike made several trips to the grinder and back to the chassis to test fit his work. The quality of the welds and the mounting of the steering rack depended on this level of attention to detail. We recommend strongly that you do not take a short cut here.

Taking no short cuts, these mounting brackets were fitted perfectly to the crossmember.
Now that the rack was firmly mounted to the crossmember, we could focus on routing the steering shafts. With the big engine in place with the Lemons headers attached, there was little room for the steering shaft to run. A new route from the steering rack to the steering column had to be made. Armed with a bi-metal hole saw, we created a new path for the steering shaft by cutting through the cross member.

Making a hole in the crossmember to run the steering shaft
Working from the steering rack back to the steering wheel, we managed to find a decent path through the engine cross member, outside the first two header pipes near the upper A-Arm and through the firewall. Our goal was to route the steering column through the original location in the firewall. This required manufacturing a new mounting plate for the steering column to run through. Again, patience was key to fabricating a plate that covered the existing firewall hole and allowed the steering shaft to run through it.

Our new firewall steering column plate
All the pieces were in place for us to run the steering shaft from the wheel to the rack, so we started putting the puzzle pieces together. The angle of the shaft coming through the firewall to the rack was steep enough that we needed to use three universal joints. Using this setup requires keeping the angles of the universal joints within a few degrees of each other. Too much of an angle on one of the joints will cause binding or give the driver a stiff feel in the steering.

Steering shaft running through the firewall and utilizing 3 U-joints to route to the rack

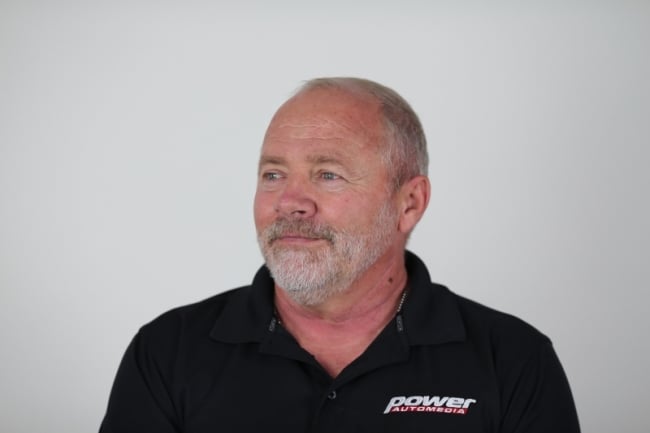
Our fabricator, Mike “scrooge” Ryan, takes a moment to chase the photographer away
By this point, our fabricator was tired of grinding and decided that we had made enough progress for the day. Our plan is to pickup the next day with the final steering column assembly and start working on the interior components like the parachute release handle and the transmission shifter. Looks like our Grandma project is starting to enter the home stretch run.


