

Until recently the brake system available on Mustang GT’s were one size fits all. Those of us who didn’t opt for or couldn’t afford a Cobra were stuck with the factory standard equipment, which often left much to be desired.
There are many brake upgrade kits out there. They run the gambit from a simple pad and rotor upgrade to full on six piston caliper race bred systems. The more clamping force you want, chances are the more you’re going to pay. Since the debut of the 1994 Cobra many with 79-04 Mustangs have often turned to the Cobra’s bigger and better 13-inch brakes as a go to upgrade at a reasonable price. ” The SVE Brake Kit is our most popular brake upgrade for both 79-93 & 94-04 Mustangs,” said LateModelRestoration.com‘s, Jonathan McDonald. This upgrade should offer a substantial improvement in brake performance and pedal feel. It also offers improved looks over the factory calipers which have become discolored and weren’t that attractive to begin with.
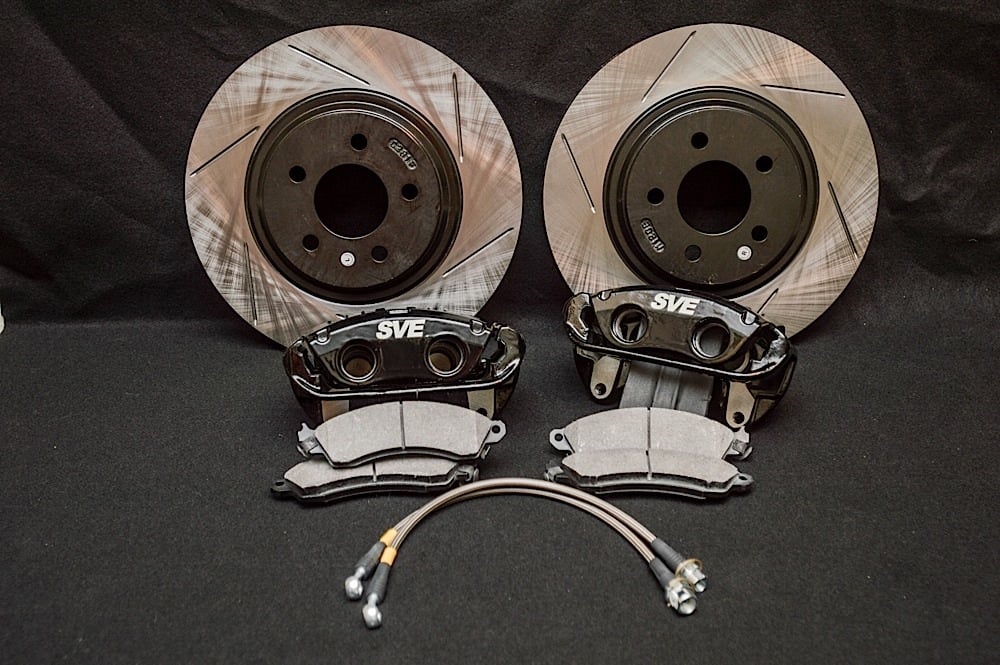
This SVE brake upgrade kit from Late Model Restoration Supply comes complete with new coated calipers, high performance brake pads, Power Slot 13-inch rotors and Power Stop stainless braided brake hoses. All the additional hardware for the installation is also included.
The SVE Brake Kit
LateModelRestoration.com sent us a SVE brake upgrade kit for our 2004 Mustang GT, part number SVE-2300KB. This kit includes new 13-inch Power Slot rotors with coated hats and fins to better resist corrosion. New powder-coated black dual piston calipers with brackets, this will also prevent corrosion and keep your brake parts looking good. The black finish will also minimize the appearance of brake dust on the calipers. Power Stop stainless braided brake hoses finish things off, which includes new banjo bolts and sealing washers. Their stainless braided construction not only makes them tough and durable but also reduces brake fade due to hose expansion.
Since our 2004 Mustang came factory with the 17-inch GT Premium wheels, we won’t have to change our wheel and tire package. Before you buy or install any brake upgrade it’s a good idea to check with the supplier and make sure your wheels offer correct clearance.


Left to Right: Calipers come coated in black and include the correct mounting bracket. Brake pads are a high performance friction with the correct chamfers and slots. Power Slot rotors have cooling slots, as well as coated hats and fins to prevent corrosion. Stainless braided brake hoses from Power Stop will reduce fading by not allowing the rubber hose to flex under hard braking.
Upgrading
The SVE Brake Kit is our most popular brake upgrade for both 79-93 & 94-04 Mustangs. – Jonathan McDonald

This is fairly basic upgrade that nearly any one with some basic mechanical ability should be able to perform in their driveway or garage in just a few hours. As McDonald told us, “The components are based on OE parts making them as close to plug & play as possible. There’s no special adapters, no fabrication or drilling involved, just literally straight bolting on of parts.” There are a couple of things that you need that might not be in your shop cabinet or tool box including a set of line wrenches. These will ensure that you don’t round the hex fitting on your brake lines during removal or installation.
You’ll also need a bottle of brake fluid. This car was originally equipped with DOT3 so that’s what we’re going with. You can upgrade to DOT4 but it’s recommended that you have your brake system flushed to do so, which you could have done at a service center once you’ve completed your work. Unless you have a one man bleeder you’ll probably need a buddy to help you bleed the brakes.
Tear Down
With the car raised and the front wheels off, we removed the stock front calipers first. Since we’re going to be replacing the hoses with this upgrade as well, we’ll start by disconnecting the rubber brake hose from the hard line in the fender well. Remove the retention clip with a a small pry-bar. You will not be able to disconnect the line until you remove this clip. Use a 17mm line wrench on the rubber brake hose to hold it and gently use a 11mm box wrench to loosen the fitting on the hard line. If the hard line fitting won’t budge, try using a penetrating spray and allow it to soak.


Far Left: An arrow indicates the locking clip, this must be removed to remove the brake hose from the vehicle, we used a small pry-bar and pushed up against the bottom or open area of the clip. Left Center: A 17mm line wrench is used to hold the rubber brake hose and an 11mm box wrench to rotate the hard line fitting. Be gentle and don't force the hard line, too much force could twist or break it. Right Center: The two caliper mounting bolts are removed with an 11mm wrench or socket. Far Right: The caliper is pried out of the bracket to remove it from the car.
With the brake line disconnected, we removed the calipers from their brackets which are held there with two bolts – you’ll need a 12mm wrench or socket for these. Pry the caliper from the bracket, and remove it with the brake hose. Next remove the caliper bracket which is secured to the spindle with two more bolts, a long handle, or impact gun will aide in removal of these bolts, you’ll need a 16mm socket or wrench for them.


We removed the caliper bracket using a 16mm socket and impact gun. With it out of the way, the rotor nearly fell off. Right: Clean the hub face to remove scale, dirt and debris, this ensures a true mounting surface for the new brake rotor.
The front rotor can now be removed. Removing the rotor may require a bit of finessing if your rotor has been on for a long time. You may need a hammer or mallet to tap on the rotor and get it to come off. Often the rotors will corrode where they mount to the front hub and causing them to stick. With the rotor removed clean the face of the hub with a wire brush, needle descaler, or abrasive disc to remove any scale and corrosion. This will ensure the rotor has as true surface to mate to.
Installing
Installation goes pretty much the opposite of the removal. Install the new rotor and caliper bracket – the rotors are labeled left and right. Installing the rotors on the proper sides is critical for brake cooling. You may also want to put a small amount of caliper grease on the contact points where the pads will slide. This can help reduce brake noise.


Left to Right: The original 11-inch rotor before removal, the new 13 inch rotor installed, the two rotors side by side. Far Right: With the new rotor on we installed the caliper bracket using the original bolts.
The components are based on OE parts making them as close to plug & play as possible. -Jonathan McDonald
To speed up installation we installed the brake hoses on to the calipers while they were on the work bench. Be gentle installing the hoses – use the bolts that are supplied with the new hoses. You’ll also use the supplied sealing washers where the hose meets the caliper and between the head of the bolt and the hose. The torque spec for the bolt that goes into the caliper is 14 ft-lbs. Don’t over tighten the bolt or you’ll damage the caliper, which will require you to replace it.
We’re also going to go ahead and put the pads in at this time as well. Install the brake pads into the caliper by pushing them into the holes in the pistons and in the face of the caliper. The squeal tab will go towards the bottom or lower side of the calipers with the hole on the top side or front of the caliper.
These calipers are a full floating design. This means there is no actual bolt that retains the caliper to the bracket. One side will slide into and under the top or front of the caliper bracket, the other side then is retained with a pin. To install the pin, press down on the caliper firmly and insert the retaining pin from the outside. With the retaining pin all the way through slide on it’s washer and then secure it with the E-clip retainer, both go on the inside of car.


Left: Installing the brake hoses to the caliper will speed up installation, the caliper hose bolt is only tightened to 14 ft-lbs. Center: the front or upper half of the caliper is held in place with the tabs on the brake pads, these slide in at an angle. Right: Push down on the caliper and insert this pin from the outside. The washer will then slide onto the backside or inside, followed by the locking E-clip. Connect your brake hose and install the retaining clip and the installation portion is complete.
Connect the brake hose to the hard line and reinstall the brake line retaining clip. Repeat these steps for the opposite side and you’re nearly finished. Last bleed the brake system to remove air from the lines. This is where you’ll need the help of a friend unless you have a one man bleeder system. Bleed the passenger’s side first, since it is farthest from the master cylinder. Once bleeding is completed, install the wheels and bed in the new pads and rotors.
Break In
Use the Proper Hose
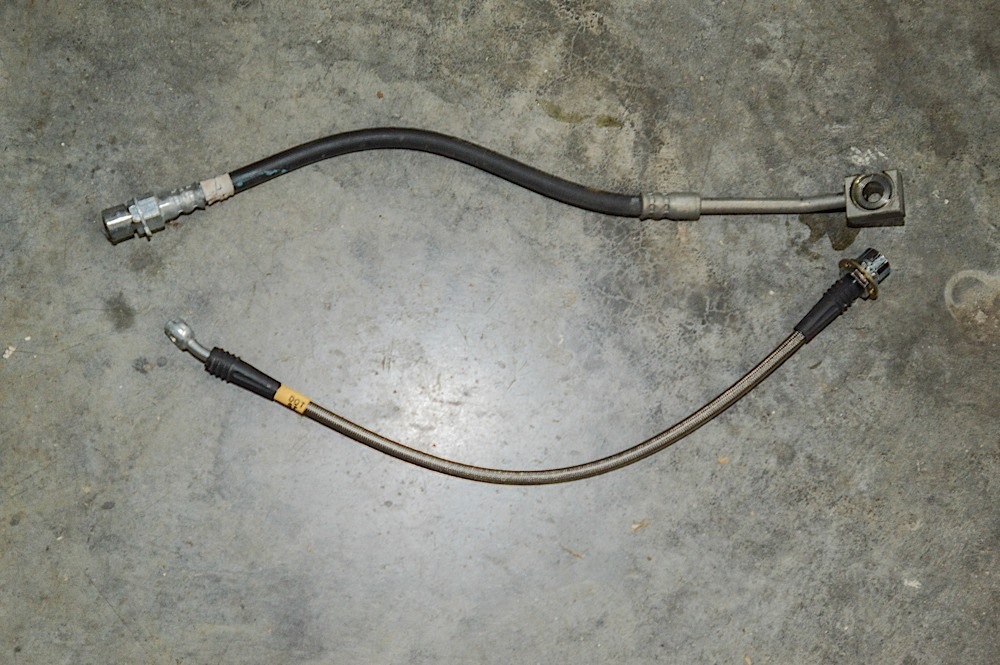
We have seen people reuse the stock hoses, either because they didn’t buy new hoses or they ordered a lesser kit without them. This is a bad idea for a number of reasons. The stock GT hoses are not designed to work properly with the SVE calipers. They also are not the right length. Since the SVE caliper is larger it requires a hose that is slightly longer as well. While you can get a stock hose to fit initially, turning the wheel will stretch and subsequently stress it. This will eventually cause the hose to rupture, which then results in a rapid loss of brake fluid, loss of brake pressure, and loss of braking force. Don’t skip or skimp on safety, use the right hoses.
We performed a series of hard stops from 60 mph at near lockup. We then allowed the brakes to cool by driving around at 60 mph for another 10 minutes. We then repeated the process and allowed the brakes to cool again. This process burnishes the pads and seasons the rotors, removing any oils from the factory and also better aligning the grain of the metal in them. We could have simply driven a few thousand miles, but we needed these brakes to perform immediately so that we could test the car for this story. This too ensures that if we need the additional stopping ability it’s there for us.
Brake Testing
The 2004 GT we’re installing these brakes on is bone stock with the exception of a Flowmaster cat-back exhaust system. Prior to this installation we performed a few stops from 60 mph to get an idea of the stock brake system’s performance. The brake pads and rotors were replaced on this car with stock equivalents less than 10,000 miles ago. Our testing showed that from 60 mph on the edge of ABS activation, it took 199 feet to get this car hauled down to a stop.
After our upgrade and break in we took it out for another set of test stops on the same stretch of road under similar conditions. After a few tries with the SVE front brakes we were able to get the car stopped in 164 feet from 60 mph. That’s an improvement of 35 feet, stopping us 18% sooner than the stock brakes. “Decreased stopping distance equals increased safety,” said McDonald.
Brake Stop Testing From 60 mph
- Before: 199 feet
- After: 164 feet
- Improvement: 35 feet, a reduction of 18%


Top the old 11 inch stock GT brakes, Bottom after the SVE 13 inch brake upgrade install
Driving
Driving we could immediately tell a difference in pedal feel and how quickly the brakes respond. As demonstrated the improvement in stopping could make the difference in a panic stop out on the road. Those few extra feet are sometimes all the difference between a fender bender and a close call.
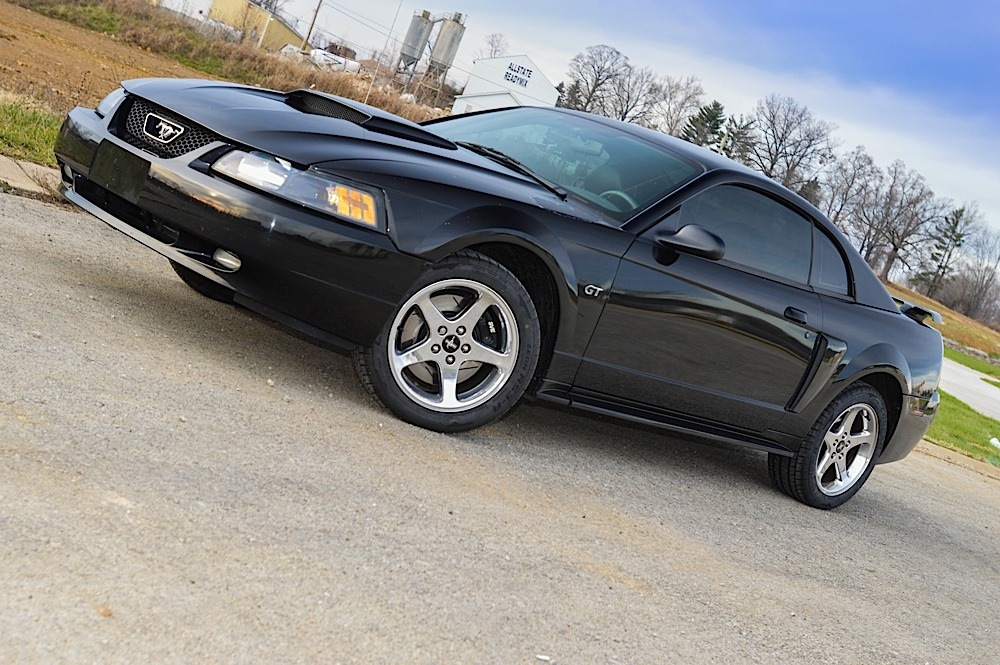
Our brake upgrade not only made the car safer with an 18% shorter stopping difference, but also fills in the front wheels very nicely.
A brake system upgrade is a good idea on any Mustang whether bone stock or snarling track beast. The best part of this one is that we’ll be able to get replacement pads from our local parts store or Ford dealer for years to come, and have piece of mind that if there’s a problem with any part of it that it’s easily serviced by any shop since the parts are OEM.


