
Our 5th Gen Camaro build is one of the most ambitious projects we’ve taken on in some time; its accelerated schedule has us preparing the car for road course duty with a complete ProCharger i-1 supercharger system, one of McLeod Racing’s RXT twin-disc clutches, SLP’s complete exhaust system including headers, X-pipe, and axle-back, and the most recent installment, a complete suspension upgrade from the guys at BMR Suspension.
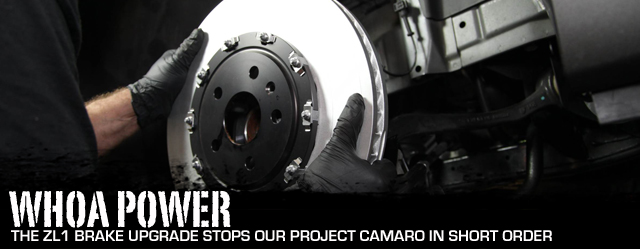
Now that we’ve got the “go” handled, along with the body roll and handling manners improved thanks to the new suspension pieces, it’s time to address the “whoa” factor. The current-gen ZL1 Camaro can trace its heritage back to the original ZL1 program of 1969, and with 580 supercharged horsepower, it has enormous, high performance brakes to match.
Wouldn’t it be great if you could get these parts for your own Camaro? Now you can! Since Chevrolet and Brembo have already done the work by outfitting the ZL1 with an awesome set of brakes, we decided it would make the most sense to look at the factory products that are sourced from the ZL1 program – offered by Chevrolet Performance in their catalog as part numbers 22959672 and 22989384 . The best part? For those of you choosing to use these, they don’t affect your warranty one bit.
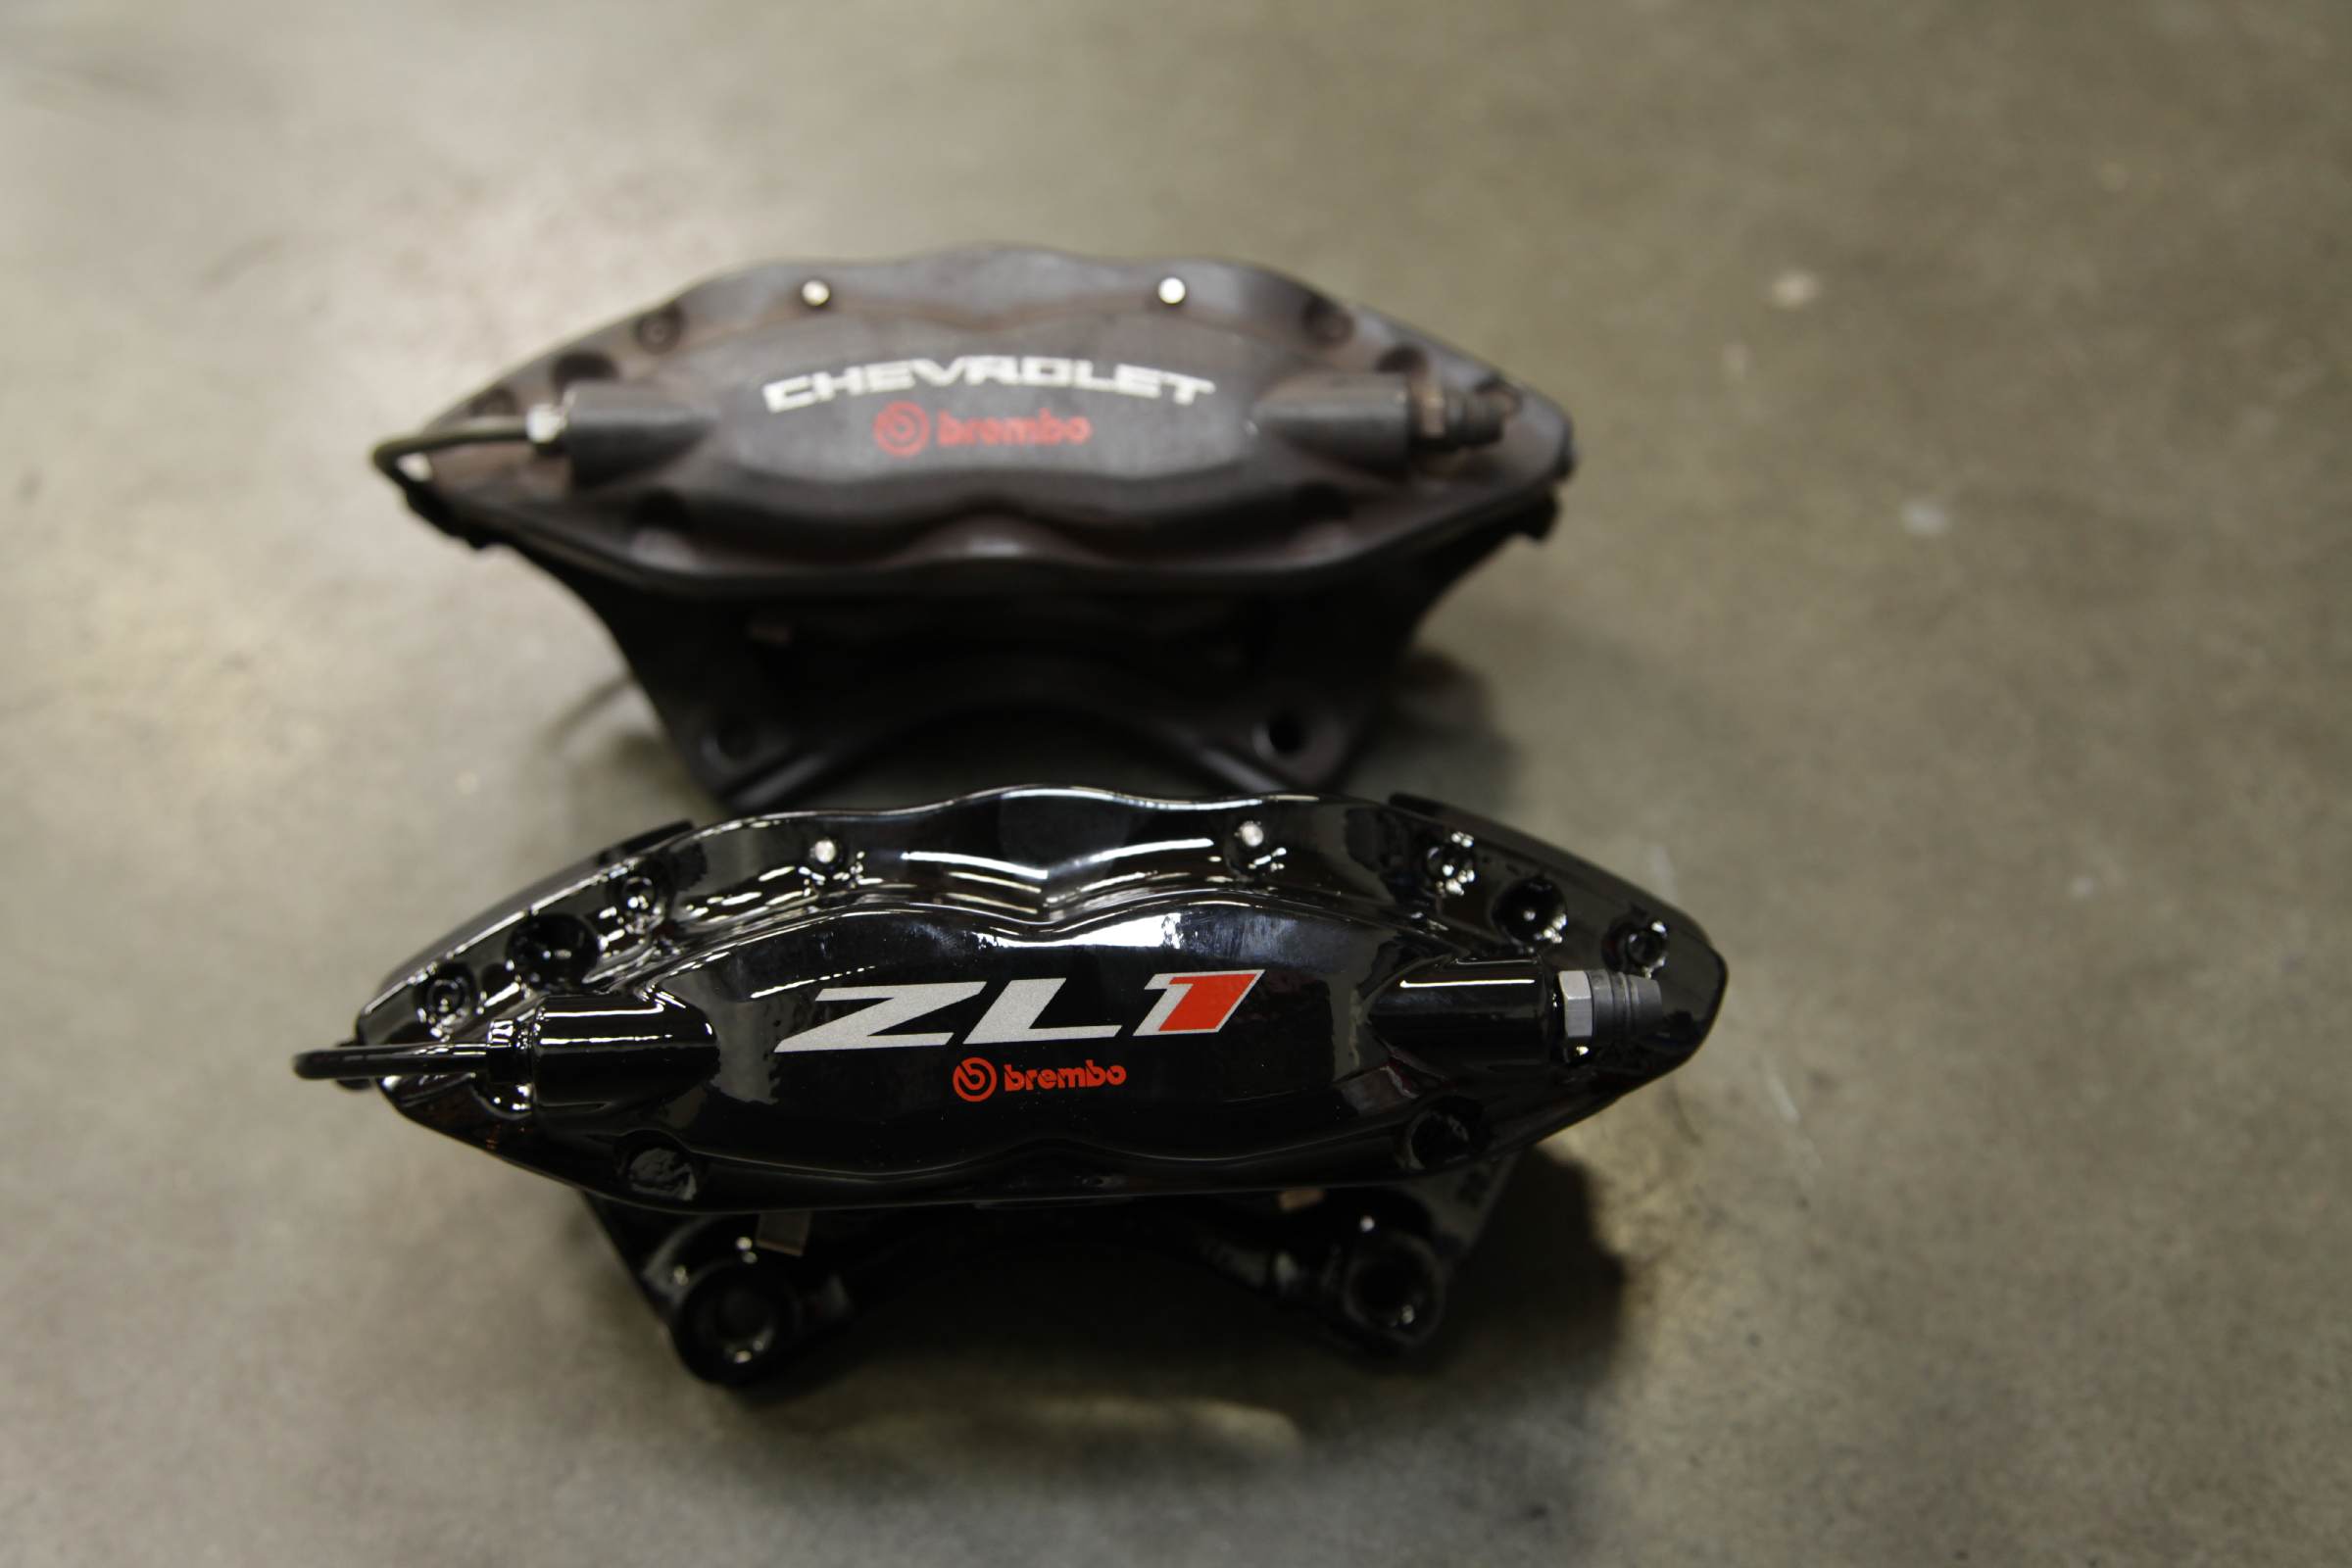
Although our factory Brembo stoppers looked good, our new gloss-black ZL1 calipers – complete with logo – take our ZL1-inspired machine to the next level.
How Do They Work?
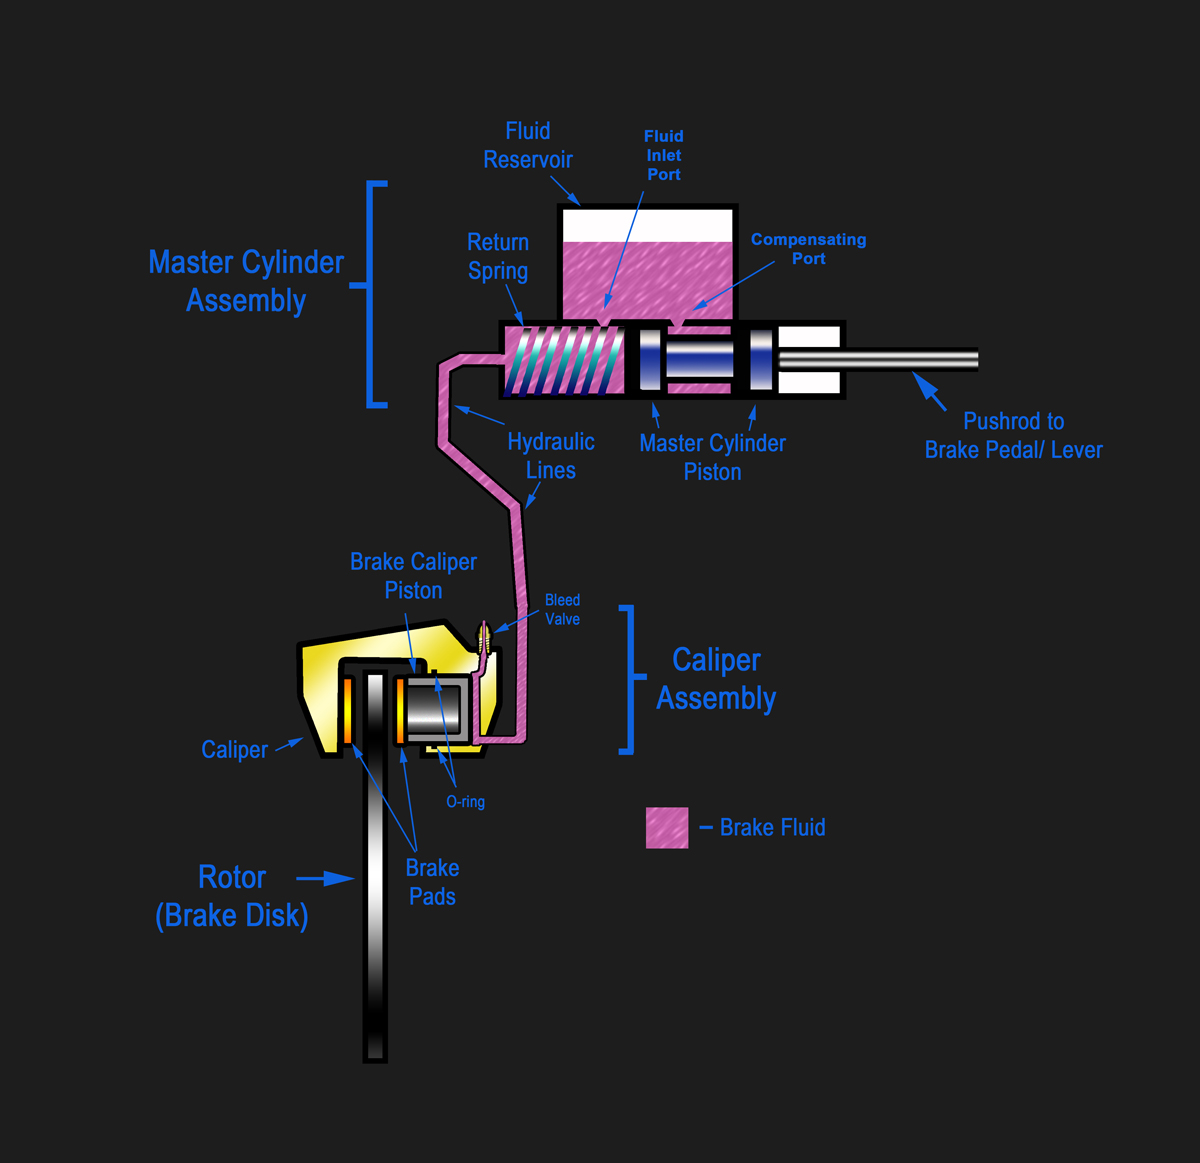
A basic layout of how a disc brake assembly operates. Keep in mind that the lever (brake pedal assembly) attached to the pushrod (not shown) creates more braking force as a function of its design. Image Courtesy Wikipedia
Braking systems have one job – to slow a vehicle down from warp speed with a minimum of drama. There are nuances to that job, of course, like ensuring that the calipers don’t lock up under heavy pedal pressure, and thanks to the advent of four-channel anti-lock braking, those issues are a thing of the past.
Hydraulic pressure is applied through the depression of the brake pedal and subsequently boosted using the principles of hydraulic multiplication, where the enclosed brake fluid in the lines receives the pressure, undiminished, from the master cylinder and brake booster. The hydraulic fluid carries that pressure out to the caliper pistons.
The brake pedal is designed so that it multiplies the force applied to the pedal end of the lever, sometimes by several times, before the pressure even reaches the fluid. The fluid is forced out towards the calipers. Using the hydraulic multiplication principles (area of the master cylinder piston compared to area of the caliper pistons) combined with the addition of the power booster to the equation, the pressure is increased yet again before being applied to the brake pads.
Since the area of the piston in the master cylinder is typically much less than the total defined area of the caliper pistons, it takes much more movement from the master cylinder piston to press the caliper pistons a much smaller amount – but the force is several times greater in the process. For example, if there are only two pistons in the system and one of them is two times larger than the first, it will move half as much, but with two times the force.
Simple, right? Of course it is. Add pressure, stop car. Multi-piston brake calipers like the ZL1 brake kit’s Brembo stoppers we’re installing in this article are necessary when trying to slow a 3,750-pound Camaro down, and the end result of the pressure applied to the brake pads and rotors (as friction) through the calipers’ hydraulic force is heat – and lots of it.
The Parts
Our factory Camaro SS brakes use a 14-inch diameter front rotor on each side combined with a four-piston caliper. Nice pieces, but worthy of an upgrade in a situation like ours where the car will be subjected to the torture test of racing on the road course, where vehicle dynamics and corners come up much more quickly than in a typical street application. In the rear of our SS, the factory specs measure out with 14.4-inch rotors wrapped in four-piston calipers.
The new Brembo pieces come as complete kits, split between front [PN 22959672] and rear [PN 22989384]. The new ZL1 front brakes have a number of significant upgrades designed to help performance, most notably the upgrade to larger, 14.6-inch vented rotors that are of two-piece construction rather than the one-piece front rotors our stock brakes use.

Our new, larger front brake calipers provided a large boost in braking capability, as evidenced by our testing found at the end of the article.
“There are a number of advantages to the two-piece front rotor – better resistance to warping, and potential for longer life as well. The larger front calipers have much better braking capability due to their physically larger dimensions, greater piston area, and larger pad area,” explains Chevrolet Performance’s Carl Smith.
Warping is when the rotor is not flat, and that variation is transmitted into the rest of the brake system, noticed in the driver’s compartment as an oscillation of the pedal under your foot. The two-piece rotor design also offers a reduction in weight over our stock pieces – and a reduction in unsprung weight is always a good weight reduction.
Better resistance to brake fade is necessary in our application as the brakes will get plenty of hard use on the road course. Fade is the reduction in stopping power than can occur after repeated, sustained application of the brake system in high-demand applications.

Two-piece front rotors use a separate “hat” section that’s bolted to the cast-iron rotor. They resist warping and offer lighter weight than the OEM one-piece rotors.
The six-piston front calipers included in the kit offer a substantial upgrade in clamping area over the stock pieces. “The SS four-piston caliper uses two 40 mm and two 44 mm pistons, while the ZL1 six-piston caliper uses two 38 mm, two 34mm, and two 30 mm pistons, staggered front to back,” says Smith. The increase of 36 mm of piston area per front caliper provides vastly greater clamping force on each rotor.
The front kit arrives complete with Brembo pads, all new hardware, and even a set of brake hoses for the front application. The rear kit includes all items for installation including new pads, the ZL1-branded calipers, and hardware. V6 applications performing the rear upgrade get new hoses, rotors, dust shields, and even a new master cylinder in addition to the aforementioned pieces – so make sure you pick the correct items to reflect the vehicle’s specification when ordering.
Puttin’ Em On

The Bleeding Process
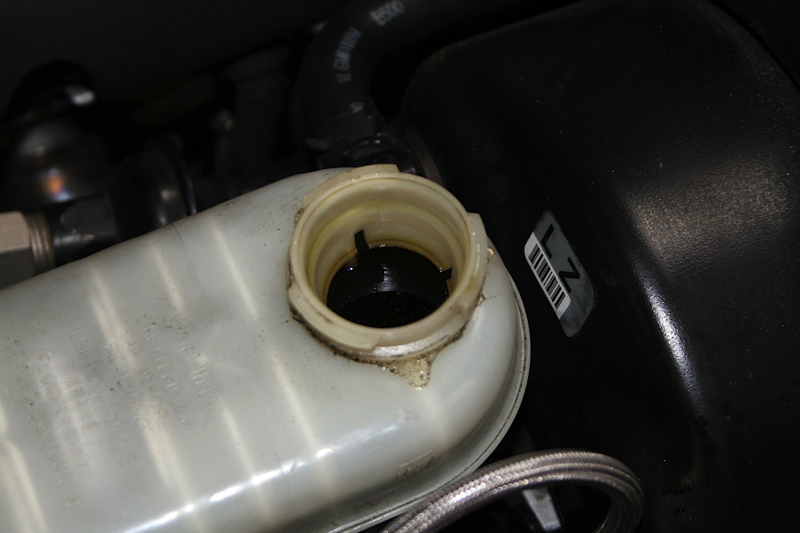
Make sure that when you begin the bleeding process you have plenty of fresh fluid on hand to replace the fluid you’ll be bleeding out of the system.
Keep in mind that these are original equipment parts, so the bleed process remains the same. Start with the right rear caliper, then the left rear, right front, and finally the left front caliper to ensure that there is no air anywhere in the system.
There are two bleed screws in each caliper, so you’ll need to start with the inner screw on each wheel before progressing to the outer bleeder. Take care to not get any fluid on your fresh new calipers, and make sure that you’ve got someone to help you with the process. Also ensure that the master cylinder stays full during the process so as to not introduce any new air into the system.
The calipers are designed to bolt right to the factory spindles in both the front and rear positions.
Each end of the car uses a floating rotor design, so removal and replacement of the rotor assemblies was a matter of removing the factory calipers and simply sliding the rotor off from the hub. Replacement was the reverse of the removal process.
Note that the front kit comes with a new set of dust shields that match the diameter of the new front rotors – these help to keep the inner rotor faces clean and clear of debris when the car’s on the road.
After changing the calipers, as Jigamian says, you must take care to bleed the hydraulic system properly. Check out the sidebar for instructions on how to do this properly for the Camaro platform.
Proper Bedding Procedures
Critical during the installation process is the proper bedding of the braking system once all of the new items are installed. “Bedding” is the process of depositing an even layer of pad material on the rubbing surface of the brake rotor. It removes impurities from the surface of the brake pad and is considered the final heat cure for the pads. Brake pads are initially cured in an oven during the manufacturing process, but the oven is unable to provide the pressure, torque, and elevated surface temperatures that are necessary to condition the pad for performance both on the street and at the track.
Not performing this process properly can result in inconsistent braking performance and even pedal vibrations if the transfer layer is not applied properly, so it’s important to do this – not only with performance brakes but any time you replace brakes on any vehicle. Since the process is simple, it’s important to not overlook it during your installation.
“Bedding” the brake pads consists of a number of controlled heat cycles performed at varying speeds and degrees of pedal application, and is designed to transfer a layer of pad material to the rotor surface to aid in engagement.
The larger front calipers have much better braking capability due to their physically larger dimensions, greater piston area, and larger pad area. – Carl Smith, Chevrolet Performance

At very low speed, apply the brakes hard several times while turning the steering from left to right, ensuring that everything is operating properly. These things should be done in a safe place, where there is no danger to other people or vehicles. A nice empty parking lot should probably suffice.
The actual bedding process needs to be done in a safe place as well – one where you can get the vehicle up to 65 MPH while also being able to decelerate quickly, like the back road near your house where nobody ever goes.
Begin with a series of light decelerations to gradually build heat into the brake pads and rotors. Use an on-and-off technique, applying the brakes for three to five seconds, then allowing them to release for double that amount of time. If you use three seconds to apply, then let them release for six seconds.
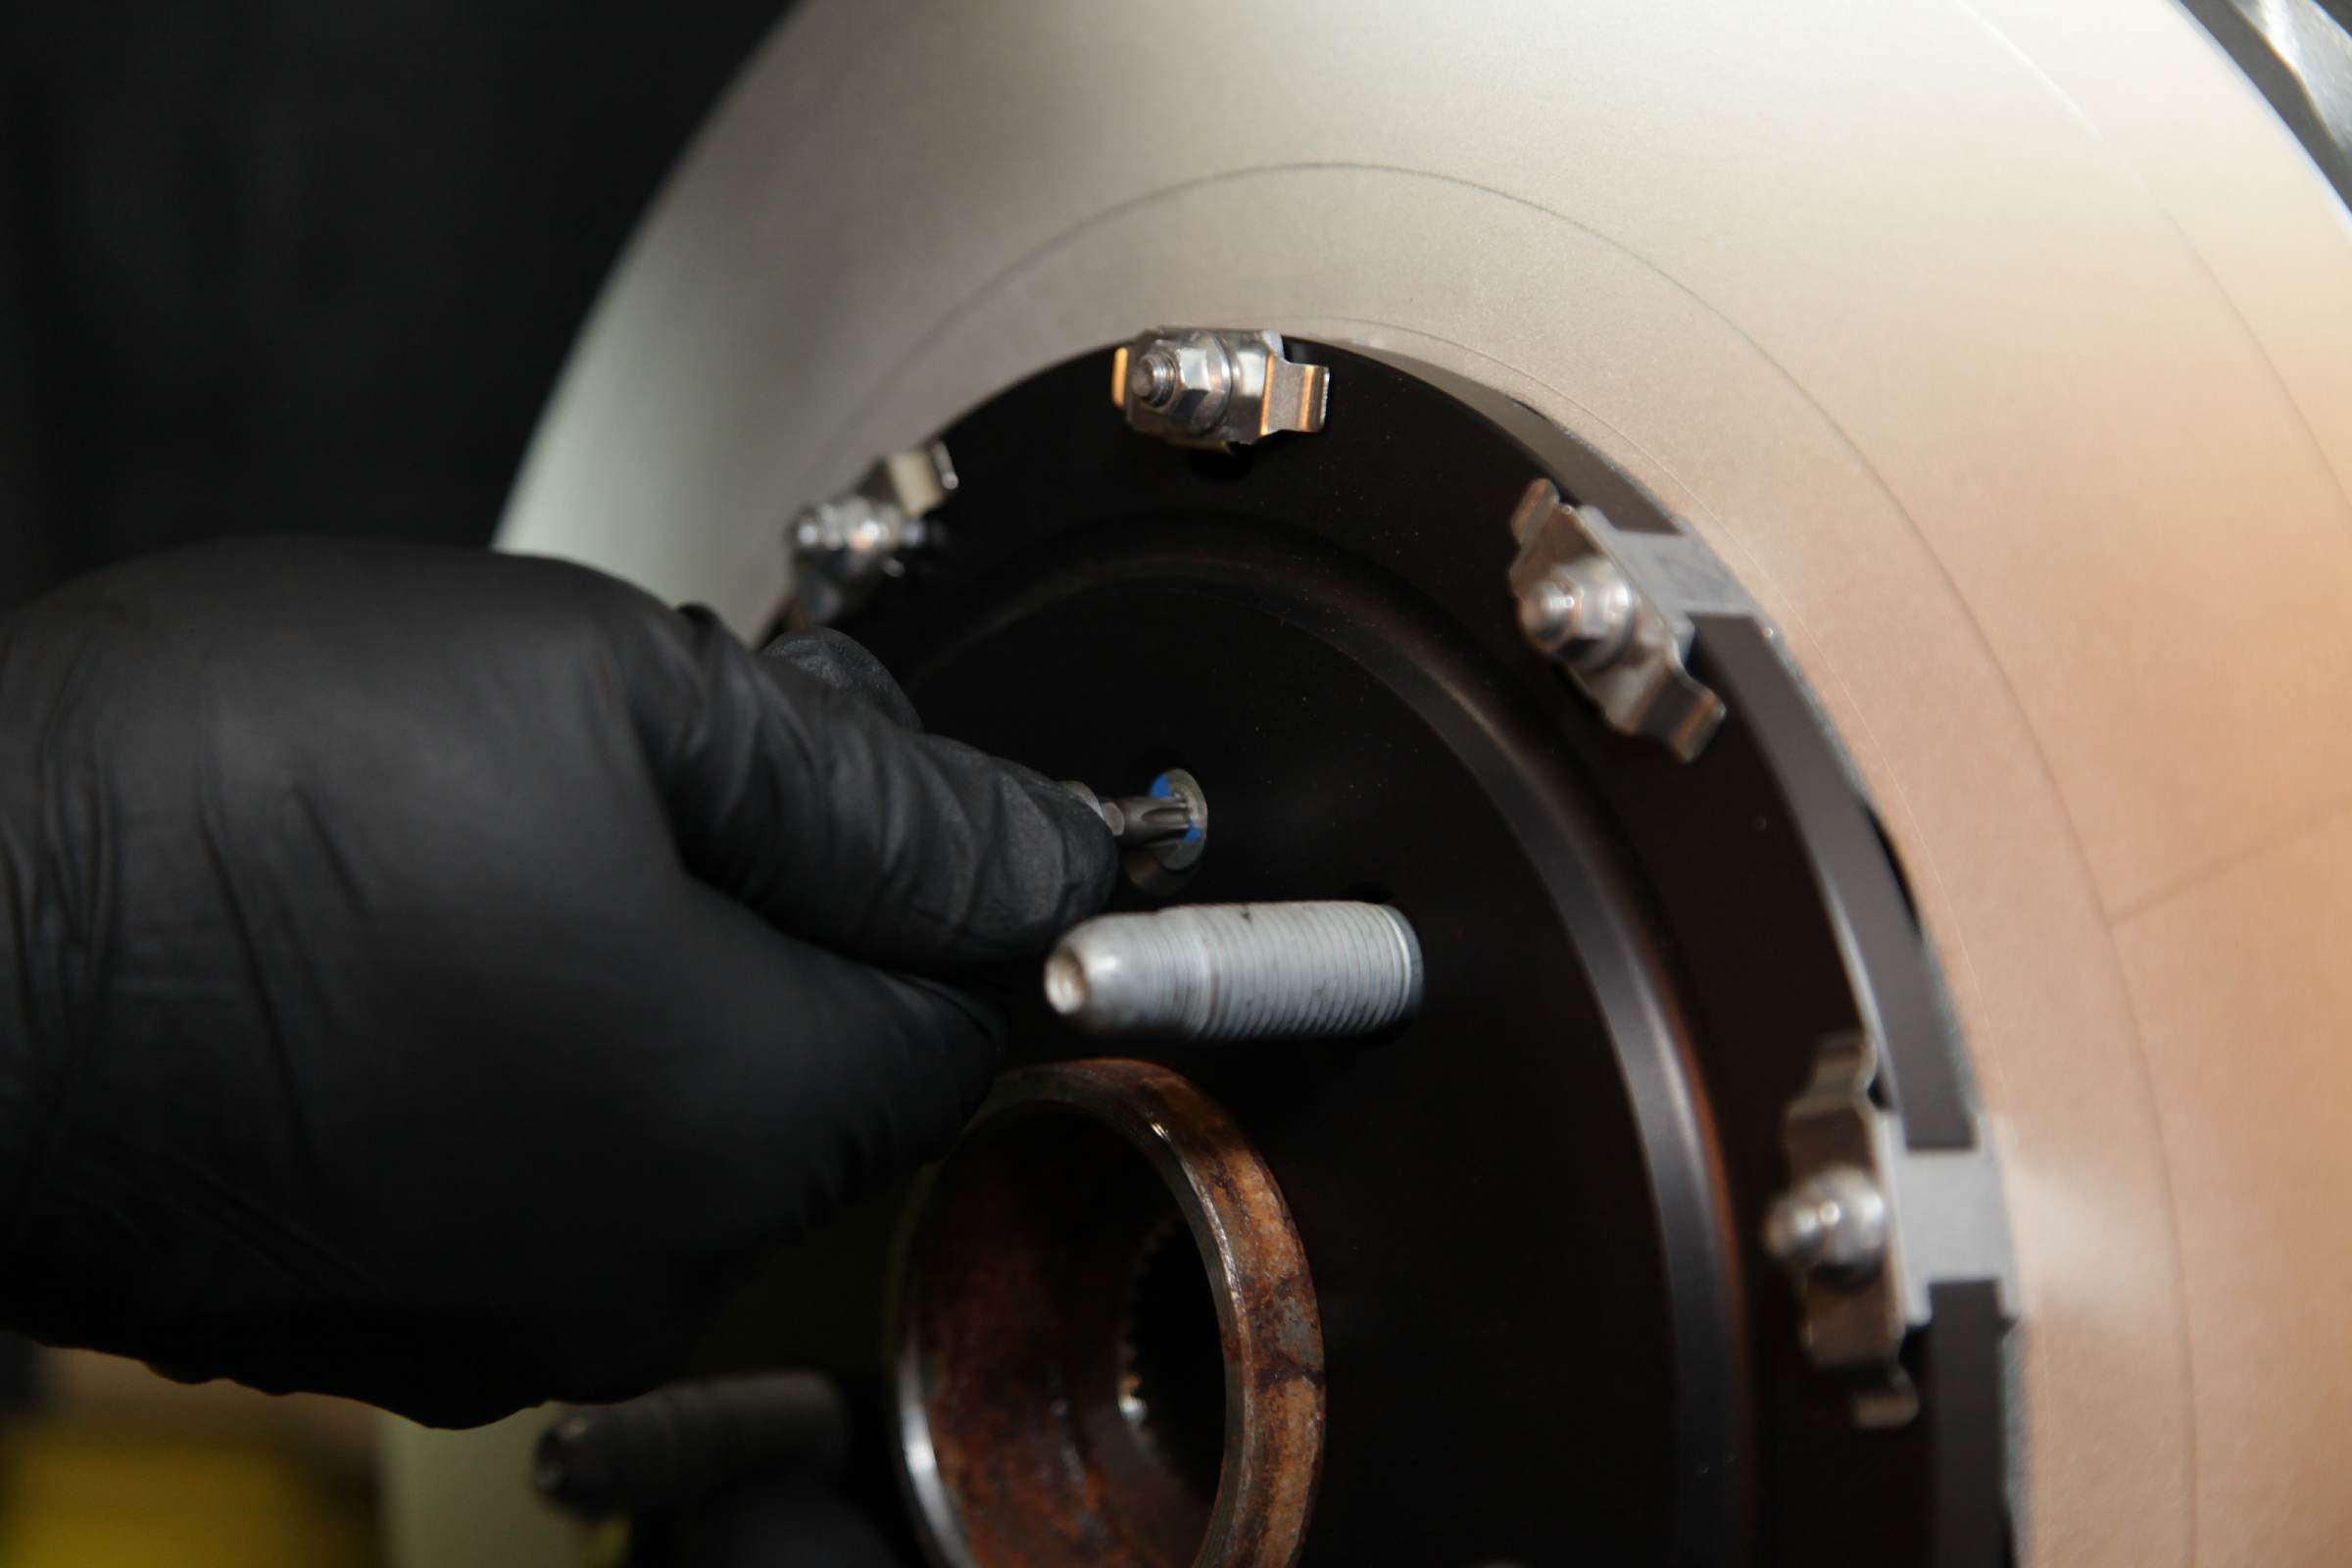
The new front rotors have a retention hole in the factory position – we used the hardware to limit potential brake system noise from the rotor moving around under hard braking.
After several cycles of this, move on with a series of medium to firm deceleration stops to keep the temperature level of the brakes up. Finish the cycle with a series of eight to ten hard decelerations from 55-65 MPH down to 25 MPH, while allowing the same type of cool-down as you did in the first step. On the brakes for however many seconds it take to go from 55-65 down to 25, then off the brakes for the same amount of time. At this point the pads should be consistent in their stopping capabilities.
The last step in the process is to allow the brakes to cool fully, driving at moderate speed until most of the heat has dissipated. A good run on the highway should allows this. Try not to sit with the brakes depressed to hold the car in place at this point. Once you’re all done with this process, park the car and let the brakes cool to ambient temperature.

Our old rear calipers during the removal process – note the small bag over the brake hose to limit leakage and prevent potential paint damage from the fluid.

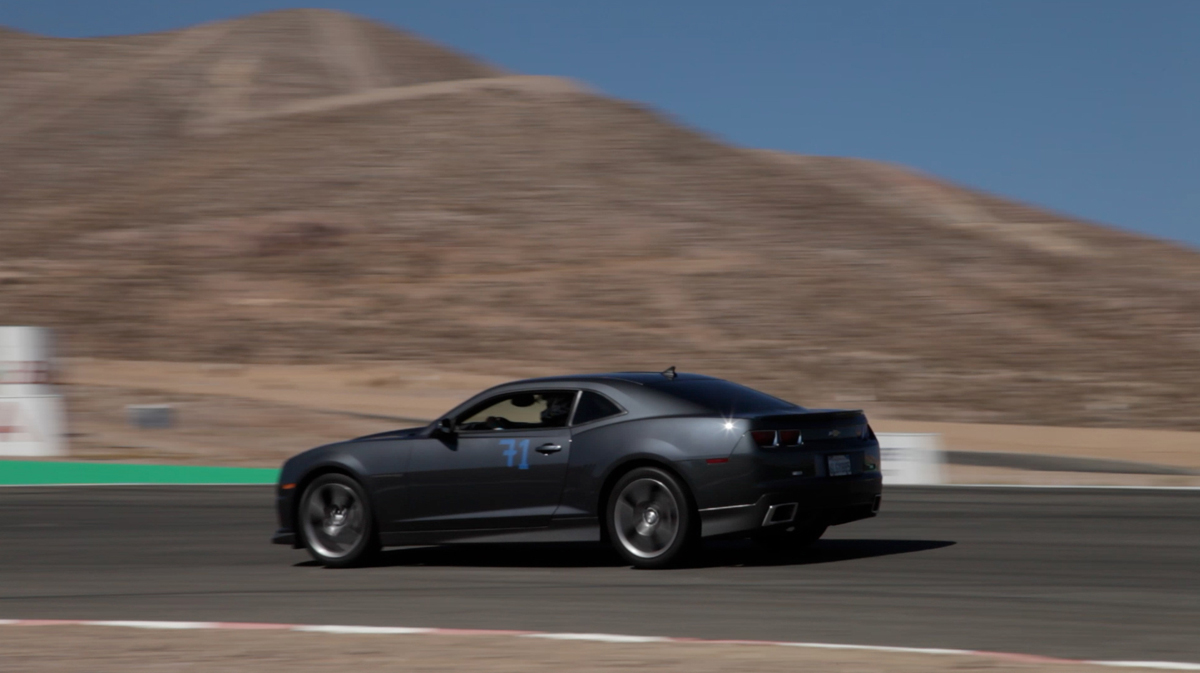
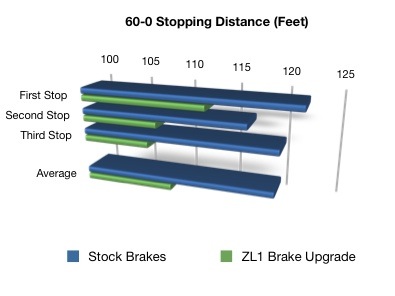
Of course, what good would a brake upgrade be without a before-and-after test? So in the interest in fairness, we hit the road before we ever got started, and over a three-run average from 60-0, we stopped in 122 feet, 117 feet, and 120 feet for an average stopping distance of 119 feet.
After the upgrade process was completed, our stopping distance decreased to a three-run average of 109 feet with 60-0 distances of 113, 108, and 107 feet – indicating that the new brakes appear to work even better when worked hard as the distance was shorter on the third stop compared to the first stop. Our driver also reports substantially less brake fade and that the brakes do not seem to heat up nearly as quick as with the stock components.
We found this to be a very worthy upgrade on our machine. We get the advantages of the new ZL1-spec parts onto the car, tighten up the behind-the-wheel looks, and in the process reduce our stopping distances substantially, especially when combined with the chassis stiffening and suspension upgrades provided by the BMR suspension parts.


