
 Ford’s FE engine is one of the most famous engines of all time having earned its stripes on NASCAR tracks for years. The 427ci version of the FE ushered in the era of the “super car” with the Shelby Cobra 427. Ford produced the FE block from 1958 until they finally ceased production of the venerable mill in 1976.
With so many of these blocks pressed into service, the availability of multi-carburetor intakes and other “dress-up parts” have become popular. What seemed to be missing however, was a front drive system that provided modern looks and performance in one kit.
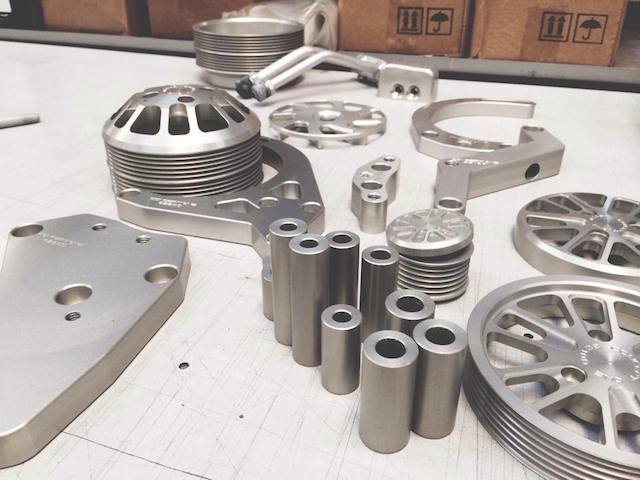
Concept One designed the FE front drive kit to be the perfect fit and complete kit for these venerable Ford engines.
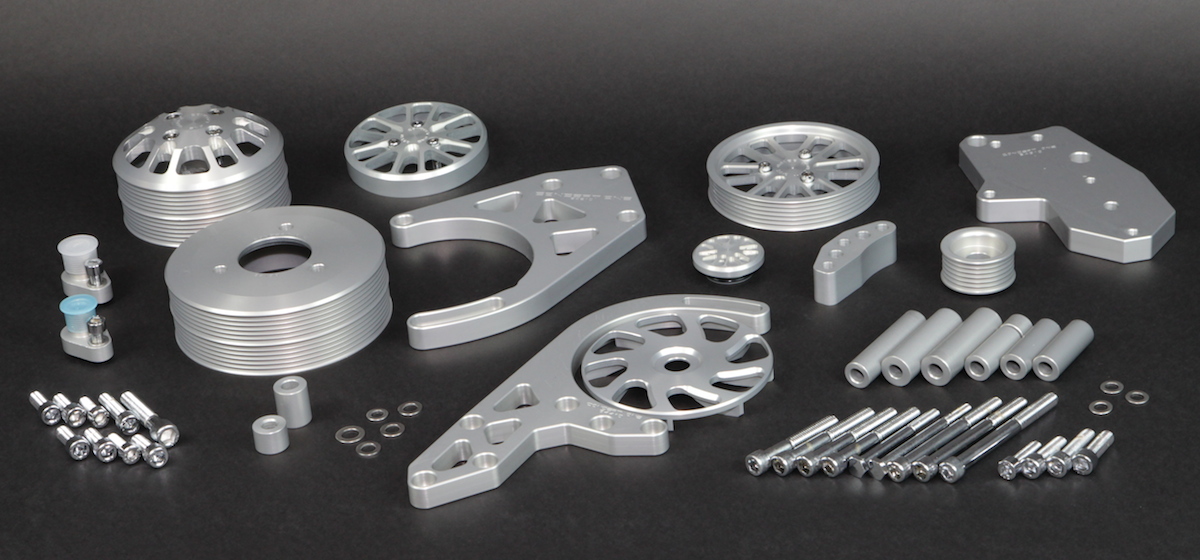
If you are one of the lucky enthusiasts that own a Ford FE engine, Concept One‘s Ford FE Pulley Kit adds that modern look and performance in a multi-belt configuration. The kit routes two six groove serpentine belts around some cutting edge accessories for top performance in a top shelf package.
About Concept One
Kevin and Randy Redd founded Redd Machining and Manufacturing, Inc. in 1996 after working in the family’s Goodyear Tire and Service Center for several years. The brothers went to college to take their passion and practical knowledge of cars to the next level while their parents, Jean and Darryl Redd, opened American Classics Restoration. Specializing in Corvettes, Jean and Darryl (with the help of their sons) earned several NCRS Top Flight awards and Bloomington Gold Awards, and, eventually, the coveted Duntov Award with a 1955 Corvette.

Redd Machining and Manufacturing continues to design and develop exclusive parts like this mini reservoir power steering pump for the Concept One front drive systems.
Kevin and Randy began manufacturing aftermarket parts on a small scale after completing their technical and engineering degrees. In 1996, the Redd brothers started designing and manufacturing pulley systems for the racing industry with parts for all levels of competition from local Saturday night racers to ARCA and on to NASCAR Sprint Cup. It was here that Redd Machining and Manufacturing was born. Today Redd Manufacturing, with its Concept One product line, continues to manufacture high quality pulley systems while continuing to develop new product lines.
Concept One’s Ford FE Pulley System
The FE front drive system kit from Concept One is a compact design designed to open up the engine compartment and free up more room. Moving the accessories out front clears the way for countless valve cover, header, and steering arrangements in all types of vehicles. In our case, we found a 1966 Ford Galaxie with a 427 FE engine to test the kit’s installation.
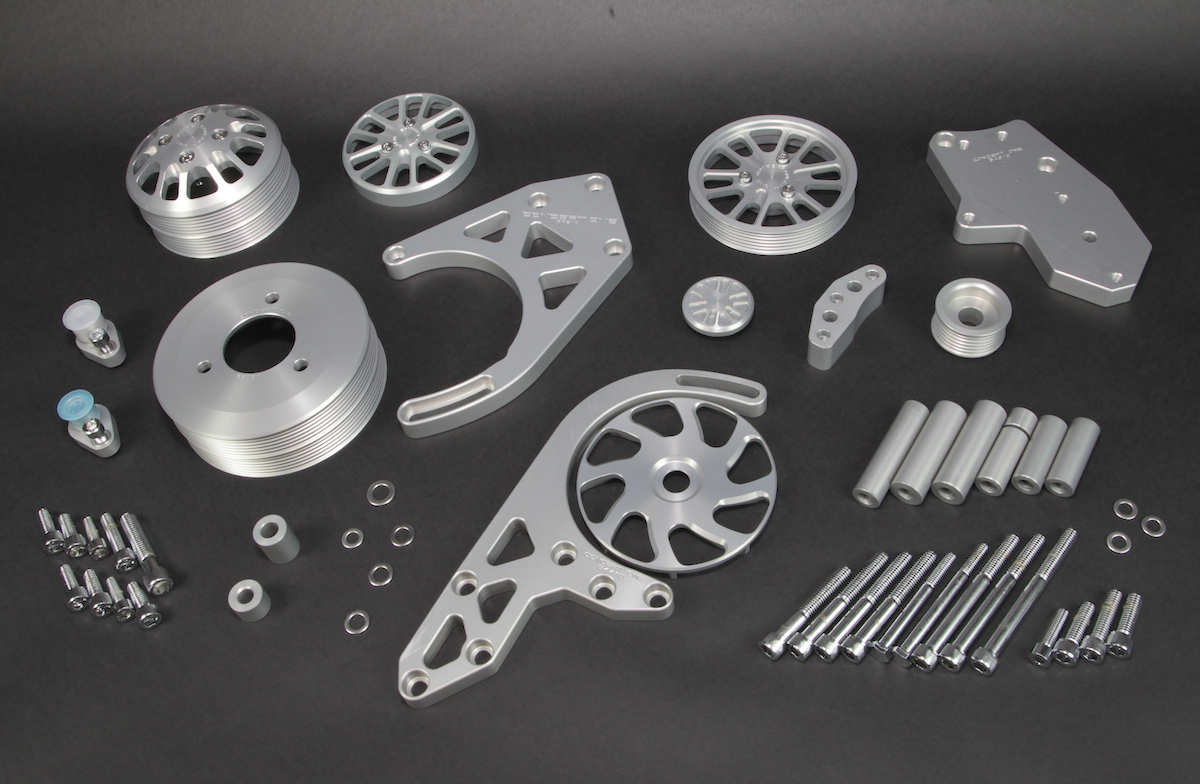
Concept One’s front drive systems are designed with components that work as a complete kit. They have been tested and proven to work together so that you don’t have to piece together random parts that may or may not work.
Our car was equipped with an alternator, air conditioning and power steering, which would require a front drive kit that could handle all of these accessories. According to the folks at Concept One, “This kit, with all the standard equipment, is an exact fit, which means an easy installation. This is perfect for do-it-yourselfers that want to save money for even more hot rod parts.”
The perfect fit and complete kit means that you get to avoid a couple of the worst nightmares that the folks at Concept One have seen over the years. The “junkyard jitterbug” and the “mail-order mamba” are two of the most serious avoidable conditions with the Concept One SFE 01 pulley system.
Accessories
One of the many reasons that enthusiasts like the Concept One front drive systems is because the kit is assembled with high quality components that are tested and known to work well together. There’s nothing worse than a parts warehouse that assembles a “kit” by pulling random parts and combining them into a product for car builders. These type of “kits” aren’t tested to see if they will work or even fit together for the application. Concept One’s kits are thoroughly tested and the products used are top shelf components.
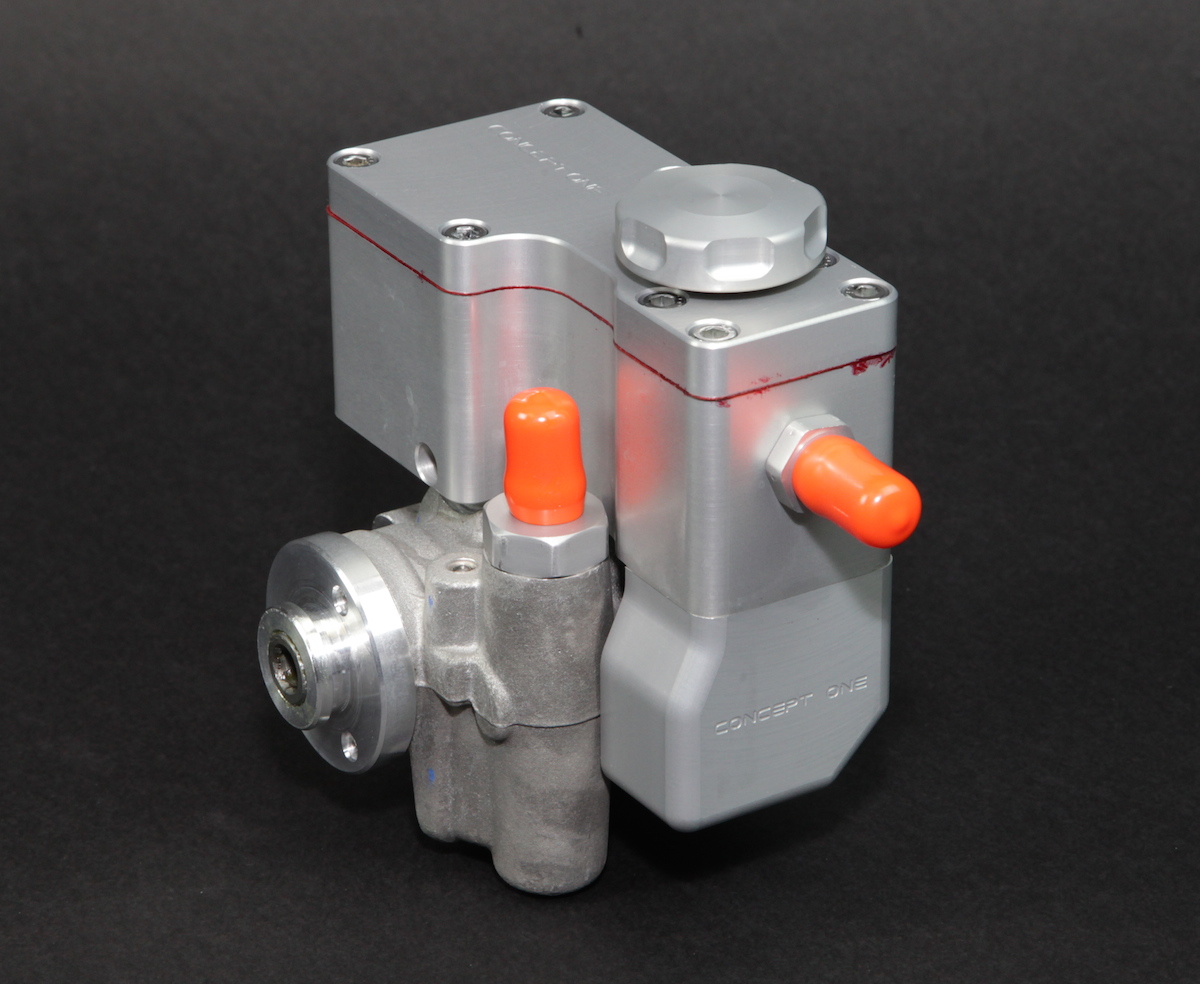
Delphi aluminum body power steering pumps are standard equipment in the Concept One kits. This one has the Concept One exclusive mini-reservoir attached to the pump.
Options in the FE front drive kit include power steering pump configurations for GM racks (1,300-1,400 psi), Mustang racks (800-900 psi) or Fox Body/T-Bird racks (1,100-1,200 psi). Flow rates are available from the standard 1.6-gallons per minute to 2.11 gallons per minute. Remote reservoir and mini-reservoir mounted on the pump are other options available. Delphi aluminum body pumps are standard equipment in the kits. We opted for the Concept One exclusive mini-reservoir for Fox Body/T-bird rack and pinion steering systems.
The alternators used in the kits are from Powermaster Performance and are available in either the 105-amp, one-wire version or the 140-amp one-wire version. The 105-amp model comes in a polished finish while the 140-amp models come in either the polished or chrome finishes.
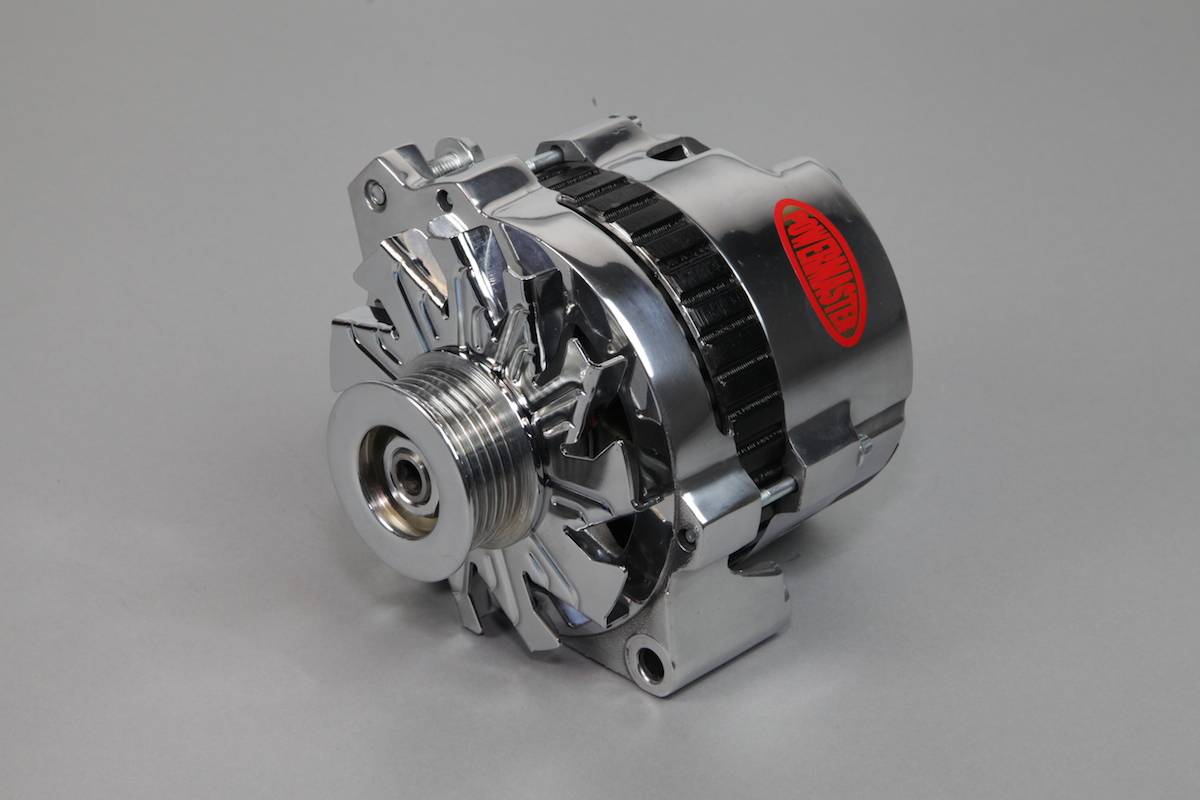
This Powermaster alternator is a 140 amp CS130 style alternator with 95 amps at idle.
We chose the 140-amp polished version. Powermaster Performance’s Brady Basner explained the alternator’s specifics by saying, “It’s a 140 amp CS130 style alternator with 95 amps at idle. One of our most popular alternators. What makes Powermaster alternator’s a great choice is that every alternator is new and individually dyno tested for guaranteed performance. It is dual plane balanced to ensure high RPM reliability and long life. The gold finish battery terminal is specially plated to resist corrosion and promote a long, low resistance life.”

Standard Equipment
- Ultra small polished Sanden SD-7 compressor with billet manifold
- New Delphi aluminum power steering pump
- Power steering reservoir – Exclusive Concept One billet aluminum pump mounted mini reservoir
- 105 amp polished Powermaster one-wire alternator
- Crank pulley, water pump pulley, alternator pulley, and power steering pulley
- Complete bracket set for alternator, A/C compressor and power steering
- Alternator fan
- Alternator pulley cover
- Compressor nose cover
- Goodyear gatorback belts
- Chrome hardware
Installation Notes
Concept One designed the FE pulley kit to be used with electric cooling fans. Anyone planning on using a mechanical fan should let the sales person know when ordering the kit so that modifications to the water pump pulley can be made before shipping.
All Concept One FE engine pulley systems are designed for standard rotation water pumps. They recommend Edelbrock’s #8805 cast finished water pump or Edelbrock’s #8835 polished water pump. Stock 1965-1976 water pumps will also work with the front drive kit.
Every bolt that screws into the engine should be coated in some form of lubricant or sealer. Bolts that are being screwed into aluminum parts, like aluminum cylinder heads, should be coated in an anti-sieze lubricant to prevent galvanic corrosion between the two dissimilar metal types.
Getting Started
Removing the old front drive system is simply a matter of removing the bolts from each pulley, including the crankshaft pulley. The center bolt and washer must be removed in order to remove the crankshaft pulley.
Concept One’s FE front drive system is designed to work with factory three-bolt pattern dampers. There are a large number of aftermarket balancers on the market for this engine. If a damper change is planned as part of the installation, the balancer should be removed along with the old front drive system.


The old V belt system is good but it was time to modernize our classic.
Make sure that the damper is a direct replacement for the factory damper when replacing the stock damper with an aftermarket version. Correct bolt pattern and pulley spacing is critical for safe operation.
Once all of the stock pulleys and brackets have been removed, the new front drive kit can be installed.


Removing the old front drive is as easy as taking the compressor bracket, water pump pulley and crankshaft pulley off.
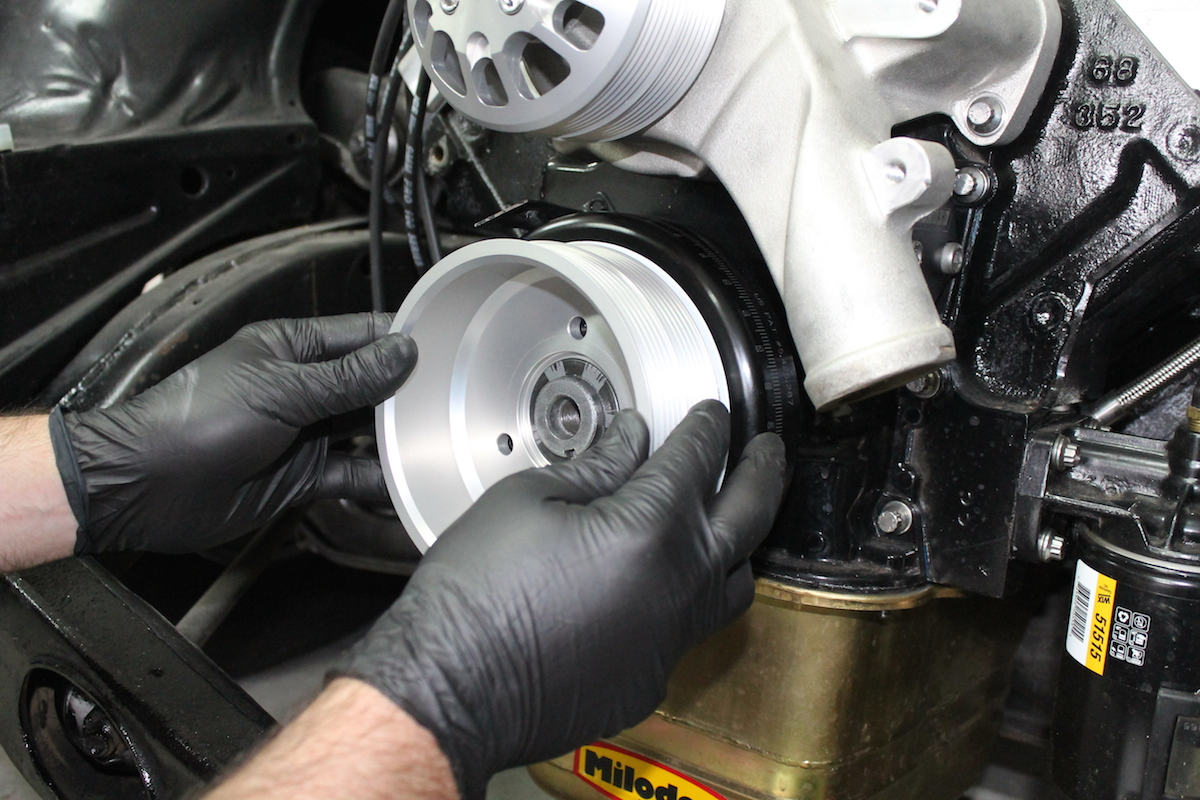
We started the installation by installing the crankshaft pulley on the existing damper.
Installing the New Front Drive Kit
We began by installing the crank pulley (#34130) on the existing damper using three 3/8-16×1.00 cap screws. Using thread locking compound on the 3/8-inch socket head cap screws, we installed the three bolts with flat washers that hold the crankshaft pulley onto the damper assembly, torquing the cap screws to 40 ft-lbs. Installing the three socket head cap screws with thread locker, we secured the crank pulley by torquing them to 40 ft-lbs.


Next we installed the original crankshaft bolt and washer that keep the pulley and vibration damper on the crankshaft snout. Using a bead of thread locker, we torqued the bolt to the OE specified 90 ft-lbs. Completing the first stage of the installation, we installed the water pump pulley using four 5/16-inch socket head cap screws coated with anti-seize lubricant. Using a criss-cross method, we tightened the cap screws down evenly then applied a final torque of 20 ft-lbs.


The water pump pulley installation is a matter of tightening four cap screws that hold the pulley in place. Don't forget to use thread locker.
Power Steering Installation
The power steering pump requires a bracket (#64310) for proper spacing and firm installation. In order to achieve the spacing needed for belt alignment, two spacers (2.756-inch) are used between the mounting bracket and the cylinder head on the driver’s side. Installation of the power steering unit begins with the mounting bracket and spacers. After the bracket is installed, the power steering pump assembly can be installed.

Two 3/8-inch socket head cap screws hold the mounting bracket and spacer in position. Because the cap screws were being inserted into aluminum cylinder heads, we used anti-sieze lubricant to prevent galling on installation or removal of the screws. A final torque of 20 ft-lbs was applied to the cap screws. The power steering pump pulley is mounted to the assembly with three socket head cap screws.

Next we mounted the power steering pump assembly to the mounting bracket with two-5/16-inch hex head bolts, each with a flat washer. Both bolts were installed with anti-seize lubricant and torqued to 20 ft-lbs.
Alternator Installation
Concept One’s alternator installation assembly involves the most parts but it is not complicated to install if you pay attention to the directions. The power steering bracket also provides the foundation for the alternator mounting. Using the top two holes on the bracket, an alternator spacer (#64490) is installed with thread locker and torqued to 20 ft-lbs.
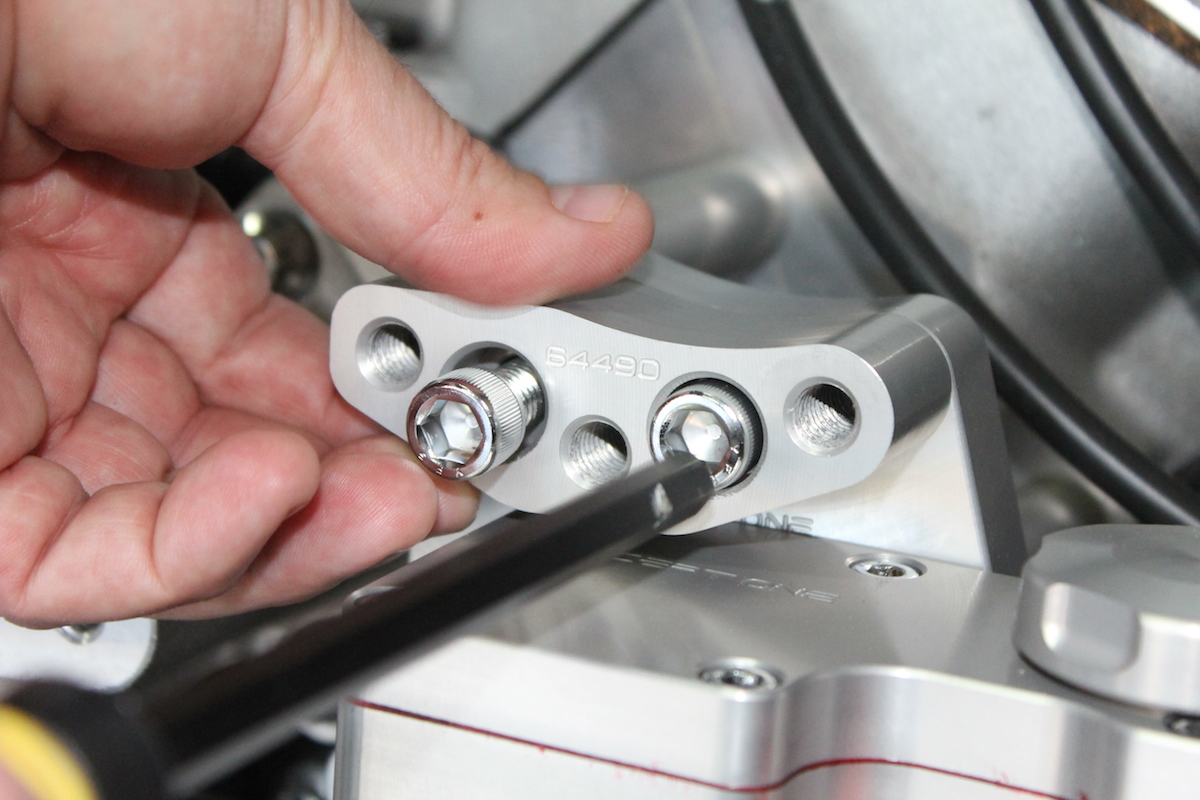
The alternator is installed on the same mounting bracket as the power steering pump. A small spacer mounted at the top with two cap screws to hole the alternator arm in proper alignment is the first step in the installation.
The alternator arm (#64410) is installed with the five spacers that hold the arm in the right relationship to the other accessories for proper belt alignment. Putting the correct spacer in the right place during installation is critical to achieve that belt alignment. The smallest spacer is located at the very bottom of the arm and mounts to the water pump. Right above that mounting hole on the alternator arm is where the 1.681-inch spacer is installed, with the bolt also going into the water pump. Then the alternator arm and Powermaster alternator are installed to the bracket.

The next two-spacers are 2.00-inch spacer that are installed at the upper end of the alternator arm. Finally the last spacer, a 3.00-inch spacer, is installed at the bottom of the arm near the spacers whose bolts go into the water pump. The illustration in Concept One’s directions clearly show how the space setup should go. The photo is not confusing and very clear, so installation should not be difficult at all.
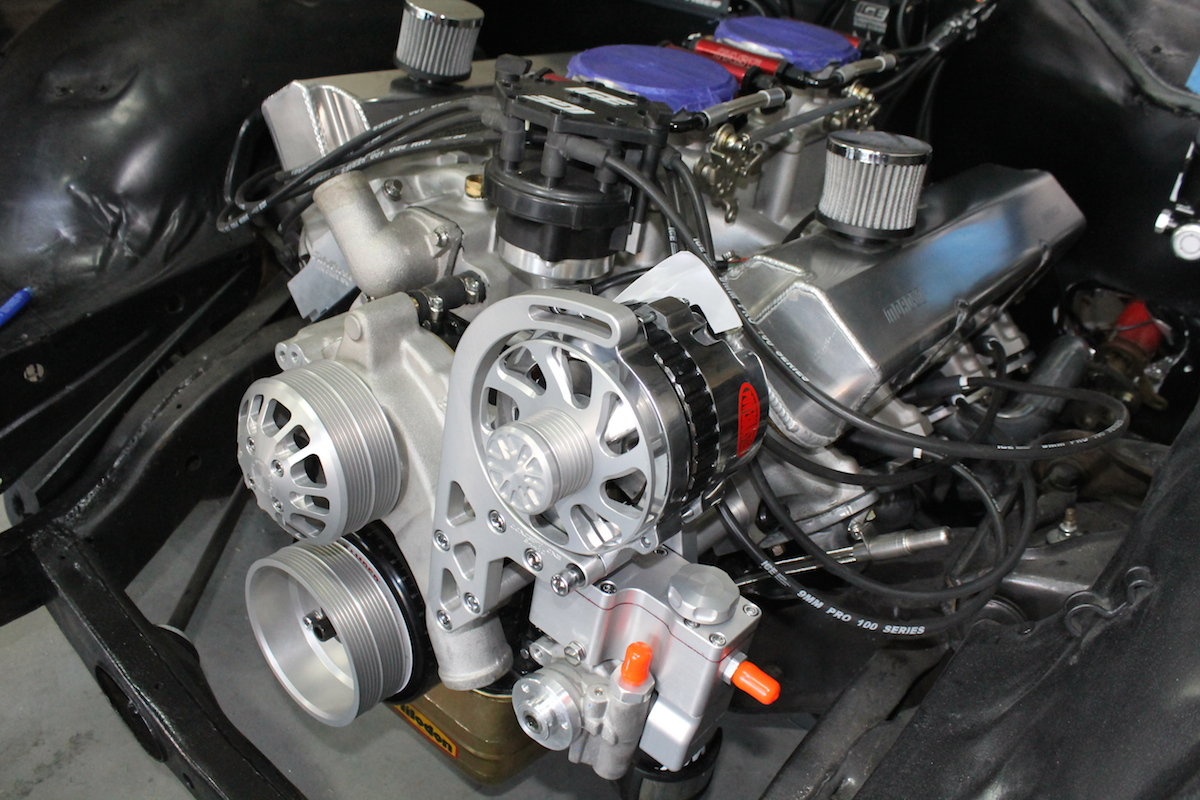
It’s clear by this point in the installation how much room has been created by relocating some of the front accessories.
Once the alternator arm is in place, the alternator can be bolted to the arm and the alternator fan and pulley can be installed with the retaining nut being torqued to 70 ft-lbs. Don’t forget to use thread locker on the alternator’s threads and a lock washer under the nut.
Air Conditioner Compressor Installation
Much like the alternator arm, the air conditioner compressor is mounted to the block by means of a bracket that is supported with four socket head cap screws and two small spacers. The smallest spacer supports the bracket from the water pump while the longer of the two-spacers holds the bracket away from the engine block. Use of these spacers holds the compressor pulley in the correct alignment for the drive belt. The socket head cap screws are torqued to 20 ft-lbs. The compressor is bolted to the engine block at the pivot point first. The compressor arm can then be mounted to the water pump for alignment and to act as a tension adjustment.


After the compressor is mounted to the compressor bracket, the compressor cover is installed on the front of the compressor with three-socket head cap screws torqued 18-20 ft-lbs. Remember to use thread locker to prevent the cap screws from loosening during operation. The compressor fan caps off the front drive installation.

Final Notes
Install the Goodyear Gatorback belts supplied with the kit and tighten all the components where the belt tension is tight enough that the belt can be twisted 90-degrees with your fingers. You should feel a stiff resistance, but still able to twist the belt 90-degrees. This represents the lowest tension possible where the belt should not slip. If the belt slips and you hear wines or squeals, tighten the belt tension in small increments until the slipping stops. The two Goodyear gator back belts are installed and held tight using the system's tensioner bolts.


Conclusion
Serpentine belts are much thinner than a conventional V belt. Because it is so thin, the serpentine belt dissipates heat better than the chunky V belt and therefore lasts longer. However, even a serpentine belt will eventually degrade, crack, and break, but it will last longer than a conventional V-belt before it needs to be replaced. Keep an eye on your drive belts and this system will offer you a long service life.
The use of machine cap screws are a great addition to this front drive kit. Using thread locker on these cap screws almost guarantees a tight connection that won’t back out. The brackets are perfect-fit, as Concept One proudly proclaims, with a great finish that completes the look of any engine bay. The system is compact and pure quality. Thumbs up to Concept One on a nice job of engineering and manufacturing a much needed front drive kit for Ford FE engines. This kit fills a void for Ford 427ci owners that were looking for a high performance option to the stock components.
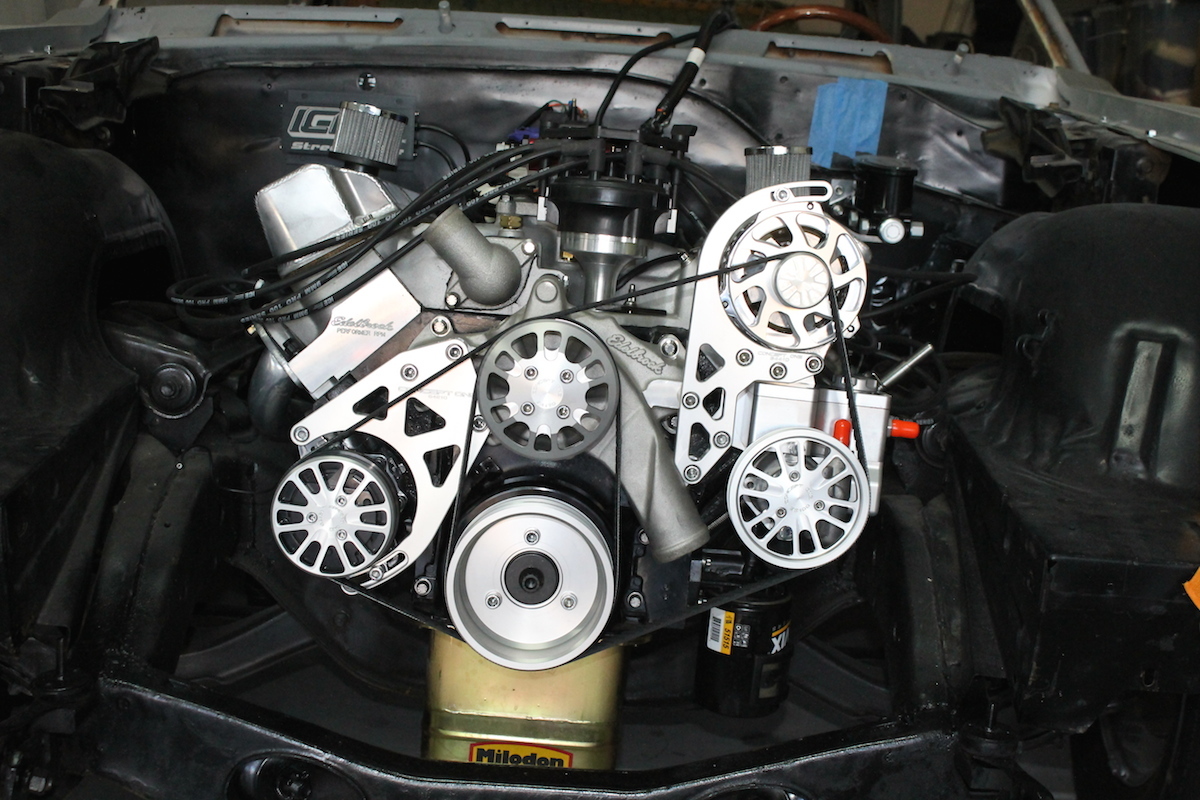
Viola’, a modern front drive system for a vintage Ford FE engine.


