

Ah, the 0ne wheeled peel – the bane of any hot rodders existence. Honestly, is there any worse feeling than when a child goads you into doing a burnout at a stoplight, only to give you the thumbs down (or worse) because you can only rip one tire free from the hellacious grip of asphalt?
Not only is he disappointed, but the driver should be embarrassed…that driver was…us. Yup, we’re sad to say, but our project Pheonix, which has been around since 1968 and been LS-powered since 2010, was relegated to laying down one lonely patch of rubber for years…until now!
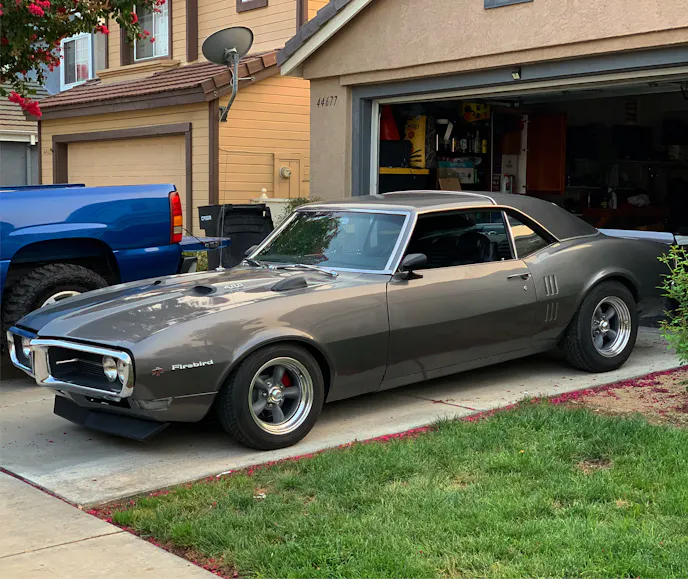
We hooked up with the folks at Moser Engineering to bring our rear end into the modern age. We previously added a little spring into the step of the LS1 under the hood by way of a Holley fabricated aluminum intake manifold and Aeromotive fuel tank with its Phantom technology, but something was missing…traction.
Since the car is lowered on QA1 suspension with double adjustable shocks, tubular control arms, and lowering spindles, it handles pretty well for an antiquated setup, and the same could be said for the rear end with the global west leaf springs and QA1 shocks out back, but we were lacking the ability to negotiate a turn at speed without losing traction and damn near spinning out.
The thing about positraction is, it prevents that loss of traction we were experiencing by sending power to both the rear-drive wheels. The way it does that is accomplished in a number of ways, and with the help of experts at Moser and a very experience friend, we were able to select which will work best for us.
Making The Right Choice
Their order process is fairly simple, but there are a few things you should know about your project before you make certain decisions. For us, this was both challenging and easy at the same time because we know what type of driving we’ve done behind the wheel of Project phoenix so far, but our overall goals involve autocross and road racing. So, since it’s a highway cruiser and aspiring track day terror with visions of the Trans Am era in the rearview, it made sense for us to select a gear ratio that lent itself to highway miles, and second and third gear wide open throttle pulls.
But before we get into the nitty-gritty of how we made our particular selections, let us run down what the folks at Moser could tell us about the order process.
“It’s the easiest way to get a complete axle assembly built the way you want, with parts guaranteed to match without breaking the bank or putting your build behind schedule. You can do this over the phone or online. First, you’ll choose from Moser 12 bolt, 8.8, 9-inch, Mopar 8 3/4, dana 60, or fabbed housings in bare metal or a variety of durable powder-coated finishes. The Muscle Pak also comes standard with OEM located perches, Moser custom alloy axles, a limited slip differential, and drum brakes.” said the experts at Moser.
“From there, you can select upgrades, like high-performance disc brakes, a spool or locker in place of the standard diff, select from a range of gear ratios and wheel bolt patterns, and even add in high-performance lubricants for a complete, ready to run, axle package.
So, even though we had all the necessary information to make selections, we were still faced with some difficult decisions. With so much variety and each option offering improved performance in different ways, we were going to need to confer with a reputable source of information.
Consulting A Legend
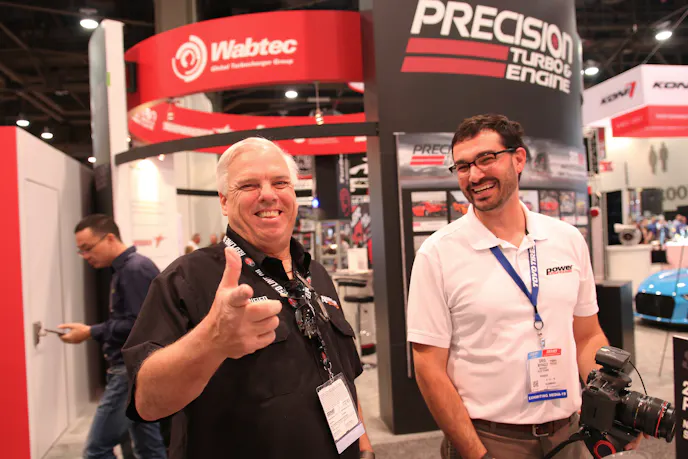
In fact, we ended up consulting a seasoned car builder, engineer, and racer when we were making the final decisions for our rear end setup. We called upon the expertise of Mike Copeland – you know, the mastermind behind countless builds at not only Arrington Performance, his flagship business, but Diversified Creations, Lingenfelter, and even his time at General Motors as a design engineer, pioneering designs on projects like the 5th Gen Camaro and the Pontiac Solstice.
We caught up with mike at SEMA one year as he was gearing up for the Optima Search for the Ultimate Street Car Challenge, and he has plenty of experience using a similar combination to the one we have in Phoenix.
Once we explained our goals to Mike, he launched a series of quick questions at us to help sort out our needs.
Since we have a 4L60E transmission behind our LS1, Mike knew the drive ratio for first gear is 3.06, and .1.62 in second gear. So, he explained our biggest challenge with autocross or a short course would be providing enough of a rear gear to keep from shifting in an inopportune position. “If you have to bang the rev limiter on the top end, then so be it, you may send that thing to 6,7, or even 8k rpm. Oh well.”
“It’s really hard to operate in that range with a 4L60E, because you want enough of second gear for most courses. So, let’s say you put a 4.10 gear set in the rear end. It gives you a good opportunity to run second gear for most of the course. You may have to feather the throttle off the start to keep from spinning the tires, but at least you’ll be in second for most of the course…That’s probably the best option as opposed to 3.73 gears. Because the 4L60 has a 0.67 final drive ratio while in fourth or overdrive, it can still cruise on the highway with 4.10s. That’s assuming you’re running a 26.5 or 27 inch rear tire with 305 or 315s.”
When it came time to select axles and a differential, Mike had more to say, “So, pretty much everybody does 35 spline axles now. 35 splines are the new 31, and I’d definitely select an Eaton True Trac. A locker locks both tires in the corners, so that will kick the ass end out. If you were to race on a road course, you could lose speed in a long sweeping turn if you’re worried about that. Whereas, with a True Trac, you could maintain your speed in those long sweepers.”
This is how we narrowed down our selection for each of the parameters Moser provides on its website order form. If it works for Mike, it will work for us!
Out With The Old
We began the transformation into two-wheeled terror by removing the old rear end. The Firebird was already equipped with a Ford 9-inch of unknown origins. Interestingly enough, the 9-inch had previously been modified with Mopar axle housing ends at some point which made finding a disc brake upgrade kit tricky – all the more reason to upgrade to a Moser unit that we knew would be ready to roll right out of the box.

The first step was to disconnect the driveshaft from the old 9 inch’s pinion yoke.

Next, we dropped the old 9-inch by disconnecting the rear brake lines and shocks and removing the spring perch baseplates and the two rearward-most bolts that hold the leafsprings in place.


Lastly, we placed our floor jack under the pumpkin of the crusty old one-wheeler and lowered it out of the way.

In With The New
When it came time to install the fresh new Moser M9 MusclePak, we regrettably weren’t able to record the whole thing because it was difficult jacking the new rear end into place and work a camera. This is definitely a two-man operation if you’re trying to document things.

Luckily for us, the rest of the installation was easy! We jacked the new rear end into place and bolted it right back in just like the old one did. That’s really one of the major selling points for a Muscle Pak – the fact that it is a direct replacement or direct fit for your specific build. We walked through the order process before, but the direct-fit aspect is major. We didn’t have to worry about measuring flanges or anything like that. Moser knew exactly what we needed based on the specs we provided them. If someone were to want a custom order, they have the ability to provide that as well, but the easy, no-worry approach to their products is awesome. It comes right out of the crate ready-to-run.

So, just as we had done before, but in reverse order, we bolted our leaf springs back into place, and that held the rear end up so we could get the perch bolts on the bottom. That provided us with our rear shock mounts in the factory location, so those went back on. We then reconnected our brake lines to the new economy brake calipers that are included in the Muscle Pak and added a vent line with the supplied barb fitting and 3/8 vacuum hose we had laying around.


We did have to press out our old U-joint because the Moser M9 came with a 1350-style upgraded pinion, so the 1310 style U-joint we had wouldn’t work. We placed an order to Spicer for the new U-joint and swapping out the adapter was easy. For those that want to do the same thing, the part is a 1310 to 1350 U-joint.


The final step was the break-in for our new gears, and the Eaton Tru Trac the MusclePak comes with includes instructions for just how to do that, which included running the car in first gear for several minutes before taking it out on its maiden voyage. So, we did just that. With the car still on jack stands and no wheels mounted, we ran the car in drive and let the gears wear in. Once that initial run was done, it was time to hit the road and lay some patch!


Laying Patch
httpv://vimeo.com/556535372
So, after a few nights of work lying on our backs on the cold garage floor, we got Moser’s M9 Muscle Pak installed in Project Phoenix. The only thing left to do was go out and smash some burnouts, of course. Well, that and test it out on an autocross or road course. But, doing burnouts was always going to happen right away and the latter will take some time. For now, enjoy our new two-wheel-peel!
You might also like
Chevrolet Brings The Legendary IROC Format Back To Laguna Seca
Chevrolet brings the legendary IROC series back to Laguna Seca this August. Top champions will compete in identical race cars.

